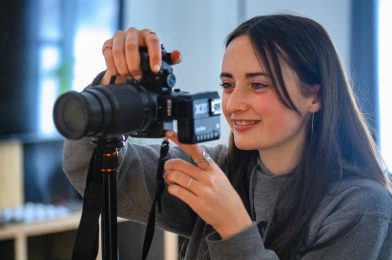
Since 2006 I have been doing a one-week lighting workshop as part of the School of Photography program of YWAM with Dennis Fahringer in Kona, Hawaii.
This year I was asked by two of his former students to come to Dunham, Quebec, Canada, and teach the same thing, but this time to a school that will be in French and English.
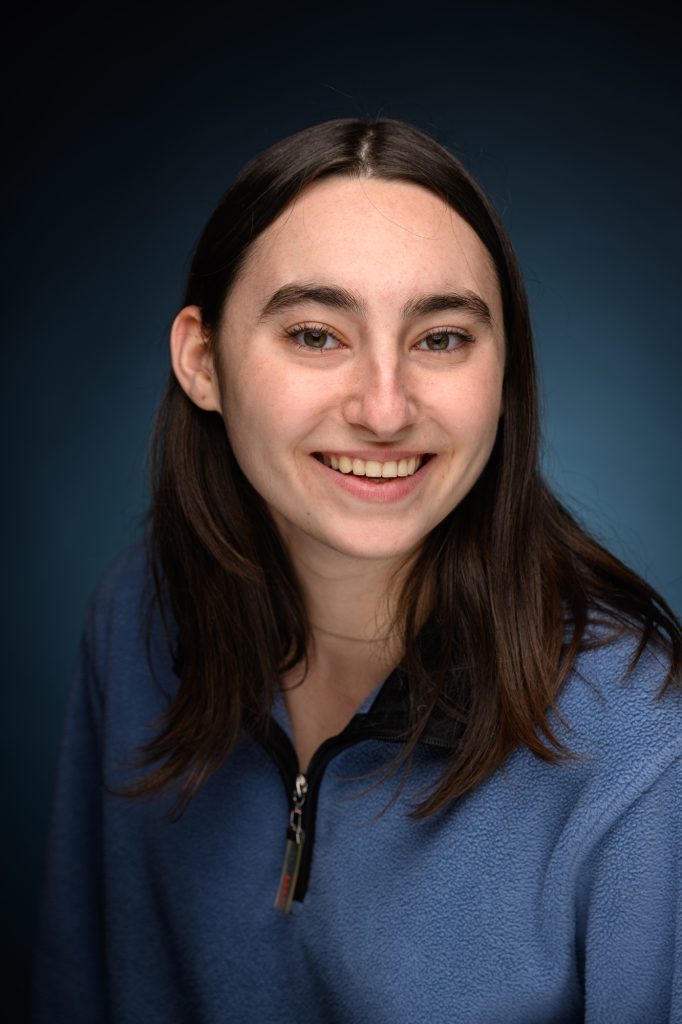
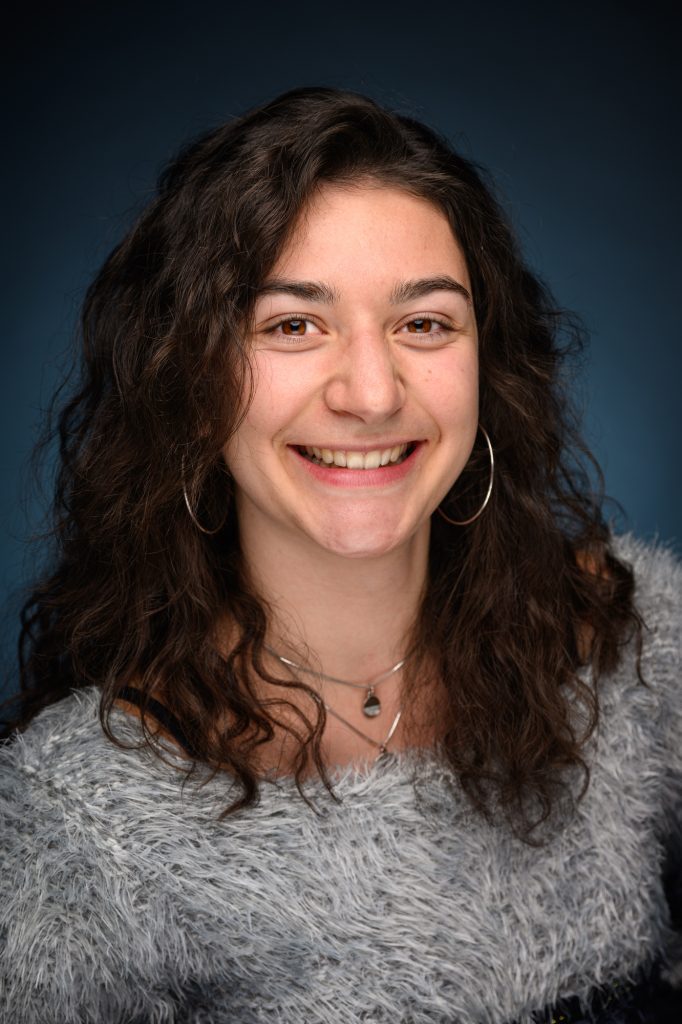
Raphael PaquetJulie Gavillet
This was their very first time leading a School of Photography for YWAM. The leaders Raphael Paquet and Julie Gavillet hosted me during the week and translated me into French.
The students were learning where to place the leading light for a starting position with portraits. They also were learning not to light everything evenly.
I also told about my journey in photography and how it took time before I got the assignments I wanted. I also taught them a little about how to make a living with Business Practices.
You may be interested in a Lighting Workshop. Drop me a line if you are interested.
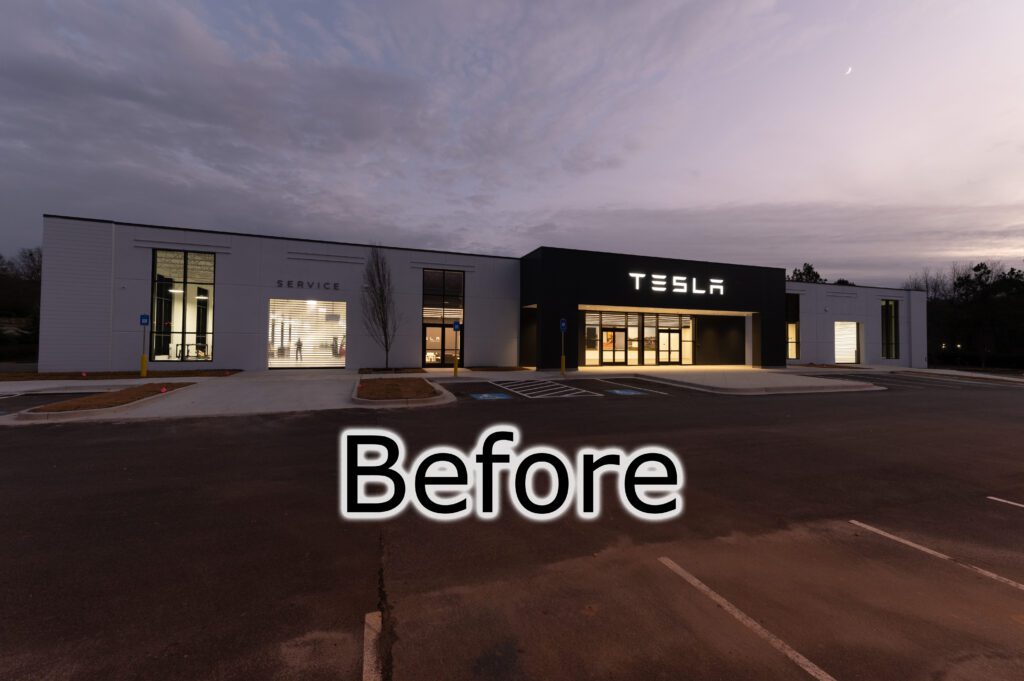
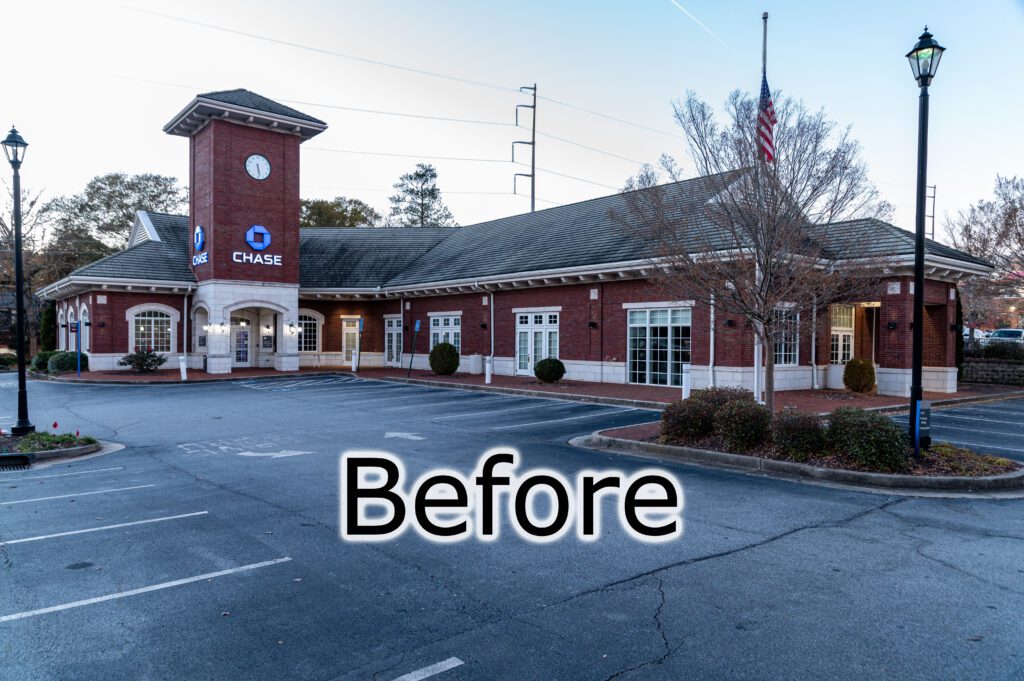
While a photo may look great–seeing the before gives you a peek into what a professional photographer brings to a project.
Tesla Service Center – 1875 Greers Chapel Road, Kennesaw, GA 30144
With a smartphone camera, anyone can get a photo of them before. However, a professional uses the skills of lighting and editing to transform this into an “Eye-Popping” photo.
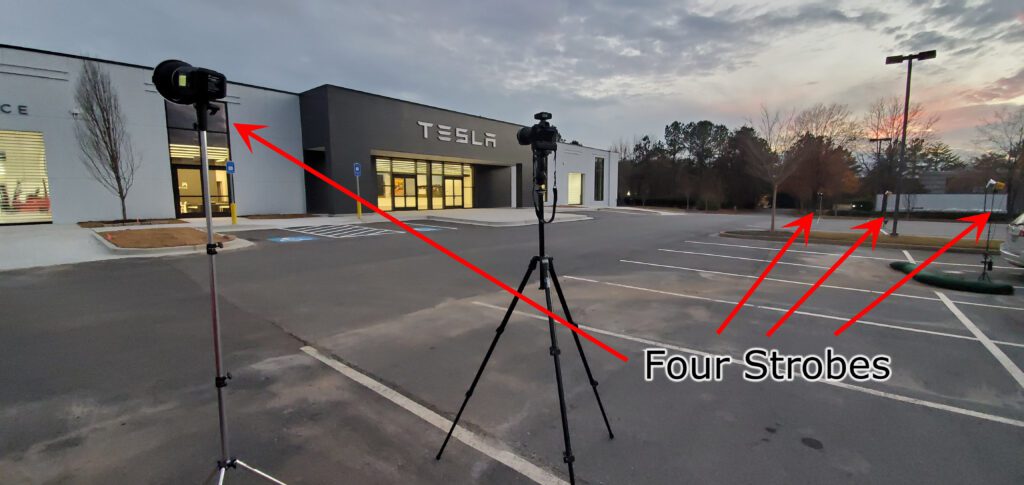
I shot this photo with my cellphone to show the setup. All four strobes are set to full power.
I first shot this photo when I arrived.
Tesla
1875 Greers Chapel Road, Kennesaw, GA 30144
I was not a fan of that tree.
Tesla
1875 Greers Chapel Road, Kennesaw, GA 30144
I like them now, both for different reasons. I will let the client choose the angle to use.
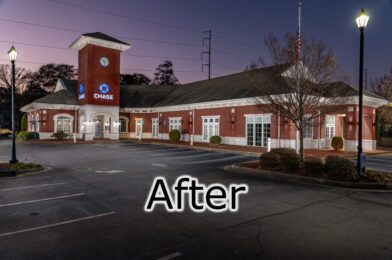
Chase Bank, 4241 Roswell Road, Atlanta, GA 30342 Six Strobes were used in addition to the natural lighting. [NIKON Z 6, 24.0-105.0 mm f/4.0, Mode = Manual, ISO 400, 1/4, ƒ/8, (35mm = 24)]
What does it mean to see someone in a better light?
This is an expression of seeing something from a different perspective. For example, you always thought someone was bad, but after talking with them, you now see them in a different light. (Now you see them differently and think they are very nice)
It is an Idiom
The two words Better & Light together give us a new meaning in language.
Chase Bank
4241 Roswell Road
Atlanta, GA 30342
Without the extra light on the building, you are missing the “WOW FACTOR.”
Chase Bank
4241 Roswell Road
Atlanta, GA 30342
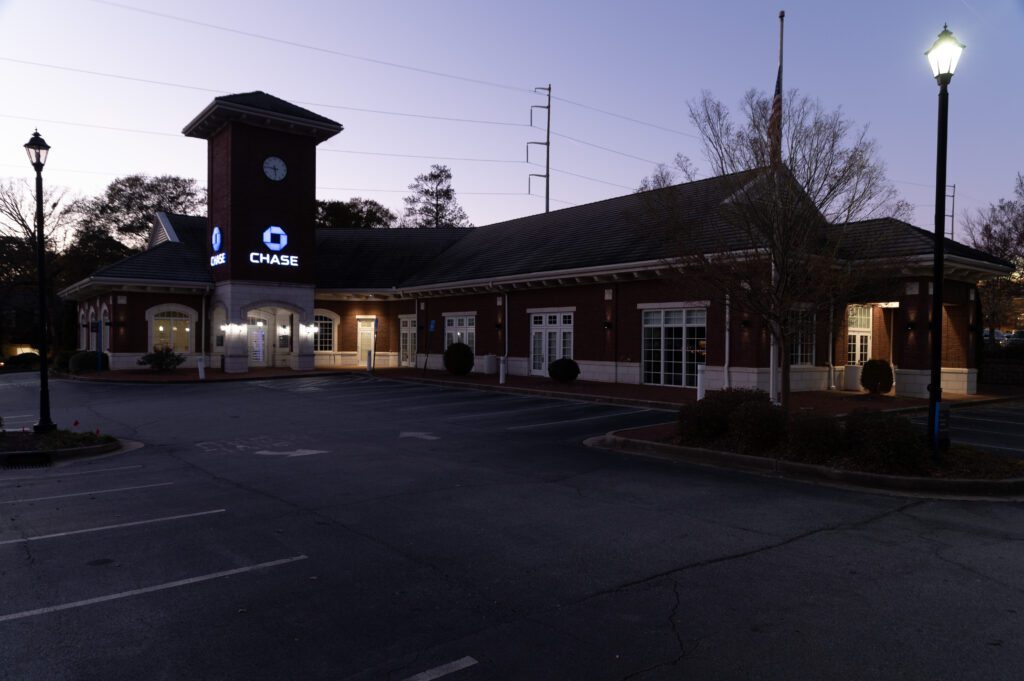
Even waiting for the dramatic sky and lights on the building were not giving the same results that I do with my “Dusk” or “Dawn” architecture photography. If you notice the street lights in the photo, I had to fix the one on the left that wasn’t on in the final image. Again another thing I do to help my client’s work to be seen in the “Best Light.”
Chase Bank
4241 Roswell Road
Atlanta, GA 30342
The key to Dusk and Dawn photos is that everything isn’t getting equal amounts of light as you get during daytime. If you want your photos to be more dramatic, be sure the light is where you want it and not just everywhere evenly.
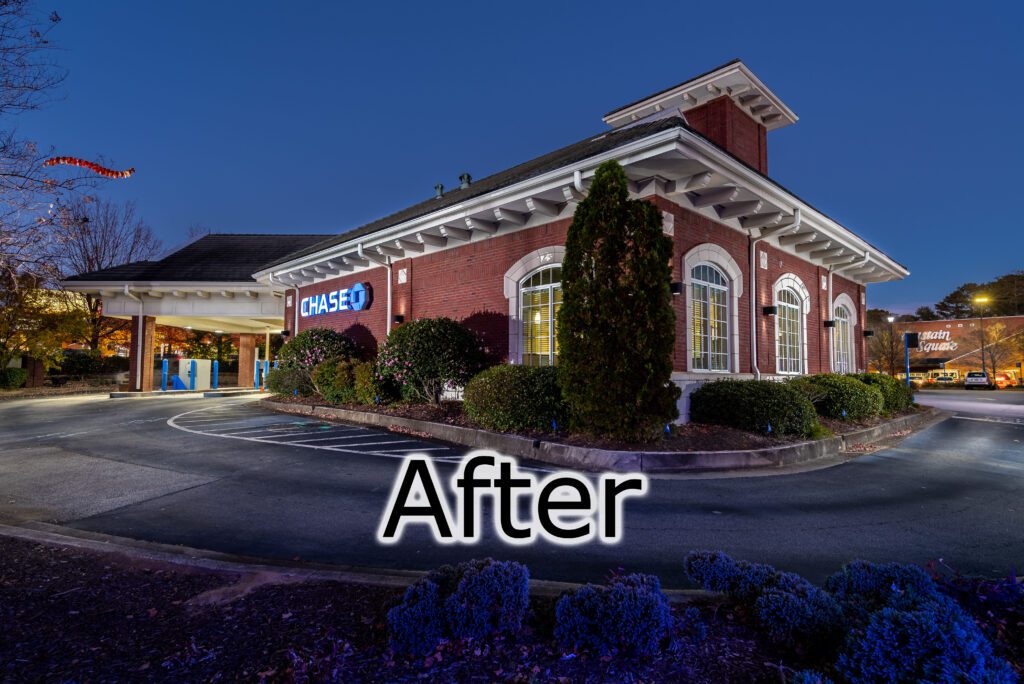
Chase Bank 4241 Roswell Road Atlanta, GA 30342 Three strobes are helping with the lighting. [NIKON D5, 14.0-24.0 mm f/2.8, Mode = Manual, ISO 400, 1/8, ƒ/5.6, (35mm = 19)]
Now the differences between these photos are much more than just lights. More than 30 photos were taken at each angle—different exposures and light capturing. Then, after some minor editing, I select 3 to 5 photos blended in PhotoShop to give the results you are seeing.
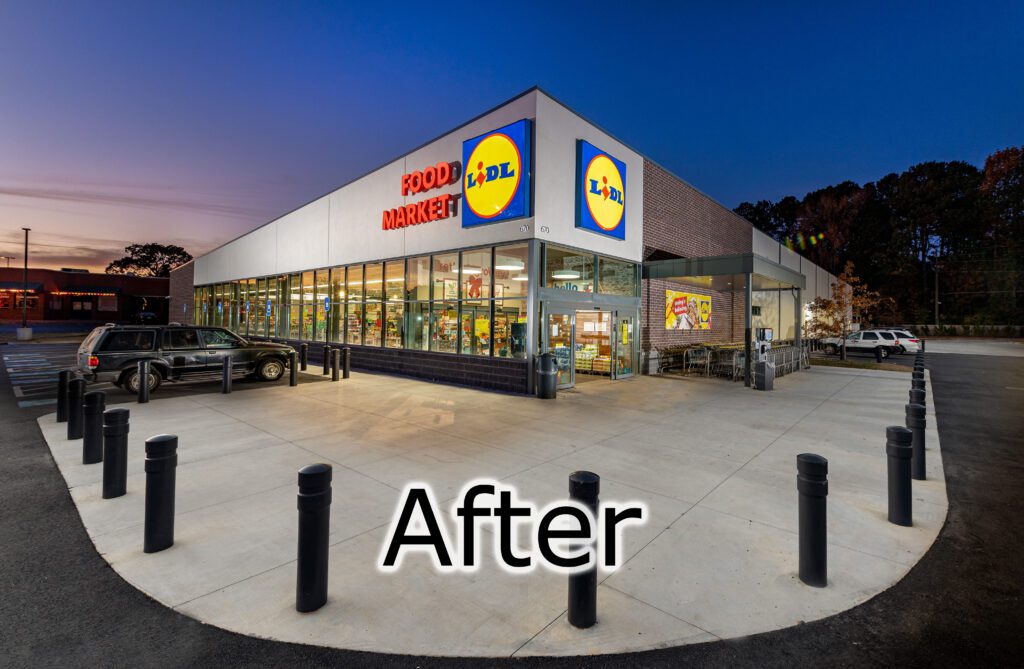
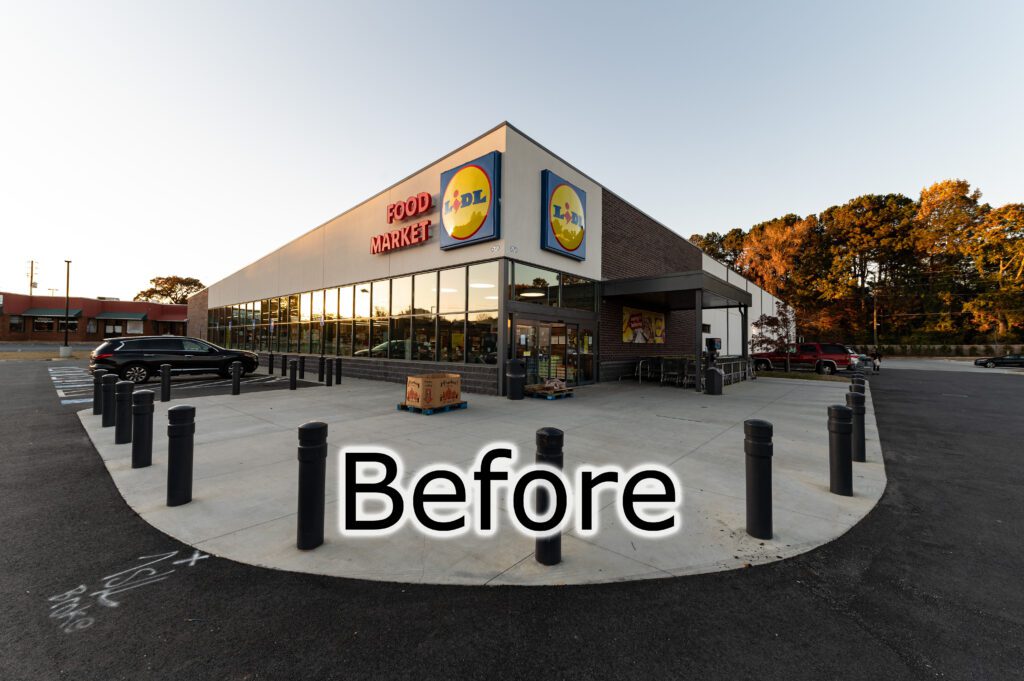
Lidl Building – 670 Whitlock Ave – Marietta – GA 30064 5 strobes used in this photo [NIKON Z 6, 14.0-24.0 mm f/2.8, Mode = Manual, ISO 400, 1/15, ƒ/8, (35mm = 14)]
So when I arrived just before Dusk, I got this photo below.
Lidl Building – 670 Whitlock Ave – Marietta – GA 30064
I asked the manager if they could move those pallets. Again I took 30+ photos and, after minor editing, picked five pictures that I blended to get the final image.
Is Good Enough going to make you Competitive?
Today, so many people use their cameras on their phones and tend to say it is good enough. That lets you get these before photos I am showing here.
Can you continue to get jobs and projects with “Good Enough”? Can you pay your people good salaries with “Good Enough”? Can you deliver yourself enough for a comfortable lifestyle?
Hire a professional photographer whose portfolio shows they can put your products in the best light. Doesn’t your work deserve it?
Tony Messano, a creative director who designed my logo, said one day that he would hire photographers to take his vision and improve it.
Today’s phone cameras are good enough to get some great photos. What does the pro bring that you cannot get with your phone?
George C. Griffin [NIKON Z 6, 14.0-24.0 mm f/2.8, Mode = Manual, ISO 100, 1/5000, ƒ/2.8, (35mm = 14)]
A professional photographer’s biggest strength is their ability to “Write With Light.” That is what the word photography is about–Writing With Light.
The coining of the word “photography” is usually attributed to Sir John Herschel in 1839. It is based on the Greek φῶς (phots), (genitive: photo’s) meaning “light,” and γραφή (graphê), representing “drawing, writing,” together meaning “drawing with light.”
By adding light to help enhance the light on the statue of Dean Griffin at Georgia Tech, I could make the figure look different.
Different
My friend Dave Black, Nikon Ambassador and professional photographer says, “Look for something ‘Different’ not necessarily ‘Better.’” Dave had discovered through his career that when something is “Different,” the audience will stop and look.
Dean Griffin Statue. [NIKON Z 6, 70.0-200.0 mm f/2.8, Mode = Manual, ISO 100, 1/2000, ƒ/2.8, (35mm = 200)]
Another thing other than light is the composition that a trained eye brings. Notice in this photo how Dean Griffin looks like he is looking down and even has a depressing look to the picture.
Dean Griffin Statue [NIKON Z 6, 35.0 mm f/1.4, Mode = Manual, ISO 100, 1/2500, ƒ/1.4, (35mm = 35)]
By changing the camera angle and perspective, I make him look more authoritative and a leader.
By the way, the client called me needing help with their annual report cover. They wanted a photo to be “Iconic” about their foundation. They raise funds to help students get an education. I knew that Dean Griffin established and managed an emergency loan fund to assist students with financial difficulties, and he started, with his funds, Georgia Tech’s Central Placement Office. After his retirement, he operated a job placement service for alumni over forty.
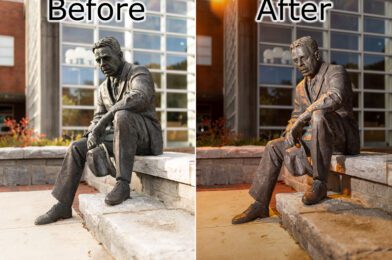
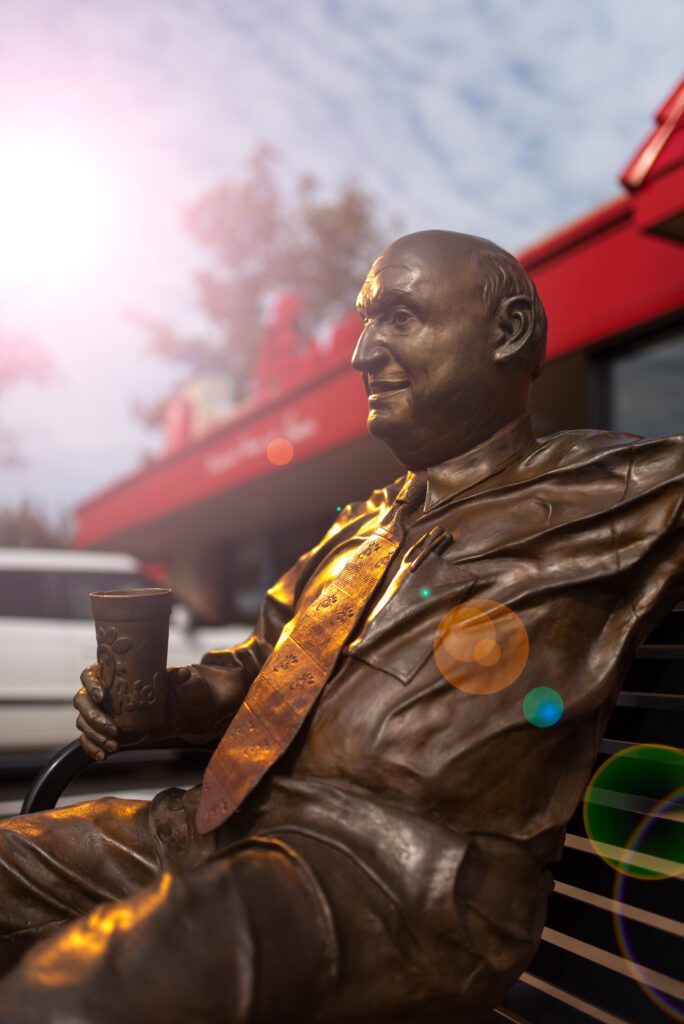
I proposed the Statue of Dean George C. Griffin for their cover. I mentioned I had done something similar for S. Truett Cathy for Chick-fil-A. I sent them this photo of the statue of Cathy in front of the Original Dwarf House in Hapeville, Georgia.
Truett Cathy Statue at the Original Dwarf House [NIKON D750, 35.0 mm f/1.4, Mode = Manual, ISO 50, 1/4000, ƒ/1.4, (35mm = 35)]
They were initially looking at real people. The advantage of going with a statue of someone who is no longer here but embodies the institution’s core values is that it becomes “Iconic.”
Nikon D750, Sigma 24-105mm f/4 DG OS HSM Art Lens, ISO 2500, ƒ/10, 1/50
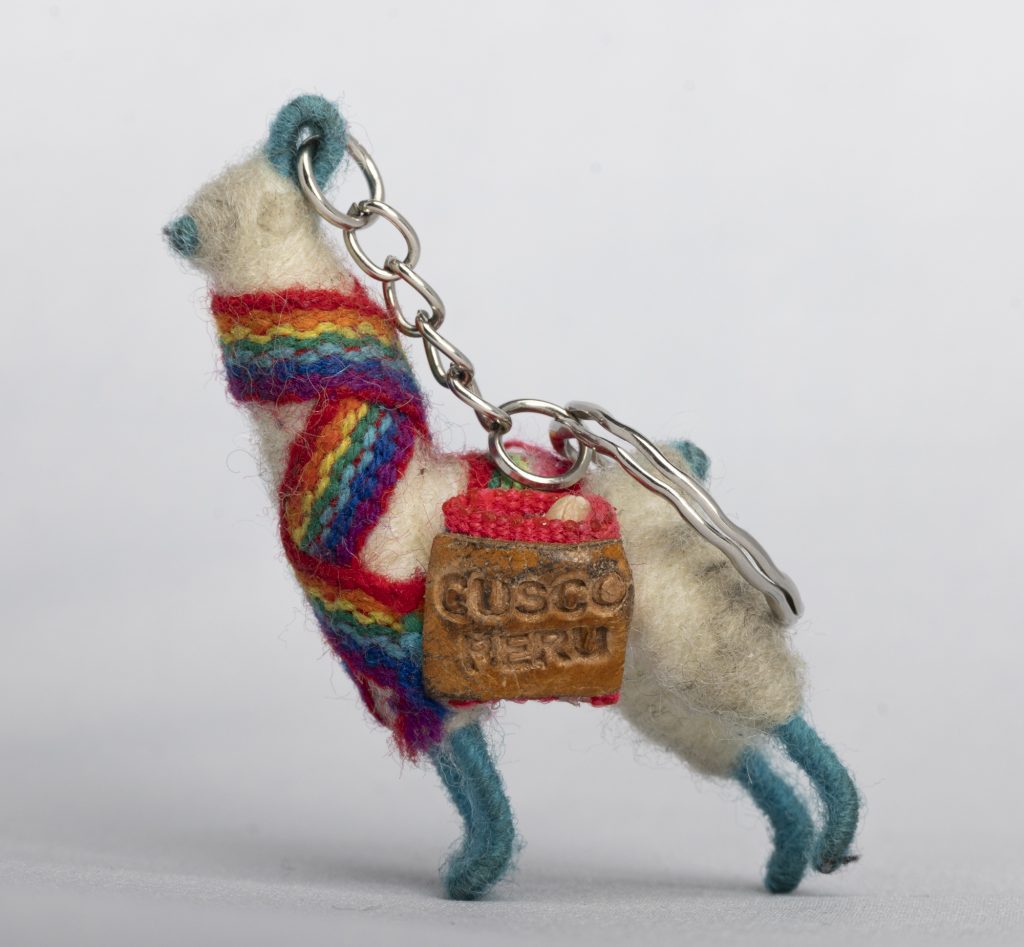
This last shooting assignment I have given my class this week is to take a studio strobe out and make a photo where this compliments the light already in the scene.
Before they shot in the field, I did two different shoots. Here is the second shoot I did with them where we left the classroom, and I showed them how to talk to folks and get them to pose for an environmental photograph. So again, this is an environment that tells us something about the person.
Here we are showing the guy doing his job as a barista in the local coffee shop.
Nikon D750, Sigma 24-105mm f/4 DG OS HSM Art Lens, ISO 2500, ƒ/10, 1/60
I first made this photo of him working and showed it to the class. I showed them the light on the subject and didn’t make him pop. Then, as he continued to work, I took another photo with the studio strobe to make him pop.
Nikon D750, Sigma 24-105mm f/4 DG OS HSM Art Lens, ISO 2500, ƒ/10, 1/60
The setup was like this for the shot:
I put a 10º Grid and a neutral density filter on the flash, which was still pretty bright. I used the grid to keep the light from going everywhere and lighting up too much in the scene.
Then I just had him turn and look at the camera for the first photo.
Nikon D750, Sigma 24-105mm f/4 DG OS HSM Art Lens, ISO 100, ƒ/4, 1/500
We heard sawing nearby, so we checked it out and saw if we could get another person in their work environment. Here is the first photo.
Nikon D750, Sigma 24-105mm f/4 DG OS HSM Art Lens, ISO 100, ƒ/11, 1/80
After adding the flash, I took this photo and adjusted the shutter speed to where I didn’t blow the background away.
When I first talked about the assignment, we walked outside the studio, and I took these photos to give them some understanding of the assignment.
Nikon D750, Sigma 24-105mm f/4 DG OS HSM Art Lens, ISO 100, ƒ/10, 1/250
After making this photo, I then added a flash.
Nikon D750, Sigma 24-105mm f/4 DG OS HSM Art Lens, ISO 100, ƒ/10, 1/250
Then I added a CTO Gel, an orange-colored gel, to the light. I then took a custom white balance and reshot the photo.
Nikon D750, Sigma 24-105mm f/4 DG OS HSM Art Lens, ISO 100, ƒ/22, 1/250
I also underexposed the background by 1 1/2 stop by turning the strobe up in power but keeping everything else the same. Unfortunately, this adjustment meant I had to close down the aperture from ƒ/10 to ƒ/22. The change made the background darker since the light didn’t affect it.
Nikon D750, Sigma 24-105mm f/4 DG OS HSM Art Lens, ISO 100, ƒ/18, 1/250
I then added a CTB to the light and did a custom white balance. The background went orange with a blue gel on the flash and corrected the white balance to give a good skin tone.
Make this your assignment as well. Here are the directions that I gave to the class:
Lighting
Mixed Lighting
This assignment aims to demonstrate that when you are out of the studio, you can use your strobes to improve an otherwise dismal situation.
Whatever you choose, you must provide two photos.
Photo without strobes. In other words, your subject needs light to make it look better. You want to make this the best exposed as possibly you can do. (the same as with strobes)
Photo with the strobes.
Some Blog Posts to help get your juices flowing and walk you through the steps:
I had a major executive headshot the other day. We were to shoot in four locations with multiple outfits.
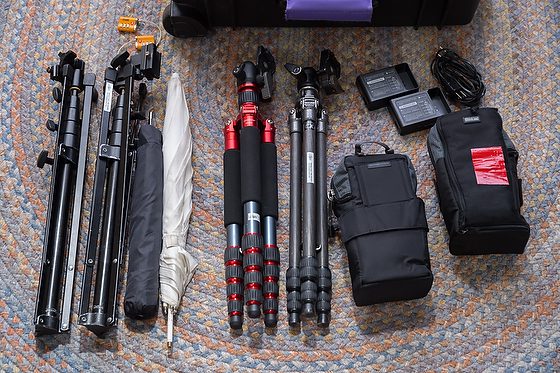
All the locations were onsite at the corporate headquarters. Thus I had to set up all the lighting on site.
I may have left some things regarding my lighting gear, but everything I owned came with me.
I arrived several hours ahead of the time the executive was to show up.
I set up each shot and had my assistant stand in the place of the executive.
These are just a few of the many test shots I took. I am not posing as my assistant for the best photo, I wanted to see how the light looked and the compositions with the lenses I would be using.
Here is a quick walk-through for each location:
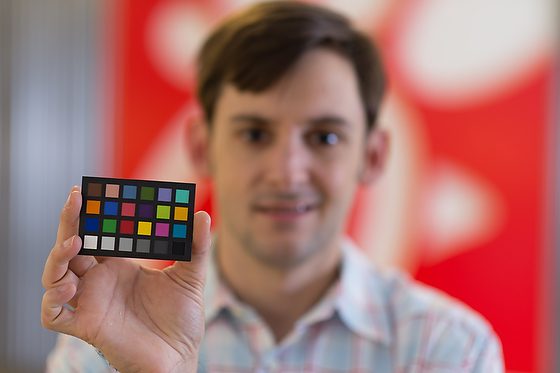
Composition first – I want to test before I set up any lights on the lens for a shot. I want to ensure the background is broad enough behind the subject to work. This searching for the angle might require me to move back and forth and move the subject back and forth between the background and the camera.
Custom White Balance & Test Shot with Available light – You would be surprised how often you don’t need to do a thing but click the shutter, and everything looks great.
Test for aperture – how much depth-of-field do I need? I can shoot pretty wide open with one person, but if you start doing group photos, you need more room to work.
Review the image for the four essential lights and evaluate which ones may need help.
Main/Key
Rim Lighting
Background Light
Fill Light
Going one light at a time, I will add I shoot a test shot and then make adjustments until I get the desired look.
Repeat until all four light values and color temperature is all set for the look I am trying to achieve.
Pull the images on my laptop whenever possible to see the best picture. Unfortunately, the LCD on the back of a camera doesn’t do justice to the fine-tuning evaluation of images.
Problems I often encounter
Lens Perspective and Location – sometimes, the only way to get a background, like a company logo on a wall, into a shot has me shooting with a super wide angle that isn’t flattering to the subject. Better to have test shots to show a client to steer them to another location. Sometimes you cannot back up enough to do the room to make it work.
Lighting gear gremlins – I have had some strange things happen through the years.
Plugged lights into the walls in a classroom, and suddenly, they just started flashing. When they wired the room, the polarity wasn’t correct and caused the strobes all to flicker if I unplugged them from one side or the other of the room; no problem—I fixed it with extension cords.
I had a transformer in a light blow once, and smoke came out of the light.
Radio Remote Triggers not working – Check the batteries. Change channels to get a better signal.
Lens Failure – I had oil in the lens get so hot from sitting in a car that it got all over the aperture and stuck wide open. So I had to use another lens.
Flash damaged by airlines – This happened when I flew to Chicago. I had not to use that flash and adjust accordingly. Luckily I had more than just one flash.
Many other problems have occurred throughout my career. The point is simple–Arrive Early.
If you run through all the scenarios before the client arrives, the odds are now in your favor. But, on the other hand, coming just in time for a shoot and going with the flow can make you look bad in front of the client.
Nikon D3s, 14-24mm, ISO 400, ƒ/5.6, 1/500—Off-camera fill-flash using the Nikon SB-900. The flash is on the Pocketwizard TT5 and is triggered by the Mini TT1 on the camera with the AC3 to control the flash’s output.
I have been going through my files, preparing for next week when I teach lighting to photography students in Hawaii.
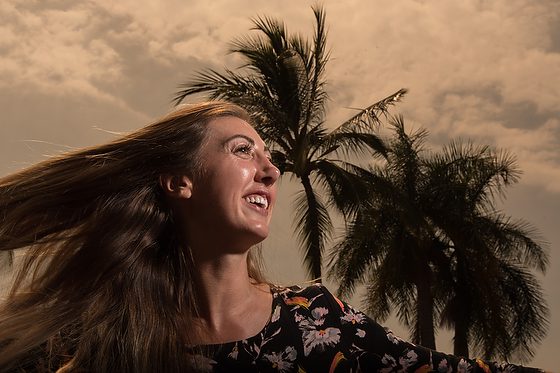
One of the tips we will discuss is learning not to light everything. So here in this photo, I just used the existing light, and the camera is set to -2 EV, and then I added strobes that are zoomed in to just light the subjects. So the strobes are set around +2 EV.
Nikon D3s, 14-24mm, ISO 400, ƒ/3.2, 1/400
Here is the same photo without the strobes. See how the strobes make the subjects “POP” and help saturate the colors.
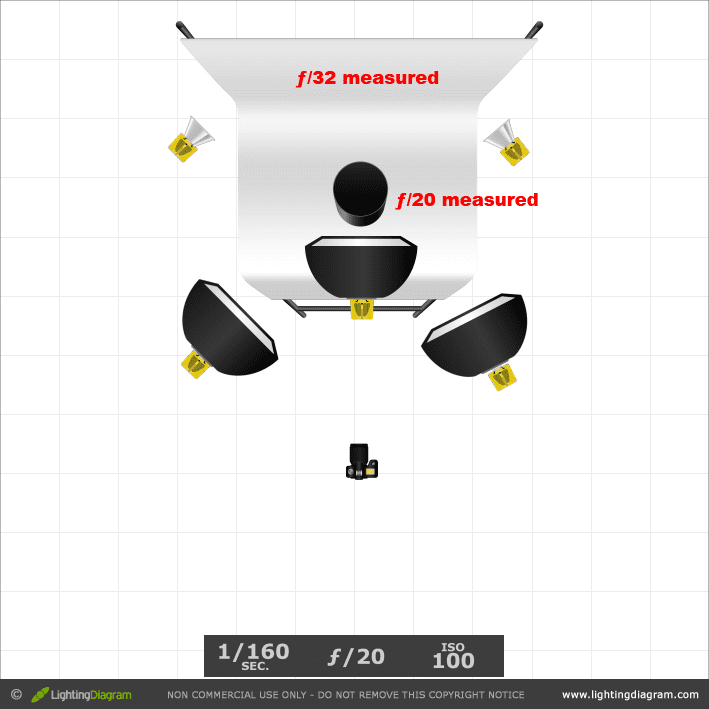
Click on the diagram to see it larger
Here is the lighting diagram for the top image.
Nikon D3s, 14-24mm, ISO 100, ƒ/5.6, 1/250—Off-camera fill-flash using the Nikon SB-900. The flash is on the Pocketwizard TT5 and is triggered by the Mini TT1 on the camera with the AC3 to control the flash’s output.
By underexposing the background, I am saturating the colors of the sky. Then the flash helps light the subjects to be correctly exposed and draw your eye to them.
Nikon D3s, 14-24mm, ISO 100, ƒ/5.6, 1/250
Click on the image to see larger.
With no strobes, these photos just don’t “POP” like I want them to do.
Nikon D3s, 14-24mm, ISO 100, ƒ/4, 1/200—Off-camera fill-flash using the Nikon SB-900 & Nikon SB-800. The flash is on the Pocketwizard TT5 and is triggered by the Mini TT1 on the camera with the AC3 to control the flash’s output.
Now here is an example where using two lights on either side of the subjects starts to create what I call an “unnatural” light setup. Now they look like this is a painted background, and they are on some cruise ship where you get your photo made.
Nikon D3s, 14-24mm, ISO 100, ƒ/4, 1/200
If you want your photos with light to truly “POP,” remember not to light everything. Use light sparingly for more dramatic images.
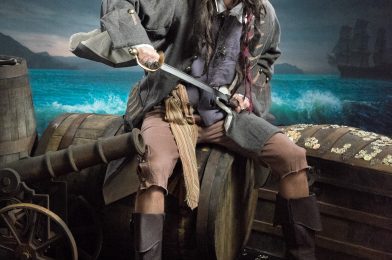
Are you impressed with my photo of Jack Sparrow? The way you get this photo is no different than shooting any concert tour or theater production.
Set the white balance, get good exposure, and then wait for a great moment.
Fuji X-E2, 18-55mm, ISO 6400, ƒ/2.8, 1/200
Just like everyone else at PhotoShop World, I most likely took the photo above and this one below.
Fuji X-E2, 18-55mm, ISO 6400, ƒ/4, 1/450
Someone else found all the props, the model, and the backgrounds and then even set up all the lights for me. All I had to do was set the white balance and the correct exposure. The models would even stay in a pose for minutes to help anyone figure out a “moment.” So there are no “kudos” for this photo if you show it as your work.
Fuji X-E2, 18-55mm, ISO 6400, ƒ/2.8, 1/105
Everyone with a camera is going crazy shooting photos that, if they showed to any art director and hired to shoot the same photo themselves, they would most likely have no clue on how to make it happen.
Photography is writing with light, and when you have nothing to do with the light, you do very little with the photograph, especially in these situations where without the lights, there is no photograph.
Fuji X-E2, 18-55mm, ISO 6400, ƒ/2.8, 1/250
What can you learn from these setup situations?
Find interesting subjects
Find interesting settings
Use light creatively by not lighting everything equally in the photograph.
Fuji X-E2, 55-200mm, ISO 6400, ƒ/5, 1/140
While we all will continue to shoot stage productions and concerts, remember if you are a photographer showing your work around and have nothing demonstrating your ability to create this lighting setup.
Learn how to create these photos rather than just getting them well exposed.
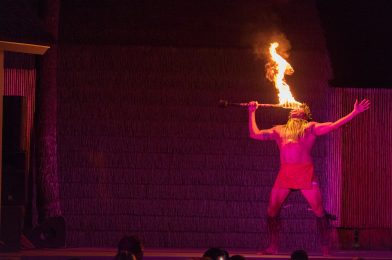
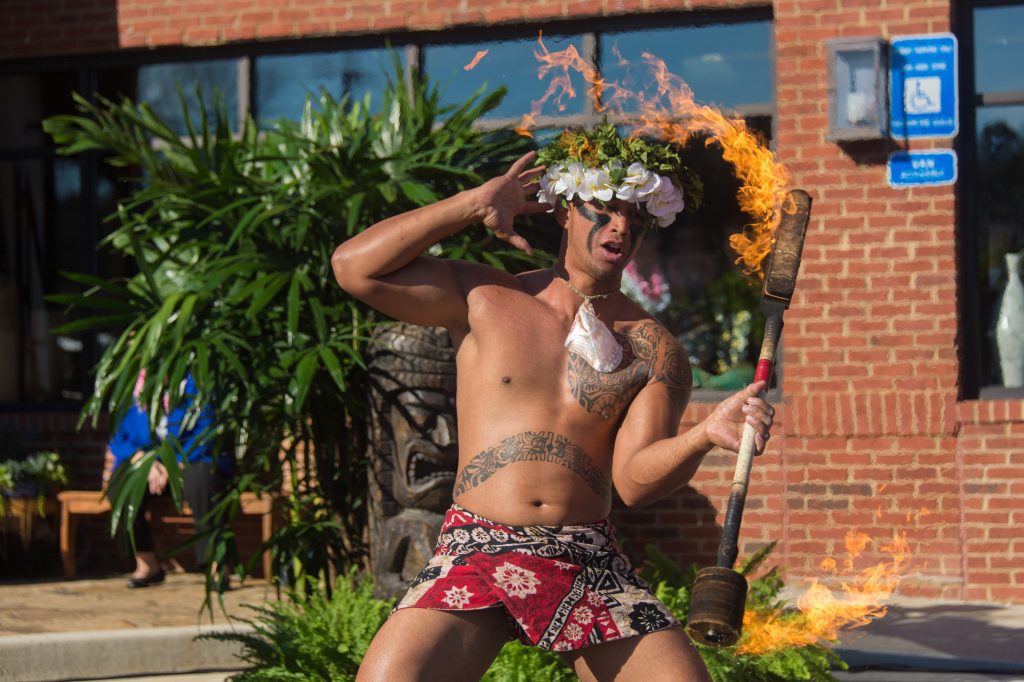
How can you go wrong with a fire-eating subject? If you miss the exposure, maybe, but if you get a well-exposed photo of something average and then something more dramatic, you get the idea of why start with a more exciting subject.
Fuji X-E2, XF 55-200mm, ISO 6400, ƒ/5, 1/140
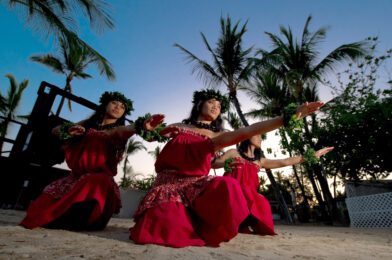
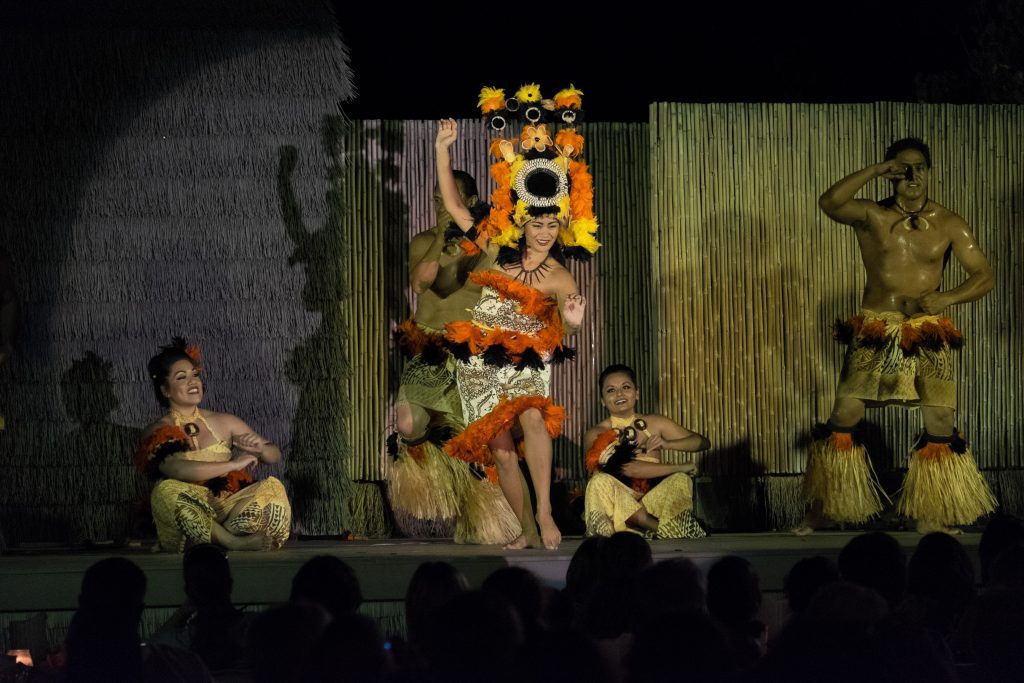
Look for things like this Luau in Kona, Hawaii, for example.
Nikon D4, 28-300mm, ISO 640, ƒ/4.5, 1/100
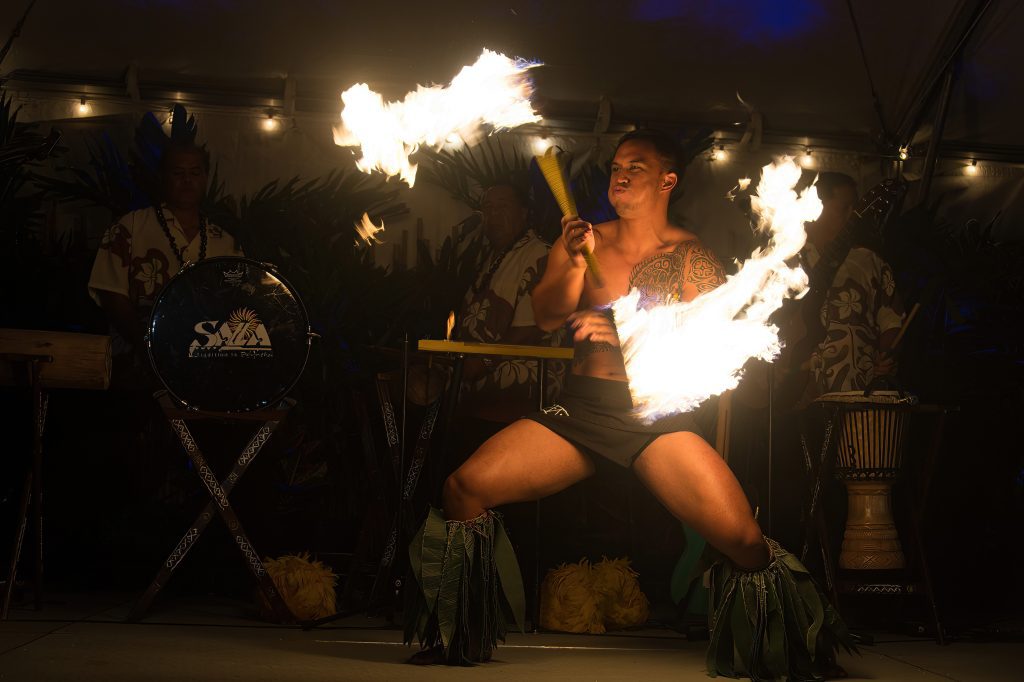
I photographed him for this Fire Knife dance at Truett’s Luau in Fayetteville, GA. So, you don’t always have to go to Hawaii to get your photo.
Nikon D4, 28-300mm, ISO 640, ƒ/5.3, 1/3200
Later, I photographed the same guy the following day, but this was outside in the sunlight. This change in time and location should help you see how much a place and lighting can help a situation or not at all.
I think to improve your photos, don’t light everything when they turned off all the stage lights and let the fire dancer be the center stage so that the image is more dramatic than in the bright sunlight.
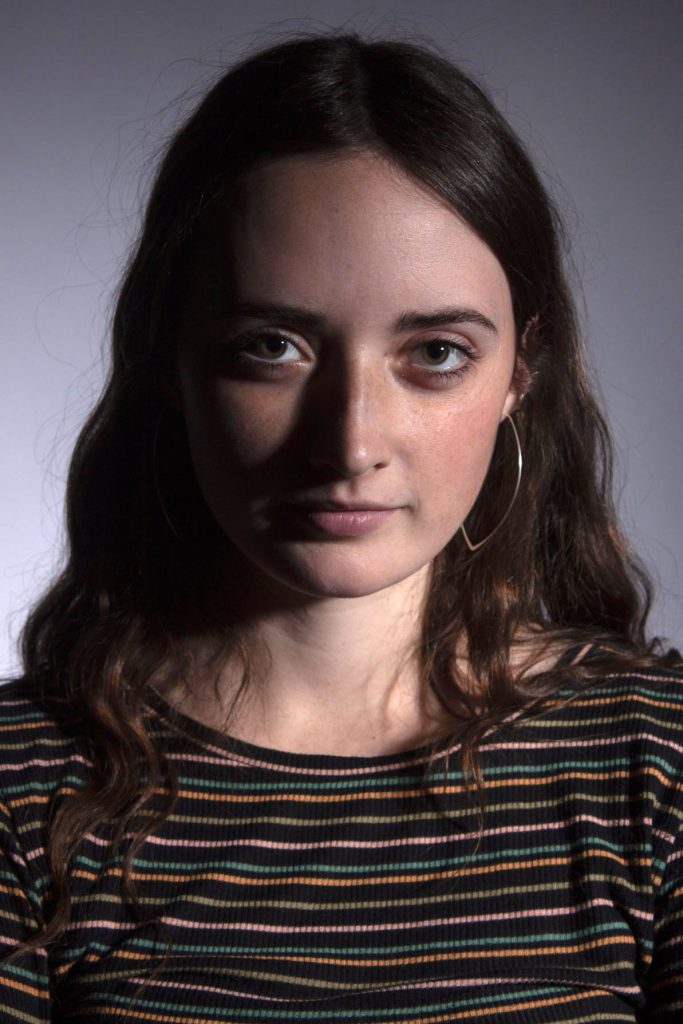
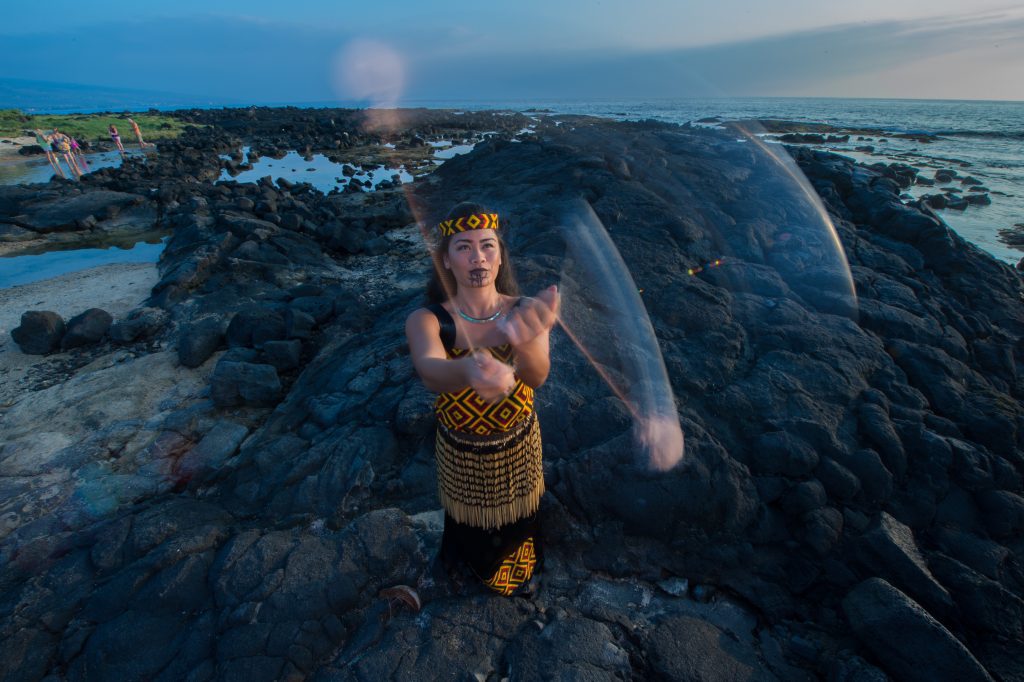
Without flash. Photo by Clara Kwon
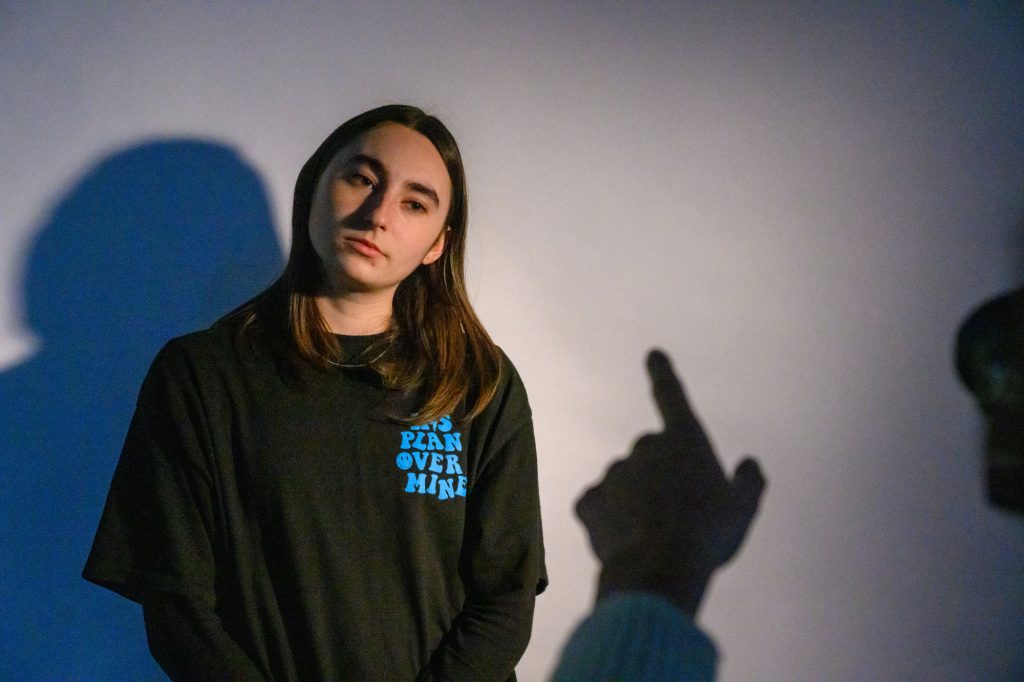
With off-camera flash. Photo by Clara Kwon
In these two photos, you can see how Clara Kwon had no flash, and then adding sparkle helped to make the subject “pop.” She is not lighting everything, and the rest of the scene is slightly darker, making the subject stand out.
Remember to pick exciting subjects and try your best to put them in the best light.
Nikon D4, 14-24mm, ISO 200, ƒ/22, 1/13 with two Alienbees B1600 with CTO triggered by Pocketwizards.
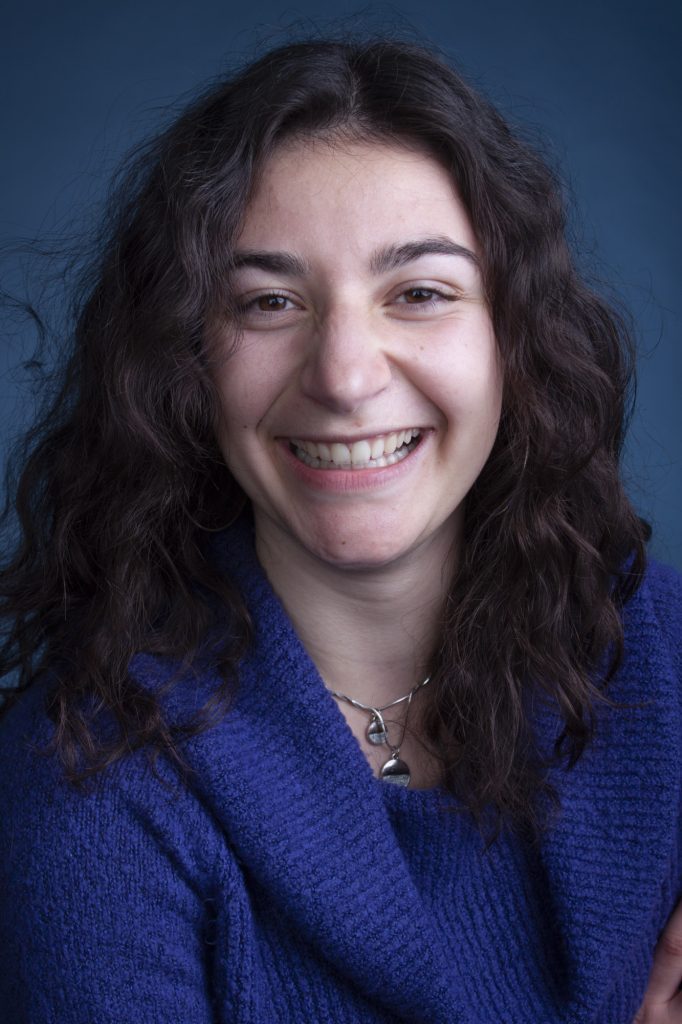
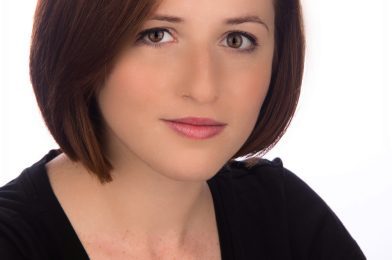
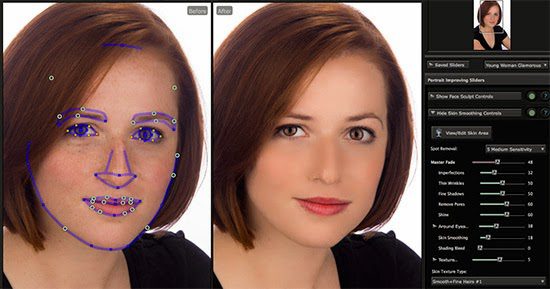
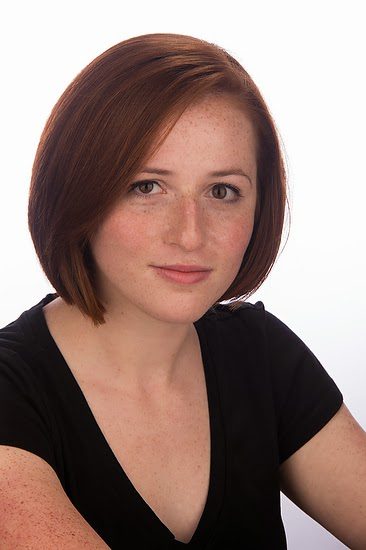
Let me walk you backward through this process. The top photo is one of the potential retouched photos. I used the software program Portrait Professional to do the touchups. You may not like any of the touchups, but I wanted to show you often you may make some touchups for various reasons. This software helps speed up the process.
Below is the photo after shooting it and making very minimal adjustments in Adobe Lightroom.
I like working with a white background. The general rule is 1 to 2 stops brighter than the subject to ensure your white background remains white. I find it best to slightly angle the background so that it does not act like a mirror and creates a flair in the lens.
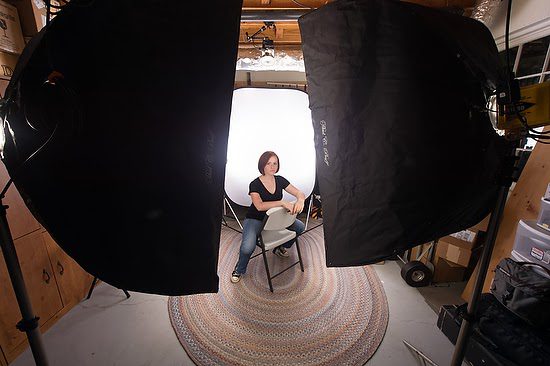
Camera Perspective
For this setup, I chose to use more of a copy stand setup with two large soft boxes on either side of the camera. Straight above and slightly behind the subject is a hair light with a 30º grid pointing down onto the back of the model‘s head and shoulders.
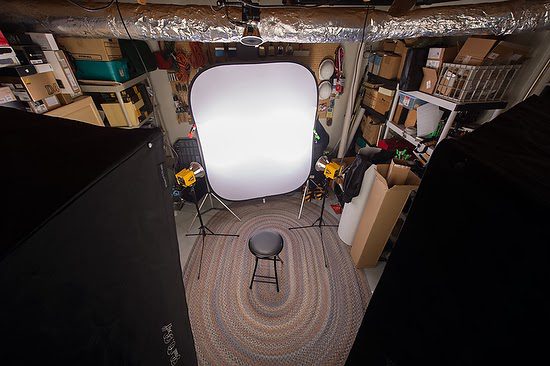
Top View
Here is the diagram of the setup.
I put two mono-blocs on the background duplicating the same angles as the softboxes on the subject. Again the location is one stop brighter than the subject.
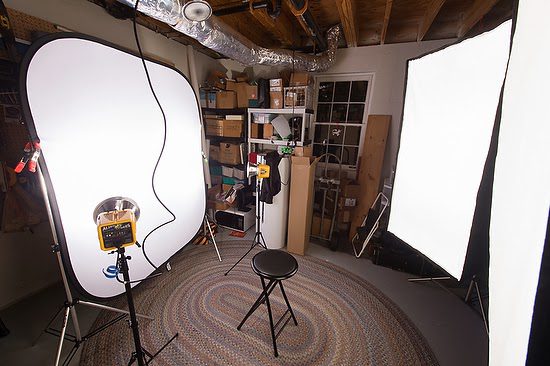
Side view
The model can change poses and move with similar light with this setup. Freeing the mode,l letting the subject play with expressions and body positions without having to change the lights every single time we moved the model.
I started with the stool and found that the chair gave the model more to work with and feel more relaxed. However, each person is different, so you must work together to find those poses and expressions that bring out the best in the model.
For these last few, I turned the 30″ x 60″ softbox long side front to back rather than side to side, which helped eliminate a black line that you may see in the photos above.