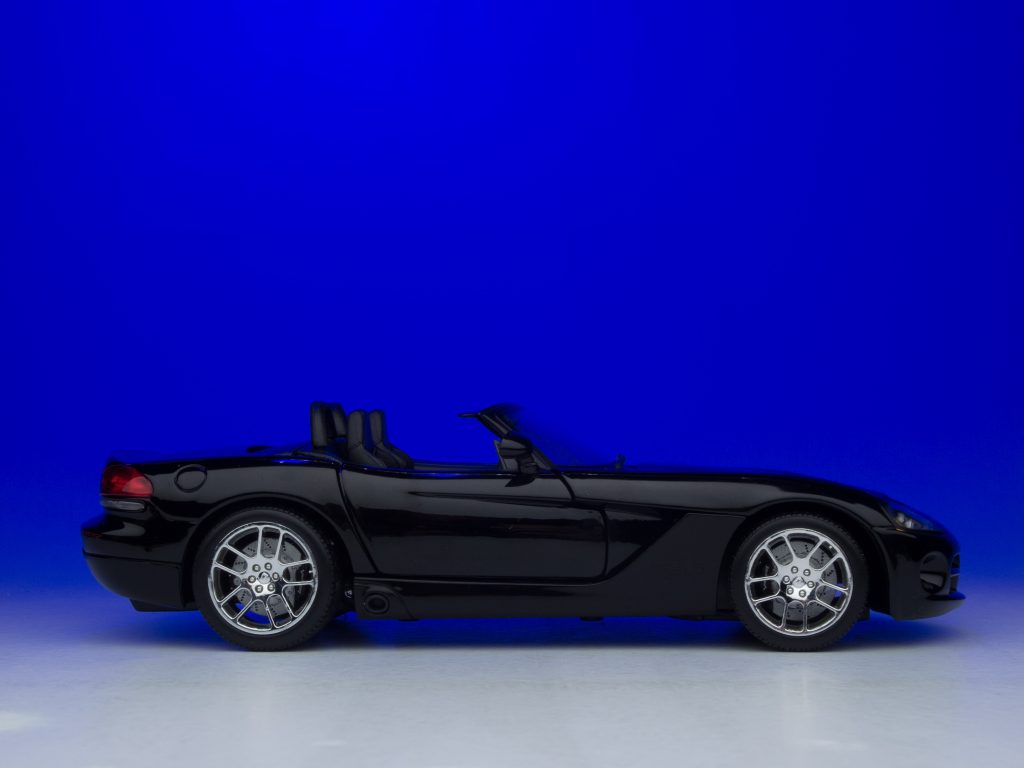
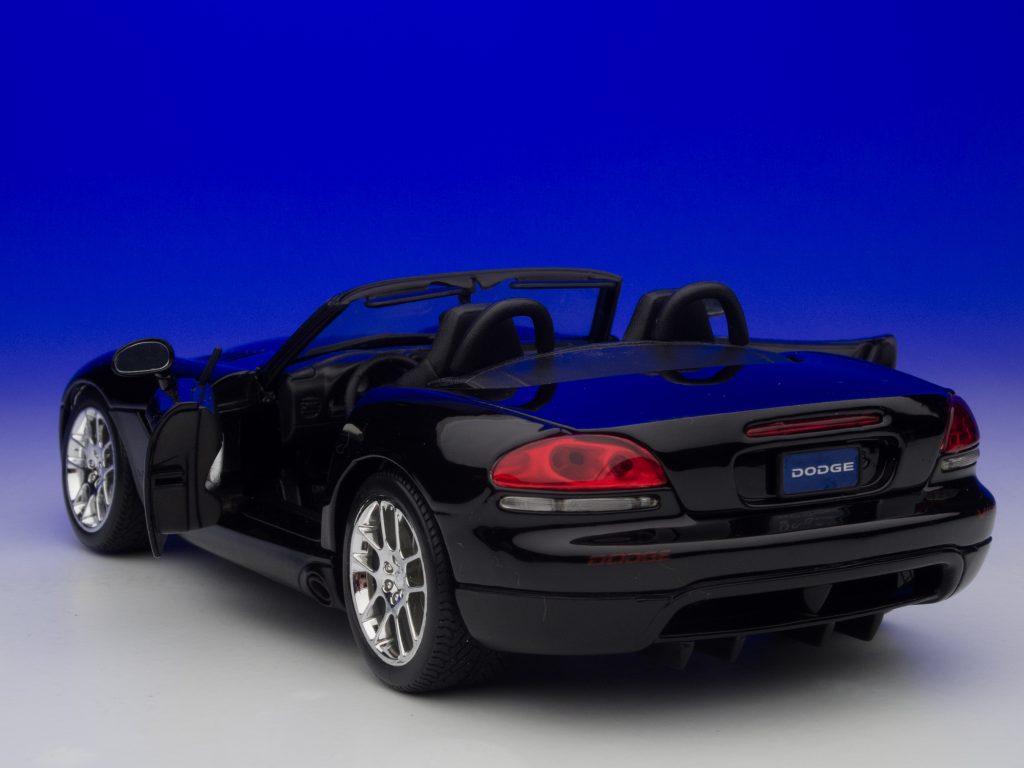
Now how did I take all these photos? Well, first, I was walking through Sam’s Club and saw the Dodge Viper and decided to buy it on the spot. So yeah, I spent a whole $12.95 for a model.
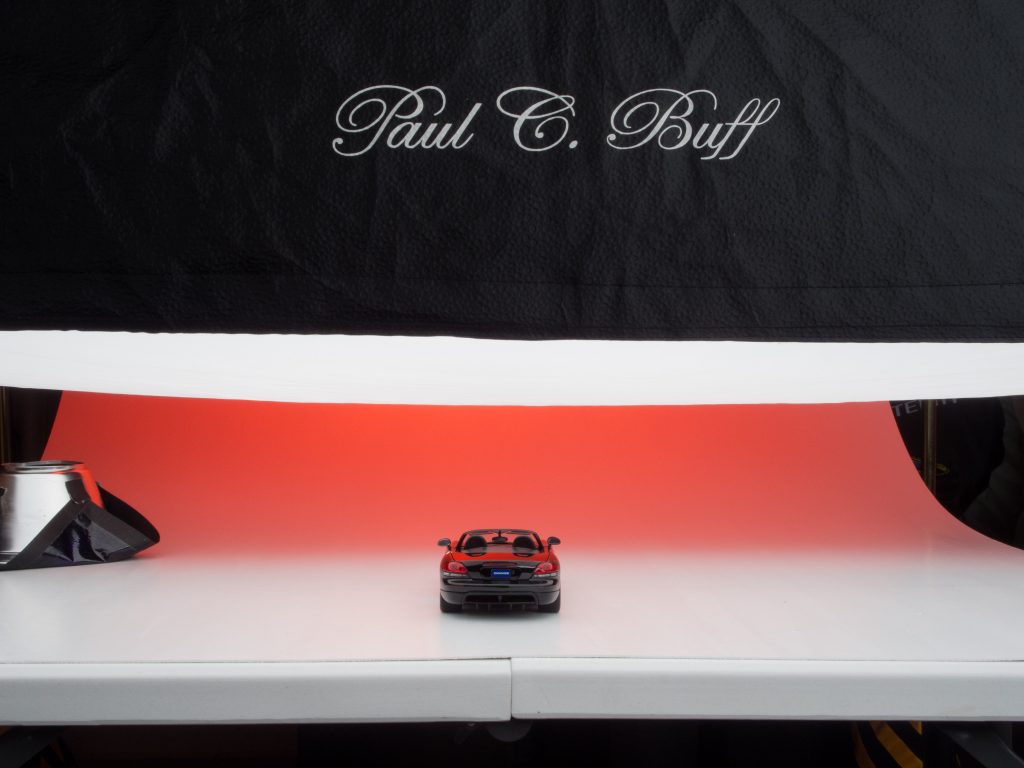
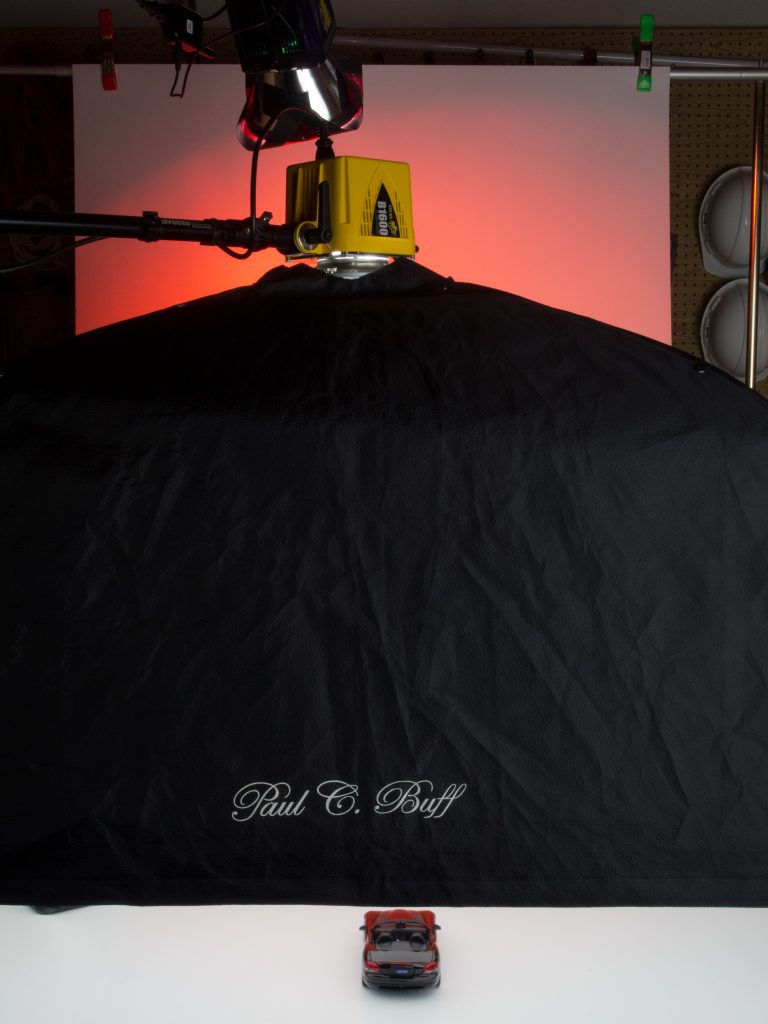
I moved the softbox further from the background and more in front of the car for the first photo and did a similar with the first red photo.
I suggest playing with something like a car and photographing it in a different light. I also highly recommend buying a black car versus a lighter color car if you want to learn how to light.
1 Paul Buff set of four honeycomb grids for a 7-inch reflector
Roll of Gaffer Tap
Several gel filters for color correction or adding color if needed
All this fits into the Tamrac 660 Rolling Studio – Black and weighs about 65 lbs. I check this bag when flying.
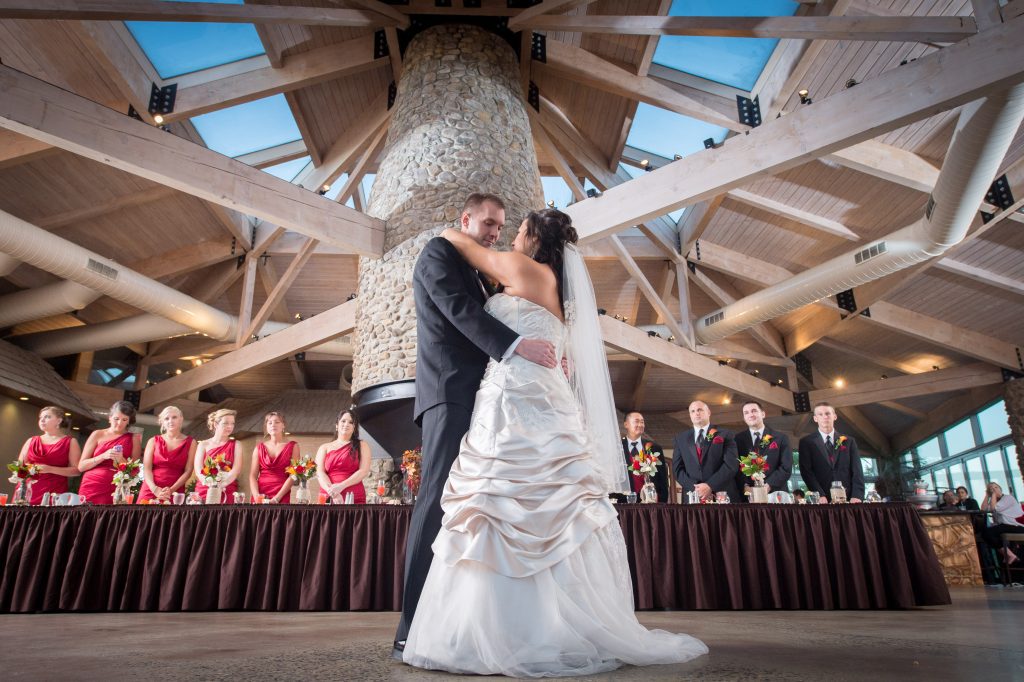
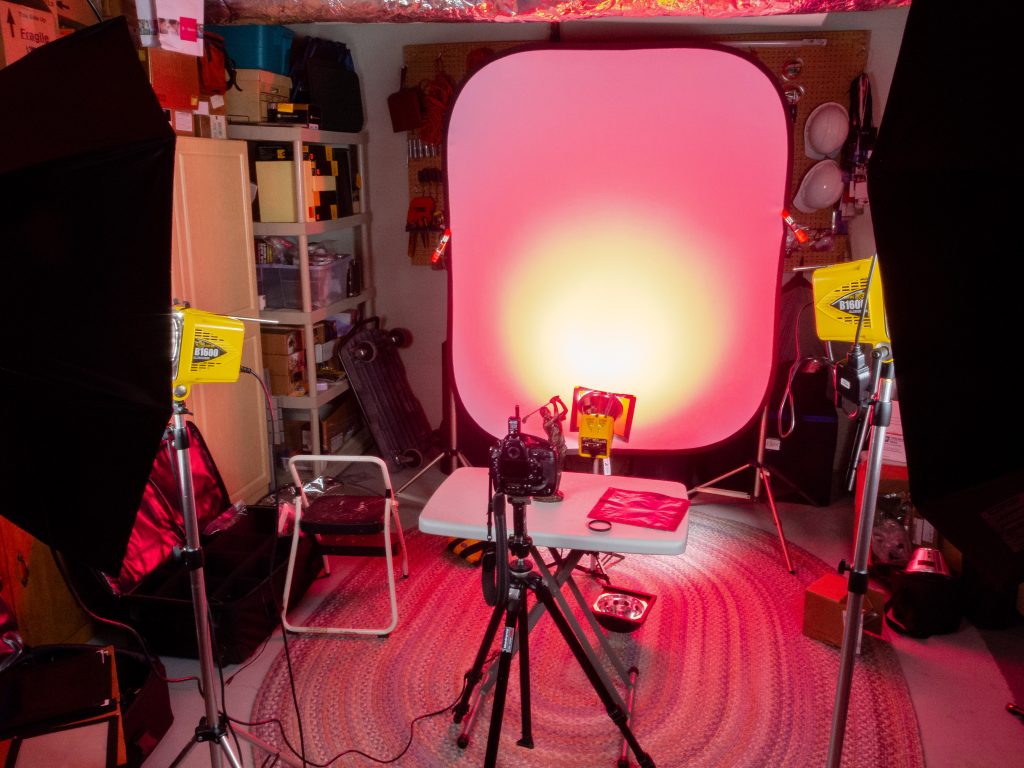
In this photo, you can see the room lit up with the 3 Alienbees B1600.
Rebecca Kramer and Cameron Manzi Wedding
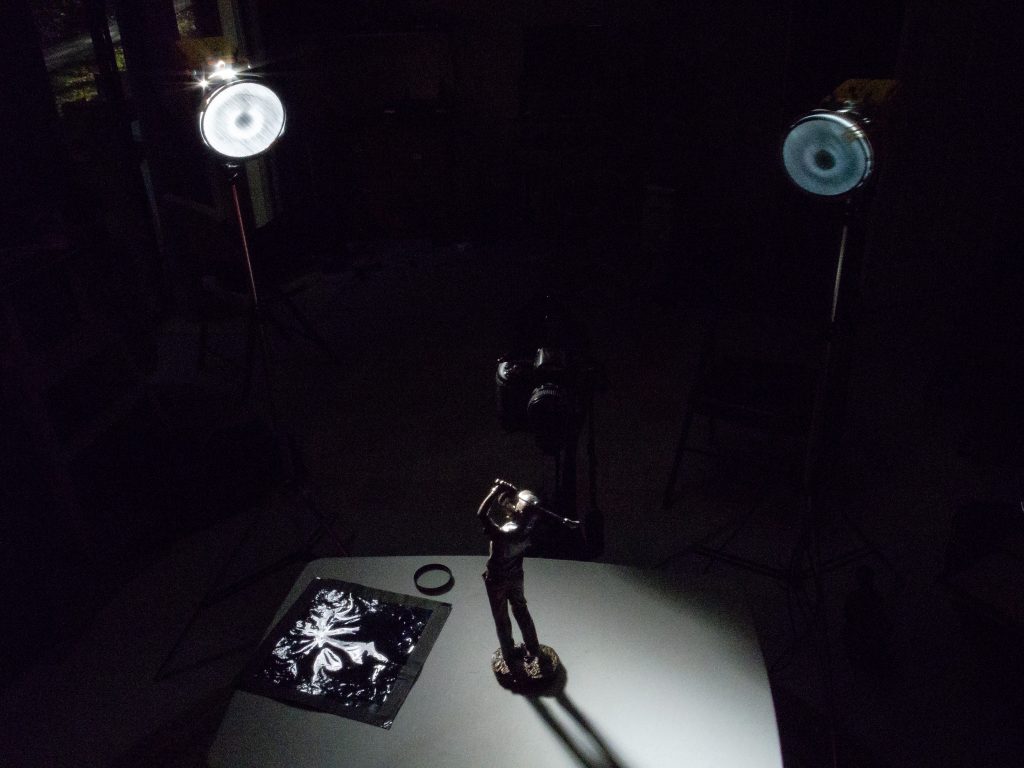
Here is another photo showing how the lighting works in the room. Again, most of the action happened in the center, not on the fringes where I placed the lights.
Kit Two
This photo shows my hotshoe lighting kit. It includes
1 Nikon SB900
1 Nikon SB800
Pocket Wizard Flex Transceivers TT5 Kit
2 TT5
1 TT1—Use this with the PocketWizard Plus so I can sync at 1/500
1 AC3
2 ThinkTank Strobe Stuff bags to carry the flashes
SD-9A 6 AA External Flash Battery Pack for Nikon SB-900 SB900
2 Metal Umbrella Brackets with Adjustable Flash Shoe
2 Manfrotto 5001B Nano Black Light Stand – 6.2′ (1.9m)
2 30″ PhotoFlex White Translucent Umbrellas
All this except the light stands and umbrellas go with my cameras in the ThinkTank Airport Security™ V 2.0 Rolling Camera Bag. I usually pack the stands along with my Tripod.
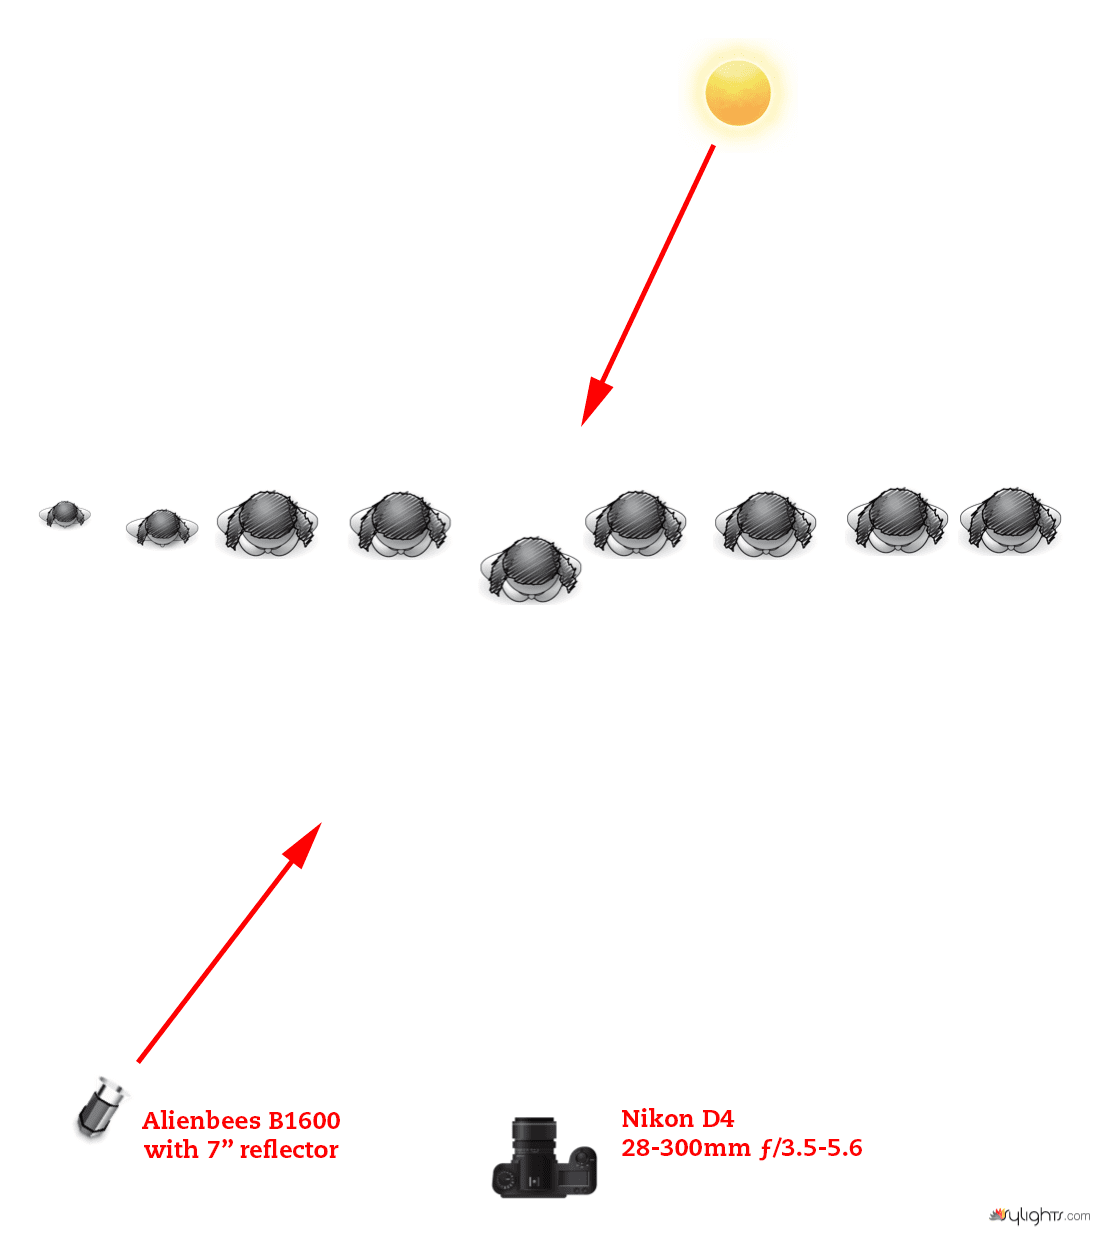
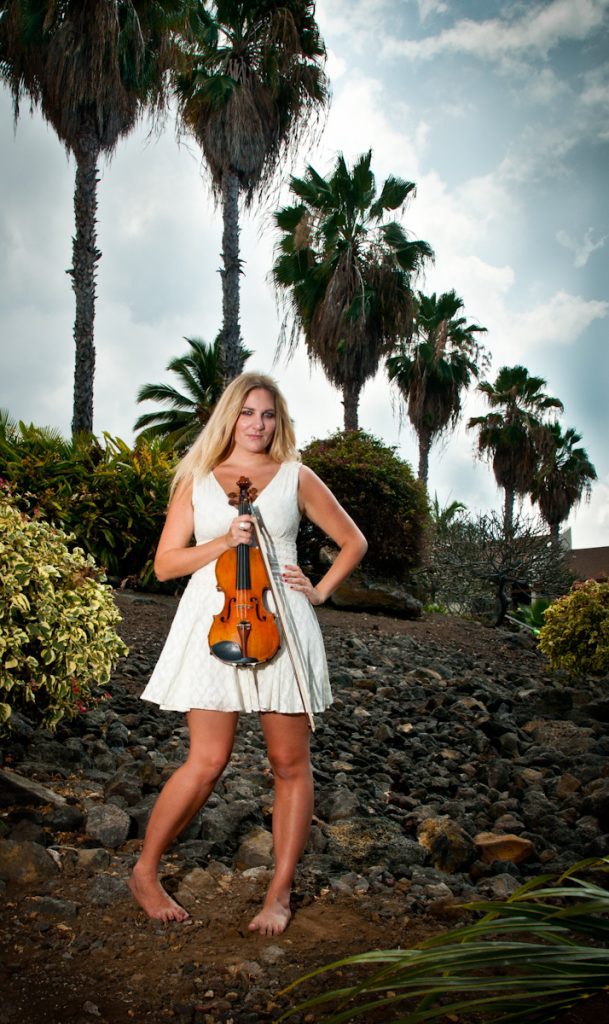
Nikon D4, 28-300mm ƒ/3.5-5.6, ISO 100, ƒ/8, 1/125, Off camera Alienbees B1600
The Setup
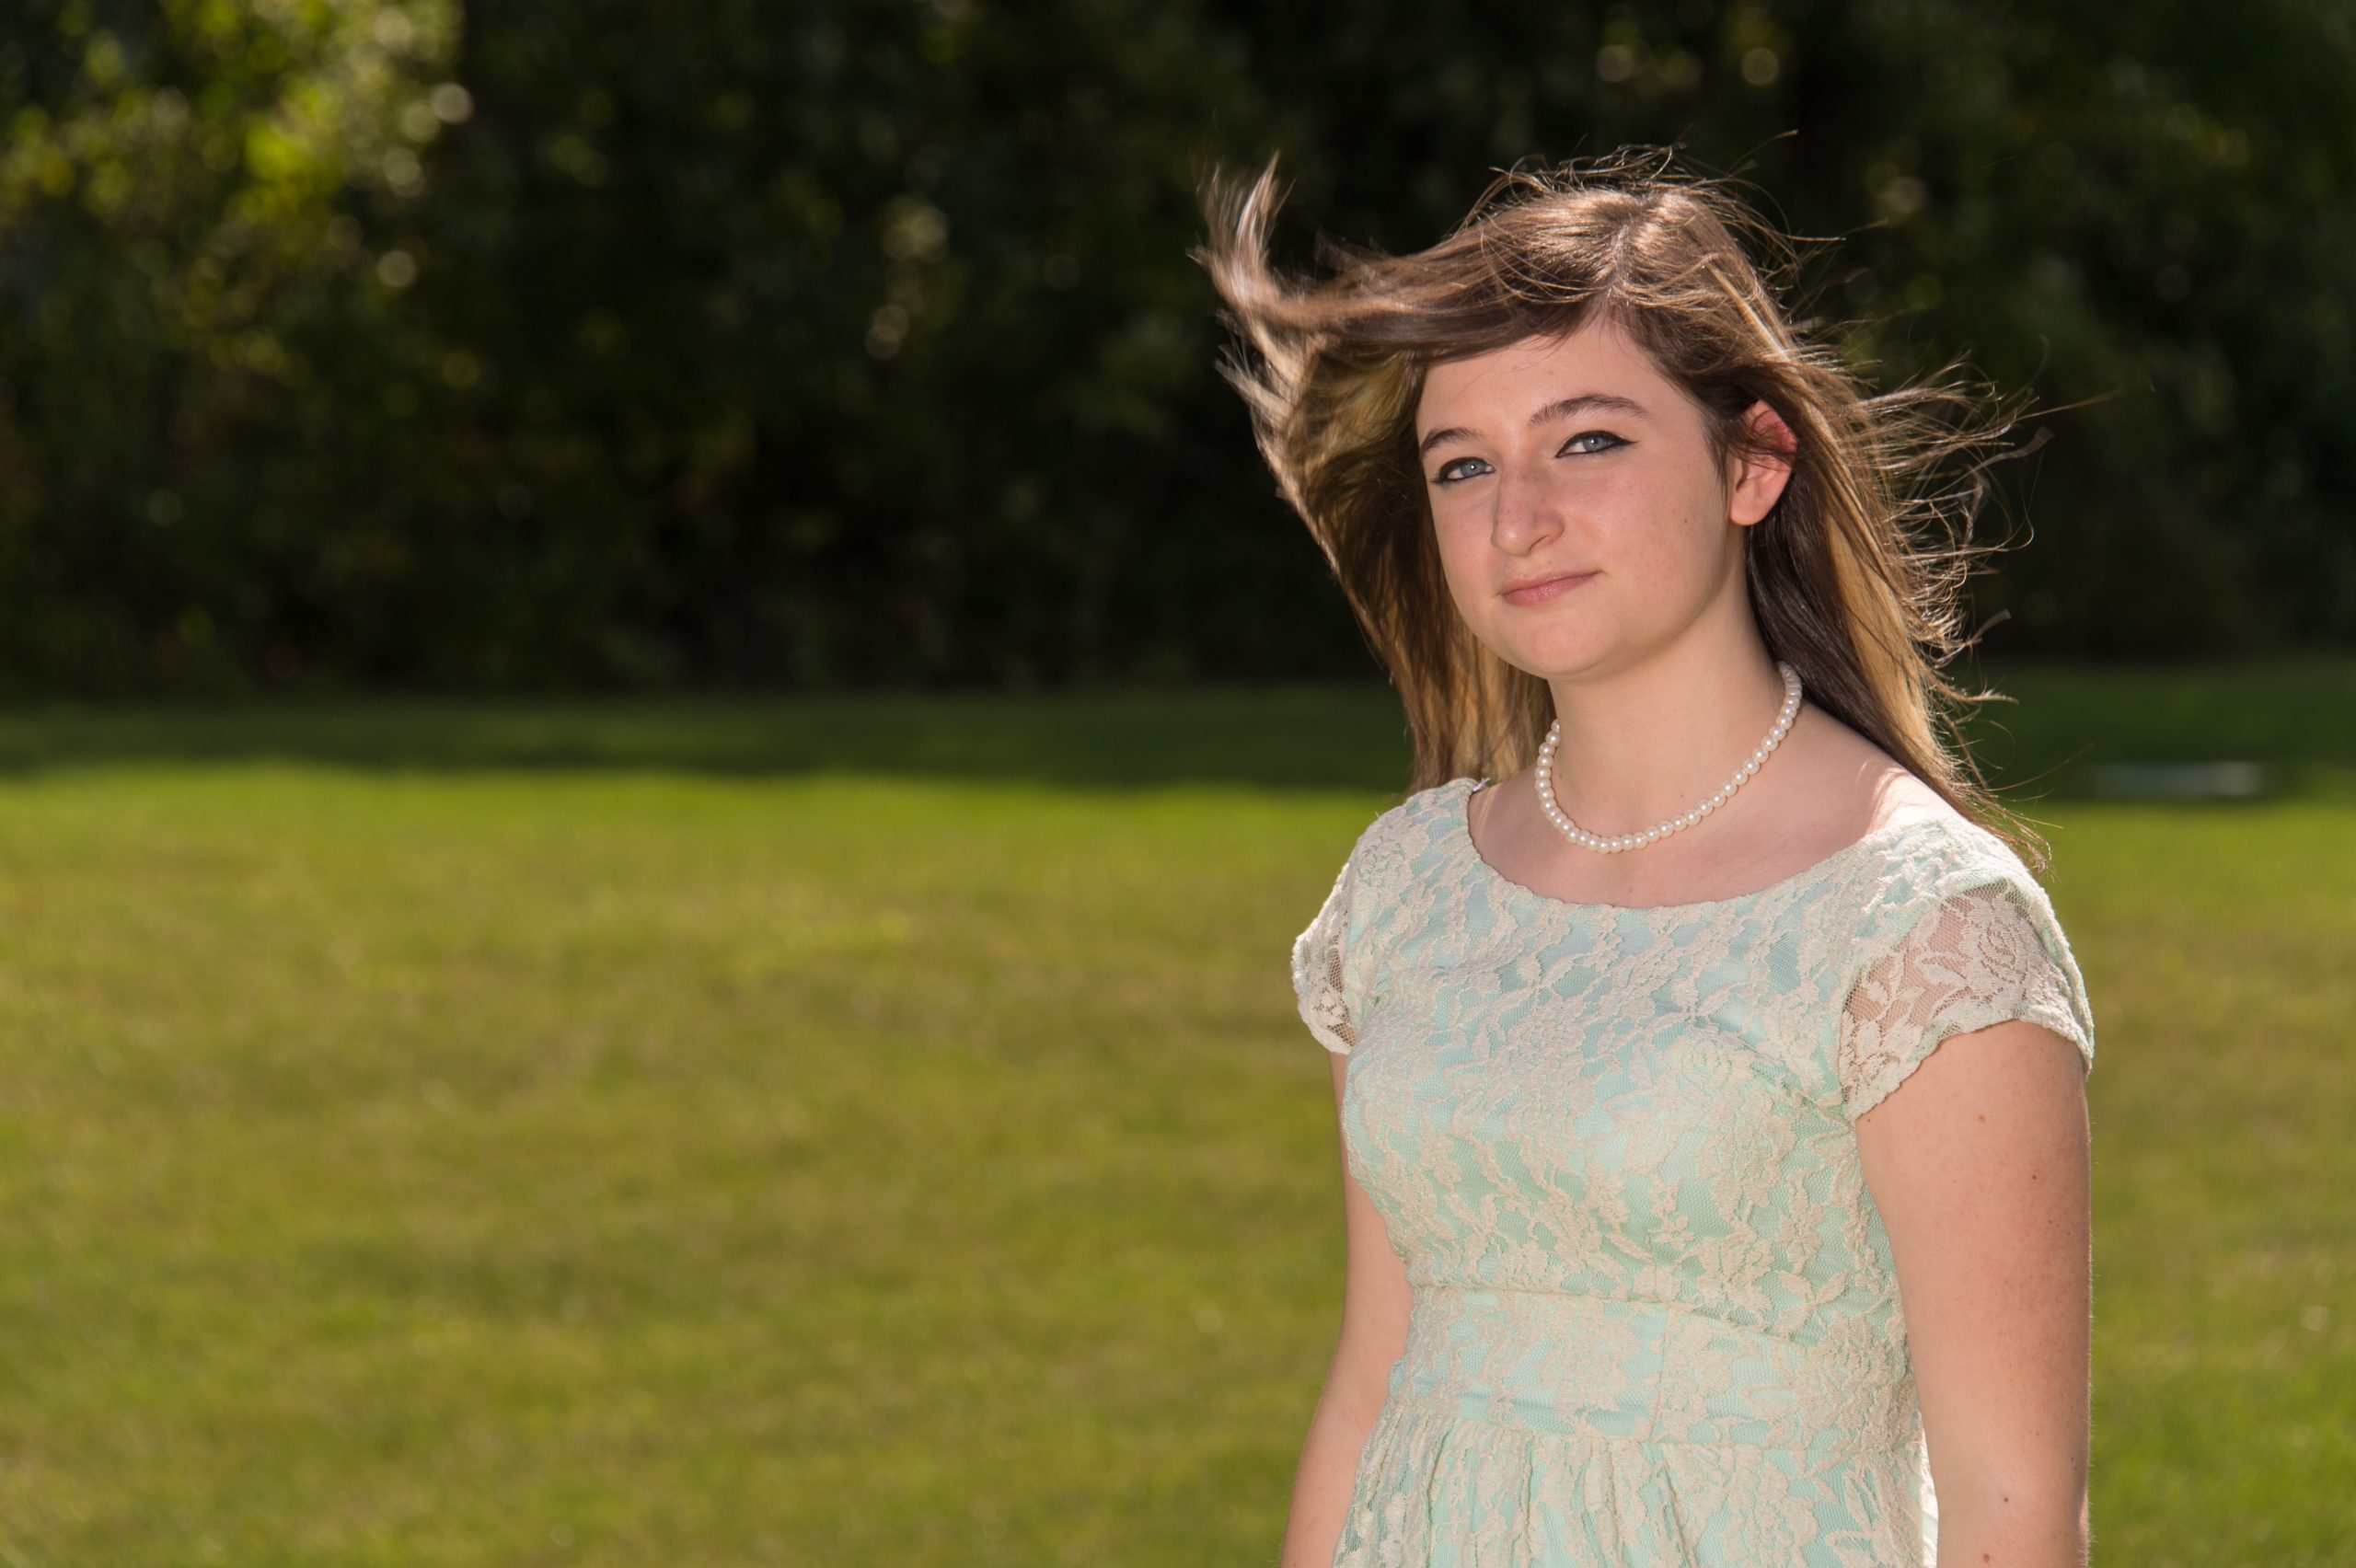
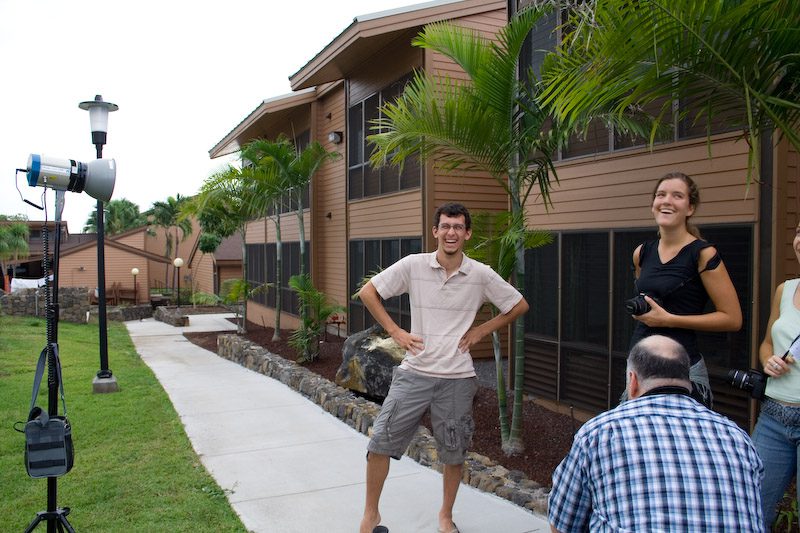
Simple lighting setups work great outside when you already have the sun as one of the lights.
Before getting the photo above, you must plan and do some test shots.
I recommend putting the strobe opposite the sun and using the sun as a hair light to help create separation from the background.
Nikon D4, 28-300mm ƒ/3.5-5.6, ISO 100, ƒ/8, 1/125, Off camera Alienbees B1600
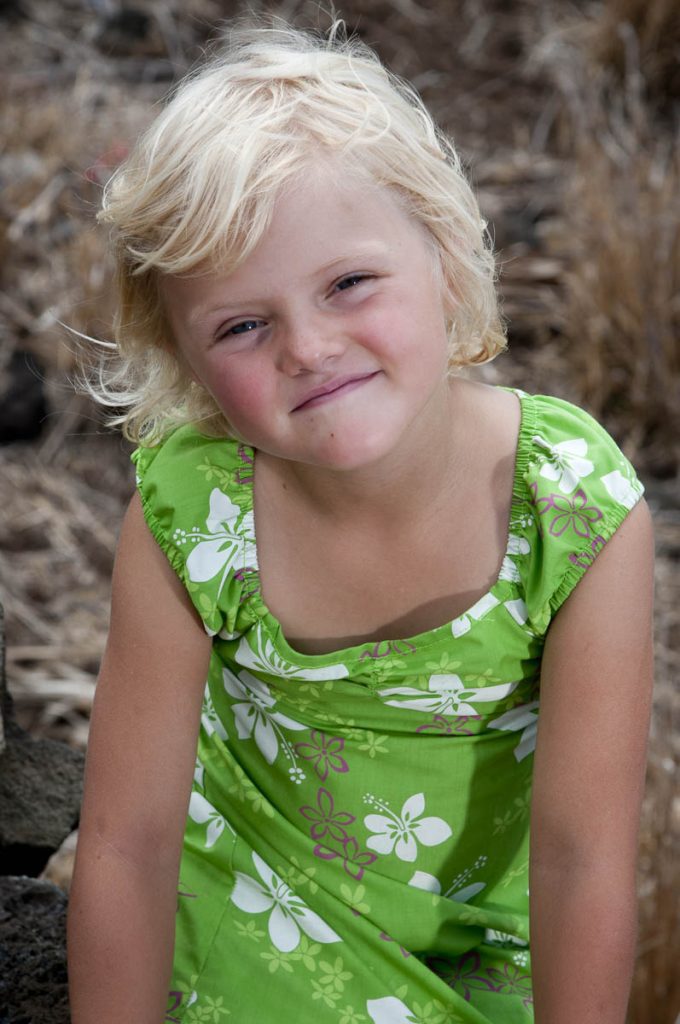
When I do test shots, I take intimate photos of the face to see how the light looks on the front. So here, my daughter, who was also my assistant, stood in the place I would have the bride and bridesmaids stand.
Top View
I metered the scene and then added the strobe at one stop less than the scene.
Just be sure no one comes between the strobe and the people, and always have someone standing next to the strobe so that a strong gust of wind doesn’t blow it over. Also, this person can be sure the flash is firing.
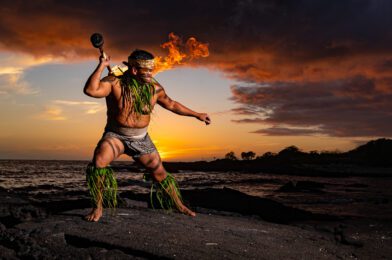
Here are a few tips before you start shooting the performance.
Arrive Early—You need some time before the curtain goes up.
Fast lens and/or high ISO—You need gear to take low-light photos.
Find a good seat—You might think the front row is the best, but sometimes the back row is the best. If it is assigned seating, you might want to go before you buy a ticket to the venue. In general, I find the seats in the center to give you more opportunities than from the side.
Test Shots—Often, you can make some test shots to set your exposure correctly.
White Balance—Shooting on Auto White Balance for a theater production is the worst possible time to use this setting. Often, the productions use colored lights, which can have your camera correcting, giving your actors funny skin tones. Custom white balance is ideal, and second, you can try some presets like tungsten to get you close.
White Balance
Pleasing skin tones are the number one thing that separates hobbyist photos from pros.
My secret weapon is the ExpoDisc.
ExpoDisc EXPOD2-77 2.0 Professional White Balance Filter 77 mm, 82mm (Black)
ExposDisc goes in front of the lens and then you use it to get an incident reading rather than a reflective reading of the light.
Notice the direction of the light hitting the subject. You move to the same position to get the light reading below.
Point the camera toward the direction of the light that is falling on the subject.
If the subject is facing me and the light is from the side, I face the camera with the ExpoDisc on it so it is pointing toward the camera position. The chart above is to help you understand the concept, but you can modify it.
One way you can modify it is if the light is the same where you are standing, you could cheat and take a reading from where you are. The problem that can arise is if they are lit by Window light and the camera position is in the shade; your color balance will be off if you do not take it from the subject’s perspective.
Nikon D4, 28-300mm, ISO 3,600, ƒ/5.6, 1/400
If it is supposed to be a silhouette and you get a photo like mine, that’s great. However, if you are supposed to see their faces, you must make some adjustments.
Nikon D4, 28-300mm, ISO 4,500, ƒ/5.6, 1/320
There are a few ways to adjust to get a good exposure to skin tones. First, use spot metering if your camera has it. On the Nikon D4, I can choose selective focus and spot metering. I then have 51 different points to move the focus/spot metering to take the photo.
Using spot metering and selective focus with the Nikon D4, I have red brackets to move where I want the focus and exposure to be set.
Nikon D4, 28-300mm, ISO 12,800, ƒ/5.6, 1/320
Waiting for the light
While waiting for the peak moments in the scene, you also have to wait for the best light. For example, this witch’s hat had her face in the shadows most of the time she was on stage., but when she was singing those dramatic high notes, she put her head up and said, you have your shot.
Post-production is critical.
Nikon D4, 70-200mm, ISO 1,2500, ƒ/2.8, 1/500
No Flash—That is the rule for stage performances; therefore, you are at the mercy of what stage lighting you see. Unless your small town has some incredible endowment for the arts, your lighting on the stage will not look like Broadway or TV shows. Throughout this production, the light value on one person would look great, and the other person was blown out or silhouetted.
This is where taking the photo into either Adobe Lightroom or PhotoShop can help salvage a photo. This is one of the rare moments I have to fix photos in post-production. It isn’t because I screwed up, it is because the lighting just isn’t even or at least acceptable for photos.
This is the photo before I cropped it or made changes in post-production. Notice that the kneeling actress is well-exposed and not blown out. Generally, you can open up the shadows but do very little with something blown out without detail.
Nikon D4, Sigma 120-300mm ƒ/2.8, ISO 2,500, ƒ/2.8, 1/500
Get Close
Don’t shoot the entire stage all the time. Vary your images using long glass, like a 300mm lens or longer, to isolate an actor. The lighting guys do this with a spotlight to make you look at just one place, but you can do it with lens choice.
Nikon D4, Sigma 120-300mm ƒ/2.8, ISO 2,800, ƒ/2.8, 1/500
Think Marching
Nikon D4, 28-300mm, ISO 7,200, ƒ/5.6, 1/250
The photos look fantastic when you see the military marching in formation or marching bands, and everyone is in sync. It looks better when everyone is in full stride because it creates motion. Closer the legs are together, they look like they are standing still, even tho they are moving.
Nikon D4, 28-300mm, ISO 4,000, ƒ/5.6, 1/250
Summarizing
Please arrive early, shoot many photos, and plan on doing some post-production to get the quality I am getting here. Your camera phone will not get this quality. Nor will having excellent gear. What gets this quality is experience. So please arrive early to take test shots so you do not need to shoot your first images of the play when it is live.
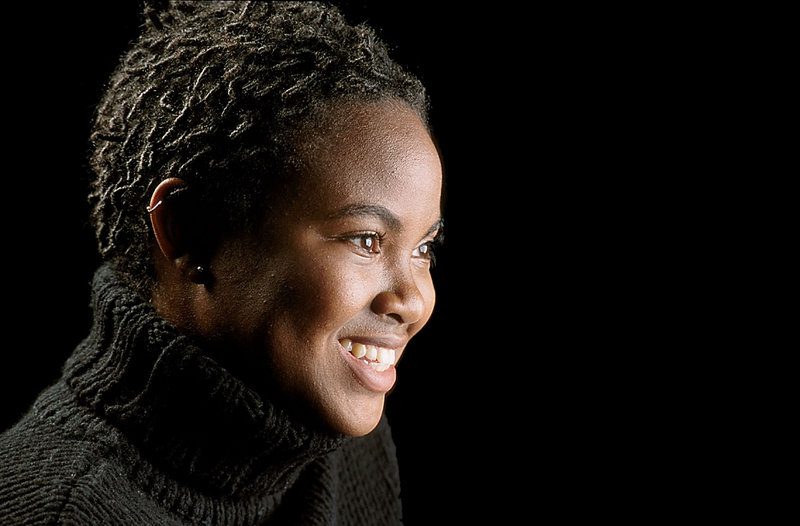
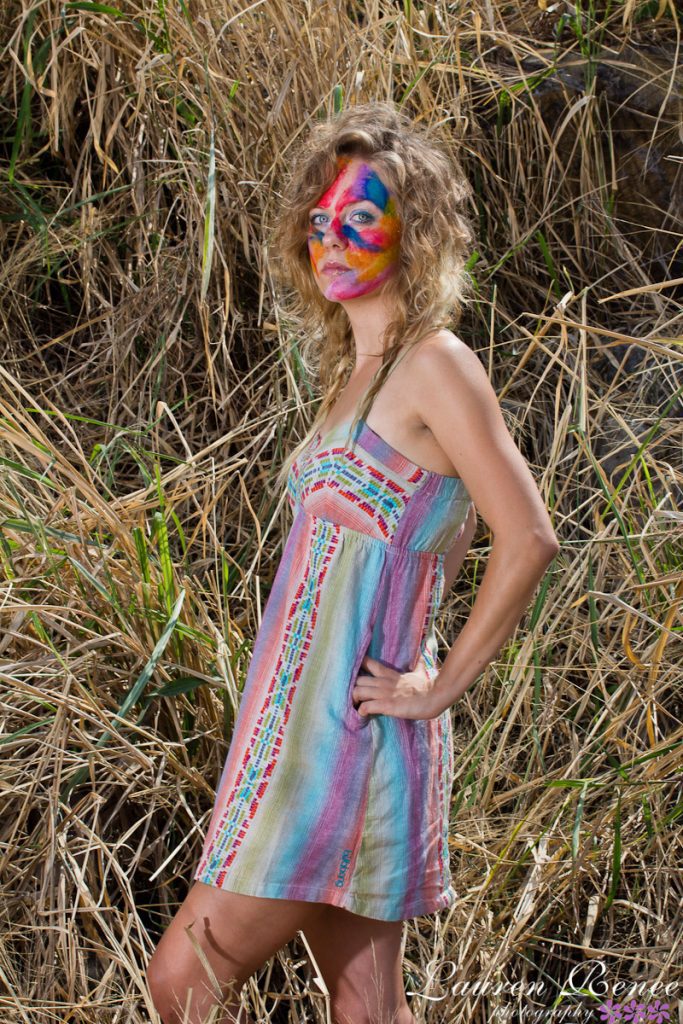
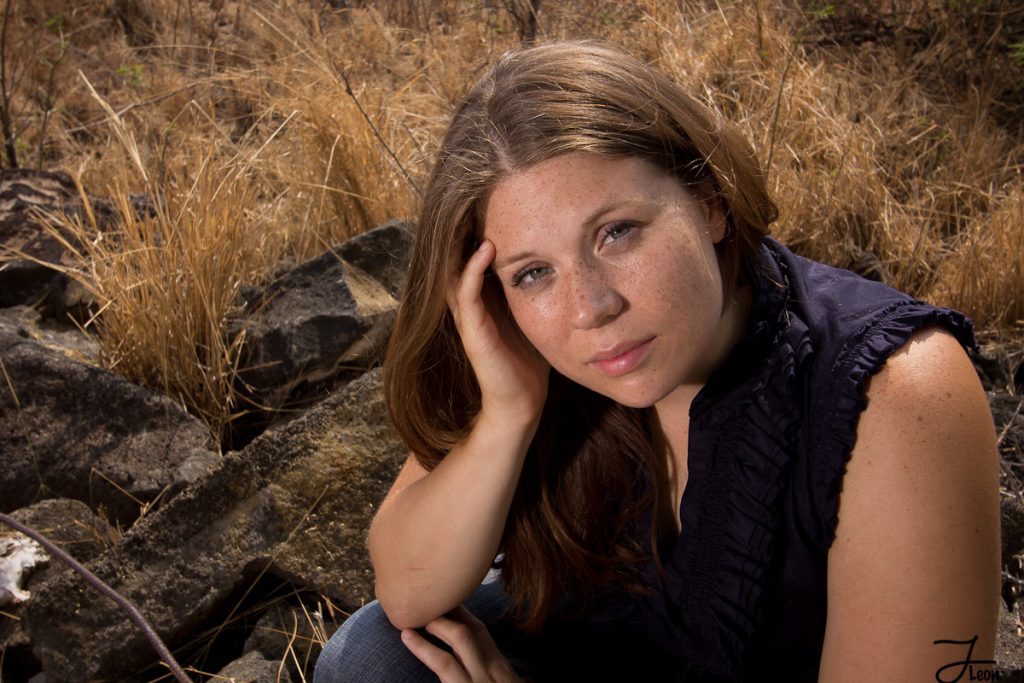
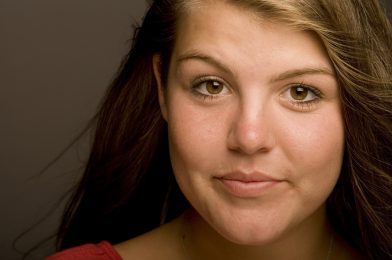
This is one of my favorite photos that I have ever made. I think the model brought as much to this session as I did lighting her.
I love her hair, the turtle neck and her wonderful skin and smile.
Simplicity is what makes this work so well. You need to have the background far away from the soft boxes. There is easily 10 feet from the model to the background. So the amount of light hitting the subject drops off pretty quickly and what little light is hitting the background isn’t enough to register in the photo.
She is around f/8 on the Mamiya RZ 6×7 camera system. I was using a 100-200mm zoom lens and shooting with Provia 100 transparency film. I didn’t know how good it was until I got the film back from the lab a day or so later.
Sure I shot a test shot. I shot that with a Polaroid back using Fuji’s Polaroid film.
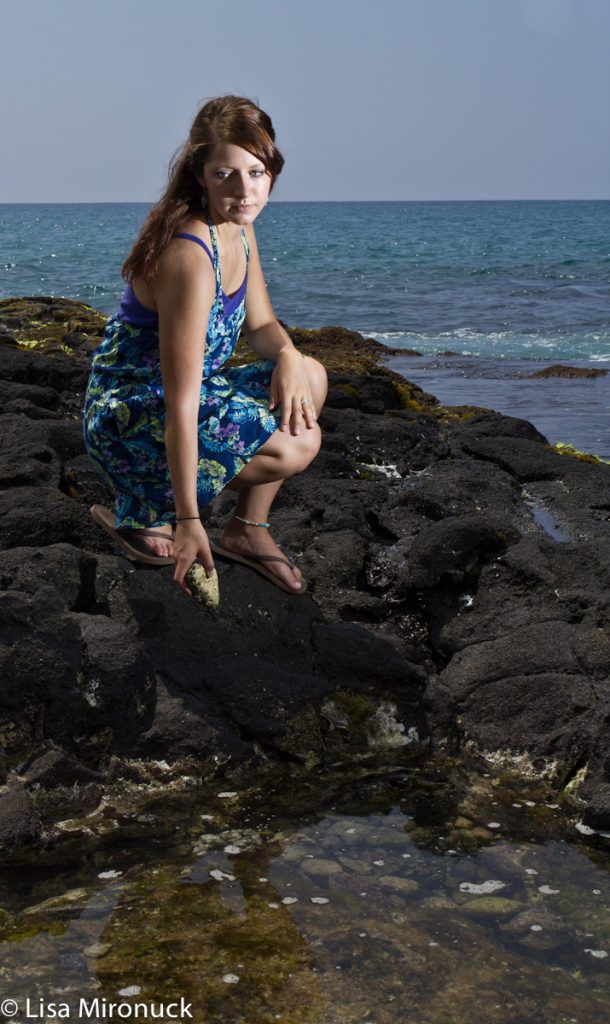
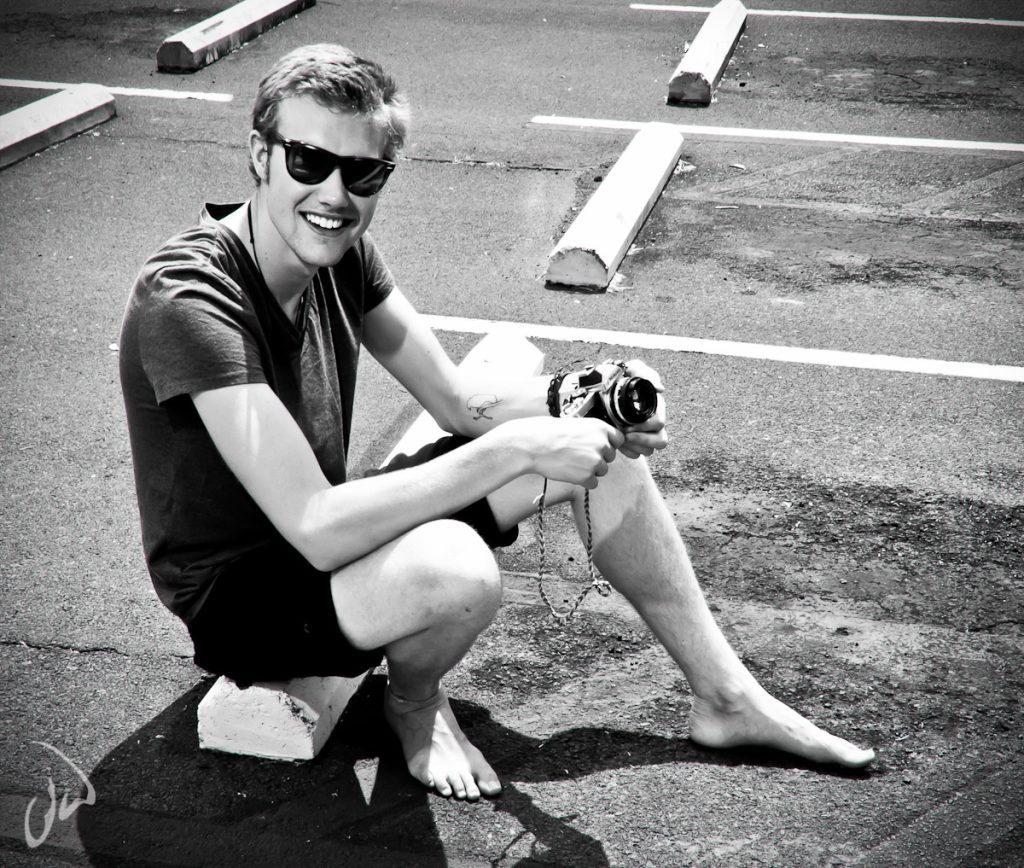
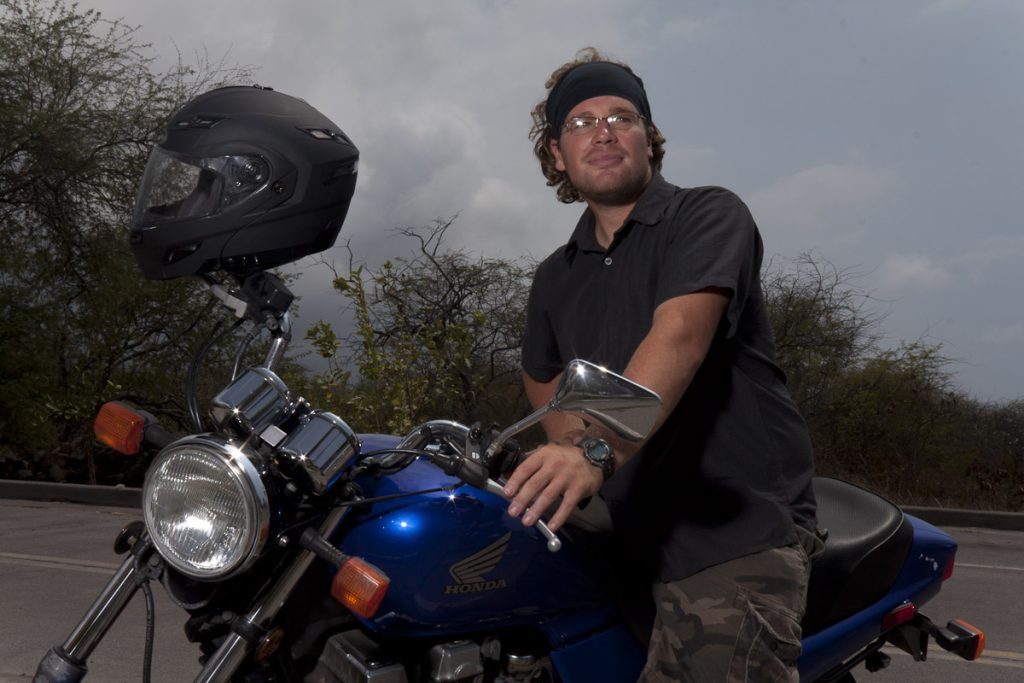
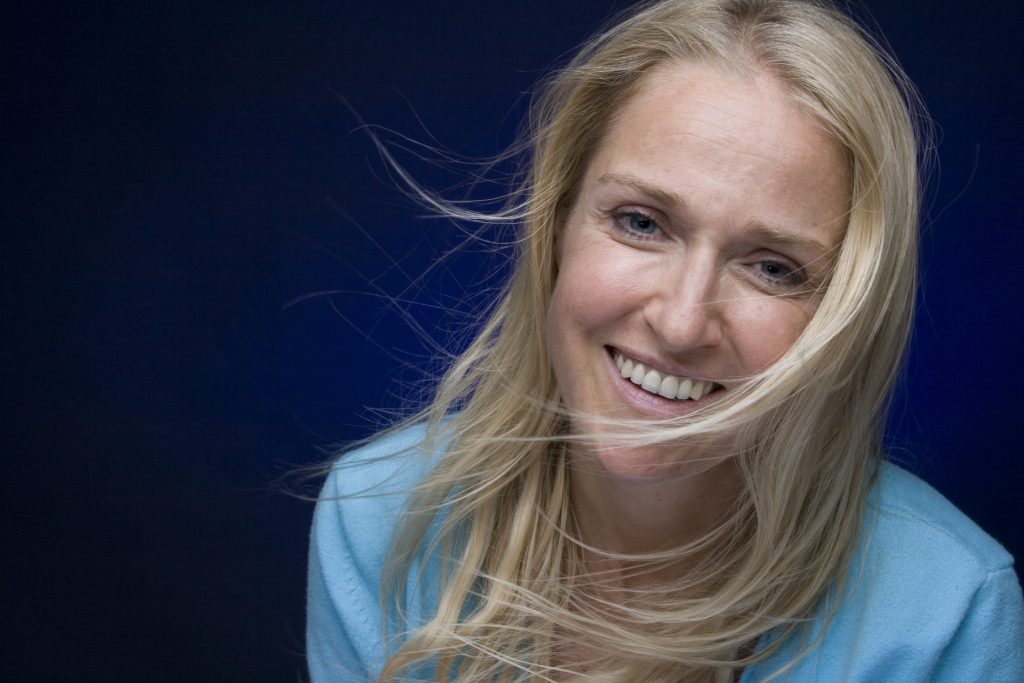
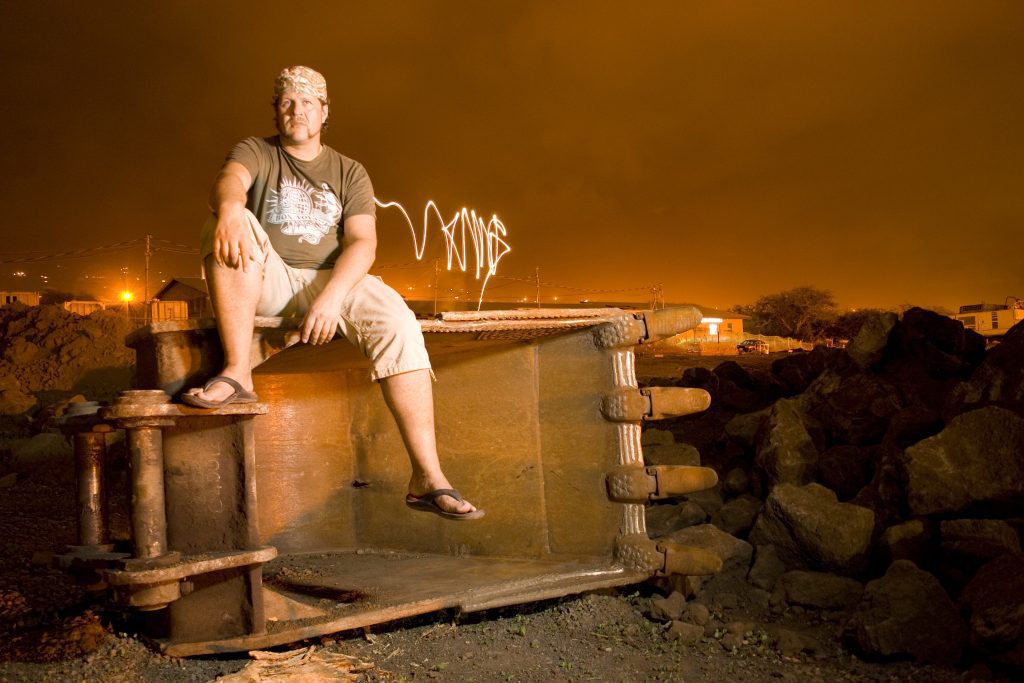
Here is another lighting assignment for the students. They were to go outside, use the sun as a backlight, and then use a strobe as the leading light. Here are the assignment and diagram that I sent to them.
Description: Mixed lighting
Items:
Monobloc If you choose, you may use your hot-shoe flash, but it must be off the camera. A short cord will not work for this. You need a long line to fire the flash, or you need to use the radio remotes. Use extension cords for power or use the battery-powered strobes.
Camera You may use any lens you choose for this assignment fish-eye, wide angle, portrait, telephoto, lens baby, or shift. Make this a complete environmental picture as you can.
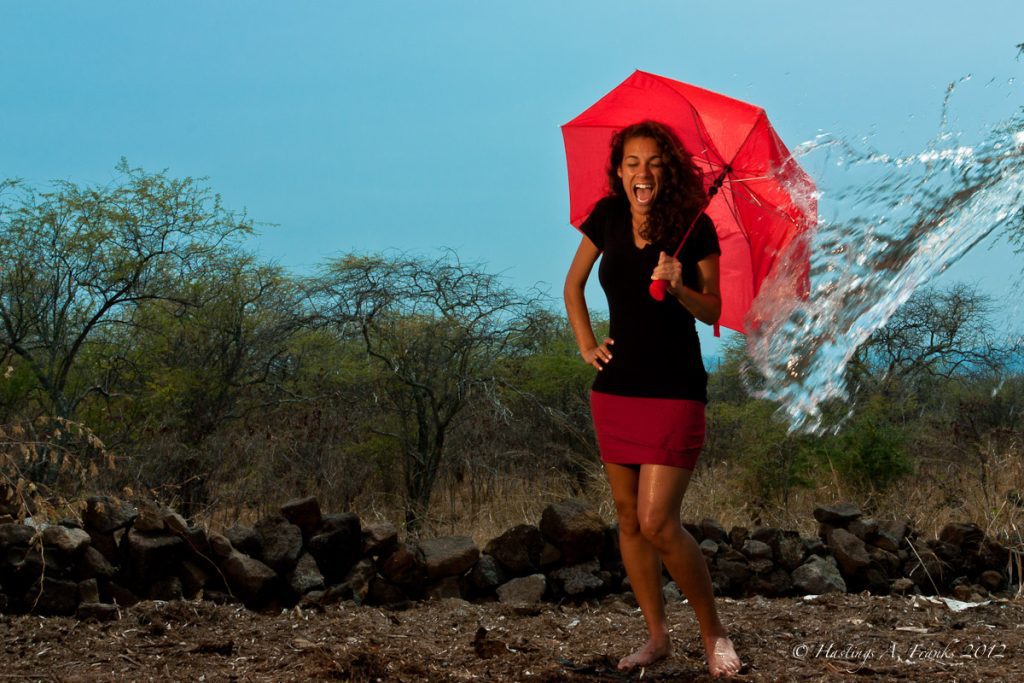
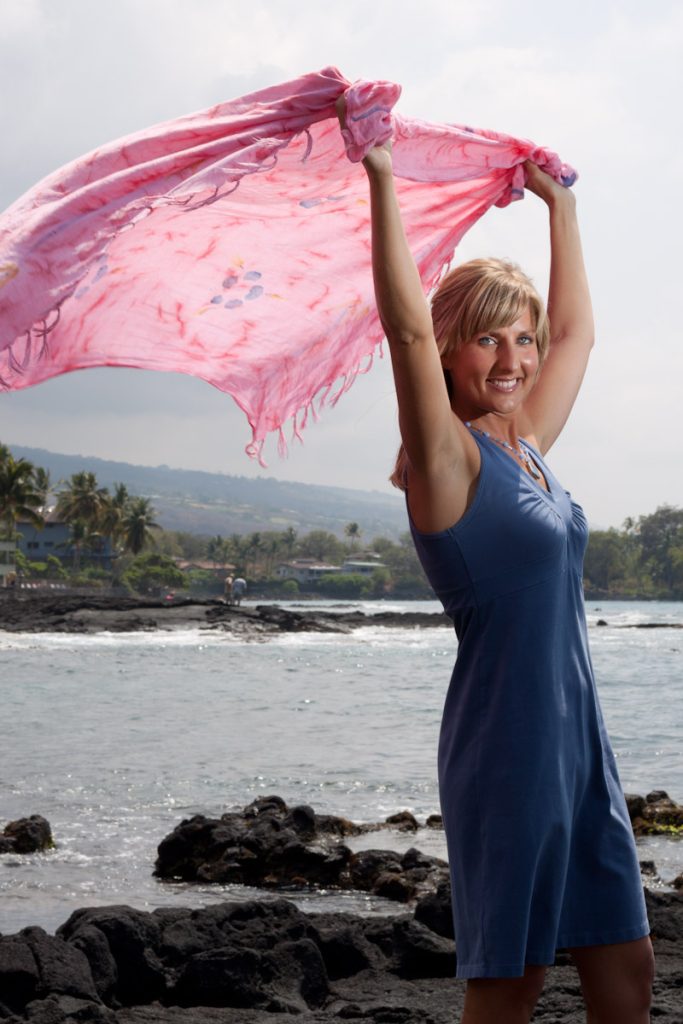
Sun You can do this assignment outside with the sun still lighting the sky. It can be dusk, dawn, or mid-day sun. Be sure the subject is backlighted by the sun and not on their face.
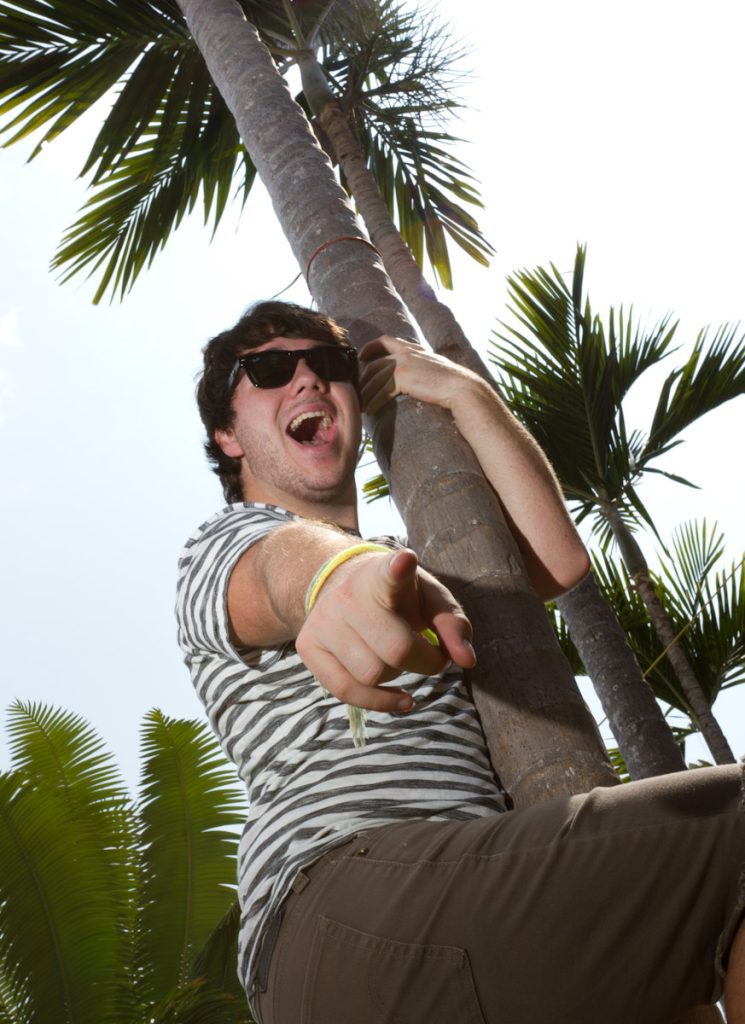
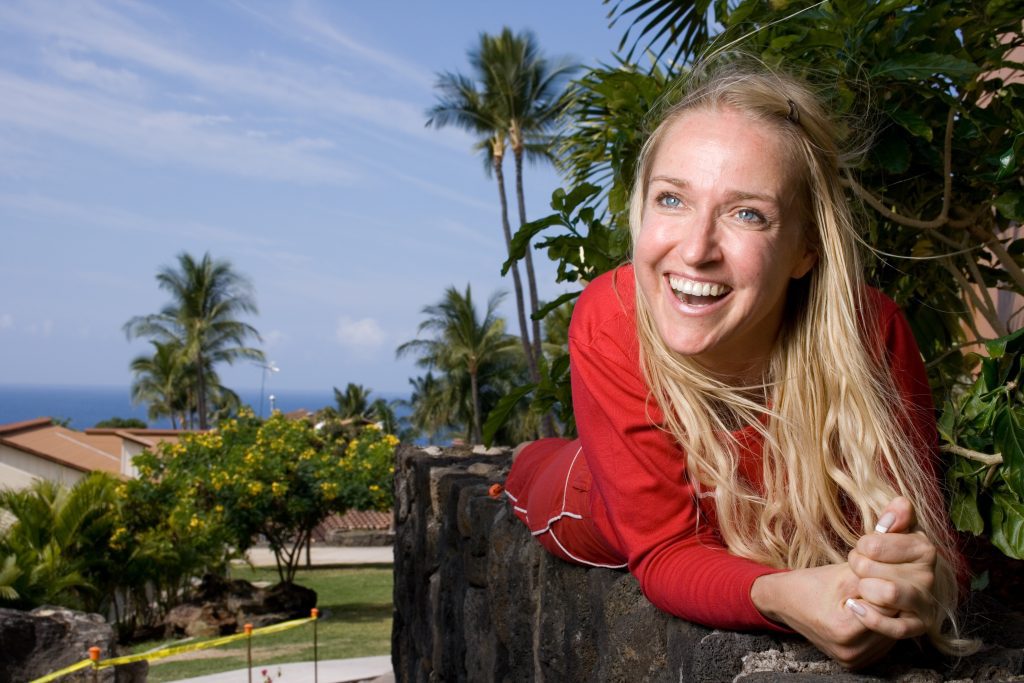
Subject We need good expressions in this photo. Maybe have the subject posing with something. Sitting on a motorcycle or holding a surfboard are examples of what students have done in the past.
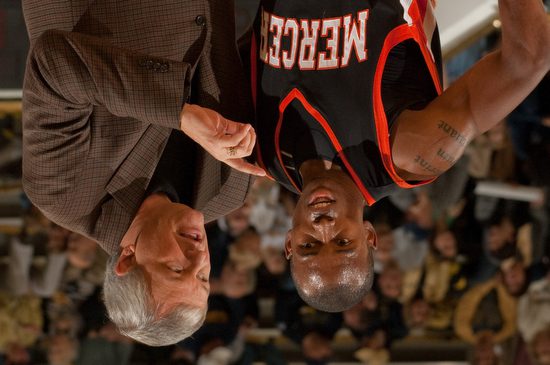
Turn your photos upside down; this will help you see where your eye goes first. After seeing where your eye goes first, is this where your audience wants to look? Nikon D2Xs, ISO 400, f/7.1, Nikkor 24-120mm
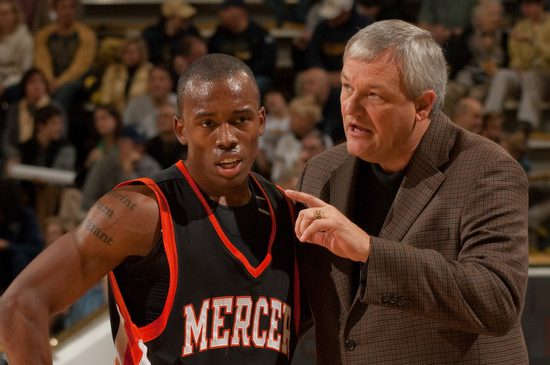
Fair values are one of the most significant factors influencing where someone looks. Nikon D2Xs, ISO 400, f/7.1, Nikkor 24-120mm
Start upside down One of the ways I was first taught to look at a photo is to turn it upside down. This way, you see how the photo’s composition and light values will direct someone to what is essential or away.
The light values alone have a tremendous effect on the viewer. If you put a black dot on a white paper with nothing else or a white dot on a black piece of paper, your eye is drawn to the dot.
With more stuff on the paper, the principle is still the same. The contrast of the light value to the rest of the scene will draw you to a spot.
Now that you know this, you should be able to help create a photo that directs the viewer based on fair values to the subject.
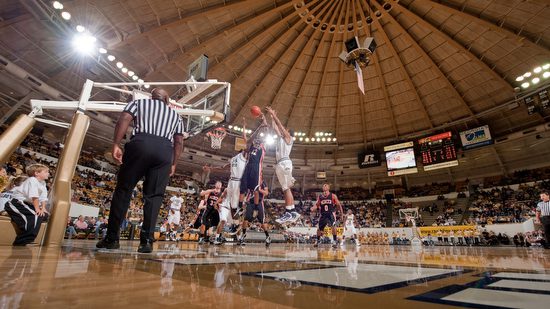
The ceiling helps to add some graphic qualities to the photo. Nikon D3, ISO 400, f/7.1, Nikkor 24-120mm
Graphics
Sign manufacturers have used big arrows to direct you to a store location. You could use a large hand to show people where to look, or you can use this same principle more subtly to direct the viewer.
Leading lines and perspective can help pull you into a photo and give the image some depth.
While straight lines hit you over the head, directing your eye, the S-curve is a classic way to draw a viewer’s eye. One of the most common uses in the scenic photo is the river winding through a scene.
Framing
Here I am using the tree and the people in the shadows as framing at The Citadel. Nikon D3S, ISO 200, 1/1250, Nikkor 24-120mm
While a photo might look good in different frames, you can buy it at a frame shop. You can also use elements in an image to help frame the shot. This framing often helps create a sense of depth to a photo and not just a border like a physical frame. Looking through a doorway to the subject in a room helps create some context.
Using the flowers to fill in what could be an empty space. Nikon D3, ISO 1600, f/5.6, 1/5000 Nikkor 14-24mm
Flowers in the foreground and the subject like a house in the background help fill what would often be dead space in the photo.
Hey there’s more
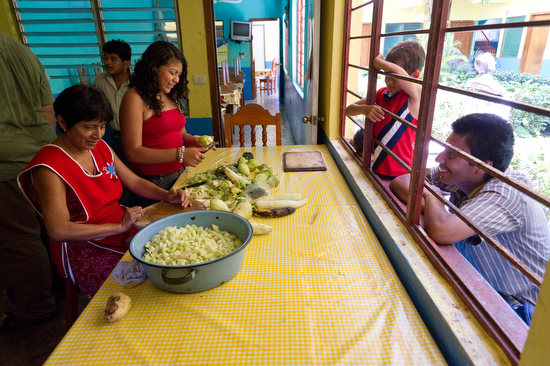
While your eye may go to the young man setting the table and it is telling a story, your look will likely drift to the woman at the stove cooking and then to the people in the back room. If I did it right, your eye would drift around looking at the more minor details because I got your eye moving, and once it is, it will explore. Nikon D3S ISO 12,800, f/5.6, 1/40, Nikkor 14-24mm
You can make a nice composed photo of a subject and do a great job creating a good image of the issue. You can also make a more storytelling photo and not just a pretty picture. These are photos that you may be drawn immediately to the main subject, but your eye continues to be moved around the scene, and you are learning more about the story.
Some photographers have you looking only at the subject and not much more. The seasoned storyteller will have you looking all around and absorbed into the content.
Multi-layered compositions take time and help tell the story in its context more. It also is more entertaining but requires time for the audience to absorb. Photos like this need a longer pause in the slide show or video. Sometimes in magazine story spread, you let them run over two pages to let the audience see all the action. Nikon D3S ISO 5600, f/5.6, 1/250 Nikkor 14-24mm
Students go from not knowing how to turn on the strobes in one week to doing incredible work. My job is to take the fear out of trying new things and teach them some basics upon which they can build.
Take a look at these shows showing you some of the student’s work through the years. I think you will be impressed as I was with their first time shooting with studio strobes.
Here are the students’ work from 2006
In the studioMixing the strobes with available light
These photos are from the students’ work in 2007.
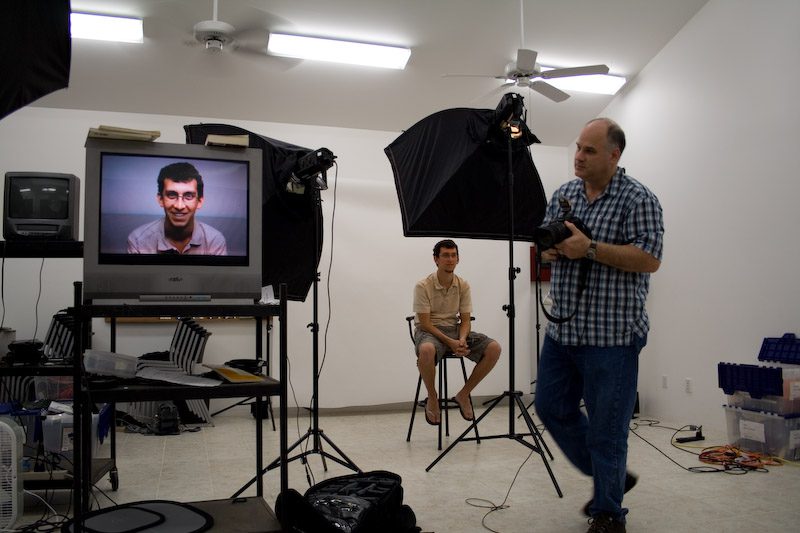
We shoot and let everyone see each other work on monitors, this way; we are learning not just by doing but observing as well.
The school has a variety of lights for the students to practice within the class. Here we have the JTL battery pack system letting you shoot outside with studio lights and radio remotes.
Students learn they can shoot at dusk and night with the strobes. Next, the students mixed strobes with available light and added a flashlight to write the word “Viking” beside the subject, his nickname.
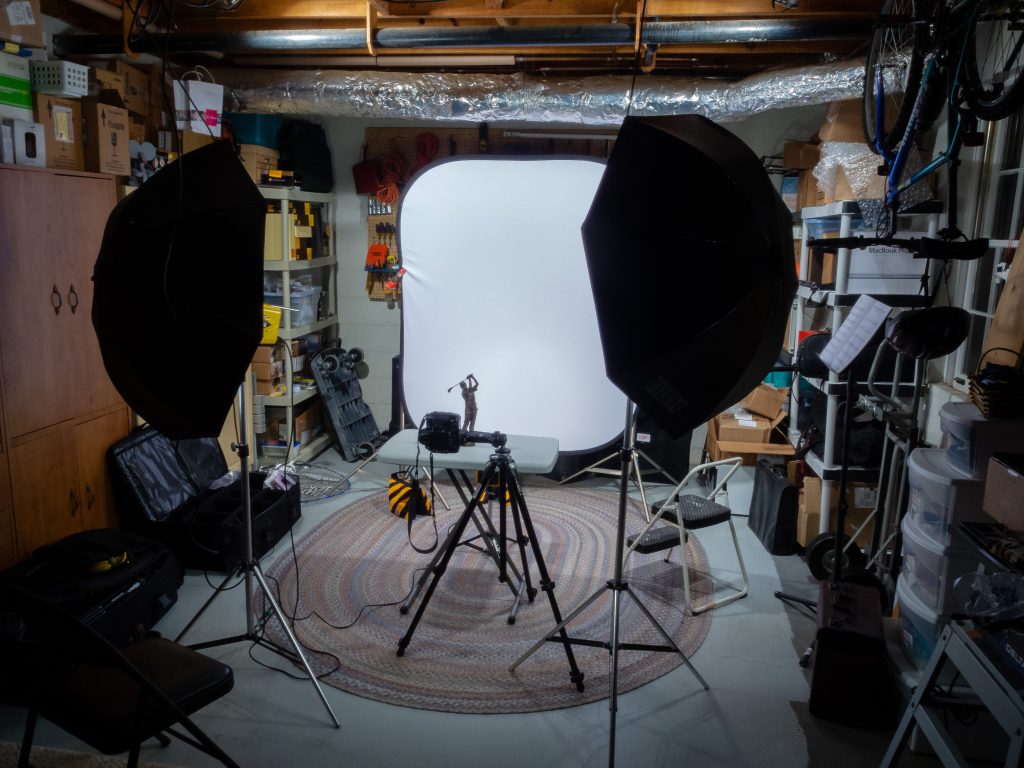
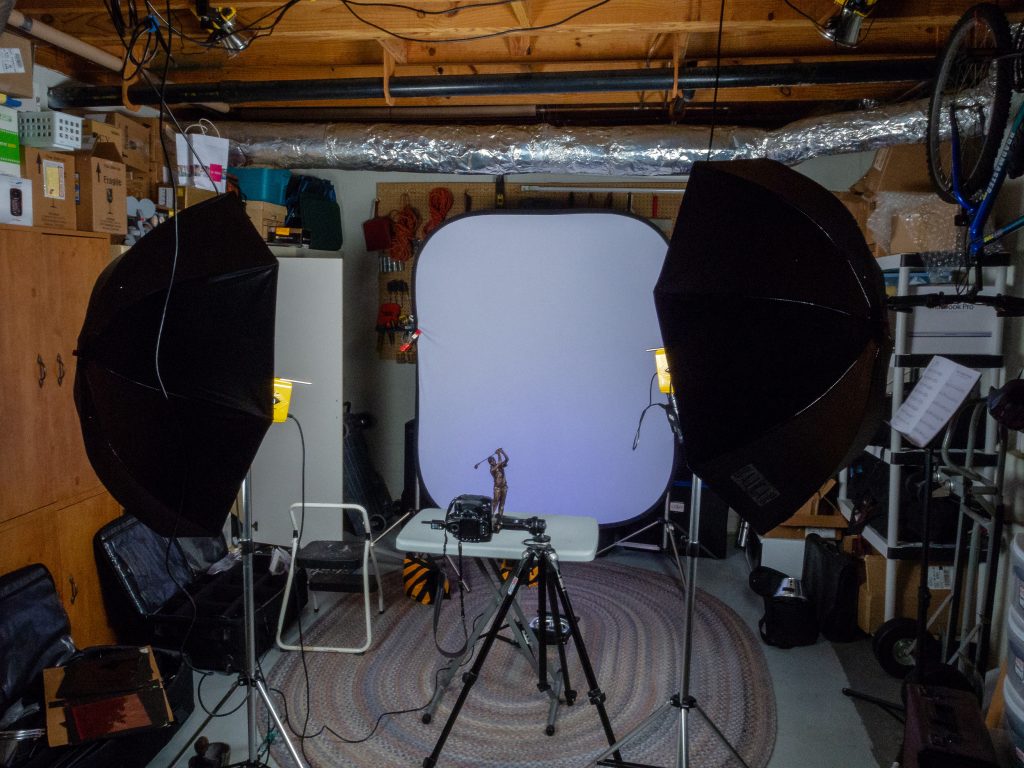
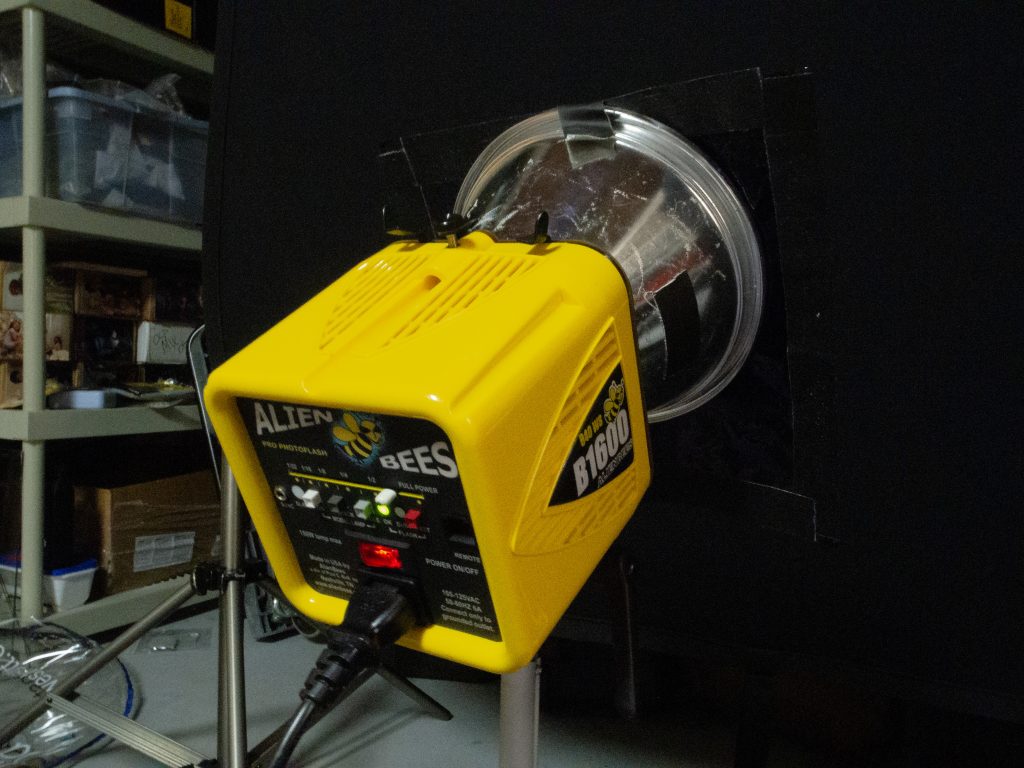
How do you get the photo on top versus the one below? Read on. Lighting everything and using a white background are what you typically get at the bottom. TIP: to get a clean white background, be sure the background is 1 stop greater than the subject. Also, slightly angle the background so it isn’t perpendicular to the camera, or you will get a light flare caused by the background. (Figure 1)
I like to light parts of a scene rather than all of it. Lighting everything, as in the photo above, gives a sterile or even a feeling of the afterlife and living in heaven. If I want that look, I might use this lighting setup. The other advantage of lighting the subject is that you can move and spin, and the light will look the same. You don’t worry about shadows in the wrong places.
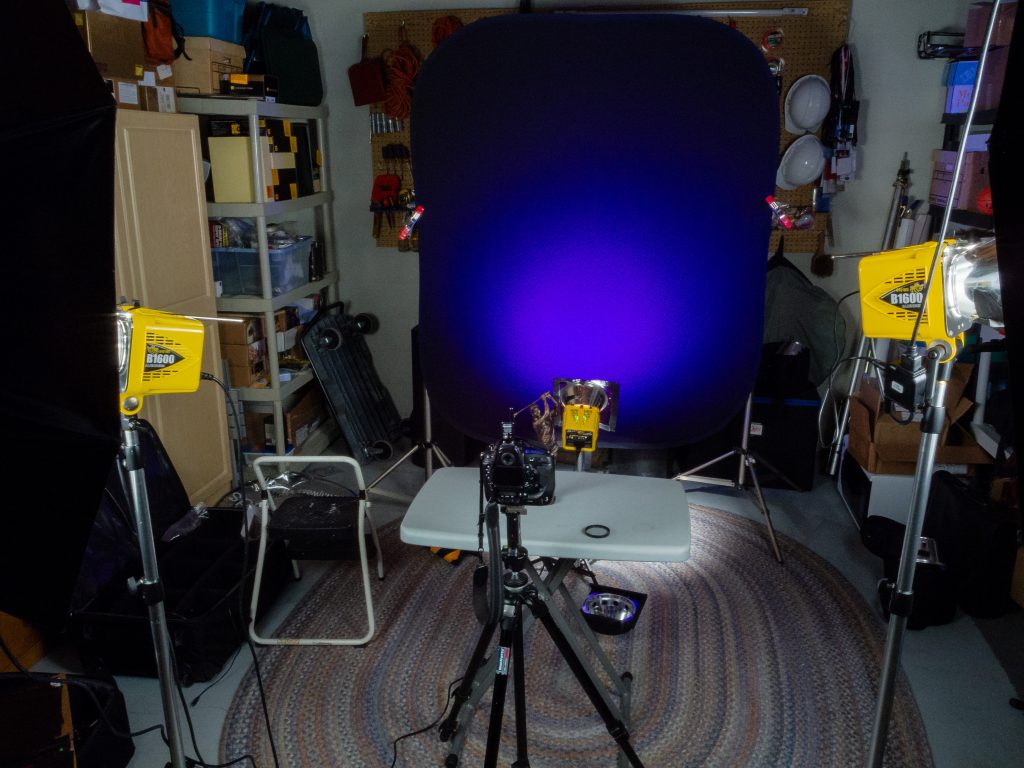
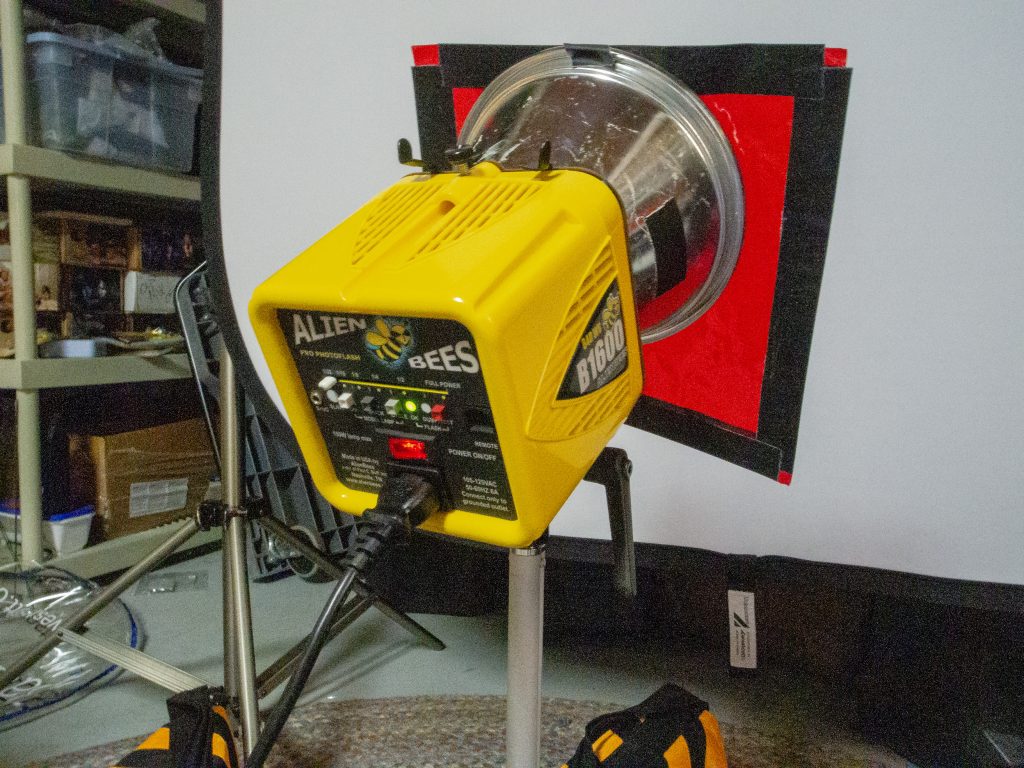
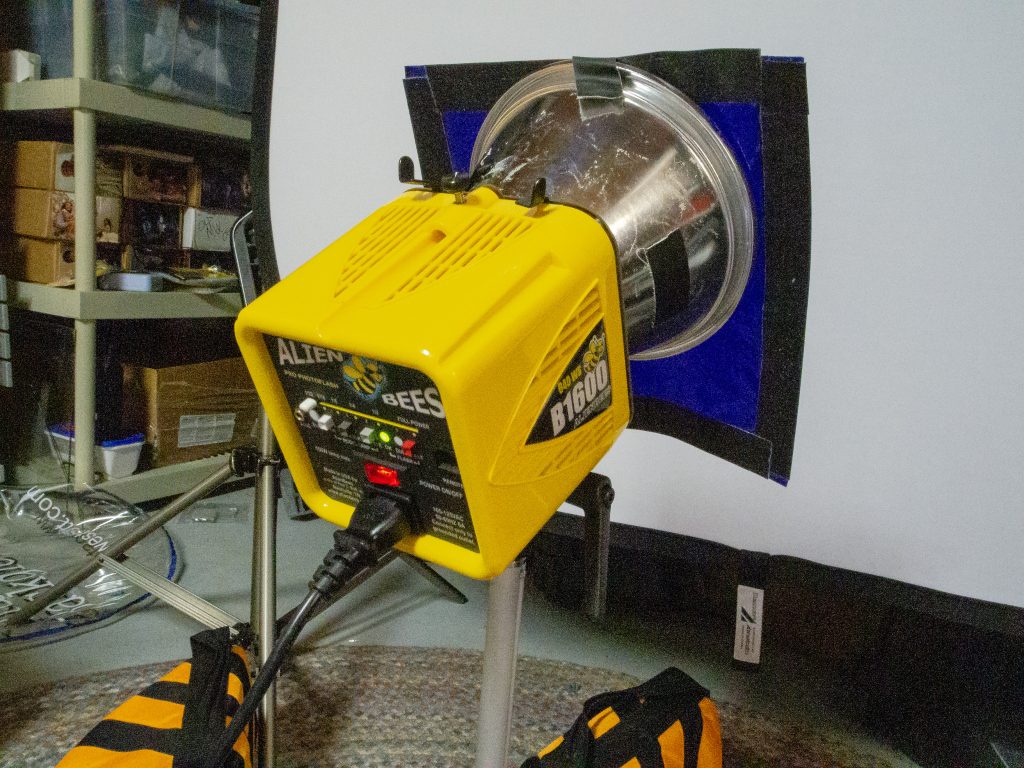
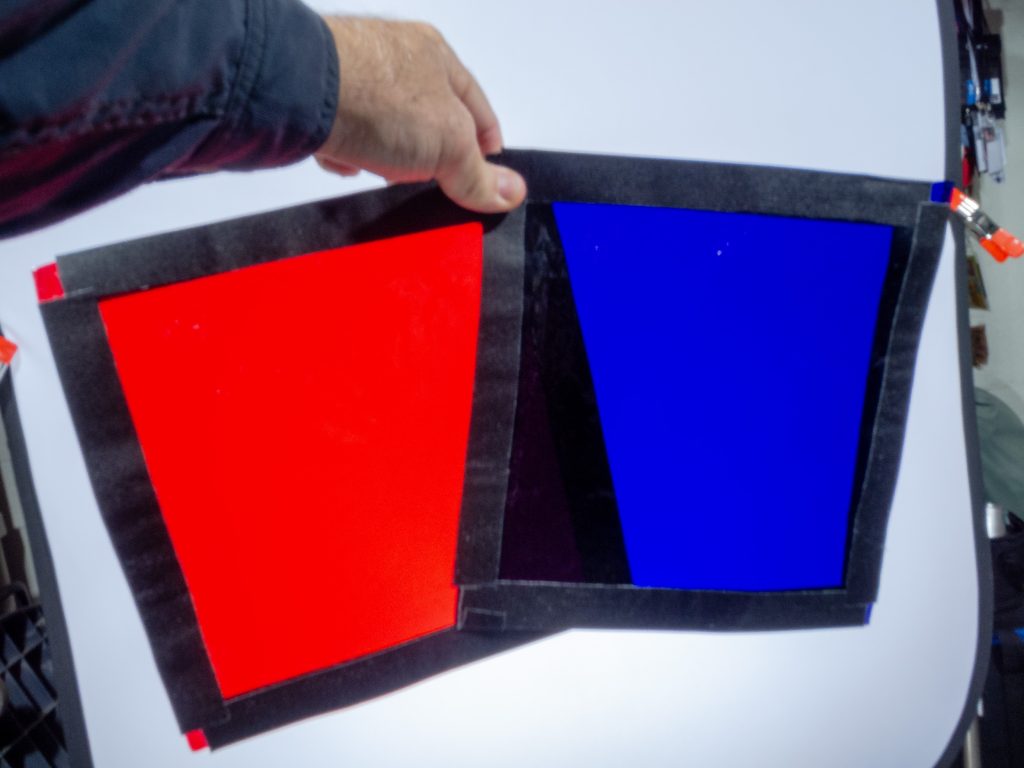
Figure 1 was done using this setup. Three lights are in the background and two on umbrellas lighting the statue. (Figure 2)Using the two umbrellas like in Figure 1, I now just used one light on the background, but now with a blue gel. Because it takes very little light to affect the white background, the two lights on the subject are spilling over to the background and washing out the blue color. (Figure 3)This is the lighting setup for figure 3. (Figure 4)By changing the background from a white background to a black background and everything else the same as in Figure 3, the blue pops. The reason is the black sucks light as opposed to reflecting light like the white background. (Figure 5)
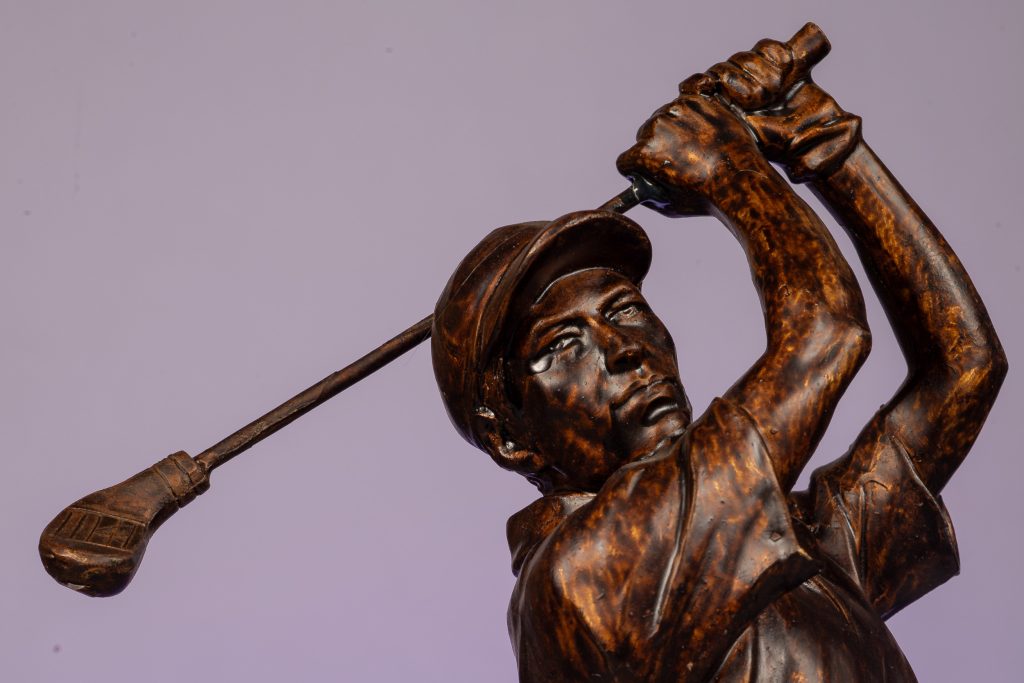
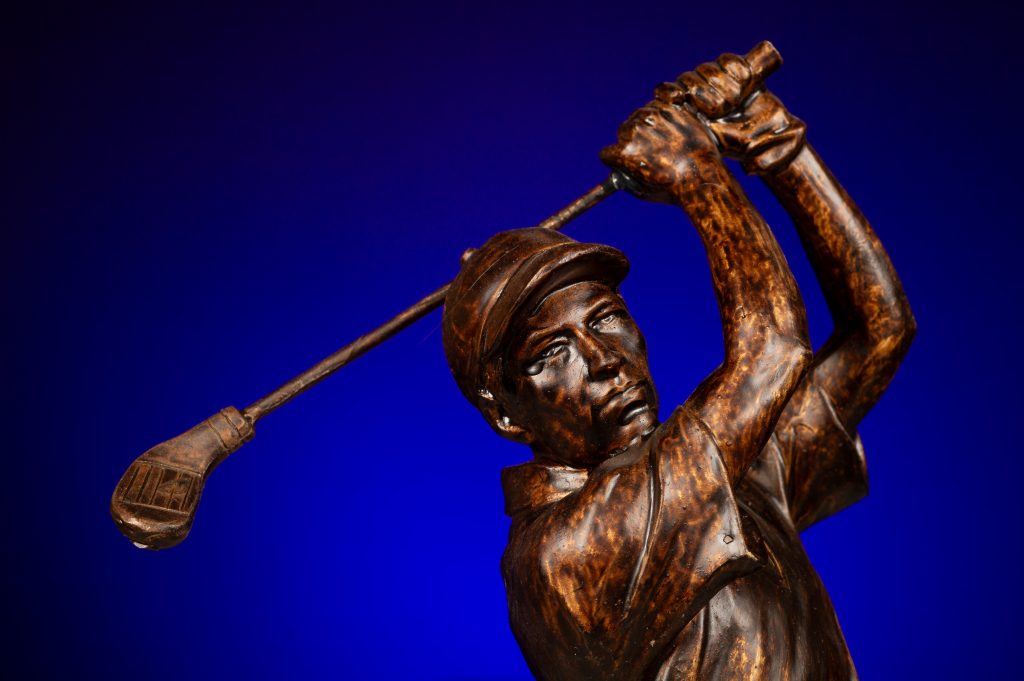
I like to have more drama as in this photo of the golfer with the blue background fading out to black around the edges.
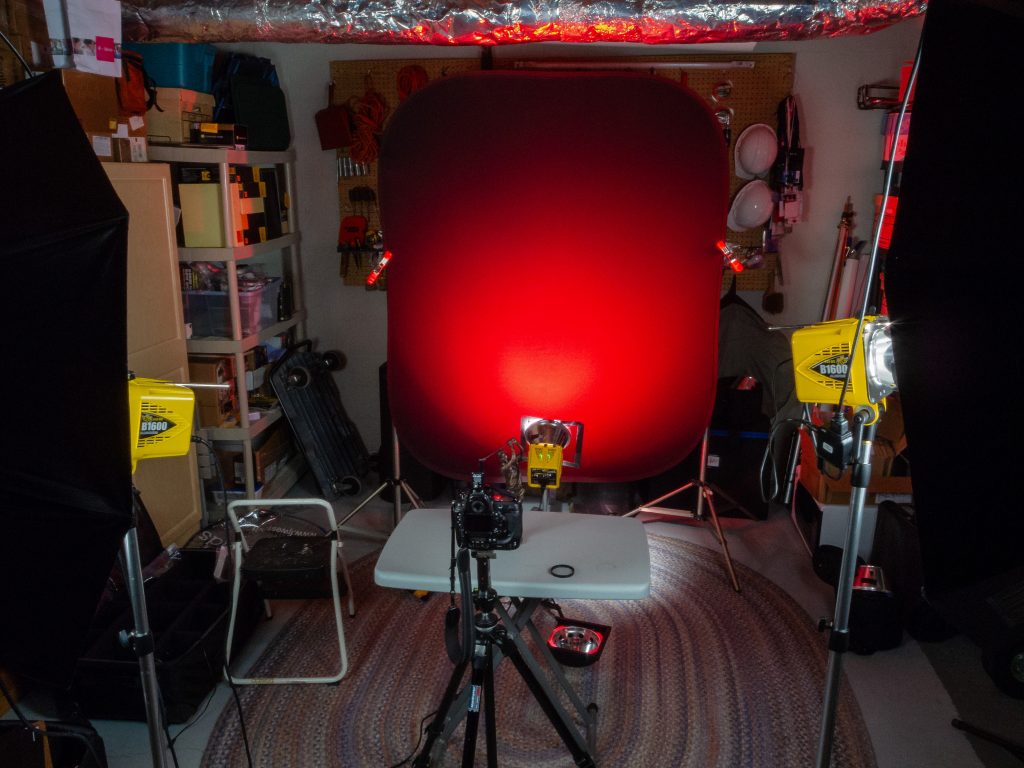
As you can see, everything is the same. There are two changes: 1) White to Black Background and 2) 4 times the light through the blue gel. Just remember to get the gel to look the same color as you see it, it must be 2-stops brighter on the background than the light on the subject, assuming you expose for the subject. (Figure 6)Just changing the gel and leaving everything else the same, I can now decide which color I like best. (Figure 7)Here is what the setup looks like in figure 7. (figure 8)Changing back to the white background, I again get contamination from the front lights, which goes pink instead of red. (Figure 9)
This photo is too pink and there is pink light on the subject. This happens when you are not controlling your lights. Learn to control the lights by not lighting everything up like you do with umbrellas.
Figure 9 setup. (Figure 10)This is shot on the white background. I changed the setting on the background to -2 stops under the setting of the subject. I removed the umbrellas and put 10 degree grids on the lights. (Figure 11)Here is the setup for figure 11. Everything goes black except for where the light is hitting. This is how you can control the light and not light the whole room. (Figure 12)
You don’t need to use gels to get a dramatic effect, but the more you learn not to light everything, but just parts of the photo, is when you can direct the audience’s attention in the photo. There is more than just lighting parts of the image; you can ratio the light throughout the photo and have some parts that are not black but slightly darker than the subject. This way you still see those other aspects of the scene, but they are secondary to the main subject. It is like having two or three sentences in a paragraph, and you direct the reader to who the main subject is and the supporting roles.
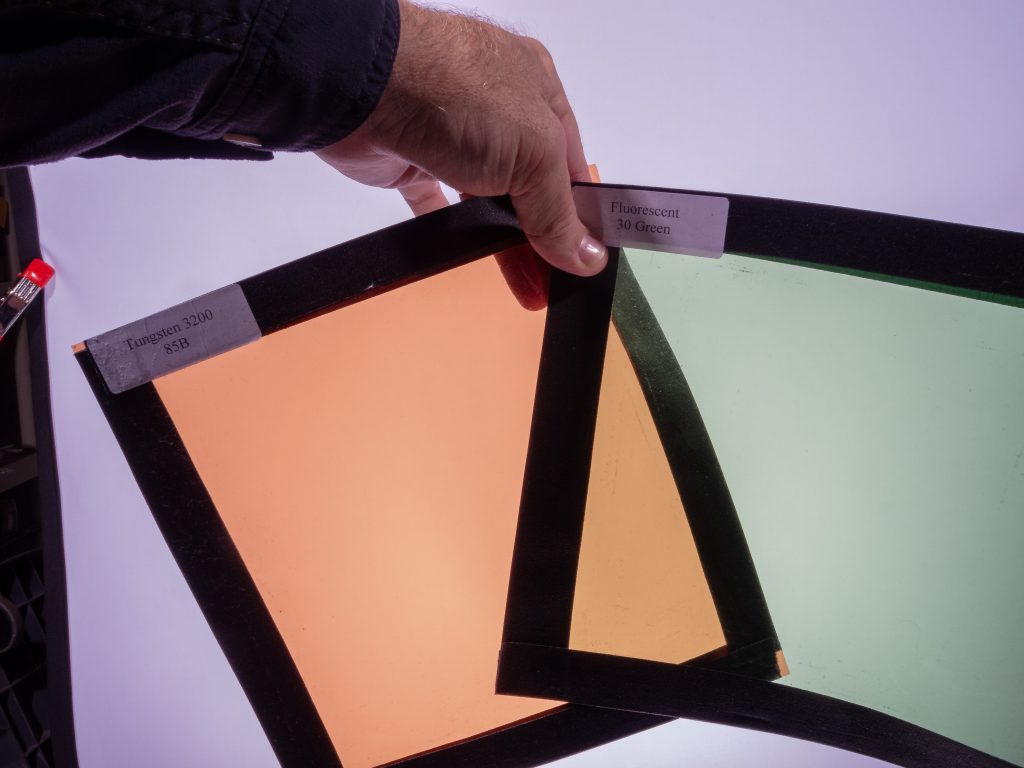
Here is the light powered down for the white background for figure 11. (Figure 13)Just change the red gel to blue, leaving everything as shown in figure 11. (Figure 14)All I changed is the gel to blue from red to get figure 14. (Figure 15)Here you can see I have the power way up, actually 2 stops greater than the subject. This is for figure 5 photo. (Figure 16)A tip to make your gels last longer. Cut them to the size you use for your strobes, take gaffers tape, and wrap the edges. When you use them on the lights, turn the modeling light off after checking them with the modeling light. They will last longer and not melt or catch fire. (Figure 17)Some of my gels I have labeled. Here I have the gel on the left labeled 3200 Kelvin and 81B. This lets me know I can put this over a strobe to match incandescent light bulbs. The one on the right is 30G, letting me know that I can balance my strobes to color match the fluorescent for many fluorescent lights. (Figure 18)
If you like this image I will walk you through the steps to get here. (Figure 1)
I started here and got the exposure to pretty close to the tones in the carving. (Figure 2)
By just adding one light off to the right I got the next image. (Figure 3)
I liked the result, but wanted a little more color in the bowl than I have in this photo. (Figure 4)
Here you can see that the statue is back lit naturally, but can see the first light to the right that I added and the second fill light I added just next to the lens on the left. (Figure 5)
The reason I chose a dark object to light is because it is much more difficult, but also shows you how the light dramatically improves the object. It works similarly with a lighter object, but the results are harder to see sometimes.
I had the object back lighted to be sure you understand the light I am adding truly helps. This is like having people looking at the camera and it is the best angle, but the sun is behind them. By just turning on the flash you get a better result, but there is little to show the shape of the object as compared to getting the flash off the camera.
One flash off camera give nice shaping to the face. (Figure 6)
By adding a fill light just beside the lens on the left, we help not only fill in the shadow side, the photo transforms from an almost black and white look to a color feel. (Figure 7)
Now for all the photos above the exposure compensation was used at -2 stops under what the auto exposure was reading. I had my flashes under exposed or 0. The reason is the camera wants to make the statue a neutral gray when it is actually darker. To compensate I under exposed to fool the meter to get what was correct.
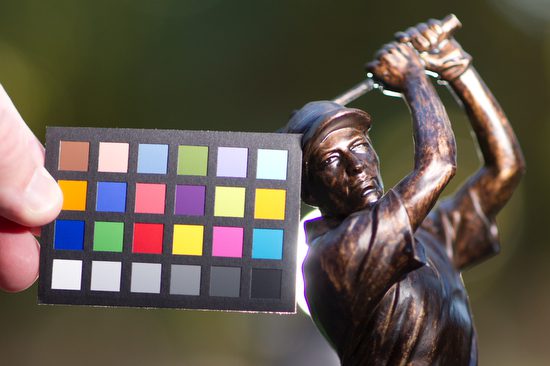
I am using the Mini ColorChecker by x-rite so you can see the color as shot in each situation with this series. This will not just help you see proper exposure, but the color space for each photo. (figure 7)
I wanted you to see you can just use a reflector to help improve the photo, but please pay attention to not just the shadows being improved, pay attention to the colors. (Figure 8)
Shot with fill and you can see not just exposure but color temperature will be different with reflector or flash. (figure 9)
Here with one flash to the right of the camera and one behind the statue you can see ho it improves the tones and the color space. This is why I prefer using strobes over reflectors alone for portraits. Another major benefit with strobes over a reflector, is the reflector gives a constant light source which will cause most folks to squint. (Figure 10)
This was the setup for Figure 11. By the way, I shot this with my Nikon P7000 with the flash on for fill. (Figure 12)
I thought the light behind the golfer was a little distracting, so I moved it to the left out of the photo 180 degrees opposite the main light to the right. The Nikon TTL system is balancing the background -2 Stops under to the flashes which are normal of 0 setting. (Figure 13)
This is the setup for Figure 13. Again I shot this on the Nikon P7000 with the pop up fill flash to help the statue and the camera gear to have some definition. (Figure 14)
Practice lighting with some objects that are dark or even black. See if you can change the mood of the situation by just positioning the lights in different places. Maybe you use the X-Rite Mini ColorChecker to see if you are setting the camera’s white balance correctly to get the best color. If you shoot in Raw you can correct this later, but if you shoot in JPEG you can change it later, but the results are noticeably poor.
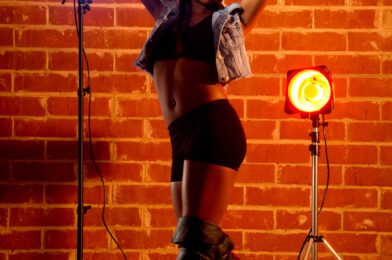
We liked the lights in the photo to give that backstage feel and decided to rotate some dancers through and go with the best one rather than changing things a great deal.
I like giving my clients options. We tried a few different looks with different dancers. You get a different look by swapping dancers in the same lighting scheme. If we had more time, you could have tried a few more outfits to give you more options.
Photographers need to understand that by shooting vertical and horizontal photos of the same subject, the client now has options that help them do much more from the time they invested with the photographer. More important than the options is the best photo looks even better when they see you tried to get more.
If a photographer only shows one image from the shoot, then a client will wonder why you didn’t try something more. By offering them a variety, they see how the photographer tried different things, but the subject didn’t make it happen. Type, of course, is why you sometimes pay for a professional model who can give you the best expression and body language options as the photographer is trying to do with camera angles, composition, and lighting.
Lighting Diagram for the photo above
These photos are not all that different in lighting, but the difference is in the dancer, the way they pose, and the expression they bring to the moment.
Which one of these do you like the most? Can you tell me why you like it better than the other photos?
Business
Just like you vary the lights and the poses and do everything to give the client choices, do this in your estimates.
I try to offer some options whenever possible. The client may choose the cheapest package, but by providing the opportunity where you had unlimited funds, you could do this; the client appreciates your creativity and willingness to be flexible.
Sometimes I must give an even cheaper package and show that it lacks what they need to show them I can be flexible on price, but they might have to lose something.
I hope you remove the concept of going the 2nd Mile and give superior service by providing the client more options.
Sometimes the subject’s attitude, in combination with the composition and lighting, can create the mood you are looking for. [NIKON D3S, 28.0-300.0 mm f/3.5-5.6, Mode = Manual, ISO 200, 1/160, ƒ/16, (35mm = 112)]
Lighting diagram for the photo of the dancer on the bar
We got a different look with very little change by just bringing the dancer forward and moving the grid to highlight her face.
Here you can see my first major tornado that hit my last semester in college at East Carolina University.
I started my career in the 80’s and one of the first disasters I saw and covered for my college paper was a F4 tornado. There were 16 deaths and 153 injuries. The tornado was up to 3/4 of a mile in width. Portions of East Carolina University were severely damaged. 300 homes were leveled, most in Greenville, NC. My good friend Jesse Riggs lost family members that night.
No matter how many times you see disasters each time I feel a numbness come over me for the loss of life and property. You are sad for those who are having to rebuild their lives.
On November 10, 2002, a tornado destroyed 50 homes. At least seven people were killed in the Morgan County community of Mossy Grove in eastern Tennessee. I was looking for an overall perspective up the mountain when I shot this photo.
The tornado cut a swath about a mile wide and a mile long. The hard part when covering these disasters is showing items to give a sense of scale and what is destroyed. Here I wanted to show the cars overturned for scale and what happened.
What always amazes me is the quickness of the national media on covering these events.
What I realized over the years covering these events is that the national media always took the time even in a disaster to get the best lighting for a shot. Notice the hair light above the reporter in addition to the main light. This helped to separate the reporter from the early dawn background.
Just hours before a tornado destroyed this community
The national media all find similar angles to show the destruction to their viewers. Here you can see three networks all lined up for their early morning news shows. I chose to shoot this to show how a nation was mourning for the folks.
Cookie Consent
We use cookies to improve your experience on our site. By using our site, you consent to cookies.