
Because this was Public Relations piece and not Photojournalism I used music. I did not get natural sounds that would have improved this package a great deal. I had started doing Slide Shows online in 2006.
Four years ago I did this Grand Opening of a Chick-fil-A in Birmingham, Alabama. Again this is a Public Relations piece and not a Photojournalism package. I used the music to help set the tone of the package.
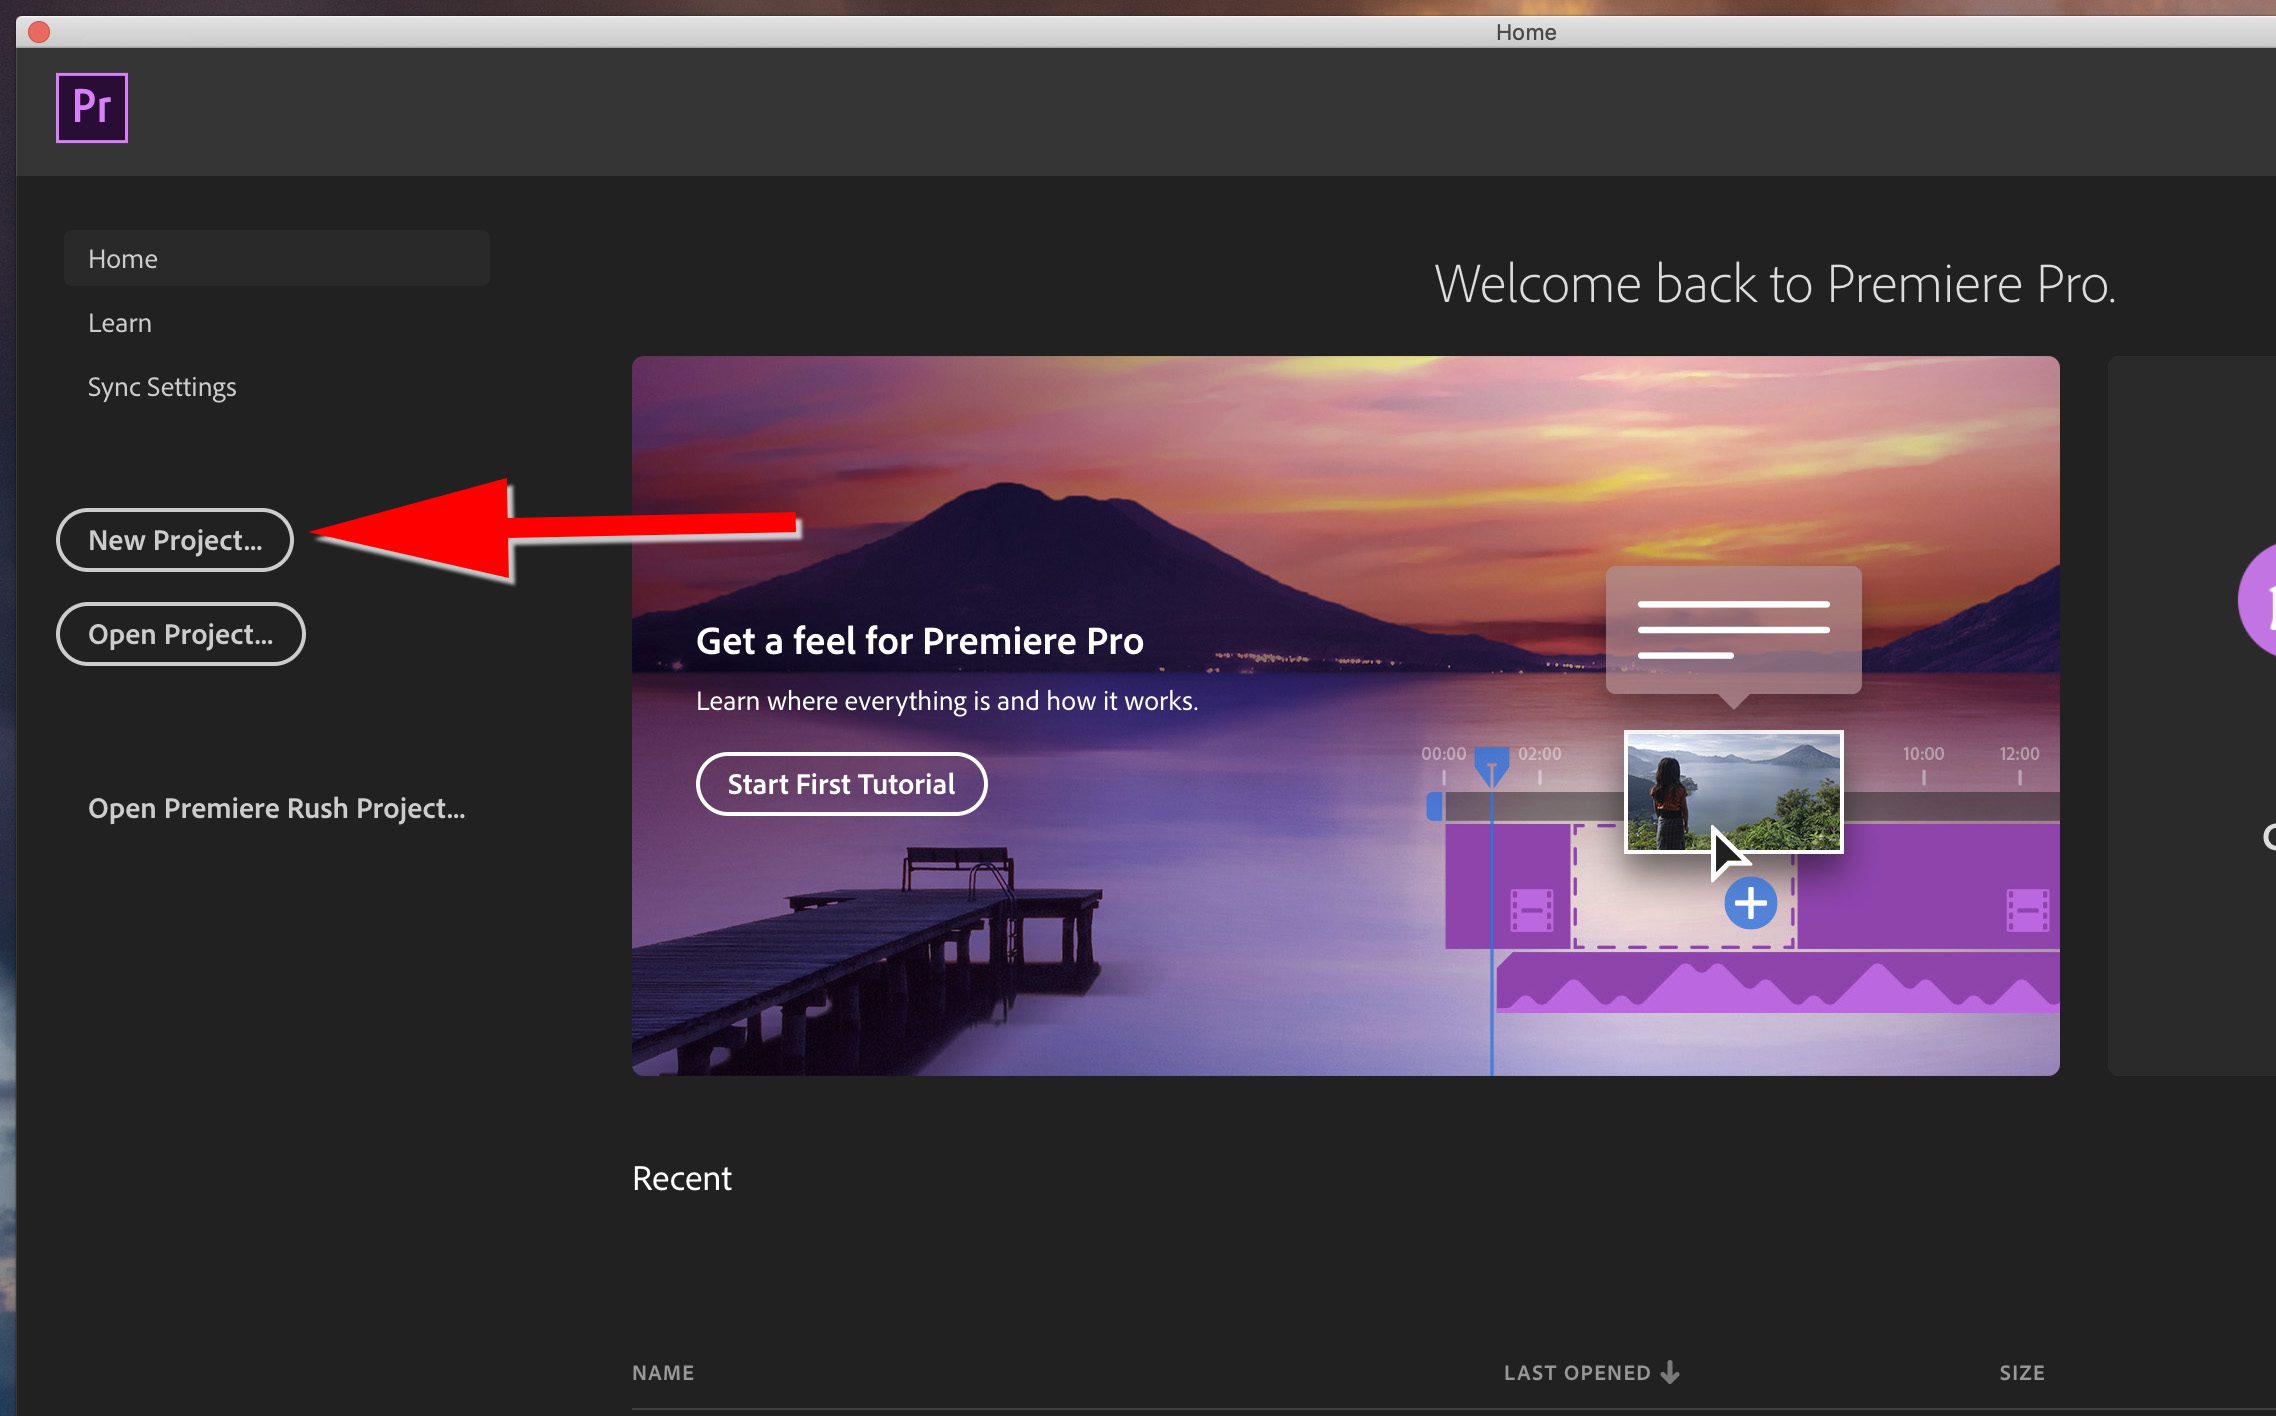
Launch Premier Pro. This is the 2019 version. Your version may look different, but look for clicking on “New Project”. This is similar to Final Cut’s Library.
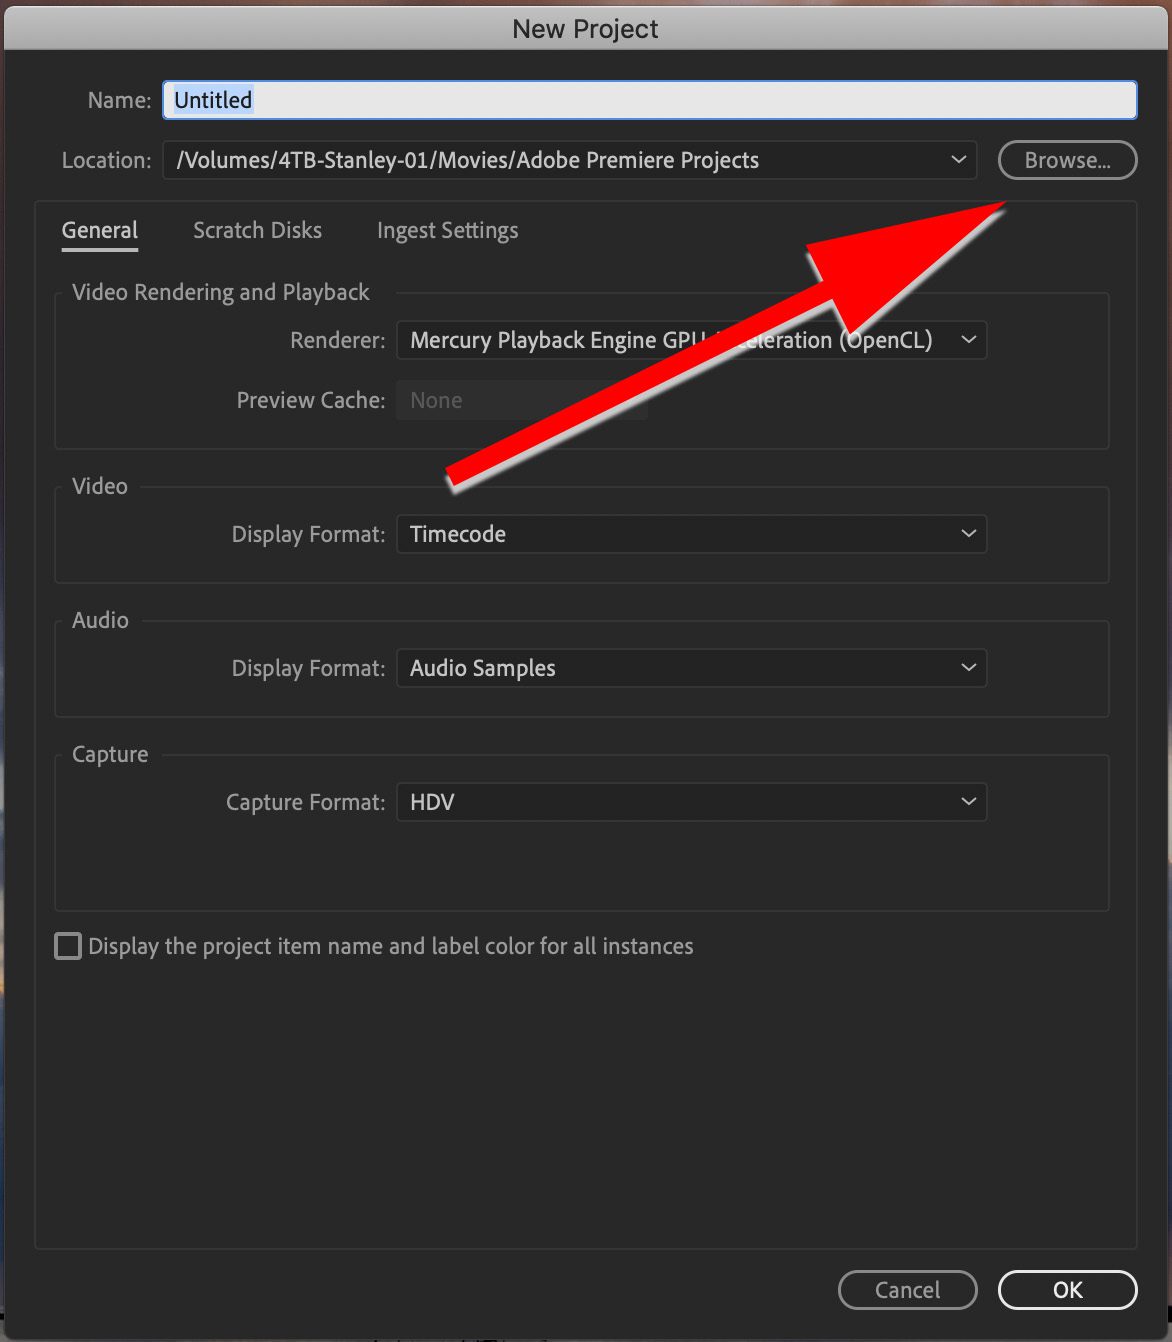
The next screen looks something like this. You need to click on Browse and decide where you want to put this project. I put all my projects on an external hard drive. I have a folder for movies and subfolder in that for Adobe Premiere Projects. Put your files where ever you like, but this is something you should decide so you can find it later.
Go to Premiere Pro CC>Preferences and this is what you will see next.
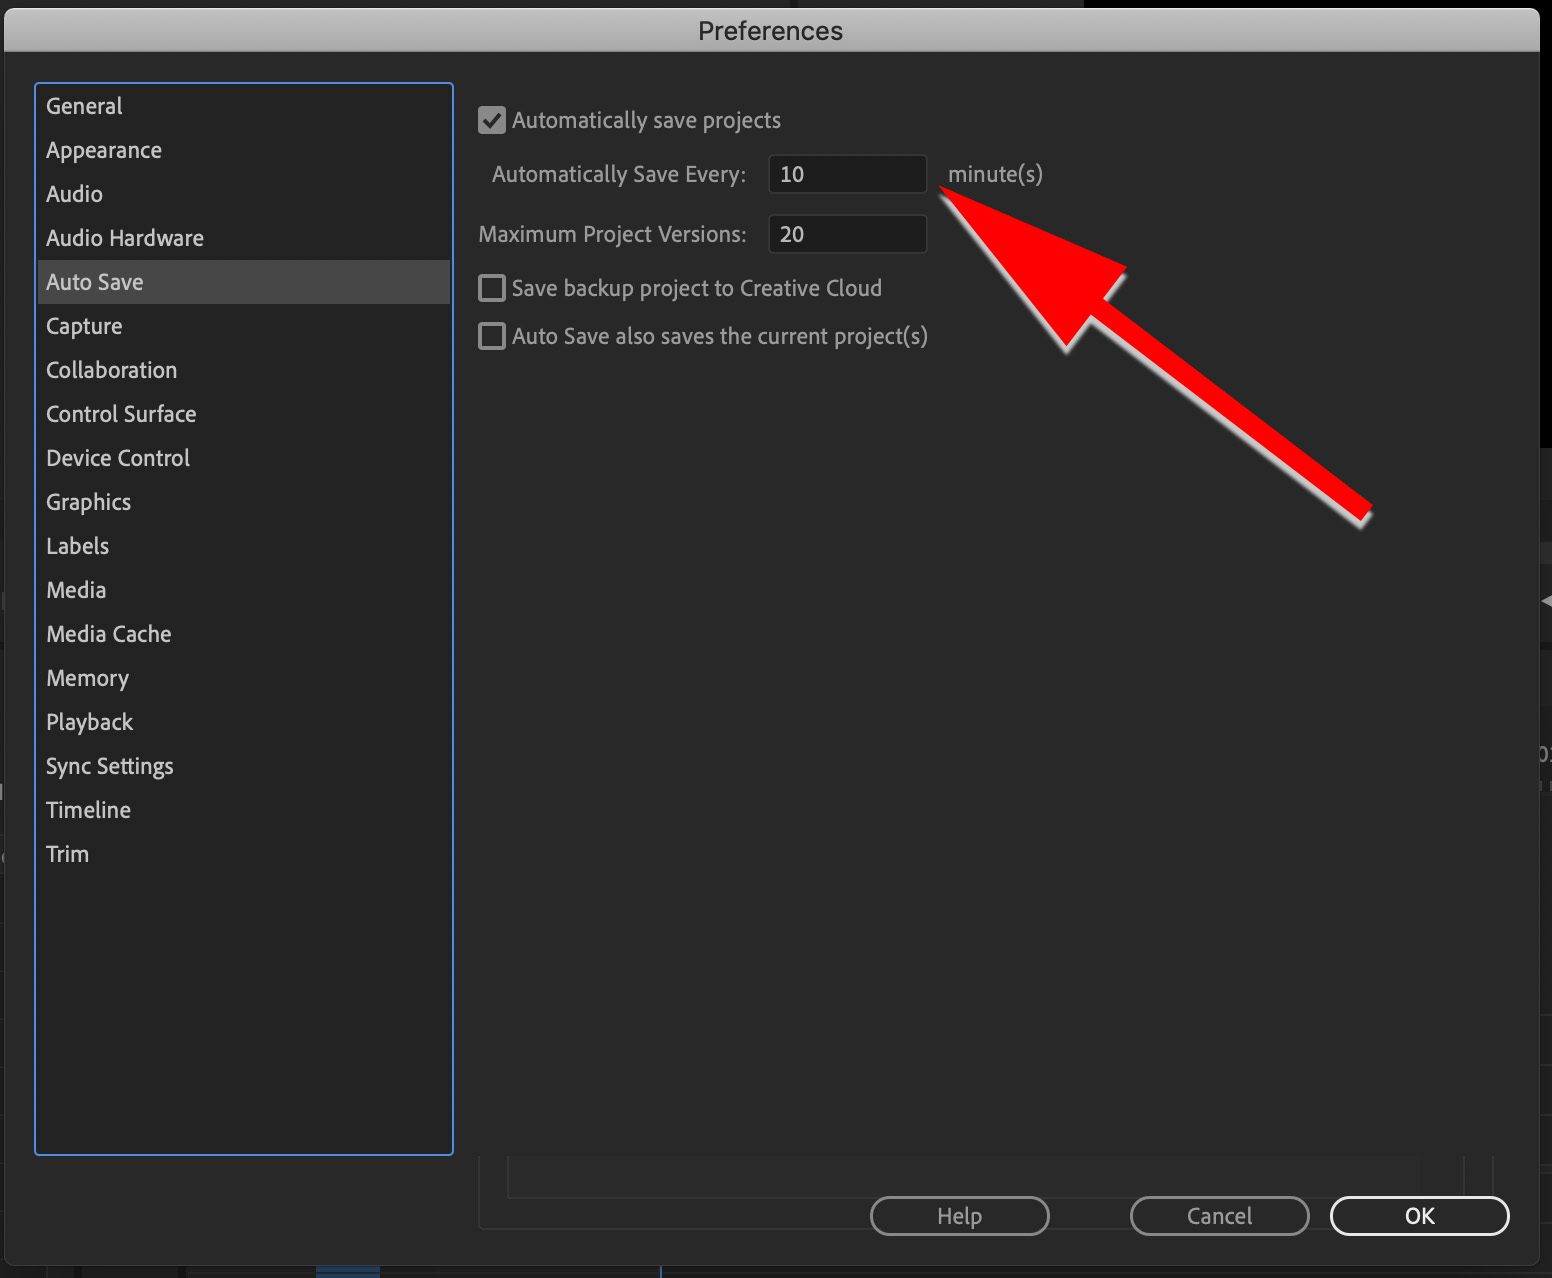
Go down to Auto Save and be sure this is turned on. I have my set for every ten minutes.

Then select media and change the Default Media Scaling to Set to frame size.
While both options will resize your image, each does so in a slightly different manner.
Scale to Frame Size changes the image Scale setting to 100%, effectively throwing out any addition resolution. If you need to further increase your image you will have to up-res it.
Using Set to Frame Size will also scale your image to the sequence frame size but it does so by simply increasing or decreasing the size until it fits. No resolution is lost in the process.
For my money, Set to Frame Size is the better option.

Click on Timeline on left and then at the top you will see the default settings for Video, Audio and Still images. I have my stills set at 5 seconds. You can pick whatever you want, this just sets the duration of a photo on your timeline to always be what you set here. Again you can make it longer or shorter later, this is just the default starting point.
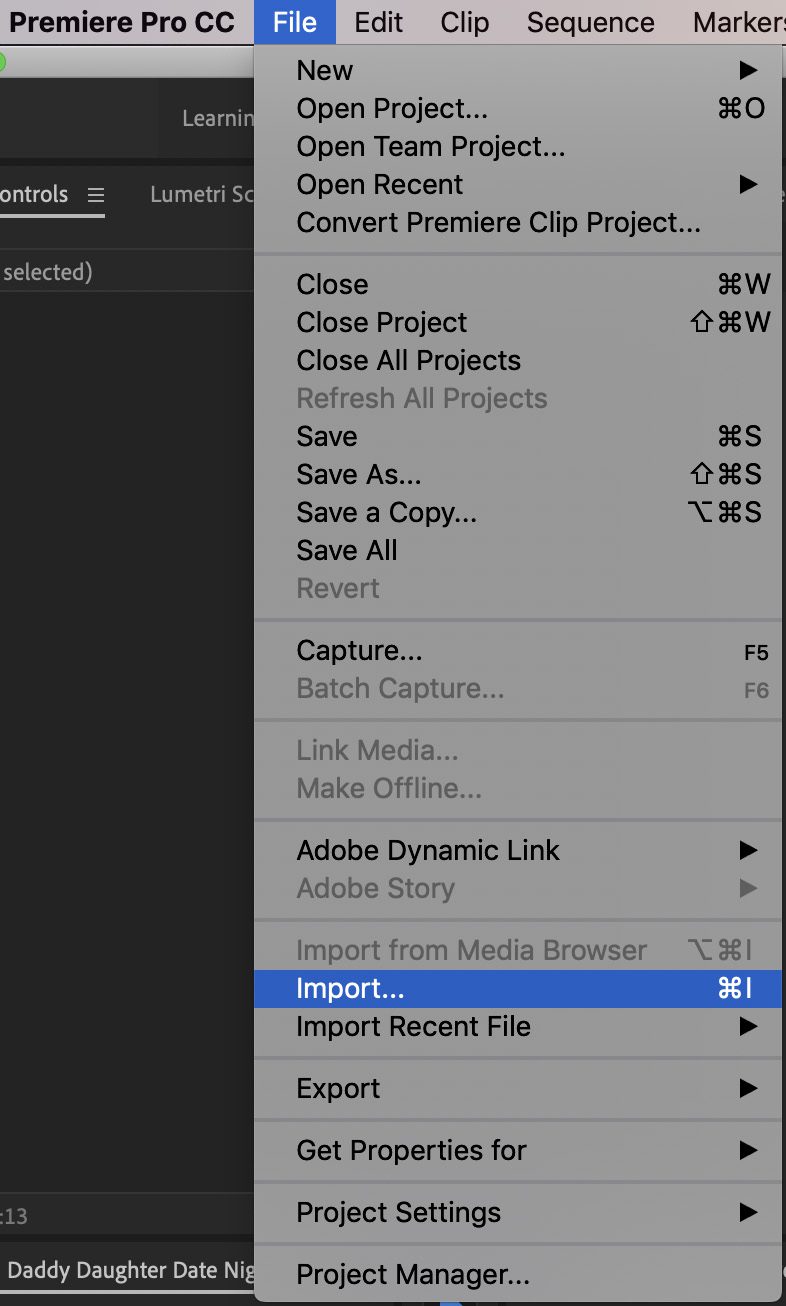
Next import all your JPEGs and Audio files.

Next create a new Sequence. If you are use to Final Cut Pro this is similar to what they call a Project.
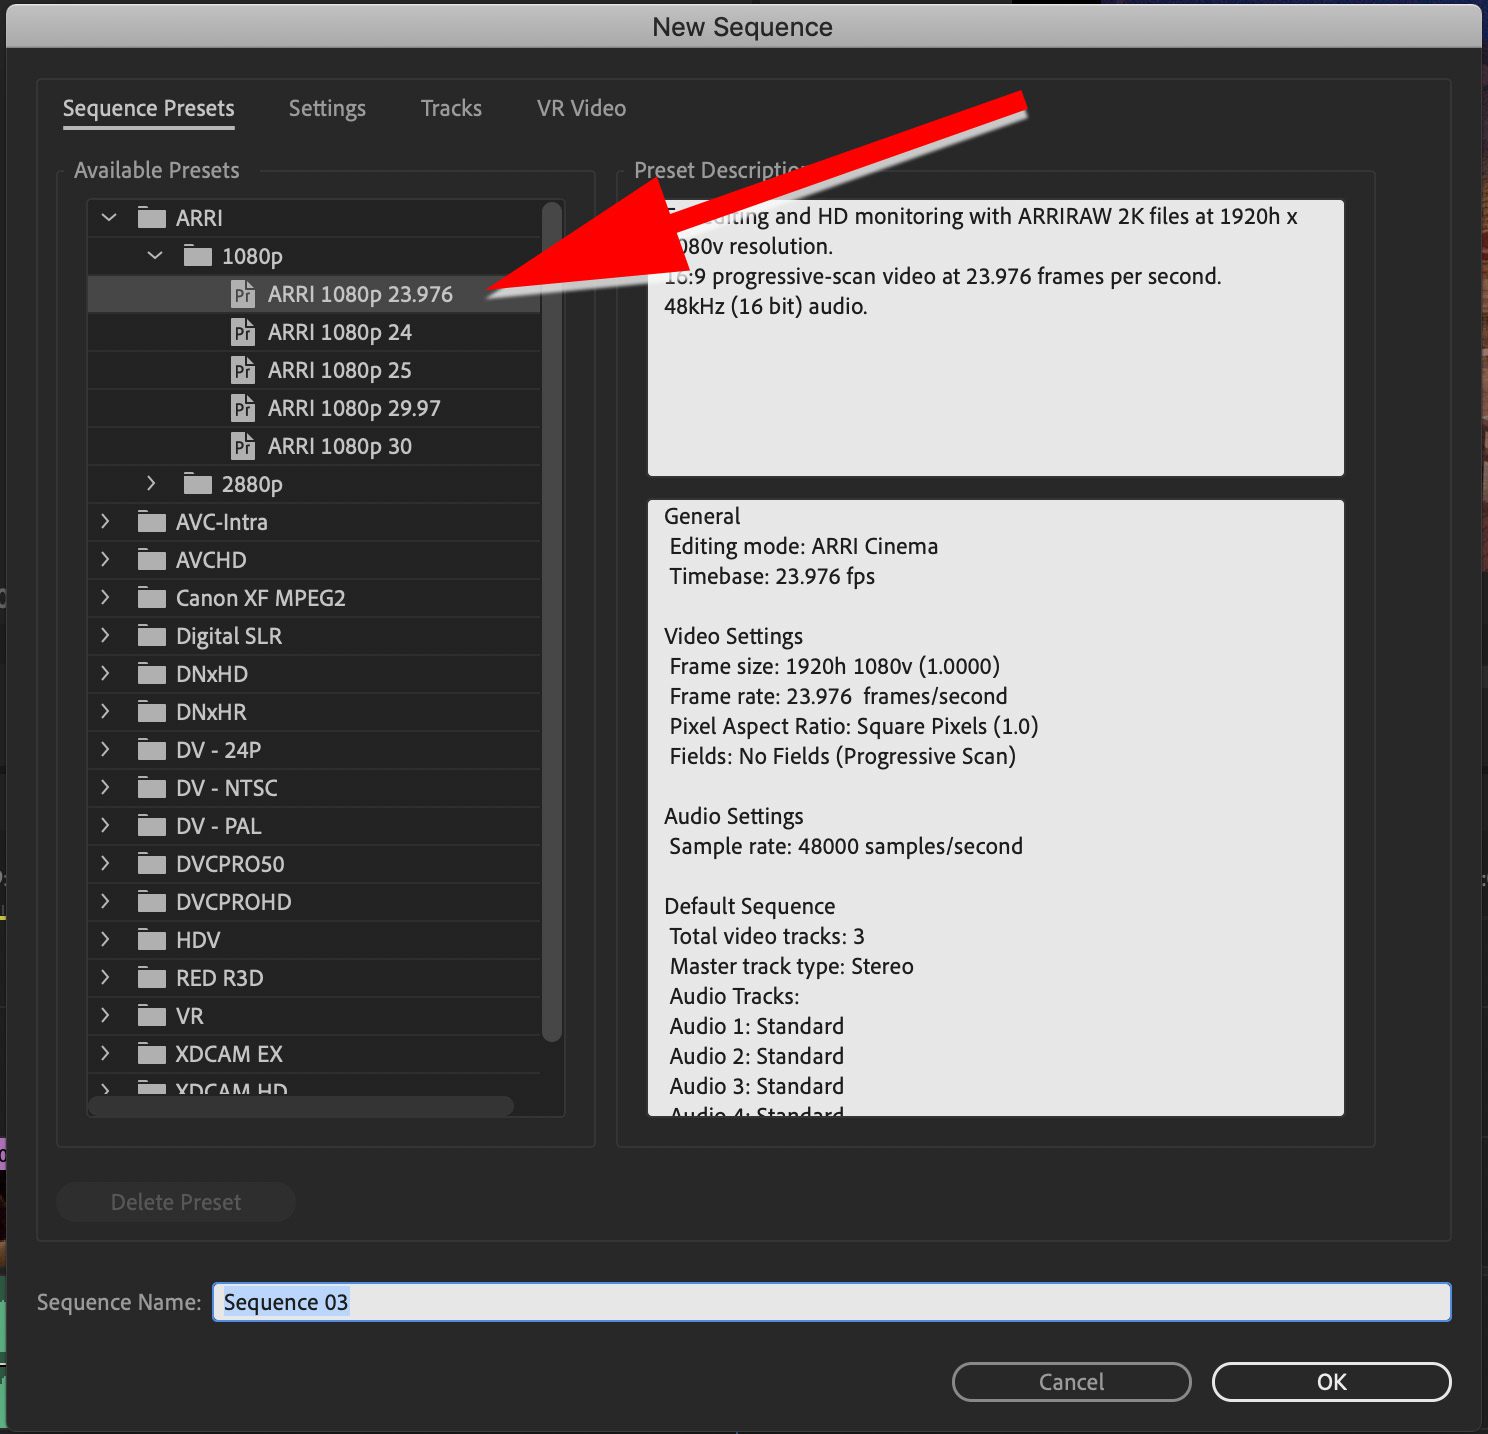
Choose the selection as you see here which will give you a HD 1920 x 1080 @ 23.976 frame rate. This is pretty much the same settings you see when you go to the movies. In some videos people pick something similar that gives you the 1920 x 1080 which is fine. I just recommend the 23.976 frame rate since it is an industry standard.
Call it what you like. The default name is Sequence 01. That will work. The recommendation is save your work and if you come back later start a new Sequence 02 and then copy every thing in the first sequence and paste in the second one. This way if you make any mistakes you can go back to the earlier version.

Your screen should look like this. If it doesn’t go to Window>Workspaces and pick “Editing”.
Far left corner will be all the files you imported and the Sequence you started is on the right.
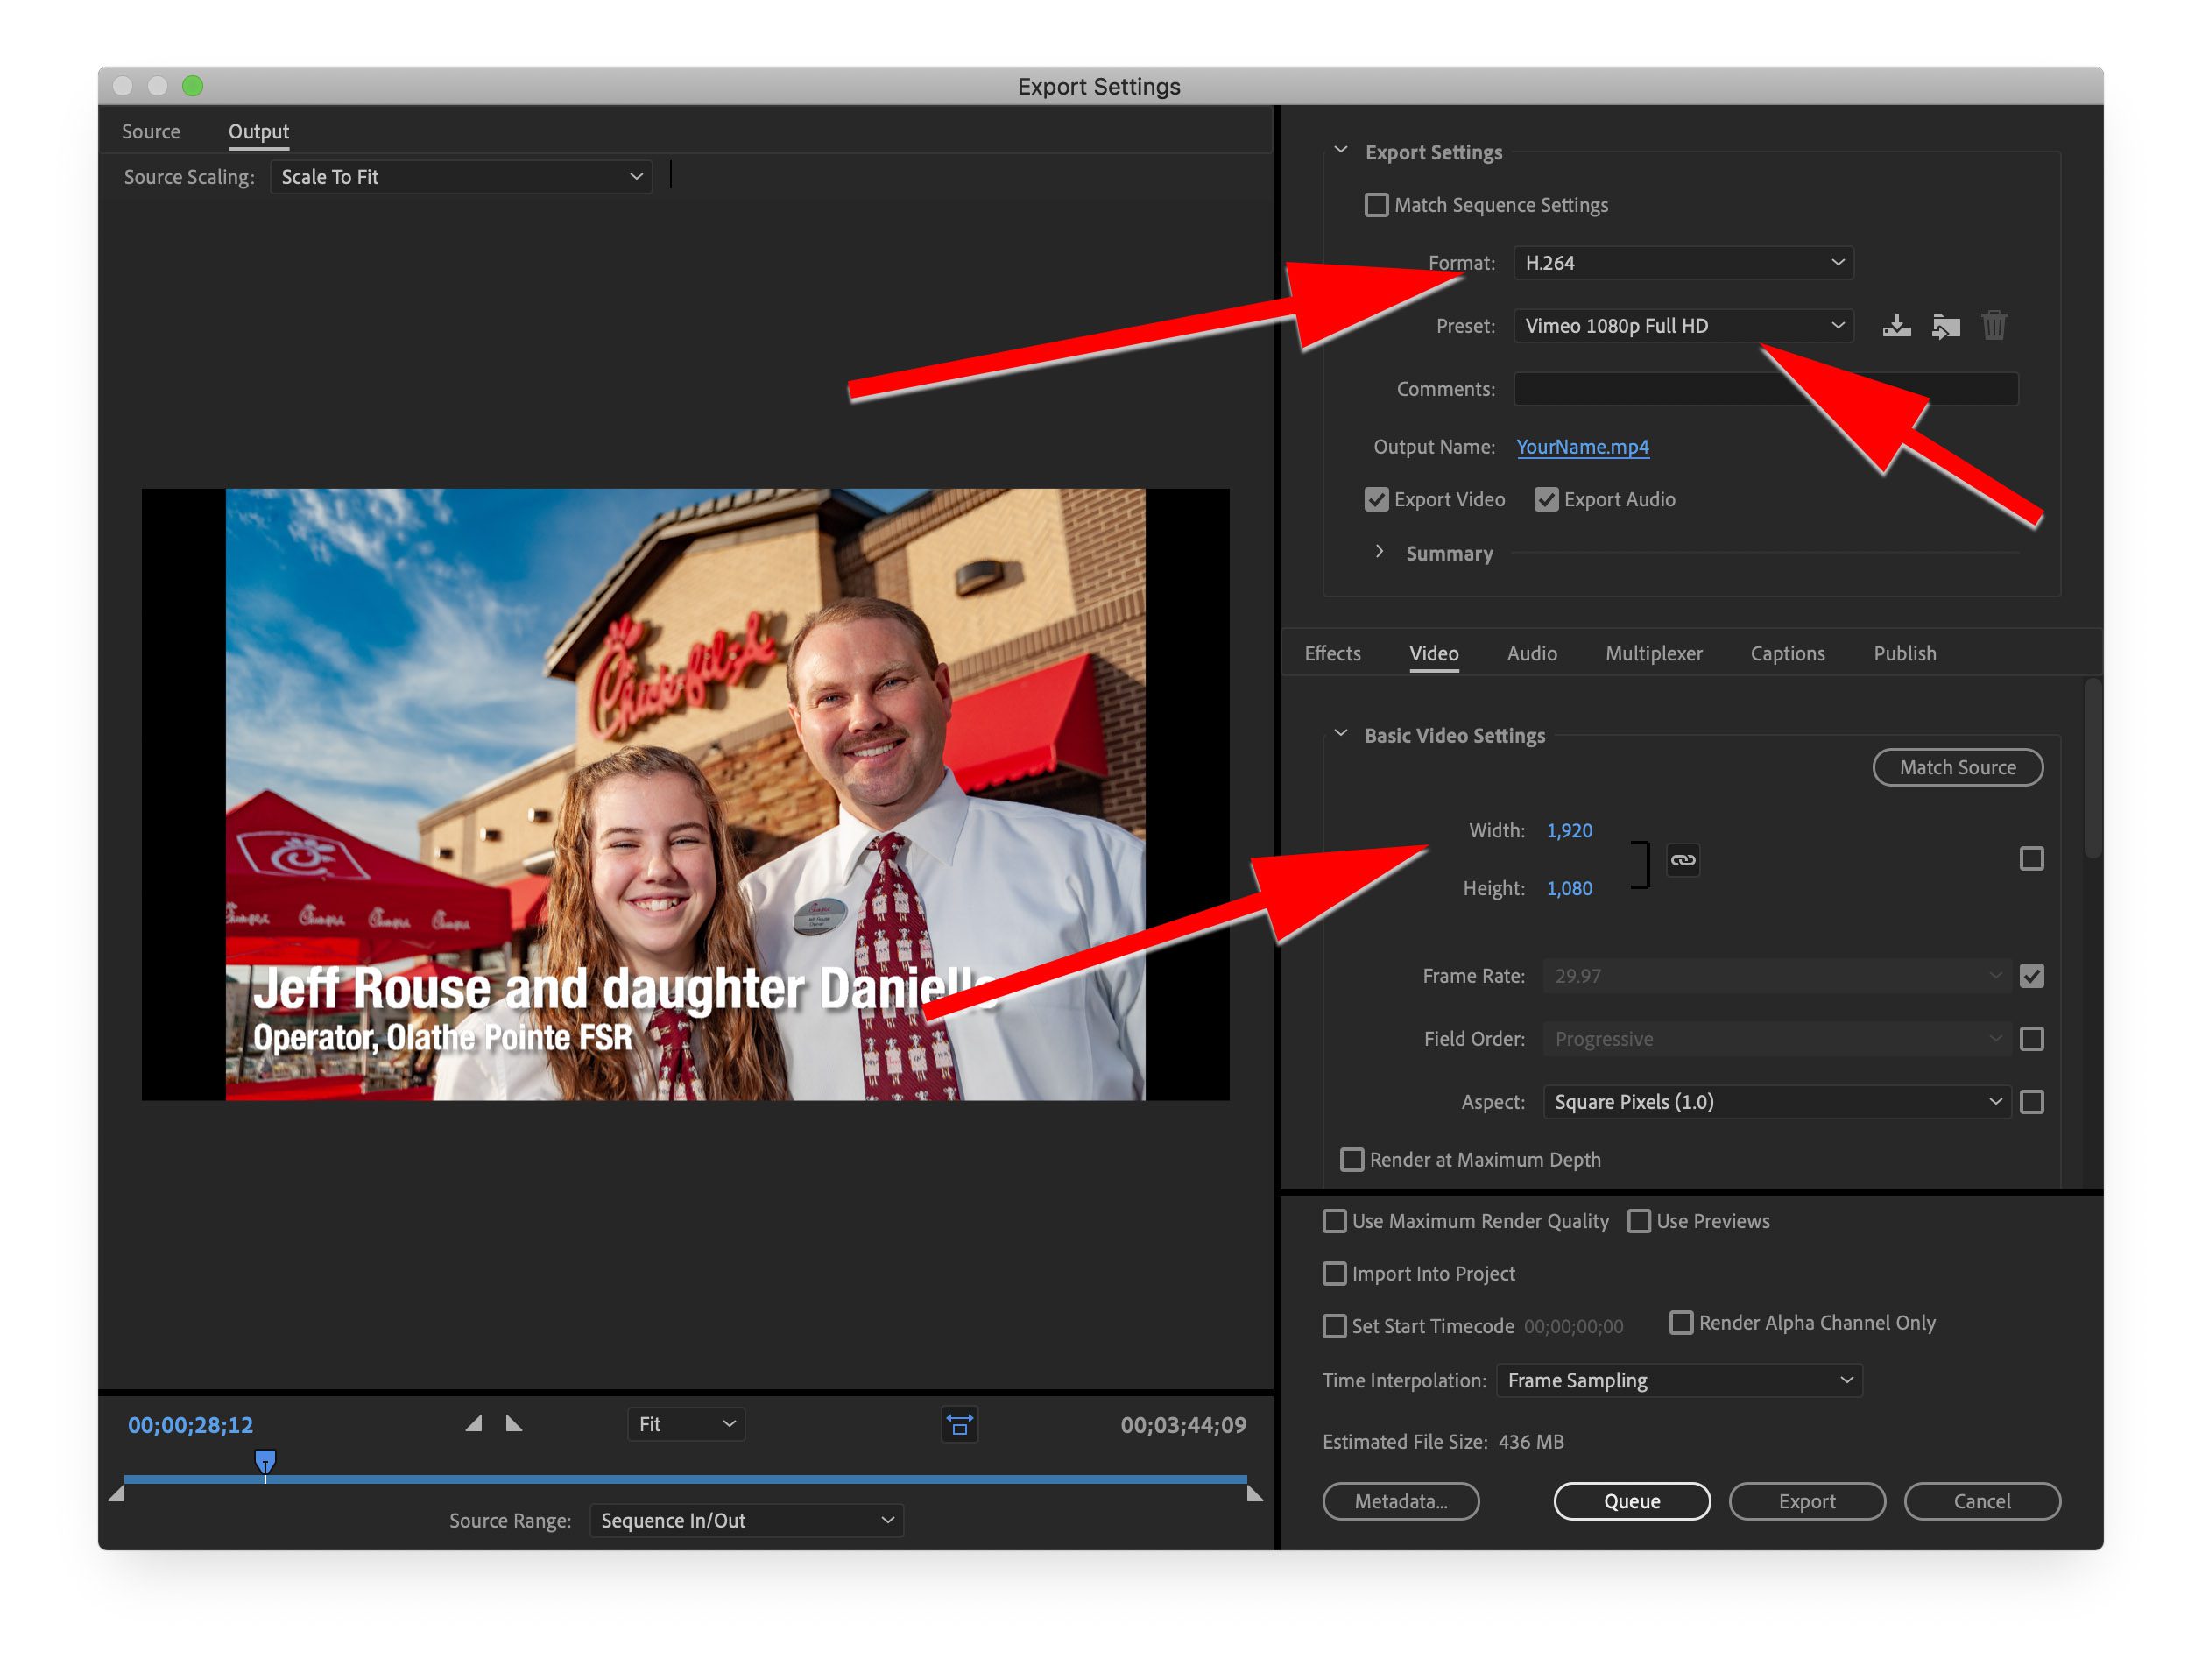
Now when you finish your edits export your file. Go to File>Export and use these settings here. Below this are some more tips as well.
This is a video walking you through the above and then also showing you how to edit the audio.
These are some videos that show you similar techniques. I have them here because one person’s way of doing this may resonate more with you.