
|
Getting your Trinity Audio player ready...
|
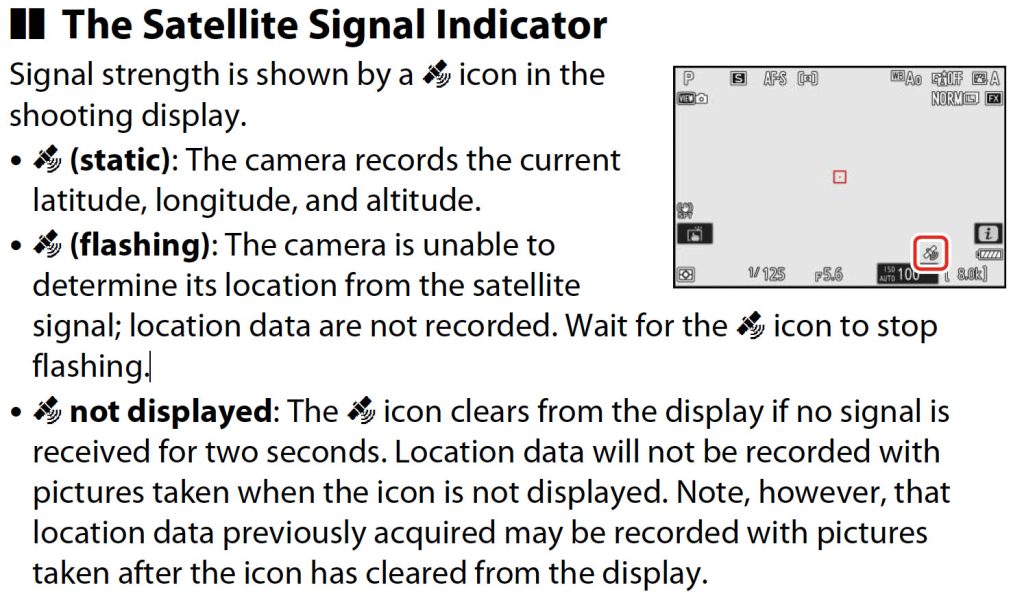
When traveling to different time zones, it’s important to remember to adjust your camera settings rather than changing the clock itself. This is especially true for the Nikon Z9, which has a built-in location data unit that records the camera’s current latitude, longitude, and altitude, as well as the current time (coordinated Universal Time, or UTC).
One of the main advantages of adjusting the time zone setting rather than the clock is that it ensures all your images will sync with each other when sorted by capture time. This can be especially helpful when working with multiple photographers, as it makes it easy to ensure that everyone’s images are correctly aligned.
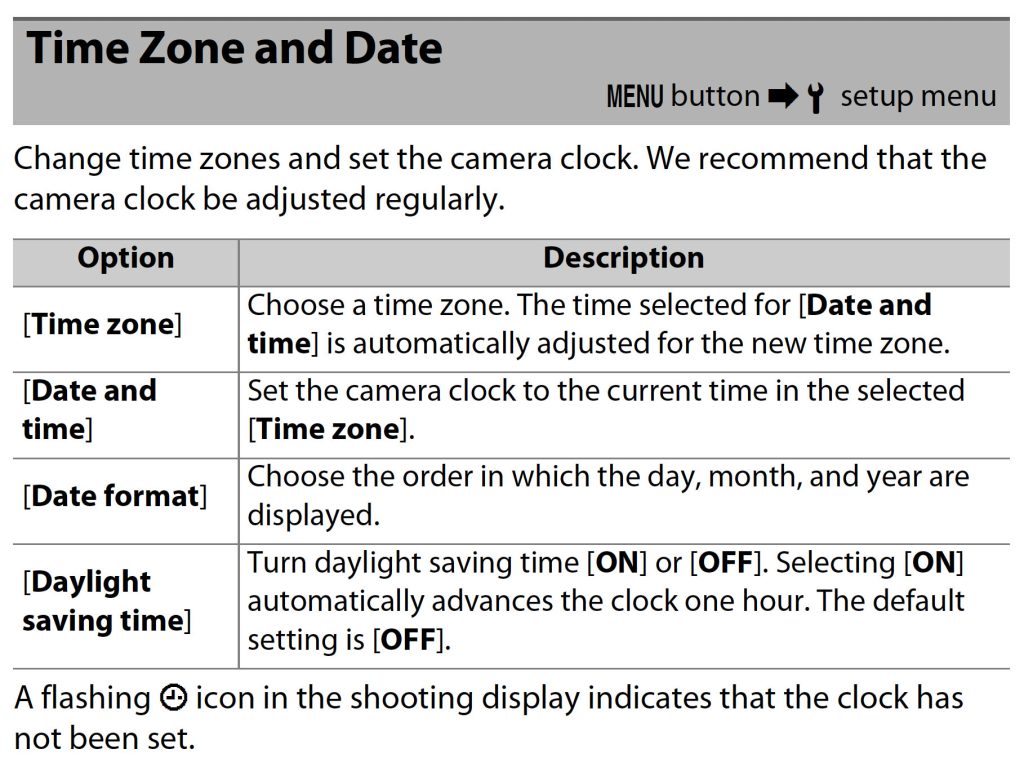
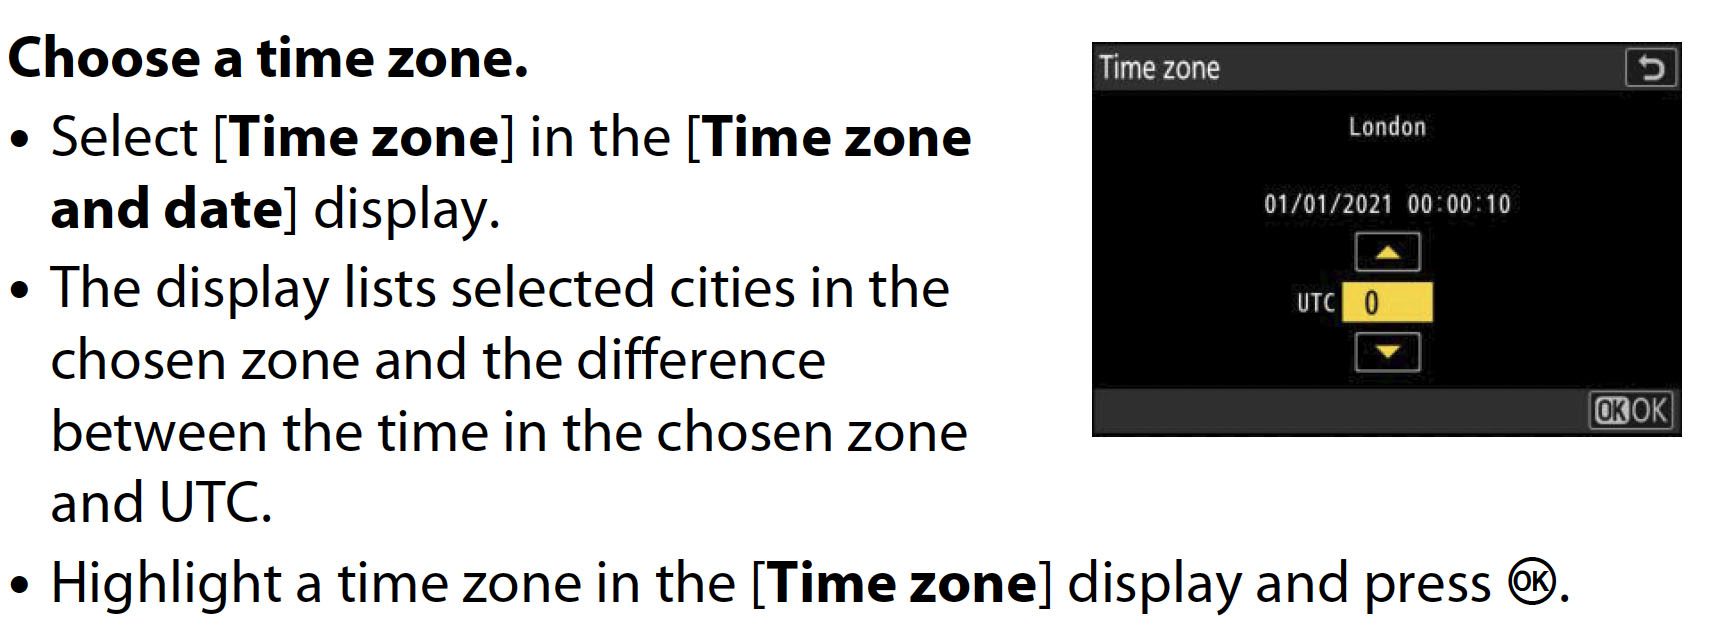
To adjust the time zone setting on your Nikon Z9, ensure the location data function is turned on. This can usually be done by going into the camera’s settings menu and selecting the appropriate option. Once this is done, you can set the clock to synchronize with the time reported by the location data function.
It’s also worth noting that when you turn on the location data function, the Nikon Z9 will automatically adjust the time to the correct time zone for your region. This means that you won’t have to worry about manually changing the time every time you travel to a new location.
In conclusion, when traveling to different time zones, remember to adjust your camera settings rather than changing the clock. This will ensure that your images are correctly aligned and that you can efficiently work with other photographers. Also, remember to turn on the location data on Nikon Z9 and turn on the option to synchronize the camera clock with the time reported by the location data function.