One Week Lighting Workshop With Stanley

Since 2006 I have been doing a one-week lighting workshop as part of the School of Photography program of YWAM with Dennis Fahringer in Kona, Hawaii.

This year I was asked by two of his former students to come to Dunham, Quebec, Canada, and teach the same thing, but this time to a school that will be in French and English.

This was their very first time leading a School of Photography for YWAM. The leaders Raphael Paquet and Julie Gavillet hosted me during the week and translated me into French.

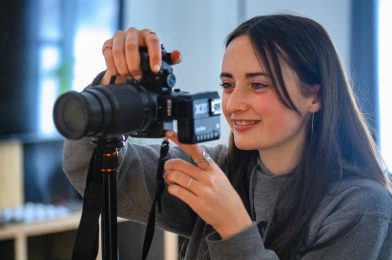
We did four lighting assignments.

Rembrandt

© Heidi Bergeron

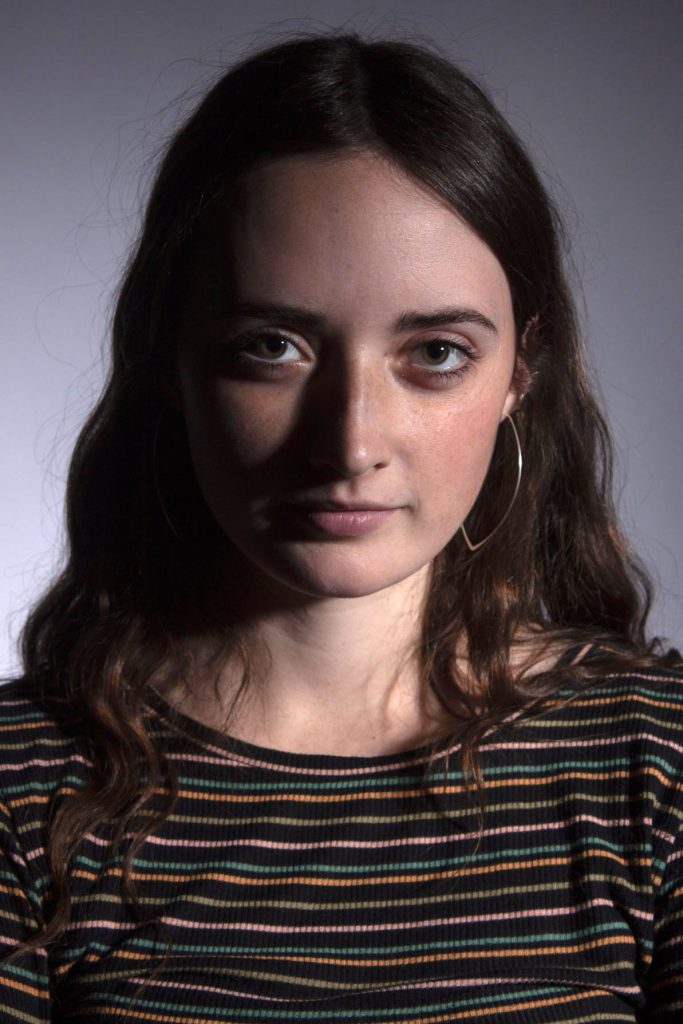
The students were learning where to place the leading light for a starting position with portraits. They also were learning not to light everything evenly.
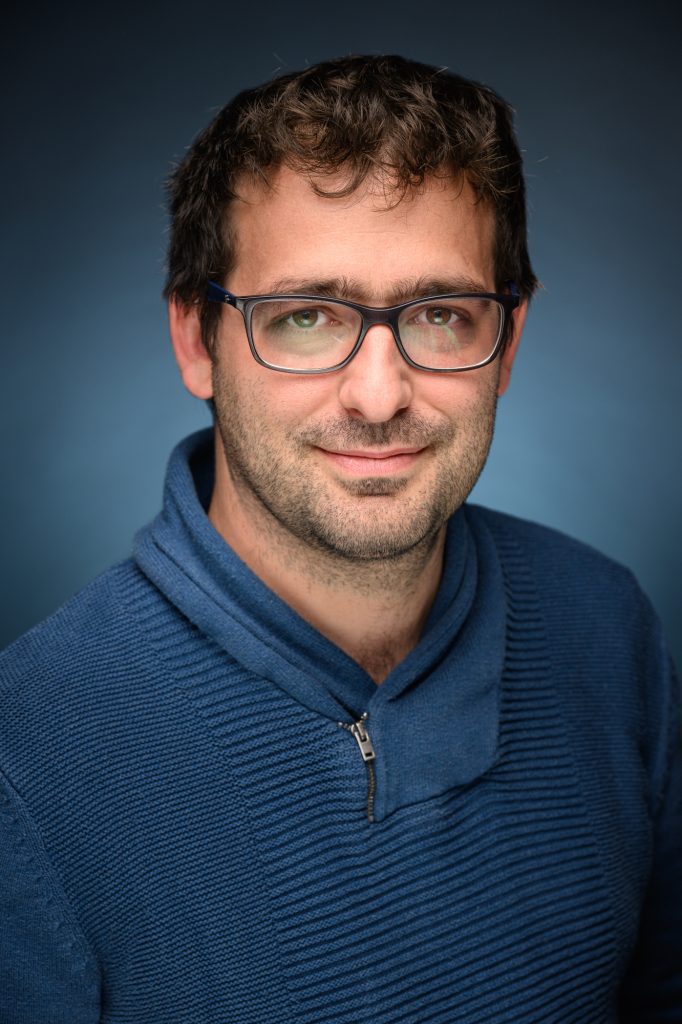
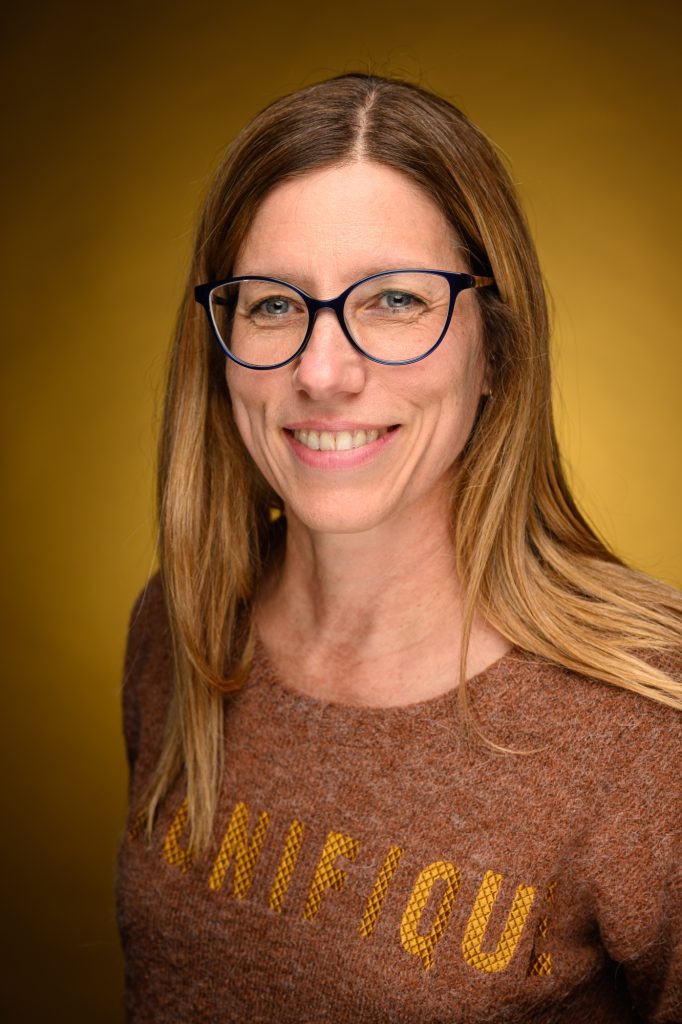
Students in class working on Rembrandt Lighting

1:3 Lighting Ratio

© Heidi Bergeron

Clamshell Lighting

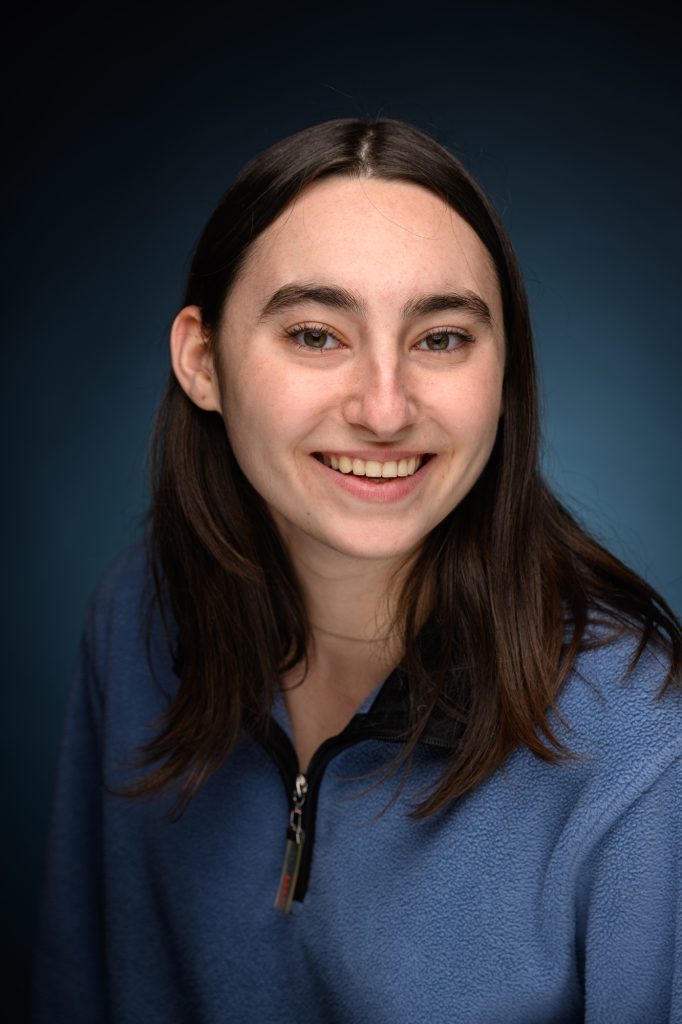
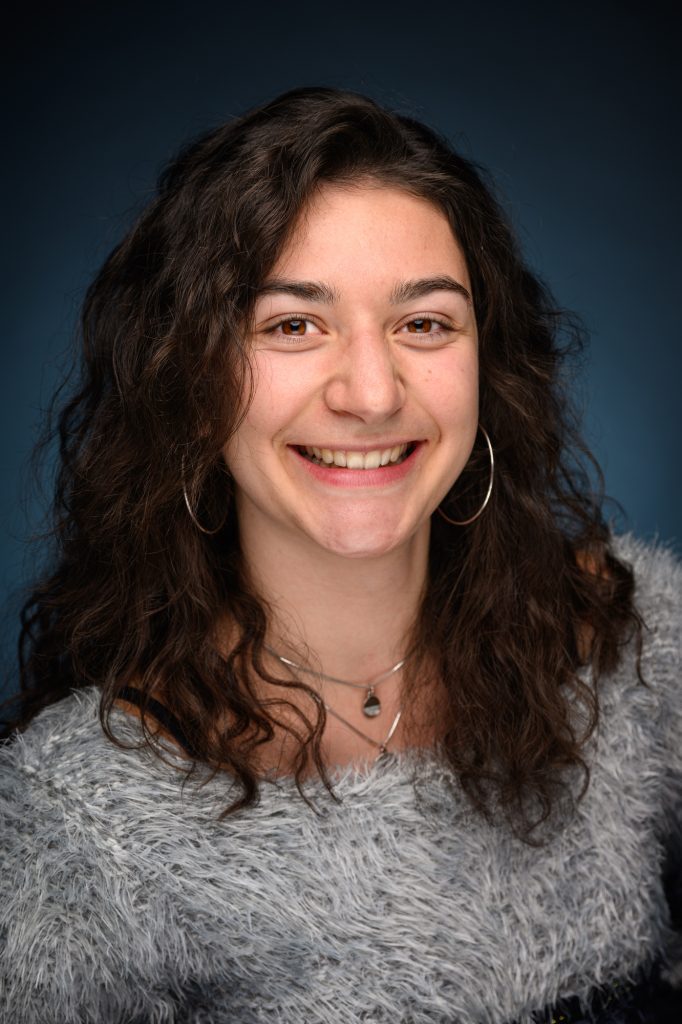
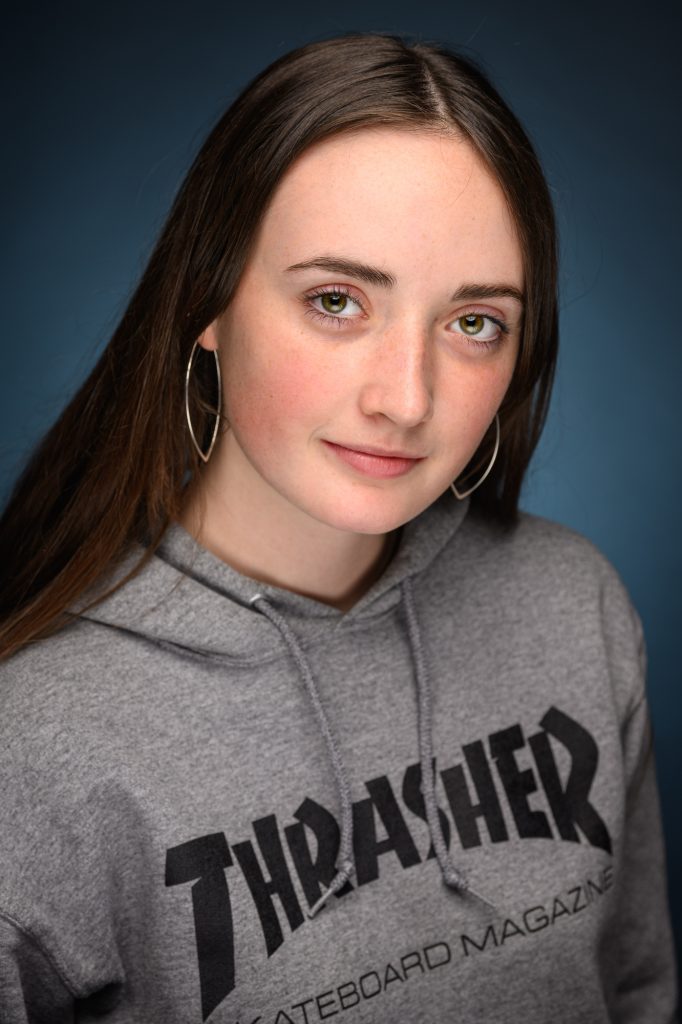
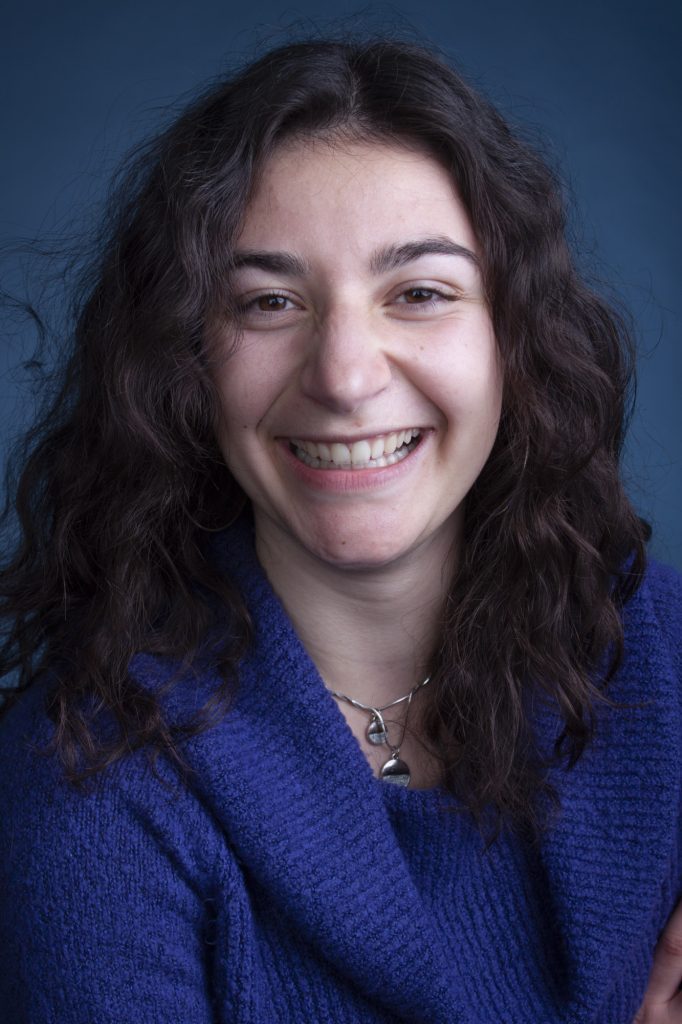
To demonstrate the Clamshell/Butterfly lighting, I took everyone’s photo. Here are the three students.

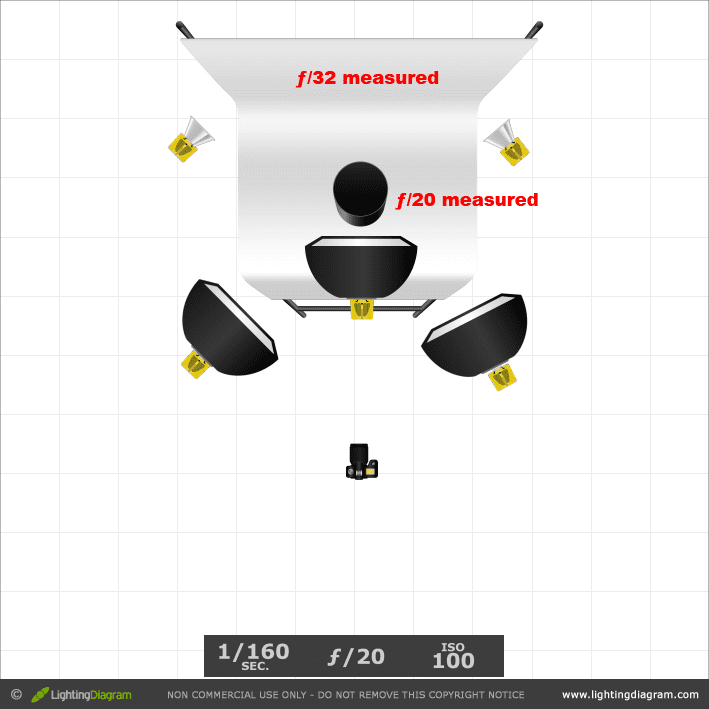
Tent Lighting for Products

This is because some students work with the tent lighting setup to photograph products.

Table Top Photography

I also told about my journey in photography and how it took time before I got the assignments I wanted. I also taught them a little about how to make a living with Business Practices.

You may be interested in a Lighting Workshop. Drop me a line if you are interested.

Shaping the light is how you light metal

Just throwing light on a metal object 

This is what you see a lot of on ebay and other websites of people selling metal objects. My examples are using my Yamaha YTR-734 Silver Trumpet, which I pulled out and started playing again.

After cleaning it up I didn’t want to waste not preserving this for myself.

You would think just putting a metal object like this Silver Trumpet on a blue background and using two off the camera flashes at 45º angles (like copy stand) would give you perfect light. This is how this is lighted.
Here is the setup for the photo above.

I have two hotshoe Nikon Speedlights (1 SB900 & 1 SB800) lighting the trumpet. They are setup like a typical copy stand photo shoot. Works great for objects other than metal. Perfect for copying flat art work and books.

This is the same photo as above with just the room light and no flash.
This is the available light without the blue background

By removing the blue fabric the white table wrap the light around the metal and give it more shape.

Two flashes

My recommendation is Tent Lighting

Here I am using tent lighting. I pulled back the front panel so you could see inside.

When you wrap an object with light all around it you get much better results.

There are four flashes lighting this setup. Two Alienbees B1600 up in the ceiling pointing towards the back and two on umbrellas as you see here.
This is the setup with white seamless background.

I think you might do a better job of selling this trumpet on ebay with lighting like this than the light above.

Notice how in the bell the blue fabric is reflected. if you look really close you will see just a little black spec. This is the camera peaking thought the front panel.

Here the only difference in the above photo is using a blue fabric.

Somewhere in between?

Maybe you want something in between the top photo and light wrapped all around the object. Instead of tent lighting just use white foam board and cut it into different shapes. You can then put a black sheet out of the photo but blocking light. Then just place the strips of white foam board to place you want to add white verses the black. Slowly you can give different looks. Use different color foam board and you can add color to the reflections like the blue fabric is doing here, but just put it outside the view of the camera but in the reflection of the metal.

Rather than me showing you everything, go photograph something yourself and see what you come up with.

Tent Lighting

cube
Lighting cube shot with Panasonic Lumix DMC-TZ5.  It triggers the studio strobes with it’s built in flash.  The pre-flash fires and sets the exposure and then second flash takes the picture.

If you are doing product photography you need to know how to do tent lighting.

You may remember as a child taking some chairs and throwing a sheet over them and getting inside to play. If you used a white sheet you have a pretty good idea what tent lighting does—it diffuses the light.

If you already own a white tent with a white bottom then you can just set this up and you are pretty much good to go.

You can buy a cube tent like I have. I use the Interfit 4 foot cube tent. Here is a link for you Click Here

The basic idea the white material diffuses light passing through it and bounces light off of it inside back on the subject.

You need at least 2 lights to get a really even light and often I use 4. I put two lights on either side then one on top and one on the bottom. I like to literally wrap my subject in light. The best objects to see the results of tent lighting are black. You can see detail all around the object.

By the way, I used a point and shoot Lumix camera and the flash on the camera set off my studio strobes and there you have it—a perfectly lit object.

binoculars
Simple shot of binoculars which are black and give you example of how evenly the light is around the object using the tent lighting. 

straight flash
Example of flash built into Panasonic Lumix.