Since 2006 I have been doing a one-week lighting workshop as part of the School of Photography program of YWAM with Dennis Fahringer in Kona, Hawaii.
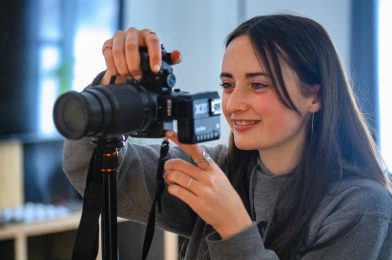
This year I was asked by two of his former students to come to Dunham, Quebec, Canada, and teach the same thing, but this time to a school that will be in French and English.
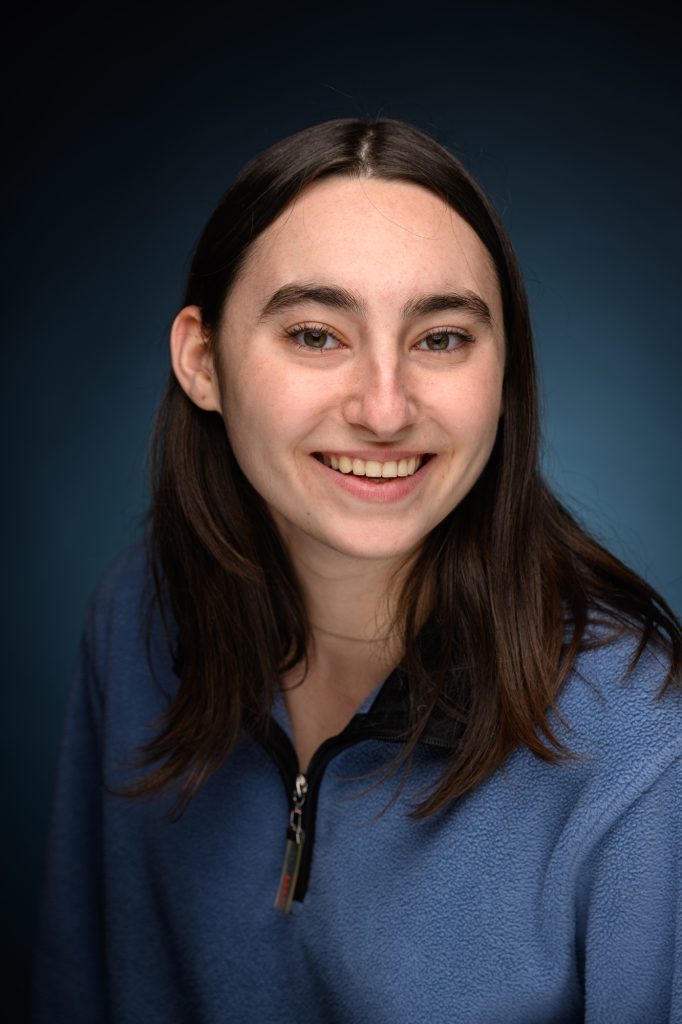
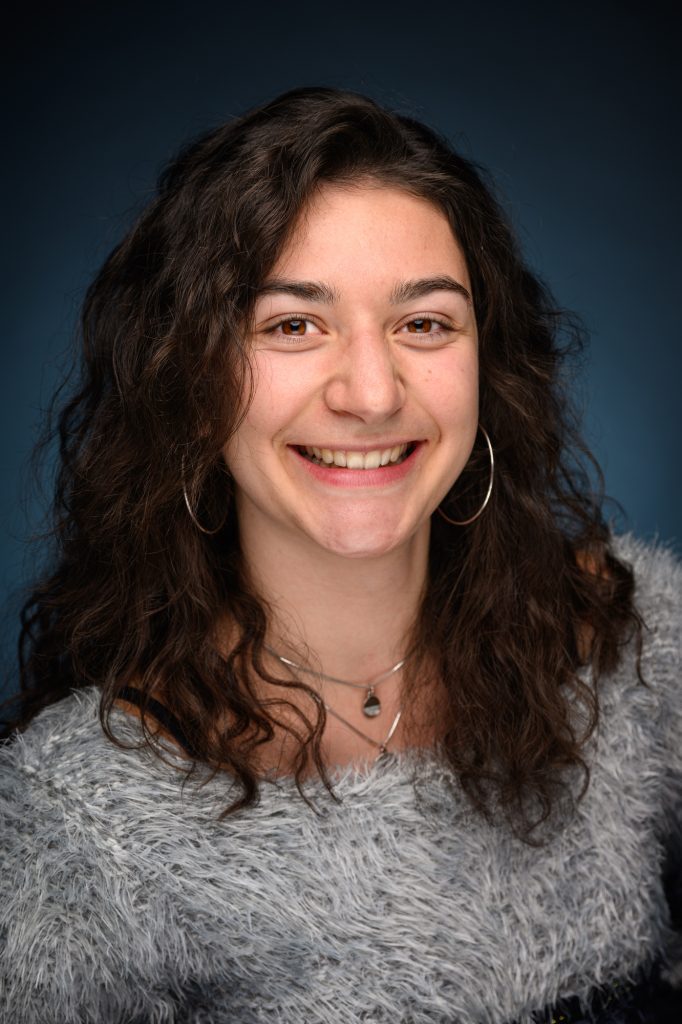
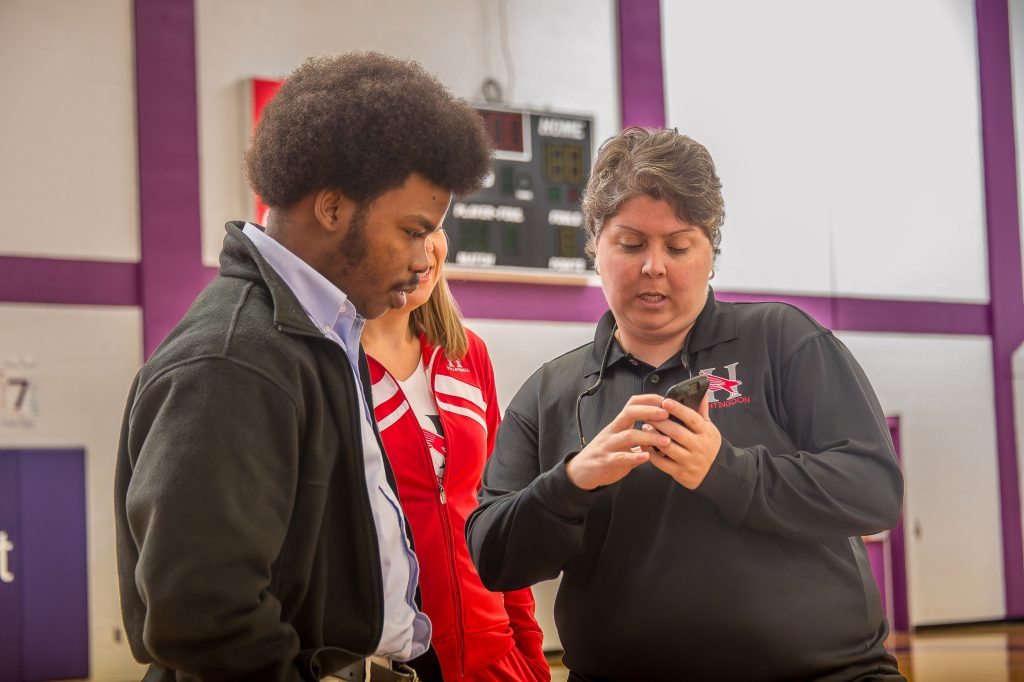
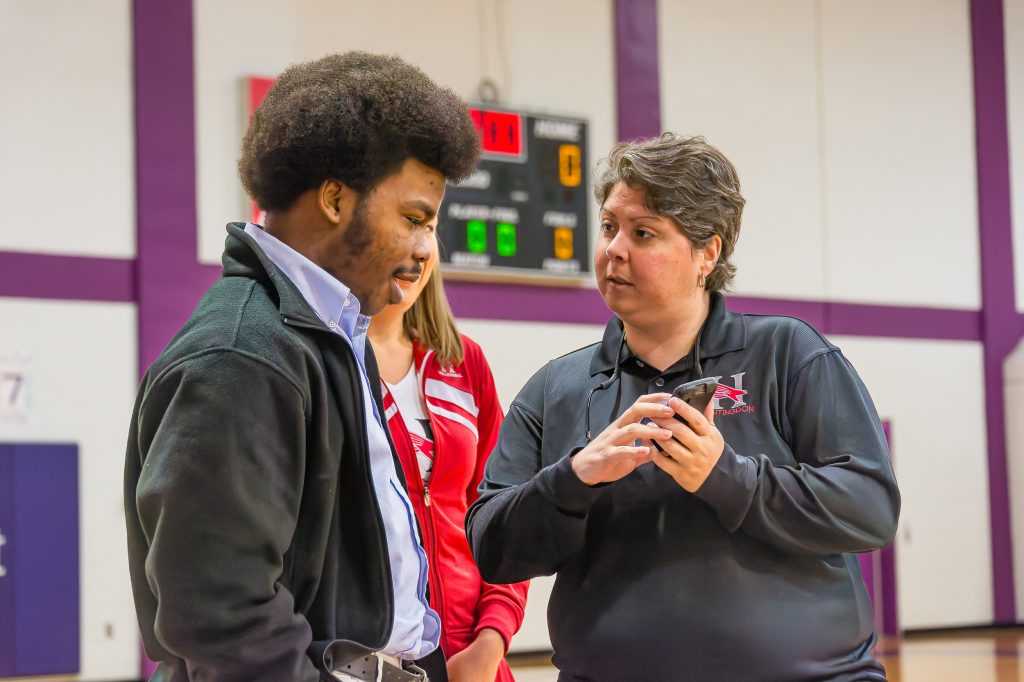
Raphael PaquetJulie Gavillet
This was their very first time leading a School of Photography for YWAM. The leaders Raphael Paquet and Julie Gavillet hosted me during the week and translated me into French.
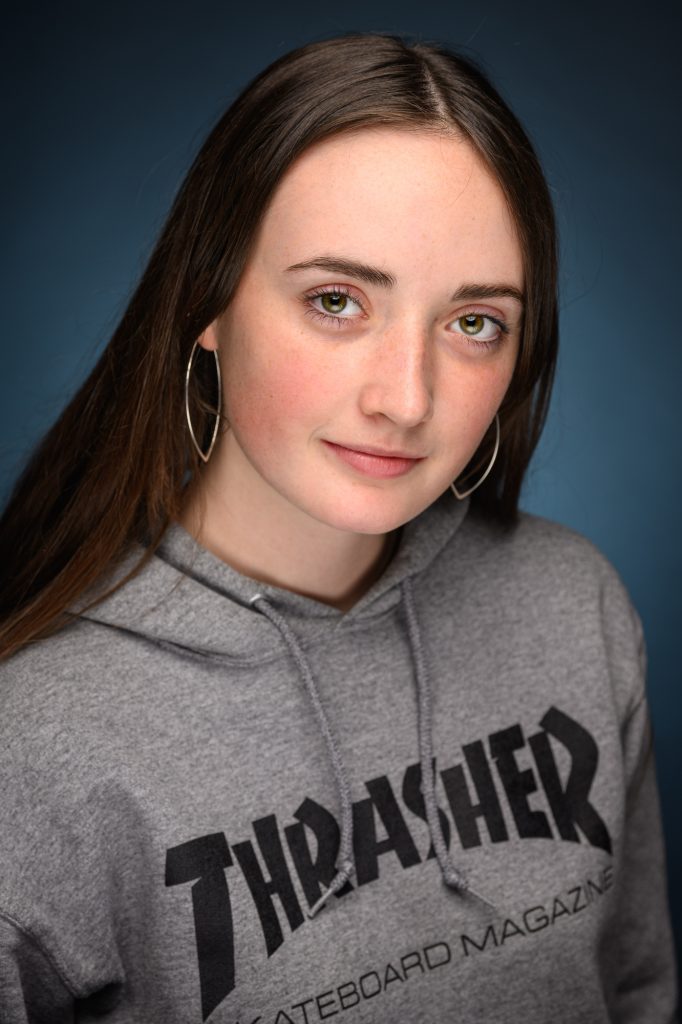
The students were learning where to place the leading light for a starting position with portraits. They also were learning not to light everything evenly.
I also told about my journey in photography and how it took time before I got the assignments I wanted. I also taught them a little about how to make a living with Business Practices.
You may be interested in a Lighting Workshop. Drop me a line if you are interested.
I have preached over and over on my blog about how Flash can improve the colors in your photos.
Flambient is even a new term you will see in photography that was being done long before. This is where the photographer blends available light with Flash.
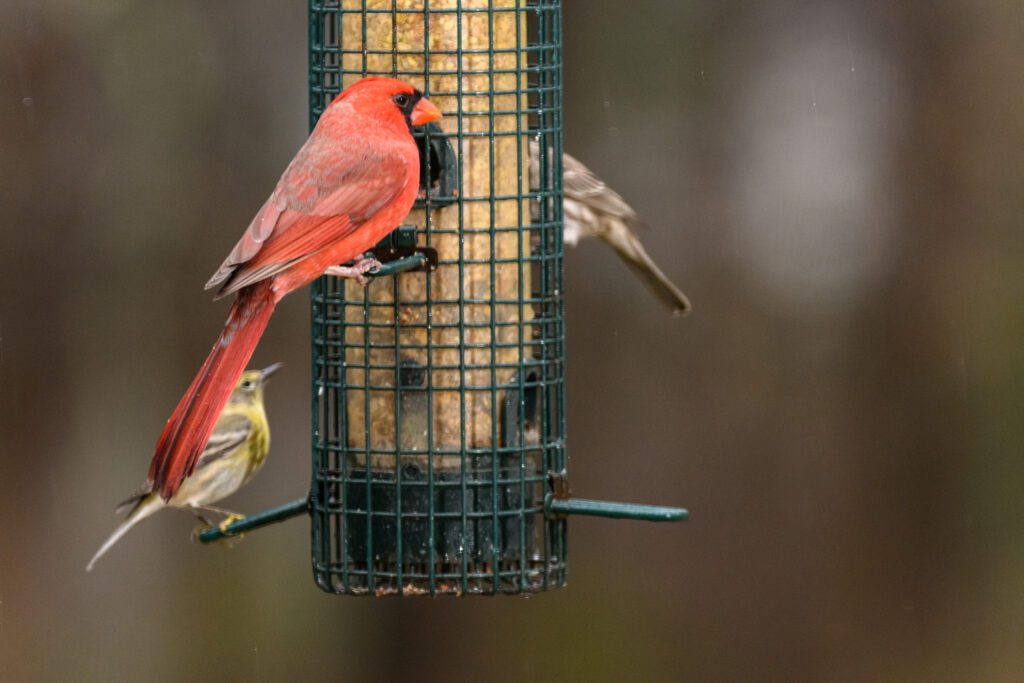
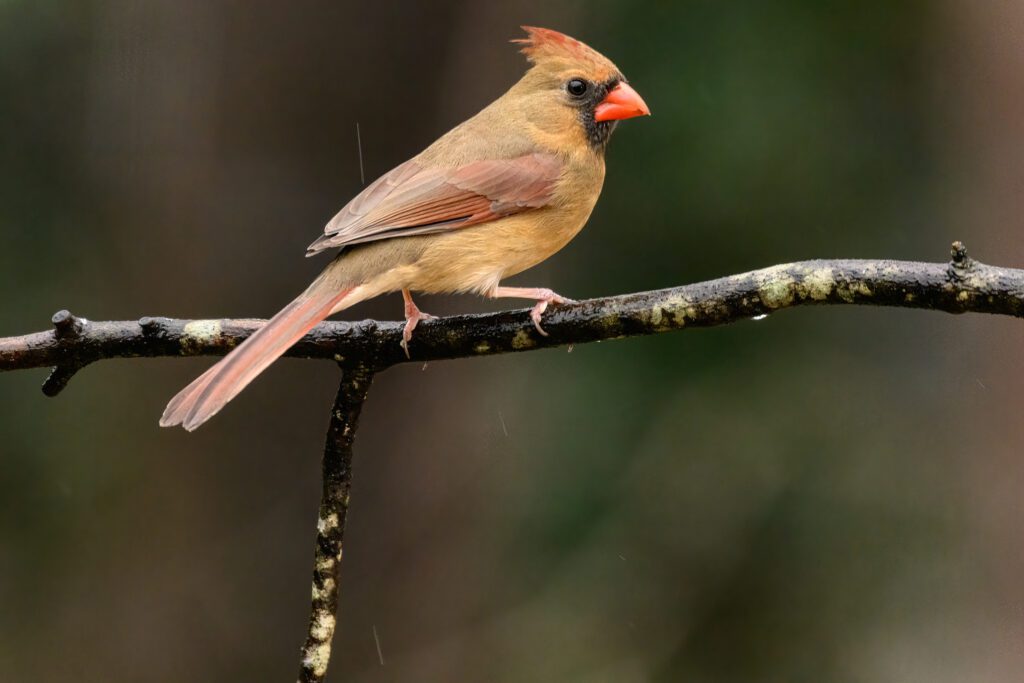
No Flash [NIKON Z 9, VR 120-300mm f/2.8G, Mode = Manual, ISO 4000, 1/160, ƒ/5.6, (35mm = 460)]
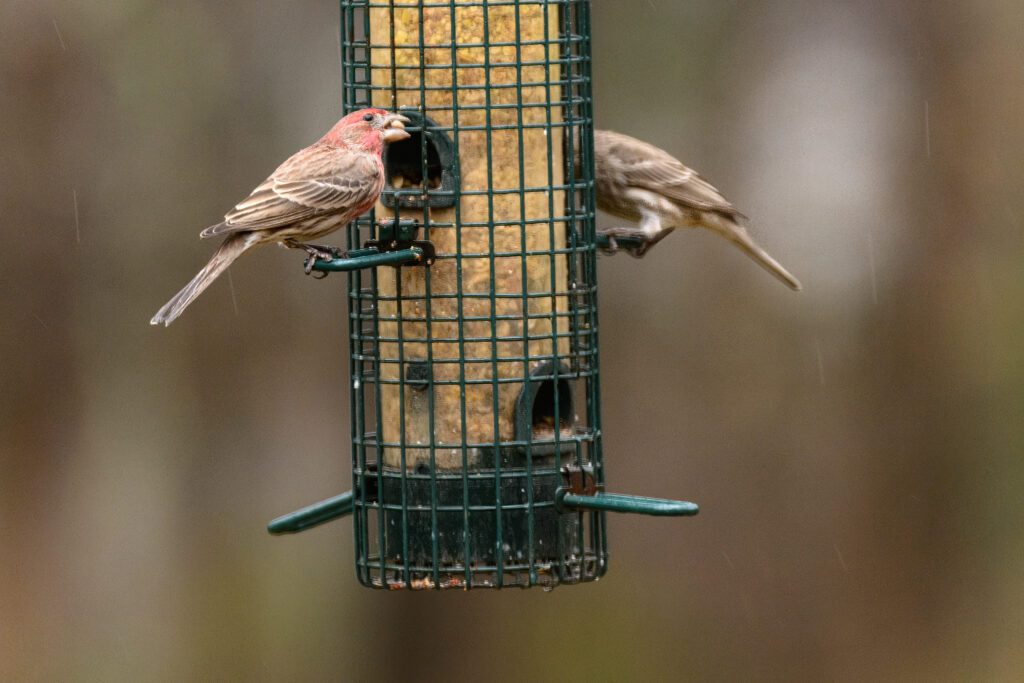
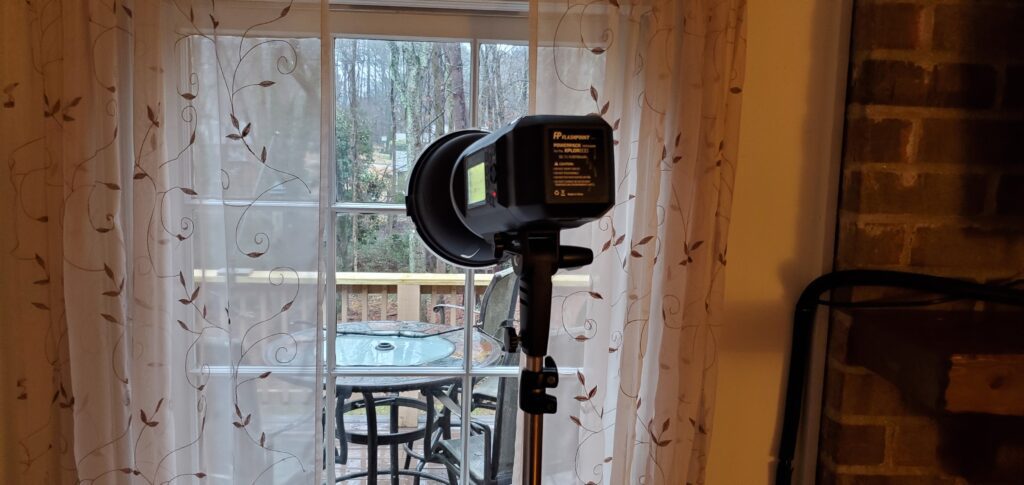
This is without a flash shot of birds on the bird feeder. I am shooting from one window of my house, and I put the Flashpoint XPlor 600 HSS TTL in another window about 15+ feet away, creating a triangle between camera, subject, and light.
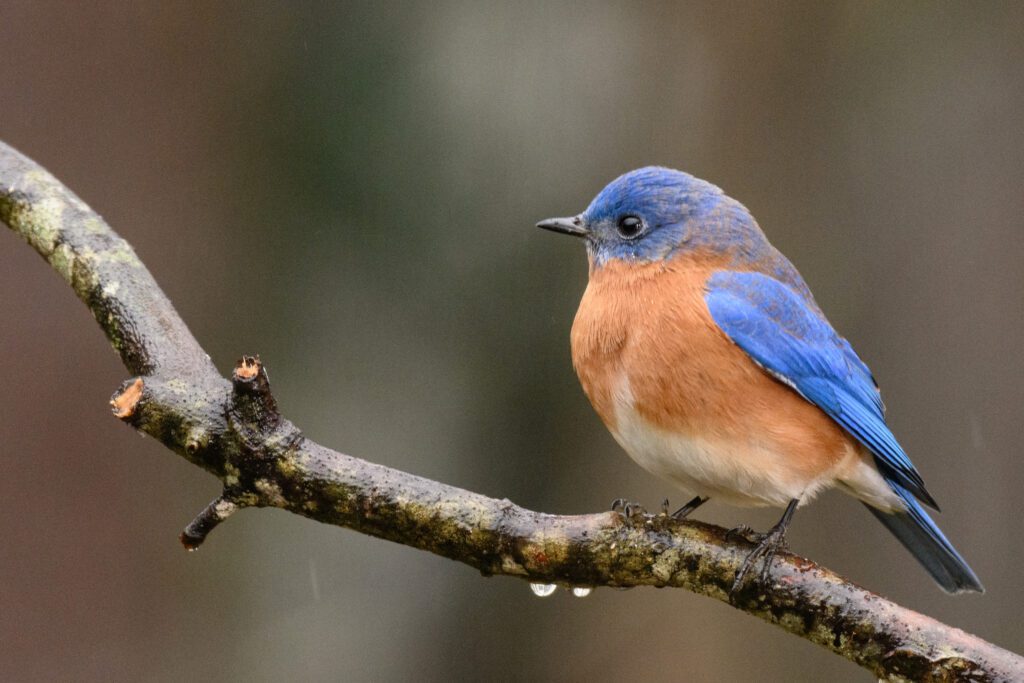
Birds at Bird feeder using the Flashpoint XPlor 600 HSS TTL [NIKON Z 9, VR 120-300mm f/2.8G, Mode = Manual, ISO 4000, 1/160, ƒ/5.6, (35mm = 460)]
The hard part of doing this is balancing available light and the flash.
Birds at Birdfeeder
Using the Flashpoint XPlor 600 HSS TTL
[NIKON Z 9, VR 120-300mm f/2.8G, Mode = Manual, ISO 16000, 1/500, ƒ/5.6, (35mm = 380)]
This, to me, is a little too much flash. What you choose to do will be part of your style and approach.
Birds at Birdfeeder
Using the Flashpoint XPlor 600 HSS TTL
[NIKON Z 9, VR 120-300mm f/2.8G, Mode = Manual, ISO 16000, 1/500, ƒ/8, (35mm = 600)]
Tip Don’t Use TTL
TTL Flash works by the flash doing a pre-flash, and then the camera takes a picture with the second flash. I think you could risk startling the subject and affecting the one with the actual moment.
Another problem is you will drain your battery for a flash much quicker, with it taking two seconds every time you take a photo.
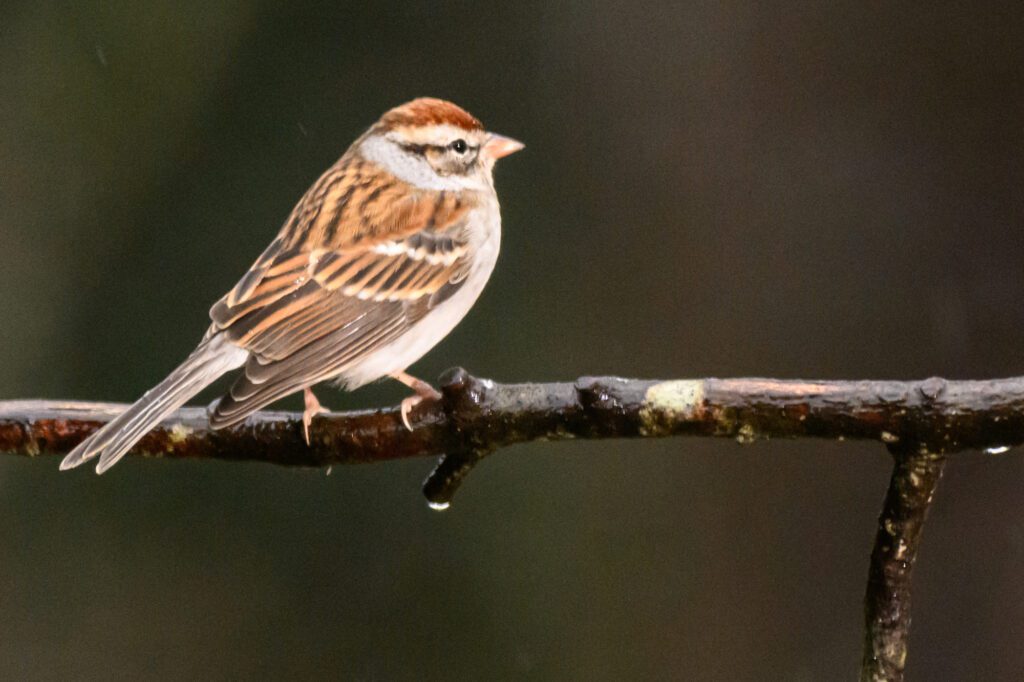
Processed in Lightroom and Topaz AI Sharpen Birds at Birdfeeder Using the Flashpoint XPlor 600 HSS TTL [NIKON Z 9, VR 120-300mm f/2.8G, Mode = Manual, ISO 8000, 1/250, ƒ/8, (35mm = 600)] Flash set to 1/16 power.
I think you dial in the best settings to take the photo without the flash and then add the sparkle. I suggest having the flash -1 EV of the location you have before.
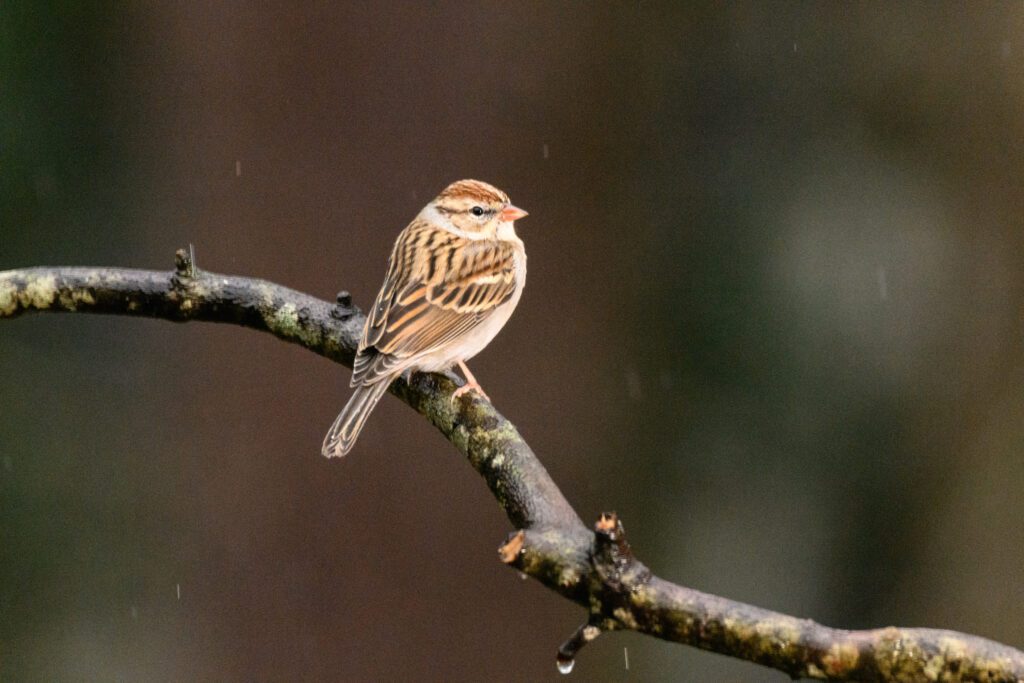
Birds at Birdfeeder Using the Flashpoint XPlor 600 HSS TTL [NIKON Z 9, VR 120-300mm f/2.8G, Mode = Manual, ISO 5000, 1/250, ƒ/8, (35mm = 600)] Flash set to 1/16 power
Today was the first class of lighting I was teaching at the School of Photography at the University of Nations in Kailua-Kona, Hawaii. I asked one of the students to be my model.
Bethany is helping me as the model for the first assignment on Rembrandt lighting using just one light with a 10º grid on the Alienbees studio strobe.
The top photo is my first photo showing what the fluorescent room light looked like before we used lights.
Nikon D4, 85mm ƒ/1.8G, ISO 12800, ƒ/1.8, 1/250
I first turned all the lights off except for the modeling light on the Alienbees with a 10º grid. Then, rather than jumping into shooting with the strobes, I showed the class that you could see what you would get using the modeling light.
Here, you can see the triangle on the cheek, which is the classic Rembrandt lighting with a little twist: I shot her not looking straight on but slightly behind her.
To see the rest of the assignment, you can go to an older post that walks you through the Rembrandt light exercise. Here is that link
Before using flash, you must see what you are trying to create.
In my last blog post, I explained three things that affect exposure when using flash.
Flash Power—The bright flash will influence if the picture is over, under, or properly exposed. You can control the Neewer flash from 1/128 to full power in 1/3 stop increments.
ƒ-stop/Aperture—You control how much of the light is coming into your camera by the camera iris called the aperture. These are fractions—the focal length of the lens over how wide the opening of the lens is.
Flash Distance to Subject—The closer you put the flash to the subject, the brighter the subject, and the further away you set it, the darker it gets. Of course, this assumes your Flash Power and ƒ-stop is constant.
TTL—Through The Lens
TTL metering has been around for a while with cameras. Your camera helps make the proper exposure settings based on what light hits the camera’s sensor. The TTL flash is a very sophisticated flash system that sends out a flash that tells the camera what to set the camera, and then the flash fires again, taking the photo at those settings. The first flash happens so fast that it looks like one flash went off to the human eye.
An incident meter is the most accurate way to take a reading for any photo. An incident reading is where you put the meter where the subject is located and take a reading of the light falling onto the subject. The white dome needs to be where the subject is to get an accurate reading.
Most incident meters have an available light setting and flash setting where you can measure the light.
TTL metering is a reflective reading. You are reading the light that bounces off the subject. If you take a reflective reading of a White Wall, an 18% Gray Wall and a Black Wall, all three photos will look like an 18% Gray Wall.
Using the settings, you get from the incident reading meter for all three walls will look like they should.
TTL Metering has a variable
As you can see, the TTL metering system has one major disadvantage of using a reflective reading to set the aperture, shutter, and ISO on your camera—the color and tone of the subject will influence the exposure and white balance, whereas the incident reading is consistent.
Incident vs. Reflective
If the situation allows you to use incident metering, you will get the most consistent results. However, there are situations where this is impractical.
At parties where you are moving around the room, getting an incident reading and then taking a photo may be impractical to get the “moment.” Roaming photos is where a flash with TTL can get you close on exposure and white balance. You may have to check the LCD for a histogram and adjust the EV of the camera and the flash. A histogram often is much more practical than incident reading.
The TTL will adjust pretty quickly when the subject moves toward you, like a person on a red carpet walking toward you. If you are shooting RAW, you most likely be close enough to fix it in post if necessary.
Most seasoned pros have TTL flashes, hot shoe flashes, and some studio strobes that are not TTL. In addition, most pros will have an incident flash meter to adjust the lights and camera.
If you do portraits in a studio setting, TTL flash isn’t necessary, but if you shoot pretty fluid situations, then the TTL system can help you get photos that may be impossible without them.
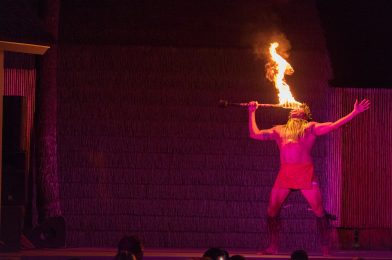
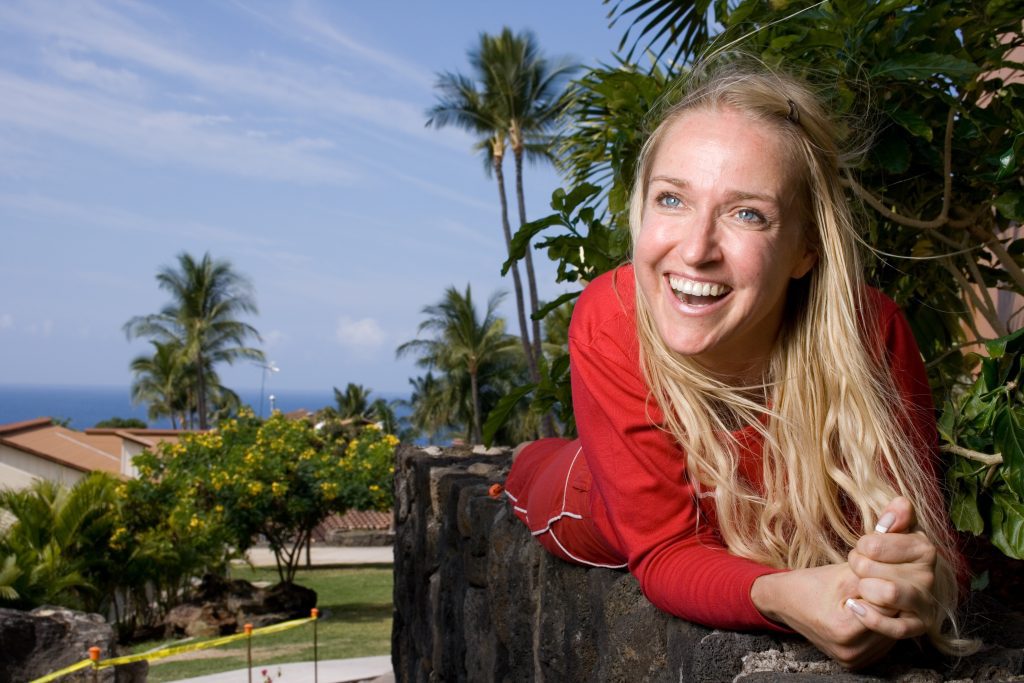
How can you go wrong with a fire-eating subject? If you miss the exposure, maybe, but if you get a well-exposed photo of something average and then something more dramatic, you get the idea of why start with a more exciting subject.
Fuji X-E2, XF 55-200mm, ISO 6400, ƒ/5, 1/140
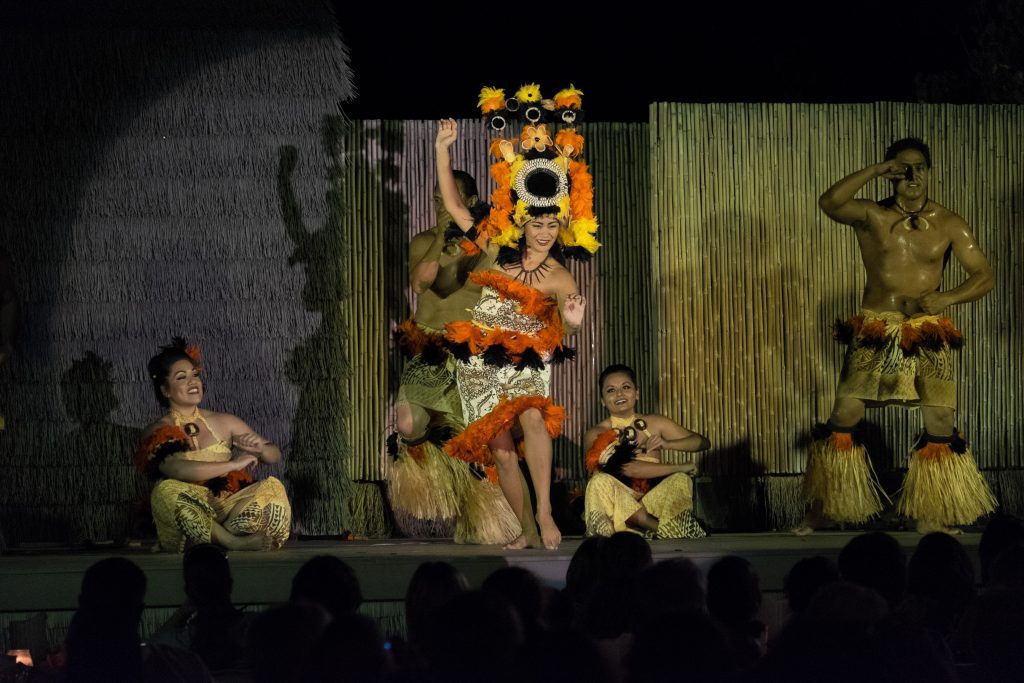
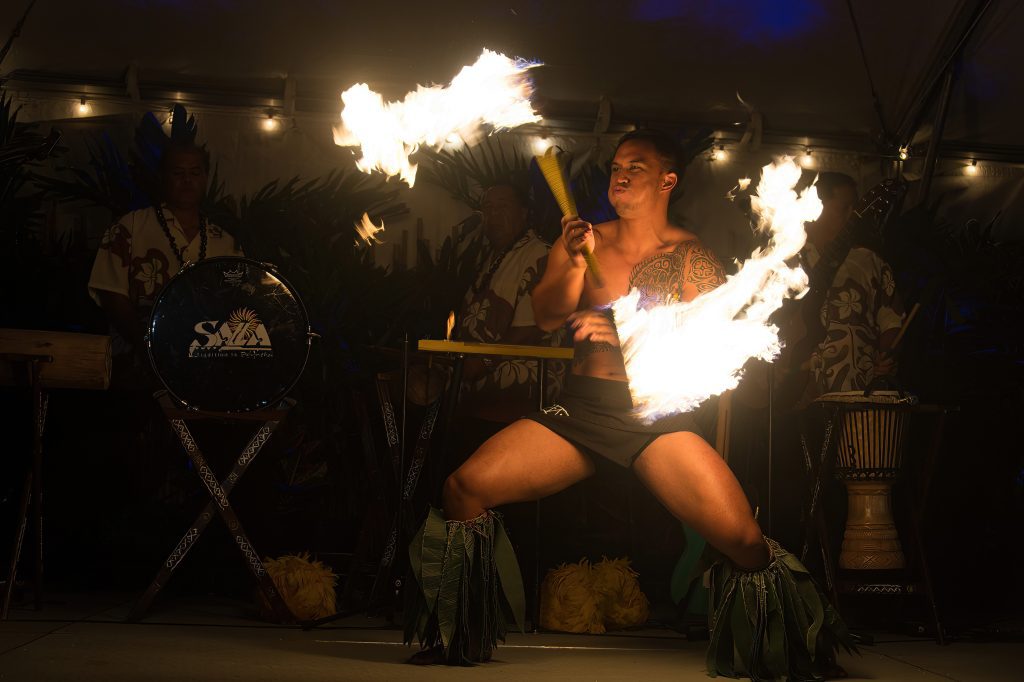
Look for things like this Luau in Kona, Hawaii, for example.
Nikon D4, 28-300mm, ISO 640, ƒ/4.5, 1/100
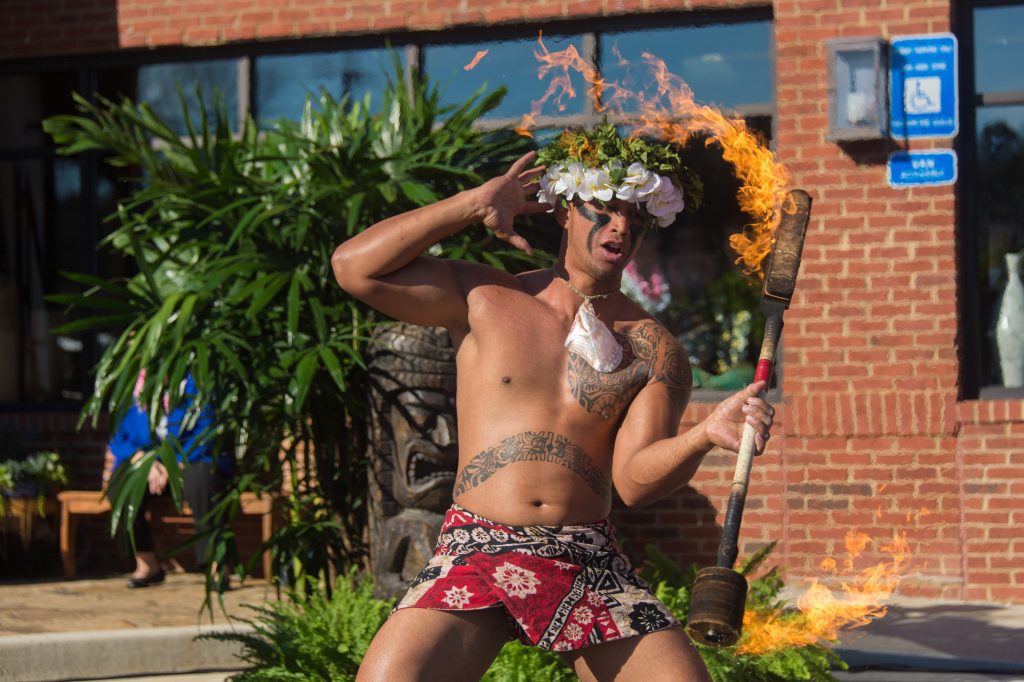
I photographed him for this Fire Knife dance at Truett’s Luau in Fayetteville, GA. So, you don’t always have to go to Hawaii to get your photo.
Nikon D4, 28-300mm, ISO 640, ƒ/5.3, 1/3200
Later, I photographed the same guy the following day, but this was outside in the sunlight. This change in time and location should help you see how much a place and lighting can help a situation or not at all.
I think to improve your photos, don’t light everything when they turned off all the stage lights and let the fire dancer be the center stage so that the image is more dramatic than in the bright sunlight.
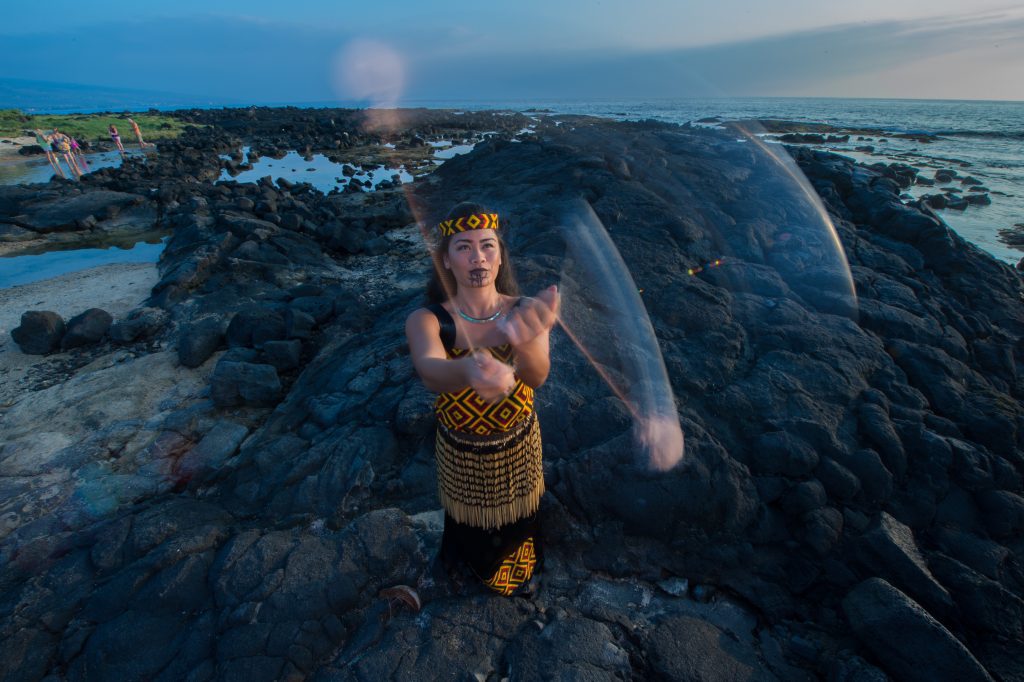
Without flash. Photo by Clara Kwon
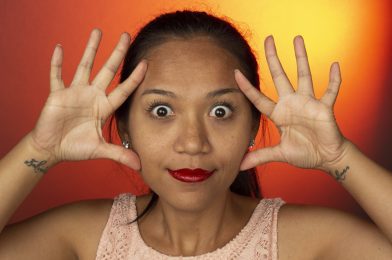
With off-camera flash. Photo by Clara Kwon
In these two photos, you can see how Clara Kwon had no flash, and then adding sparkle helped to make the subject “pop.” She is not lighting everything, and the rest of the scene is slightly darker, making the subject stand out.
Remember to pick exciting subjects and try your best to put them in the best light.
Nikon D4, 14-24mm, ISO 200, ƒ/22, 1/13 with two Alienbees B1600 with CTO triggered by Pocketwizards.
These are examples of the student’s work from this past week on lighting that I taught in the School of Photography 1, which is part of Youth With A Mission’s University of the Nations campus in Kona, Hawaii.
This class was the first time most of the course used studio strobes.
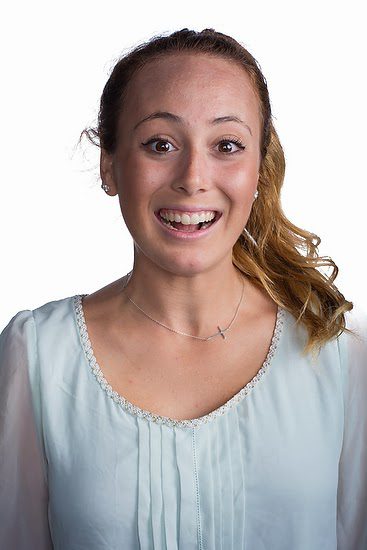
Without flash — Photo by Andrea Klaussner
With flash — Photo by Andrea Klaussner
They learned how to use off-camera flash on location. The assignment required them to hand in one photo without a flash and one with it. Some of the student’s photos looked better without a flash, and sometimes you don’t need a flash.
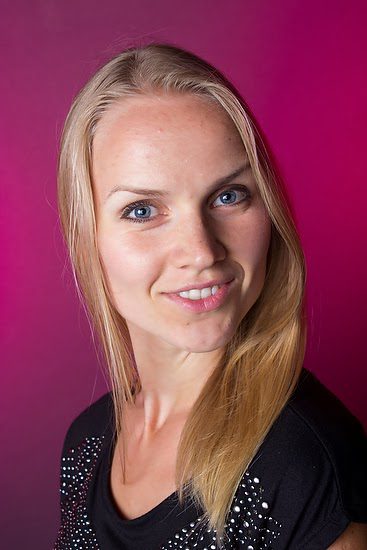
Without flash — Photo by Lizz Busby
With flash — Photo by Lizz Busby
The bread and butter assignment for a photographer is the environmental portrait. Taking a poor lighting situation and improving it was the purpose of the assignment, as well as knowing how to make it.
The students took a baseline photo without a flash and below the sync speed for their camera. Then they made a flash reading setting the strobe to be one stop greater than the aperture reading without the flash. They then only changed the aperture to the great one-stop aperture that was the flash setting. They were also encouraged to see if more power from the flash was better for the photo.
1:3 Lighting Ratio Assignment
In an earlier blog post, you can see the students’ assignments. First, they needed the leading light [key] at 45º from the camera, with the model looking straight into the camera. We did this to help them see the shadow across the nose. They then had a fill light one stop less than the leading light.
They could use different backgrounds from White, Gray, or color.
Photo by Debbie Smit
Photo by Erik Wuesthoff
Photo by Keziah Khoo
Photo by Lizz Busby
Photo by Oo Shinoda
Photo by Melissa Kelsey
I think the students all did a great job, and in less than a week, each person had a potential of a couple of photos to add to their portfolios.
Caption: Nikon D4, 28-300mm, ISO 12,800, ƒ/5.6, 1/400 — Flashes used (4) Alienbees B1600 with 11″ long throw reflectors with PocketWizard Plus II receivers and being triggered by the PocketWizard Mini TT1. with DXO Pure RAW 4 & Lightroom
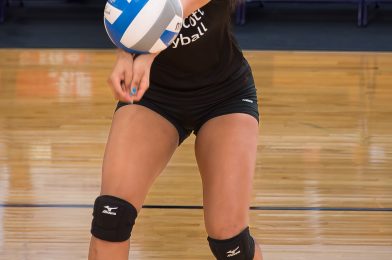
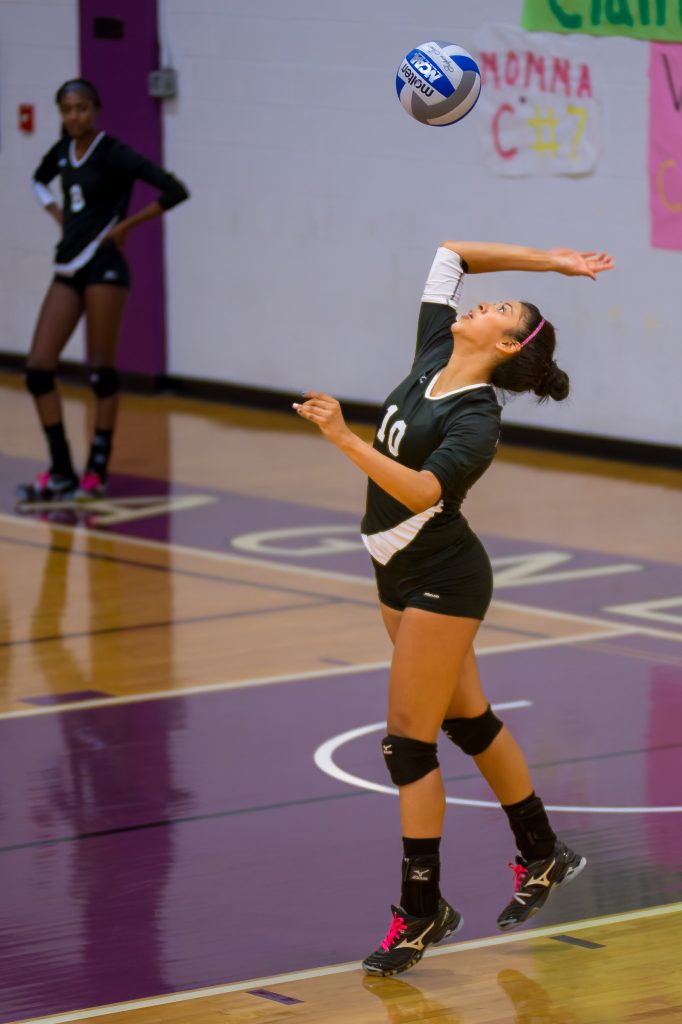
High-Speed Flash vs. No Flash
In the photo above, I used a flash with an output about the same as the existing light.
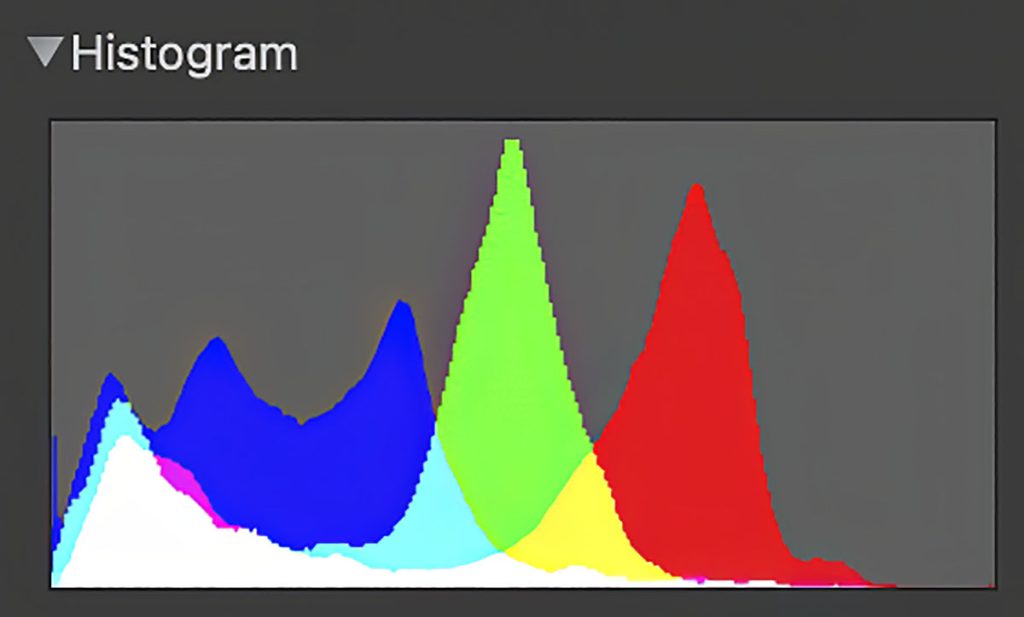
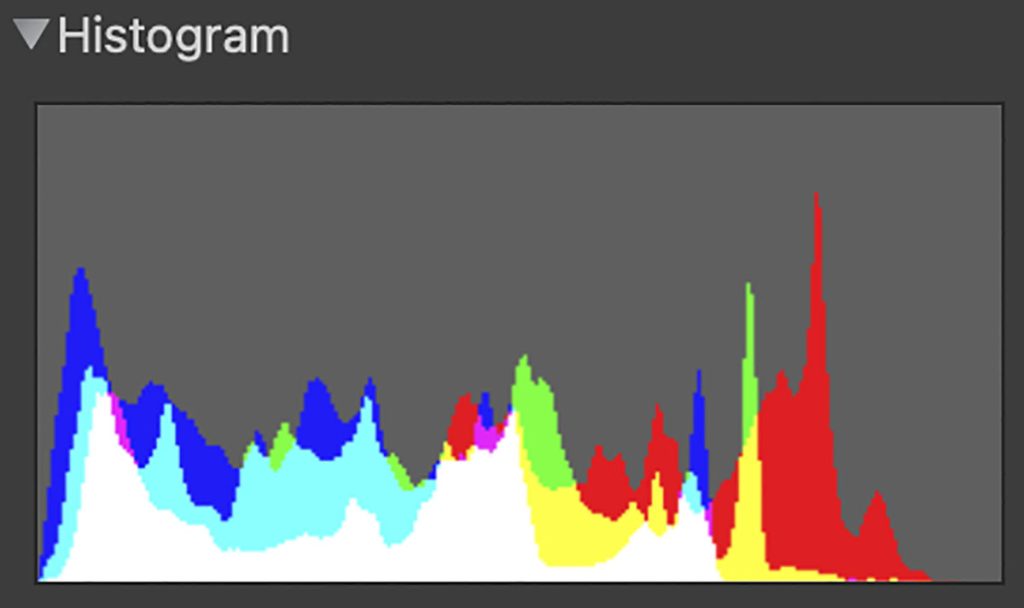
This is the histogram for the above photo.
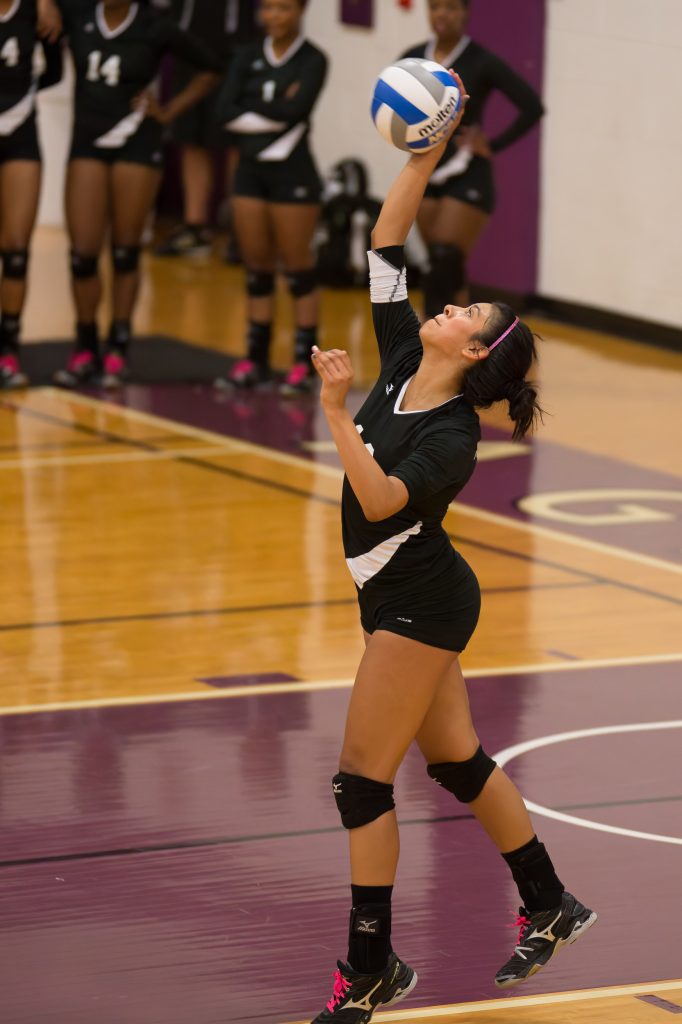
Nikon D4, 120-300mm, ISO 11,400, ƒ/2.8, 1/1000 with DXO Pure RAW 4 & Lightroom
Here is another photo without strobes. I had to change to a faster lens and use a faster shutter speed.
This is the histogram for the second photo. Two things stand out. First, the shadows in the picture using available light have less information than the photo using flash. Second, the entire dynamic range appears more significant with the flash, resulting in less photo noise.
ISO 25,600
I wanted to see what the Nikon D4 looked like at 25,600 without strobes. Here is the result. I am showing the same player, so there is a slight variation as possible except for ISO.
Nikon D4, 120-300mm, ISO 25,600, ƒ/4, 1/1250 processed with DXO Pure RAW 4 & Lightroom
Here is the histogram for ISO 25,600
Color Temperature
A camera’s ability to accurately reproduce color depends greatly on the color space with which the object is photographed. The dynamic range of color is the greatest with Daylight or 5500º Kelvin. As you move away from this color temperature to the sodium vapor lights in this gym, which are 3700º Kelvin, and then you must add 27+ magenta to color correct this to get a neutral grey, the color space shrinks. The dynamic range is less.
If we had used only the strobes and no ambient light for the most accurate color, the color would have been the most accurate. Also, I could not have bounced the flashes off the ceiling; I would have had to point them straight at the volleyball players. The bounced flash will shift the color of whatever it bounces off. If the ceiling were red, there would be a red tent to the light.
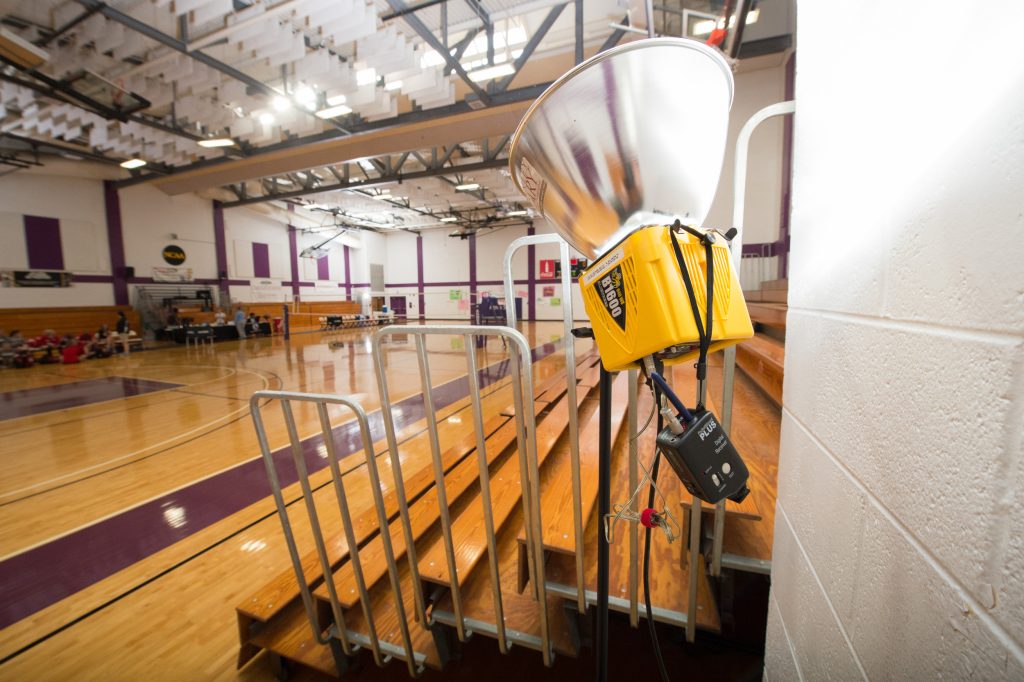
Setup
Here is a photo of one of the four Alienbees B1600 with the 11″ long throw reflectors. You can also see the PocketWizard Plus II used to trigger the flash. I dialed down the flash output to 1/8 power. Again, with today’s full-framed high ISO camera chips, the results are quite acceptable, and the flash is less disturbing to those in the room.
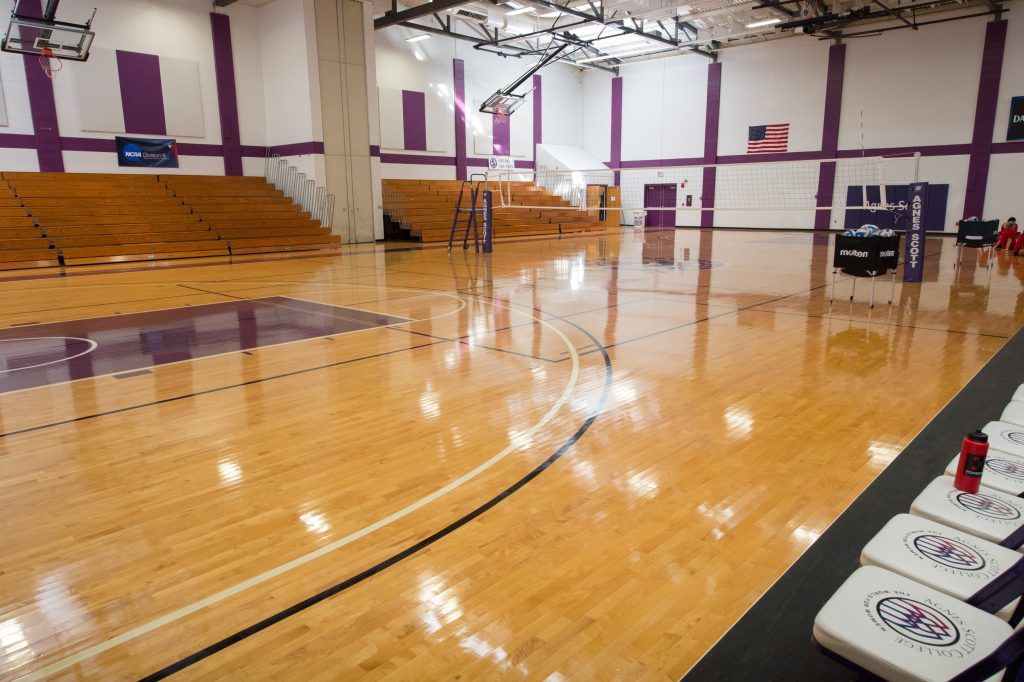
This is a wider shot of the room where you can see the results of all four strobes going off.
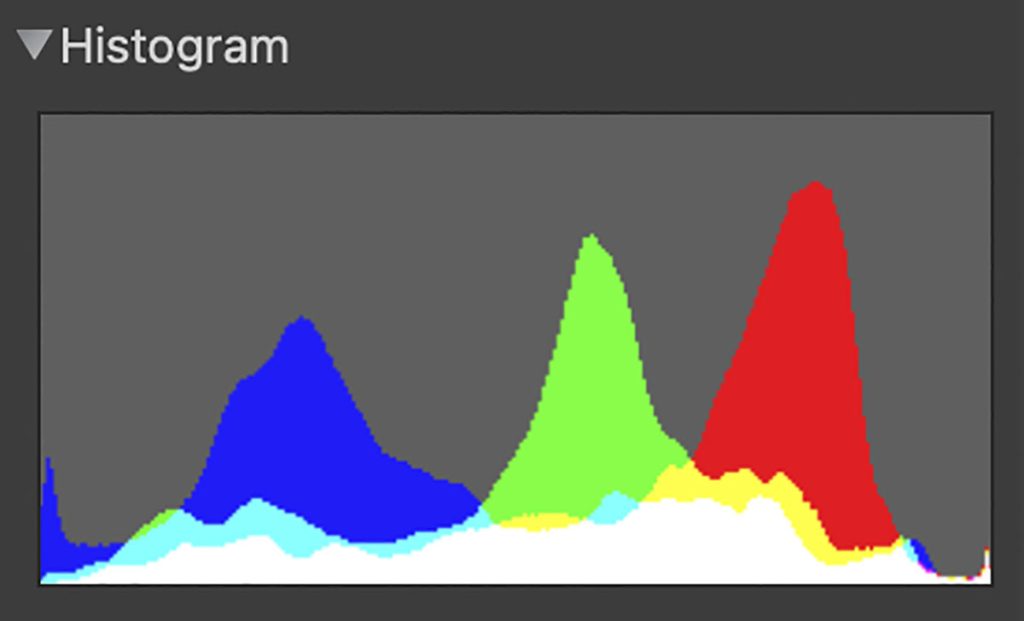
This is the histogram for the overall shot above.
Agnes Scott vs Huntingdon
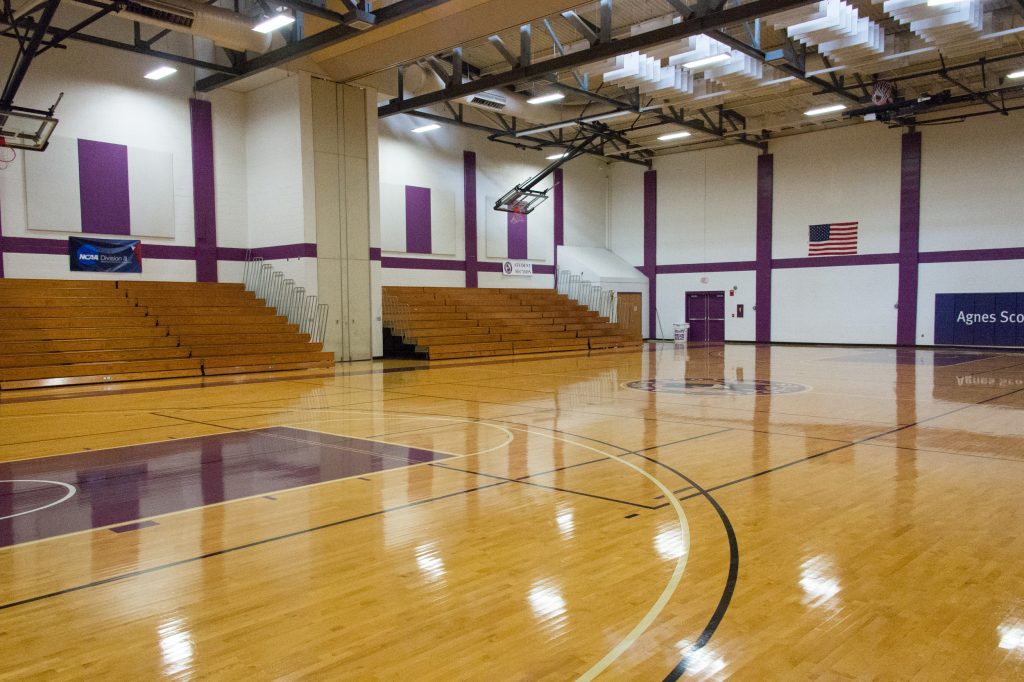
Here is that same angle with no flashes.
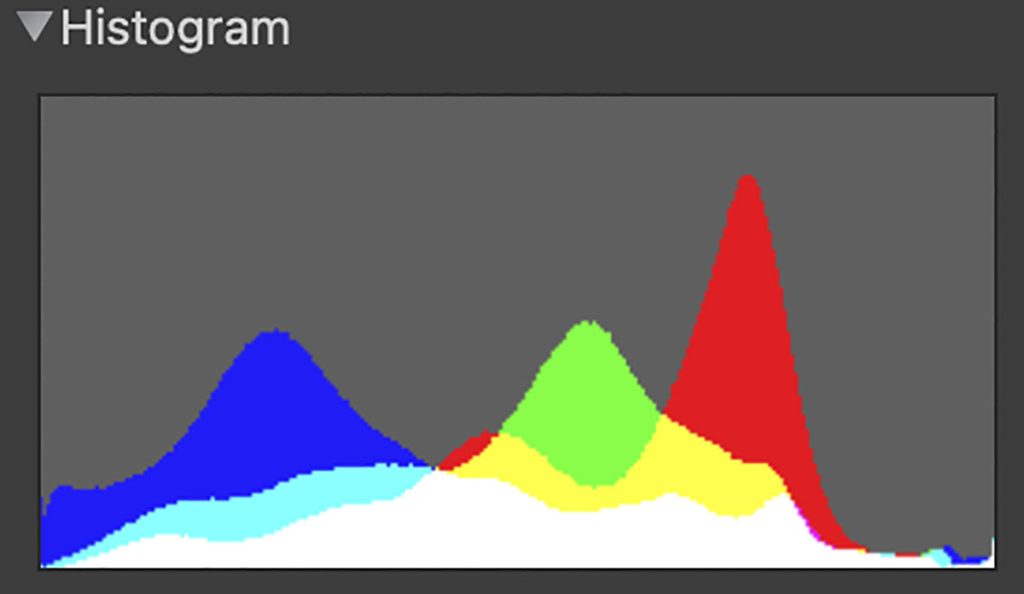
This is the histogram for the available light photo.
One last comparison
Nikon D4, 28-300mm, ISO 12,800, ƒ/5.6, 1/400 — Flashes used with DXO Pure RAW 4 & LightroomNikon D4, 28-300mm, ISO 12,800, ƒ/5.6, 1/400 — No Flash with DXO Pure RAW 4 & Lightroom
High-Speed Flash Sync
You may have noticed that the flash shots were taken with studio strobes and synced faster than the Nikon D4’s 1/250 sync speed. How did I do that?
Here is an explanation from the PocketWizard website.
PocketWizard’s HyperSync™ feature throws x-sync out the window, allowing never before possible shutter speeds with full power flash – any full power flash. With some camera and flash combinations even 1/8000th second is possible. (Alienbees with the Nikon would only sync up to 1/400)
HyperSync is simply the ControlTL® system’s unique ability to adjust the timing of the flash burst so that you can use as much of the light output as possible as the shutter opening passes over your sensor. With the systems “through-the-shoe” communication, a ControlTL transmitter with HyperSync can automatically detect the camera type connected to it as well as the shutter speed. Read more …
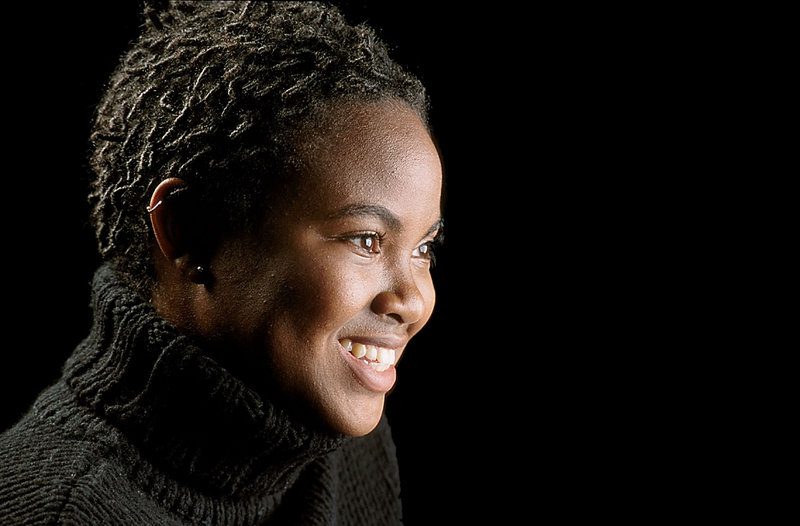
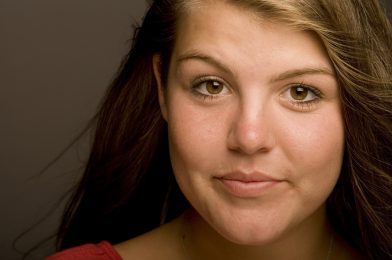
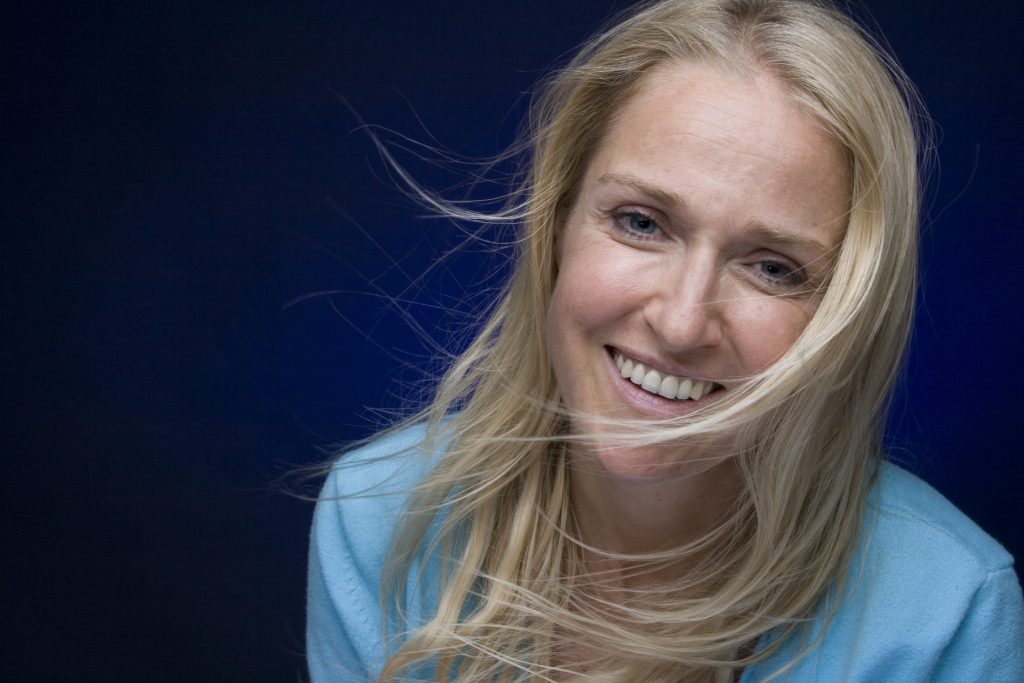
This is one of my favorite photos that I have ever made. I think the model brought as much to this session as I did lighting her.
I love her hair, the turtle neck and her wonderful skin and smile.
Simplicity is what makes this work so well. You need to have the background far away from the soft boxes. There is easily 10 feet from the model to the background. So the amount of light hitting the subject drops off pretty quickly and what little light is hitting the background isn’t enough to register in the photo.
She is around f/8 on the Mamiya RZ 6×7 camera system. I was using a 100-200mm zoom lens and shooting with Provia 100 transparency film. I didn’t know how good it was until I got the film back from the lab a day or so later.
Sure I shot a test shot. I shot that with a Polaroid back using Fuji’s Polaroid film.
One of my favorite shots for organizations is doing what I call the “Walk and Talk.” This is where two or more people walk next to each other towards me.
I encourage them to feel each other barely next to each other. This keeps them from walking further and further apart. Their closeness also helps communicate that they are friends. This is using the body language of touching or almost touching to help communicate their relationship.
Here are examples I did while teaching in Kona, Hawaii, in February this year. In these first ones, I was showing the students how to use two hot shoe flashes as fill lights. I have included the assistant carrying the lights for these examples to show you what they are doing as well.
I talk to the subjects and explain what I want them to do—no flash when off here.
The photo assistant is carrying a Nikon SB900 and a Nikon SB800. They are zoomed out to 200mm for the SB900 and 120mm with the SB800. This helps the light go farther but also keeps the light mainly on their faces.
Notice that the assistant must be pretty close to the subjects for the flash to work properly. In addition to the flashes, I am using the RadioPoppers PX system to help relay the infrared signal from the Nikon SU800 on my camera to the flashes.
We switched out the subjects so everyone could experience what it felt like doing this exercise and see it being done.
While showing the class how to use the hot shoe flashes, there were a few times when I got ahead of the flashes’ recycling. By not waiting long enough between flashes (2 seconds), the flash wouldn’t fire.
Walk and Talk with Studio Strobe
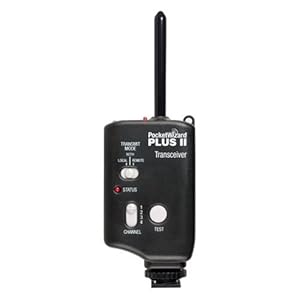
To help everyone see the difference in flashes, I also used an AlienBee 1600 powered by a Vagabond Mini Lithium battery. I borrowed the Photo Schools radio remotes, but I now mostly use the Pocket Wizard Mini TT1 Transmitter on my Nikon Camera and the Pocket Wizard Plus II transceiver on the flashes.
The MiniTT1 will let me shoot at 1/500 sync speed rather than just 1/250.
Another thing you will notice that is different in these examples is how far away the photo assistant is from the subjects.
The AlienBee 1600 has the reflector that comes with it, so notice that the flash lights more of the subject. I can change that by just adding a grid, but I didn’t for these photos.
The flash is set at about 1/8 power. I can almost shoot on the motor drive setting for these photos, which is why the recycle time is so short.
When I shot these photos, not a single time did the flash fire. I think that when it comes to getting the best expression, you need to be able to shoot at any moment and not just when your flashes are ready.
I would highly encourage using the studio strobe over the hot shoe flash for this reason alone.
Just like I did above, I talk to the subjects and do a few test shots before I have them walk towards me.
After we did some tests to get them moving, I had them start over where they were talking to one another.
As you can see, it doesn’t take long for people to relax, and the photos look pretty natural. I would have changed one thing in these photos. I would have had the assistant put the light on a light stand and raise the light a little higher to help avoid the glare in the glasses.
This is to show that the flashes fired every time.
Now look at the photos where the flashes didn’t fire. Besides their faces in the shade, the color on their faces isn’t as good. I think that using flash helps you get the best skin tones outside.
Go out and try this yourself.
When flying around the world, it is often easier to carry the Nikon SB900 and a Nikon SB800 than the AlienBee 1600 and the Vagabond Mini Lithium battery. So, depending on the situation, I can still take a photo with either system.
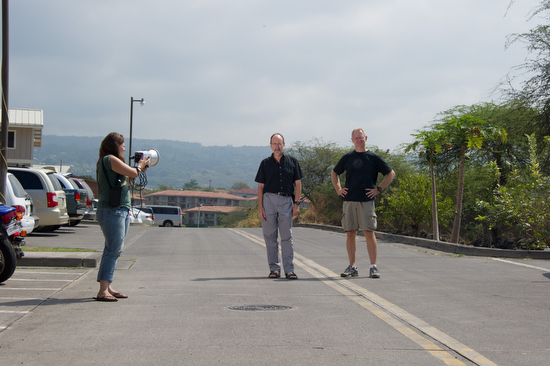
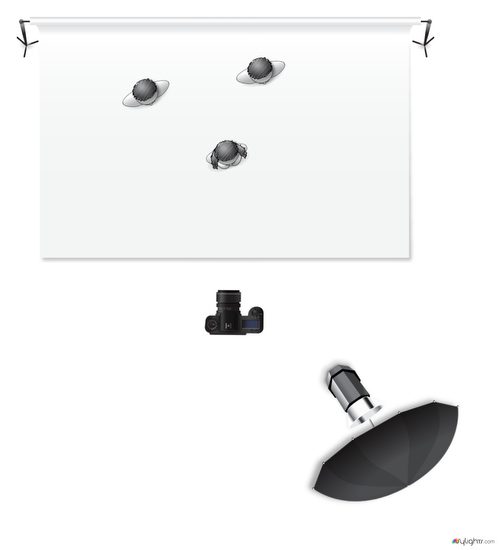
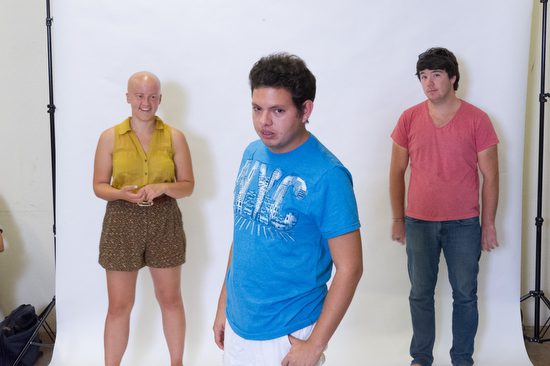
Students helped me demonstrate the issues of a problem with one light close to the group. The person closest is brighter than the others.
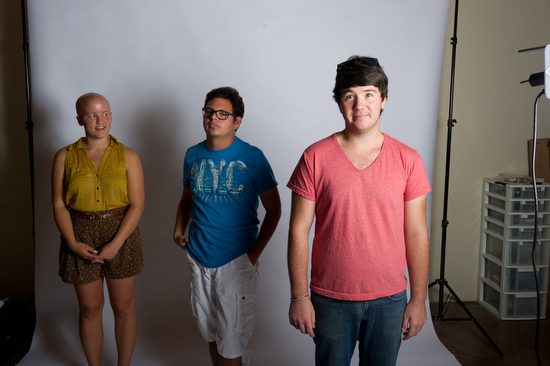
Here, all I have done is repositioned everyone, but the lady on the far left is still darker than the other two in the photo.
This is the lighting setup for the two photos above.
After seeing the photos above, one of the first things people think they need to do is add another light. No question this would help solve our lighting problem.
Now let’s be realistic here. Most photographers starting will have just one light and cannot justify another until they begin earning income. How do you solve the problem in just one morning?
Inverse-Square Law
We need to first start with understanding the Inverse-Square Law of Light.
In physics, an inverse-square law is any physical law stating that a specified physical quantity or strength is inversely proportional to the square of the distance from the source of that physical quantity. (Wikipedia)
In photography, an object twice the distance from a point source of light will receive a quarter of the illumination.
How this is most often used in photography is to determine your exposure. If you want to keep the same f/stop when you move a light twice the distance from the subject, you must increase the power four times. Inversely, if you move the lamp twice as close, you will need to power down the light to 1/4 the power to keep the same f/stop.
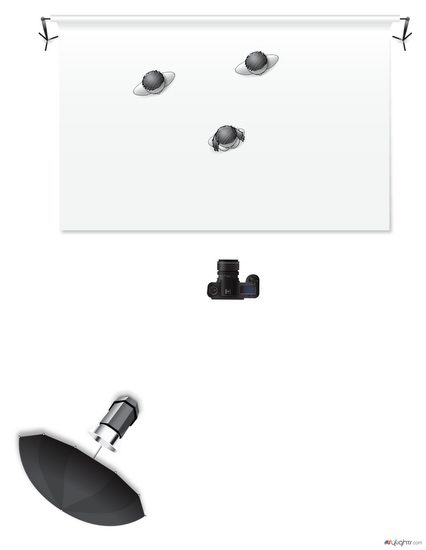
Using the Inverse-Square Law of light for a group photo
The further you move the light from a group, the less the light falling on the subjects’ faces will differ. The reason is that the distance of each subject to the light source, as compared to others in the group, will be so small a difference that they will appear to be more evenly lighted.
The only thing that changes from the first diagram to this one is that the light source is moved farther from the group and to the left.
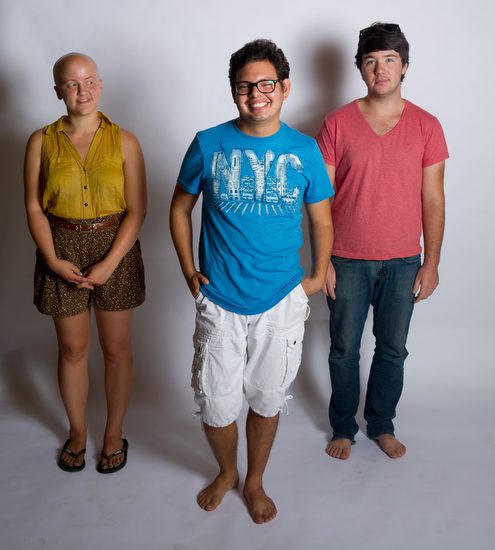
As shown in the lighting diagram, I have moved the light source further from the group. I suggest moving the light as far away from the group as possible to get the most even light.
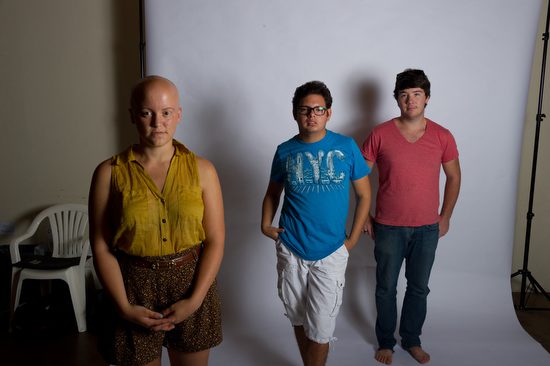
You can now see that the light is more even on everyone in the photo. One person said it is light, creating a depth-of-field effect with the flash.
While this would have solved the lighting problem by keeping the lighting the same as in the first photo, it would limit your creativity when posing with a single light. This is why moving the light back gives you more posing options and more light in a group photo.
Technical Changes
ISO: You may need to use a higher ISO to keep your flash effective. You may change from ISO 100 to ISO 3200. Remember that, since you are using a flash, the noise is different and can actually seem to disappear. (link to earlier blog on this)
Aperture: For group photos, use f/8 or higher to ensure everyone is in focus. If you use f/2, for example, your group photo above would look more like a solo act with backup singers than a musical group.
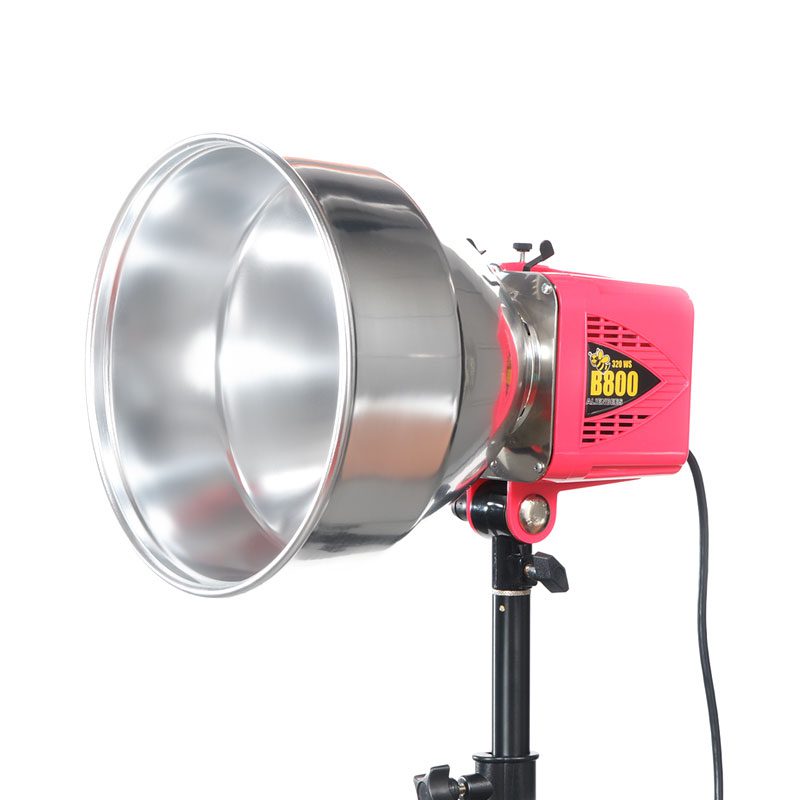
Studio Strobe vs Hot Shoe Flash: This is when it makes more sense to own a studio flash than a hot shoe flash. You can get more power, and the recycling time is much quicker. (Earlier Blog Post comparing hot shoe flash and studio light)
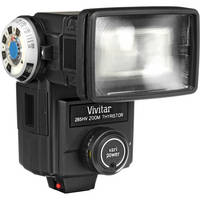
You can buy hot shoe flashes for under $90. These hot shoe flashes are not TTL, but you can use them in manual mode just as you would a studio strobe. They are just less powerful and take a while to recycle.
This is the Vivitar 285, which you get at B&H Photo for $87
Practice making a group photo and evenly lighting everyone with just one flash. Understanding and mastering this skill will help you when you have limited equipment and still need a professional group photo.
Students go from not knowing how to turn on the strobes in one week to doing incredible work. My job is to take the fear out of trying new things and teach them some basics upon which they can build.
Take a look at these shows showing you some of the student’s work through the years. I think you will be impressed as I was with their first time shooting with studio strobes.
Here are the students’ work from 2006
In the studioMixing the strobes with available light
These photos are from the students’ work in 2007.
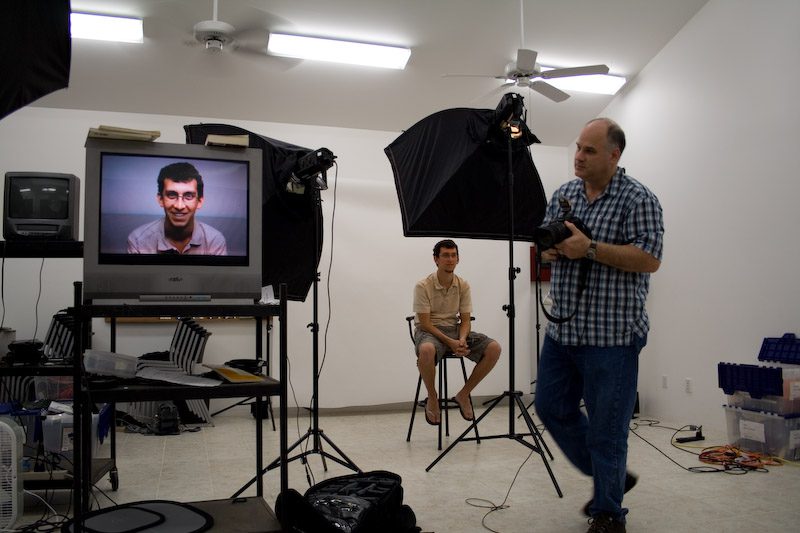
We shoot and let everyone see each other work on monitors, this way; we are learning not just by doing but observing as well.
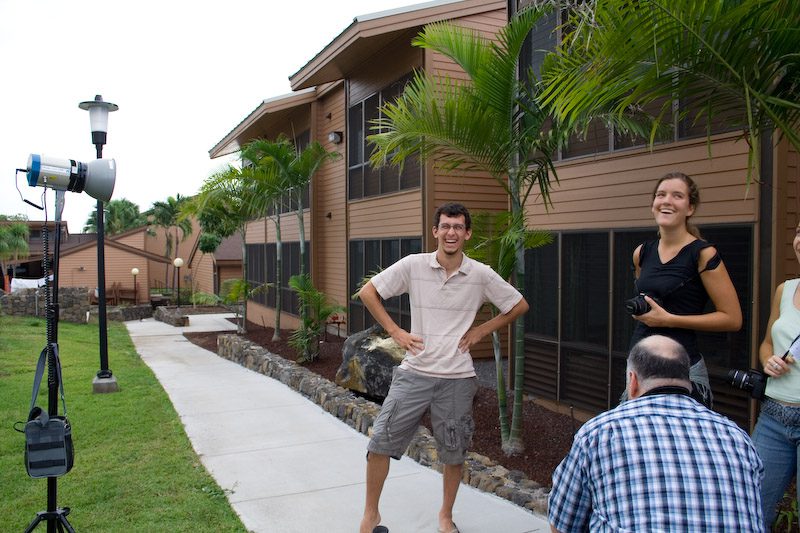
The school has a variety of lights for the students to practice within the class. Here we have the JTL battery pack system letting you shoot outside with studio lights and radio remotes.
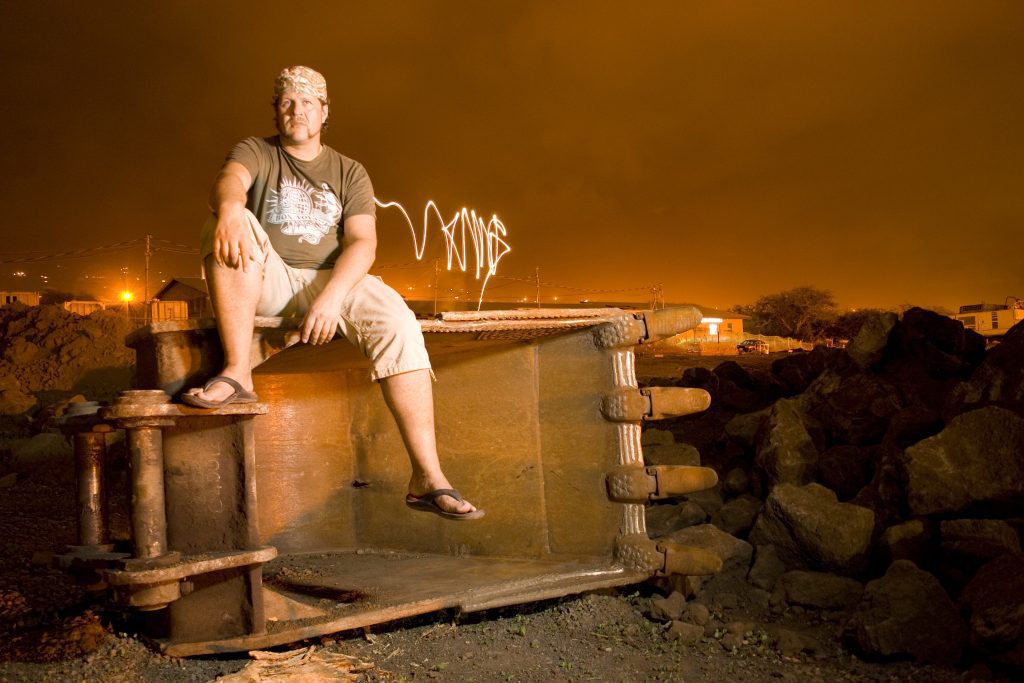
Students learn they can shoot at dusk and night with the strobes. Next, the students mixed strobes with available light and added a flashlight to write the word “Viking” beside the subject, his nickname.
Cookie Consent
We use cookies to improve your experience on our site. By using our site, you consent to cookies.


