

|
Getting your Trinity Audio player ready...
|
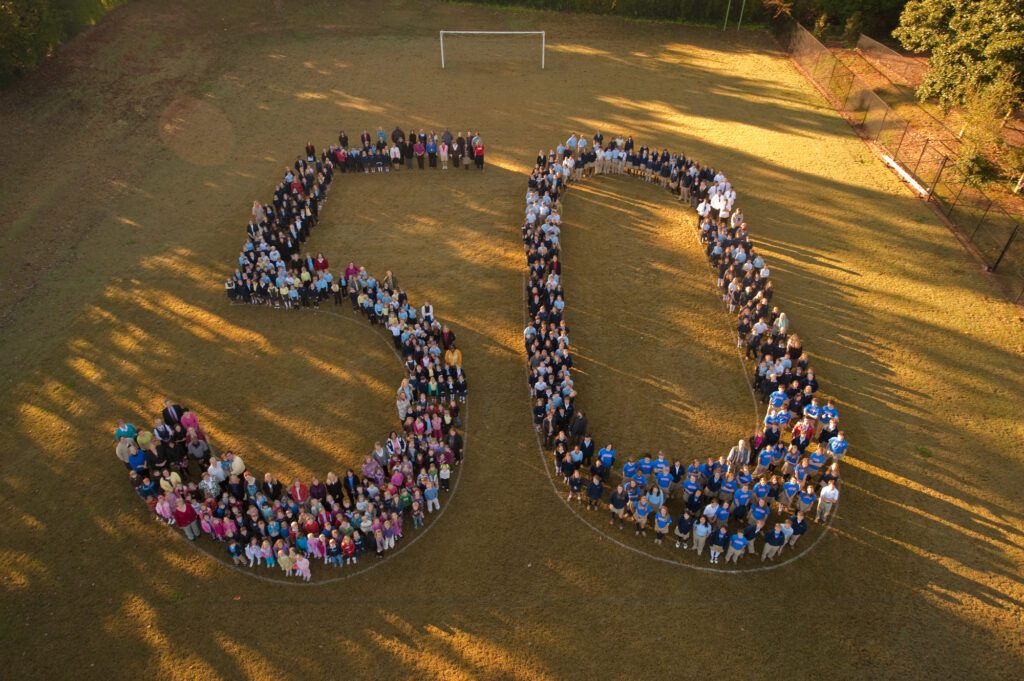
[NIKON Z 9, 14-24mm f/2.8G, Mode = Manual, ISO 400, 1/125, ƒ/8, (35mm = 16)]
While setting up for this photo, my photo assistant for the day asked me what is a good aperture to do group photos. The assistant had left another profession in the last couple of years and was still learning the ins and outs of photography.

Here is the light setup for most all my group photos.
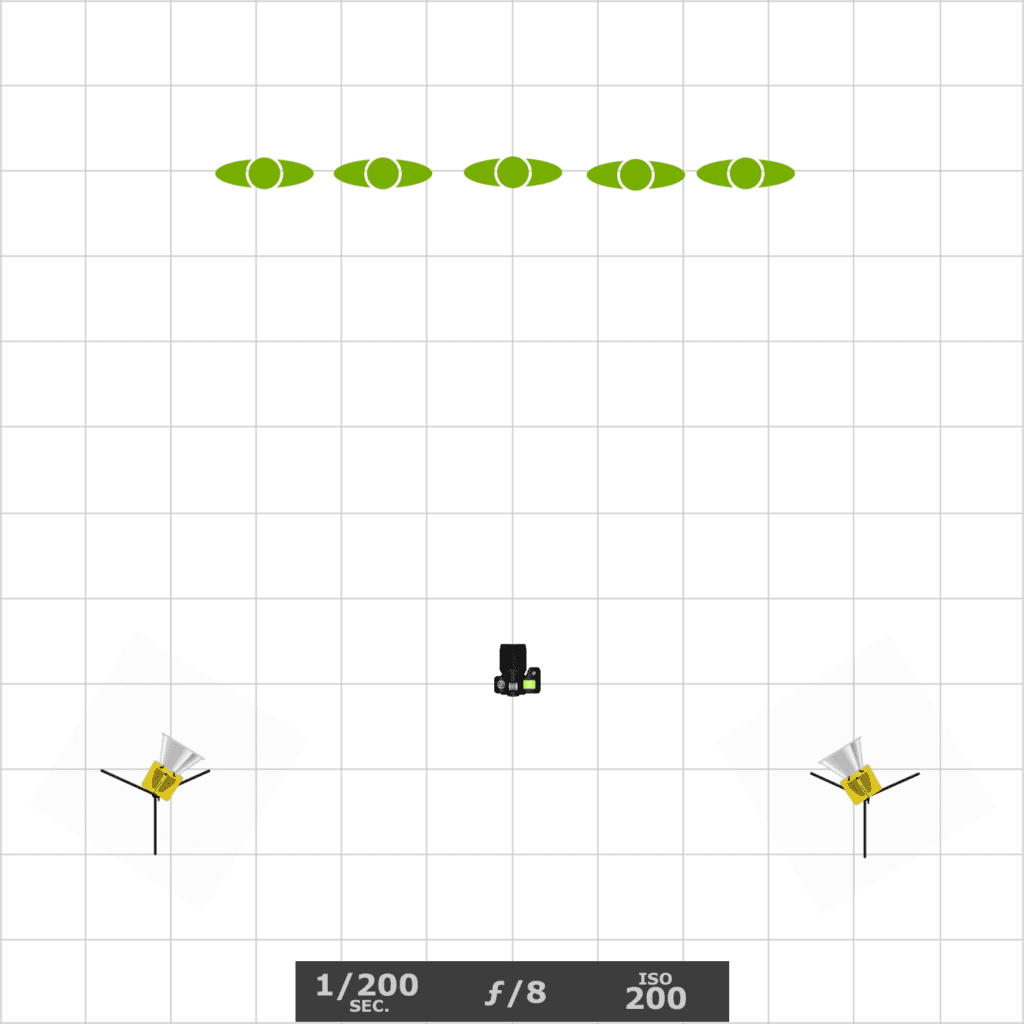
Sometimes when doing a large group, I often have a few smaller groups to do, like in this large group. I kept the lights the same and just posed the people in the same space. We removed the risers.

There are a couple of things that affect depth of field.
- The ƒ-stop/aperture – As you already know, the lower the number, the less depth-of-field you have.
- Distance to the subject – The closer you get to a subject, the shallower the depth of field when the ƒ-stop stays the same. In macro photography, for example, when you get as close as a 1:1 ratio, you often have to be at a ƒ -stop at a minimum of ƒ /11 to appear in focus. When I do macro photography, the aperture is often at ƒ /45 and still seems like a shallow depth-of-field.
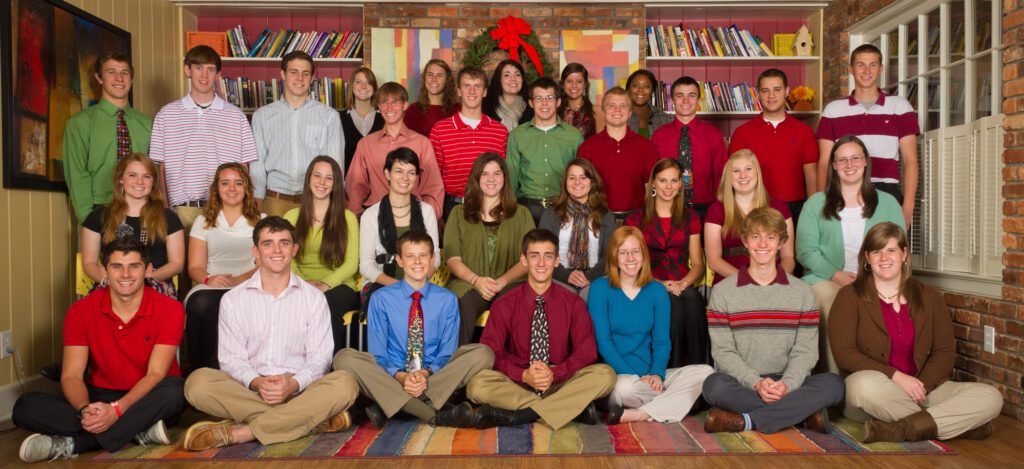
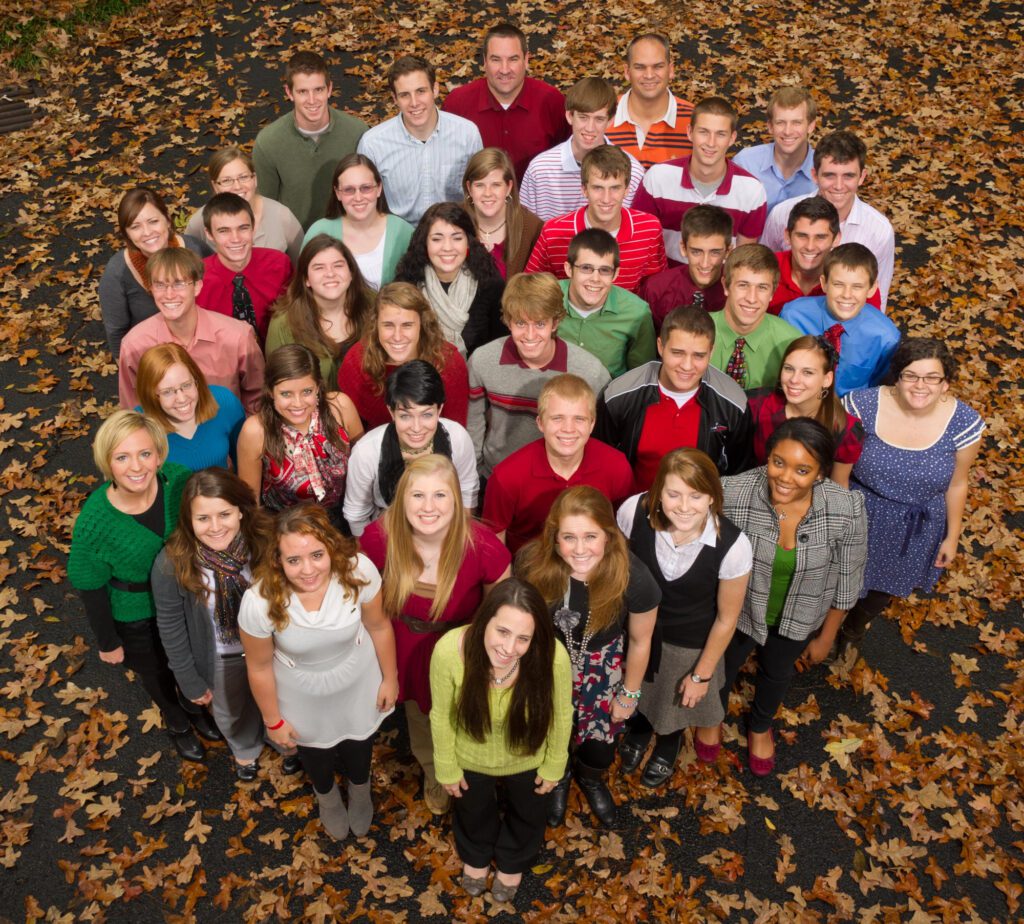
Compare these traditional rows of people to shooting down on everyone looking below.
In the first photo, the person on the front row is a few feet from the person on the back row, so I must adjust the aperture to be sure all are in focus.
In the second photo, the distance of each person’s face to the camera is similar. Therefore, the aperture can be a shallower depth of field as compared to the first one.
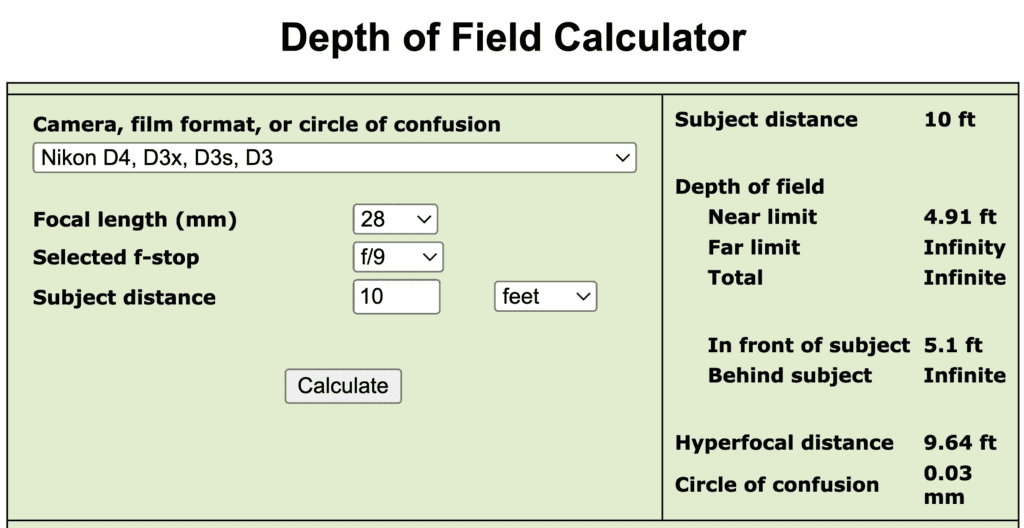
When you set your aperture and focus, the depth of field in front and behind the subject is called the hyperfocal distance. The link above will let you put your camera, lens, aperture, and distance to your focus point to get the depth of field.
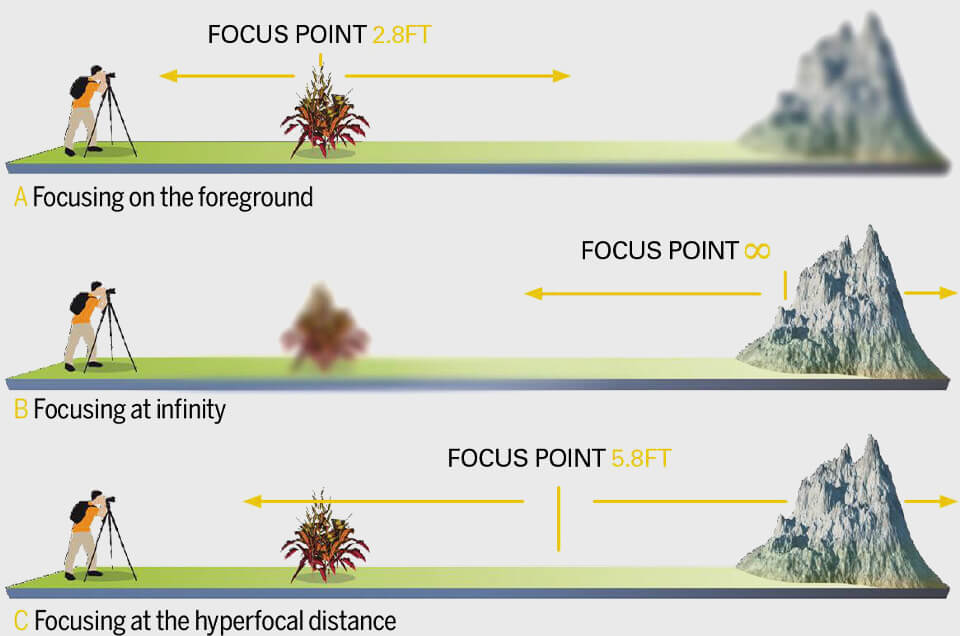
If you are focusing on the person closest to you, then you will always need a much higher aperture to get everyone in focus. The key is to focus about a 1/3 of the distance from the front of the group to the back. Look at the graphic from Broadway Camera above to show you how this works.

I focused a little on the group. See the photo below with the red box around the lady I was focusing on to get everyone in focus.

Now here is the focal point for the very top photo.

Study the graphic above from Broadway Camera. You will soon see how I use this technique to get the most depth of field with the lowest aperture.
Why not just shoot ƒ16 or ƒ/22?
If you use the smallest aperture on your lens for group photos, you will have everyone most likely in focus.
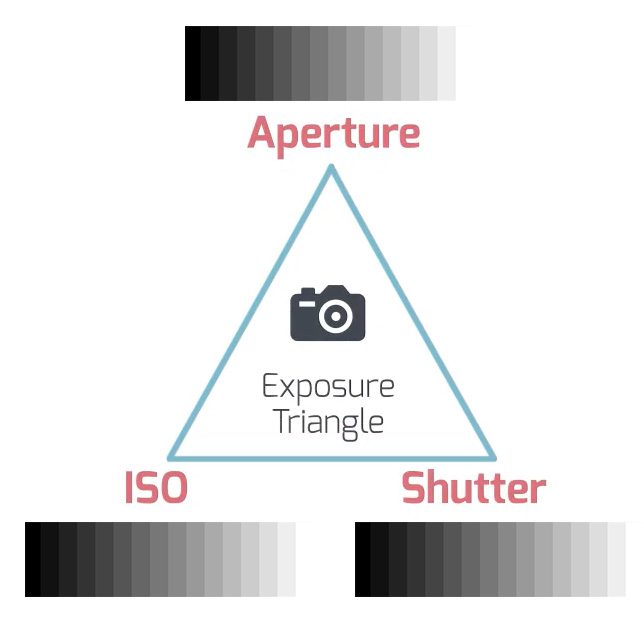
Every adjustment on the camera affects something in the final photo. Remember the Exposure Triangle to help you know why you don’t want to shoot at the smallest aperture, if possible.
There is one more adjustment to consider if you are using flash. The power of the flash will also impact exposure.
If you use ƒ/22 vs. ƒ/8, then you will need to adjust for one if not all of these:
- More flash power
- Higher ISO
- Slower Shutter Speed
The higher ISO will introduce noise without a flash, and a slower shutter speed will raise the possibility of blur due to camera movement or subject moving.

I have repeatedly found that ƒ/8 works most of the time. However, if you have a smaller group but more rows, I might change the aperture to ƒ/11.
Couple Tips
- Use Flash – You get rid of raccoon eyes due to shadows from lights overhead inside and the sun above outside.
- Start with 400 ISO inside – With today’s cameras, there is very little difference in photos shot at ISO 100 or 400 as in the past. However, just shooting at ISO 400 makes your flashes are now 2-stops brighter. In addition, 400 ISO helps you shoot at ƒ/8, and recycle time is often better.
- ƒ/8 – Start with this aperture. Increase if needed to high aperture.
- Test with Model – I usually have a photo assistant to stand in for test shots. If you don’t have an assistant, just ask someone from the group to help. Check for white balance, exposure, and most of all, set your focus point and have them stand close and the in the back to see if the depth of field is suitable for the photo.
- Use Computer for Viewing – When possible, put the test photos on a computer screen. It is much bigger than the screen on the camera, and you will see details that are hard to see on the back of a camera.