
Here is a video walking you through all the steps, and below are some screenshots.
Open Lightroom
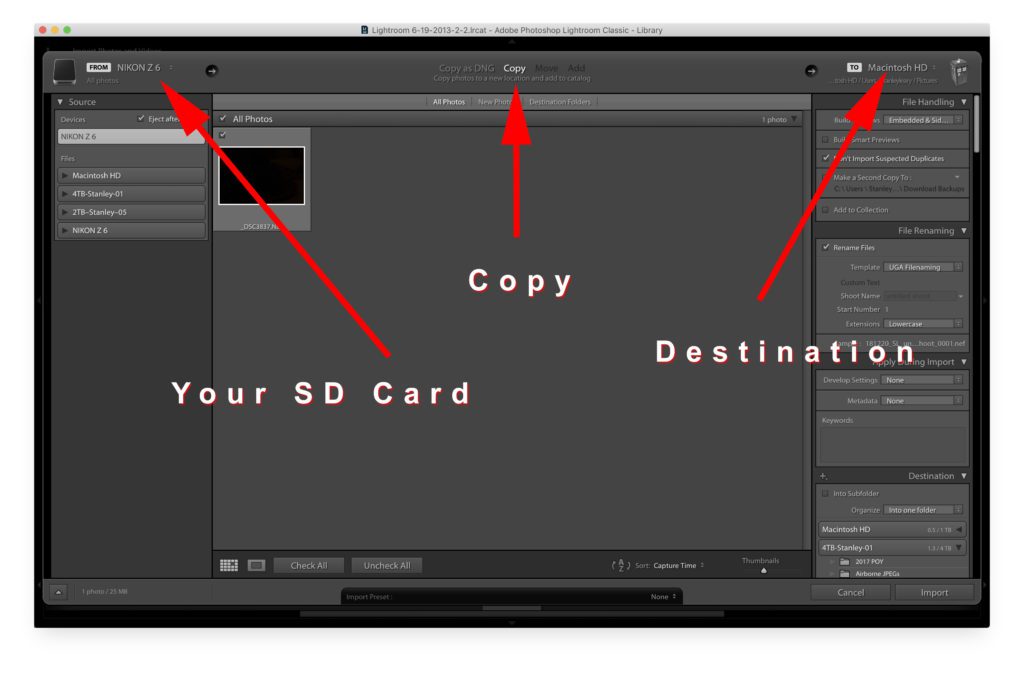
While it is open, insert your camera’s SD Memory Card into the computer. When you do that, this screen will pop up [above].
Be sure you select your card. If you do, the photos will pop up in the middle. Be sure to select all.
Click on Copy in the middle [see red arrow]
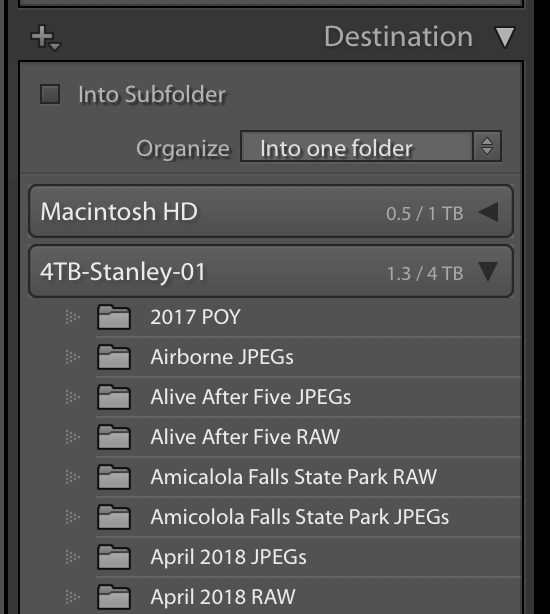
Then, on the far right, pick your hard drive. I suggest using an external hard drive and creating a separate folder for each assignment.
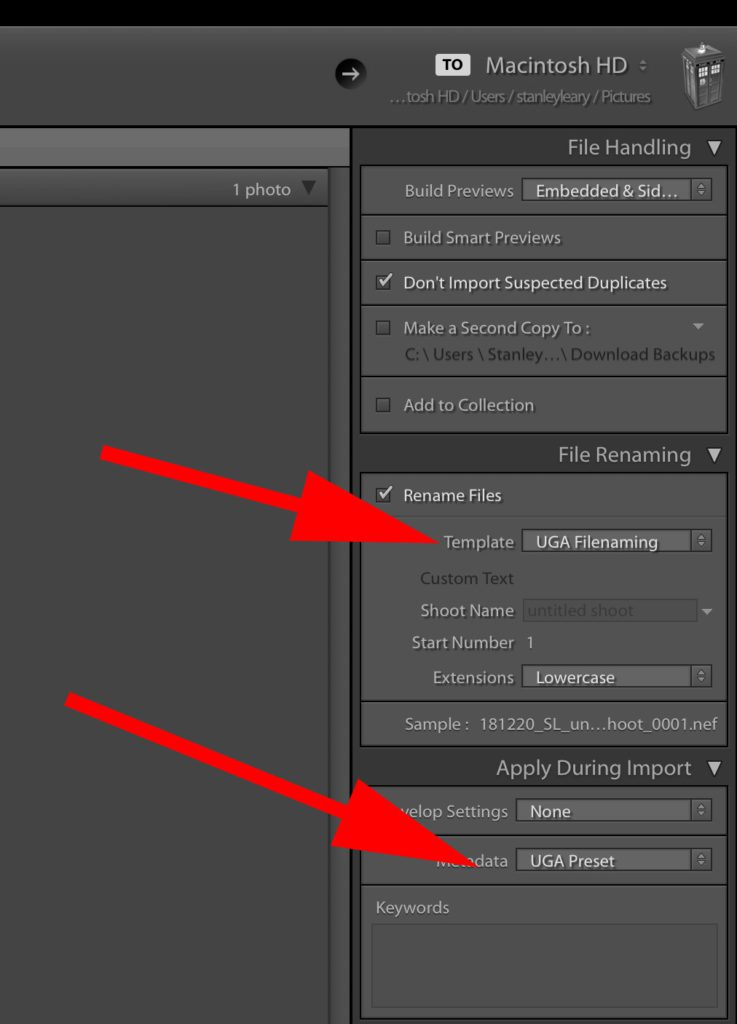
On the far right, be sure the File Renaming is expanded. Then check the renamed files, select the Template, and choose edit from the pull-down menu. This will pop up.
You need to fill out these two fields as a minimum for all your assignments: 1) Caption & 2) copyright. Fill in the Copyright Notice with the copyright symbol (Option-G), the year, your name, and your contact information.
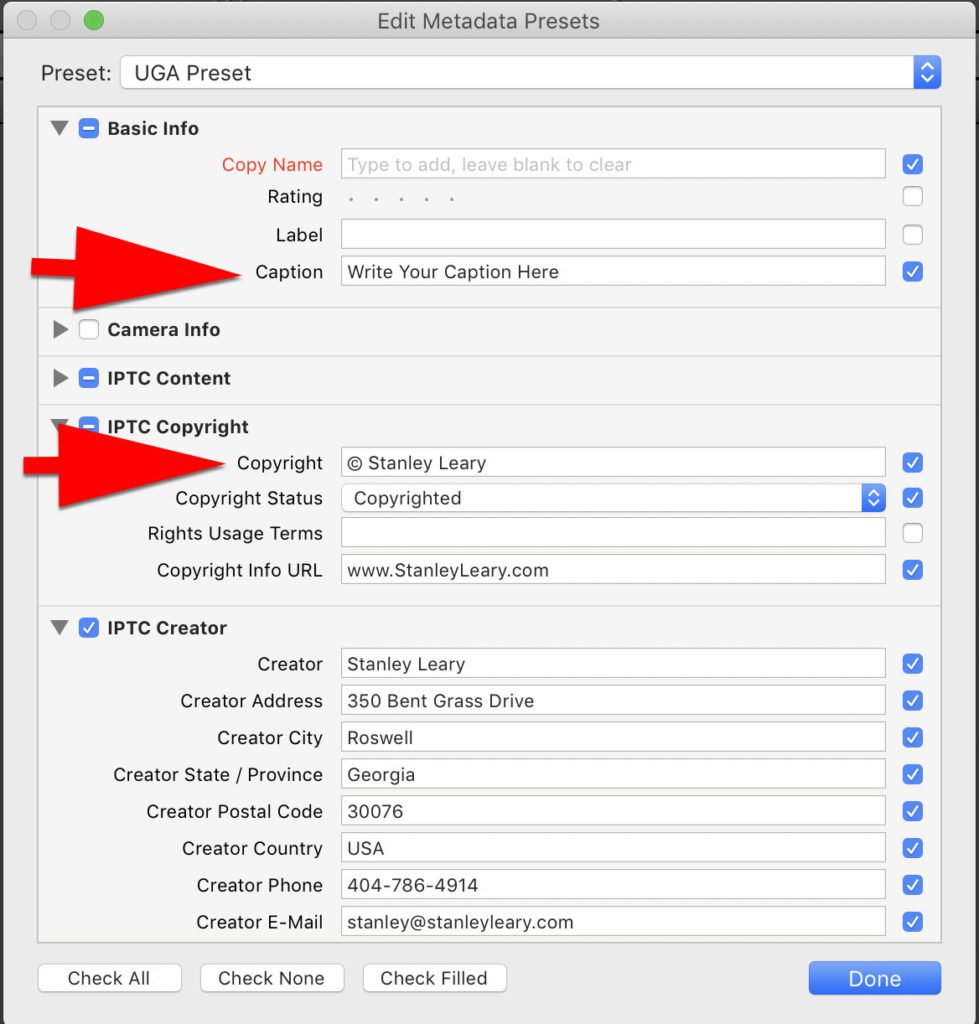
Fill in the fields like I have done here.
After you click Done, select Apply during import [see above], then select metadata and choose Edit from the drop-down menu. This will pop up.
The box will be empty. Go to Additional, open the date drop-down menu, select “Date (YYMMDD)”, then insert. The _ which will follow with your initials with another _ with the Assignment Name followed with _ and immediately add a sequence with four digits.
Be sure you have selected and created the destination folder. When that is done, just hit import.
I will teach more editing later.
Pick the photos you want to use. When you export, click on export in the Library module.
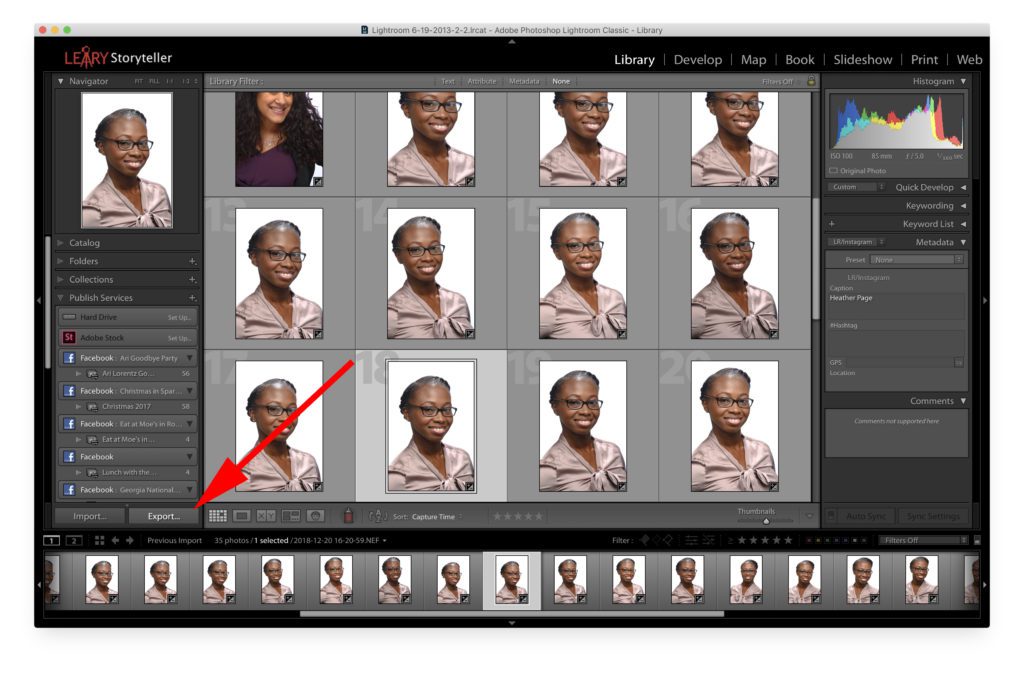
This will pop up
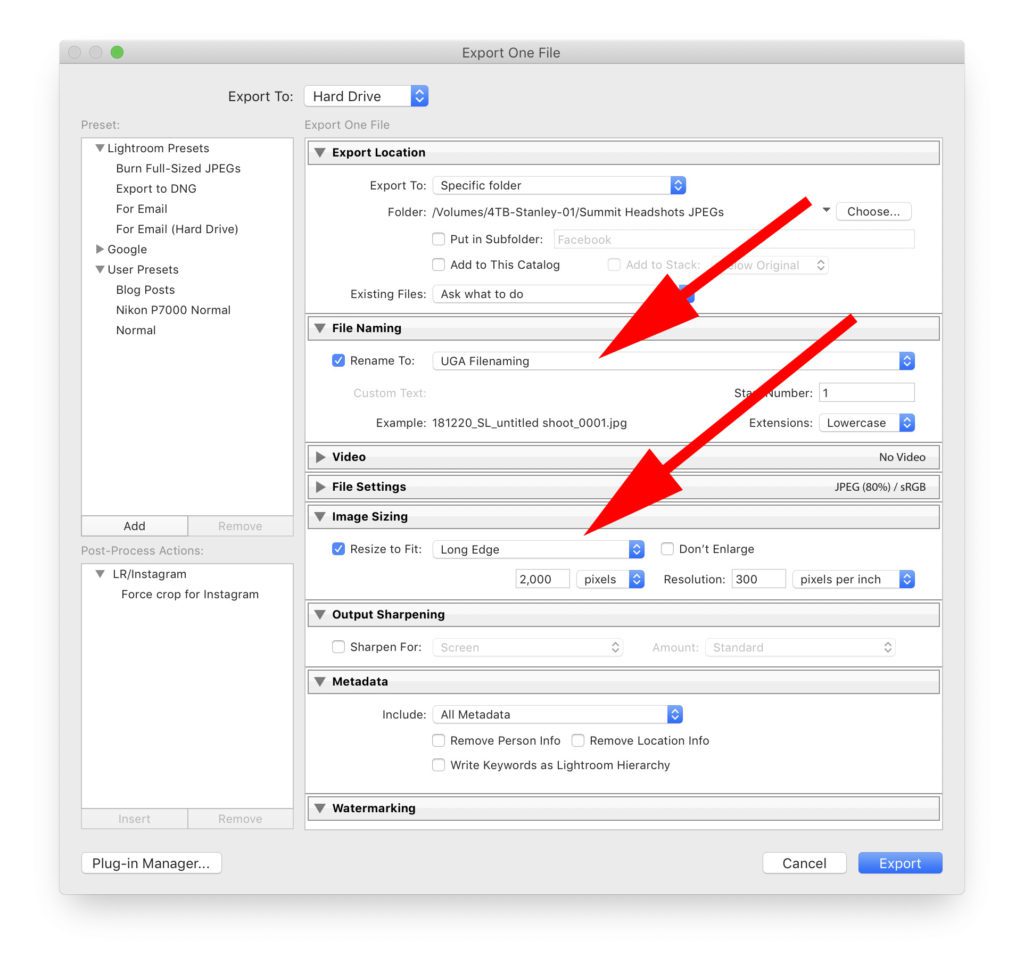
If you choose File Naming, you can select your import settings and modify them here.
Be sure the image size is set to Long Edge and 2000 pixels. This is the size you will turn in.
Batch Copying
1. Insert your memory card into your computer.
2. Launch Adobe Bridge and click on the Computer icon near the upper left corner.
3. Double-click on your memory card icon. You may see two folders; ignore the “MISC” folder and double-click on the other one. Depending on how many images you have made, you may see more than one numbered folder. Double–click the lowest-numbered one, and you should see your images.
4. Select all of them using Command-A.
5. Go to File -> Copy To -> Select Folder, then create a New Folder to put your images into, and then click Open to start the copying process.
6. If you have more than one numbered folder, use the breadcrumbs near the upper left to navigate back and then select all the other images and copy them into the same folder.
7. Exit out of Bridge and eject your card. This is critical – if you do not eject and then physically remove your card, your chances of screwing up your card and images are massive. Do not take a shortcut, do not try to be smarter than us here – EJECT and PHYSICALLY REMOVE YOUR CARD NOW.
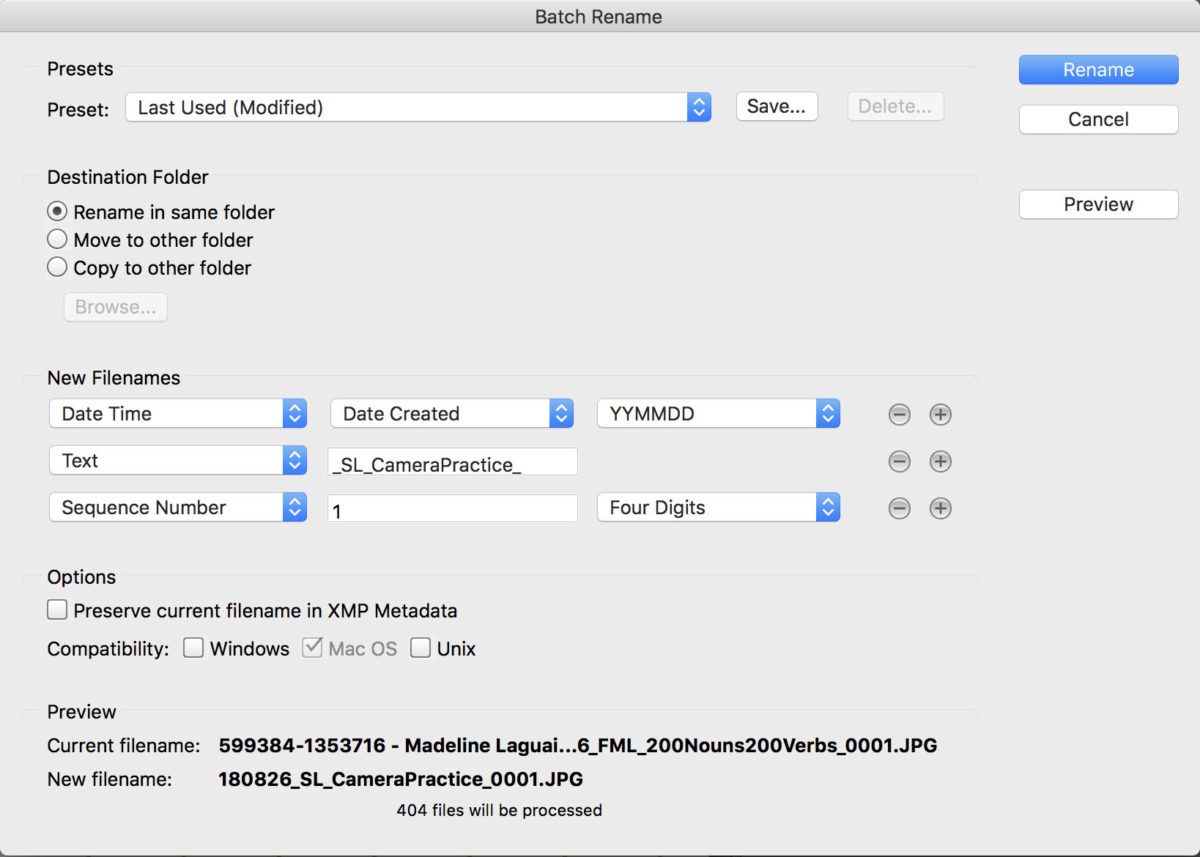
Batch Renaming
1. Go back into Bridge and navigate to your folder of copied images.
2. Select all of them (Command-A).
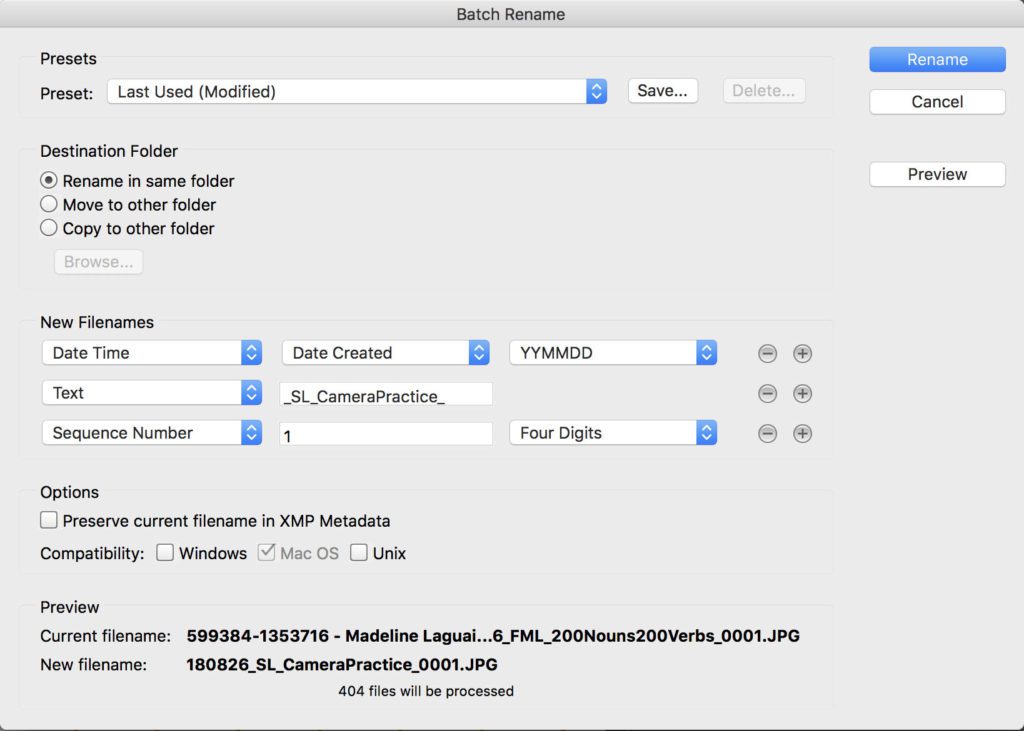
3. Go to Tools -> Batch Rename.
4. Destination Folder should be renamed in the Same Folder.
5. New Filenames, first line should be set to Date Time, Date Created, and YYMMDD.
6. New Filenames, second line should be set to Text and then fill in “_YOURINITIALS_ASSIGNMENTNAME_” using your actual initials and the assignment name (note the underscores).
7. New Filenames, third line set to Sequence Numbers, set start to 1, and Four Digits.
8. Check the Preview at the bottom to make sure it looks correct.
9. Click Rename.
Batch Captioning
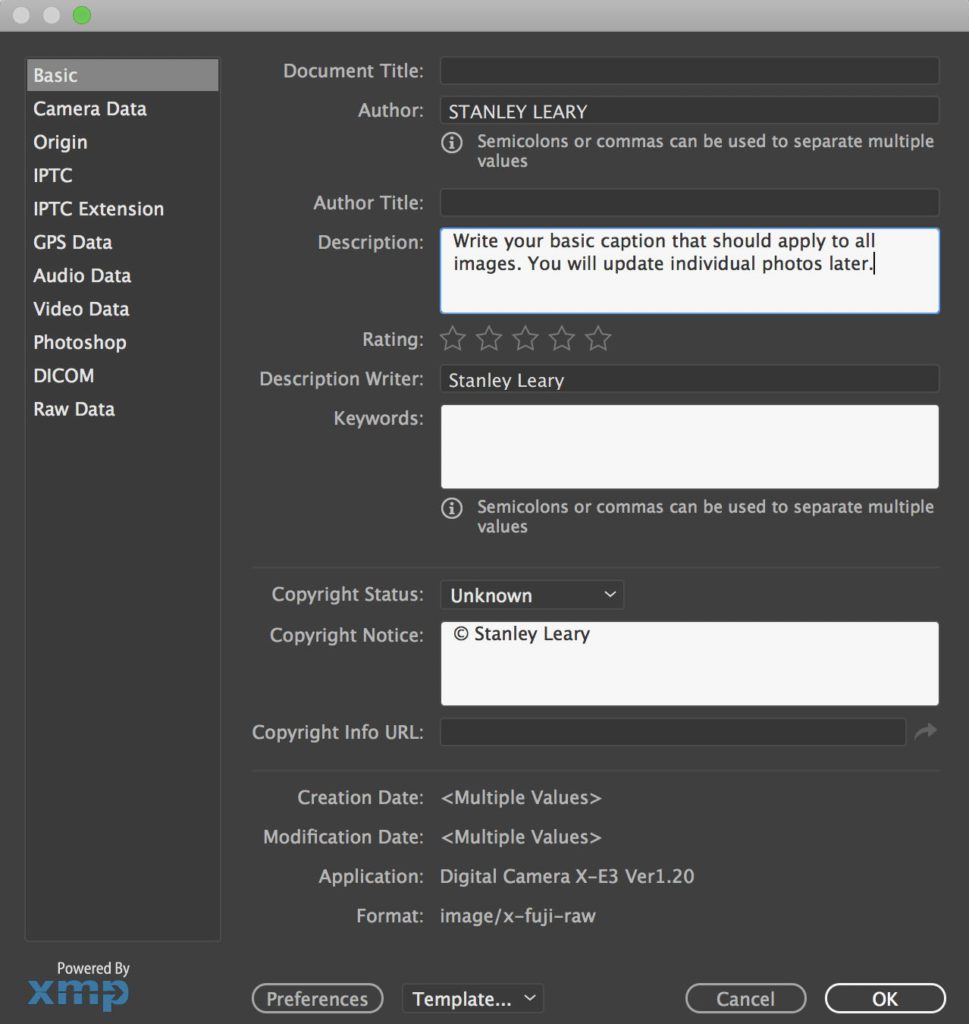
1. Select all of your images (Command-A).
2. Go to File -> File Info and make sure you are on the Description tab.
3. Write your generic caption in the Description field. We recommend including any notes, contact info, etc., in this field – you will be editing this down to a final caption later on.
4. Fill in the Copyright Notice with the copyright symbol (Option-G), the year, your name and your contact information.
5. Click OK, and it will apply that information to every image.