
Batch Resizing
- Open your folder in Adobe Bridge and select all the images (Command-A).
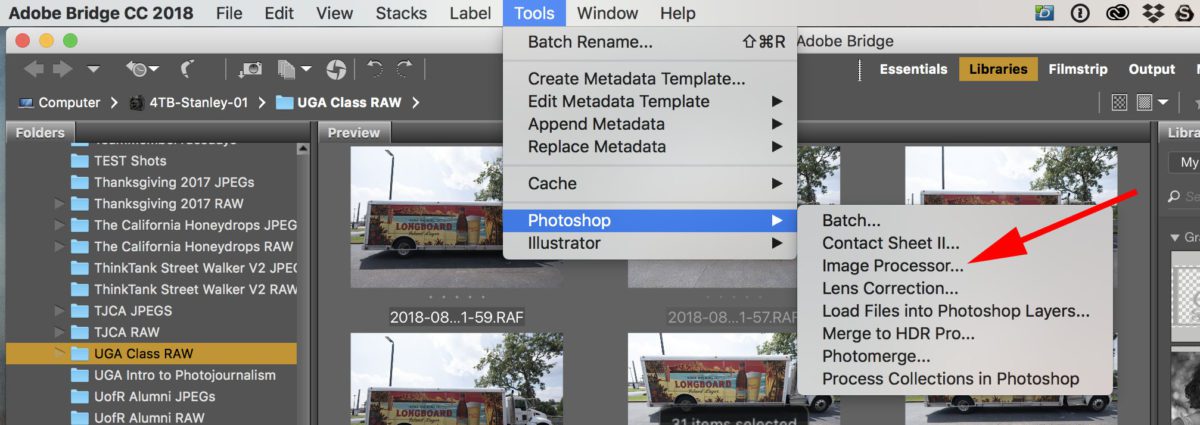
- Go to Tools -> Photoshop -> Image Processor. (This will launch Adobe Photoshop, so that it will take a few moments.) If it is missing, uninstall Photoshop and reinstall it. Restart Bridge, and you should be fine.
- In the Image Processor window:
- Leave the first section unchecked.
- In the second section, check Select Folder, then click Select Folder and create a new folder to save your resized images. (Tip: Use “YYMMDD_initials_slug_sm” to denote the images as being smaller.)
- Under File Type, check Save as JPEG and Resize to Fit. Set the Quality to 10 and the width and height to 2000 pixels.
- Under Preferences, leave Run Action unchecked, but check Include ICC Profile.
- Click Run and wait while all your images are resized. Depending on how powerful your computer is, this could take a while – you’re leaning on the processor to do a lot of work. I recommend against running other applications (especially Chrome); let Adobe have as much power as your machine can handle.

Compressing for Upload to eLC
- Once your images are done, they will be in a subfolder titled “JPEG.” Move them out of that folder; one with your name “YOUR NAME” is an example.
- Right-click (or Control-click) on the main folder and select Compress. This will take a few moments, but it will give you a single file with a “.zip” extension that you can upload to eLC.
- You can right-click (or Control-click) on that file and select Get Info to see the size – for eLC, it needs to be less than 1 GB.