

Nikon has two WiFi solutions for the Nikon D4: one costs $1,000 and the other $877. I have not had the best of luck with Nikon’s WiFi solutions in the past, especially with the Nikon D2Xs. I bought the Nikon system for $600, which dropped out so often that it was almost impossible to sync.
While at PhotoShop World in Atlanta this week, I ran into my friend Gary S Chapman. He asked if I had seen the CamRanger booth. I had not, and after he walked me over there, I decided to buy one after their demonstration. Gary said he would wait for my review before buying one. So, the next gizmo we find, he goes first.

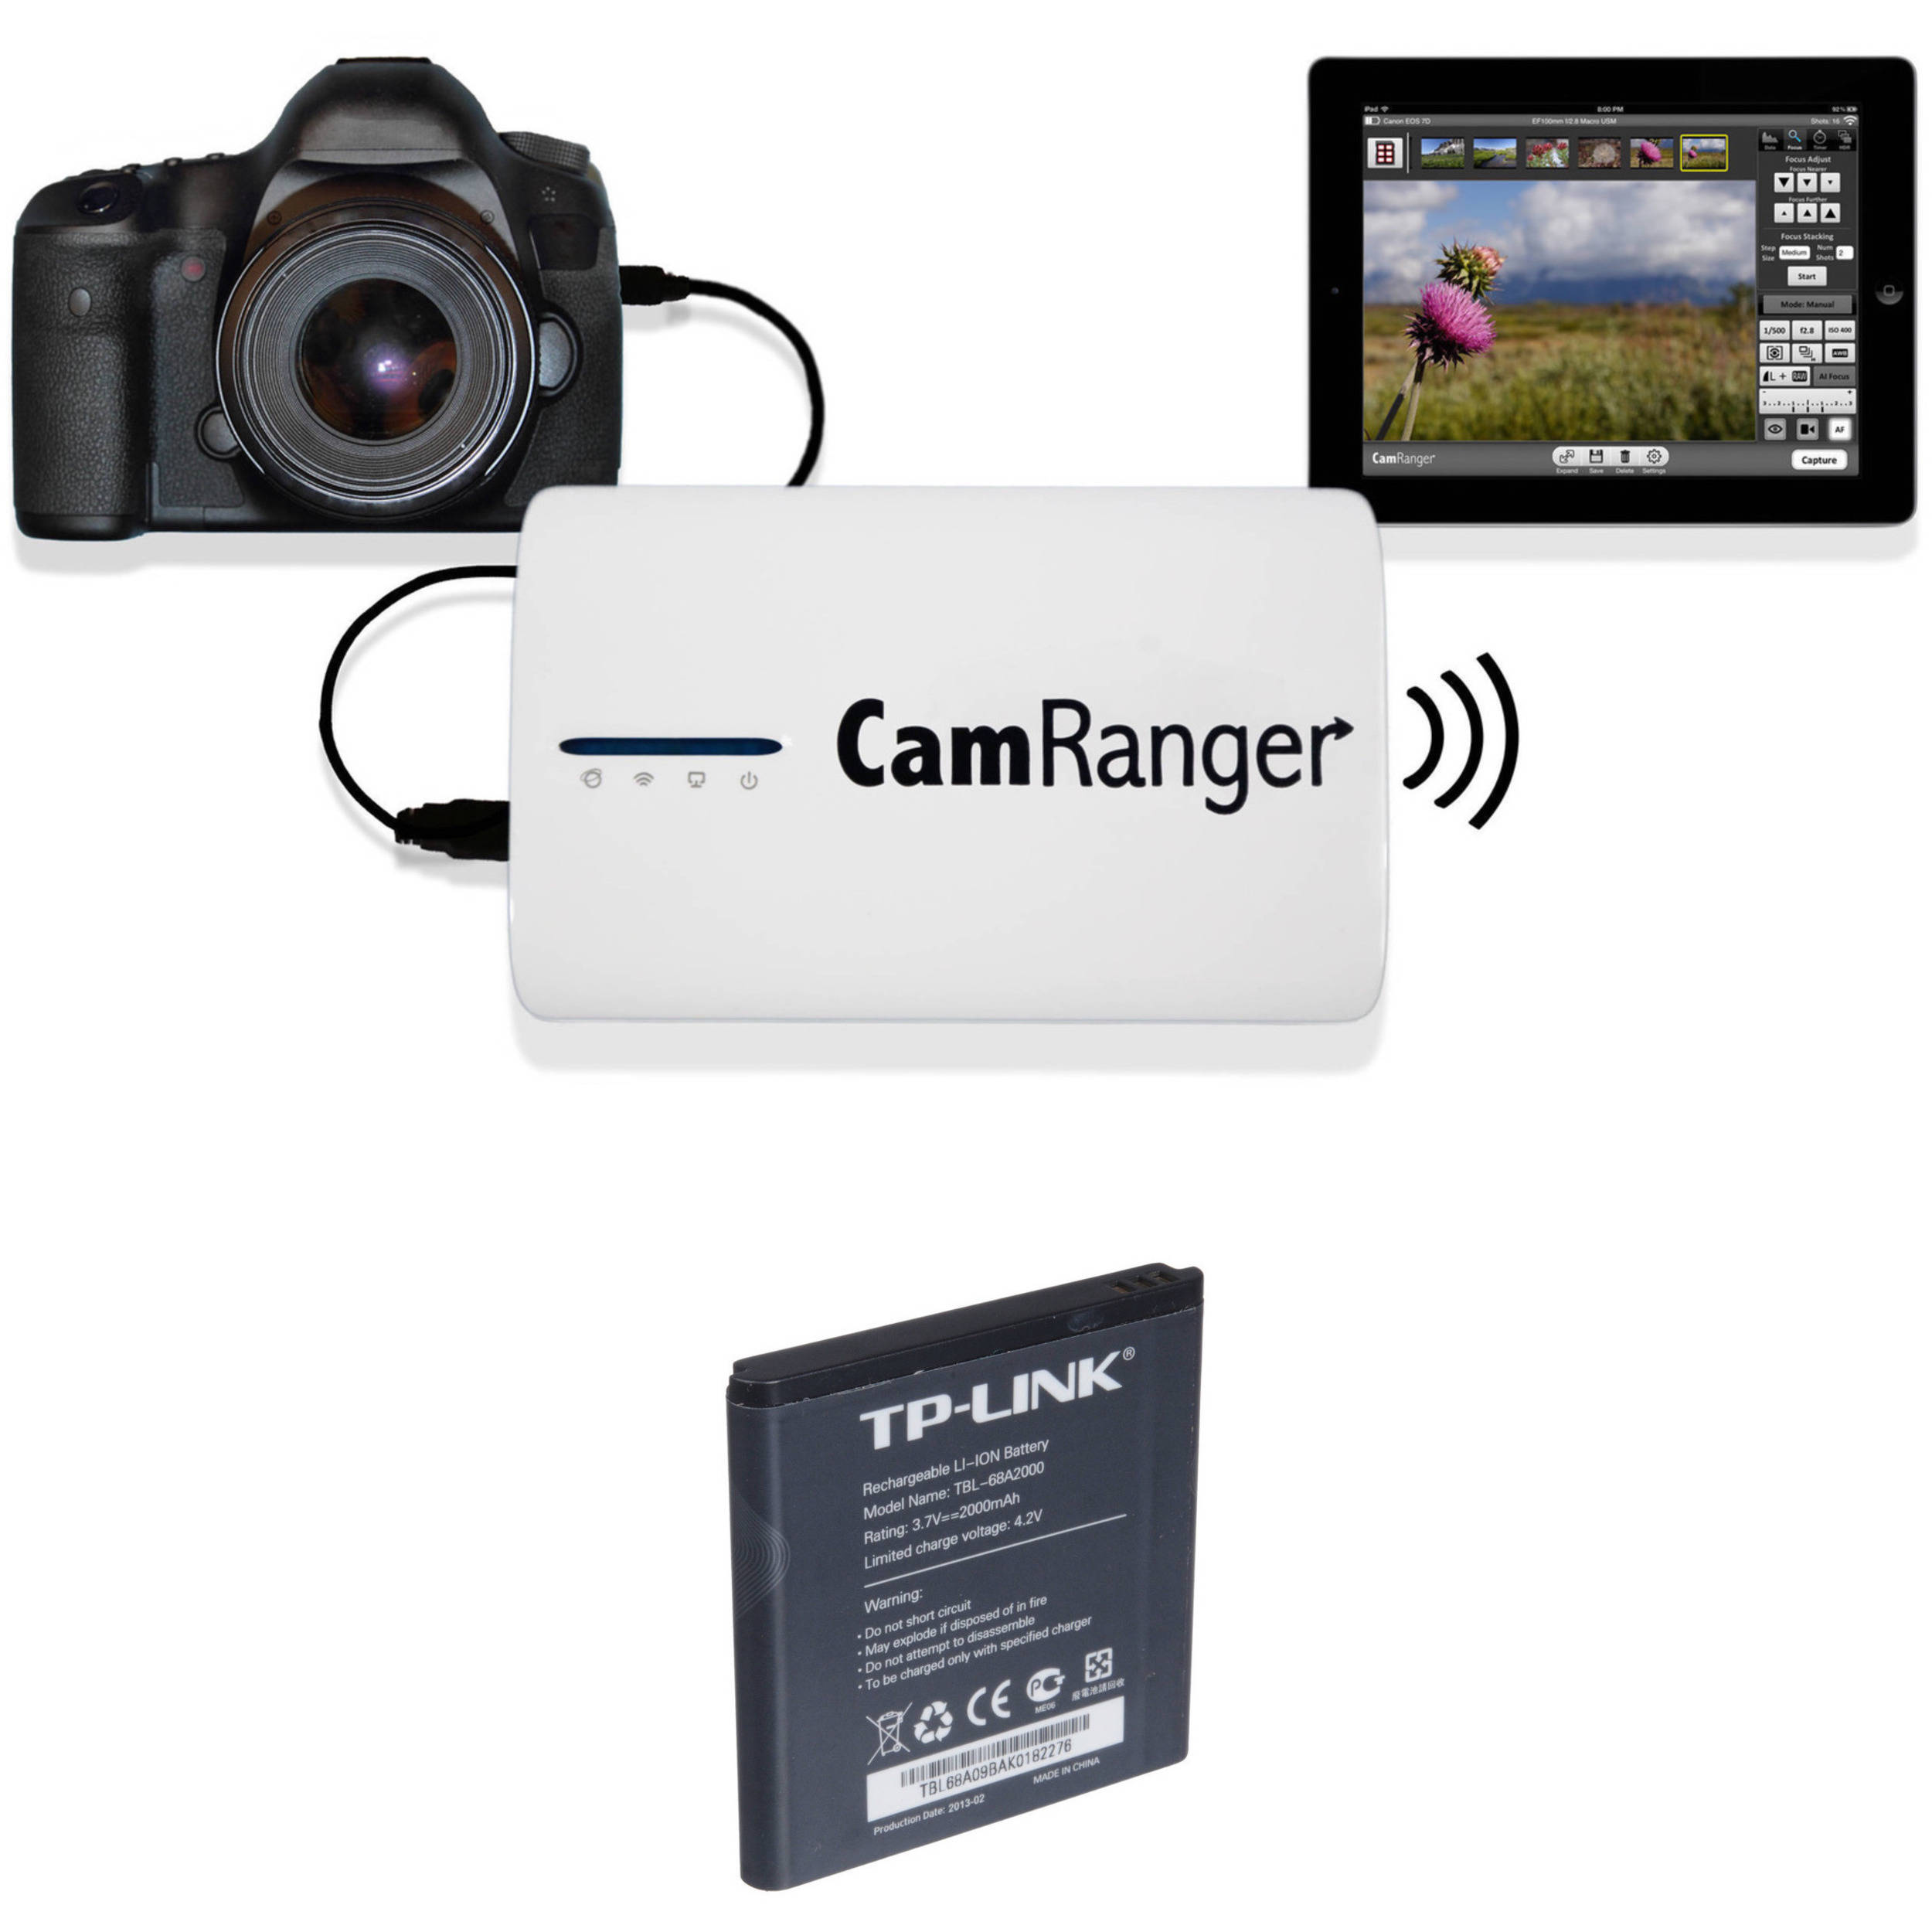
The system cost $299.98, and they had a special offer that included an extra battery and charger.
It has a USB cable to connect to your camera [pick your camera when ordering the correct cord] and a CAD5 cable for updates. It also comes with a small bag that hangs on your camera strap.
The charger looks identical, but it’s just minus the WiFi part.
CamRanger currently supports a large number of Canon and Nikon cameras. Go to this link to see the complete list and all the features for each camera. You will find your camera and what features will work with your particular model.
The CamRanger supports iOS, Android, Mac, Windows computers, and the Kindle. All the following apps are free and will work universally with the CamRanger unit! In addition, the CamRanger can be registered with multiple devices and used with one device or computer at a time.
I have an Android phone, an iPad, and a MacBook Pro that I would use with the CamRanger. They all work just fine.
My Settings
Shooting with the Nikon WiFi and using the EyeFi SD card taught me a few things that made me want to get the best performance out of the CamRanger. If EyeFi had made a card that would work in the Nikon D4, I would have never looked at the CamRanger, but they didn’t, so here I am using the CamRanger system.
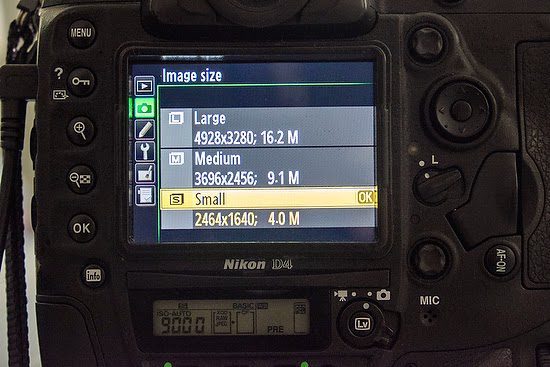
Shoot RAW+JPEG—You are sending files from one device to another. The bigger the file, the slower it will take. You could shoot just JPEGs, but I prefer speed and, therefore, would like the smallest JPEG I can use to preview on the iPad, for example. However, I now create the higher-resolution image from the RAW file.

Small JPEG: Go to the menu and select the image size under the camera icon. Selecting Small will help you get the smallest file size.
I would also use essential rather than refined. Sometimes, I want creative and art directors to use my iPad and see the images as I shoot. This way, they are not over my shoulder but can see the results.
If I am tweaking the settings, I can turn off the WiFi and turn the system on when I am ready for them to start seeing images.
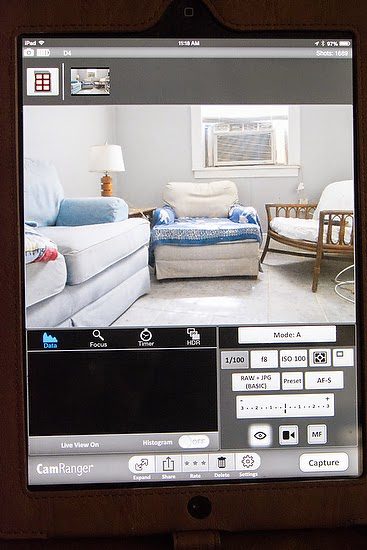
Once you set it up, it connects right away to the iPad. The setup lets you enter your device’s WiFi settings and select the CamRanger. Then, you put in your serial number as the password. Once connected, you use the CamRanger App you downloaded for free to join.
Two Main Ways I Use It—When I want someone to see the images, I shoot, and the images pop up as thumbnails and big ideas.

You can set up the controls in the App to client mode, where they see the image and can star rate it if they like. I changed the default setting to have Auto View on, so the print displays big when shooting. The thumbnails let you go back and see previous images.
If I were shooting a lot, I might turn off Auto View and let someone click on the thumbnails they want to see big without my latest image popping up while they try to see another image.
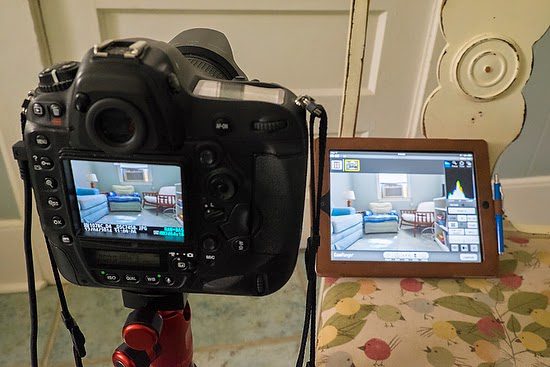
The second way I like to use the system is in Live Mode. You select Live Mode from the App and not from the camera.
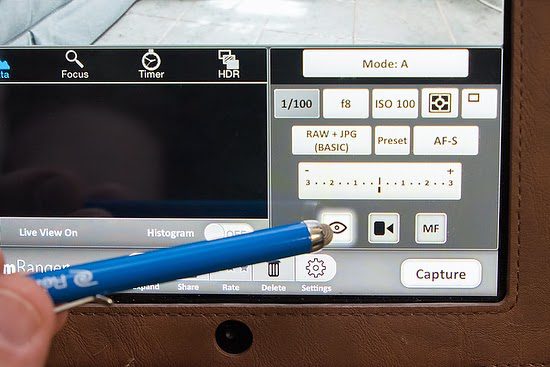
You can see the camera settings in both modes and change them unless you have Client View turned on.
I think the CamRanger from my tests performs as well, if not better than anything I have used for the WiFi connection to my camera.
Why use WiFi?
I first need to tell you how I shot tethered for years when doing portraits. The images popped up, and they were all on the computer, where the subjects could pick their pictures. Once, I had the camera on a table, and my foot caught the cable. Well, that was a $600+ repair for a shattered lens.
So I started using WiFi because I prefer radios for triggering flashes—No Cords.
When doing portraits, I control the lighting, making processing a RAW image a waste of my time. So here I can shoot the Large/Fine setting JPEG and be done with it. Yes, it takes a few seconds longer, but all the images load on the computer, and I can give the client all the photos at the end of the shoot.
Another great reason to use WiFi is when I teach. I like to show everyone what I am doing as I set up lights, for example. I can shoot with a large-screen TV or projector, and they immediately see the results and the settings on my camera—a great way to learn studio or location lighting.