Photographing the Island Breeze Luau cast on the beach of Hawaii

Reading Time: 4 minutes
Nikon D4, 14-24mm ƒ/2.8, ISO 200, ƒ/16, 1/200 with 2 Alienbees with CTO 1 for off-camera flash. These are triggered with the Pocketwizard Radio Remotes.

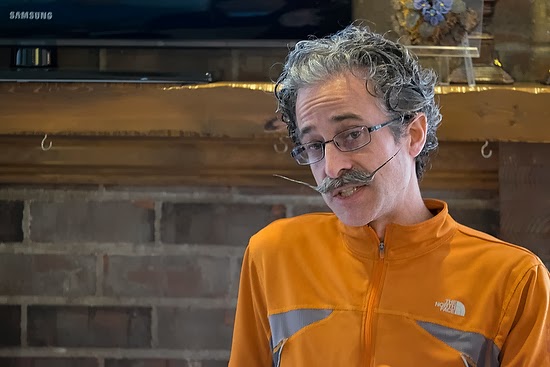
I enjoyed shooting these photos of the Island Breeze Impact Tour cast at the Old Kona Airport State Park on the Big Island of Hawaii. In this setting, I took control of the situation as compared to the night before, when I was photographing them while they were putting on a Luau.

While the stage lighting is excellent, the amount of light they use in the show is minimal.

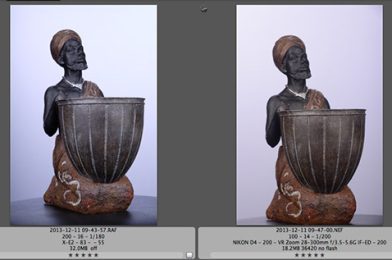
Fuji X-E2, XF 55-200mm, ISO 6400, ƒ/4.6, 1/125

The show I was shooting at ISO 6400 with ƒ/4.6 and a 1/125 setting compared to the controlled shooting on the beach with ISO 200, ƒ/16, and 1/200.

Nikon D4, 14-24mm ƒ/2.8, ISO 200, ƒ/14, 1/320

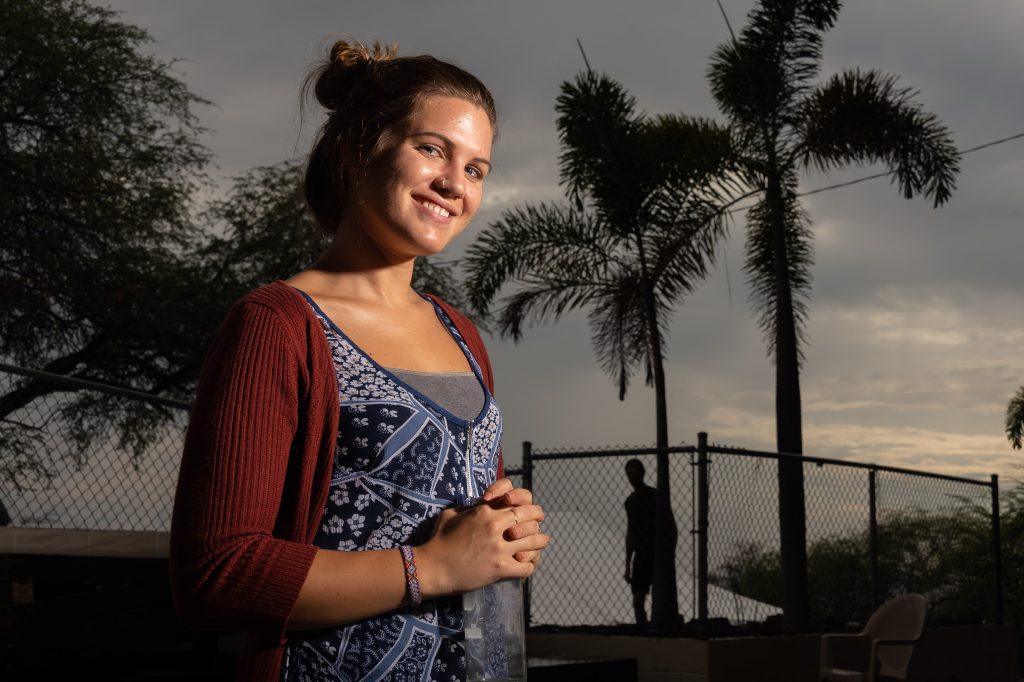
I am in Hawaii teaching lighting to YWAM School of Photography students. We went to the beach for them to see me shoot mixed light, where I added light to the scene to help make the photos better.

Nikon D4, 14-24mm ƒ/2.8, ISO 200, ƒ/14, 1/400 no flash

As you can see in the photo, there is no flash; it is more of a silhouette.

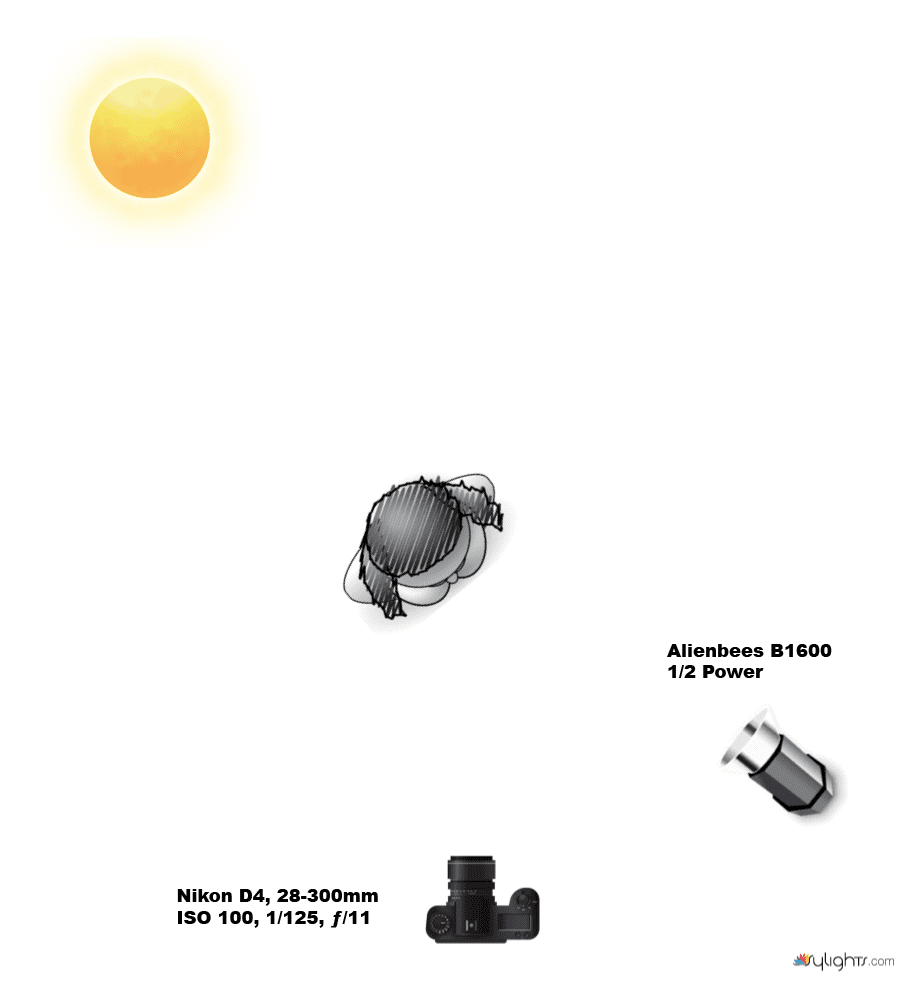
Photo by David White

In this photo, you can see it was taken by my assistant David White. First, I set this up using the Alienbees B1600 flash with CTO 1 over the strobes to warm up the subject, and then I color-corrected for the light, which made the sky even bluer.

Two Alienbees B1600 at full power on the right at 45º with CTO Gels.
Nikon D4, 14-24mm ƒ/2.8, ISO 200, ƒ/22, 1/20

Brooke Valle, a former student of mine, is part of Island Breeze and is spinning the POI. I worked with her to have her friends and family in the cast come and help us with the photo shoot.

Brooke is spinning the “POI” [it is the Maori word for “ball” on a cord].

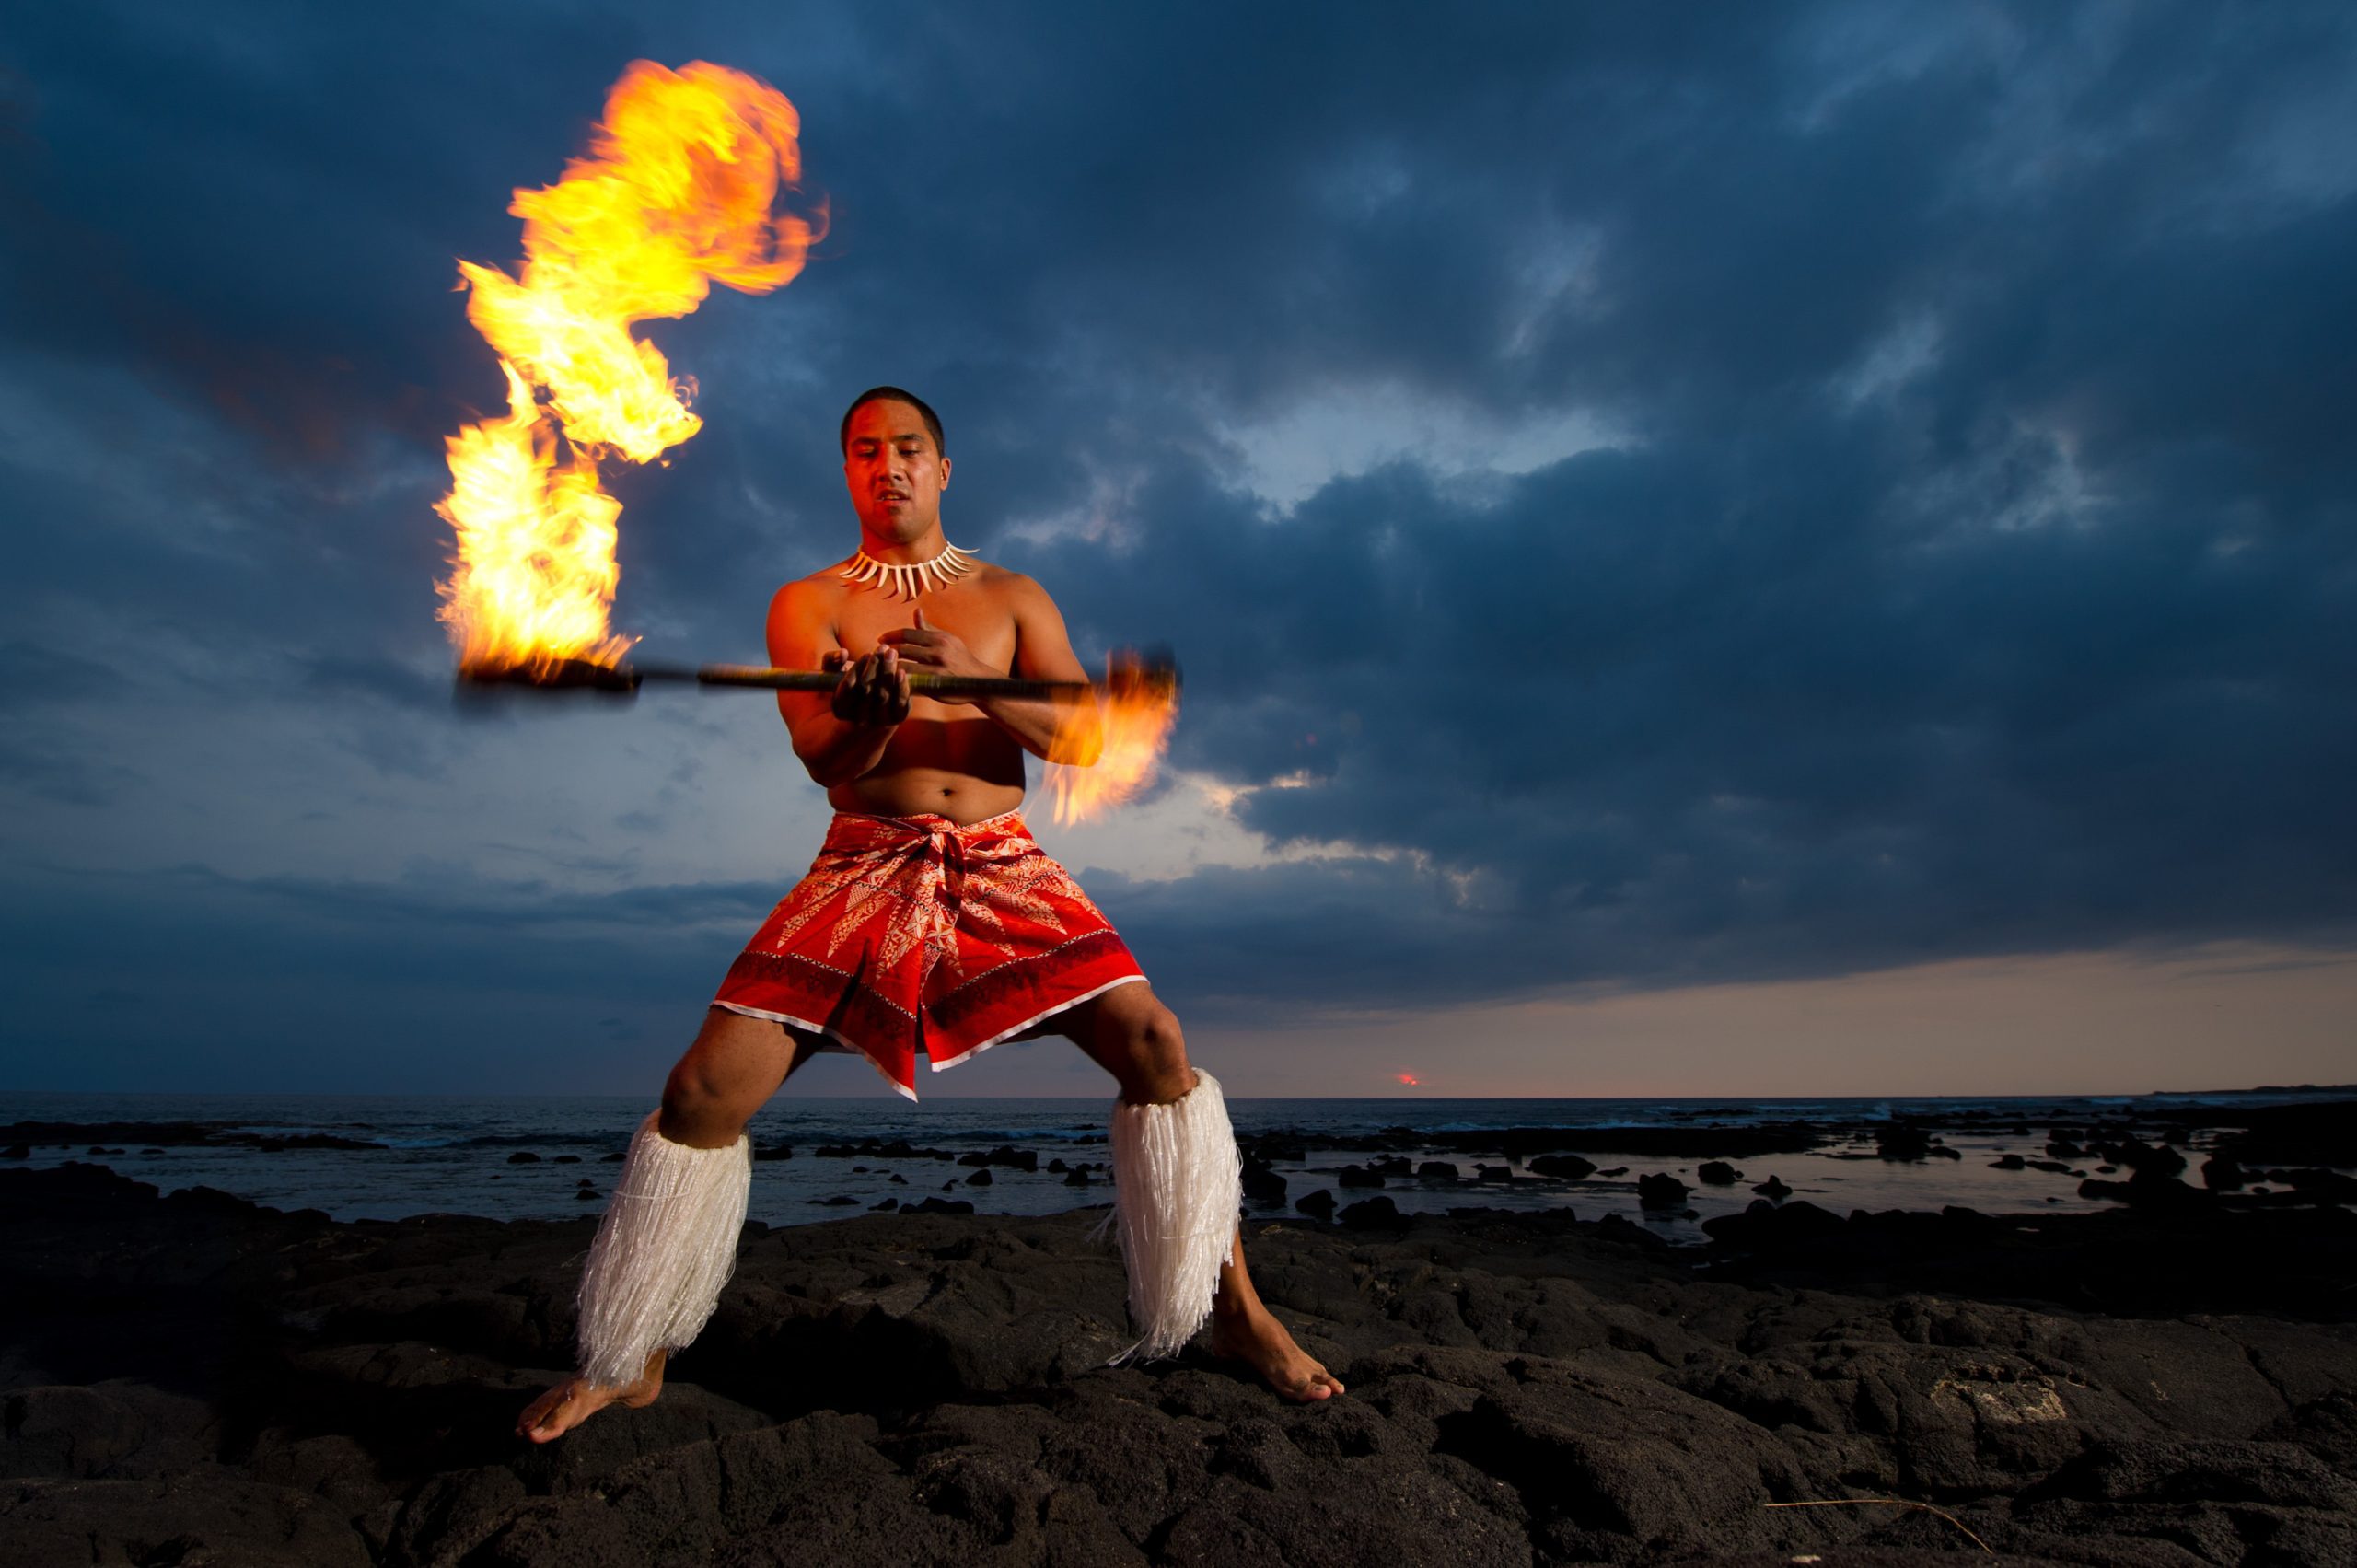
Nikon D4, 14-24mm ƒ/2.8, ISO 200, ƒ/16, 1/400

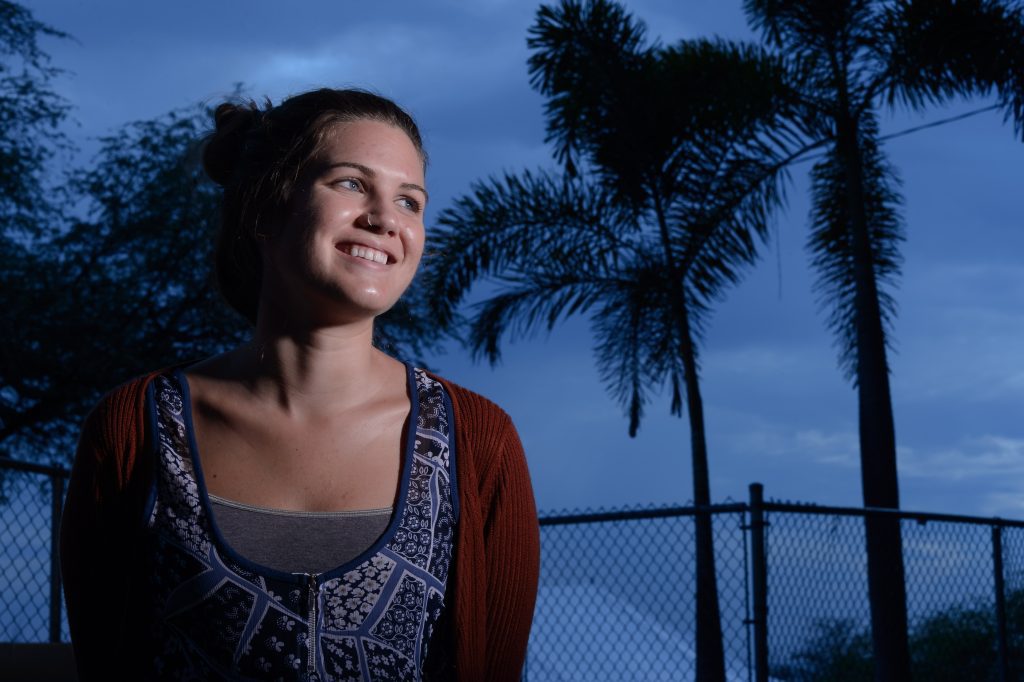
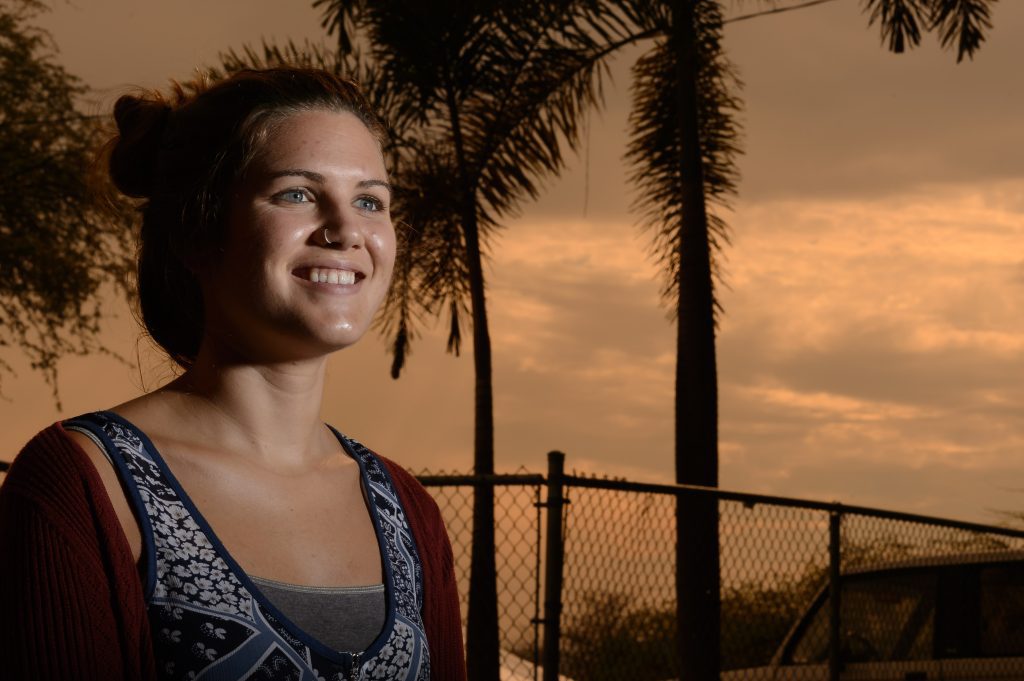
Due to working around other events, we could not shoot right at sunset. So we shot had to stop about 30 minutes before the sunset. Had we been able to go later, the sky would have been a little darker and more vibrant than in these photos.

I am under-exposing the subject about two stops to get the background to saturate and be darker. I then am overexposing the issue by two stops with the strobes. The combination of the under-exposure on the camera and the overexposure with the lights makes the subject well-exposed; the background is slightly under-exposed and a little more saturated than what the naked eye saw.

Nikon D4, 14-24mm ƒ/2.8, ISO 200, ƒ/8, 1/400

If we had waited a little longer, then flame would also have shown up even more.

Nikon D3S, 14-24mm ƒ/2.8, ISO 200, ƒ/7.1, 1/100

Two years ago, I did a similar shot, and by waiting till the sun dipped below the horizon, I could capture the flame much better because the sky was darker.

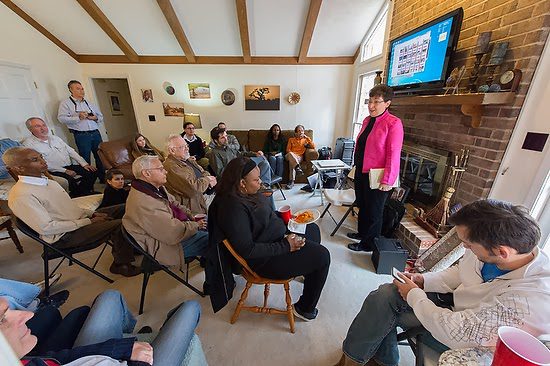
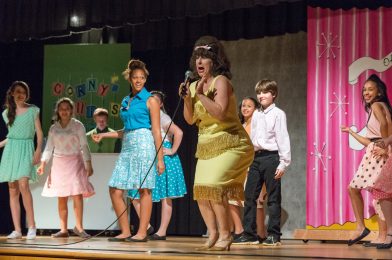
The class enjoyed watching and seeing all the lights set up and also taking some of their photos of the cast in costume.

Fuji X-E2, 18-55mm, fill flash -1 EV, ISO 6400, ƒ/5, 1/15

What did you shoot the last few days? Here are some of mine

Reading Time: 3 minutes
Fuji X-E2, XF 55-200mm, ƒ/8, 1/2000, ISO 5000

What did you photograph the last couple of days? Please don’t say anything. There are opportunities every day, even out your back window.

This photo is out our back window, and while I shared some images before and even wrote about how I captured them here. So does this mean I shot it and just moved on?

I find that sometimes just going back to something over and over helps you get better, and just because it is a different time, you may get a surprise.

Fuji X-E2, XF 55-200mm, ƒ/8, 1/2000, ISO 5000

What I like about these photos is the attitude you sense of the birds and how they interact.

Fuji X-E2, XF 18-55mm, ƒ/3.6, 1/500, ISO 5000

Our family decided to celebrate Valentine’s Day this past weekend by driving to Truett’s Luau in Fayetteville, GA. It is so new the website is not entirely up. Truett’s Luau is one of a kind restaurant that Truett Cathy, founder of Chick-fil-A, decided to open up at the age of 92. He had a big hand in everything about it.

Fuji X-E2, XF 18-55mm, ƒ/3.2, 1/125, ISO 640 with fill flash set at -1 EV

These are not Pulitzer Prize-worthy photos, but they keep my eye fresh. I am also working on being sure everything I do is second nature. Like in this photo of my daughter playing the Ukulele at the restaurant, I popped in a little fill flash at -1 EV so as not to overpower the natural light but fill in her face that was backlit.

Nikon D4, 14-24mm, ISO 400, ƒ/5.6, 1/100, also three Alienbees B1600 @ 1/32 power to wink enough light to clean up the color of the mixed lighting. One morning is in the ceiling over the counter, and the two others are in the far corners behind the camera, left and right. I am triggering them with the PocketWizard radio remotes.

I shot photos of the new Chick-fil-A restaurant at Charleston Southern University in North Charleston yesterday. I shot them on the Nikon because Fuji 10-24mm is still not out, and I prefer to work with super wide angle lenses more than any other focal length because I want the viewers to feel like they are there.

I had a John Amis as a photo assistant who helped with the lights and getting model releases for every person that came into the restaurant that morning as guests and employees. It would help if you had a team to make these photos happen.

Fuji X-E2, XF 18-55mm, ƒ/5.6, 1/500, ISO 640

After the shoot, I drove by The Citadel in Charleston to get some photos of the new Ring on the parade field this past year.

Fuji X-E2, XF 18-55mm, ƒ/5.6, 1/500, ISO 640

The overcast sky made the colors pop and gave excellent tent lighting to the Ring.

I walked around the Ring and shot a lot of varieties which we will maybe use a few for a book I am working on with my wife on The Citadel. She has a blog that we think many will want some of the content in book form.

What are you going to shoot today?

Nikon 85mm ƒ/1.4D my go to portrait lens

Reading Time: 3 minutes

Today I had a lot of fun helping a young actress build her portfolio. Her mother wrote, ” We need to get some Headshots done for my daughter’s acting webpage. She is an actress and has an agent here in Atlanta.”

They needed four different looks, so we shot for about four hours and had some fun. I used the Nikon 85mm ƒ/1.4D for the headshots.

Sometimes, I white-balanced the modeling lights and did not use the flash, like in the photo above. I did this so I could shoot at ƒ/1.4. She is considering using this as the big photo you first see landing on her page. It makes sense because the horizontal format will work great on the webpage.

Nikon D4, 85mm ƒ/1.4, ISO 400, ƒ/1.4, 1/100

I think she did a great job of bringing some significant variations of expressions to create those different looks, and then I tried to light the photos to match the mood we were looking to produce.

Nikon D4, 85mm ƒ/1.4, ISO 400, ƒ/1.4, 1/125

We could get a completely different look by changing clothes and hair.

Nikon D4, 85mm ƒ/1.4, ISO 200, ƒ/1.4, 1/80

I talked to her about the character Anna Bates in Downton Abbey for this photo.

Nikon D4, 85mm ƒ/1.4, ISO 200, ƒ/8, 1/200

For this photo with the red background, we discussed The Evil Queen/Regina Mills in the ABC series Once Upon a Time.

Nikon D4, 85mm ƒ/1.4, ISO 200, ƒ/8, 1/160

In this photo, I can easily see her as one of the Pretty Little Liars cast.

Nikon D4, 85mm ƒ/1.4, ISO 200, ƒ/8, 1/160

It is essential to know that it is much easier to have something in mind together that you are creating than to pick up a camera and start shooting. Together, we got some great images, but we both had to be on the same page.

She had to bring expressions and clothing for each shot, and I had to light and compose the photos to help create that mood.

If you know anyone wanting to build a model or acting portfolio, send them my way, and we can have some fun creating something together.

The Importance of a photography community–that you belong to one

Reading Time: 6 minutes

Ben Gray, Visual Manager at the Atlanta Journal-Constitution, was our keynote speaker. [Fuji X-E2, 18-55mm, ISO 6400, ƒ/6.4, 1/110]

While I have tried for many years to get a large group of photographers together for mainly social time to get to know each other, it has been a struggle. Finally, however, this weekend, we had thirty-two people show up for our meeting of Christian in Photojournalism Atlanta/Southeast at our home in Roswell, GA.

I talked to my friend Ken Touchton, who said he wasn’t surprised because we had created a mini-conference.

Berrie Smith, a camera repairman, who works with Nikon and Canon regularly, was there cleaning people’s camera sensors and doing minor repairs. [Fuji X-E2, 18-55mm, ISO 2500, ƒ/8, 1/125 with a fill-flash set at -1 EV]

We had a keynote speaker, a devotional, camera repairs, and complimentary lunch provided by Chick-fil-A.

Dorie Griggs led our devotional time [Nikon D4, 14-24mm, ƒ/9, ISO 12800, 1/100]

Dorie Griggs reminded each of us while our jobs may isolate us from one another that, we do need to come together and rely on each other for support.

1 Peter 4:10
New International Version (NIV)
Each of you should use whatever gift you have received to serve others, as faithful stewards of God’s grace in its various forms.

The Bible verse she used to remind us that we should use our gifts to reconnect with one another was 1 Peter 4:10.

Craig Carden and John Bazee discover they have a great deal in common. Both have worked for radio stations and love music and photography. [Nikon D4, 14-24mm, ƒ/9, ISO 12800, 1/50]

What was different from most photography communities is we encouraged spouses and significant others to come to the meeting. The reason is they are part of our support system. Those who support photographers also have a lot in common; they found out.

Also, spouses enjoyed meeting their spouse’s colleagues and getting another perspective on someone else doing photography.

Peggy Frazeur and Carrie Carden spend some time getting to know each other for the first time at this meeting.  [Nikon D4, 85mm, ƒ/3.5, ISO 8000, 1/200]

Since I am a photographer more than a writer, I am hoping that these photographs are helping you see the emotional connections and the enjoyment people showed in being in this environment. Most everyone commented how this was a blessing for them.

Coming together and talking to others, and doing photography can dramatically affect our emotional condition. Then, of course, people brought their latest cameras to show each other. We all have to be a gearhead to be a successful photographer, and finding something that is helping us do a better job is so exciting we enjoy sharing it with someone. But, of course, the big hit with most folks was pulling out their mirrorless cameras and showing all these cameras will do that fit in a pocket.

[Fuji X-E2, 55-200mm, ISO 6400, ƒ/4.5, 1/50]

In December, the Atlanta Journal-Constitution laid off all of its ten photographers. They then gave each of them the first shot at one of their seven new multimedia specialist positions. As a result, they no longer have just a photographer position on their staff. Ben is also no longer just at the desk; he is covering breaking news daily. In this role, he is often the only AJC journalist on news scenes and is relied on to provide still photos, video, audio, and reporting with accuracy and immediacy. In addition, he frequently contributes video to WSB-TV and audio to WSB Radio during his work.

We asked him to walk through a typical assignment and how he gathers all this for all those outlets.

Ben’s Breaking News Workflow:

  • Get photos first: He arrived at the airplane crash and knew from experience that he would be moved back by the police as they established the boundaries. “I can get quotes later, but I cannot get the photos later.” So he has an Eye-fi card in the camera. He tags a photo, and the camera automatically sends the picture using his hotspot to the newspaper/radio/TV station, where they can pull those while he continues to work.
  • Shoot Video on iPhone: He shoots 10-second clips that they post to the websites, which WSB-TV can also use. He doesn’t have to send the video if they arrive with a crew.
  • Reporting Role: He gathers audio with his iPhone, and then he sends these interviews by email to the assignment desk, where they have a writer turn this into copy for the web.
  • Touches base with the assignment desk: They may call and ask for more.
  • Formal editing: He will do minor editing of images and captioning to add to the galleries online. He will also check the photos pulled from his pictures that were automatically transmitted. For example, he has pulled photos off the web that accidentally showed a dead person in an image.
Gibbs Frazuer is one of the people who shared their work. We have always given 2 – 5 minutes for anyone to share their work. The short presentation is an excellent way for all of us to see what each other is doing and also a perfect time to practice showing our work. [Fuji X-E2, 18-55mm, ISO 6400, ƒ/8, 1/35]
[Fuji X-E2, 18-55mm, ISO 6400, ƒ/8, 1/25]
Our First Project
I wanted to introduce the idea of shooting a project where we could each find a person and tell their story. So I showed Chick-fil-A’s Every Life Has a Story to introduce the concept.
[youtube https://www.youtube.com/watch?v=2v0RhvZ3lvY]

We will all find a subject and put together a package which we will share at our next meeting. We are hoping to find a space to hold an event where we can invite the subjects and the community to see the stories and maybe for us to leave an exhibit of some prints from those stories.

We are enjoying our Chick-fil-A sandwiches and getting to know one another. [Nikon D4, 14-24mm, ƒ/9, ISO 12800, 1/200]

When we all arrived, everyone was meeting new people for the first time. In one way or another, we asked each other, “So what’s your story?” We all want to connect. We not only want to communicate by getting to know someone’s story, but we also want to share our story.

Dorie Griggs and Laura Espeut wanted a photo together. That is what friends do when they get together–smile. [Nikon D4, 14-24mm, ƒ/9, ISO 12800, 1/80]

Do you have a community? Look for a community to join and if there is not one you can find, then start one yourself.

Remember this is what God intended, as we see in 1 Peter 4:10 “Each of you should use whatever gift you have received to serve others, as faithful stewards of God’s grace in its various forms.”

Once you understand God’s grace, you cannot help but want to pay it forward through service to others.

So, when are you getting together with some photographers?

Nikon D4 vs Fuji X E2 in Studio

Reading Time: 2 minutes

Studio Comparison

First, after importing the RAW images from the Nikon and Fuji into PhotoMechanic, I noticed one thing right away—file size. The Fuji RAF file was 32MB compared to the Nikon NEF 18.2MB.

After import, I went into Adobe Lightroom and selected lens profile to change. The Fuji doesn’t have that data yet for Lightroom. They have a lens modulation optimizer built into the camera. Here is how it works:

[youtube https://www.youtube.com/watch?v=8Sf3KYwdc1I]
You may want to read about the Quest for Highest Possible Resolution by Fuji HERE.

The second step was getting the comparison closer to each other, so I used the eye dropper and clicked on the white background to get a similar white balance.

Then I exported them.

See for yourself

Nikon D4, 28-300mm ISO 100 [Click on here for high res]
Fuji X E2, 18-55mm ISO 200 [Click here photo for high res]

I shot at the lowest recommended ISO for each manufacturer. Click on the links above to see full-resolution JPEG images.

Nikon D4 cropped version of the photo above
Fuji X E2 shortened version of the photo
I suggest downloading the high resolution and doing all the pixel peeping you like.

Nikon D4 Audio recording in video mode

Reading Time: 3 minutes

While I read all the manuals, it takes some practice to refine your results when shooting with any camera gear.

My first recommendation is to choose manual sensitivity on your microphone. When the microphone is set to Auto, and your subject stops talking, the Auto setting will crank up the gain [volume], introducing noise or hum in the background.

After much trial and error, I have noticed that if you move above seven on the microphone setting, you will introduce noise.

My recommendation is to buy an external microphone. I have two. I usually record all my interviews with two cameras. One camera that is pointed straight onto the subject has the shotgun Røde Video Pro microphone on that camera. The second camera, left or right of the primary camera, has a wireless lavalier Shure FP1 microphone. WL183 (Omnidirectional): Recommended for general purpose sound reinforcement, recording, or remote monitoring applications. Low handling noise. Pickup angle: 360 degrees. Clip on the subject and keep it close to their mouth. 

Both of these microphones work with DSLR video cameras. First, they have a stereo 1/8″ plug to put the mono sound on both channels. Next, both of these microphones let you boost the gain so that the sound coming out of the microphones, so you do not have to turn your gain up too high on the camera.

The Røde microphone has a +20 dB gain. I recommend using this setting and then listening through your headphones to adjust the input gain level. By doing this, you will avoid most of the time going above the seven gain level on the Nikon D4.

On the Shure FP1 lavalier, there are transmitter and receiver gain controls. My mistake early on was I only adjusted the receiver. If you turn both of these up, just like with the Røde microphone, you can avoid going above seven on the gain setting with the Nikon D4.

If you continue to find that you need more than seven regularly, you need to get an amplifier on the line to increase the volume so you can keep that number lower than seven on the Nikon D4.

You may want something like the Beachtek DXA-SLR PRO HDSLR Audio Adapter, which will let you increase the volume so you can keep the gain level lower on the camera.

Photographing school plays

Reading Time: 5 minutes

Nikon D4, 70-200mm, ISO 11,400, ƒ/5, 1/500

Be Prepared

Here are a few tips before you start shooting the performance.

  • Arrive Early—You need some time before the curtain goes up.
  • Fast lens and/or high ISO—You need gear to take low-light photos.
  • Find a good seat—You might think the front row is the best, but sometimes the back row is the best. If it is assigned seating, you might want to go before you buy a ticket to the venue. In general, I find the seats in the center to give you more opportunities than from the side.
  • Test Shots—Often, you can make some test shots to set your exposure correctly.
  • White Balance—Shooting on Auto White Balance for a theater production is the worst possible time to use this setting. Often, the productions use colored lights, which can have your camera correcting, giving your actors funny skin tones. Custom white balance is ideal, and second, you can try some presets like tungsten to get you close.

White Balance

Pleasing skin tones are the number one thing that separates hobbyist photos from pros.

My secret weapon is the ExpoDisc.

 ExpoDisc EXPOD2-77 2.0 Professional White Balance Filter 77 mm, 82mm (Black)

ExposDisc goes in front of the lens and then you use it to get an incident reading rather than a reflective reading of the light.
Notice the direction of the light hitting the subject.  You move to the same position to get the light reading below.
Point the camera toward the direction of the light that is falling on the subject.

If the subject is facing me and the light is from the side, I face the camera with the ExpoDisc on it so it is pointing toward the camera position.  The chart above is to help you understand the concept, but you can modify it.

One way you can modify it is if the light is the same where you are standing, you could cheat and take a reading from where you are.  The problem that can arise is if they are lit by Window light and the camera position is in the shade; your color balance will be off if you do not take it from the subject’s perspective.

Nikon D4, 28-300mm, ISO 3,600, ƒ/5.6, 1/400

If it is supposed to be a silhouette and you get a photo like mine, that’s great. However, if you are supposed to see their faces, you must make some adjustments.

Nikon D4, 28-300mm, ISO 4,500, ƒ/5.6, 1/320

There are a few ways to adjust to get a good exposure to skin tones. First, use spot metering if your camera has it. On the Nikon D4, I can choose selective focus and spot metering. I then have 51 different points to move the focus/spot metering to take the photo.

Using spot metering and selective focus with the Nikon D4, I have red brackets to move where I want the focus and exposure to be set.
Nikon D4, 28-300mm, ISO 12,800, ƒ/5.6, 1/320

Waiting for the light

While waiting for the peak moments in the scene, you also have to wait for the best light. For example, this witch’s hat had her face in the shadows most of the time she was on stage., but when she was singing those dramatic high notes, she put her head up and said, you have your shot.

Post-production is critical.

Nikon D4, 70-200mm, ISO 1,2500, ƒ/2.8, 1/500

No Flash—That is the rule for stage performances; therefore, you are at the mercy of what stage lighting you see. Unless your small town has some incredible endowment for the arts, your lighting on the stage will not look like Broadway or TV shows.  Throughout this production, the light value on one person would look great, and the other person was blown out or silhouetted.

This is where taking the photo into either Adobe Lightroom or PhotoShop can help salvage a photo. This is one of the rare moments I have to fix photos in post-production. It isn’t because I screwed up, it is because the lighting just isn’t even or at least acceptable for photos.

This is the photo before I cropped it or made changes in post-production. Notice that the kneeling actress is well-exposed and not blown out. Generally, you can open up the shadows but do very little with something blown out without detail.

Nikon D4, Sigma 120-300mm ƒ/2.8, ISO 2,500, ƒ/2.8, 1/500

Get Close

Don’t shoot the entire stage all the time. Vary your images using long glass, like a 300mm lens or longer, to isolate an actor. The lighting guys do this with a spotlight to make you look at just one place, but you can do it with lens choice.

Nikon D4, Sigma 120-300mm ƒ/2.8, ISO 2,800, ƒ/2.8, 1/500

Think Marching 

Nikon D4, 28-300mm, ISO 7,200, ƒ/5.6, 1/250

The photos look fantastic when you see the military marching in formation or marching bands, and everyone is in sync.  It looks better when everyone is in full stride because it creates motion. Closer the legs are together, they look like they are standing still, even tho they are moving.

Nikon D4, 28-300mm, ISO 4,000, ƒ/5.6, 1/250

Summarizing

Please arrive early, shoot many photos, and plan on doing some post-production to get the quality I am getting here. Your camera phone will not get this quality. Nor will having excellent gear. What gets this quality is experience. So please arrive early to take test shots so you do not need to shoot your first images of the play when it is live.

Off-camera flash and gels for the sky

Reading Time: 2 minutes

When I get this kind of situation on a cloudy day in Kona, Hawaii, sometimes I fix it with flash.

By using an off-camera flash, I set the flash to be 2 stops over the available light, and the camera I underexposed by -2 stops.

While this made the photo much better, the color didn’t pop in the background.

Here I added a CTO +1 and did a custom white balance for the flash on the model’s face. I could have dialed the white balance to tungsten and been very close.

I put a CTB +1 on the flash in the last photo and then did a custom white balance. Because the camera compensates for the blue in a flash, it adds orange to the scene. So where the flash hits the model is now the proper color temperature.

So, which one do you like the best? Do you want a flash or add a blue or orange filter to change the background?

Seven Reasons Not to Become a Freelance Professional Photographer

Reading Time: 3 minutes

7) Not a self-starter—In your first year or so you will be getting up with no photo shoots on your schedule. You must be able to fill your day with something that will be productive. If you are someone that takes initiative and rarely needs someone to tell you what you should be doing at work, then you might make it as a professional photographer.

6) Procrastinator—You may know what you need to do each day, but you can easily get distracted and not stay on task. If you have seen the movie “UP” then you will recognize the comment—Squirrel.  I know a good number of former photographers who just didn’t get around to doing what they should have been working on and now they are no longer working professional photographers.

Nikon D4, 70-200mm, ISO 6400, ƒ/2.8, 1/100–Marc Broussard

5) Hate rejection—If you get easily discouraged then you do not want to go into business for yourself—in any field. Just because your family and friends think you are a great photographer is not the same as everyone lining up to pay you to take photos. If you have people lining up and begging you to shoot things for money—then this is way different and makes you the only person I know to be in that situation. Successful photographers are only selling to 5 – 10% of those people they have contacted. 90 – 95% of the time they are rejected.

4) Poor Negotiator—For the most part photography is not so cookie cutter. This is very true for the commercial photographer. Each job is different from the rest and requires you to price differently. Due to this there tends to be a lot of negotiating with clients. Sometimes this may sound harsh when someone is trying to get you to lower your price.

Nikon D4, Sigma 120-300mm ƒ/2.8 DG OS HSM S, 2X, ISO 10000, ƒ/4, 1/2000

3) Do not like taking direction—many “artists” tend to think they know better what they need to create. Unless you are going to be a “fine art photographer” then you will need to execute other people’s ideas. You will need to learn how to bend to keep a client and get paid.

2) Do not like sitting at a computer for long periods—You will need to spend time editing your work for sure, but you will spend a lot of time connecting with people through emails, website, blogs, creating printed materials and searching the web for clients to name just a few of the things you will need to be doing on a computer.

Nikon D4, 85mm ƒ/1.4, ISO 200, ƒ/1.4, 1/80

1) No business skills—You need to understand pricing of your services that will help you make a profit for the long haul is not easy to do. You also have to be a risk taker in running your own business. Almost nothing is a sure bet and you will have to put money behind ideas that may or may not work. You also need to know how to market yourself to the world.

Now you don’t have to be good at all these things, but they all must be done to remain a professional photographer. You can outsource some of these, but the outsourcing will cost more than if you did them yourself. At a certain point in your growth of your brand you will find it necessary to outsource some of this to grow your business.

You might think of more things to add to this list–but freelancing full-time is not for the faint of heart.

Shooting Volleyball with the Nikon D4 using available light

Reading Time: 3 minutes

Nikon D4, 70-200 ƒ/2.8, ISO 12,800, 1/1250, ƒ/4

Today I shot a volleyball game with just available light. I was pleasantly surprised at how nice the quality of the images were for shooting under sodium vapor lights.

The Nikon D4 is something I wish I had back in the 1980s.  During those years I was shooting sports every week for the daily newspaper that I worked back then. Now I only occasionally shoot sports.

While the Nikon D4 has the high ISO capabilities the new technology of vibration reduction also contributes to the photos being sharper than I can remember.

Nikon D4, 70-200 ƒ/2.8, ISO 12,800, 1/800, ƒ/4

White Balance Setting

To insure I got the best skin tones possible, I used the ExpoDisc.  I put the ExpoDisc over the lens and pointed it towards the lights in the gym.  I also slowed the shutter speed to 1/100 to be sure I was not catching the lights during a cycle.  After doing this for both of the Nikon D4 cameras, I cranked the shutter speed preference in the Auto ISO settings to 1/2000.

Nikon D4 Exposure Settings

  • Aperture Priority
  • Auto ISO
    • Lowest ISO 100
    • Highest ISO 12,800
    • Shutter Preference 1/2000

I also was using the Vibration Reduction on the lens to help improve sharpness due to handholding the lens.

Nikon D4, 70-200 ƒ/2.8, ISO 12,800, 1/1250, ƒ/4

With the Nikon D4 you also have auto focus setting as well to choose from. 

Auto Focus Setting for the Nikon D4

  • Continuous Auto Focus
  • 21 Grouping
  • Kept it centered and locked it
  • Focus Tracking on Long
  • Shutter on C-H 10fps

Nikon D4, 120-300 ƒ/2.8, ISO 12,800, 1/1000, ƒ/5.6

My Favorite Angle

This is my favorite angle for shooting volleyball. However, the one thing I would have loved even more was to shoot from a slightly higher angle. The reason for this would help me keep the net from trying to refocus my lens.

Why I like this angle is I can show the team I am covering. You can see their face expressions and while I cannot see the other teams faces, I can see the competition in the body language.

The good thing in shooting up a the players is it gives them this Greek gods feel.  I like athlete looking like they are bigger than life.  Shooting up at them helps to create this feel.

There you have it, my settings and secret weapon, the Nikon D4.

Super simple off camera flash portrait

Reading Time: 3 minutes
Nikon D4, 85mm ƒ/1.4, ISO 200, 1/8000

The key to any good photo is the old KISS rule, which is: Keep It Simple, Stupid.

For this portrait of my dad, I chose to shoot outside and use some of the sunny weather we were having down at the beach. We shot this outside on the balcony of our cottage. The location was chosen because it was the fewest steps I needed to make to get a good photo.


Start with the sun backlighting the subject.

One of the reasons I always start with the sun on the back of the subject and not where it is lighting their face has to do with expression. I find i  almost impossible for getting a good expression when people are squinting and straining due to the sun being directly in their eyes.

The benefit of backlighting the subject is that you get a good rim light around it, which will help you separate it from the background.

Look for a darker background.

I like to find a simple background without blown-out highlights. I normally look for a much darker background than I chose here. My point is to be careful, or your blinking highlights will be in the background and distracting rather than complementary to the subject.

Choose a shallow depth-of-field

I am using my favorite portrait lens, my Nikkor 85mm ƒ/1.4, for this photo. When shooting with this lens, you need to be sure that the eyes are the sharpest point in the photo. I still recommend having the eyes be where you focus, even if you shoot this at ƒ/22.

In general, if you are doing a portrait of a person and not an environmental portrait, then the background and surroundings are not really that important. Since that is the case here for this photo, I threw that background way out of focus by shooting at an aperture of ƒ/1.4.

Fill Flash

I love to use an off-camera flash as my fill/main light outside for portraits. Here is a diagram showing where the sun was and the off-camera Nikon SB-900 speedlight placement for this photograph.

You can trigger the off-camera flash in many different ways. I often use the Nikon SU-800, which uses infrared to trigger the off-camera flash. I chose to use the PocketWizard Mini TT1 on the camera with the AC3, which lets me alter the power of the flash from the camera and not the flash itself. This saves you a lot of steps back and forth for tweaking those fine adjustments.

The Nikon SB-900 has the PocketWizard FlexTT5 on it, which receives the signal and talks to the camera’s TTL system to give consistent exposures.


I placed the light 45º to the right of the camera and not quite 45º above the eyes. I am a little lower since my subject has deep-set eyes. 

What is the benefit of the flash, say, over a reflector? If I use the reflector, I will be bouncing the sun into their faces and often getting the squint I was trying to avoid.

Second, I get good skin tones by using the flash, and the color temperature of the flash gives it that “pop” I like to see.

Third, I like seeing a catch light in the eyes, and the flash helps me be sure one is there. I think it helps bring the eyes to life.

Go and try this setup yourself. Adjust it to your conditions and the subject, and see what you come up with.

Nikon D4: Tethering & 11 FPS Tips

Reading Time: 4 minutes

Nikon D4 with 85mm f/1.4

Photoshop is complex

Photoshop got its start with a father and his two sons Glenn, John and Thomas Knoll back in 1988.  Not even the Knolls know all you can do with Photoshop.

It is quite common to go to some of the Adobe Photoshop users conventions and have a speaker show you how they got a result and on the same stage are the developers saying this is knew to them.

Nikon Cameras are complex

About two years ago when the Nikon D3S was just introduced, I was at a basketball game shooting with my new Nikon D3S. Next to me was Bob Rosato, who was a staff photographer for Sports Illustrated, getting a phone call just before the game started.

I could hear Bob saying he didn’t know the answer to the caller. After hanging up, Bob looked at me and said that was Nikon calling asking him what settings he was using for sports.

This has been the case for many years with these new cameras that have complex computers in them. You have so many focusing modes to choose from. You can shoot is S, CL, or CH modes for how many frames the camera will fire when you push the shutter. Then you have which focusing modes you can choose from. Single, 9 group, 21 group, 51 group, Auto and then each of these in combination with the shutter mode gives you different results.

On top of those setting you have back focus settings for tracking your focus.

Who wants to be a millionaire?

Once you buy one of these cameras you will be heavily invested in learning all you can do the type of photography you do. This is important to point out that the cameras will do more than most any pro would ever use them to do. However, you must master it for your niche´.

Very quickly you will want to use a life line like they do on the TV hit show “Who wants to be a millionaire?” Sooner or later most pros will phone a friend to help them out. Even after reading the huge camera manual you will find yourself overlooking a detail.

So this week I get a call from my friend Paul Abell, a sports photographer, who shoots most of the pro teams and college teams in every sport. “Hey Stan, are you having trouble with your Nikon D4 follow focusing?” was the question from Paul.

Paul figured he had some setting in the camera not set correctly, because he knew Nikon would not introduce a camera with focusing issues after Canon had done so just recently.

I had not experienced the issue and told him I would look into it. Next day, I get another phone call from Paul. He had figured out the problem and wanted to tell me.

The answer is on page 112 of the camera manual.

Nikon D4 Camera manual page 112

My camera came from Nikon set on 10fps, but Paul’s came with it set on 11fps. Once he switched to 10fps he was getting great results.

Camera manual stays with the camera

Most pros keep their new camera manual with their camera these days because of the situation Paul ran into. I don’t know anyone who has memorized those huge manuals. My Toyota Sienna, which costs a lot more than my camera has a manual about half the size of the Nikon D4.

Until you have mastered all you need on the camera, keep your manual in the camera bag with you.

Tethering with Nikon D4

I have been tethering my camera to the laptop for studio shoots for many years. One of the main reasons l like to do this is with headshots. I may go to a company and do over 100 headshots in a day.  The department hiring me wants to match each headshot up to a name.

I use the Nikon Camera Control Pro 2 when I tether. It lets me put into the IPTC fields the name of each person before I shoot and then every time I shoot a photo the name of the person is embedded into each photo. I put in the name of each person before I shoot.

When I got my D4 I continued to do the same thing. However, now I had to change something. Earlier I wrote how with the Nikon D4 you can now embed this IPTC in the camera. (Earlier Blog)

I have enjoyed doing this, but now when I tether I must turn this off or the IPTC I use in Nikon Capture Control Pro 2 will not embed.

Nikon does a great job of telling the camera owner about what can and cannot be done, but for those of us who have trouble learning by reading, you need to practice.

Practice before you perform

It is very important to sit with your camera manual and read everything that you need to do what you shoot. Then practice shooting situations that are exactly like you will do for a job.

Paul was practicing in the backyard with his kids running at him to check the follow focus on his Nikon D4. He was having trouble. He sat down with his manual and then walked through all the settings and this is when he say parenthesis around his problem.

I hope by me sharing here about what I and other pros are learning about their Nikon D4 cameras will help you get the most out of your camera. Read your camera manual and then practice shooting changing the settings to see how you can get the most out of your camera in any given situation.