
Nikon D4, 70-200mm, ISO 11,400, ƒ/5, 1/500
Be Prepared
Here are a few tips before you start shooting the performance.
- Arrive Early—You need some time before the curtain goes up.
- Fast lens and/or high ISO—You need gear to take low-light photos.
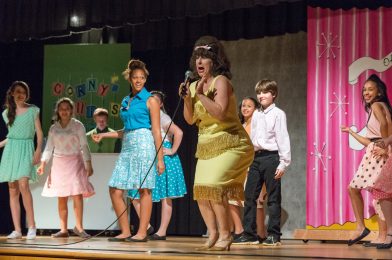
- Find a good seat—You might think the front row is the best, but sometimes the back row is the best. If it is assigned seating, you might want to go before you buy a ticket to the venue. In general, I find the seats in the center to give you more opportunities than from the side.
- Test Shots—Often, you can make some test shots to set your exposure correctly.
- White Balance—Shooting on Auto White Balance for a theater production is the worst possible time to use this setting. Often, the productions use colored lights, which can have your camera correcting, giving your actors funny skin tones. Custom white balance is ideal, and second, you can try some presets like tungsten to get you close.
White Balance
Pleasing skin tones are the number one thing that separates hobbyist photos from pros.
My secret weapon is the ExpoDisc.
ExpoDisc EXPOD2-77 2.0 Professional White Balance Filter 77 mm, 82mm (Black)
 |
| ExposDisc goes in front of the lens and then you use it to get an incident reading rather than a reflective reading of the light. |
 |
| Notice the direction of the light hitting the subject. You move to the same position to get the light reading below. |
 |
| Point the camera toward the direction of the light that is falling on the subject. |
If the subject is facing me and the light is from the side, I face the camera with the ExpoDisc on it so it is pointing toward the camera position. The chart above is to help you understand the concept, but you can modify it.
One way you can modify it is if the light is the same where you are standing, you could cheat and take a reading from where you are. The problem that can arise is if they are lit by Window light and the camera position is in the shade; your color balance will be off if you do not take it from the subject’s perspective.
 |
| Nikon D4, 28-300mm, ISO 3,600, ƒ/5.6, 1/400 |
If it is supposed to be a silhouette and you get a photo like mine, that’s great. However, if you are supposed to see their faces, you must make some adjustments.
 |
| Nikon D4, 28-300mm, ISO 4,500, ƒ/5.6, 1/320 |
There are a few ways to adjust to get a good exposure to skin tones. First, use spot metering if your camera has it. On the Nikon D4, I can choose selective focus and spot metering. I then have 51 different points to move the focus/spot metering to take the photo.
 |
| Using spot metering and selective focus with the Nikon D4, I have red brackets to move where I want the focus and exposure to be set. |
 |
| Nikon D4, 28-300mm, ISO 12,800, ƒ/5.6, 1/320 |
Waiting for the light
While waiting for the peak moments in the scene, you also have to wait for the best light. For example, this witch’s hat had her face in the shadows most of the time she was on stage., but when she was singing those dramatic high notes, she put her head up and said, you have your shot.
Post-production is critical.
 |
| Nikon D4, 70-200mm, ISO 1,2500, ƒ/2.8, 1/500 |
No Flash—That is the rule for stage performances; therefore, you are at the mercy of what stage lighting you see. Unless your small town has some incredible endowment for the arts, your lighting on the stage will not look like Broadway or TV shows. Throughout this production, the light value on one person would look great, and the other person was blown out or silhouetted.
This is where taking the photo into either Adobe Lightroom or PhotoShop can help salvage a photo. This is one of the rare moments I have to fix photos in post-production. It isn’t because I screwed up, it is because the lighting just isn’t even or at least acceptable for photos.

This is the photo before I cropped it or made changes in post-production. Notice that the kneeling actress is well-exposed and not blown out. Generally, you can open up the shadows but do very little with something blown out without detail.
 |
| Nikon D4, Sigma 120-300mm ƒ/2.8, ISO 2,500, ƒ/2.8, 1/500 |
Get Close
Don’t shoot the entire stage all the time. Vary your images using long glass, like a 300mm lens or longer, to isolate an actor. The lighting guys do this with a spotlight to make you look at just one place, but you can do it with lens choice.
 |
| Nikon D4, Sigma 120-300mm ƒ/2.8, ISO 2,800, ƒ/2.8, 1/500 |
Think Marching
 |
| Nikon D4, 28-300mm, ISO 7,200, ƒ/5.6, 1/250 |
The photos look fantastic when you see the military marching in formation or marching bands, and everyone is in sync. It looks better when everyone is in full stride because it creates motion. Closer the legs are together, they look like they are standing still, even tho they are moving.
 |
| Nikon D4, 28-300mm, ISO 4,000, ƒ/5.6, 1/250 |
Summarizing
Please arrive early, shoot many photos, and plan on doing some post-production to get the quality I am getting here. Your camera phone will not get this quality. Nor will having excellent gear. What gets this quality is experience. So please arrive early to take test shots so you do not need to shoot your first images of the play when it is live.