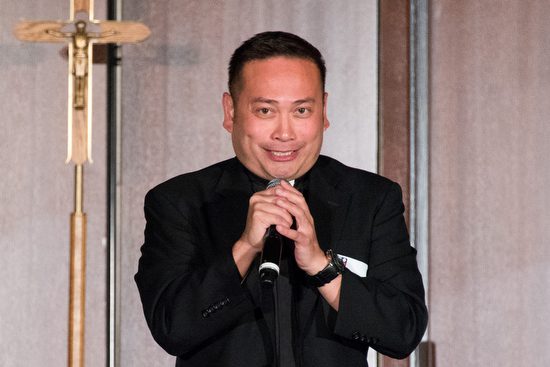
I am covering the Revive! Young Adult Track at the 2012 Eucharistic Congress put on by the Archdiocese of Atlanta. These are photos of the keynote speaker for the evening.Your job is to help me pick the best photo or photos that would run with an article about him speaking to the group.
Known for his love of cooking and inviting people to rediscover the kitchen as a place of daily grace, Father Leo Patalinghug is a popular conference speaker. A native of the Philippines raised near Baltimore, he studied writing and political science before seminary and earned a black belt in Tae Kwon Do. He developed his love of cooking in seminary at the North American College in Rome, Italy. He was ordained in 1999 and, as a parish priest, authored “Grace Before Meals: Recipes for Family Life,” a book that blends simple recipes with ideas on bringing the meaningful spiritual discussion to the dinner table.
His cooking skills led to a Food Network episode where he defeated chef Bobby Flay in a steak fajita cooking competition on “Throw Down With Bobby Flay.”
Father Patalinghug is on the faculty at Mount St. Mary’s Seminary in Emmitsburg, Md., where he directs a pastoral field education program for future priests. He holds advanced theological degrees from the Pontifical Gregorian University and Pontifical Maranium Institute in Rome. He is featured in a 2012 EWTN series “Savoring Our Faith.” He frequently speaks at conferences, college campuses, and prison ministry. His topics include spiritual combat, praying as a family, teen spirituality, and the theology of beauty.
Help me pick the photo from below.
Photo #1
Photo #2
Photo #3
Photo #4
Photo #5
Photo #6
Photo #7
Photo #8
Which photo would you use? You can pick more than one.
This is a lighting setup I used for an awards dinner last night. A little over 100 awards given on stage in just a few minutes. After they got their award they walked off the stage and I took their photo. I was averaging about 3 groups a minute with 2 shots each. We were moving.
Camera: Nikon D4 with 28-300mm, ISO 200, f/8, 1/500
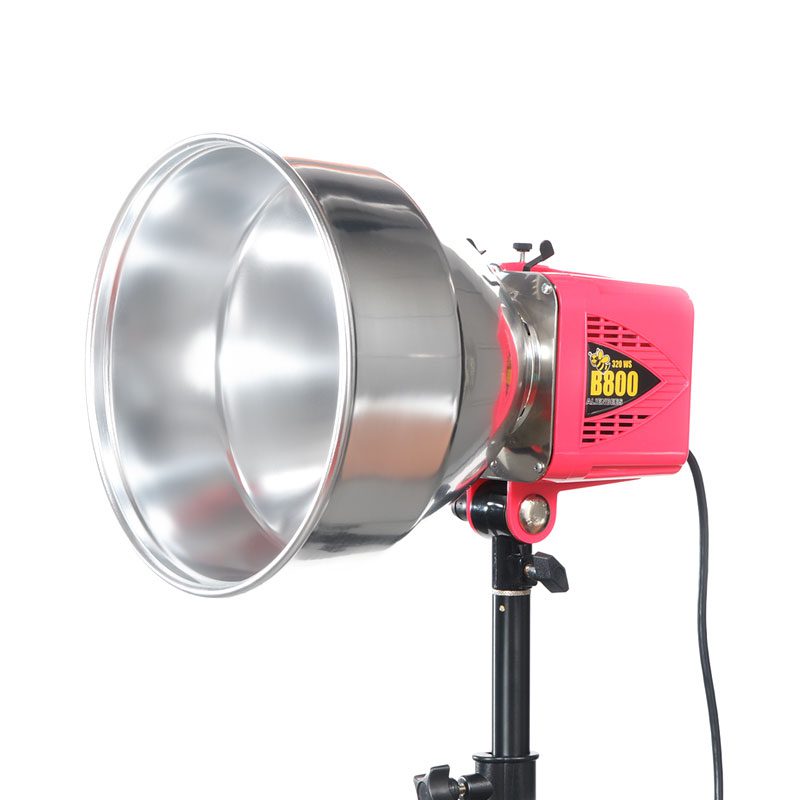
Studio Strobes: 2 – Alienbees 1600 Setting on 1/8 power
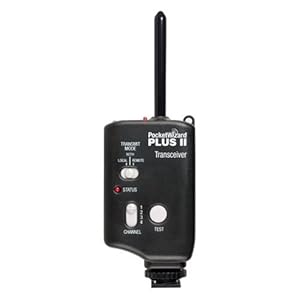
Radio Remote: Pocketwizard MiniTTL and (2) Pocketwizard Plus II transceivers
When I set this up I used light stands that go to about 8 feet tall. I would suggest 10 foot light stands if I were to do this again. I set the lights 45º to either side of the camera and as I high as the light stands would go.
The reasoning is that I had no time to have people sit down and pose them. They would all be standing. I wanted the shadows to go down behind the and not up on the screen. I kept everyone about 2′ to 3′ away from the background to help the shadows to fall down or wide.
I wanted to shoot at f/8 to be sure if I ended up with two rows everyone was in focus. I didn’t need much more depth a field.
I shot at ISO 200 and 1/8th power on the monobloc lights.
Results for the Awards Photos
The reason I didn’t use umbrellas or soft boxes was the space issues.
While you are here photos
Now the primary reason I am hired is to get these photos which are then sent to those in the photos for them to use in their own newsletters to promote their winning of the awards. However, once you are there they often want some other photos. The most common is head shots of their staff.
Since we didn’t have the luxury of time and space to use another lighting setup I shot the staff head shots using this lighting setup.
Results for quick head shots
The client is satisfied because the photos work well for their uses.
More than photos
If all I were doing was just taking these photos it would be one kind of a job, but they need names of everyone. So I was able to shoot and identify all the people in the photos. Think about pulling this off.
How would you shoot and identify all the people in the photos?
I then print out contact sheets with the photos and the names under each photo. The text is also in the metadata of each photo, so if they can search for photos by names or open the file in software that reads metadata (PhotoShop) and read the caption.
Since the photos all have identification embedded, then the client can easily just drag and drop these photos into a database and easily pull photos in the future.
Keep in mind when you do a job that there might be a better way to do any individual part of the package. However, you must take into consideration all the aspects and how they impact one another to reach the goal for the client.
When we were younger we used to play musical chairs.
The game starts with any number of players and a number of chairs one fewer than the number of players; the chairs are arranged in a circle facing outward, with the people standing in a circle just outside of that. A non-playing individual plays recorded music or a musical instrument. While the music is playing, the players in the circle walk in unison around the chairs. When the music player suddenly stops the music, everyone must race to sit down in one of the chairs. The player who is left without a chair is eliminated from the game, and one chair is also removed to ensure that there will always be one fewer chair than there are players. The music resumes and the cycle repeats until there is only one player left in the game, who is the winner. When down to the last two players the chair may be moved as long as the music has stopped before the chair has been touched.
In the early rounds people are excited that not only they got a chair when the music stops, but their friend did as well.
What does musical chairs teach us?
To stay in the game requires you do be on your toes and paying attention to the music, the chairs and everyone around you.
Alliances are often formed between friends. You will find that often friends will help one another and force you out.
There can only be one winner of this game
Musical Chairs is a fun game to play, because rarely does the same person always win. There is a certain amount of serendipity to this game.
Photography is a profession in a Red Ocean
Blue ocean strategy challenges companies to break out of the red ocean of bloody competition by creating uncontested market space that makes the competition irrelevant. Instead of dividing up existing—and often shrinking—demand and benchmarking competitors, blue ocean strategy is about growing demand and breaking away from the competition.
Kim, W. Chan; Renee Mauborgne (2004-12-16). Blue Ocean Strategy: How To Create Uncontested Market Space And Make The Competition Irrelevant . Harvard Business Press. Kindle Edition.
When you look around yourself as a professional photographer and you notice that there is more and more competition each year you are experiencing a game of musical chairs, but in this game the number of people is growing and the number of chairs is the same or maybe less.
I can tell you from personal experience this is not a fun game to play. It isn’t a game at all when after so many rounds you find yourself not winning at all because the odds are too tough.
Where are the Blue Oceans for photographers?
Unfortunately, blue oceans are largely uncharted. The dominant focus of strategy work over the past twenty-five years has been on competition-based red ocean strategies. The result has been a fairly good understanding of how to compete skillfully in red waters, from analyzing the underlying economic structure of an existing industry, to choosing a strategic position of low cost or differentiation or focus, to benchmarking the competition. Some discussions around blue oceans exist. However, there is little practical guidance on how to create them. Without analytic frameworks to create blue oceans and principles to effectively manage risk, creating blue oceans has remained wishful thinking.
Kim, W. Chan; Renee Mauborgne (2004-12-16). Blue Ocean Strategy: How To Create Uncontested Market Space And Make The Competition Irrelevant (p. 5). Harvard Business Press. Kindle Edition.
Picking the right instrument early can help you get a college scholarship in music. The reason is simple–less competition.
If you wanted to major in music and decided to be a voice major, the number of scholarships verses the number of students applying is like going to Las Vegas and playing the slot machines.
However, if you were to pick an instrument like viola, bassoon, oboe or french horn for example the odds are more like playing cards with your friends at home.
One way to separate yourself from all the other photographers is photographing subjects that time wise cannot be done after normal business hours.
The first place I find hobbyist dipping their toes into the profession are those subjects where they can do this without conflict of work.
Here is a quick list I have of places many people can enjoy shooting after work:
Concert Photography
Weddings
Sports
Nature
Everyone of those subjects in my opinion is over crowded with photographers. Those photographers who are successful have done so by choosing a strategy of low cost (free) or differentiation or focus, to benchmarking the competition.
Zack Arias was one of those photographers shooting concerts and not making enough money to leave his day job at Kinko’s. He was also helping shoot as a second shooter at weddings with his friend. Both of these allowed Zack to have a job to pay the bills.
Zack however looked around and noticed everyone was giving these bands free photos of them playing in concert. Zack saw little room for any way to make a living doing this, yet this is where he was most motivated.
Zack noticed most of the local bands didn’t have any good publicity photos and good photos for CDs. Two things collided for him at one time, he decided to use an off camera flash to photograph a concert and his creativity for finding a blue ocean.
With one camera, one lens and one off camera flash Zack went after a blue ocean. He sent letters to those bands he researched that most likely had enough money to afford paying him for quality poised band photos.
He offered them a free session if they contacted him within 30 days. Zack shot many of those bands and found himself in a blue ocean.
Keith Ladzinski is another photographer who has found a blue ocean in photography.
I met Keith Ladzinski through my friend Dave Black. We were looking for a photographer to help connect with some of the younger students at a conference. Dave said Keith is your guy.
Keith was first a kid who loved skateboarding and rock climbing. He started to photograph his friends when they were out doing some of these cool moves.
You are not going to find a pool of photographers who are willing to climb the side of a mountain with their bare hands and while up there photograph their friends doing the same thing.
Keith was able to separate himself from the crowd due to access. There were two things that gave him access to these sports: 1) he was one of them and 2) they trusted him.
Today you are very likely to pick up a magazine that has rock climbing or skateboarding and find Keith’s byline below the photo.
Dave Black is another photographer who was able to separate himself from the pack of sports photographers to become one of the most premier sports photographers of the industry.
Before becoming a photographer, Dave was a gymnast. He and his brothers were all world class gymnasts.
After college Dave was coaching and doing photography of his students. His brother was working with the Olympic committee in 1980 and asked Dave to come and help them with the photography to promote the US Olympic Gymnast team.
It was Dave’s knowledge of the sport that help separate his photography from the competition. Dave knew the gymnast routine so well that he would be able to anticipate the exact moment that showed the athleticism and art of the moment. I forgot to mention Dave majored in art. Can you see this all coming together for Dave?
For a gymnast to do well on the world stage they practice over and over a routine to where it is all muscle memory when it comes to the performance. This work ethic is what separates Dave even today from all the competition. Dave was the first person to show up at the Kentucky Derby each day. He was there when the trainers would arrive and there when everyone left.
Dave showed up at the Augusta National Tournament the same way catching the lawn crew at sunrise preparing the course each day.
Dave’s Blue Ocean was his knowledge of the sport and the understanding of preparation. He is so well prepared that he can isolate the moment that will capture the beauty and excitement in a way not seen before.
Strategy for a Blue Ocean
Be the expert in a subject to help separate you from the pack
Get access to something difficult for everyone to access
Photograph subjects that hobbyist cannot because of their day job
Once you find a Blue Ocean–Look for another because your competition will follow you.
Miyuki Ishida Johnson, the Japanese teacher at Elkins Pointe Middle School, accepts a check from Cranes for Kids, run by Osh Kosh Clothing.
Of check presentations, this is one of my favorites. All the kids from the Origami Club came to the Osh Kosh clothing store with the teacher and all the Cranes they made. Visually, this is quite interesting.
One of the main reasons I love the photo is my daughter is in the group photo. If I were thumbing through a publication, this photo most likely wouldn’t make me stop to read the caption or the story.
A good lead for a story is as much about surprise as the content itself. If you are not careful, you can pay more attention to grammar and style and forget that the audience needs to be entertained to keep them engaged.
The best way to ensure that your photograph doesn’t do what it is supposed to is to use a cliché.
What is a photo supposed to do?
Why use a photo? Before you answer that question, you’ll need to ask what you want to accomplish. You may determine you don’t even need a photograph, an article, or a press release.
Sometimes, the primary audience you are trying to reach is so tiny you could hold a luncheon; sometimes, you meet with the people in person.
When the purpose has been decided that you need to communicate a message and the audience is best reached through a website, printed pieces, or social media, you know that people respond to photos more than text.
The most common mistake made at this point, which leads us to the check presentation photo, is the assumption that any photo will do.
This is the best way to communicate your message; you have seen many check presentations. More people than other options use it; therefore, it must be the best, which needs to be revised.
What is the check for?
The best question to help you move to a better photo is to ask what the check is for.
With Guest Conductor Arild Remmereit and Sergei Krylov as guest violin soloists, the Atlanta Symphony Orchestra spent some time with the Elkins Pointe Middle School Orchestra students, answering their questions. Due to gifts to the music program, students can meet some of the world’s best musicians.
Which would you instead use, the photo of the students getting time with one of the best violinists and orchestra conductors or the check presentation to the school administrator that helps support these types of opportunities?
Even a setup photo can do better than a check presentation photo. Would you stop and want to read more about this photo? If so, then it is successful. I can see this used to help talk about a Catholic School expanding to include new grades in the fall due to a gift assisting the school in adding more classrooms.
Series of photos
Could you think about one photo? Sometimes, a series of photos will help tell the story even better.
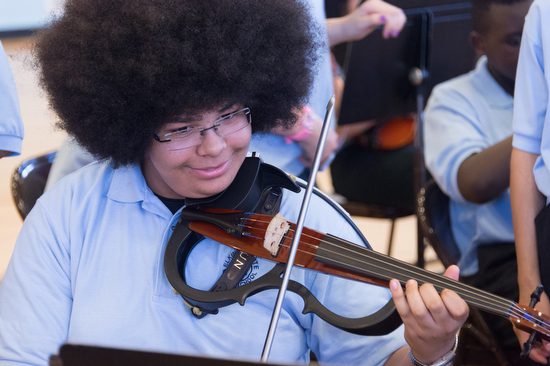
Seth Gamba had few instruments when he started teaching orchestra in North Fulton elementary schools; he could buy some electronic orchestra instruments as gifts. This made a difference in the student’s excitement about music.
Besides the expression helping communicate excitement, most of the public has never seen electronic viola. So, this photo has some visual surprises that help share what a check presentation helped to fund.
The intensity of the student playing and the look of the strange instrument, an electronic cello, help communicate how a gift supports the arts.
This is an electronic violin. Again, seeing middle school students this engaged in school is exciting.
While the photo is a better visual surprise than a check presentation, a good writer will help drop in other surprises.
One study done at Georgia Tech found that the only thing that significantly impacted retention and graduation rates was if a student took music classes. Tutors, Greek life, taking courses to help improve study habits, and everything the school could test had no significant impact other than music.
Can you see how working this into the caption can help the development office raise even more funds than a check presentation photo?
Next time someone suggests a check presentation photo, please remember to ask what the check is for and indicate a picture that shows the purpose of the gift.
One of my favorite shots to do for organizations is doing what I call the “Walk and Talk.” This is where I have two or more people walk next to each other towards me.
I encourage them to barely feel each other next to each other. This keeps them from walking further and further from each other. The closeness to each other also helps communicate they are friends. This is using the body language of touching or almost touching to help communicate their relationship.
Now here are examples I did while teaching in Kona, Hawaii in February this year. These first ones I was showing the students how to use two hot shoe flashes as fill lights. I have included the assistant carrying the lights for these examples to show you what they are doing as well.
I am talking to the subjects and explaining what I want them to do. No flash went off here.
The photo assistant is carrying a Nikon SB900 and a Nikon SB800. They are zoomed out to 200mm for the SB900 and 120mm with the SB800. This helps the light go farther, but also keeps the light mainly on their faces.
Notice the assistant must be pretty close to the subjects for the flash to work properly. In addition to the flashes I am using the RadioPoppers PX system to help relay the infrared signal from the Nikon SU800 on my camera to the flashes.
We switched out the subjects so everyone could experience what it felt like doing this exercise and see it being done.
While showing the class how to use the hot shoe flashes there were a few times where I got ahead of the flashes recycling. By not waiting long enough between flashes (2 sec) the flash wouldn’t fire.
Walk and Talk with Studio Strobe
To help everyone see the difference in flashes I also used an AlienBee 1600 being powered by a Vagabond Mini Lithium battery. I was borrowing the Photo Schools radio remotes, but most of the time I now use Pocket Wizard Mini TT1 Transmitter on my Nikon Camera and have the Pocket Wizard Plus II transceiver on the flashes.
The MiniTT1 will let me shoot at 1/500 sync speed rather than just 1/250.
Now another thing you will notice that is different in these examples is how far away the photo assistant is from the subjects.
The AlienBee 1600 has the reflector that comes with them on it. So notice that the flash is lighting more of the subjects. I can change that by just adding a grid, but didn’t for these photos.
The flash is set at about 1/8 power. I can almost shoot on motor drive setting for these photos. The reason is the recycle time is so short.
When I shot these photos not a single time did the flash not fire. I think that when it comes to getting the best expression you need to be able to shoot at any moment and not just when your flashes are ready.
I would highly encourage using the studio strobe over the hot shoe flash for this reason alone.
Just like I did above, I talk to the subjects and do a few test shots before I have them walk towards me.
After we did some tests to get them moving I then had the start over where they are talking to one another.
As you can see it doesn’t take long for people to relax and the photos to look pretty natural. I would have changed one thing in these photos. I would have had the assistant put the light on a light stand and get the light up a little higher to help avoid the glare in the glasses.
This is just to show that the flashes fired every time.
Now look at the photos where the flashes didn’t fire. Besides there faces in the shade the color on their faces isn’t as good. I think that using flashes helps you get the best skins tones outside possible.
Go out and try this yourself.
Often when I am flying around the world it is easier to carry the Nikon SB900 and a Nikon SB800 than carrying the AlienBee 1600 and the Vagabond Mini Lithium battery. So, depending on the situation I find myself in I can still get the photo with either system.
You will never have someone hire you and say they don’t like you. However, just because someone hires you doesn’t mean they want you.
It may shock you that there are people who will hire you just because of your price and not because of your quality.
Photos are just from the beautiful weekend we had here in Georgia.
It was so beautiful this past Saturday that my wife and I drove to Amicalola Falls in Dawsonville, Georgia, to enjoy the day. We found this after climbing the 175 steps to the top.
What is also challenging to understand is that many of your clients will never pay you more? It isn’t because you cannot articulate your value and need to charge more. There are just people out there who do not value anything but price.
When you start in photography, you may end up with price-shopping clients. I had a few of these clients. I needed the work and was willing to take their low price to get some money.
It took me years to realize I wasn’t charging enough for my services to pay my bills. This is how I am defining success for this article. The ability to pay your bills for your household, pay your taxes, have healthcare, and have enough money to buy/replace equipment over time.
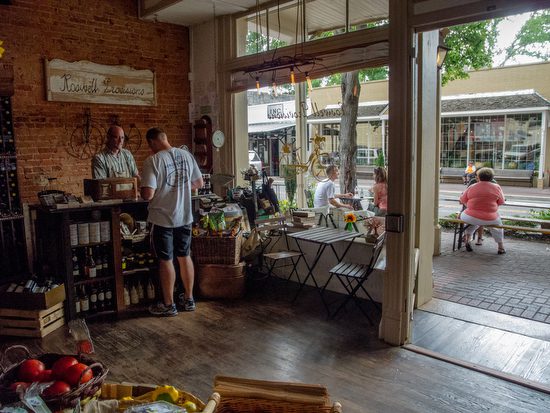
Sunday was just as beautiful in Roswell, GA, as Saturday. We drove down Canton Street, stopped, and enjoyed our time at Roswell Provisions.
Time to Educate the Client
My first thought when I learned I wasn’t charging enough was to try and educate the client. I would talk to my clients about the cost of doing business. News Alert!!–they didn’t care.
I needed to educate myself first. I was starting to learn what my operating costs were and that I had to charge a minimum or lose money to cover these costs and grow my business.
Day Rates
I discovered that day rates were day labor. How I learned was quoting day rates and then showing up to be burned a new one.
Clients would hire me to come to their location, and I would quote the day rate. I felt like I was in the big leagues. I went to professional photographers’ workshops, where I learned about the cost of doing business. The National Press Photographers Association even has a calculator to help you consider all your expenses and generate a day rate.
It didn’t take long before I felt abused by clients. “While you are here, can you shoot …?” was becoming too familiar.
Later I would get with other photographers and find out that they were getting 3 to 5 times more for what I was doing. They, however, were not quoting day rates.
Ken Touchton was the first to educate me that I needed to use project rates.
Project Rate
Unlike a day rate where I am pricing myself the same way as a day laborer, the project rate quoted a price based on the end deliverable.
Honestly, learning how to price a project, so the client understood and appreciated the pricing structure took years; frankly, I am still learning how to do a better job.
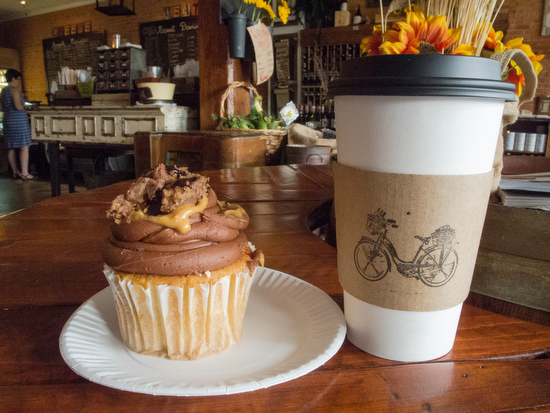
This is peanut butter and chocolate cupcake with my mocha latte. It is a lot of sugar and tastes great.
GWC vs PS
My career shifted from the Guy With a Camera to a Problem Solver. The client hiring a GWC knows more typically than the photographer and must direct them to get what they need. I cannot tell you a specific date that this happened, but over time I discovered I knew more about what the client required than the client at some point.
My stepson is early in his career working in restaurants. He doesn’t know enough to do it all and is learning the ropes. Clearing tables is where he has had to start. After doing this for a while, he will move to help the waiters and become a waiter.
Hearing him talk about his work day brings back many memories and reminds me how it takes time to become a problem solver. You need enough information and how things relate before you can find solutions for people.
Working for more than 30 years in the industry means that I, more often than not, am covering something I have done in some way in the past. While the exact situation is new, it is often similar to other things I have covered.
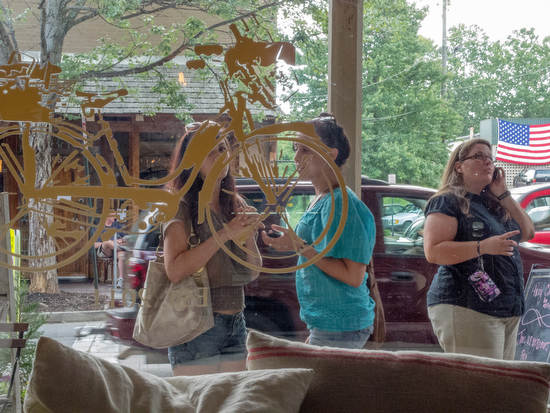
While groundbreaking and check presentations seem routine, after 30 years, I can tell you there have been times when I was challenged to take a photo. I remember walking into one business where every wall, except for the bathrooms, was glass. Try and use a flash in this situation, and you find yourself working harder than usual to avoid a glare caused by your moment in the photo.
I enjoyed my coffee, watching people walk by and look in the window. I was enjoying people-watching that afternoon. I enjoy photographing little slices of life like this one.
Transition to clients who value YOU!
In time you will learn to communicate how you are there for your clients. You will no longer price things that make sense to you but rather communicate value to your client.
However, I had to go through what I thought was why people would hire me. Most of these were “Fallacious Arguments” to justify my photography abilities.
Some of “Fallacious Arguments” in photography I used
The camera—If you own the right camera, they will take great photos. I wanted to ensure the client knew I had the best camera possible.
Use Composition Rules—Too many photographers will not only learn the classic rules of composition but will judge their work and others based on these rules. You can hear them in camera clubs saying that it isn’t a good photo because it is breaking the law.
Master the technical—Some photographers are obsessed with the technical details of photos. They will spend their time getting a “perfect exposure.” They will judge their work and others based on if the values of the photograph fall within what they determine as proper exposure. They may argue that their photo is perfect because they used different known values to assure perfection. They may use a GretagMacbeth® ColorChecker®.
I know that, for the most part, I am gifted with technical expertise, but so are many of my colleagues who are working professional photographers.
It is my total package that separates me from others.
One day I had my photo assistant helping me with a job. I was photographing different managers in a company for profiles that were being done on them. I was doing about 20 of these a day.
The photo assistant commented on the day as we were driving back from a long day. You are good at getting people to relax and get good expressions. The assistant was surprised about my ability to talk to a range of people and get them all talking to me about what they like to do.
The assistant could articulate what made my photos so much better than other photographers she had worked with. You get great expressions.
“How do you learn how to do this?” was her question. I talked about how I had majored in Social Work, where I was trained on how to do interviews and get to know people. I then spoke about how my mentor taught me to read body language.
I talked about how my interest in people drove me to seminary, where I studied education, and how people learned at different ages.
I also talked about how it took many years of practice to develop these skills and that classroom alone was not enough.
Hired for my expertise beyond the camera
A few years ago, I had one of my life’s most remarkable moments.
Greg Thompson, director of corporate communications for Chick-fil-A, called me to see if I could do lunch with him one day. We had only known each other a few months after my wife had met him and encouraged him to get to know me.
Greg read my bio and did some investigation about me. He went to Fort Worth, TX, to the Southwestern Photojournalism Conference, of which I am on the staff. He learned about my work with Youth With A Mission, where I taught students how to use photography.
Greg also had been to some Christian in Photojournalism meetings in Atlanta that I help with regularly.
Greg had done his homework and knew me well. Greg had to do this with his work. He knew that he had to trust whoever he was to work with because they represented the company and reflected on his management skills.
I will never forget that meeting in the corporate dining room. After we ate, Greg talked to me about my corporate rates for shooting assignments. I thought he was getting ready to ask me to do a job for him.
Greg then asked me to be a consultant and use all my skills beyond the camera to help him and be a part of his team. I have noticed how you teach, give your time to other pros, and still do excellent work. Greg said why not hire the guy, so many photographers go for advice.
Couple enjoying a meal together on Canton Street in Roswell, GA.
Light bulb moment
While this was a light bulb type of moment, honestly, it was more like I had someone turn on the light with a dimmer. I still understand all he said at that moment.
When I talk to other photographers who have been in business for many years, most have had a moment they can look at as pivotal. They had a client value them for more than GWC. They loved their expertise.
How do you communicate your value?
Everything you do is part of your brand. It takes time to develop a brand. The consistency of execution will help you develop into a desirable brand.
Your photos, over time, will show your skills. When time after time, you always come through and get a particular style of the image–your clients will come to expect this.
Some clients will need to try other photographers before they realize what they get from you. This is important to hear and understand. Sometimes losing a job to another photographer may be the best thing for you. When that photographer fails to deliver what they were getting from you and expect to get, they will come back to you.
This is when you realize you have value for that client. In some cases, this is the best time to raise your rates. Sometimes you raise your rates and then go shopping and return to you.
There is no easy road
My conversation with Greg Thompson didn’t happen until I had been doing photography for some twenty-four years. This is not something that happens overnight. It takes time to build a reputation.
You cannot easily talk people into understanding why they need to pay you the rate you need to be successful. If it were this easy, everyone would be a successful photographer.
It takes time for them to see your quality of work and to experience all that you bring to them. Sometimes the only way they learn all you bring to the table is to discover they cannot get this just anywhere.
Trust is earned over time and can be lost in an instant.
Grow your business by constantly looking for those clients that value you as a person and are not just interested in the lowest price.
First of all, there are times you need to be sure your photos can be adequately reproduced. For example, the headshot is the most used picture I know of in publications.
There are some pretty cool lighting setups you can use, but if you are unaware of how this will affect the photo in print, your client will be sorely disappointed with your photos.
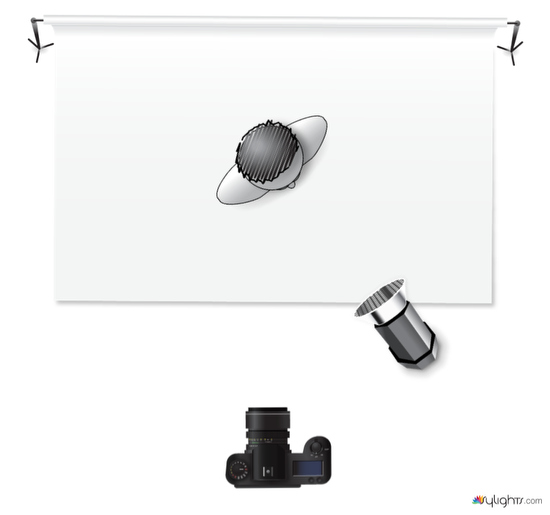
Take this first photo where I am lighting the person with one light on a grid. This classic Rembrandt Lighting gives you a nice triangle on the cheek.
All the photos here were taken during a class I taught in Hawaii on lighting.
You can do this assignment yourself to understand how to understand ratio lighting. You need to first start with one light and then add other lights. Use this lighting diagram and the instructions below to duplicate this with your camera and off-camera flash.
Description: Rembrandt portrait using one grid light
Items:
Monobloc with ten or 20-degree grid
You may use any power setting you choose. Be sure your skin tone is adequately exposed and correct white balance.
White backdrop
You may use a black background as well. No other lights are to be used in this assignment.
Woman
Please get the best possible expression. For example, if they see a triangle on their cheek would be best. Be sure the triangle includes lighting their eye.
(D)SLR
Choose the lowest ISO setting for your camera. For example, use a portrait lens 85mm – 100mm, or if you don’t have a full frame, then 50mm will be OK.
The first place the above photo becomes a problem is in your newspaper. Especially when it runs in black and white, you see that everything without a light on it in the subject will be black in newspaper print.
To still get the excellent shape that takes place with an off-camera flash, you need to add fill light to help soften those harsh shadows so you can still see detail.
It would be best if you used the lighting diagram below to get the second photo here and follow the instructions. Then, shoot your subject with your camera and two lights.
Description: 1:3 lighting ratio. This photo is classic lighting.
Items:
Woman
Your subject should have the main light lighting only part of the face, and the shadows should be just a little to show the 1:3 Ratio.
(D)SLR
Choose the lowest ISO. Use a portrait lens of 50mm if you don’t have a full-frame camera that can work. No more than 100mm.
Octobox
This is your fill light, and get a reading of this 2nd. Be sure it is 1/2 the power (1 f/stop less) than the leading light. After this is done, get a 3rd light reading of both lights, which will be the setting for the camera. It can be level with the eyes, but you may have to move up with glasses to avoid glare.
Softbox
This light is your leading light. Get a light reading with just this first. The light should be 45 degrees off the axis of the camera and 45 degrees above the subject’s eyes.
White backdrop
Keep the subject a few feet from the background, and do not use more lights to light it.
How to figure the Ratio
It would be best if you changed your f/stops into ratios. What I do is first understand that your leading light is putting out twice the light as your fill. You would think that this means you have a 2:1 ratio, but this isn’t the case.
The reason is you must figure not by what each light is putting out but by how much light is hitting the subject.
Everywhere the leading light hits, so are your fill light from the camera’s angle. You then need to add the leading light and the fill for all those places, adding 2 + 1 = 3. The fill only lights the shadow, so there is no need for addition or subtraction.
On the subject, the brightest areas being lighted by the main and fill get three times the light compared to the shadows getting illuminated by just the fill, which we say is one amount of light.
This is what we call the 3:1 lighting ratio, and very printable in a newspaper.
Adding a hair light
Go ahead and then shoot this third shot and add a hair light. Use the diagram below and play with the exposure of the hair light till you get something you like.
Description: 1:3 lighting ratio. This photo is classic lighting with hair light.
Items:
Woman
Your subject should have the main light lighting only part of the face, and the shadows should be just a little to show the 1:3 Ratio.
Monobloc with grid on boom
With dark hair, start at the same f/stop as the main up to about 1 or 2 stops more. With bald or light hair, be careful using hair light. Sometimes better not to use one.
(D)SLR
Choose the lowest ISO. Use a portrait lens of 50mm if you don’t have a full-frame camera can work. No more than 100mm.
Octobox
This is your fill light, and get a reading of this 2nd. Be sure it is 1/2 the power (1 f/stop less) than the leading light. After this is done, get a 3rd light reading of both lights, which will be the setting for the camera. It can be level with the eyes, but you may have to move up with glasses to avoid glare.
Softbox
This light is your leading light. Get a light reading with just this first. The light should be 45 degrees off the axis of the camera and 45 degrees above the subject’s eyes.
White backdrop
Keep the subject a few feet from the background, and do not use more lights to light it.
Background Light
You can add color to your background by just putting a colored gel over a light and pointing it to the background. It would be best if, first, you were sure your other lights were not lighting the background. For the photos below, we used the first lighting setup with one morning with a grid and then added the background light.
Using a white background, be sure your value on the background from the background light is -2 stops as compared to the leading light. This will give you the same color as your gel. Suppose you want a darker color, then even less light. If you prefer a lighting color, add more light.
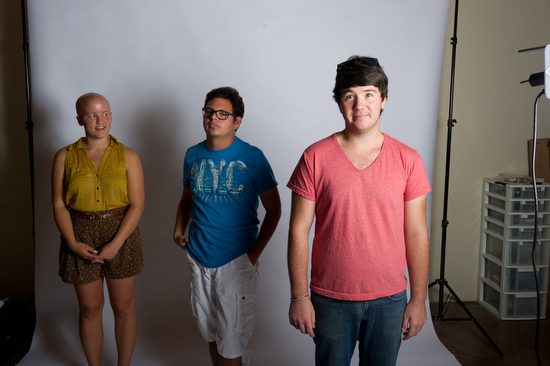
Here is a photo of some students having fun with their assignments in Kona, Hawaii.
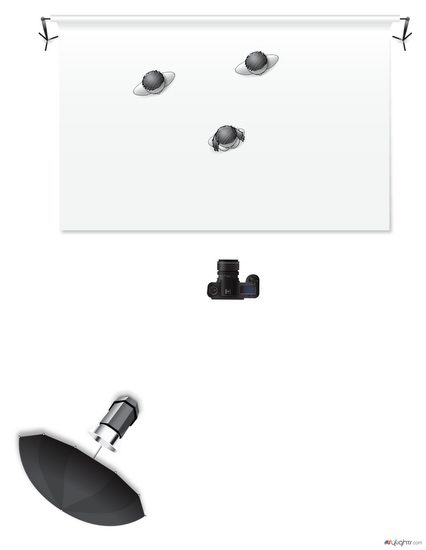
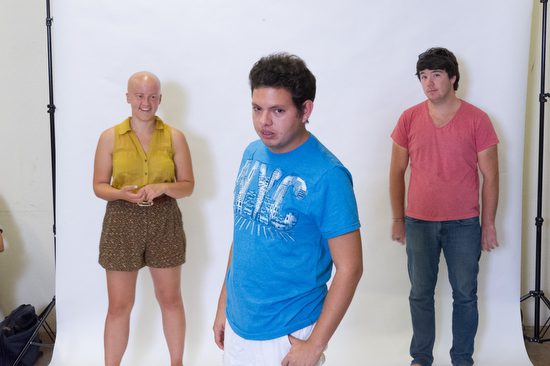
Students helped me demonstrate the issues of a problem with one light close to the group. The person closest is brighter than the others.
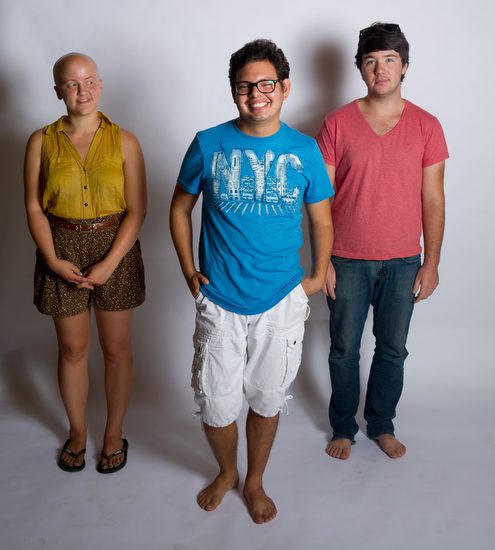
Here all I have done is repositioned everyone, but still, the lady on the far left is darker than the other two in the photo.
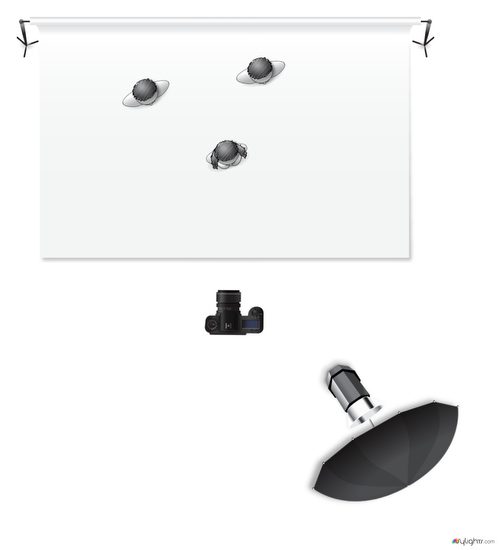
This is the lighting setup for the two photos above.
After seeing the photos above, one of the first things people think they need to do is add another light. No question this would help solve our lighting problem.
Now let’s be realistic here. Most photographers starting will have just one light and cannot justify another light until some income begins. How do you solve the problem in just one morning?
Inverse-Square Law
We need to first start with understanding the Inverse-Square Law of Light.
In physics, an inverse-square law is any physical law stating that a specified physical quantity or strength is inversely proportional to the square of the distance from the source of that physical quantity. (Wikipedia)
In photography, an object twice the distance from a point source of light will receive a quarter of the illumination.
How this is used most often in photography is to figure your exposure. If you want to keep the same f/stop when you move a light twice the distance from the subject, you must increase the power four times. Inversely, if you move the lamp twice as close, you will need to power down the light to 1/4 the power to keep the same f/stop.
Using the Inverse-Square Law of light for Group Photo
The further you move the light from a group, the difference between the light falling on the subjects’ faces will become less and less different. The reason is that the distance of each subject to the light source as compared to others in the group will be so small of a difference that they will appear to be more evenly lighted.
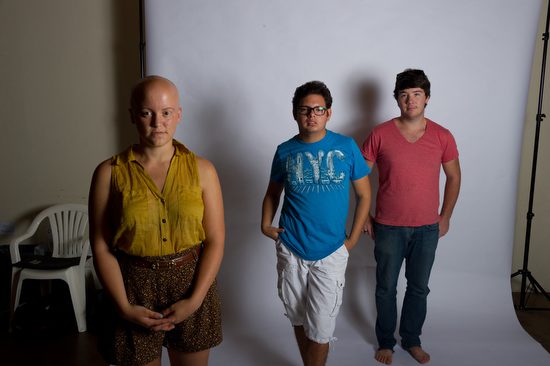
The only thing that changes from the first diagram to this one is the light source is moved further from the group and moved the light to the left side.
As shown in the lighting diagram, I have moved the light source further from the group. I suggest moving the light as far as possible from the group to get the evenest amount of light.
You can now see that the light is more even on everyone in the photo. One person said it is light creating depth-of-field for the flash using this technique.
While this would have solved the lighting problem by keeping the lights the same in the first photo, it will limit your creativity for posing with one light. This is why moving the light back gives you more posing options and more light in a group photo.
Technical Changes
ISO: You may need to use a higher ISO to have your flash still be affective. You may change from ISO 100 to as high as ISO 3200. Remember that since you are using a flash the noise is not the same and actually can appear to disappear. (link to earlier blog on this)
Aperture: With group photos you will want to use f/8 or higher to be sure everyone is in focus. If you use f/2 for example your group photo above would look more like a solo act and their backup singers and not like a musical group.
(8+ Nikon SB900s) = (1 Alienbees 1600) (8 x $510 = $4,080) vs ($360)
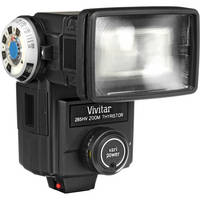
You can buy hot shoe flashes for under $90. These hot shoe flashes are not TTL, but you can use them in manual mode just as you would a studio strobe. They are just less powerful and take a while to recycle.
This is the Vivitar 285, which you get at B&H Photo for $87
Practice making a group photo and getting everyone evenly lighted using just one flash. Understanding and mastering this skill will help you when you have a limited amount of equipment and still need a professional photo of a group.


