
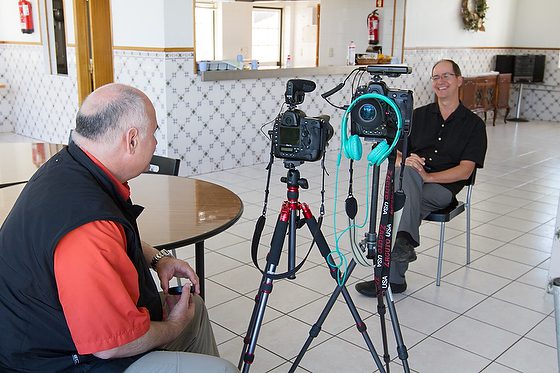
Two Cameras
When I do my interviews, I always try to use two cameras. There are many benefits like:
- Backup of the interview if one camera fails
- Different looks using a slightly wide shot and a tight shot
- Helps with editing
Let me talk briefly about how much two cameras can help with editing. Almost all the time, you need to edit someone’s comments. This means you cut something out, and when you do it, the person’s head will jump on the video and give us the telltale sign that you just cut something.
Now, if you have two cameras, you can switch camera angles, and it doesn’t tip the audience that you cut something. It will just look like you went to a different angle.
Now, if you have a slightly wider shot that includes the hands when the person is quite talkative with their hands and not just their mouth, it is good to include them.
Besides cutting out a long comment that doesn’t add to the storyline, there are times you need to rearrange their remarks. Maybe the last thing they said would make the most substantial lead for the story.
Again having that second camera lets you change angles, and it will look like they started with this thought.
In the end, you will help the subject sound more coherent and look like this was just a straight take and more accessible for the audience to absorb.
Reasons to redo the interview
The first time you interview someone, be sure and tell them you may need to come back the next day or two for a second interview.
Unless you are a seasoned pro most people will not catch everything happening in real time and will notice missing information during the post processing editing time.
If this happens, I highly recommend having the subject redo the parts you liked for several reasons.
- They often have changed clothes.
- Matching the lighting and camera angles is difficult
- Matching the sound can be difficult as well
You may even want to play the video parts you liked and have them rehearse a few times before you redo them. I have found that often the person realizes they can even say it better now that they have heard themselves.
I must tell you this funny story about a seasoned photographer learning to do a video for the first time. He thought of locations he wanted to use as the background for his subject’s interview.
We realized that we failed to tell people to do their interviews in one place while teaching. While in a still photo, that would make sense to show your subject in the different locations, when it came time for editing, the sound didn’t match, the lighting was so different, and when you finished editing the content and put the takes in the logical order of how it best told the story the guy was jumping all over the city back and forth.
It was so funny. Just imagine the evening news where it was the same person instead of going to Washington to listen to the correspondent there and then to the West Coast correspondent or maybe an East Coast correspondent. That was what it looked like.
If you do an excellent job with the interview and have a well-thought-out storyline told by the subjects, you should be pleased with the results. If this is all the audience saw and heard, it will work.
One strategy for editing almost any type of production is to do a “radio” edit. Focusing your cuts and the assembly of your timeline on the dialog [AUDIO] places the story’s content as the highest priority.
Once you have this done, you will work on getting visuals to supplement the audio—more on that in the next part of Shooting Video with your DSLR.
Some more technical tips
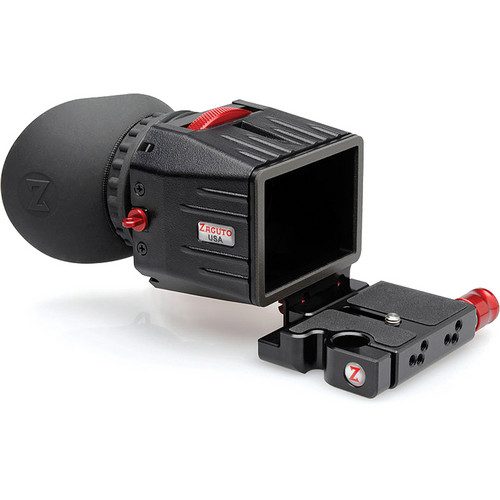
I recommend a magnifier for your LCD. It would help if you were sure your shot was in focus.
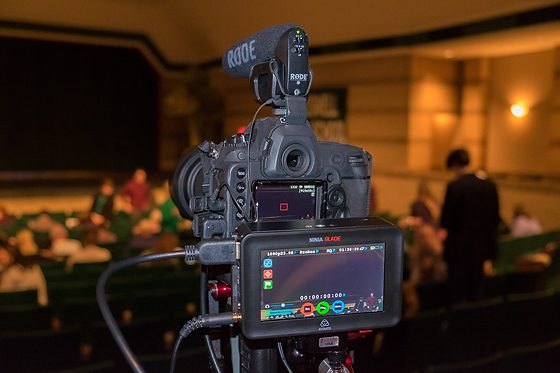
Another option is using a video monitor. The advantage of an external monitor is not just a bigger picture for focusing and exposure control, but with some monitors like this Atomos Ninja Blade 5″ HDMI On-Camera Monitor & Recorder is recording for more extended periods than the time limits on most DSLR cameras. You are only limited to the size of the hard drive you use.
Atomos Ninja Blade 5″ PRODUCT HIGHLIGHTS
Key Features
– 325DPI, 5″ IPS 1280 x 720 capacitive touchscreen monitor/recorder.
– Waveform RGB & luma parade, vectorscope with zoom, and test pattern generator.
– Adjustable gamma, contrast and brightness.
– HDMI input and output.
– Real-time monitoring, playback, playout to a PC or Mac with QuickTime, and edit logging.
– Focus peaking, 0-100% zebra, and two modes of false color monitoring.
– Records 10-bit, 4:2:2 in ProRes or DNxHD.
– S-Log / C-Log recording.
– Trigger REC/STOP from camera (Canon, Sony, ARRI, Panasonic, RED, JVC)
– Timecode from camera. [Nikon has no timecode]
– 2.5″ HDD/SSD media storage.
It records up to 1080 30p/60i resolution via HDMI to an available HDD or SSD using either Apple’s ProRes or Avid’s DNxHD codecs. Recording at 10-bit with 4:2:2 color sampling, this unit provides a monitoring and recording solution in one compact battery-powered unit.