Shooting Video with your DSLR (Part 6)

Keziah Khoo gets some help from James Dockery, editing her story in Adobe Premiere Pro.

B-Roll

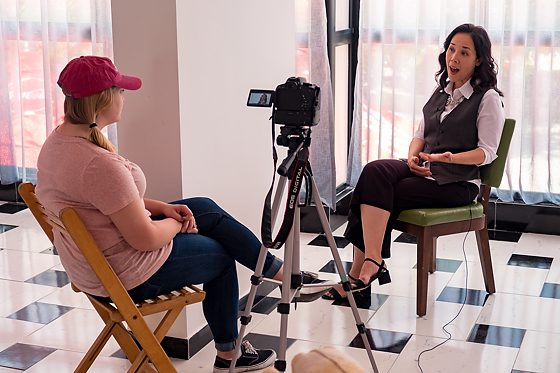
B-roll is supplemental or alternative footage intercut with the main shot in film and television production. These can be still images, videos, and even graphics.

Your video’s overall goals and pace should help determine the length of your B-roll shots. Say you have a longer support video demonstrating a specific process to your customers. Those illustrative shots might be 20 to 30 seconds long, depending on what you’re trying to achieve.

A still image up for 20 – 30 seconds can be made more interesting by zooming in or out and panning across the image. The Ken Burns effect is a type of panning and zooming effect used in video production. The name derives from the extensive use of the technique by American documentarian Ken Burns.

Just like music has a beat, most interviews have a similar feel. The very best editors have a good feel for finding that beat and pacing to then know when to start and stop B-Roll clips.

Hawaii Tropical Botanical Gardens [Fuji X-E2, 18-55mm, ISO 6400, ƒ/8, 1/80]

Literal vs Abstract B-Roll

When I took a course in church music during my seminary days, the professor helped me understand how a creative [organist, for example] can help lead people in worship. He divided music that an organist plays when people are coming into worship, leaving, or during the service can be literal or abstract.

When the organist plays “Amazing Grace,” this is literal because people so know the song that they begin to sing it in their heads and sometimes even out loud when they hear the music.

However, if the organist starts to play something like Mendelssohn wrote, which is often music that isn’t associated with words, then the people can let their minds wander. The organist can create a mood, but how the people hear it individually will let their minds wander. This is an abstract type of music.

I suggest using a literal B-Roll when you can show something that relates directly to what the person is talking about. For example, if they are talking about their parents, a pan across their dresser with photos of them works pretty well.

Now often during interviews, people talk about things in the past or even the future. This is where abstract B-Roll usually works great.

When someone reflects on growing up somewhere, this is a great time to use nature shots from that area. It is like helping the audience dream with them as if they are thinking back and looking out their window or like they are driving down the road looking out the car window.

Flowers blowing in the wind or a person’s hand moving through a field of flowers can work as an abstract. Seeing rain hitting a puddle or a stream of water flowing can be pretty soothing.

Closeups of tools can work great as well. Seeing the blade cut wood versus a wide shot of a person cutting wood can often look more abstract. A closeup of welding that goes from out of focus to in focus is another way to create an abstract B-Roll.

Nikon D5, Sigma 24-105mm f/4 DG OS HSM Art Lens, ISO 800, ƒ/4, 1/4000

Transition B-Roll

You often need to transition the audience from one scene to another in the storyline. This is where a B-Roll of a door opening and closing or having someone walk through a location can help you transition to a new thought.

Video portraits are pretty famous today for B-Roll. They can work with transitions as well. This is where you roll for 20 to 30 seconds on a person with video versus the still portrait. I would advise getting a lot of different takes if using this technique. Have the person look out a window. As they look out the window, have them turn and look into the camera. Reverse that and do another take.

Have people look into the camera and they then walk away with the camera following and another time staying still.

Have them go from pretty expressionless faces to anger or smile. Start your shot out of focus and then go in a direction. Start in focus and then go out of focus.

[Fuji X-E2, 18-55mm, ISO 400, ƒ/4, 1/100]

Movement

With video, you are capturing motion. You can keep the camera still and have the environment moving, or you can move the camera within the environment.

Car scenes are notorious with showing motion. You can have camera stationary on the person while they are driving. The windows are like cinema screens showing life happening around them as they are driving.

Shooting from another vehicle, you can drive alongside them to give a sense of context.

Type of shots

You have a variety of shots which I encourage you to get lots in each category for easier editing later.

Wide Shot – helps to establish the context.
Medium Shot – often two people close together or where you see the subject’s hands type of distance.
Tight Shot – This is often where you are just showing the face. You are letting the facial expressions help tell the story. More than 50% of most movies are tight shots.
Close-up – These are the detailed shots. Where you see someone’s ring on their finger, pouring a cup of coffee, the cork on a bottle of champaign being opened.

James Dockery is introducing Adobe Premiere Pro to the students. [Fuji X-E2, 18-55mm, ISO 2500, ƒ/5, 1/100]

You can never have enough B-Roll. I have never heard this said in an edit suite. That what were they thinking giving me all this B-Roll. I do listen to it over and over that there is not enough.

Shooting Video with your DSLR (Part 5)

Stanley is interviewing James Dockery, senior editor for ESPN. Photo by: Jeff Raymond

Two Cameras

When I do my interviews, I always try to use two cameras. There are many benefits like:

  • Backup of the interview if one camera fails
  • Different looks using a slightly wide shot and a tight shot
  • Helps with editing

Let me talk briefly about how much two cameras can help with editing. Almost all the time, you need to edit someone’s comments. This means you cut something out, and when you do it, the person’s head will jump on the video and give us the telltale sign that you just cut something.

Now, if you have two cameras, you can switch camera angles, and it doesn’t tip the audience that you cut something. It will just look like you went to a different angle.

Now, if you have a slightly wider shot that includes the hands when the person is quite talkative with their hands and not just their mouth, it is good to include them.

Besides cutting out a long comment that doesn’t add to the storyline, there are times you need to rearrange their remarks. Maybe the last thing they said would make the most substantial lead for the story.

Again having that second camera lets you change angles, and it will look like they started with this thought.

In the end, you will help the subject sound more coherent and look like this was just a straight take and more accessible for the audience to absorb.

Reasons to redo the interview

The first time you interview someone, be sure and tell them you may need to come back the next day or two for a second interview.

Unless you are a seasoned pro most people will not catch everything happening in real time and will notice missing information during the post processing editing time.

If this happens, I highly recommend having the subject redo the parts you liked for several reasons.

  • They often have changed clothes.
  • Matching the lighting and camera angles is difficult
  • Matching the sound can be difficult as well

You may even want to play the video parts you liked and have them rehearse a few times before you redo them. I have found that often the person realizes they can even say it better now that they have heard themselves.

I must tell you this funny story about a seasoned photographer learning to do a video for the first time. He thought of locations he wanted to use as the background for his subject’s interview.

We realized that we failed to tell people to do their interviews in one place while teaching. While in a still photo, that would make sense to show your subject in the different locations, when it came time for editing, the sound didn’t match, the lighting was so different, and when you finished editing the content and put the takes in the logical order of how it best told the story the guy was jumping all over the city back and forth.

It was so funny. Just imagine the evening news where it was the same person instead of going to Washington to listen to the correspondent there and then to the West Coast correspondent or maybe an East Coast correspondent. That was what it looked like.

If you do an excellent job with the interview and have a well-thought-out storyline told by the subjects, you should be pleased with the results. If this is all the audience saw and heard, it will work.

One strategy for editing almost any type of production is to do a “radio” edit. Focusing your cuts and the assembly of your timeline on the dialog [AUDIO] places the story’s content as the highest priority.

Once you have this done, you will work on getting visuals to supplement the audio—more on that in the next part of Shooting Video with your DSLR.

Some more technical tips

I recommend a magnifier for your LCD. It would help if you were sure your shot was in focus.

Another option is using a video monitor. The advantage of an external monitor is not just a bigger picture for focusing and exposure control, but with some monitors like this Atomos Ninja Blade 5″ HDMI On-Camera Monitor & Recorder is recording for more extended periods than the time limits on most DSLR cameras. You are only limited to the size of the hard drive you use.

Atomos Ninja Blade 5″ PRODUCT HIGHLIGHTS

Key Features
– 325DPI, 5″ IPS 1280 x 720 capacitive touchscreen monitor/recorder.
– Waveform RGB & luma parade, vectorscope with zoom, and test pattern generator.
– Adjustable gamma, contrast and brightness.
– HDMI input and output.
– Real-time monitoring, playback, playout to a PC or Mac with QuickTime, and edit logging.
– Focus peaking, 0-100% zebra, and two modes of false color monitoring.
– Records 10-bit, 4:2:2 in ProRes or DNxHD.
– S-Log / C-Log recording.
– Trigger REC/STOP from camera (Canon, Sony, ARRI, Panasonic, RED, JVC)
– Timecode from camera. [Nikon has no timecode]
– 2.5″ HDD/SSD media storage.

It records up to 1080 30p/60i resolution via HDMI to an available HDD or SSD using either Apple’s ProRes or Avid’s DNxHD codecs. Recording at 10-bit with 4:2:2 color sampling, this unit provides a monitoring and recording solution in one compact battery-powered unit.