The Culling of Photographers

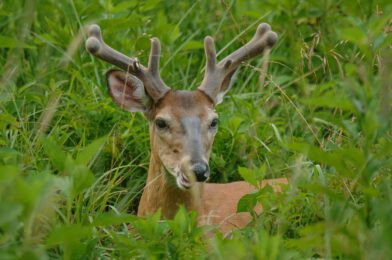
When populations of deer get too great, they can start to destroy the land due to the lack of resources. There are Wildlife Management Programs around the country to control the population of deer.

Without management, you can overharvest, and it will take a long time for the population to recover; if you harvest, crop damage and deer-vehicle accidents may increase.

This process is the herd’s culling, or herd thinning.

There have been natural disasters that have helped nature to correct itself without any culling.

Humans used to have a more natural culling of our population. If you did something stupid on your bike when I grew up, then you didn’t survive. Today helmets are keeping more of us around. Some could argue that the lack of helmets helped us thin the herd.

Weld Founder Austin Mann says, “Many people call photography a profession and moving away from a 9-to-5 job.” Yet, the other day on Facebook, an advertising headline read, “Understand your camera in 10 minutes.”

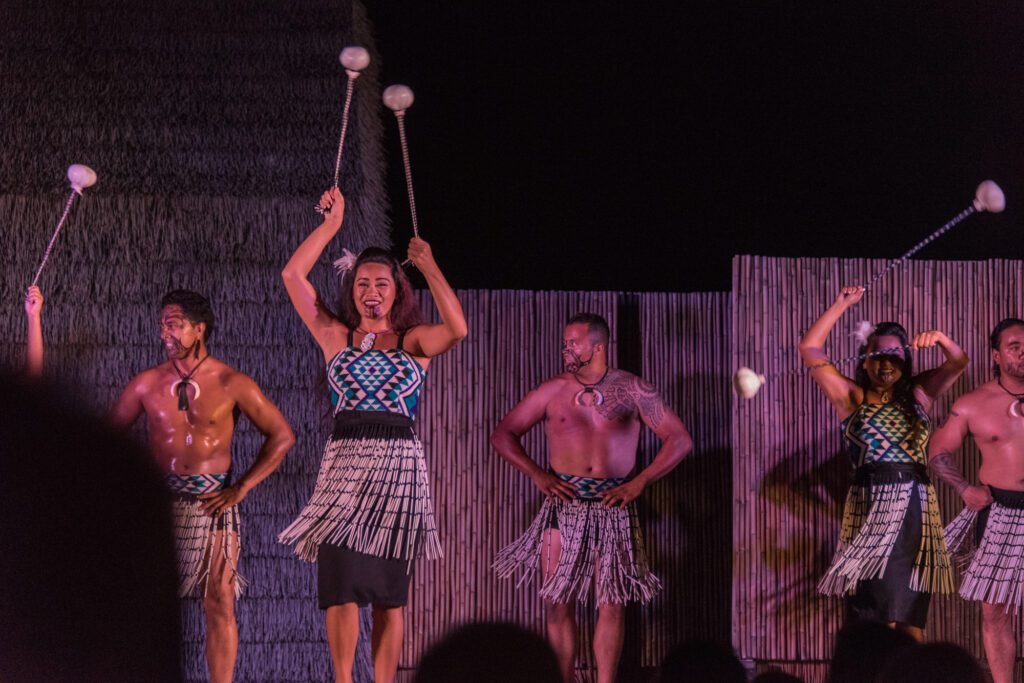
Today the market is flooded with photographers, and since we do not cull the population [some may wish they could], nature has its way of natural selection or the survival of the fittest in today’s marketplace.

There is a limit to the jobs for photographers. Many will have to move on to pay their bills from a lack of work.

It is said in sailing the pessimist complains about the wind. The optimist expects it to change. The leader adjusts the sails. – John Maxwell

I played trumpet for many years and even through college. I was pretty good and enjoyed playing. However, I did not have what it took to become a professional musician. I did not enjoy practicing for hours each day.

When I discovered photography, things changed. I was spending an unusual amount of time shooting or in a darkroom. I would lose track of time. I never remember losing track of time playing my trumpet.

If you lose your sense of time with photography, you might survive. But, first, you must love the work. Losing yourself to photography lets, you know this is not just fun but your passion.

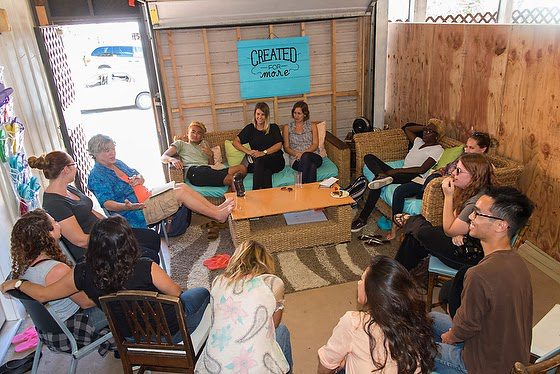
Jay Maisel, Bernie Boston, Hugh Morton, and George Tames. Our famous photographers in my book. I took this photo at the Southern Short Course in the 1980s.

Jay Maisel tells his students to “always carry your camera.” He goes on to tell them he can tell who will not make it—those not carrying their cameras all the time.

“In this world, you’re growing or dying, so get in motion and grow,” said Lou Holtz.

Time to assess

Where are you now, and where do you want to go? How are you going to get from here to there?

I know many photographers who wanted to go from no video skills to adding these to their skill set. Hey, I took the NPPA Multimedia Immersion Workshop. I invite you to join me in Romania this summer for a Multimedia Immersion Workshop. Here is the link to the Storytellers Abroad Workshop.

I will be glad to help you see the way from here to there if this is the path you want to choose.

I believe that a passion for photography is better than having a passion for the story. For example, Eugene Richards went from a social worker to a social activist and finally realized that photojournalism was the most powerful way to help people.

Discover your passion, and it will help give you the answers to the big questions. Why go there? A D Why not stay here?

You may also discover that you don’t have a passion for this, which is a good discovery. J st move on to your love, and you will be successful–if you nurture it.

Guest Blog: Story is King!

Robin Rayne is an Atlanta-based photojournalist for international and domestic magazines and newspapers. Robin is also producing a documentary film on people with significant disabilities who have been mandated to relocate from state hospitals into community.


It was only 96 hours on an island in the middle of the Pacific, but the joy and rewards that came from leading a class of young, passionate student storytellers will rank high on my list of life experiences — even though I learned as much for myself as I likely taught them.

I was apprehensive when the University of the Nations first asked if I would consider flying to Kona, Hawaii to teach for a week at its School of Photographic Communication (SoPC) on the Youth With a Mission campus. I was one of a handful of journalists recruited as instructors.

Nikon D750, AF-S NIKKOR 28-300mm f/3.5-5.6G ED VR, ISO 1000, ƒ/5.6, 1/100

I know some photographers for whom teaching, coaching and counseling seem almost effortless. They are full of knowledge and experiences that just cry to be shared.

I’d never taught a photo class before. But I pushed through my anxiety and said yes anyway. For weeks I pondered what I’d have to offer.  What could I share that was different from the others?

What kept coming back to me was ‘the story.’ Because what we do is really is all about the story, or narrative, or whatever we’re calling it these days.

Without journalistic depth, all those creative, artful and technically brilliant images in the world will remain nice pictures for a gallery or photo magazine, but they fall short as real journalism.

Nikon D750, AF-S NIKKOR 28-300mm f/3.5-5.6G ED VR, ISO 4000, ƒ/8, 1/100

In 2015, our culture has become one of viewers – on our laptops, iPads, tablets and smartphones – than readers of the printed page.

As journalists, we need to use all the tools available to communicate: still photos, cinema, text, audio and design.

Photojournalists are first of all journalists. The world is brimming with photographers,  but it’s our job to tell stories. Sometimes we have editors who direct us to specific people or situations to capture, but much of the time it’s up to the photojournalist to find someone that moves a story forward.

Everyone has a story if we dig deep enough.  Too often we take the easy way, the low-hanging fruit. We don’t dig. We don’t get names, or if we do, we only get the top layer.  We often don’t get the rich story because we don’t ask the right questions, or we don’t know how to ask questions and really listen to the answers.

Students interview coffee grower in downtown Kailua-Kona, Hawaii. [photo by Robin Rayne]

So that’s what our class worked on for several days. As an exercise, I asked the students to pair off and interview each other, digging for something  that that was interesting, curious, unique — or that had conflict.

We split into two production ‘crews’ and talked about a common narrative that had conflict. The students shaped and refined their questions for a handful of  prospective subjects and then left the campus in search of a multimedia story that could be told in two minutes.

Nikon D750, AF-S NIKKOR 28-300mm f/3.5-5.6G ED VR, ISO 180, ƒ/4.5, 1/100

A few learning moments quickly surfaced as the crews approached their mission.

Rule Number One: The story is king.

Other things to remember:

2. Do your research and think hard about what the story really is. Answer the question: What’s the conflict? Why should the viewer care about your subject or the story?
3.Don’t fall in love with your original idea. Have a “Plan B.’ and a ‘Plan C, D, E and F’ if necessary.
4. Be willing to dig for the real story and follow wherever it goes.
5. Look for emotional, spontaneous moments, establishing shots and appropriate b-roll.
6. You can never have enough b-roll.
7. Know your equipment. f4 at 125th sec. outside on a bright day is probably going to be overexposed. And make sure the record button is ‘on’ when it is supposed to be.
8. Watch your monitor. Know your camera, microphones and cables.
9. Always bring a reflector, tripod and fresh batteries.
10. Listen to the subject’s answers. If they’re stiff, ask the subject to say it a different way.
11. Delegate responsibility so each crew member knows her/his job.
12. Watch out for things other crew members might have missed.
13. Mediocre images can be forgiven if the audio is solid and clean. Bad audio will lose viewers even if the images are stellar.
14. Kona coffee is awesome.

Students learn how to use microphones with their DSLRs to interview subjects. [photo by Robin Rayne]

Watching the crews learn by doing was the best way to teach. All the things I knew to be true were hammered home to me as we watched the final pieces together. We learn from screwing up more than we learn by our successes.

I hope the students learned some things they might not have known before. Sitting among them rather than in front of them was a great equalizer. Because none of us has ‘arrived’ and knows everything. We ought to be learning until the day we die.

Students talk to a local shop employee in Kailua-Kona, Hawaii. [photo by Robin Rayne]

Now I have a few more friends who will go on to do amazing things in their lives.  I’m deeply blessed to know them. I really liked what we accomplished together that week.
They all rocked, and I hope we’ll stay connected.

Aloha,

robin rayne nelson
http://assignmentatlanta.com/

How to capture “Golden Light”

 
Nikon D750, AF-S NIKKOR 28-300mm f/3.5-5.6G ED VR, ISO 12800, ƒ/5.3, 1/30

While most people are facing the sunset on the beaches of Hawaii, I like to turn around 180º and face the beach.

Guess what you will find?

Nikon D750, AF-S NIKKOR 28-300mm f/3.5-5.6G ED VR, ISO 12800, ƒ/4.5, 1/25

You will find the Golden Light that you often hear National Geographic Photographers talk about. I love this warm light for portraits.

Nikon D750, AF-S NIKKOR 28-300mm f/3.5-5.6G ED VR, ISO 12800, ƒ/4.5, 1/40

Now to the naked eye, it was a lot darker than it appears in these photos. It was dark because the sun had set and was just below the horizon.

Nikon D4, AF-S NIKKOR 14-24mm f/2.8G ED, ISO 1000, ƒ/2.8, 1/25

Here I captured the look back towards the sun. All these photos are taken within a 5–minute window of time.

Nikon D750, AF-S NIKKOR 28-300mm f/3.5-5.6G ED VR, ISO 8000, ƒ/4.5, 1/100

How do you capture this light? Well, while you see this sunset, just turn around, and the Golden Light is everywhere you see. I think it looks best by having subjects not quite looking straight at sunset. Have them turn slightly 45º to 90º to the light. If you have the camera 90º in the evening, you have some of the most beautiful light I know of capturing.

I think it beats the window light. By the way, if you don’t want to stay up for the sunset, you can get up early, capture the sunrise, and get similar results.

Plan ahead for great Prom Pictures

 
Nikon D3S, 24-120mm, ISO 200, ƒ/9, 1/60

The key to a great photograph of any kind has much to do with the location. So check with your friends for possible locations before all the kids go off to the prom.

One of the parents had a lovely backyard with steps that made for fabulous “natural” risers.

Nikon D3S, 14-24mm, ISO 200, ƒ/9, 1/60

This large group photo is typical. The last photo is usually the large group since some will run late.

I recommend using lights to ensure you can see everyone’s face without raccoon eyes. Racoon eyes are from the overhead sun or, even worst, a backlit photo.

Here is the setup I did for all the photos:

I had six Alienbees B1600 lights. Four are in front with 65″ umbrellas, and two in the back pointed up to be sure the trees didn’t go black. Instead, the trees created a dark canopy, and the strobes in the back helped open up the shadows.

Nikon D3S, 24-120mm, ISO 200, ƒ/9, 1/60

Plan for the lens choice as well. I needed to move quickly, so for all the photos except the massive group photo, I used the Nikkor 24-120mm. This lens lets me do a couple of shots and then quickly have a small group photo.

You see, on the evening of the prom, they do not want to take photos all night long. They want to go to the dance. So pick a great location, put up your lights and then have a lens like the 24-120mm or multiple cameras with different lenses ready to go.

Proms are just a couple of months away, but the best photos are the ones where the photographer takes the next two months to plan. You can rent lights if you don’t have them. If you have never done this before, do a test run before the date.

Nikon D3S, 24-120mm, ISO 200, ƒ/9, 1/60

Theater photography with Sigma 120-300mm ƒ/2.8 DG OS HSM | S

 
Nikon D4, Sigma 120-300mm ƒ/2.8 DG OS HSM | S, ISO 5000, ƒ/2.8, 1/1000

I love using the Sigma 120-300mm ƒ/2.8 DG OS HSM | S to shoot things other than sports.

My daughter is in the high school theater, and I am getting many opportunities to capture her and her friends on stage. In a few years, she will be off to college, and these photos of her performing will be even more valuable to our family.

She is in the center in the photo above, playing a blind girl.

Nikon D4, Sigma 120-300mm ƒ/2.8 DG OS HSM | S, ISO 12800, ƒ/5.6, 1/640

Why is the lens what I like so much? It is a zoom. I never know if I need a tight or wide shot of the stage. By being an undersized back shooting over the audience, I can get those closeups and not miss wider shots.

Nikon D4, Sigma 120-300mm ƒ/2.8 DG OS HSM | S, ISO 5000, ƒ/2.8, 1/1000

In theater, you may have just a few actors or many in a scene. Sometimes I need a little more depth of field, and other times I need a shallow depth of field. The lens lets me open up to ƒ/2.8 and close down as required.

Nikon D4, Sigma 120-300mm ƒ/2.8 DG OS HSM | S, ISO 5000, ƒ/2.8, 1/1000

The audience was smaller for the first four photos, and I was much closer to the stage. But another play, I was in the very back of the room. I used a Sigma 2X converter to change the lens to 240-600mm.

Nikon D4, Sigma 120-300mm ƒ/2.8 DG OS HSM | S, Sigma 2X, ISO 4000, ƒ/5.6, 1/250

Had I been shooting with my Nikkor 28-300mm, I would have to use ƒ/11 if I put a 2X converter on it, but I was shooting at ƒ/5.6 with the Sigma.

There are many times when I need this specialty lens. Maybe you only need it once in a while. If that is the case, then rent the lens. I decided I used it enough to justify buying the lens.

The key to getting the photo is sometimes has the right gear for the situation. Consider the Sigma 120-300mm ƒ/2.8 DG OS HSM | S for more than just sports.

Why Change?

 
Nikon D750, AF-S NIKKOR 28-300mm f/3.5-5.6G ED VR, ISO 100, ƒ/4.5, 1/200

Two of my favorite times of the day are sunrises and sunsets. New beginnings and endings are what they represent to me.

This week I have been attending a corporate meeting where the one thing that struck me was that they acknowledged that probably one of the greatest threats to the success of their business was their success.

When you become successful, you can become very complacent. You take for granted your actions.

If your customers love your work, that is great, but don’t settle for what you do. Instead, learn to continue to push yourself and grow.

Nikon D750, AF-S NIKKOR 28-300mm f/3.5-5.6G ED VR, ISO 8000, ƒ/4.5, 1/100

“The Only Thing That Is Constant Is Change,” said Heraclitus. Change is happening all around us all the time. You cannot stay the same and remain relevant today.

Trying to stay the same because your success today was because of your actions yesterday will not lead you to success tomorrow.

If you want to go somewhere in the future, you need to assess where you are and think and plan accordingly to make changes. But, unfortunately, when you do, you will most likely go backward at first.

Going backward first is called the J Curve. The J Curve breaks down our behavior patterns as we change tasks, habits, or routines. There are five stages to manage internally in your head as you cascade through the stages.

  1. Plateau
  2. Cliff
  3. Valley
  4. Ascent
  5. Mountain Top
It looks like this:
 

I only mention all this to make you aware that taking action to ensure you move forward often will feel like you are making it worse.

Take the time and do some research. Then, plan your choices based on where you want to go.

See you at the top!

Nikon D750 & AF-S NIKKOR 28-300mm f/3.5-5.6G ED VR at Hawaiian Luau

 
Nikon D750, AF-S NIKKOR 28-300mm f/3.5-5.6G ED VR, ISO 7200, ƒ/5.6, 1/500

Last night I took in the beautiful Luau put on by Island Breeze at the Courtyard Marriott King Kamehameha’s Kona Beach Hotel. If you come to the Big Island, this is a must-see!!!

I am also working on putting together a photography workshop here and will do my best to make this part of the package. I know many of the Island Breeze folks. They have been my Hawaiian fire dancers.

Nikon D750 Performance

I just wanted to enjoy the Lua and not work, but I still wanted a photo or two from the night. So I just took the Nikon D750 and the AF-S NIKKOR 28-300mm f/3.5-5.6G ED VR with an extra battery–that I never needed.

This camera and lens are an excellent combination—extremely sharp images due to the D750 sensor and the lens’s Vibration Reduction.

Nikon D750, AF-S NIKKOR 28-300mm f/3.5-5.6G ED VR, ISO 800, ƒ/5.6, 1/100

After taking this photo of the dancers, I changed the Auto ISO shutter speed to 1/500. But I was surprised at the sharpness at 1/100.

Here are some more images from the night that you might enjoy:

Mixed lighting assignment comparing TTL Hotshoe to Studio Strobes

 
Nikon D4, Nikkor 85mm ƒ/1.8G, ISO 100, ƒ/1.8, 1/8000—Off camera fill-flash using the Nikon SB-900. The Pocketwizard radio remote triggers the flash. 

Today I taught the students the difference between studio strobes using them outside for lighting and using a TTL Hotshoe flash.

I love the photo at the top with the ƒ/1.8 look.

Now, all these test shots show the difference between the lights. Not so much about finding a great location–now, seeing these, I should have spent more time scouting before the class to find a great background.

Click on the diagram to see a larger one.

Before we added flash, we took one photo as the light was on the subject.

Nikon D4, Nikkor 85mm ƒ/1.8G, ISO 100, ƒ/2.8, 1/1000

So this is where we started with no light, just the available light.

Nikon D4, Nikkor 85mm ƒ/1.8G, ISO 100, ƒ/11, 1/250–Off camera Alienbees B1600 powered by Vagabond.

Here for this photo, we took the first photo and transferred the settings using a sync speed of 1/250. Instead of the same exposure, we underexposed by -2EV. I wouldn’t say I like the background as sharp as it is here. However, I like the shallow depth of field in the first photo.

Now you can see the advantages of TTL Hotshoe flashes, and the benefit of the studio strobe is shooting faster [less recycle time]. 

Nikon D4 and D750 shooting Hawaiian Fire Dancer

 
Nikon D750, NIKKOR 28-300mm f/3.5-5.6G ED VR, ISO 5000, ƒ/25, 1/40

I went out to shoot with strobes last night to show the students how to use a fill flash.

We set up a strobe to take some photos. This top one was without the strobe, which was a pleasant surprise to me.

Nikon D750, NIKKOR 28-300mm f/3.5-5.6G ED VR, ISO 100, ƒ/7.1, 1/60

Here you can see us setting up. Only one of those strobes is going off at a time. So we had two strobes set up the same way, giving more people the opportunity to shoot.

Click on the diagram to see it larger

Here is one of the photos using this setup here.

Nikon D4, AF-S NIKKOR 14-24mm f/2.8G ED, ISO 100, ƒ/7.1, 1/60

If I had been shooting this for myself, I would have had even more options and maybe an even better photo. Instead, I shot a few and gave the students time to shoot the same setup on their cameras.

We used Pocketwizards to trigger the strobe.

Student’s 1:3 Lighting Ratio results

 
© 2015 Stephanie Leilani

These are the students’ assignment results, where they were to create a 1:3 lighting ratio on the subjects. They could add a background color or just white. They could also have fun, but they had to demonstrate the 1:3 lighting setup.


Assignment Description:
1:3 lighting ratio. This photo uses classic lighting.

Items:

Softbox
This light is your leading light. Get a light reading with just this first. The light should be 45 degrees off the axis of the camera and 45 degrees above the subject’s eyes.

Subject
Your subject should have the main light lighting only part of the face, and the shadows should be just a little to show the 1:3 ratio.

White backdrop
Keep the subject a few feet from the background, and do not use more lights to light it.

(D)SLR
Choose the lowest ISO. Use a portrait lens of 50mm if you don’t have a full-frame camera can work. No more than 100mm.

Octobox
The Octobox is your fill light; get just a reading of this 2nd. Be sure it is 1/2 the power (1 f/stop less) than the leading light. After this is done, get a 3rd light reading of both lights, which will be the setting for the camera. It can be level with the eyes, but you may have to move up with glasses to avoid glare.

© 2015 Benjamin Marsden


Before you use the studio strobes–See the light first

 
Nikon D4, 85mm ƒ/1.8G, ISO 5000, ƒ/1.8, 1/250

Today was the first class of lighting I was teaching to the School of Photography at the University of Nations in Kailua-Kona, Hawaii. I asked one of the students to be my model.

Bethany is helping me as the model for the first assignment on Rembrandt lighting using just one light with a 10º grid on the Alienbees studio strobe.

The top photo is the first photo I took showing what the fluorescent room light looked like before we used lights.

Nikon D4, 85mm ƒ/1.8G, ISO 12800, ƒ/1.8, 1/250

The first thing I did was turn all the lights off in the room except for the modeling light that is on the Alienbees with a 10º grid on it. Then, rather than jumping into shooting with the strobes, I showed the class you could see what you are going to get with the strobes using the modeling light.

Here you can see the triangle on the cheek, which is the classic Rembrandt lighting with a little twist of me not shooting her looking straight on but slightly behind her.

To see the rest of the assignment, you can go to an older post that walks you through the Rembrandt light exercise. Here is that link

Before using flash, you need to see what you are trying to create.

One light is often better than too many.

 
Nikon D3s, 14-24mm, ISO 400, ƒ/5.6, 1/500—Off-camera fill-flash using the Nikon SB-900. The flash is on the Pocketwizard TT5 and is triggered by the Mini TT1 on the camera with the AC3 to control the flash’s output.

I have been going through my files, preparing for next week when I teach lighting to photography students in Hawaii.

One of the tips we will discuss is learning not to light everything. So here in this photo, I just used the existing light, and the camera is set to -2 EV, and then I added strobes that are zoomed in to just light the subjects. So the strobes are set around +2 EV.

Nikon D3s, 14-24mm, ISO 400, ƒ/3.2, 1/400

Here is the same photo without the strobes. See how the strobes make the subjects “POP” and help saturate the colors.

Click on the diagram to see it larger

Here is the lighting diagram for the top image.

Nikon D3s, 14-24mm, ISO 100, ƒ/5.6, 1/250—Off-camera fill-flash using the Nikon SB-900. The flash is on the Pocketwizard TT5 and is triggered by the Mini TT1 on the camera with the AC3 to control the flash’s output. 

By underexposing the background, I am saturating the colors of the sky. Then the flash helps light the subjects to be correctly exposed and draw your eye to them.

Nikon D3s, 14-24mm, ISO 100, ƒ/5.6, 1/250
Click on the image to see larger.

With no strobes, these photos just don’t “POP” like I want them to do.

Nikon D3s, 14-24mm, ISO 100, ƒ/4, 1/200—Off-camera fill-flash using the Nikon SB-900 & Nikon SB-800. The flash is on the Pocketwizard TT5 and is triggered by the Mini TT1 on the camera with the AC3 to control the flash’s output. 

Now here is an example where using two lights on either side of the subjects starts to create what I call an “unnatural” light setup. Now they look like this is a painted background, and they are on some cruise ship where you get your photo made.

Nikon D3s, 14-24mm, ISO 100, ƒ/4, 1/200

If you want your photos with light to truly “POP,” remember not to light everything. Use light sparingly for more dramatic images.