Photographer are you shooting yourself in your foot?

 
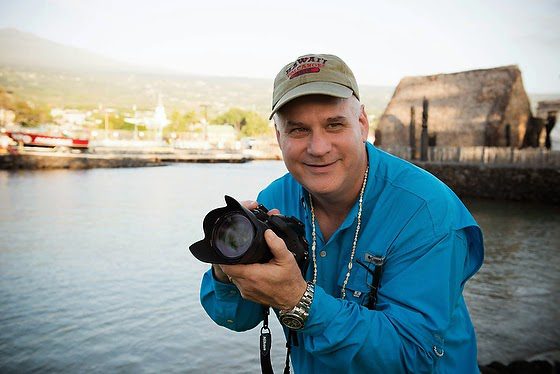
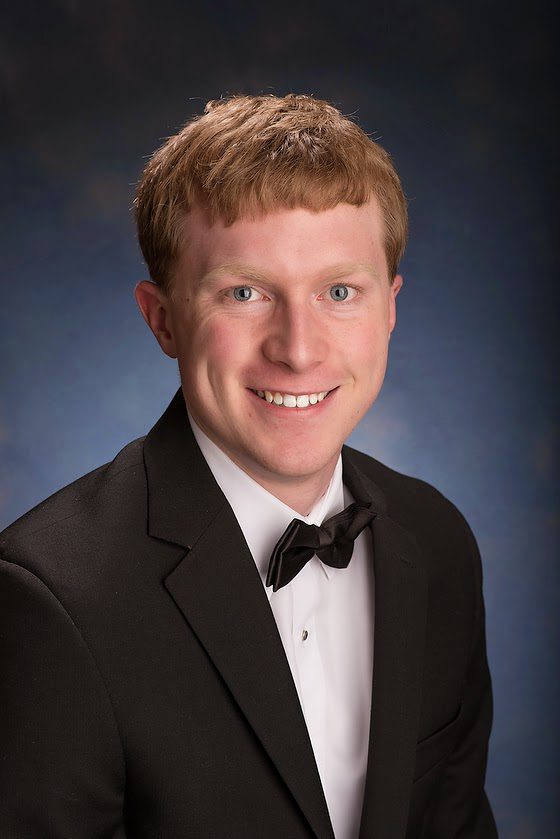
Fuji X-E2, FUJINON XF 18-55mm, ISO 1000, ƒ/2.8, 1/500

In the words of Joan Rivers, “Can we talk?” Let’s get honest here; we are often too concerned about ourselves and not enough about our clients.

Did you know that many people do what they consider loving actions to hurt someone? They are more often taking action because it makes them feel better, not their friend.

I learned about this when I was a Social Worker. We call this behavior enabling and not helping behavior.

Enabling occurs when you allow the addict, alcoholic, or afflicted individual to continue their destructive behavior. Enabling is often perceived as helping. However, the essence of enabling is permitting the addict to continue with their addiction, often by supplying money, shelter, legal aid, or any other help form.

I learned that enabling to avoid it requires you to know more about a situation. You must understand the root causes and not just the symptoms.

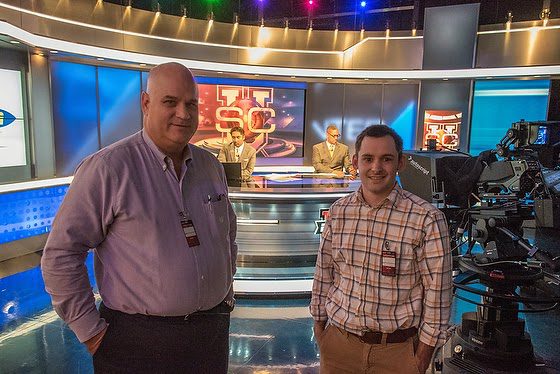
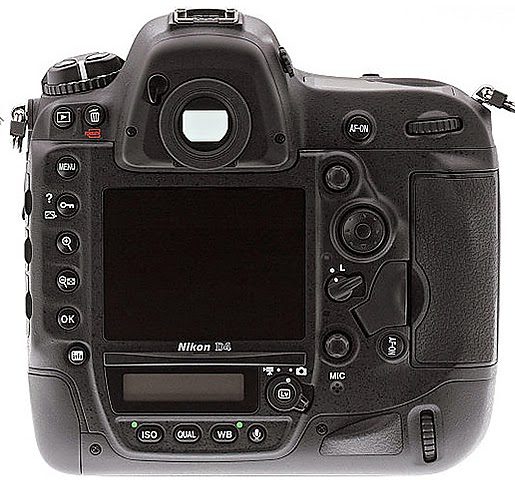
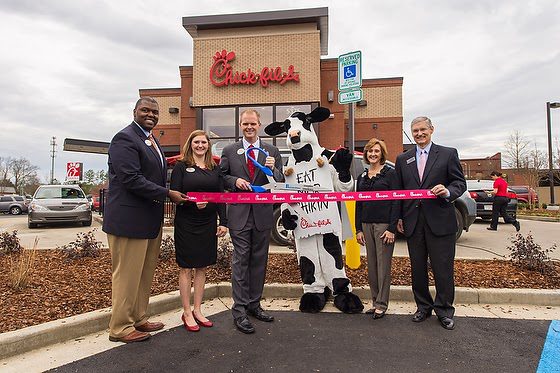
Nikon D4, AF-S NIKKOR 28-300mm f/3.5-5.6G ED VR, ISO 100, ƒ/6.3, 1/250

Providing Solutions & Not Problems

I think many photographers approach clients with problems, not solutions. Unfortunately, they are just like those enablers–they do not understand the big picture and shoot themselves in the foot over and over.

I believe today, those who pitch ideas that are easy for a client to plug into their situation get more jobs than those who pitch ideas that require the client to do more work to use their contribution.

Here are some questions to ask yourself about your pitch:

  1. What problem does my idea help solve for the client?
  2. What does my client have to do to implement my opinion?
  3. If my concept requires help, am I finding it and providing the total package or relying on the client to deliver something?
  4. Does my pitch talk about how this addresses the client’s issues?
  5. How do I know that my idea is good for the client?
  6. Do I have more than one idea in case the client says they are not interested in some reason or another?
To boil this down, the fundamental question you need to ask is why the client should care about your idea. Don’t assume they understand how this will help them–you need to have that as part of your presentation. It will show them you do understand them, or it will show that you do not understand at all what they are doing.

2015 Staff Photojournalist Job Requirements

 
Nikon D810, 24-70mm [photo by: Robin Nelson]

For those who want to find a staff job in a Newspaper, Magazine, or online outlet, the job description is a lot different these days than it was years ago.

Here are a few descriptions I pulled from job postings with the National Press Photographers Association:

  1. Candidates should excel at news, features, and sports photography. Our visual journalists are also counted on producing multimedia presentations and online slide shows.
  2. The multimedia coordinator is responsible primarily for video production and assists with other multimedia projects, including photo research, live streaming, and interactive content. In addition, the multimedia coordinator ensures that video projects produced will meet editorial and branding standards and tell compelling and distinctive stories.
  3. Candidates should have news, feature, sports, and multimedia experience and be prepared to work in a fast-paced, breaking-news environment.
  4. We are looking for an energetic, versatile, creative multimedia/visuals editor who can help us continue producing outstanding visual content for our readers!

Multimedia is technically anything that involves multiple types of content. The World Press Photo organization split this category into interactive and linear.

Linear productions give the reader guidance. However, there is only one way to experience the story. With an interactive package, the reader can decide the direction.

With either one, there needs to be visual storytelling in terms of photography and video in each.

Nikon D810, 24-70mm, ISO 3200, ƒ/7.1, 1/60 [photo by: Robin Nelson]

Here is what I am telling students and those wanting to make a career change to storytelling/photojournalism.

I believe three components [skills] are needed to be hired as a staff multimedia producer.

First, you need to be able to write. You need to be able to capture the story in a written form. Writing is necessary because you must provide written captions many times, and today you may be putting the package together all by yourself.

Second, you need to have a good command of photography skills to capture the visual story as stills. You need to master your camera not just to get well-exposed images but use the creative tools of aperture, shutter speed, and light to tell a story more effectively. You need to know how to use artificial light, and I highly recommend learning how to use strobes off the camera.

Third, you need to master capturing motion and sound. Understanding that in most multimedia linear projects, the sound will drive the project, you must know how to capture and use it to help lead the audience through the story. Finally, it would help if you mastered post-production software like Final Cut Pro or Adobe Premier.

Your understanding of what makes a good story and how to find stories will be what is most valued by your employers.

I suggest taking journalism writing and photojournalism courses before diving into multimedia post productions skills. This background will take more than just taking the classes back to back. You must produce at the highest level showing you have mastered these skills.

Your portfolio will be more important than your degree. Those with solid portfolios get the jobs. Many people without a college degree had jobs, while those with a college degree didn’t.

With a portfolio being essential, your degree is what can also make you more valuable, especially if your degree is in a subject that helps make you an expert in that subject. For example, Sebastião Salgado has a doctorate in economics, and Eugene Richards has a degree in social work. These photographers built their professions on their expertise in the subjects they cover.

As you can see, this is a lot to master, so don’t quit your day job before you have a portfolio that shows you can tell stories using multimedia.

Experiencing Israel during Holy Week in Georgia

 
Nikon D4, AF-S NIKKOR 14-24mm f/2.8G ED, ISO 180, ƒ/8, 1/200

This past week I had an assignment at the Explorations in Antiquity Center in LaGrange, Georgia. So I could experience ancient biblical life and times without going to Israel.

This place is one of the ways I learn best–Experiential Learning. Experiential learning is the process of learning through experience and is more specifically defined as “learning through reflection on doing.” Experiential learning is distinct from rote or didactic learning, in which the learner plays a comparatively passive role.

The first photo is a replica tomb of what Jesus Christ was placed into after his crucifixion.

Nikon D750, AF-S NIKKOR 28-300mm f/3.5-5.6G ED VR, ISO 100, ƒ/5.6, 1/125–off-camera flash using the Neewer TT850 flash & Neewer 433MHz Wireless 16 Channel Flash Remote Trigger 

The docent and tour guide helped us see the cross that Christ most likely was crucified on rather than the Roman-designed cross much worn today or in churches. They went into considerable detail to help you understand why this was such a horrible way to die.

 
Nikon D4, AF-S NIKKOR 14-24mm f/2.8G ED, ISO 2500, ƒ/7.1, 1/100
They have authentic goat hair tents like the nomadic shepherds have lived in for thousands of years. Here you sit and listen as the docent helps explain what you are seeing and experiencing.
 
Nikon D750, AF-S NIKKOR 28-300mm f/3.5-5.6G ED VR, ISO 100, ƒ/5.6, 1/160
This photo shows a replica of the main gate to the city. Here you learn about the gate that Jesus would have come through on the donkey. What happened around this gate gives you perspective.
 
Nikon D4, AF-S NIKKOR 14-24mm f/2.8G ED, ISO 220, ƒ/7.1, 1/200
The group is sitting in the Garden of Gethsemane replica, learning about the Olive Tree and the Olive press.
 
Here is a great blog post explaining the symbolism of the olive tree and how Jesus’ prayer in the Garden of Gethsemane was like him being pressed. 
 
Nikon D4, AF-S NIKKOR 14-24mm f/2.8G ED, ISO 400, ƒ/18, 1/200
They have the press that they first use when working with olives. So it was good to see and have an expert in Biblical History speaking and helping us to know the significance of the Mount of Olives and the celebration of Holy Week.
 
Nikon D750, AF-S NIKKOR 14-24mm f/2.8G ED, ISO 9000, ƒ/2.8, 1/100

You can experience a Jerusalem Biblical Meal, which would have been similar to the last supper. I recommend going to the center for an experiential learning experience. For photographers, it makes for a fun location to shoot.

The Explorations in Antiquity Center is not related to any particular denominational tradition, so the conferences should be meaningful and sensitive to people from many different backgrounds.

 
Nikon D750, AF-S NIKKOR 28-300mm f/3.5-5.6G ED VR, ISO 2000, ƒ/4.8, 1/100–off-camera flash using the Neewer TT850 flash & Neewer 433MHz Wireless 16 Channel Flash Remote Trigger. The MagMod with the grid is used to keep light off the screen.
Here is an explanation of the MagMod I used to keep the flash off the screen in the photo above.
 

Chick-fil-A App – No Skymiles Needed


While this may not seem to be about photography, it is about saving some time when ordering your breakfast, lunch, or dinner. As we know today, the most precious commodity we have is our time.

One of my favorite Apps and programs I use is the Delta Skymiles program. The loyalty program is excellent, and two main perks I love the most. The best part of the program is boarding early on all flights.

Having camera gear, I need to be sure this is on the plane, and I am handling it and not the baggage guys.

The second thing I like is accruing mileage to use towards future trips.


I now have another app saving me lots of time and giving me perks similar to the Delta App–Chick-fil-A’s new mobile ordering app.

I love three things about it: 1) Order accuracy, 2) jumping to the front of the line, and 3) No need to be a long-time user of Chick-fil-A to benefit.


The first thing you will do when you use the App locating Chick-fil-A restaurants near you that are participating. Over the next year, they are rolling this out in different markets. Lucky for me, in the Atlanta market, I can use the App. However, Chick-fil-A doesn’t expect to make mobile ordering available nationwide until 2016.


You tell them if you will pick up the meal: 1) Curbside, 2) Dine In, or 3) Carry Out.


Next, the App has you on the Menu page. Similar to the menu in the restaurant. You can pick a meal or à la carte.

Once you have ordered, you can save this order as a favorite. Held order is excellent for those customizations where you want more pickles or none, for example. Once you have that complicated or standard order, you can add that to your favorites.

Maybe you pick up for your family member as well as you, and you both have a standard order–this can save you time in the future.


There are combination meals, and once you pick one, you can change the drink’s size or side item like Waffle Fries.


Here you can customize your order as well.

Once you have the meal, it pops up, and you can review it. You can also see the Nutrition or Allergens by scrolling down.

Occasionally Chick-fil-A Cows might pop in with a suggestion as they did here with me.

Like Amazon, you put your credit card information into the App for easy paying. Payment in the APP speeds up the process.


You can also put money into the App. Money stored in the APP is excellent for parents with kids who need to keep them on a budget.


The last step is when you arrive; you click the button to tell them you are here, and they start your order. I don’t want those Waffle Fries just sitting around getting cold, so this keeps everything hot for you.

Emotion Trumps Technique

 
Nikon D4, Nikon 85mm ƒ/1.8G, ISO 12800, ƒ/1.8, 1/250

The other night I was watching the TV Show The Voice. Nate Ruess was a guest advisor to all the contestants. I remember one comment that stood out the most: “Emotion trumps technique every time.”

Christina Aguilera often advises the other coaches, “Go with your heart!” when trying to make a decision.

Here are a few quotes from famous photographers also talking about the power of emotion and the heart of photos:

“A good photograph is one that communicates a fact, touches the heart and leaves the viewer a changed person for having seen it. It is, in a word, effective.”
— Irving Penn

“Look and think before opening the shutter. The heart and mind are the true lens of the camera.”
— Yousuf Karsh

“I think that emotional content is an image’s most important element, regardless of the photographic technique. Much of the work I see these days lacks the emotional impact to draw a reaction from viewers, or remain in their hearts.”
— Anne Geddes

“If it makes you laugh, if it makes you cry, if it rips out your heart, that’s a good picture.” — Eddie Adams

Nikon D750, AF-S NIKKOR 28-300mm f/3.5-5.6G ED VR, ISO 12800, ƒ/5.6, 1/20

Those who capture emotion by accident will struggle to do it again. However, there are those photographers are in touch with their feelings. They can constantly deliver great photos because they are emotionally aware of themselves and their surroundings.

 
Emotion, or a feeling, can bring a snapshot out of obscurity and make it shine. Sometimes an expression on the face can help bring this to the photograph. Often the direction of light or color of the light can influence emotions.
 
Nikon D750, AF-S NIKKOR 28-300mm f/3.5-5.6G ED VR, ISO 100, ƒ/4.5, 1/500
Sometimes you need to eliminate things from the photo to strengthen it.
 
Nikon D4, AF-S NIKKOR 14-24mm f/2.8G ED, ISO 100, ƒ/7.1, 1/60
You can add light as I did here on the Hawaiian Fire Dancer. I used a Alienbees B1600 with a CTO gel and 30º grid to light up the guy. Again, the cool sky helped create a mood. So in this situation, I “created” the mood.
 
Sometimes you just need to put down the cameras and sit for a few minutes until you feel the mood. Then you need to figure out what visual cues trigger the mood.
 
Fuji X-E2, FUJINON XF 18-55mm, ISO 6400, ƒ/4, 1/6
Sometimes like here at The Wizarding World of Harry Potter–Diagon Alley at Universal Studios, the costuming and surroundings help create the mood.
 
In this photo I feel like I am in the World of Harry Potter.
 
Fuji X-E2, FUJINON XF 18-55mm, ISO 3200, ƒ/8, 1/500
My daughter’s dress and expressions transported me to Harry Potter’s world.
 
What you include and exclude can change the whole feeling/mood of the image.
 
Fuji X-E2, FUJINON XF 18-55mm, ISO 1250, ƒ/5.6, 1/125
Fuji X-E2, FUJINON XF 18-55mm, ISO 6400, ƒ/2.8, 1/40–pop up flash at -1EV
You may remember these two photos I showed in an earlier post. Remember even the time of day will change the mood.
 

What time is it on your camera?


Sunday, March 8th, Daylight Savings time happened. We lost an hour. Did you move all your clocks forward?

Time setting is essential if you have only one camera, but it is critical to have more than one camera for a photo shoot.


Go through your menu and set the camera for the correct timezone. The timezone setting is excellent to use if you travel to be sure you are placed on the local time using the correct time zone.

I like using Nikon’s Camera Control Pro 2 for $179.95 to set the camera time to the computer, which syncs to the internet time.

I synchronized the camera date and time to the PC, as you see here, as I did with my Nikon D4.

I plugged the camera into the computer using the USB port and calibrated the Nikon D750. Now all three cameras are synchronized.

Correct time helps when editing so that I can get all the photos shot at the same time together. This makes it so easy in Adobe Lightroom to organize the pictures by Capture Time.

Now, changing white balance situations can be crucial when trying to group all the duplicate photos in the same light.

SYNCHRONIZE THE CAMERA DATE AND TIMES!!!!!!

Backstage Tour of ESPN-U studios in Charlotte, NC

 
Here I am on the set of Sports Center with photo assistant David White. [Nikon D750, AF-S NIKKOR 28-300mm f/3.5-5.6G ED VR, ISO 12800, ƒ/7.1, 1/100]

This past Tuesday, I called my friend James Dockery who will be helping teach the Storytellers Abroad Workshop in Romania, with Jeff Raymond and me, letting him know I was going to be near him the next day in Charlotte, NC.

The next thing I hear is an invitation to stop by for a tour of the ESPN studios in Charlotte. Charlotte is the home of ESPN U and a few other programs.

James Dockery is a coordinating editor for ESPN and is here finishing up some edits at the end of his shift. [Nikon D750, AF-S NIKKOR 28-300mm f/3.5-5.6G ED VR, ISO 12800, ƒ/5.6, 1/60]

James is showing David White what he is editing. The software they use primarily is Quantel IQ, customized for ESPN. They are editing off of servers live rather than downloading files, then editing them, and then uploading them. They are editing so quickly that replays show up seconds after the editor captured them with graphics.

[Nikon D750, AF-S NIKKOR 28-300mm f/3.5-5.6G ED VR, ISO 12800, ƒ/7.1, 1/30]

One of the best things to learn editing from someone who works at a place like ESPN is they have created a digital workflow so that as one person leaves and the next editor comes behind them, they can pick up where the other editor stopped and finish a project. Now you cannot do this if you have your way of doing things.

One of the best things I learned from James Dockery was file structures. We learned in our workshop in Lisbon last year that you need first to create the folders for a project first before you even start working. So here is how we set up our project folder for our “Portugal Project.”

Create Project Folder

  • 01_Portugal Photo Files
  • 02_Portugal Video Files
  • 03_Portugal Audio Files
  • 04_Portugal Graphic Files
  • 05_Portugal Premier Edits [We were teaching using Adobe Premier]
  • 06_Portugal Scratch Disk
  • 07_ Portugal Output Render Files
  • 08_Portugal Preview Files

In the 05_Portugal Premier Edits folder, we created a new version each time we reopened the project to start. This way, if we had a problem, we could go back to an understanding and not have to recreate all the work we have done. The brackets were not part of the file name; just here to tell you what was in those edits.

05_Portugal Premier Edits [Inside the folder]

  • Portugal Edit_001 [Day 1]
  • Portugal Edit_001 [Day 2]
Here is the moving graphics edit suite at ESPN. [Nikon D750, AF-S NIKKOR 28-300mm f/3.5-5.6G ED VR, ISO 12800, ƒ/5, 1/125]
The other thing that James could advise on was your camera settings. Have all your cameras set the same way, so editing goes much smoother. ESPN broadcast in 720p. 
 
He recommended shooting everything in 720 60 FPS. The second choice was 720 30 FPS which depended on your camera’s capabilities.
 
David White had fun putting on Auburn’s helmet, his favorite football team–Go War Eagles! [Nikon D750, AF-S NIKKOR 28-300mm f/3.5-5.6G ED VR, ISO 12800, ƒ/7.1, 1/200] 
Seeing all the helmets reminded me that you could never have enough “B” roll. I can tell you from my experience, and so can James, that you cannot have enough “B” roll. So for those coming with us to Romania this summer, be prepared to hear this repeatedly. 
 
Here we are in one of the master control rooms for a live show. There is still another room behind me: the sound guy’s room. [Nikon D750, AF-S NIKKOR 28-300mm f/3.5-5.6G ED VR, ISO 12800, ƒ/8, 1/80]
This summer Jeff Raymond, James Dockery, and I will be teaching students how to create a video package that uses still images, video, audio, and graphics to help tell a story. 
 
 
There is still time to join us in Romania. Here is the link www.StorytellersAbroad.com 
 

Ever wonder what happened to your camera???

The other day I was trying to take photos with my Nikon D4, and it would just not focus. There was a delay when I pushed the shutter until the camera fired. 

I looked to see if I had set the timer. I didn’t select it. So now I am telling myself, what the &#%!@?!? 

I had put the Pocketwizard TT1 on the camera and was attempting to fire off the camera flash.  

I can report that this took a couple of days to figure out. Not proud of how long this took. 

The problem was the flash control on the Nikon D4 was set to Red-eye reduction. To change those settings, you push the flash button on the top of the camera and turn the main command dial. See the illustration here. 

  Here are the choices on the camera for you.

I do not remember ever changing this, so this is why I had a tough time isolating this problem.

Quick solution 

Most all cameras have a way to reset the camera to factory settings. However, the time it takes to figure out what setting the camera changed may take longer than just a quick reset. On the Nikon D4, you find the two buttons with the green ●. You can find them by the ISO and WB buttons on the back of the camera. 

Just push these two buttons, which will likely solve most of your problems.

One more way on the Nikon D4 camera [most cameras have this function] is to find all your current settings and change that one item.

I am writing this blog as much for myself as anyone else.  

Here is an interesting factoid: When you take good notes, you will remember things well enough that you rarely have to look at their notes again.

It seems that writing anything down makes us remember it better. But, on the other hand, not writing things down is just asking to forget. So it’s a kind of mental Catch-22: the only way not to have to write things down is to write them down so you remember them well enough not to have written them down.

Now you may know another reason I do a blog. It helps me to go through the process of writing something down, and in the process, I have discovered I remember more things. Another thing is I now have an online database of topics I can find later when I am having trouble remembering or I want to share with someone who asks me a question.

Rim light can be critical in portraits

Nikon D750, Nikon 85mm ƒ/1.8G, ISO 100, ƒ/9, 1/200

My friend contacted me and wanted me to reshoot their son’s senior photo but match the background. Here is one of the photos from the session. Below are the lighting diagram and settings for the image.

The softbox on the camera’s right is -2 EV compared to the leading light on the left. Depending on the subject’s face, I would alter the setup so the one he was facing was the leading light and the other light was acting like a fill.

To make this photo work, I believe the hair light behind the subject helped to rim light the issue just enough to separate him from the background. Without it, the tux would have blended with the background and created a near merger.

My preference is a muted background which, for me, helps to separate the person from the background. So, I just changed the background and added a light to the background. Below is the lighting diagram for you.

Your goal should be that the background compliments the subject and doesn’t do anything to distract from the subject. You also want to be sure your subject doesn’t blend into the background. As with all rules, there are times to break them.

Transitioning From Photographer to Storyteller

 
Photo courtesy of Knolan Benfield, Jr.

One of my earliest memories with our family is my grandfather, whom I called Daddy “B,” with his slide projector sharing his latest trip with all the family. The photo above is with my Daddy “B,” Nana “B,” my mother, sister, and me wearing an Indian hat and watching a slideshow.

Once I started shooting myself, I also got a slide projector and would have similar shows in our home.

In my second job with the International Mission Board, I helped missionaries learn how to construct a slideshow so that it told a story. I also produced slideshows to music. I worked at the IMB in the late 1980s.

I was taught how to shoot “Photo Stories.” Here is what I was introduced to capture:

  1. Opener: Sets the scene for the story
  2. Decisive moment: The one moment that can by itself tell the story
  3. Details: Besides being like visual candy to the story, help often with transitions–especially in multimedia packages
  4. Sequences: give a little variety to a situation
  5. High overall shot: Gives a good perspective on how the elements all fit together
  6. Closer: Besides the classic shot of the cowboy riding off into the sunset, there are other visual ways to help bring the story to a close
  7. Portraits: These photos are great for introducing the characters of the story

I worked with a writer and produced our packages together in magazines or newspapers.

Looking back, I would say I was getting elements of the story and not responsible for the complete package.

I was learning the craft of the storyline. Then, I focused on the HOW? and WHAT? And now, I am laser-focused on the WHY.

My first coverage of the Daddy Daughter Date Night at Chick-fil-A was one of my favorite stories where I could see some changes. So here is this story package I did in 2008:

Today I am producing small two to three-minute packages that are small stories on a somewhat regular basis.

Here is one of the latest stories I did recently for Honduras Outreach Inc.:

Here is what they have as their mission statement on their website:

HOI is a Christ-centered short-term mission organization working alongside people of developing countries who desire to implement sustainable development partnerships. We organize mission trips to Honduras and Nicaragua.

HOI’s vision is to create life-changing relationships between the people of developing countries and North Americans, while promoting community directed and integrated spiritual, physical, educational and economic development of men, women and children in the developing world through the promotion of dignity, mutual cooperation and self-sufficiency.

My goal with the package was to help communicate the emotions and the heart of HOI.

This process has taken me more than thirty years to learn. I spent twenty years learning how to produce compelling photo stories, and the last ten have been spent executive producing storytelling packages.

I want to invite you to go with me to Romania to learn how to do this in just two weeks. We still have some slots open. Here is the link to that workshop www.storytellersabroad.com

If that doesn’t work for your calendar, give me a call, and let’s plan a personal workshop or group one.

When being prepared isn’t enough.

 
Nikon D4, AF-S NIKKOR 14-24mm f/2.8G ED, ISO 250, ƒ/8, 1/250

This week I have been covering the grand opening of the brand new Chick-fil-A in Birmingham, Alabama.

Nikon D750, AF-S NIKKOR 28-300mm f/3.5-5.6G ED VR, ISO 12800, ƒ/5.6, 1/80 ***4:13 a.m. EST***

One of the fun yet not-so-fun things is waking up to capture Dan Cathy playing Reveille, which is a bugle call, trumpet call, or pipes call most often associated with the military, waking up military personnel at sunrise. Dan used it to wake up all the First 100 overnight campers.

Nikon D4, AF-S NIKKOR 14-24mm f/2.8G ED, ISO 12800, ƒ/5, 1/20

People lined up 24 hours earlier, and then because there were so many, they had a raffle drawing to pick the first 100 customers.

Nikon D4, AF-S NIKKOR 14-24mm f/2.8G ED, ISO 3200, ƒ/5, 1/60—Off camera fill-flash using the Nikon SB-900 & SB800.  A radio transmitter on the camera is triggering the Flash.

People played all types of games to fill the time. Here some are playing corn hole.

 
Nikon D4, AF-S NIKKOR 14-24mm f/2.8G ED, ISO 12800, ƒ/5.6, 1/25
Most everyone at some time took a selfie with the Chick-fil-A Cow.
 
My gear for this event:
  • 2 – Nikon D4 Cameras
  • 1 – Nikon D750
  • AF-S NIKKOR 14-24mm f/2.8G ED, Nikon D750
  • AF-S NIKKOR 28-300mm f/3.5-5.6G ED VR
  • Nikon 85mm ƒ/1.8G
  • Sigma APO 70-200mm F2.8 EX DG OS HSM
  • Nikon SB800
  • Nikon SB900
  • Pocketwizard kit, TT1, AC3, 2–TT5
  • 2 – Interfit Metal Umbrella Bracket with Adjustable Flash Shoe
  • 2 – Manfrotto 5001B Nano Black Light Stand – 6.2′ (1.9m)
  • 2 – CowboyStudio 43-Inch Black and White Umbrella for Photography and Video Lighting Reflective
  • Røde Video Pro microphone
  • Shure FP15/83 Lavalier Wireless System
  • ExpoDisc
  • Eneloop XX batteries
  • Gitzo GT-0531 Mountaineer 6X Carbon Fiber tripod
  • ProMaster XC525 Tripod
  • ThinkTank Airport Security™ V 2.0 Rolling Camera Bag
  • Zacuto Z-Finder, Gorilla Plate V2, and Z-Finder 3.2″ Mounting Frame for Tall DSLR Bodies
  • Beats by Dr. Dre Solo HD On-Ear Compact Folding Headphones
Nikon D750, Nikon 85mm ƒ/1.8G, ISO 720, ƒ/1.8, 1/250
Some Tips:
 
Generally speaking, you don’t need a ton of fancy equipment to do event photography. I use two DSLR cameras as a bare minimum (Nikon D4), a wide angle lens (14-24mm f/2.8), a general zoom lens (28-300mm f/3.5-5.6), and external flash units (Nikon SB800 & SB900). I can have two cameras by my side, eliminating the need to pause and change lenses.
 
I carried more gear than many since I also shot videos and created a multimedia package.
 
Be Prepared – Do your best to get the run of the show. The run of a play is a timeline of what is happening next. Most event planners have one, and you should ask for it. By the way, two times someone needed a pocket knife, and like a good boy scout, which I was, I had one for them to use.
 
Ask Questions – Be sure to ask the event planner are any planned surprises. You would be surprised how often this happens, and it just isn’t included in the official run of the show, just in case, it fell into the wrong hands. You need to know if they are doing something for someone’s birthday.
 
Nikon D4, AF-S NIKKOR 14-24mm f/2.8G ED, ISO 12800, ƒ/2.8, 1/60

Slow down and remain calm – “Hey photographer, can you come and capture this for us?” is asked so often at events that this is what I call planning for the unexpected.

The unexpected is when being prepared is still not enough. It isn’t on the run of the show and requires you to adjust. Be sure you are fully aware of the timeline and your main objective. Be sure that getting this quick grab shot doesn’t risk meeting the primary goal.

The most thing that gets under my skin the most is the unexpected. The reason is pretty simple. The difference between good and bad photography lies in the preparation.

What often happens is I am in the middle of setting up for something that requires me to put my cameras into a particular setup. The best example is doing a video with my Nikon D4 cameras. There are so many setting changes that I have them now memorized and saved in the Shooting Memory Bank as VIDEO.

I am in manual mode, and the autofocus to manual focus are two things I can think of right away that are not how I would shoot stills. Cameras have microphones on them, and they are on tripods. If someone were to ask me to shoot something right in the middle of this setup, I have to explain it will take me a good five minutes to be ready, and then I will need more time to set up once again for the video interview I am doing.

When this happens, it isn’t the client but someone else who thinks I am there to capture everything anyone will want.

“I would love to get that photo for you. Can you give me just one minute to make some changes with my gear?” I typically try to say when asked for the unexpected. I only say this when I need a moment to change the gear. “I am sorry, but I need to be getting what I am working on right now for _____________ [insert client’s name] that I was to do for them. I have your shot list I am working on. What can I cut to get this photo?” it is also just as appropriate.

If hiring a photographer, give them a shot list before you sign the contract. Remember, when you ask for those last-minute photos, the professional photographer needs time to adjust–this is why you hired them to remember. If it were that easy, then your smartphone would have sufficed.

Now back to the photographer. Be sure when you are saying no that the reason is that you cannot meet your primary objective versus just being unwilling to be inconvenienced. Do this too much, and you will not appear to be there doing all you can to help the client.

My third camera is often set up for quick reaction to about anything: Auto White Balance, Auto ISO, and autofocus settings for face recognition. I typically use the Nikon D750 for this camera. It has a popup flash, just in case I need it.

Remember, when people ask you to do something at the spur of the moment, do your best to accommodate them, but also let them know you may need a moment to get ready.

Nikon D750 Settings


I was asked what my settings were for the Nikon D750. Here are most of those settings, but I want to be sure you know that these are not what I use every time. I do modify these based on situations.

However, this is how I generally leave the camera set.

  • Aperture Priority
  • Slow Flash Sync
  • Auto Focus – Single
  • Auto Focus – Auto set to find faces
  • White Balance A1
  • RAW
  • Matrix Metering
  • Auto ISO
    • Lowest ISO 100
    • Highest ISO 12800
    • Shutter Speed 1/500
 

I am post-processing all images through Adobe Lightroom 5.7.


The first thing I am changing on these settings is White Balance. I will Custom White balance most of the time using the ExpoDisc.

The second thing I am changing is the Auto Focus. Again, I will choose a single point using the 51 pts to move the tiny box around the viewfinder where I put it most of the time on the subject’s eyes.