Making the most of your Fuji X system

Reading Time: 2 minutes


If you are reading this because you saw this might apply to the Fuji X system, then you need to invest in Bill Fortney’s A User’s Guide to the Fuji X-System ebook. If you are thinking about the Fuji system, this is the best $9.95 you will spend. It will help you navigate all their cameras and lenses. The best part is Bill speaks as a pro, and his words of wisdom may help you from purchasing something that you might regret, and then he gives you tips on things you might need.

Most people who write this kind of book have drunk the Kool-Aid of the company and oversold the brand. Bill Fortney loved Nikon, and I never felt like he was overselling Nikon.

If you have ever been to photo shows, you may have met Bill. I often remember standing at a trade show across the table, talking to Bill about the latest cameras and lenses.

The book A User’s Guide to the Fuji X-System is the same voice I have listened to for many years.

“Nope, not yet!” is one of the quotes about the system. Honest that the camera doesn’t do all that his Nikon System does.

Fortney even says, “What kinds of photography is the X-System not my first choice for Heavy duty sports shooting Birds in flight – extreme wildlife action. I didn’t say you can’t do this; I think there are better systems for it!”

He is honest, and his advice will save you lots of time and money in figuring out how to get the most out of the Fuji System.

He goes on and tells you all the great reasons Fuji is worth the investment and how it saves his back for one.

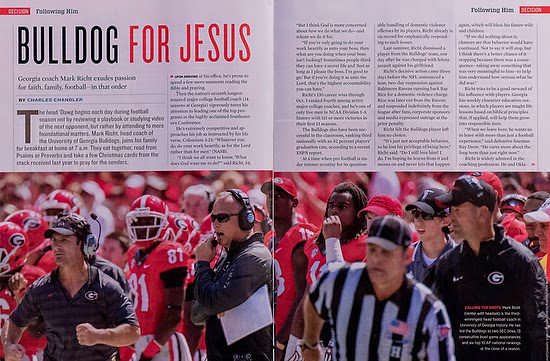
With Bill’s permission, here is one of the pages to give you a sneak peek into the ebook.


There are a lot of examples of everything he talks about in his illustrations.
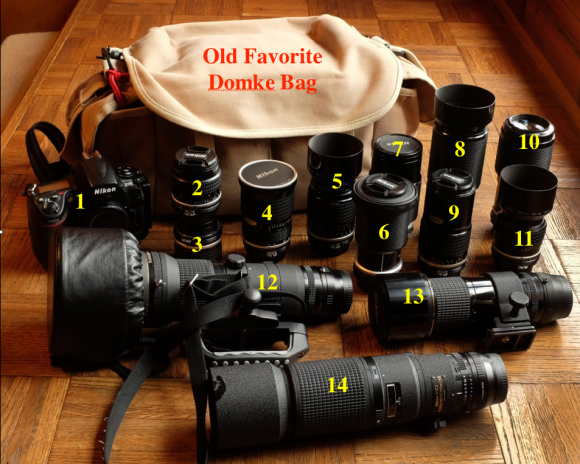
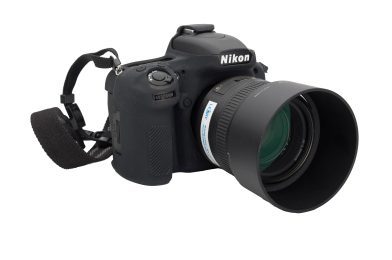
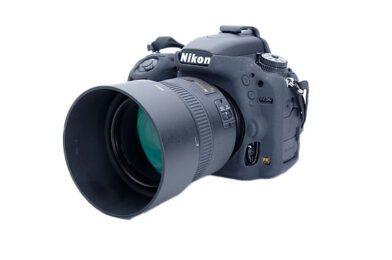
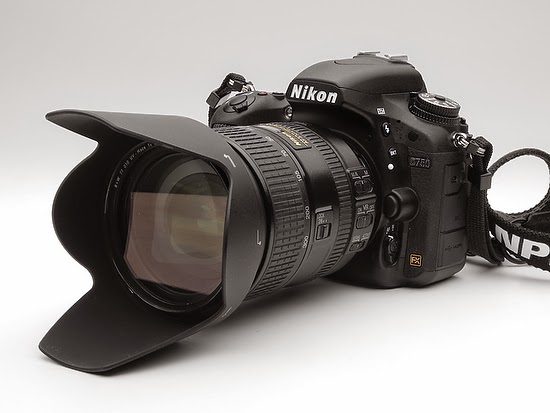
Bill’s Nikon Gear

By the way, Bill still owns his Nikons. He just wrote a blog to ensure you understand how the Fuji system is a tool and not the only one he uses. Here is that blog link [http://billfortney.com/?p=12572]

Key to survival: Variety of assignments for 2014

Reading Time: < 1 minute

 
Nikon D4, 14-24mm ƒ/2.8, ISO 200, ƒ/16, 1/200 with 2 Alienbees with CTO 1 for off camera flash. I am triggering these with the Pocketwizard Radio Remotes.

I went back, looked through my assignments from just this year in still images, and pulled some of my favorites. It had me jumping for joy.

I feel blessed this year.

Take a look at some that I pulled from the year in this package:

While I did everything from Sports, Portraits, Studio, Travel, Events, Theater, and others that I cannot remember, I did video this year.

Here are just a few that I did this year.

Transition Tips for Staff Photographers to Freelance

Reading Time: 4 minutes

[NIKON Z 6, 24.0-105.0 mm f/4.0, Mode = Manual, ISO 100, 1/125, ƒ/4, (35mm = 105)]

I had coffee yesterday with my good friend Robin Nelson [http://assignmentatlanta.com/]. Robin is one of the few freelancers that I know that most of the time is in good spirits.

When staff photographers lose their jobs many of them will call Robin and some have even called me looking for advice. He is always working for someone and has done so for more than 30+ years. Staff photographers basically want to do what Robin is doing–shooting assignments.

Successful photographers like Robin do something for other photographers–they bless them with the jobs they get called to do and cannot.

Robin gets calls and emails asking him if he is available and instead of just accepting and turning down assignments Robin solves the clients problem. If he is busy he finds someone for the client. Editors come to see Robin as not just a great photographer whose style they like, Robin knows other photographers who can meet their needs if he is busy.

I know of a few other photographers like Robin. Michael Schwarz, Billy Howard, and Gary Chapman are three other photographers I like referring work to when I cannot do it.

We all have these conversations with those who just lost a job or even newbies to the industry.

After our coffee time I decided it would be great to share what Robin and I would like to tell Staff Photographers who just lost a job.

Tips:

1) Losing the staff job is like going through a divorce. Being on a staff is like being married and being a freelancer can feel a lot like being single again. We recommend using those same techniques you used to court someone. Just like seeing and meeting a drop dead gorgeous person that you are sure God had destined for you, that person may not be aware God told you that.

2) The movie “Runaway Bride” is a predictable, but fun romantic plot about the importance of knowing and loving oneself before beginning the journey of marriage. You really need to know all that you have to offer to a client and not just your portfolio. Maybe you are a history buff and this can be a great asset to some clients.

3) Accept Rejection – Derek Jeter during interview about his career said he was really blessed to have a job that allowed him to fail 70% of the time and consider him successful. Successful business fails more like 85 – 90% of the time. Good rule of thumb is that for every 10 people you contact only 1 of those will be interested.

Jane Yandel Senior Photos [Nikon D4, Nikkor 85mm ƒ/1.8G, ISO 100, ƒ/1.8, 1/400]

4) Court your clients – Don’t ever take your clients you have for granted. Keep the fire in the relationship.

5) Ideas are more important than your portfolio. All your clients and potential clients have a job to do. They have a problem to solve. You pitching ideas that solve their problems and not your perception of what their problems are is what will keep you busy. While great stories should be told, the channel for telling that story is not every channel. Just because you find a story in the clients audience it still must address the problems that they are tackling at the moment.

Honduras Outreach [NIKON D4, 28.0-300.0 mm f/3.5-5.6, Mode = Aperture Priority, ISO 3200, 1/250, ƒ/6.3, (35mm = 65)]

6) Learn how to be a REAL friend. Number one key element to a good friend is someone who “listens.” You know they listen because all the words out of their mouth after you have talked communicate understanding and compassion for where you are in life. Calling and pretending to be interested in wanting to know me and because I don’t have a job for you right away you never call again is a great indication you are shallow and only interested in yourself. The client needs to be someone they can trust with their problem.

7) Don’t call only to ask about work. Contact your clients when you hear of something they may be interested in. Send them a card on their birthday.

8) Don’t become a problem. When the client calls and offers a job say yes you can do the job or no. Don’t start telling them all the things you need to move around.  Do your very best to solve the clients problem without them knowing you had to get a babysitter or move some personal plans around. Saying I need just a minute to check my calendar and can I call you back in 5 minutes is OK. Then call in five minutes. Take that 5 minutes to solve your problems to accept the assignment, or find someone who can and then call them. I am sorry I am booked but my friend Michael Schwarz is available will be better than babbling on about your problems on the phone or even in emails to them.

9) You are starting over. If you have been shooting 6 – 8 assignments a day or even just one a day those days are over unless you get a staff job. Extremely successful photographers are maybe shooting 100 assignments a year. That is averages to about 2 a week. Starting out you may only have a few assignments that first month. You also will have times of feast and famine. You may work really hard for a couple weeks and then go a month or more with little or no work in those first few years of freelancing.

10) Find a mentor who is a successful photographer. Be sure you treat them like a friend and don’t just use them. Offer to take them to lunch and you plan on paying for their meal. Don’t try and get everything for free from your mentor. Remember they are giving you valuable information that will not just save your money but help you make more money.

Here are more posts that talk about business tips as well:

https://picturestoryteller.com/…/9-things-you-need-to-do…

https://picturestoryteller.com/…/how-much-should-i-charge…

https://picturestoryteller.com/…/gross-income-broken-down…

https://picturestoryteller.com/…/seven-reasons-not-to…

https://picturestoryteller.com/…/lessons-learned-from…

Shooting Christmas ornaments with Nikon D750

Reading Time: 3 minutes

A fun thing to shoot this time of year are ornaments on a Christmas tree. Our ornaments all have a story with each one and how it helps us spend the season of remembering.

Here is the basic setup I did for the photos in the slideshow here. Take a look at each photo and the settings. [Click on the arrows on the side of photos to move forward and backward. You need to put your cursor on photo to see them.]


I shot all these with the AF-S Nikkor 28-300mm f/3.5-5.6G ED VR. I recommend shooting with a tripod to get the sharpest photos.

I started the project thinking that maybe the Nikkor 85mm ƒ/1.8G would be the lens for the examples, but here is the result with that lens:

D750 shooting ornaments [Nikon D750, Nikkor 85mm ƒ/1.8G, ISO 2200, ƒ/1.8, 1/200]

As you can see getting as close as I could with the lens gave me this view.

D750 shooting ornaments [Nikon D750, AF-S Nikkor 28-300mm f/3.5-5.6G ED VR, ISO 12800, ƒ/5.6, 1/200]

Comparing to the Nikkor 28-300mm I quickly saw that the zooming in the lens to 300mm and getting as close as I could gave me a much tighter shot.

Be sure you click through the slideshow and notice the depth-of-field changes in the first four images move you through ƒ/5.6, ƒ/8, ƒ/11 & ƒ/16. Basically I noticed that while the bokeh looks great at ƒ/5.6 the ornament was actually out of focus on the back part. I was very careful to focus on the soldiers in front. With the Snoopy ornament you will see the depth-of-field is so shallow you might think I shot is out of focus.

The tip is simple shoot a little higher aperture to be sure the ornaments are in focus. Shoot with a tripod and unlike what I did, go ahead and shoot with a lower ISO.

The last photo is shot with fill flash. I put the Nikon D750 pop-up flash in CMD mode. I made it not flash and then on Group A I used my Nikon SB900 set at -1EV.

D750 shooting ornaments [Nikon D750, AF-S Nikkor 28-300mm f/3.5-5.6G ED VR, ISO 12800, ƒ/5.6, 1/60–off camera flash with SB900 triggered by CMD flash mode of the D750 -1EV]

Tips Summary:

  • Use Tripod
  • Use your lens that will get you closest to the ornament and fill the frame
  • Shoot test of different apertures
  • Use aperture that works best so ornament looks in focus
  • Use off camera flash as an option. Shoot with and without and use the one you prefer.

Following UGA Head Coach Mark Richt for a game assignment

Reading Time: 2 minutes

Decision Magazine hired me to follow UGA head coach Mark Richt and his wife, Katharyn Richt.

If it worked out, I was to try to get photos of them together. That never happened, but I stuck with the coach and his wife for the rest of the day.

Nikon D4,  Sigma 120-300mm f/2.8 DG OS HSM, Sigma 2x EX DG APO Autofocus Teleconverter, ISO 1250, ƒ/5.6, 1/2000

I arrived early, met Katharyn, and then sat in the stands.

Nikon D4, 28-300mm, ISO 900, ƒ/5, 1/2000

While this will win no awards, it starts with the safe shots to be sure I had some excellent expressions.

Nikon D4, 14-24mm, ISO 400, ƒ/16, 1/500–Nikon SB900 fill flash -1EV

I liked this photo much better, even though I could not see her face. She is doing what she does every game to help support the team and Mark.

The magazine picked that photo and one more of Mark interacting with one of the players.

Nikon D4,  Sigma 120-300mm f/2.8 DG OS HSM, Sigma 2x EX DG APO Autofocus Teleconverter, ISO 1600, ƒ/5.6, 1/2000

Now, at this point in the season, the top running back in the country is UGA #3, Todd Gurley. I tried to get a photo of him with the coach. The best I did that day was this shot, but the ƒ/5.6 was too shallow to show Mark clearly in the background.

Nikon D4,  Sigma 120-300mm f/2.8 DG OS HSM, Sigma 2x EX DG APO Autofocus Teleconverter, ISO 450, ƒ/5.6, 1/2000

Mark Richt is on the far right with a headset. Well, I just missed it. A few days later, the NCAA suspension came out, so he was definitely out of the magazine piece. It would have distracted from the storyline.

Using Strobes Outside To Overcome Shadows

Reading Time: < 1 minute

I wish I had taken a before photo so that you could see the lack of light on the statue in the background. The sculpture helps inform you that this is a Catholic school, not just a prep school.

Another problem is when the student reads, the sun is above, and her face is in the shade. Her head looking down is similar to wearing a ball cap; it creates a shadow on her face.

I added two strobes using a grid on each of them. One light is to light the student, and the other is to illuminate the sculpture.

Here is the setup for this photo:

I underexposed the scene about -2/3 of a stop. Then I just was sure that the flash on the student’s face was around ƒ/8, and on the statue, it was more like ƒ/10 to help lighten it up just a bit more and support this not being in the shadows but help add value to the photograph. 

Nikon D750 used for annual family Christmas photo

Reading Time: 2 minutes

This year we decided to have fun with our annual Christmas card photo.

I am taking a photo of the rest of the family. My daughter is dressed in her Hogwarts Gryffindor robe and casting a spell on her brother Taylor. Dorie is dressed in her clerical robe. She is a chaplain at the Veterans Administration Hospital in Decatur, GA this year. Taylor is holding up a note saying, “I should have been adopted.”

This is the setup I used for the photo shoot. To trigger the Nikon D750 I used the Nikon ML-L3 Wireless Remote Control.

The reason I used this setup is that where we are standing there are a lot of shadows from the trees and not only do they create spotty patches of light they also create a color shift.

I underexposed the scene using the Aperture priority mode and Exposure Bias: -4/6 EV. I then just adjusted the strobes to fill-in so we were well lighted.

Stanley, Chelle, Taylor and Dorie

Here is a closeup of the family. Dorie and Chelle are the co-creators of this years Christmas card. I just captured it for us to use.

Nikon D750 available light ISO 12800, 25600 & 51200 @ Wedding

Reading Time: 5 minutes
Nikon D750, AF-S NIKKOR 28-300mm f/3.5-5.6G ED VR, ISO 51200, ƒ/4.5, 1/100

I attended a wedding for a friend yesterday as a guest. I thought I would take some photos and give those to the bride and groom from the day. I stayed out of the way of the hired photographers and just shot photos I saw.

Nikon D750, AF-S NIKKOR 28-300mm f/3.5-5.6G ED VR, ISO 12800, ƒ/5.6, 1/50

The service occurred at the Ritz Carlton Hotel Buckhead in Atlanta, GA. The room for the wedding was pretty dark. I used ExpoDisc to get a custom white balance, and then the settings on the camera were ISO 12800, ƒ/5.6 @ 1/50.

Nikon D750, AF-S NIKKOR 28-300mm f/3.5-5.6G ED VR, ISO 12800, ƒ/5.6, 1/60

After the service, we moved to the hallway between the two rooms they had reserved for the wedding and the reception for a formal receiving line. The light here was about the same at the wedding. Now, the canned spotlights in the ceiling occasionally would make the quality of the light suffer and sometimes help. Here, the bridesmaids weren’t thrilled with the hot light in the background.

Nikon D750, AF-S NIKKOR 28-300mm f/3.5-5.6G ED VR, ISO 12800, ƒ5.6, 1/40

Sometimes, the light was just fine on the subjects’ faces, as my wife and the bride’s parents for this photograph.

Nikon D750, AF-S NIKKOR 28-300mm f/3.5-5.6G ED VR, ISO 12800, ƒ/5.3, 1/15

I took just a few photos of the bride and groom on their first dance when I realized the AUTO ISO I had set up to peak at ISO 12800 would not cut it. When shooting at 1/15 shutter speed, I also realized that raising this one ƒ-stop wasn’t enough. Thankfully, the Nikon D750 let me raise the ISO to 51200.

Nikon D750, AF-S NIKKOR 28-300mm f/3.5-5.6G ED VR, ISO 51200, ƒ/5.6 1/60

The cool thing is while the ISO 51200 noise is noticeable, this is far superior to the film days when you shot above ISO 800.

Nikon D750, AF-S NIKKOR 28-300mm f/3.5-5.6G ED VR, ISO 51200, ƒ/5.6, 1/60

At the highest ISO, I noticed the noise in the shadows, and there, you could see the grid pattern of the pixels.

Nikon D750, AF-S NIKKOR 28-300mm f/3.5-5.6G ED VR, ISO 28735, ƒ/3.8, 1/80

Since I had the camera’s ISO set on AUTO, the camera ISO of 28735 while taking this couple’s photo, there was a carving station to my back. I intentionally put the couple there to take advantage of the extra light in that dark room.

Nikon D750, AF-S NIKKOR 28-300mm f/3.5-5.6G ED VR, ISO 32254, ƒ/3.8, 1/80

Then, another couple joined them, and they stepped back just a bit. This raised the ISO to 32254, and I got another excellent photo without using Flash.

Nikon D750, AF-S NIKKOR 28-300mm f/3.5-5.6G ED VR, ISO 51200, ƒ/4.5, 1/100

Then, when my wife asked for a photo with some friends, I knew that the lack of that carving station behind me and the stage behind them wasn’t the best lighting. So I took a photo first, looked at it, and decided for the first time that day to use the pop-up Flash at a slow shutter speed.

Nikon D750, AF-S NIKKOR 28-300mm f/3.5-5.6G ED VR, ISO 28735, ƒ/4.5, 1/100

Notice how the noise almost disappears with the added Flash. This is because the camera change was only less than a stop.

You would think I could have done this all night, but remember, I am not the official photographer. So, I do not want to go around flashing and drawing more attention than I was doing.

I think the ISO 51200 on the Nikon D750 is excellent when you need a high ISO in that range. You will be able to get photos that you wouldn’t be able to do without high ISO.

I would say the noise wasn’t just due to high ISO but rather to the quality of the light and the dynamic range of that light. The Flash illustrated that the noise disappears when used at high ISO.

The direction of the light has more to do with the noise than just high ISO.

By the way, I posted these photos on social media throughout the wedding. The Nikon App on my Android phone lets me sync using the Wi-Fi on the Nikon D750.

I was shooting just RAW files, so the app would create a smaller JPEG that was big enough for Social Media as the recommended size to transfer to the phone.

The guests enjoyed seeing photos just a few minutes after I shot them on Facebook. Then, I would tag the bride, and all her friends could see the images.

When I tried to set the custom white balance, what I would do for the Nikon D4 wasn’t working with the Nikon D750. Well, I also put the Nikon Manual Viewer App on my phone. It has the Nikon D750 manual and the Nikon D4 manual. So you can search and find whatever you need.

I think searching makes this more straightforward to use than the printed manual.

I typed in White Balance and found the instructions. I was doing everything just as recommended, but the blinking pre was only viewable on the top LCD closest to the shutter release and not blinking on the big LCD on the back.

Tips Summary:

  • Use AUTO ISO. I keep it maxed to ISO 12800, but if needed, then adjust it to 25600 or even 51200
  • Use ExpoDisc for custom white balance. http://www.expoimaging.com/product-overview.php?cat_id=1
  • Use Slow Sync Flash–To avoid the background going completely black when using Flash.
  • Watch light direction–Move people to take advantage of the existing light on their faces.
  • Carry the camera manual on your smartphone
  • Use Wi-Fi and Camera App to post photos on social media while shooting.

Nikon D750 vs Nikon D4 @ ISO 100 and ISO 12800

Reading Time: 4 minutes

Nikon D750, 28-300mm, ISO 100, ƒ/11, 1/200–Studio Strobes
100% view of the above photo

I decided to shoot some known variables and compare the Nikon D750 to my Nikon D4. The reason is this is what I own. The first two photos are from the Nikon D750. One is full frame and the other 100% view.

Nikon D4, 28-300mm, ISO 100, ƒ/11, 1/200–Studio Strobes

The first thing I was reminded of is the 100% view is much looser than the Nikon D750 as compared to the D4. The reason is the Nikon D750 24 megapixel compared to the Nikon D4 16-megapixel chip.

I would say from my perspective that the Nikon D750 at ISO 100 is a much cleaner and better resolution file. To me, this is significant to note. Most all cameras at the lowest ISOs tend to be very similar in quality. However, I am noticing a difference in the low ISO.

Nikon D750, 28-300mm, ISO 12800, ƒ/9, 1/200–Available light
100%

Keeping the camera on a tripod, I didn’t use the studio strobes and even turned them off and used the ambient room light to shoot these at ISO 12800. Compare this to the Nikon D4 photos below.

Nikon D4, 28-300mm, ISO 12800, ƒ/9, 1/200–Available light
100%

There is a little difference between the two at ISO 12800, but the difference is about $3,800, with the Nikon D4 price I paid costing about $6,000.

I would say from these charts that the Nikon D750 will do as well, if not better, than my Nikon D4 in low-light situations.

Nikon D750, 28-300mm, ISO 100, ƒ/11, 1/200–Studio Strobes
100%

I wanted to compare something more like what I might shoot with this little soldier we have. I use a lot for just these types of comparisons.  What impressed me the most was how smooth the pixels appear with the Nikon D750.

Nikon D4, 28-300mm, ISO 100, ƒ/11, 1/200–Studio Strobes
100%

Regarding the real-world shooting, I believe the only significant difference between the D750 and D4 at a low ISO is the resolution difference of 24MP vs. 16MP. So for the majority of uses for my clients, they would probably see the difference.

Nikon D750, 28-300mm, ISO 12800, ƒ/9, 1/200–Available light
100%

I was very pleased with the Nikon D750’s performance again at ISO 12800.

Nikon D4, 28-300mm, ISO 12800, ƒ/9, 1/200–Available light
100%

As you can see, the Nikon D4 isn’t as cropped at 100%, but that is due to the 24MP versus the 16MP chip difference. I am having a hard time telling the difference between the two at ISO 12800, so for those who want a full-framed high ISO camera, then the Nikon D750 is a steal at this price.

There is one downside that I have noticed when comparing the two cameras. Inside the viewfinder, the Nikon D4 tells you more information at the bottom of the viewfinder. You know what mode you are in, which is missing in the Nikon D750.

Nikon D750 has arrived!

Reading Time: 2 minutes
 

Yesterday my Nikon D750 arrived. I think I have shot only 20 shots at the most on it. These are my first impressions of holding it and going through the menu.

I first noticed when picking up the camera that all my lenses felt much heavier than on my Nikon D4.

So while the camera itself is tremendously lighter, this shifts the balance. Most of my lenses now feel like long glass, where I feel like the camera is lighter than the lens.

Another change I noticed is the grip is different. I may like it more, but only time will tell if I prefer the deeper feel of the grip.


The D750 is my first Nikon that had Wi-Fi built into the camera. I have been doing this with my Fuji X-E2, but I can tell you that the Nikon App for my Android phone works superior to the Fuji system.

You can control the camera remotely or view photos.


Here is what the app looks like when taking pictures.

When you turn the phone to horizontal, you get a different view.

I will write more about the camera in the coming days, but for now, the built-in Wi-Fi is the first cool feature I love that I do not have on my Nikon D4.

I like the ability to take photos with my camera and immediately share these through social media. I have done this with my Fuji, but I wouldn’t say I like the JPEGs from the Fuji. It makes people look like wax figures.

The Nikon JPEGs are far superior to the in-camera JPEGs from my Fuji.

I look forward to getting to know the camera in the coming days and catching you up on my findings.

Storytellers need a high Curiosity Quotient more than Intelligence Quotient

Reading Time: 2 minutes

You may know about I.Q. [Intelligence Quotient] and E.Q. [Emotional Quotient], but there is a third C.Q. [Curiosity Quotient] that also plays into our success. I argue that the most important of these three for the entrepreneur and storyteller is C.Q.

C.Q. is the ultimate tool for producing simple solutions to complex problems. Curiosity is what a journalist does when they investigate a story and then distill it down to those digestible nuggets by their audience.

Albert Einstein famously said, “I have no special talents. I am only passionately curious.”

“People with high C.Q. are more curious and open to new experiences. They find novelty exciting and are quickly bored with routine. As a result, they tend to generate many more original ideas and are counter-conformists,” says Dr. Tomas Chamorro-Premuzic. He is an international authority in personality profiling and psychometric testing.

Last year, Thomas Friedman wrote an Op-Ed piece in the New York Times called It’s P.Q. and C.Q., as Well as I.Q. Friedman says, “…the skill required for every decent job is rising as is the necessity of lifelong learning… those with more P.Q. (passion quotient) and C.Q. (curiosity quotient) to leverage all the new digital tools not just to find a job, but to invent one or reinvent one, and not just to learn but to relearn for a lifetime.”

Did you know that for every job opening, three people are unemployed? When finding your dream job, this isn’t the best news for job seekers. However, this does present an opportunity: to create a job that doesn’t exist yet.

Seeing opportunity is a new way of thinking for those entering the job market today. Curiosity should lead the way all storytellers think. They must think about pitching ideas rather than waiting for editors to give them an assignment.

Fuji X-E2, 55-200mm, ISO 25600, ƒ/4.6, 1/60

Amy Toensing has been a regular contributor to National Geographic magazine for over a decade and was one of the keynote speakers for the Atlanta Photojournalism Seminar just a couple of weeks ago.

Listen to her in this interview:

Getting out of your comfort zone is what those with high C.Q. motivate daily. For example, Toensing shared how her curiosity about the artists who drew hieroglyphics on the rocks in Australia thousands of years ago had piqued her interest. So she started to ask questions, which led to a lifelong journey of a story about the Aborigines for National Geographic Magazine.

My mentor, Don Rutledge, talked about how photographers must approach their work like a child, asking, “Why is the sky blue?”

We are all born with curiosity. Curiosity causes us to use our senses to touch, smell, and explore the world. Unfortunately, sometimes adults discourage this curiosity. But without interest, there is little motivation to discover and explore. As a result, apathy can set in for us, and we can become depressed.

Curiosity is the key to learning. Curiosity also involves risk-taking.

If you find yourself in depression and apathy, maybe the key is rekindling your curiosity. So take some risks today, explore your world, and ask why.

Found my Kodak Master Photoguide

Reading Time: 3 minutes

I found this in the drawer today, and it took me down memory lane. What is it, you might ask?

While this Kodak Master Photoguide has been gathering dust, its contents are burned into my brain from years of repeatedly using it to help me learn the principles of photography.

Here is what is on the first page of the book to tell you how to use it and what I did:

You can carry this Photoguide when you take pictures so that it will be handy. It’s the right size for your pocket, purse, or camera bag. The Master Photoguide contains a great deal of information that is usually found in photo books in compact form. You’ll find it helpful whether or not you have an exposure meter or an automatic camera. This Photoguide will help you set your camera for the correct exposure, select filters, use supplementary lenses for close-ups, determine depth of field, and much more.
In addition, the Photoguide is especially helpful for planning purposes, as it shows you the photographic requirements for the pictures you want to take in advance.

The “Sunny 16 Rule” is on the Daylight Exposure Dial. I often used this dial because my earliest camera had no meter. You lined up your ISO with one of these:

  • Daylight or Hazy Sun
    • On light sand or snow
    • Average
  • Weak, Hazy Sun
  • Cloudy Bright
  • Heavy Overcast
  • Open Shade

On light sand or snow, dial your ISO, and the corresponding ƒ/16 would be the exposure. The shutter speed would be the closest to 1/ISO. 


I often pull this little book out when planning a new adventure, find the tap, and flip to the page. The text says, “The Photoguide is especially helpful for planning purposes.”  

Click on the photo to see it larger.

Click on the photo above to see the existing light choices.

Click on the photo to see it larger.

The little book even helped you figure out your depth of field. Say you were to put a lens on the backboard in a basketball game. What ƒ-the number will you need to be sure the rim to the player’s faces is in focus. The calculator for depth of field would help you in planning. Back then, you would have to buy the proper ISO film for such a situation. The Kodak book helped you preplan.

Even planning on doing some macro work with extension tubes or bellows would help you figure out the proper exposure. We couldn’t take the photo and adjust it immediately. Instead, you would have to process the film and then see the results.

For those of you starting, you need to know that most of us had to work at understanding the principles because the learning curve with film was longer over time. You didn’t click and look at an LCD to see your results. Sometimes, it would be weeks after you returned from traveling for coverage for a month or so on the road.

While this book is less necessary in the photographer’s bag, it is still relevant for those who want to see the principles of exposure on a dial. It is also great for planning what you might need for your next assignment.

The best part is this book was like a cheat sheet for photography.