Whenever I create a blog post on gear, I get five to ten times the number of people reading those posts.
There are a few things that people are looking for when they click on one of my blogs on gear.
First, if it is new to the market, they are looking for information to help them know if they should buy this lens themselves.
Second, they want tips on how to use their new piece of camera gear. This is very true regarding camera bodies and different shooting situations. So, I can take the same camera body and do separate blog posts on how to shoot things like Sports, Portraits, Strobes, and Landscapes, and people are interested in my experience.
While not everyone will agree with my assessment, they are interested in seeing if there is something I discovered they haven’t yet experienced.
DSLR to Mirrorless Challenges
My transition from DSLR to Mirrorless was the most challenging change of any camera body, including getting started with the Pentax K1000.
To summarize the difficulty is to understand that with an introductory film camera, you had these adjustments:
ISO – But only once. You set it for the film you were shooting and only changed it when you changed a roll of film.
Shutter Speed
Aperture
Focus – you turned the focus until the image looked sharp.
With the latest Nikon Z9, you have so many options for each of those settings. What makes it even more complex is when you start combining all the options for each of those main settings with others. This is where you get Aperture priority, but do you want to set the ISO or use Auto ISO?
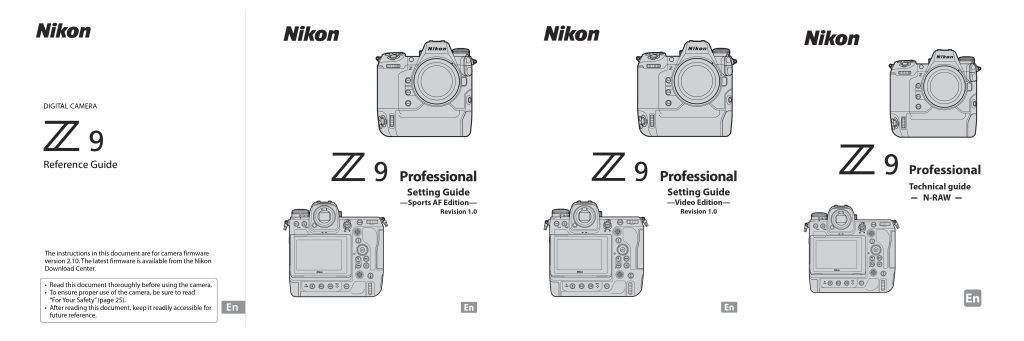
Nikon even has special manuals for Sports, Video, and even shooting in RAW video, for example. If they are on your computer or phone, you can search for the setting you are trying to understand and know the right one to pick for your shooting situation.
They also have a troubleshooting guide. Check it out here.
Footnote
Don’t go on social media and complain that the camera will not do something if you haven’t first read the manual. You will only undermine your credibility in those social media forums.
In his Lettres Provinciales, the French philosopher and mathematician Blaise Pascal famously wrote: “I would have written a shorter letter, but I did not have the time.”
While most people understand this when it comes to writing, the same is valid for photography.
It takes a great deal of time to cut perfect photos down to outstanding ones.
Lately, I am finding that many clients are asking me to help narrow down their selections. So I have to be sure that in my estimates, I have options for clients to request tighter edits, which will be an additional charge to the project.
Cull In, Cull Out
Culling is a process of finding the keepers and discarding the undeliverable images. So, the first thing you must do is determine the keepers.
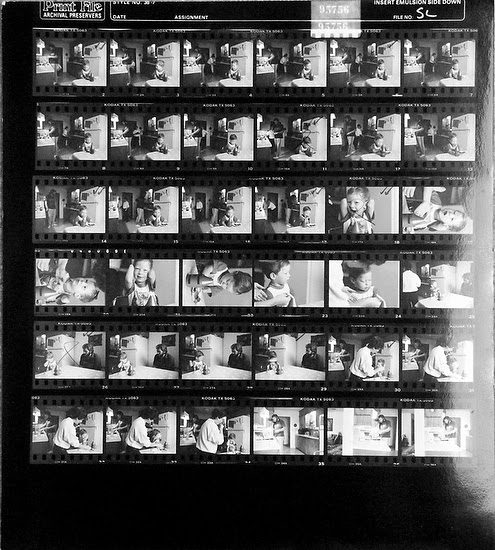
When shooting negative films like Black & White, we use contact sheets to help in the editing process. The negatives were in plastic sleeves that would hold 36 images and then printed on an 8” x10” sheet of photographic paper.
Loupe
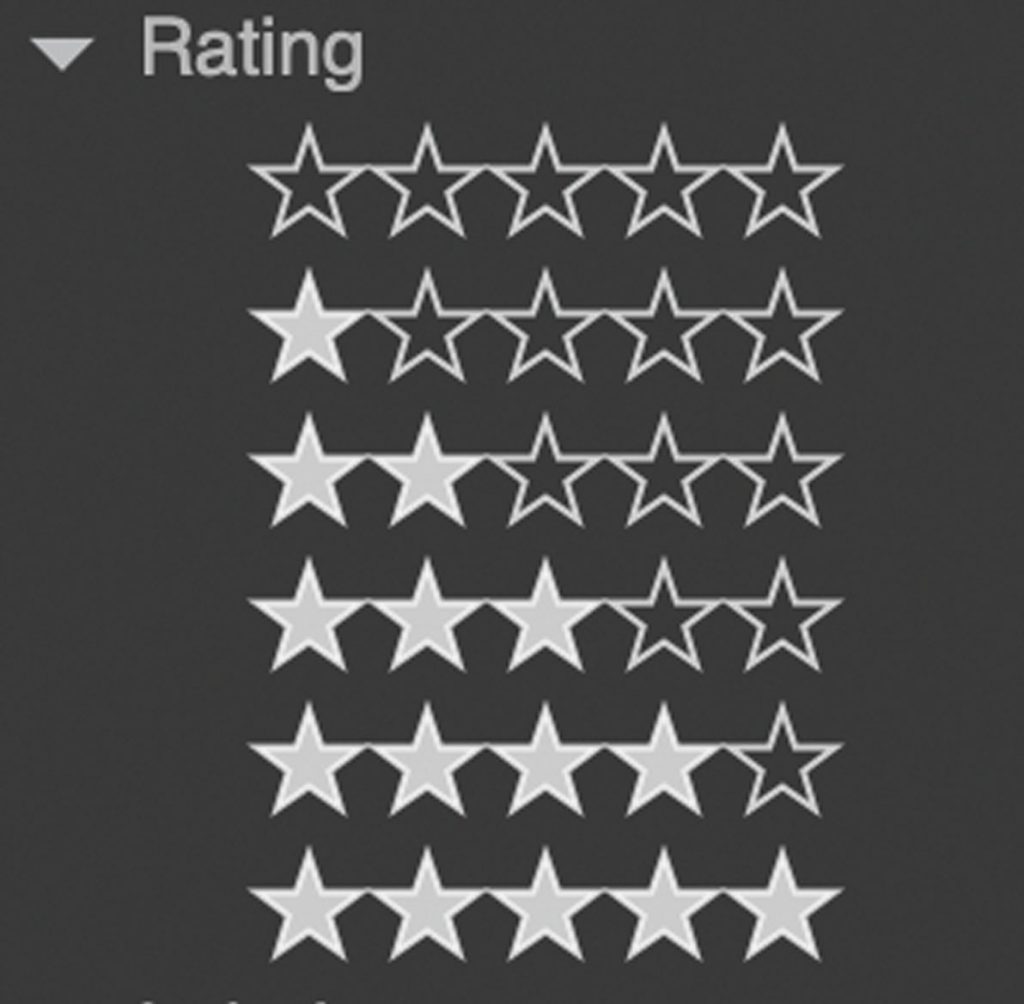
The photographer would use a loupe that would help them look at each photo, and they would then use a Sharpie or Grease Pencil and check the frames. The checks were the Star Rating system, and now that is what you see in the software programs. We didn’t draw stars in the past by hand.
Today’s photo editing software still uses the 5-Star system.
Fair
Average
Strong
Excellent
Outstanding
Most photographers and editors would do the first cull of images, checking those usable and thus getting one check or star for fair or publishable photos.
With Slides or Transparency, we would toss the unacceptable images. But, unfortunately, you kept all the negatives due to needing the longer strip to put into an enlarger to make prints.
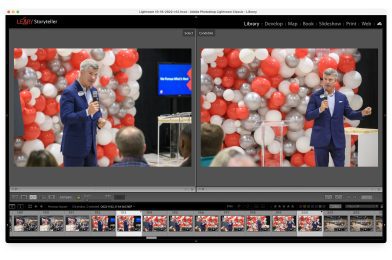
I still do this today with digital images. I treat them just like I did my Kodachrome slides. If they are good, I will keep them and do an edit using Lightroom/PhotoShop.
2nd Round of Culling
The process of now going through all the keepers and rating them is the most time-intensive process of culling. I do not do this for most of my clients. I offer this if they want me to do this for them, but I do charge for what is an additional service.
While working on staff at a magazine, I would go back through all my images and then rate them from usable to outstanding; I would do this to help an editor pick the best photos for a story’s publication. However, most of my clients today need the images for more than just a story; they put them into a library they pull from for various projects. So they are asking for a stock photo shoot. Sure there may be the first use in mind, but they want them in their files for other services in the future.
When editing for a magazine story, we would show only the 3s, 4s, and 5s. If they were looking for something we didn’t include, we could always go back to the 1s and 2s to find something.
Sometimes you have enough excellent photos of a person that the designer can pick based on what would work best for a layout—having the person looking left would work better than facing right.
We all know the problem with a group photo. The more people in the picture, the odds of someone having their eyes closed or not having a good expression are most likely to occur. For this reason, I usually don’t get rid of photos where one person has their eyes closed in a snap because the other people may look best in that photo. It is not uncommon that after a client reviews all the pictures, they ask me to cut a person in one of the group photos and replace them in another. This way, everyone looks great.
My default mode for delivering images to clients is to give them all the pictures that are Fair or better than Fair.
If a client wants me to go through all the images and give them the best picks, I must charge for the extra time to do this cull. It can usually take twice as long to narrow down the best speaker image from 50 or more shots to the best 2 or 3 images.
Ideally, you want to have all the images you keep rated. This way, when you need to find pictures, you can search through the metadata that helps you explore the caption or keyword fields. Once you have all the images of “John Doe,” you will most likely want to find the best. Since the photos are already rated, you can narrow your search based on the star rating.
Creating a separate folder/gallery of the best images is something I often do for clients. I have chosen to make this an add-on rather than my standard package because most clients don’t want to pay the higher rate for me to spend more time on their images.
I think it is something to spell out to your customers either way. Your price estimate should tell them what they are getting. If you go that extra mile in your base rate by rating the best images or just giving them the best photos, then charge for this additional work and tell them you are doing this for them.
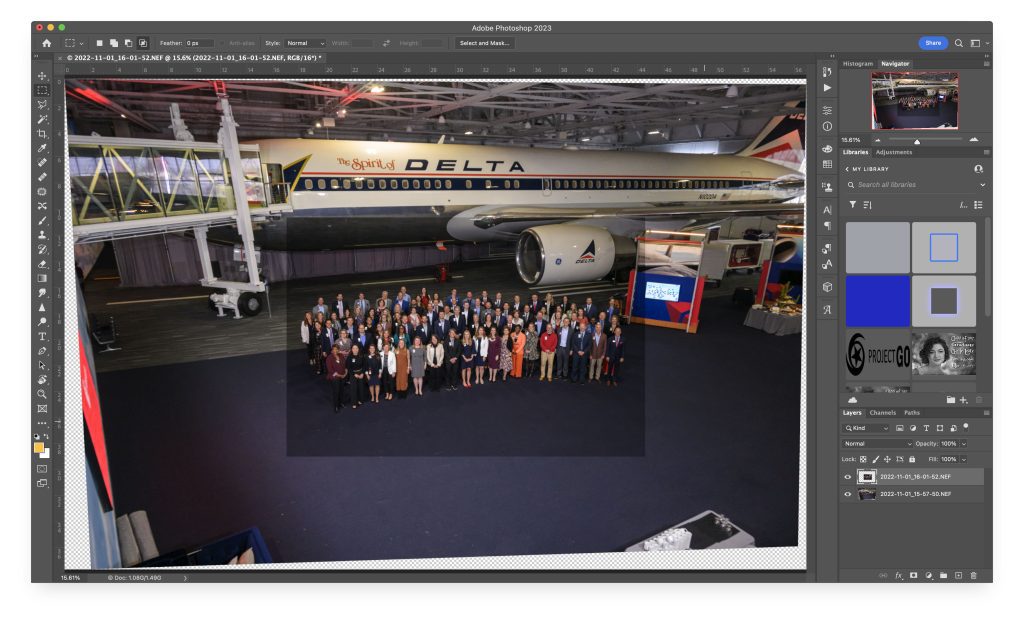
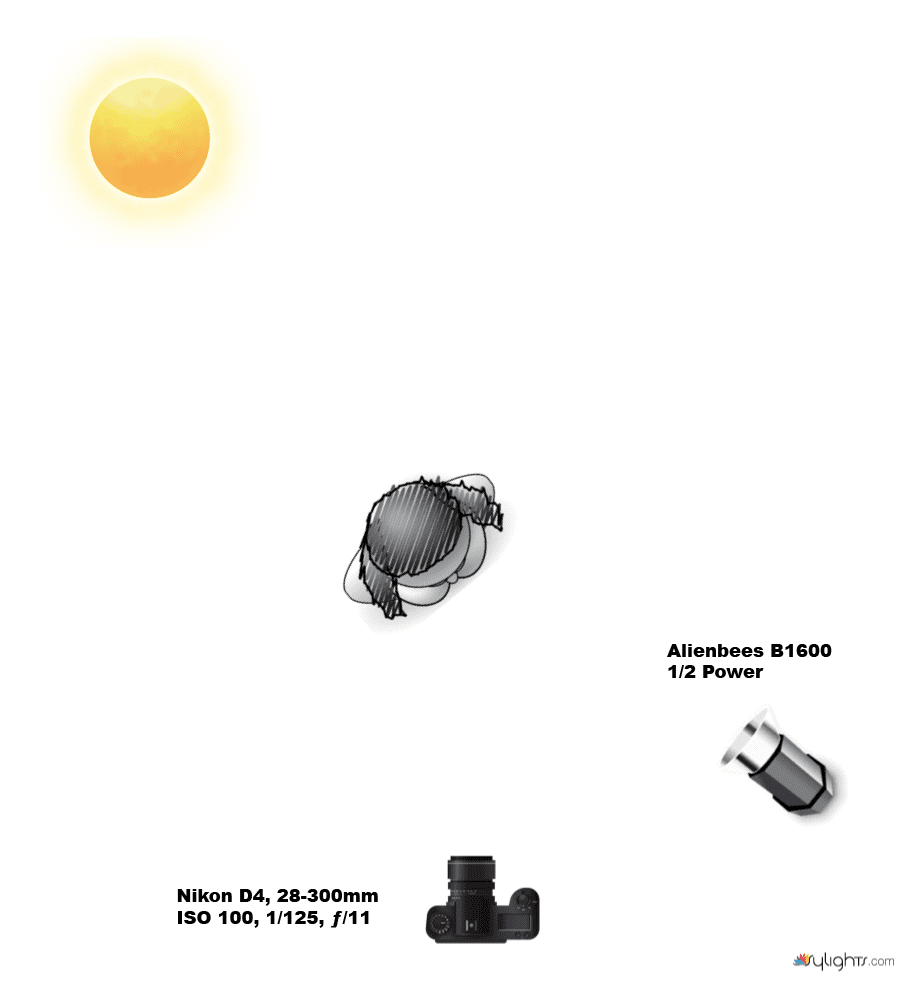
The group photo is the most crucial shot for this event. The client needed the plane included.
I arrived early and set up strobes to light the group. Nothing is worse than having a lot of dark eyes due to overhead lighting creating raccoon eyes.
This photo with no people was my test shot from above, and I would put the people down on the ground in front of the plane.
I am shooting the meeting before this group photo. So I ran up just before they came over and turned on all the lights. I composed the image as I usually would do with a group photo.
Camera Settings for all the photos [NIKON Z 9, NIKKOR Z 24-120mm f/4 S, Mode = Manual, ISO 5000, 1/125, ƒ/5.6, (35mm = 46) + (4) Flashpoint XPlor 600 HSS TTL]
Now later, as I was editing, I panicked. I was too tight, but I like this more. Since I still had my test shot, I thought there was a good chance I could merge the two photos to show more of the plane.
This screenshot from PhotoShop is what it looked like after I Auto-aligned the layers. Then it was just a matter of blending the two by matching exposure. Here is the final result from combining the two photos.
I cropped it a little closer, but I also have that option if they want more of the plane.
Now I gave them one more option as well for this group photo.
I have never had to do this before, but I have had to take people in a family photo and put them in another frame due to expressions. I was familiar with using Auto-Align in PhotoShop from my time shooting flash and ambient real estate photos and combining them into what we now call Flambient photos.
Now you have a way to do more intentionally with a group photo. Shoot test shots and save them if you want to use them in post-production.
The adage from the for-profit world, “You have to spend money to make money,” is widely accepted— but not so in the nonprofit world.
Sometimes we see nonprofits develop exciting strategic plans but need to integrate those plans into the budget.
There are about 1.5 million nonprofits in the United States. Forbes states that fifty percent will fail in the first twelve months. Other data suggests it’s less, with the National Centre For Charitable Statistics putting the figure nearer thirty percent.
Nonprofits often approach photographers, videographers, and writers to do work for free.
Volunteers at the Habitat build located in Atlanta, Georgia.
To meet your goals, realistically count the cost.
It would be best if you had a strategic plan for your business as much as any other business or nonprofit needs a business plan.
Any work you do should involve negotiation. Chris Voss points out that if you are looking for a Win-Win outcome, you are prone to be taken advantage of by others.
Chris Voss wrote Never Split The Difference: Negotiating as if your life depended on it. Voss says there are two types of negotiators: 1) Create Value and 2) Claim Value. Now those who are looking for a Win-Win outcome as long as they are dealing with another Create Value mindset will come out OK. However, Voss says that when the Create Value person comes up against a Claim Value mindset, they are often slaughtered.
While an excellent deal is usually a Win-Win, you must understand what this involves to be truly good for both parties.
2000 meals made for Feeding Children Everywhere
The Claim Value negotiator will often toss the Win-Win mindset to see if you light up. If you do, then they go in for the attack.
The Create Value person will often look at the deal and say we can make this deal, but here is the problem. You have started a relationship with someone who isn’t a true Win-Win. The agreement you worked out will stop you from growing your own business.
Voss teaches you to understand how important it is for Tactical Empathy. The client is being transparent enough to see they are looking for a mutual commitment to be strategic in reaching their long-term goals.
When you know if you can grow your business by accepting specific deals is why having a strategic plan is so important.
While it is great that you may have the ability to give your time and talent to a nonprofit, you may be setting up the organization for an early demise when you are no longer working for free.
Every organization needs line items for communications. However, you may be wasting time if the organization doesn’t understand how professional communicators are affecting their budget to meet their strategic plan.
Volunteers and homeowners are cleaning up after the Moore, Oklahoma, tornado.
Any business needs to understand Corporate Social Responsibility.
It’s important to give back and be involved. Donating to local organizations fosters goodwill. Also, you’ll create evangelists for your brand. Finally, consistently giving will get the attention of the people working and volunteering at the organizations you support.
Howard Chapnick was an American editor, photo editor, and long-term leader of the Black Star photo agency. Many nonprofits would approach Black Star, asking them to donate. First, Chapnick would explain how they do pro bono work, but when they do, everyone else involved in the project is also donating. Then Chapnick would ask if everyone else involved is also contributing for free. For example, are the caterers, the venue, and so on all doing this for free? Chapnick then would ask the person why we should give for free if others are not doing so.
I give away a lot of my time and talents each year. I encourage you to do so as well. However, do this with your strategic plan in mind. Also, be sure that the organization you are donating your talent has a strategic plan and that you are not setting them up for failure when you can no longer do work for free for them.
While you cannot get a tax deduction in the US for charging for your time and then donating that money back to the organization, this could be a great way to help the organization to understand how this needs to be a line item in their budget.
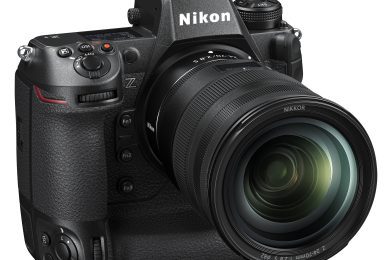
Over the past year, I have had to upgrade my cameras. While my older cameras could have worked longer for me, there is a moment with technology when you can still get a good value on your used gear, and if you wait too long, you might as well keep it.
I upgraded first from the Nikon D5 to the Nikon Z9. This was a significant change for me. While I had bought the Nikon Z6 to see if I liked how Nikon was handling mirrorless, it was the letting go of my last DSLR Nikon D5 cameras that I finally made that break.
Mind you, I had to upgrade my computer to handle these 45.7 MP files. At the same time, I was upgrading to handle bigger files; Adobe introduced AI technology in Lightroom and PhotoShop, which also required a great deal of computer speed, RAM, and more storage.
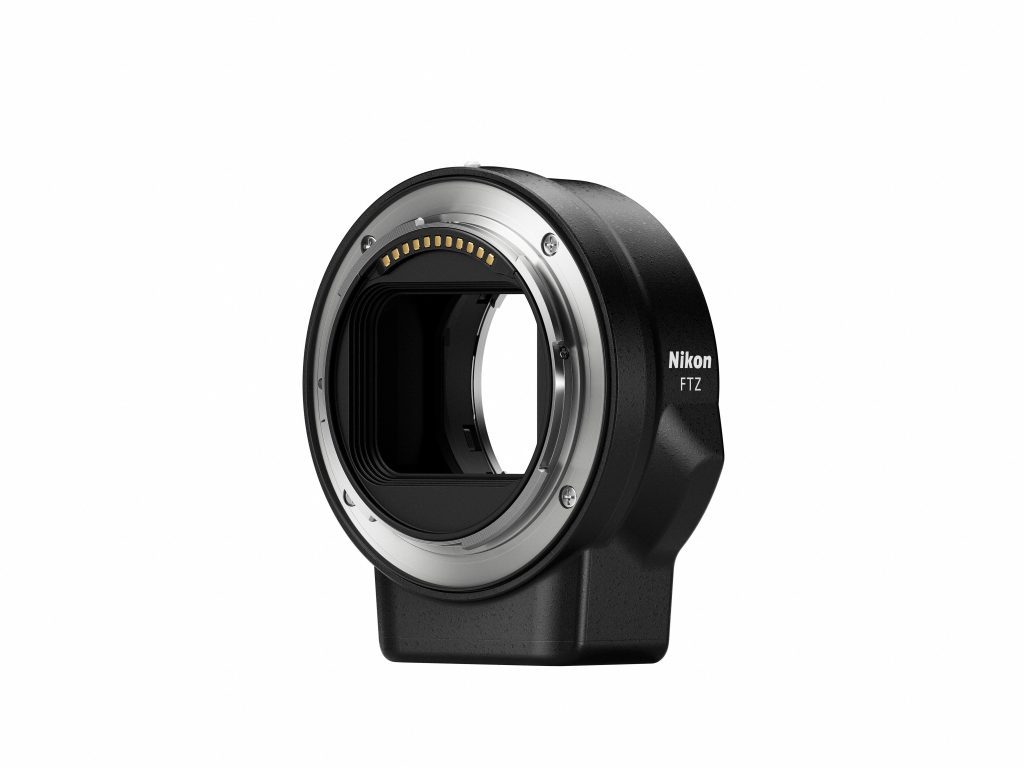
The good news was I could still use all my older lenses with the new Nikon Z9 with the Mount-Adapter-FTZ.
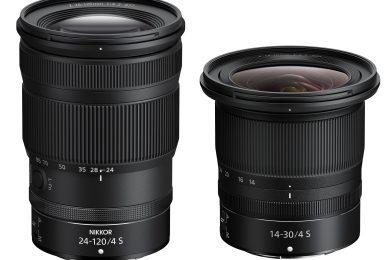
This past week, I bought the NIKKOR Z 24-120mm f/4 S and the NIKKOR Z 14-30mm f/4 S. I could use them for some events I was shooting this week.
NIKKOR Z 14-30mm f/4 S
I replaced the Nikon 14-24mm ƒ/2.8 with the NIKKOR Z 14-30mm f/4 S. Today’s ISO was not as big a deal as in 2007. I have been using it for some 15 years. Here are photos from the event where I used the 14-30mm.
[NIKON Z 9, NIKKOR Z 14-30mm f/4 S, Mode = Aperture Priority, ISO 8000, 1/250, ƒ/4, (35mm = 15)][NIKON Z 9, NIKKOR Z 14-30mm f/4 S, Mode = Aperture Priority, ISO 7200, 1/250, ƒ/4, (35mm = 19)][NIKON Z 9, NIKKOR Z 14-30mm f/4 S, Mode = Aperture Priority, ISO 25600, 1/13, ƒ/4, (35mm = 21)][NIKON Z 9, NIKKOR Z 14-30mm f/4 S, Mode = Aperture Priority, ISO 22800, 1/250, ƒ/4, (35mm = 14)][NIKON Z 9, NIKKOR Z 14-30mm f/4 S, Mode = Aperture Priority, ISO 7200, 1/250, ƒ/5.6, (35mm = 30)]
I felt great about the lens’s sharpness, the color and contrast, and how light it was to carry. My experience with the 14-24mm ƒ/2.8 was always awkward. It’s always great to lighten my load when I can.
NIKKOR Z 24-120mm f/4 S
Now, here are some of the range of focal lengths I enjoyed about using the NIKKOR Z 24-120mm f/4 S. It just isn’t convenient for me to shoot an event with my 35mm ƒ/1.4 and my 85mm ƒ/1.8 no matter how much I love them the NIKKOR Z 24-120mm f/4 S is a much better solution for event work.
[NIKON Z 9, NIKKOR Z 24-120mm f/4 S, Mode = Aperture Priority, ISO 20000, 1/250, ƒ/4, (35mm = 87)][NIKON Z 9, NIKKOR Z 24-120mm f/4 S, Mode = Aperture Priority, ISO 18000, 1/250, ƒ/5, (35mm = 105)][NIKON Z 9, NIKKOR Z 24-120mm f/4 S, Mode = Aperture Priority, ISO 22800, 1/250, ƒ/5, (35mm = 102)][NIKON Z 9, NIKKOR Z 24-120mm f/4 S, Mode = Aperture Priority, ISO 25600, 1/250, ƒ/5, (35mm = 94)][NIKON Z 9, NIKKOR Z 24-120mm f/4 S, Mode = Aperture Priority, ISO 10000, 1/250, ƒ/5, (35mm = 120)][NIKON Z 9, NIKKOR Z 24-120mm f/4 S, Mode = Aperture Priority, ISO 22800, 1/250, ƒ/5, (35mm = 36)][NIKON Z 9, NIKKOR Z 24-120mm f/4 S, Mode = Aperture Priority, ISO 18000, 1/250, ƒ/5, (35mm = 34)]
While none of these photos will win photography contests, these are the bread and butter type of images event photographers are asked to capture.
The lenses are sharp edge to edge. I found no problems whatsoever with their performance.
Silent
One of the most significant upgrades with these lenses is that they are so quiet I couldn’t hear anything while taking photos. There is no shutter noise on my Nikon Z9 cameras unless I turn that sound on to attend. With all my other DSLR lenses, you can hear the motors focusing the lenses and the apertures closing down when taking photos.
Both of these lenses are making me excited to shoot some video with them so that I can experience no noise from the cameras with video.
Did you know? One-quarter of all the candy sold annually in the U.S. is purchased for Halloween.
Pope Gregory III designated November 1 as a time to honor all saints in the eighth century. Soon, All Saints Day incorporated some of the traditions of Samhain. The evening before was known as All Hallows Eve and later Halloween. Over time, Halloween evolved into a day of activities like trick-or-treating, carving jack-o-lanterns, festive gatherings, donning costumes, and eating treats.
Besides the candy on Halloween, people love dressing up. At our house through the years, this photographer had some fun.
Here are some different things I have done through the years to capture my kids dressing up.
Here is the setup in our garage for Halloween.
In 2002, my daughter was about to turn four years old. So I decided to use a high-key background. The lights on the background are about one stop brighter than on the subject to give a clean white background.
Chelle dressed up as a princess in 2002
The high-key is a simple lighting setup that I have used over and over the years.
Chelle, Elijah & Joshua David dressed up for Halloween in 2004.
There are ways to get a little creative with the same setup. For example, I climbed a step ladder one year to capture my daughter.
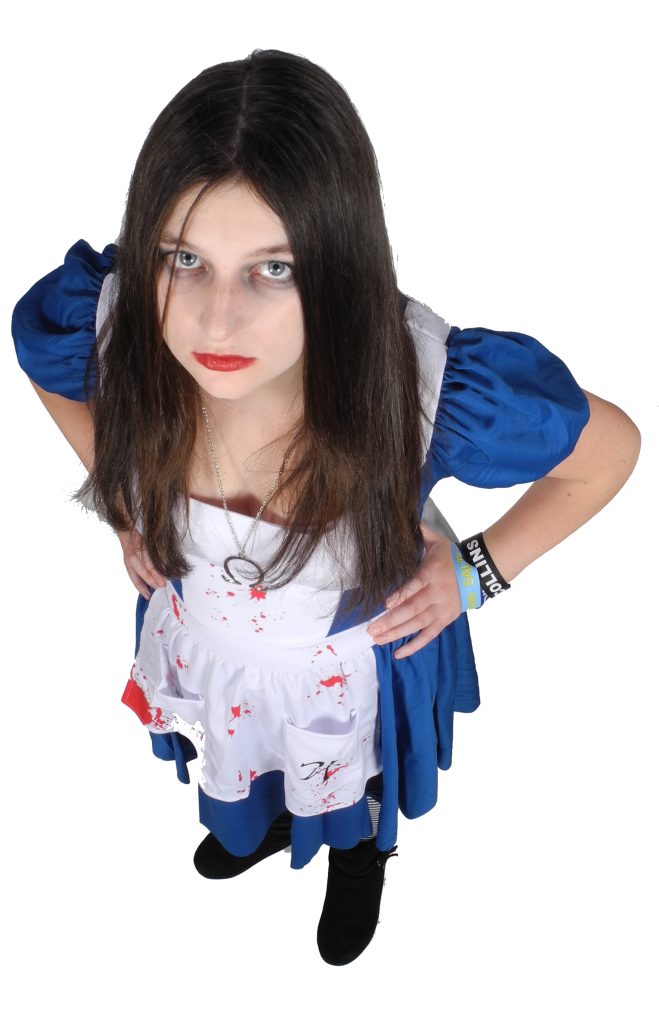
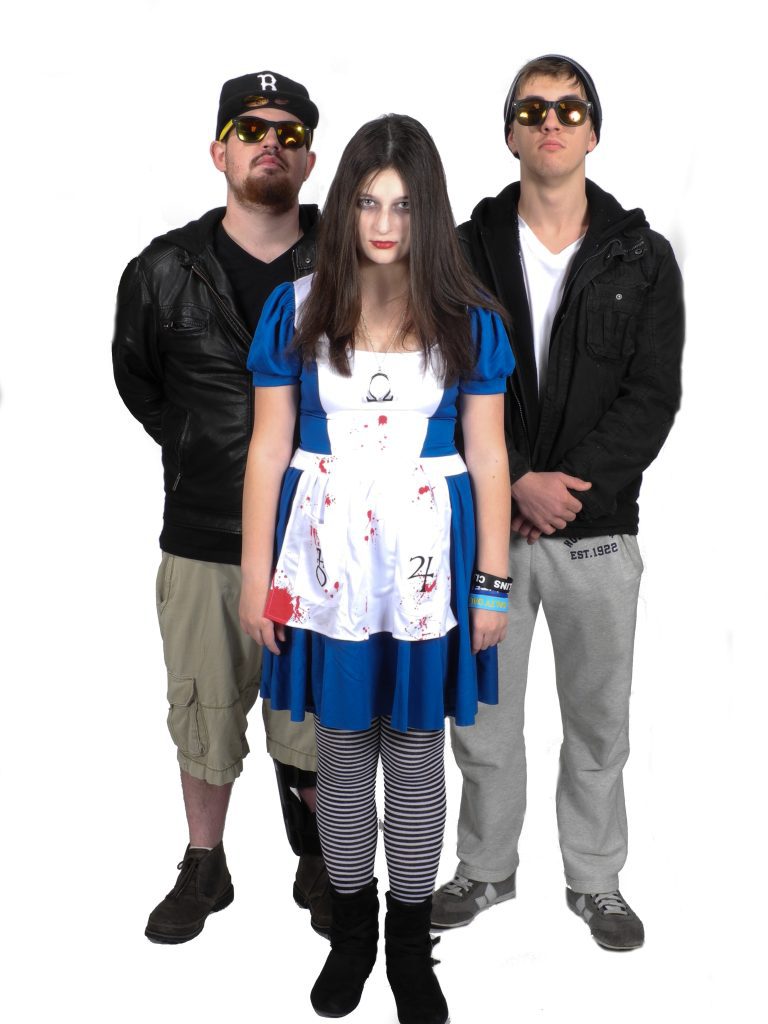
Chelle dressed up as Alice: Madness Returns 2012
Her brother and his friend decided they wanted to join in on the fun that year.
Chelle dressed up as Alice: Madness Returns.
Now you can use a regular background as I did here with a muslin-muted blue background.
Mary Anne and Chelle, 2010
Very similar lighting setup with the background lights, just keeping the light even.
Now you don’t have to do studio lighting. Instead, go outside and take photos.
Chelle in our backyard
I just used one light off to the side for this photo of my daughter dressed up in our backyard.
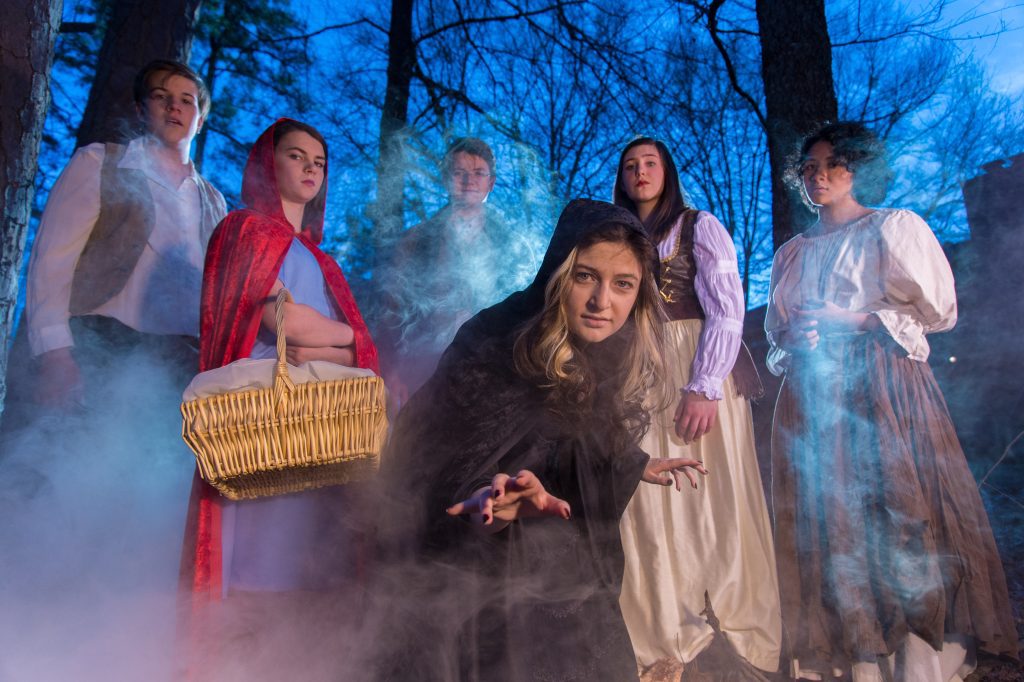
Now you can have some fun with a smoke machine and lights outside.
We had the cast of Into the Woods in our backyard with a smoke machine in the middle of the day to make this photo of Chelle Leary, Felicia Agostini, Lauren Baxter, Max Hipp, Thomas Beasley, and Virginia Roulette.
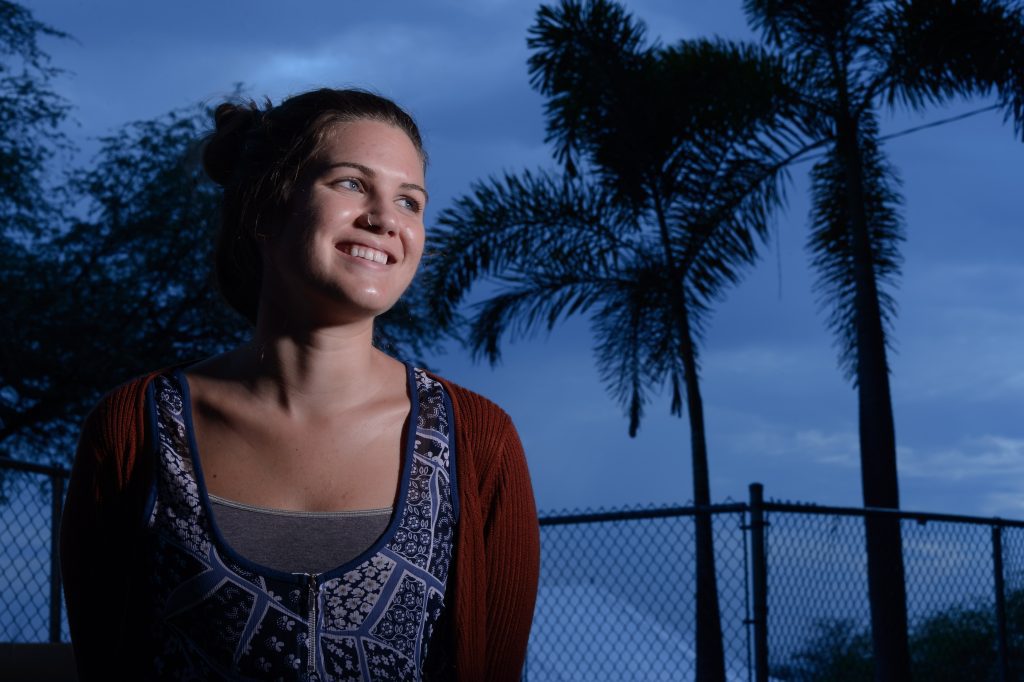
Nighttime Look In Daytime
Using an off-camera flash, I set the flash to be 2-stops over the available light, and the camera I underexposed by -2 stops.
While this improved the photo, the color didn’t pop on the background.
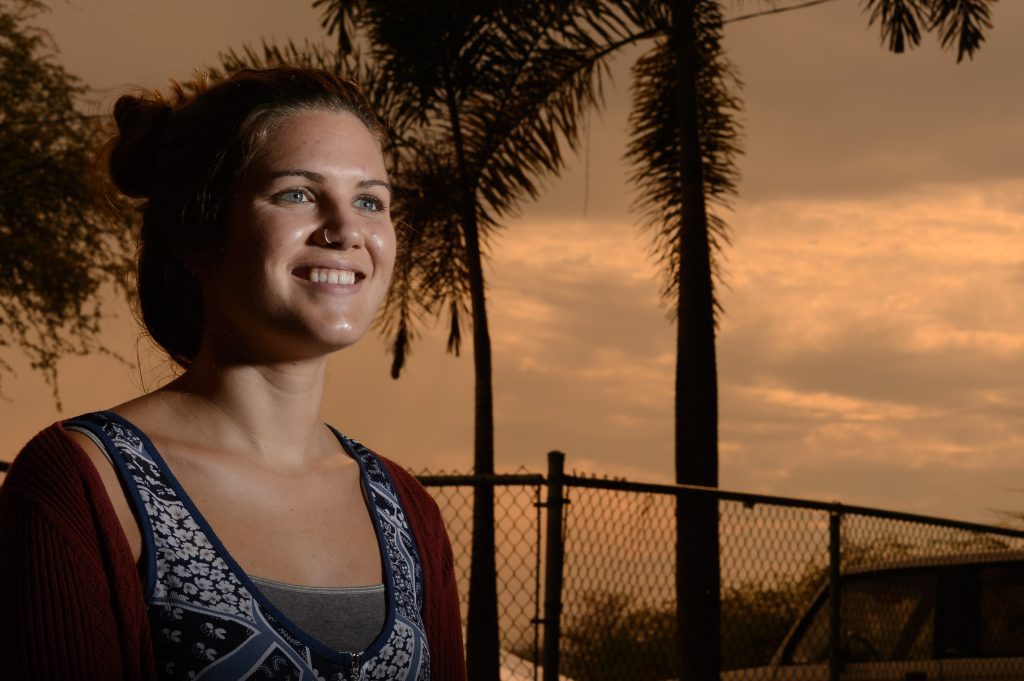
Here I added a CTO +1 and did a custom white balance for the flash on the model’s face. I could have also just dialed the white balance to tungsten and been very close.
The last photo, I put a CTB +1 on the flash and then did a custom white balance. Because the camera compensates for the blue in a flash, it adds orange to the scene. So where the flash is hitting the model is now the proper color temperature.
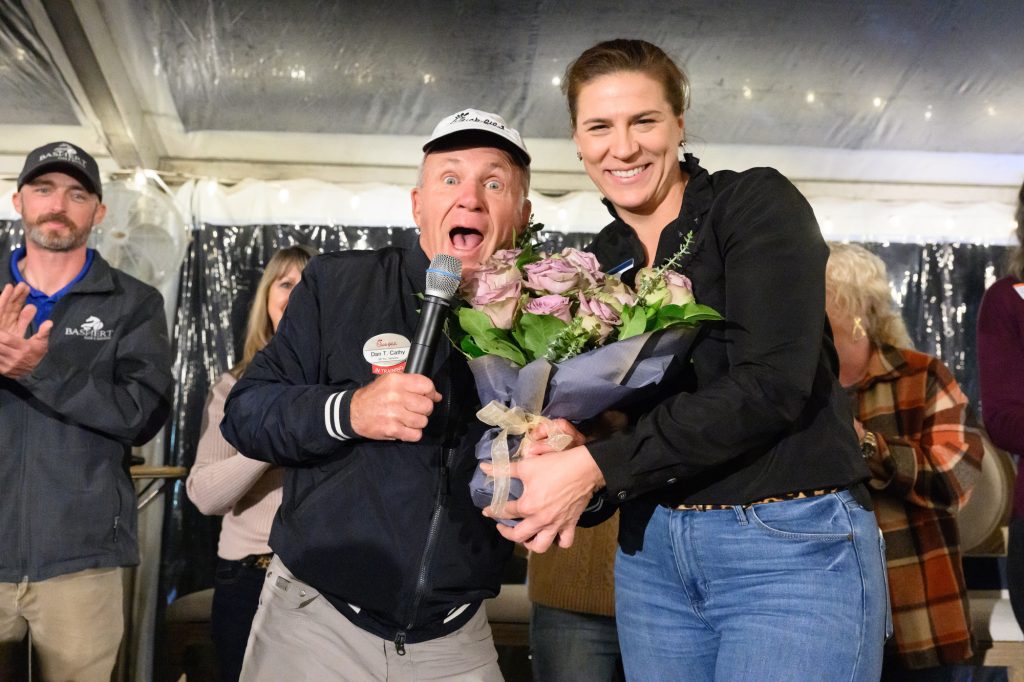
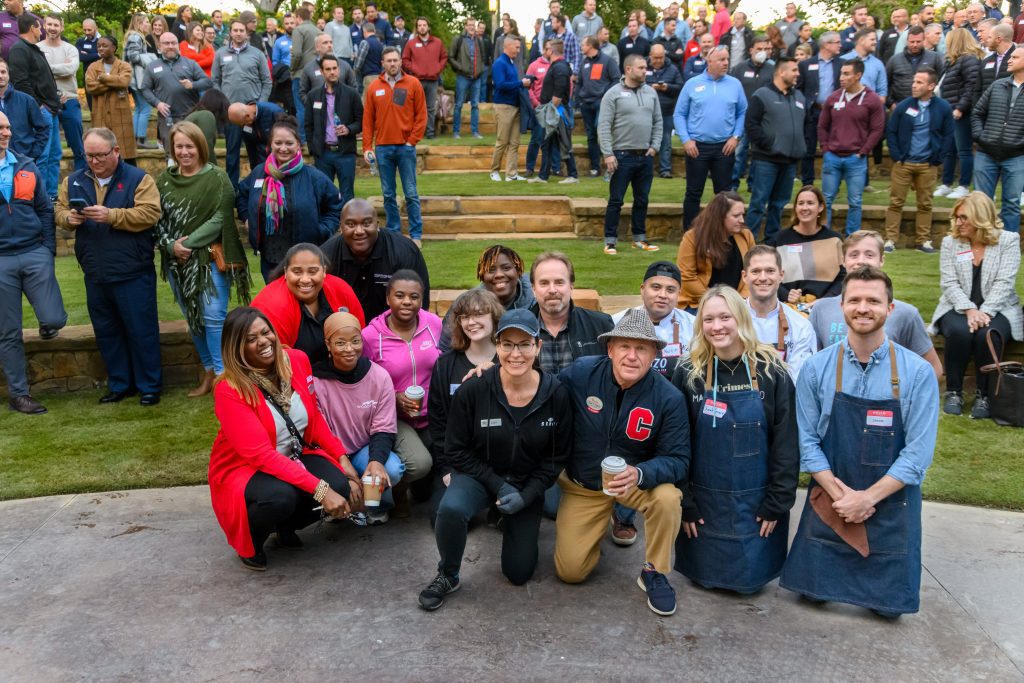
Dan Cathy is hosting some Chick-fil-A people at his home this month that I have been covering. Each evening, there is a call time for the vendors and staff working the event. The call time is very similar to how hotel staff has a meeting before a big event where they go over the expectations for the evening.
The vendors are all the restaurants located at Trilith Studios.
Trilith Studios is one of North America’s largest purpose-built movie studios, emphasizing world-class facilities, state-of-the-art technology, and premium content. It is home to blockbuster films and independent shows like Avengers: Endgame, Zombieland: Double Tap, WandaVision, The Suicide Squad, and Moon and Me. Set across 700+ acres, Trilith Studios has more than one million square feet of production facilities, including a first-of-its-kind virtual LED stage that offers the highest quality production values in the industry, 24 premium sound stages, construction workshops, costume shops, virtual production technologies, and an extensive 400-acre backlot.
Trilith is also the name of the master development featuring custom homes and micro-villages, chef-driven restaurants, and schools targeted at those in the film and creative industries.
Dan is taking the opportunity to pass along some of the hospitality secrets that have made Chick-fil-A successful at each call.
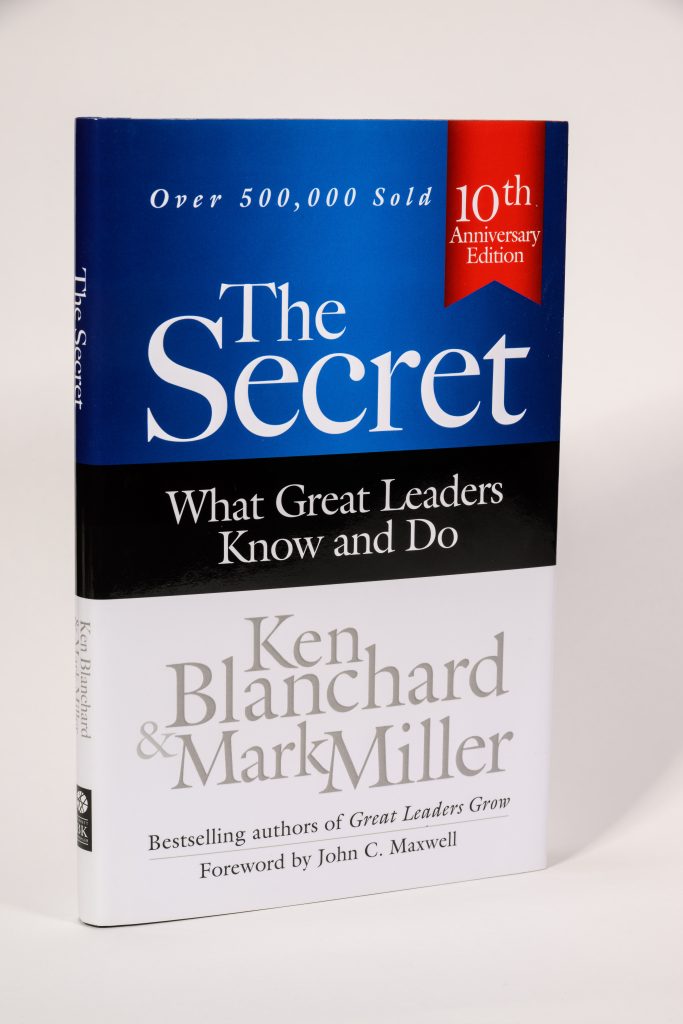
SERVE Model
Chick-fil-A isn’t so secret about most of its leadership secrets. So Chick-fil-A had Mark Miller, vice president of training and development, and Ken Blanchard write a book you can buy called The Secret: What Great Leaders Know–And Do.
Since Dan is hosting multiple groups with the same vendors, he decided to teach them the acronym Chick-fil-A uses for SERVE in the book.
See The Future
Engage And Develop Others
Reinvent Continuously
Value Results And Relationships
Embody The Values
Dan has been doing this throughout his career. He was creating structures to foster leadership and high-performance teams.
We walked along from his meeting with the vendors to a meeting with his staff. During that short walk, I told him I thought it was great that he was helping these new restaurant entrepreneurs with hospitality lessons that they might have never had an opportunity to learn about hospitality before now. Dan smiled at me and said that was precisely why he was doing this for them.
Dan is here with the restaurant vendors around him and in front of some of the Chick-fil-A Operator [Franchise] at his home.
Dan realized that not everyone has the same opportunities. Dan commented that some may not have had but one parent or none to raise them. His dad Truett had started many foster care homes that are still running today.
If you are lucky like Dan and I have been, you have had people care enough for you to teach you some hospitality lessons. Maybe you have had teachers, coaches, and friends who have poured into you and taught you many other incredible life lessons that have made you a better person.
Maybe like me, you have also had some deficits in areas of your life. I didn’t know how much I was on the Autism spectrum until my 30s.
Once I knew I lacked some knowledge, I found as many books on Autism, especially Asperger’s Syndrome, as I could.
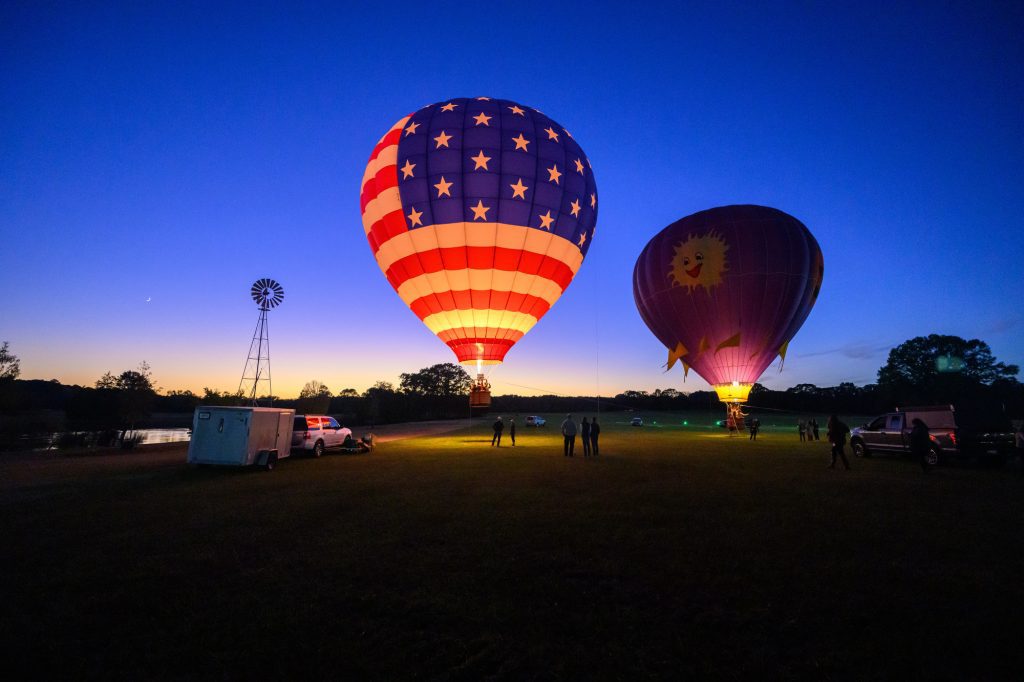
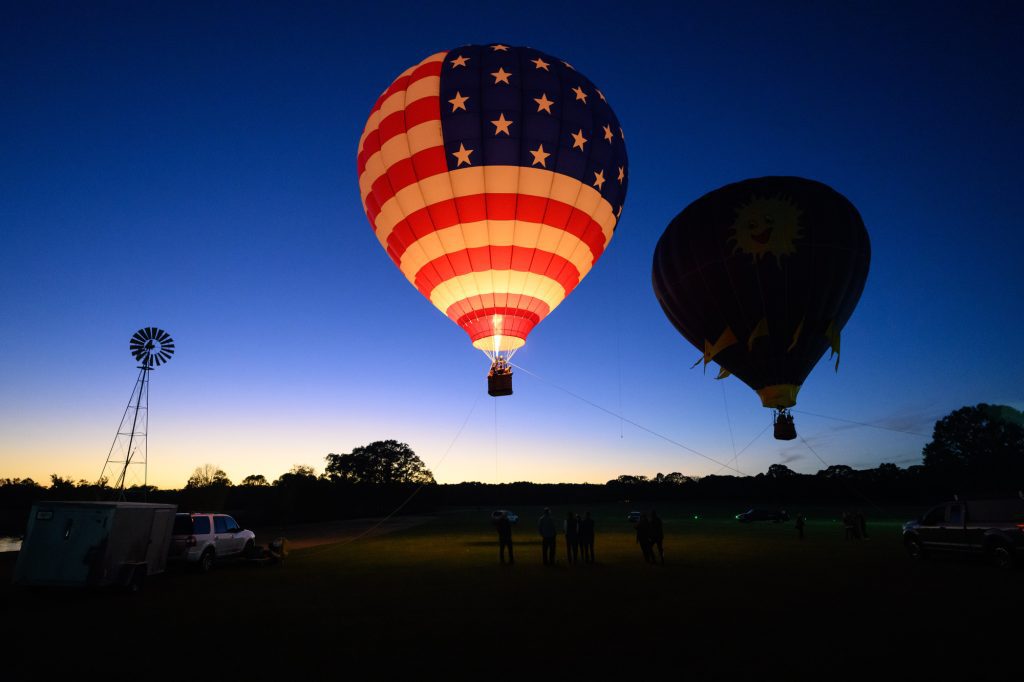
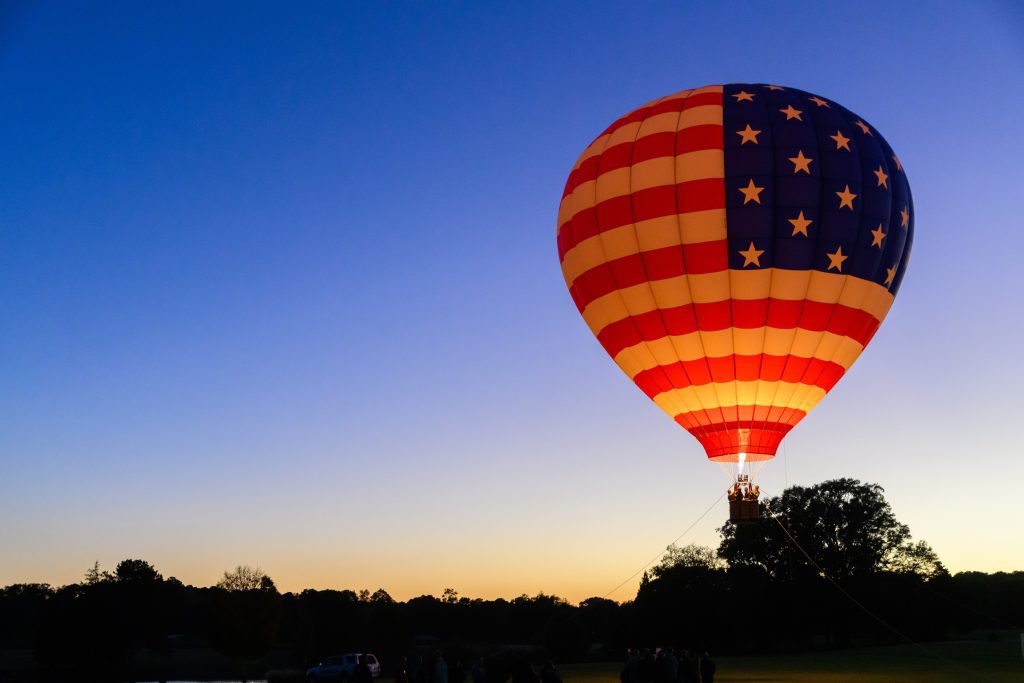
Another hospitality tip from Dan Cathy is to Surprise & Delight your guests. Dan surprised his guests with free rides in a hot air balloon.
Maybe you are aware that you a lacking in something to make your business or even family life better than it is now.
I want to remind you what the R stands for in SERVE for Chick-fil-A. Reinvent Continuously is their mindset.
“1% Better Every Day”
Few words can better describe Chris Nikic’s mindset. He is the first person with Down syndrome to complete an Ironman triathlon, and despite all the obstacles life has thrown his way, he is never deterred from his trajectory in pursuing his passion. His mentality and resilience are unmatched, and we know there is a lot to learn from true passion chasers like Chris. We are proud to support him in his continued mission to inspire and achieve greatness and look forward to standing by his side for every swim, cycle, and run along the way.
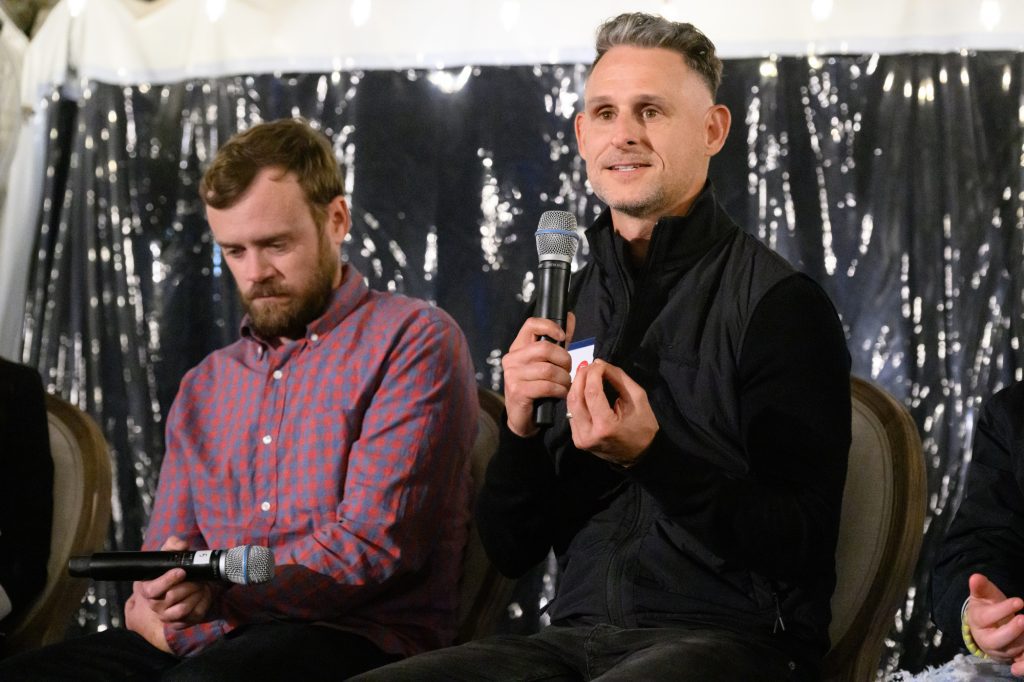
Taking photographs of speakers is like dancing with your partner; you are not leading but following.
In partner dancing, dancers seek to work together to create synchronized or complementary movements. The leader is mainly responsible for initiating action, whereas the follower’s role is to maintain this movement (though they may choose not to).
Knowing your speakers is why organizations should stay with photographers rather than just getting someone to take photos. Some speakers are more difficult to get the moment where you capture the essence of the style of the speaker.
Many people are often hard to capture due to how they blink. For example, some people, when speaking, are slow to blink. Therefore, you must be careful not to catch them with their eyes closed.
Tight shot with a 600mm lens
There are three photos I am looking for when capturing a speaker.
Tight photo
Medium photo – often showing their PowerPoint and them in one photo
Wide or including some of the audience
Medium shot with 200mm to show the PowerPoint
The ratio of photos you take to those you keep is more significant than you would have with a portrait session.
I may take more than a hundred speakers with others, usually forty or so, to get great expressions and storytelling moments.
Including the audience with a 90mm
My tip to anyone photographing a speaker is to be ready with three types of lenses.
Telephoto – For those tight shots
Medium – to capture the screen and them in a photo or to use with the audience
Wide Angle – Depending on the size of the room, sometimes you have to go wide if you are close to the speaker to show elements.
Another tip is to listen.
This speaker started their presentation with dance music and danced onto the stage. His talk was about learning the Rhythm of life.
Be sure you are aware of the tone and message. Do your photos match what they are saying and how they are saying it to the audience? If this is serious, do you have concern showing on their face? If they are energized and entertaining, do you have something that shows this?
Getting people’s hands and expressions right takes time.
Summary
It will help if you plan to take lots of photos to get those authentic storytelling moments.
These two leaders were having a conversation, and I wanted to capture this mood of trust between them.
My wife and I love watching the Ted Lasso show on Apple TV+.
Ted Lasso is kind to everyone he meets, even if someone is aggressive or rude to him. Even if he encounters someone like this, Lasso always seems to approach the situation to teach them a lesson and make them better rather than humiliating them or doing anything unnecessary.
Ted Lasso exudes optimistic leadership wisdom. He provides a relevant cultural example of servant leadership. Most importantly, Ted Lasso offers tangible leadership practice that calls us into emotionally authentic relationships and injects hope into our organizations.
The “Dart Game” is the place where the show gives a great example of where assumptions lead to mistakes.
Assumptions can shrink a relationship.
Curiosity can expand a relationship.
– Susannah Frost
Just because you are doing the right thing doesn’t mean life will be all about winning. Ted Lasso talks about how people had been making assumptions about him throughout his life. While it may appear in this clip that this was about sticking it to someone, it was a much more profound lesson.
Ted Lasso was asking those around him to be more curious. A few statements in that clip of the “Dart Game” foreshadow themes in the show. One of those is about how he played darts with his dad from age ten to sixteen when his father died.
Most of the show is about how people are making assumptions about Ted. However, an insight into his mental breakdowns shows he is often alone.
“And so what it basically forces you to question is what really matters at the end?
And I think what really matters at the end is kindness; how will we be human to each other during this crisis is through kindness”
– Wajahat Ali
Now while Ted does feel alone many times throughout the series, he is eternally optimistic for others.
“I promise you there is something worse out there than being sad, and that’s being alone and being sad.”
– Ted Lasso
Now that is the scene that is quite inspiring, but I want to remind you that Ted lived a very lonely life throughout the show. People around him are making assumptions about Ted and putting him down. So here is a series of those show clips that remind you how many of us can relate to the character Ted Lasso.
Assumptions can shrink a business.
Curiosity can expand a business.
– Susannah Frost
If you are in business, your assumptions and curiosity are the same things that affect relationships and are what impacts a business.
Customer service and customer experience are significant focuses of the most successful businesses. The first step is creating products and services that customers want. But focusing on customers goes beyond your products. Customers are tired of dealing with companies through phone menus and artificial intelligent answering services.
What does curiosity look like in business?
At the core of curiosity is a desire to learn more about your world. It would help if, therefore, you asked questions.
You need to use the data and information you know to help in asking why. For example, if your sales are dropping off, you must ask why and not assume.
Sometimes you need to pay to get someone to help you. A coach or mentor is one of the best things to go to when you are at a loss for what is going on with your business. Sometimes you don’t even know what questions you need to ask yourself.
New & Improved
Have you ever wondered why companies continue introducing new products that are often slightly different from their current ones?
Any time you make changes that a customer can notice you are communicating that you are improving. If they are already a fan of your business, this makes them want to engage with you more. For example, when a restaurant introduces a new menu item, most of its customers are very likely going to try it.
When I upgrade my camera, many of my customers do notice. They are excited that the photographer they are using is leading the industry.
What changes have you made lately with your business? Is there anything new that you are doing for your customers? If you are a brick-and-mortar location, have you refreshed your place with fresh paint, carpet, or furniture?
Planning
I keep up with the latest gear in photography. I want to be sure I know what is possible to do that I cannot do right now with the new equipment.
I am also studying my clients’ industries so that I know what they are dealing with and may offer suggestions on how I can help serve them to deal with the new challenges they are facing.
My pricing has built into it, reinvestment into the business. I must update cameras and computers and continue buying more hard drive storage.
I create blogs, newsletters, postcards, and I make phone calls to my clients and prospective customers.
I study the industries and look for what message I am using to engage with the audience.
Summary
As Ted Lasso says, “Be Curious.” He won that dart game because Rupert assumed Ted didn’t have the experience he had with playing darts. The message is simple, don’t make assumptions.
I am saying to go further than just being a curious person; plan and put in the time to do the research that will lead you to grow as a human being and grow your business.
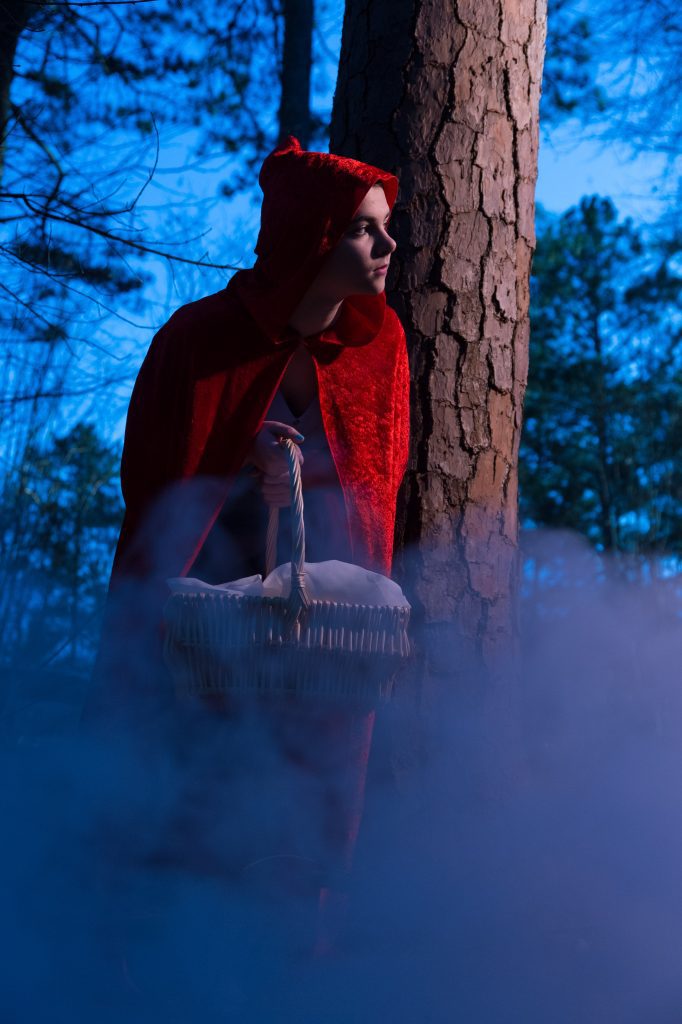
Caption: Flash is used outside to create motion yet freeze the subject.
To flash or not to flash, that is the question – at least for this article. There are two primary issues, the yin, and yang, of answering this question – the Technical and the Aesthetic.
Sometimes there isn’t enough light to make a picture, and you need to use flash. At other times the use of flash is unnecessary but can improve a photo.
There are a lot of situations that, even from a purely technical standpoint, are borderline and hard to call. Here it is necessary to consider the end use of the picture. If the photo is for a computer screen, poor light is not so important because the light passes through the image. On the other hand, if printing in black and white in a newspaper or if printing on plain paper, flash can be a lifesaver. The newsprint isn’t a bright paper, and the ink is absorbed into the paper so much that what looks a little dark on a computer screen will be solid black in a newspaper.
No FlashWith Flash
When photographing people with extremely dark skin tones, the flash will open up shadows and give modeling and definition to the face.
Picture (if you will) a shaft of light streaming through a window onto someone’s hair, creating a halo effect. Even though the face isn’t all that distinguishable, using flash here will destroy the mode. Sometimes the aesthetic rules over a technically correct rendition.
Flash was used so the numbers on the display could be highlighted.
Another aesthetic reason is not to use a flash once you fire a flash; people are aware pictures are being made, and their expressions may change from natural to posed. So you may get one realistic shot, but you’ll rarely get others.
Here again, it can be hard to decide what to do. If you take photos of people without a flash and the expression is just right, even if the light is poor, it is often better than a well-lit but posed shot. However, a flash is called for if you can’t see the expressions or if the image will be in a newspaper and their faces lose too much due to the printing process.
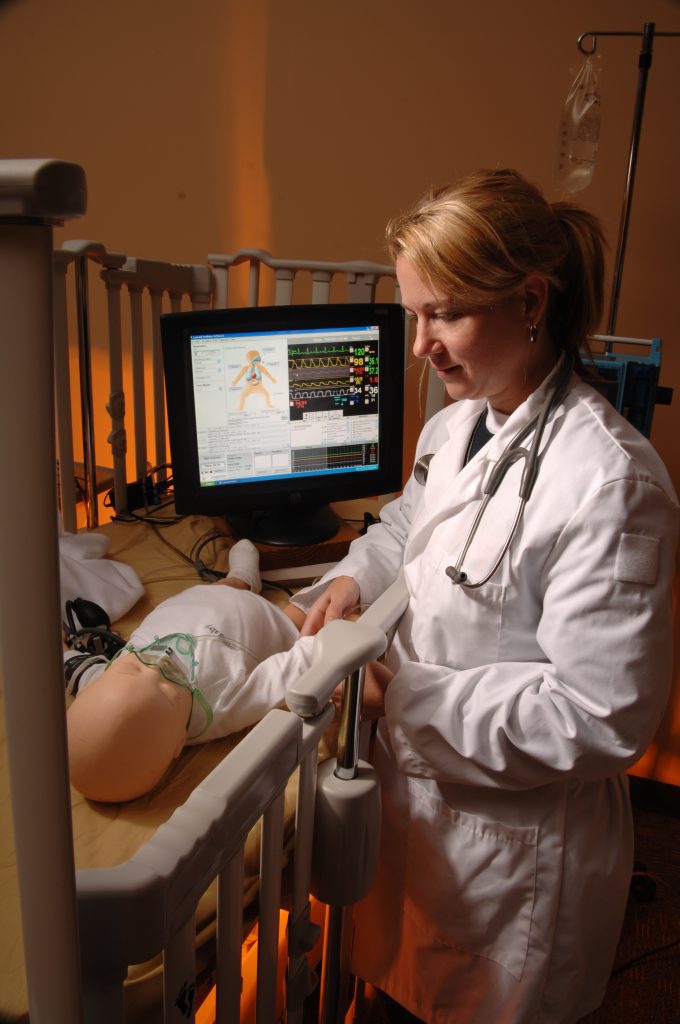
Flash was used inside to help highlight the technology in the teaching nursing lab at Clayton State University.
Not sure of the use? Want to be able to use the photo in many ways? Then it would help if you were sure the quality would work anywhere it might appear.
You will need a high ISO (800 or 1600) if you use available light, but the photo may be pixilated. On the other hand, if printing the image large for use in a display booth or a slick magazine, you need to shoot at a lower ISO and use a flash.
No Flash was used, but the photo is properly exposed and white-balanced.
Photography is always a trade-off, a compromise.
At times flash is not permitted. For example, museums often don’t allow flash since it can fade the colors in prints or fabrics.
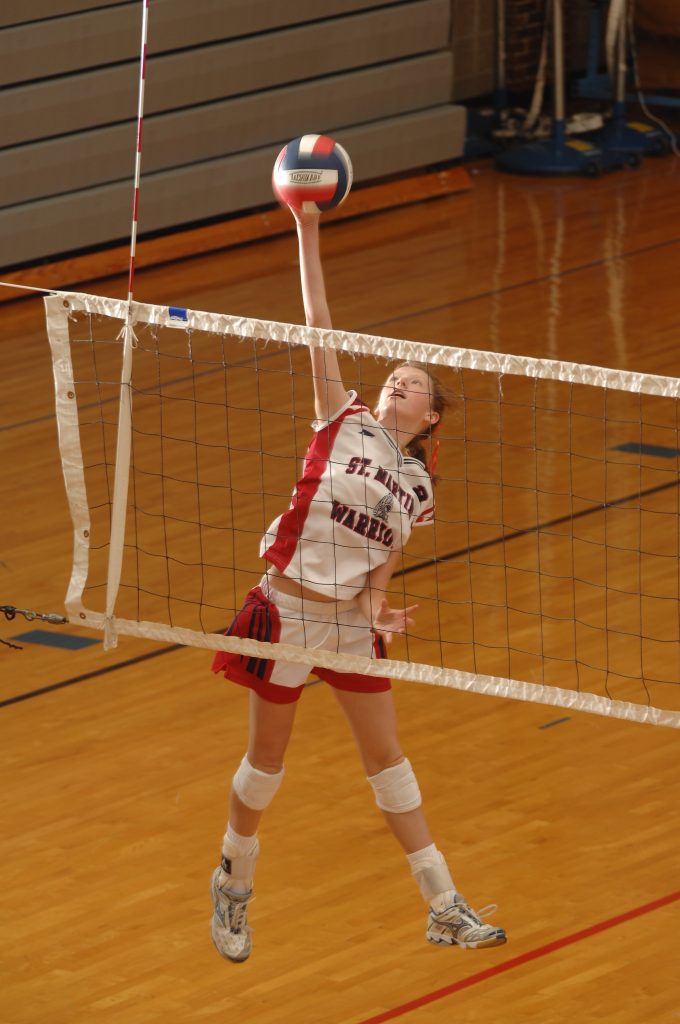
Flash is used to stop the action of this volleyball player.
Surprisingly, the rule of thumb most people apply to the use of flash is the reverse of what it should be. They don’t use the flash outside when it would help open up shadows; they use it inside where it can destroy mode and restrain naturalness.
Flash is used so the inside light can be balanced with the outside light which can be seen through the large window behind the subject.
By reversing the standard rule of thumb and using flash outside, not inside, you discover a new way of seeing the light.
With digital, seeing the results is immediate, So why not shoot these tough choices both ways and compare the outcome?
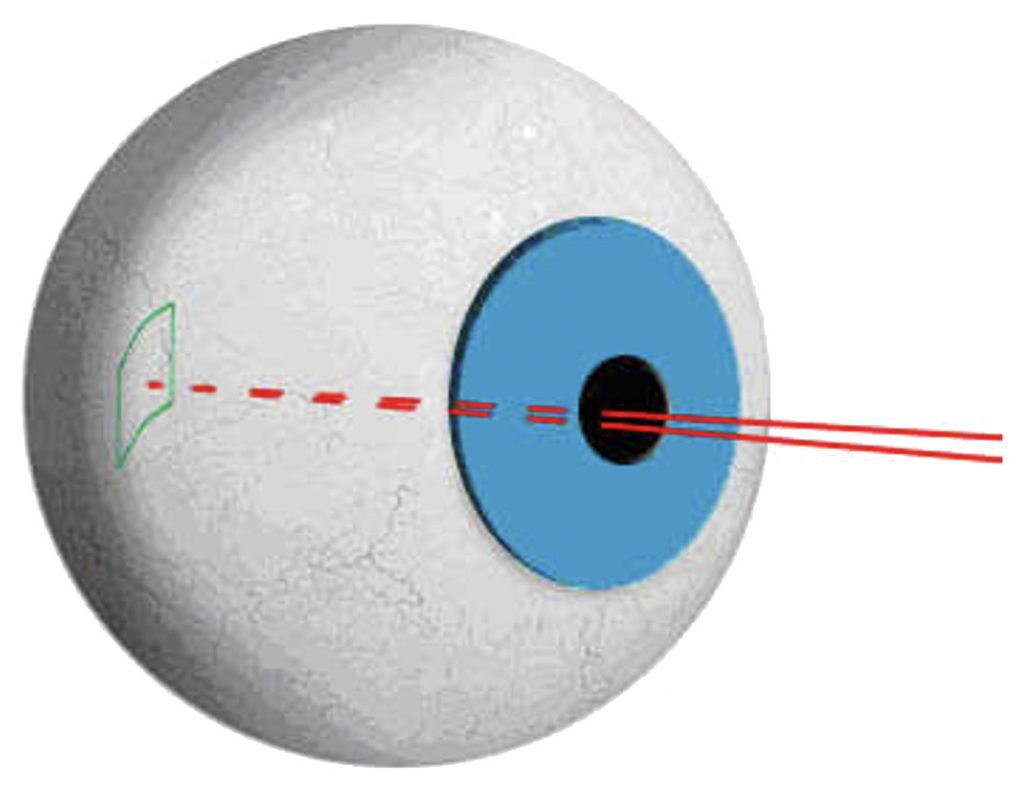
If people in your pictures appear possessed by an evil being (and you’re sure they are not), the problem is the Dreaded Red Eye.
We have all seen the horrible red eye, but how do you avoid it? What causes it?
On-camera flash is the culprit.
When the flash is so close to the camera lens, the angle formed by the flash to the eye and back to the lens is so narrow the sudden bright light bounces off the retina and back into the camera lens.
The eye’s iris is open relatively wide before the sudden flash, and what you see the red reflects the light of the blood vessels in the retina. No wonder it is called the dreaded red eye.
Since the problem is the narrow angle between the flash and lens combined with a wide open iris, we must either move the flash or “stop down” the eye or both.
Changing the Angle
Many digital cameras have a flash built into the camera right next to the lens. Convenient, but it can cause red-eye problems. Some of these same cameras also have a hot shoe allowing you to use an external flash far enough from the lens to reduce the likelihood of red eye.
If you use an extension flash cord (PC cord), you can raise the flash further above the lens, not only avoiding red eye but also casting the shadows down behind the subject and not on the wall behind your subject. Ever been to a wedding and watched the photographer; that’s why she got her flash stuck way up in the air in her head.
Another way to increase the angle bounce the flash. Use a flash with a tilting head to reflect the light off of the ceiling. Don’t try this where the ceiling is very high, like in a church or outside, unless the low-lying clouds are extremely low (just kidding).
Students learn to use off-camera flash with studio strobes in the School of Photography with YWAM. Photo by Dennis Fahringer
Other Ways To Solve The Problem
Some cameras have what they call a red-eye reduction feature. The camera fires a burst of flashes before the actual flash. This burst of bright light causes the eye to “stop down” and, theoretically, is irritating and causes blinks. Well, that would get rid of the red eye. Better than flashing at your subject to get their eyes to stop down, have them glance at a lamp in the room or, if it is daytime, glance at a window.
Do you need a flash? Sure, you will have to use it sometimes, but can you turn on more lights in the room and get the light bright enough for photography? Maybe move your subject close to a window. Perhaps you can raise the ISO, say from 200 to 400.
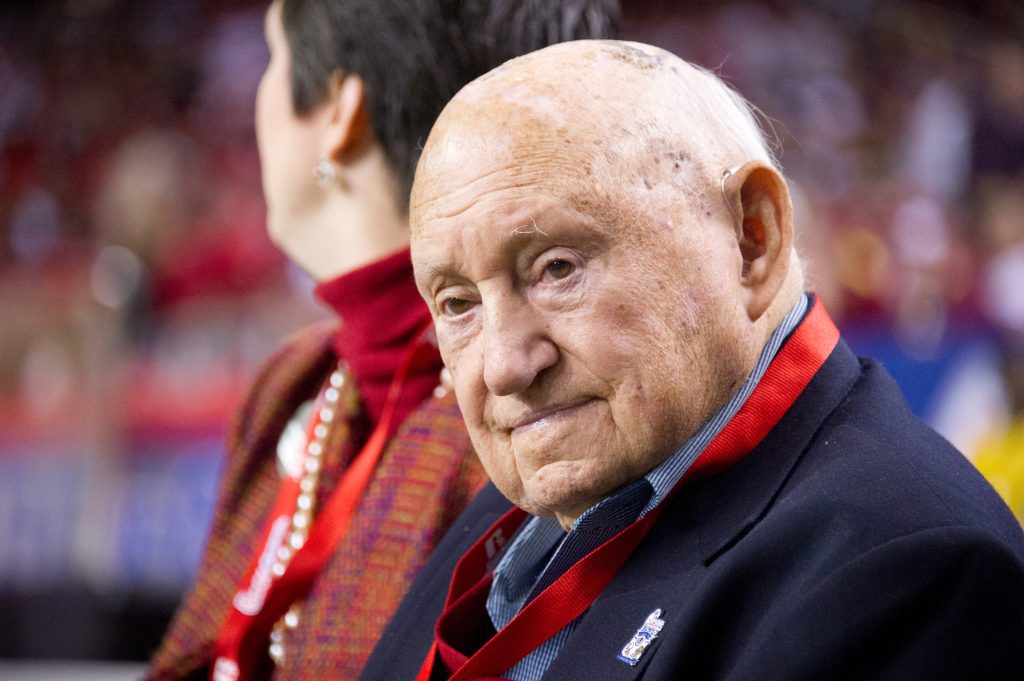
Truett Cathy
Chick-fil-A Bowl
The “available light” photos can be beautiful and move your photography to a new level if done correctly. Why not take the person outside in what Kodak likes to call “open shade” in the shadow of the house, for instance?
Oops! Too late. The people have left, and NOW you notice the dreaded red eye. All is not lost. There is probably some software that comes with your camera that lets you fix the red eye on the computer. Since there are so many different software solutions, you will need to refer to your manual for this fix.
I like to check before taking photos to see if there is enough light to work without a flash or if I can make it that way. Firing a flash announces that someone is taking pictures of people as they are.
Sometimes you have to use flash, but now we know how to avoid some of the problems it causes.