Share edits (Lightroom Mac/Win, iOS, Android)

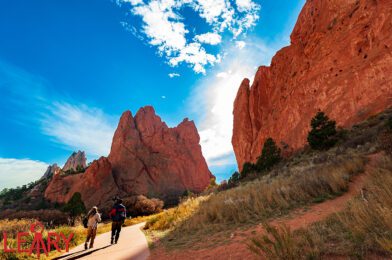
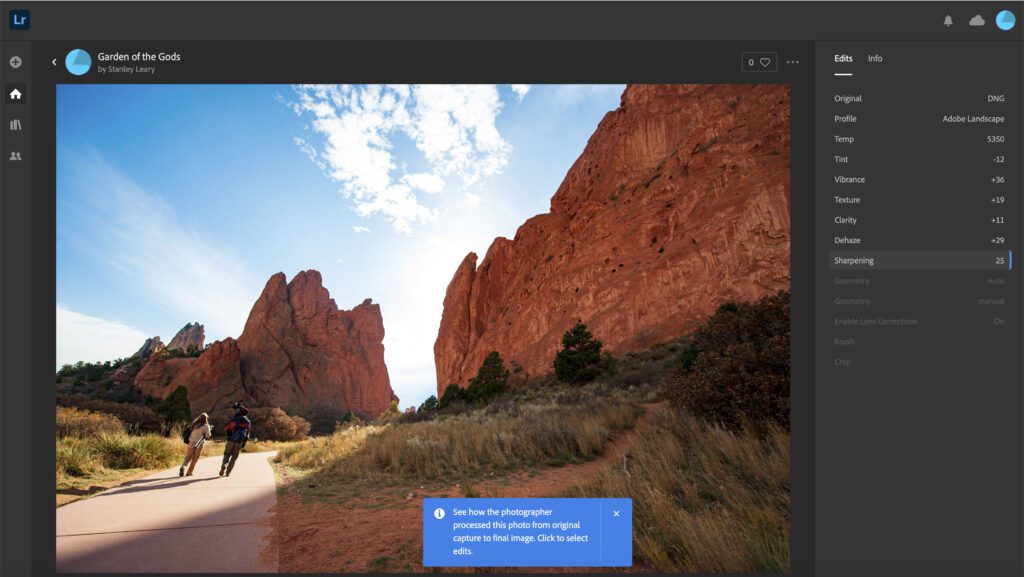
Garden of the Gods [NIKON D3, 14.0-24.0 mm f/2.8, Mode = Aperture Priority, ISO 200, 1/640, ƒ/5.6, (35mm = 14)]

One of the most enjoyable things for me to do these days is to pull up old photo shoots. In this case, one from Colorado Springs the Garden of the Gods was shot in 2009 on my Nikon D3.

I found the RAW Nikon NEF file and opened it in Adobe Lightroom. there are a few more things you can do with Lightroom that were not available in 2009.

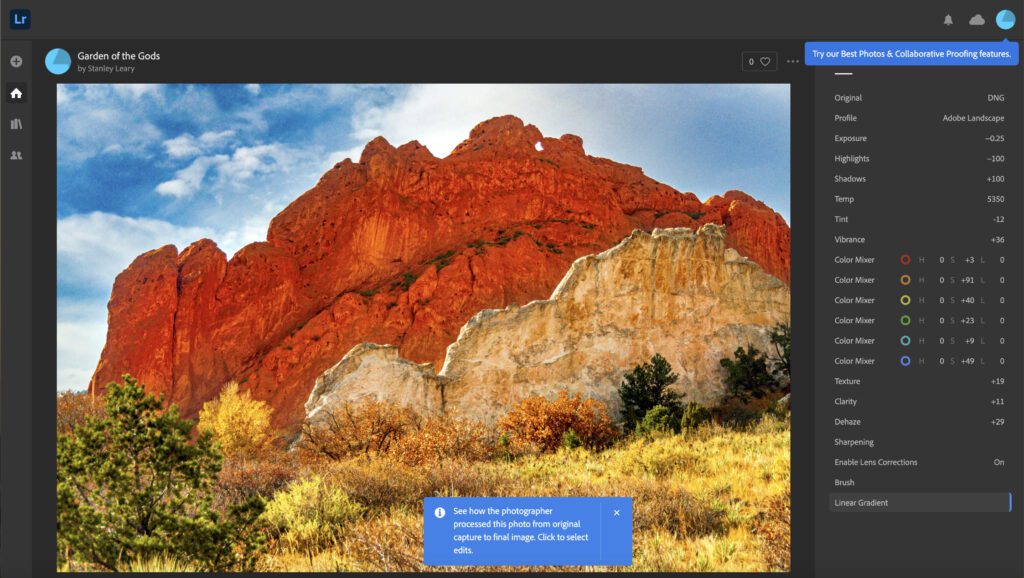
Starting in the June 2020 release, you can now contribute your images and edits to the Lightroom Discover section. The new “Share Edits” menu option allows you to share your editing process with the world, to help other photographers learn from your edits. When you submit your edit, Lightroom automatically creates a before-and-after sequence that combines your straight-out-of-the-camera image with your final edited image, so that others can see and learn from your edits. You can even let others save your edit settings as a preset that can be applied to their photos.

Click on this link and then click to see my edits one by one.

https://lightroom.adobe.com/learn/discover/aee94f3a-96c0-4f29-82a0-62d46997b4bc

This can be a great teaching tool for many camera clubs and other photographers who like to teach.

https://lightroom.adobe.com/learn/discover/4b2204f6-d104-4edc-a072-029083af0244

I can’t wait to show you some very involved editing so you can see what I am doing to improve the photos.

How I get clean images with my Nikon D5

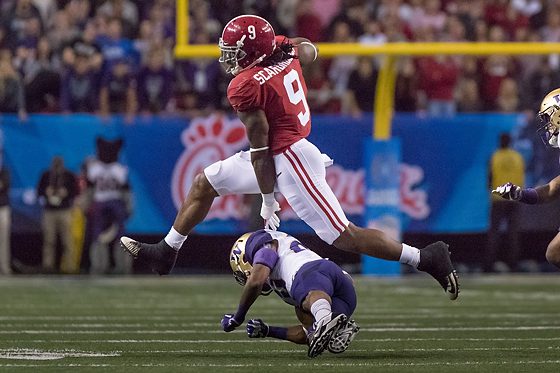
Alabama Crimson Tide running back Bo Scarbrough (9) hurdles a Washington Huskies defender during the first quarter in the 2016 CFP semifinal at the Peach Bowl at the Georgia Dome. [Nikon D5, Sigma 120-300mm ƒ/2.8 DG OS HSM | S, Sigma TC-2001 2x, ISO 45600, ƒ/5.6, 1/4000]

Anonymous said…very clean images for such a high ISO, …. is that because of the shutter speed? I feel like above 6400ISO (D5 – f/2.8 – MMA), my images degrade heavily

This morning this was a comment left on my last blog post. I realize that way too many people buy a camera and pull it out of a box and just shoot. The camera should give me great images.

First of all it isn’t due to shutter speed. It is due to proper white balance, exposure and post production that let me get more out of the camera than many with the same camera.

Now when the Smart Phone manufacturers want to show off their camera capabilities they rarely put it in the hands of just anyone and then use those photos to sell the phone. They hire a professional. The professional not only will know how to compose, but they know how to use all those settings on the camera.

Backstage Tour

So I will take you on the backstage tour of my process. First let’s see the image above as a JPEG right out of the camera first.

This is the RAW Nikon Image and then I just told the PhotoMechanic Software to generate a JPEG. This would be very close to what the camera would have produced had I had it set to save as JPEG rather than RAW.

Hopefully you can see that I rotated and cropped the image and then I did a little more work. However there is a critical step that I do that made the color look correct. I did a custom white balance using the ExpoDisc.

Here is a blog post just explaining custom white balance with the ExpoDisc.

Since I am shooting RAW I ingest all the images into Adobe Lightroom.

First after cropping the image in the editing module I correct for the lens
 
Second I adjust vibrance. Usually between +25 to +28. Then I adjust the exposure, highlights and shadows.
Occasionally I will adjust the noise.

When I do slide the Luminance slider I often need to sharpen the image as well. Here I am showing you that in Lightroom. Always have the image at 100% and I prefer to see the skin tones if available when doing this. I don’t want to over do it and they now look plastic.

Usually this takes care of 98% of most of my workflow.

On another forum we had new Nikon D5 users talking about how horrible their noise was when shooting at high ISO.

First off, often people miss the exposure and are at least a 1 stop under exposed or over exposed. That would certainly contribute to increased noise.

Second, if the Active D-Light function features is on, that would explain why the images look flat. Now if you shot RAW then the Active D-Light function will not affect the RAW file and you can fix it. I recommend not shooting JPEGs and shooting RAW and this alone will help tremendously.

Third, I would recommend using noise reduction in post verses having it active in-camera.

Another photographer Joey Terrill did his on test and created a blog on the Nikon D5 here on noise.

Here I did my own lowlight test using just one candle as the source of light.

SUMMARY

All cameras have many settings that can make your images look like crap or incredible. These settings were designed for all kinds of conditions. You must understand what the settings will do and then set the camera to technically get all you can out of a situation. Then you take that image into a software light Adobe Lightroom or Adobe PhotoShop and pull even more out of the RAW file.
Shooting wireless tethered for headshots

 
Nikon D4, Nikon 85mm ƒ/1.8G, ISO 50, ƒ/4.5, 1/160

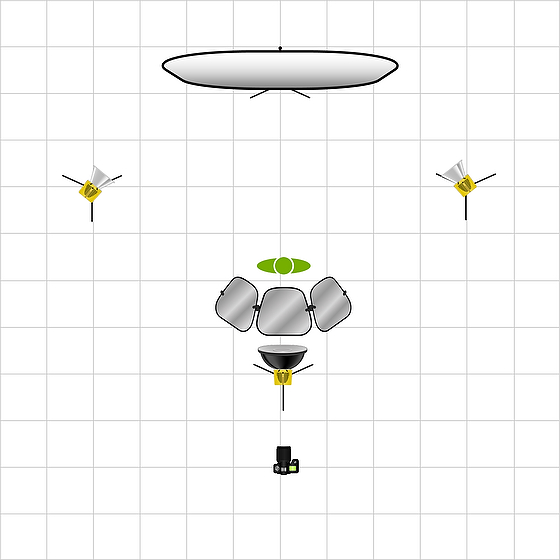
Yesterday I did headshots for my daughter’s theater. I used a straightforward setup that I have shown here before.

As I was shooting, you can also see the setup with my wife helping with putting the names into the metadata fields.

Now I was shooting wireless tethered by using the CamRanger system.

You can look at my earlier blog post on the system to see how to use this system. I shot all these as RAW this time and didn’t shoot JPEGs.

There is a delay from the time shot is taken to the time it pops up on the computer.

Here is the workflow outlined for you:

You can see the screenshot of adding the subject’s names to the caption field using PhotoMechanic.

The client can download with a password I provided or order prints online.

Here you can see the screen when they add it to their cart:

Change Capture Time in photos using Adobe Lightroom


Yesterday I shot an event with a friend. We were posting these to an online photo gallery for the client. Well, we discovered that the cameras were not all set to the correct time. Uh-oh!

You might need to change the capture times if you traveled to a different time zone and didn’t change your camera’s date/time setting before you started photographing. Or, if you import a scanned photo into Lightroom, the image would contain the creation date of when one scanned it rather than when someone took it.

Select all the photos you want to adjust first in Adobe Lightroom.

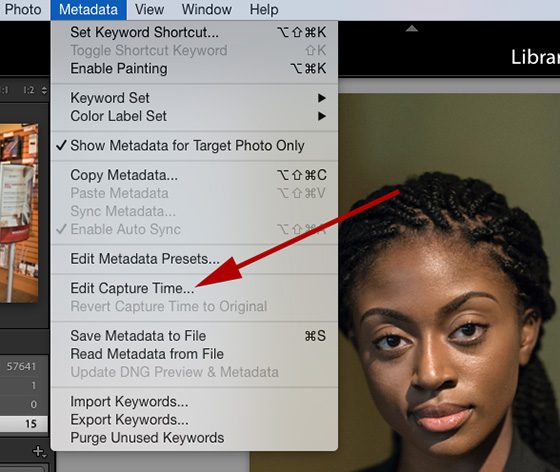
The photo above shows where you will start to fix the date and time. Go to the menu item and then click on

Here is a screenshot of what will show up. You will have three options here. The first choice is to Adjust to a specific date and time. The Original Time is what the setting captured. Then go to the Corrected time, put what you need it to be, and click on change to adjust it.

The second choice works well when you might have just had the camera set for a different time zone and need to adjust it by hour increments. Then the pop-up option on the far right is all you need to choose an hour adjustment of +/-.

The last choice will change the creation date and the correct time. These are two different fields embedded in the photo. Great for scanned images where the creation date wasn’t when anyone scanned it.

There you have the directions to change the date if you did not set your camera correctly. Time stamping is excellent when you have multiple cameras and need them all synced for the client to see the photos in the order you shot them.