
|
Getting your Trinity Audio player ready...
|
Yesterday I shot an event with a friend. We were posting these to an online photo gallery for the client. Well, we discovered that the cameras were not all set to the correct time. Uh-oh!
You might need to change the capture times if you traveled to a different time zone and didn’t change your camera’s date/time setting before you started photographing. Or, if you import a scanned photo into Lightroom, the image would contain the creation date of when one scanned it rather than when someone took it.
Select all the photos you want to adjust first in Adobe Lightroom.
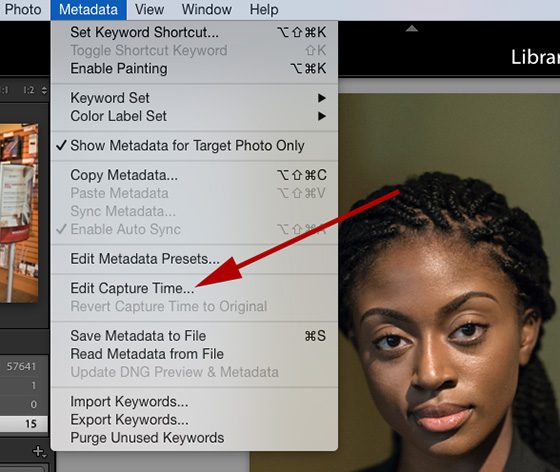
The photo above shows where you will start to fix the date and time. Go to the menu item and then click on

Here is a screenshot of what will show up. You will have three options here. The first choice is to Adjust to a specific date and time. The Original Time is what the setting captured. Then go to the Corrected time, put what you need it to be, and click on change to adjust it.

The second choice works well when you might have just had the camera set for a different time zone and need to adjust it by hour increments. Then the pop-up option on the far right is all you need to choose an hour adjustment of +/-.

The last choice will change the creation date and the correct time. These are two different fields embedded in the photo. Great for scanned images where the creation date wasn’t when anyone scanned it.
There you have the directions to change the date if you did not set your camera correctly. Time stamping is excellent when you have multiple cameras and need them all synced for the client to see the photos in the order you shot them.