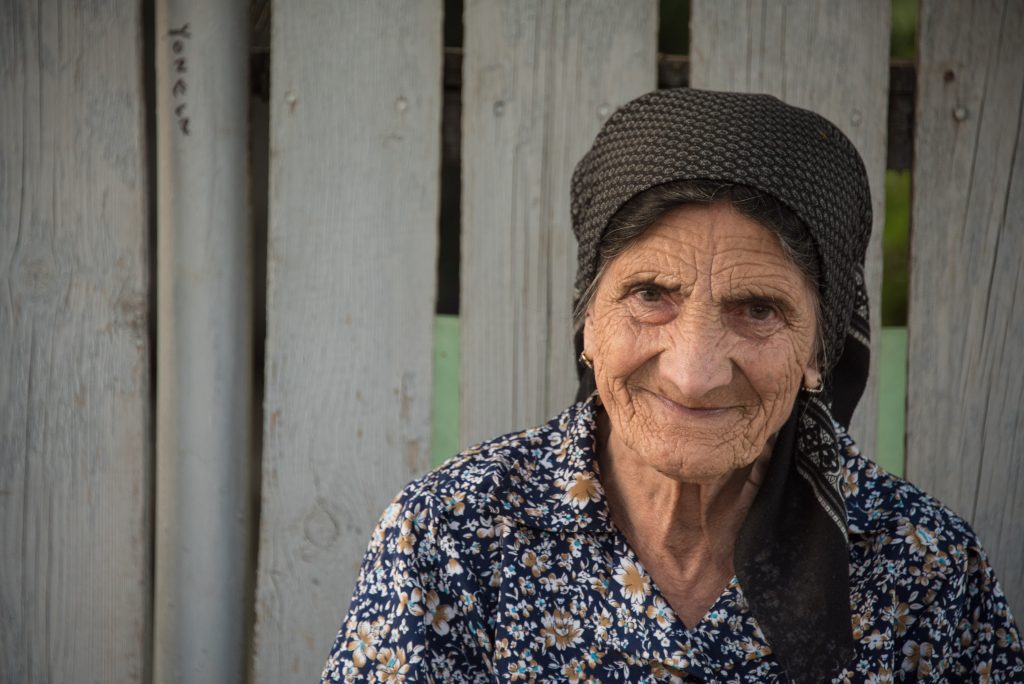
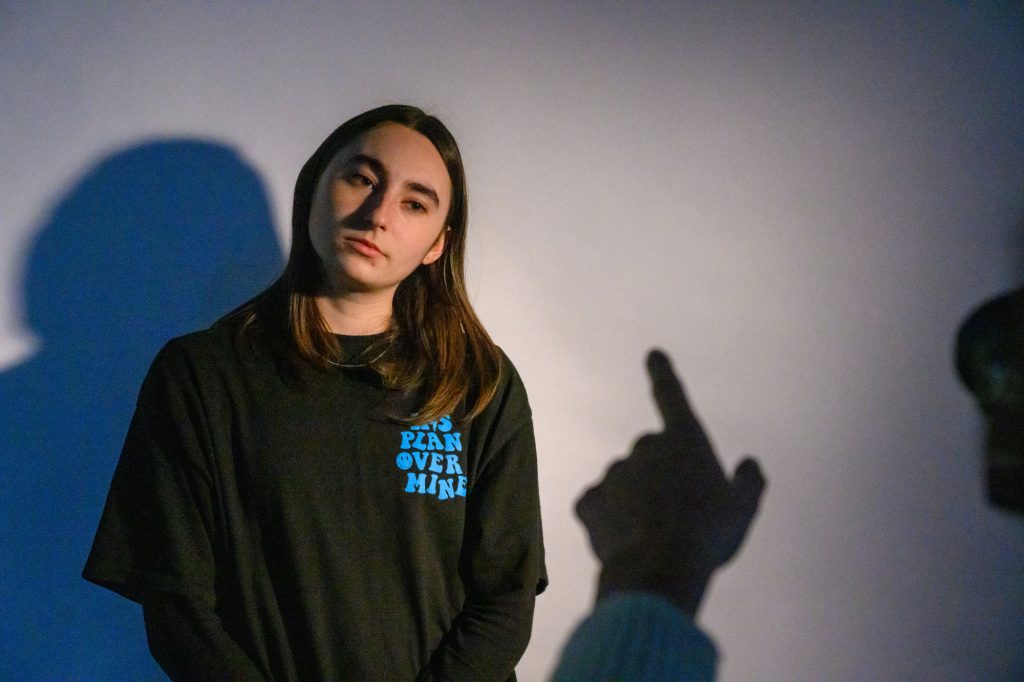
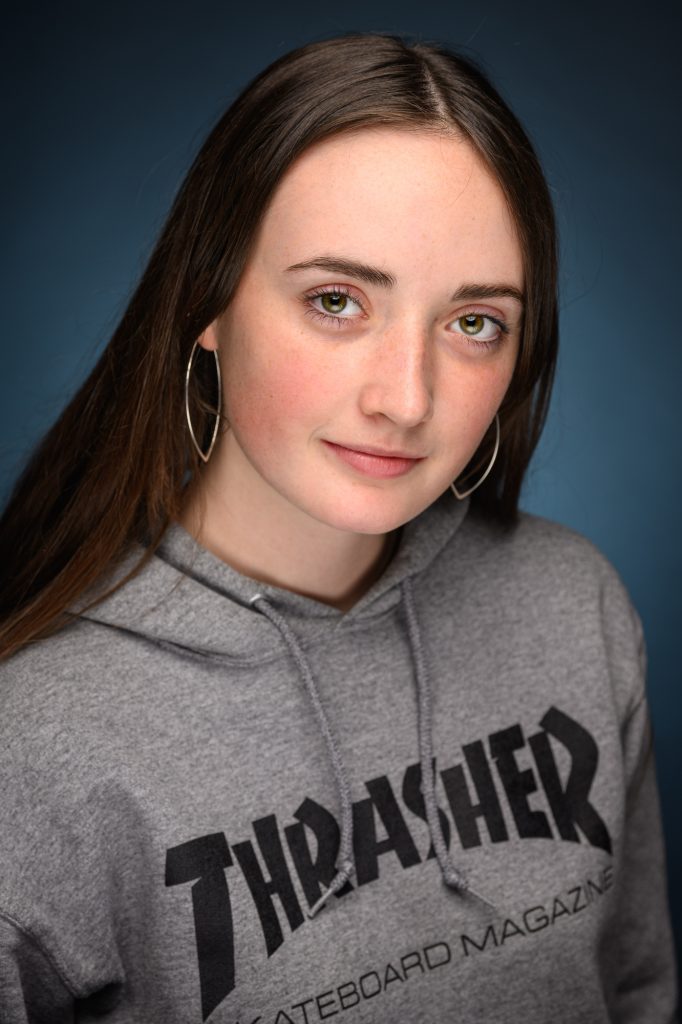
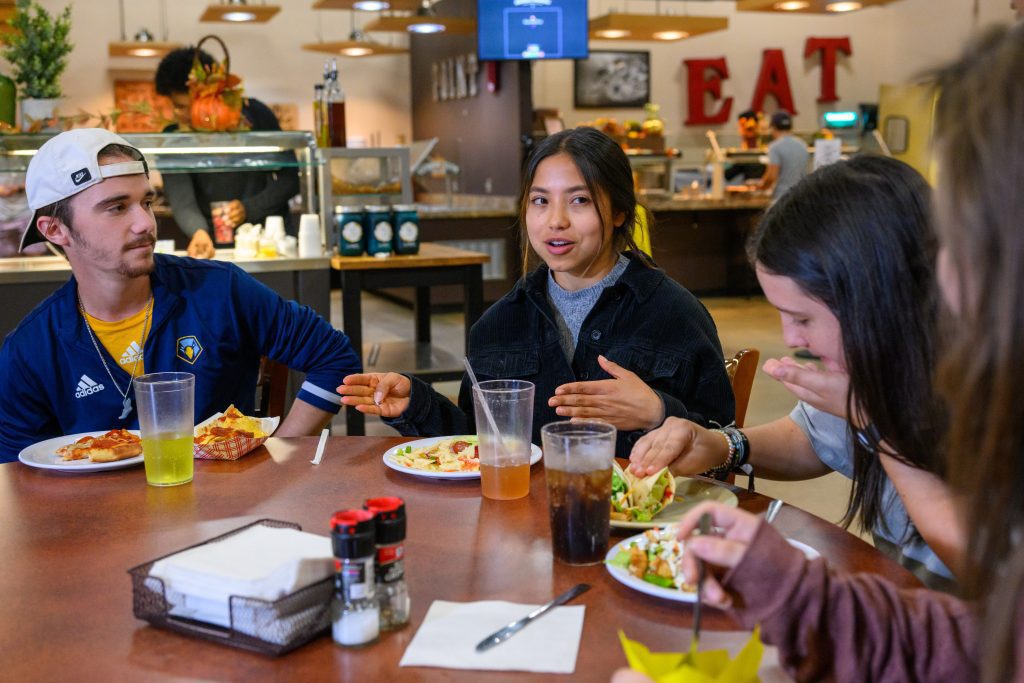
Over the years of teaching studio portrait lighting, I have slowly been creating a small tips list that I share with my students.
I have never just stopped and said hey, here are ten tips for you, but this is the first time I have put these down in writing. I hope some of these help you improve your portraits.
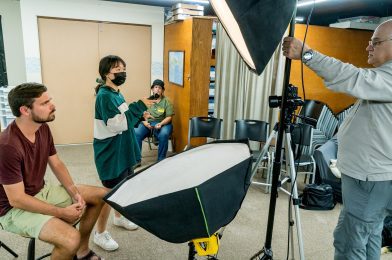
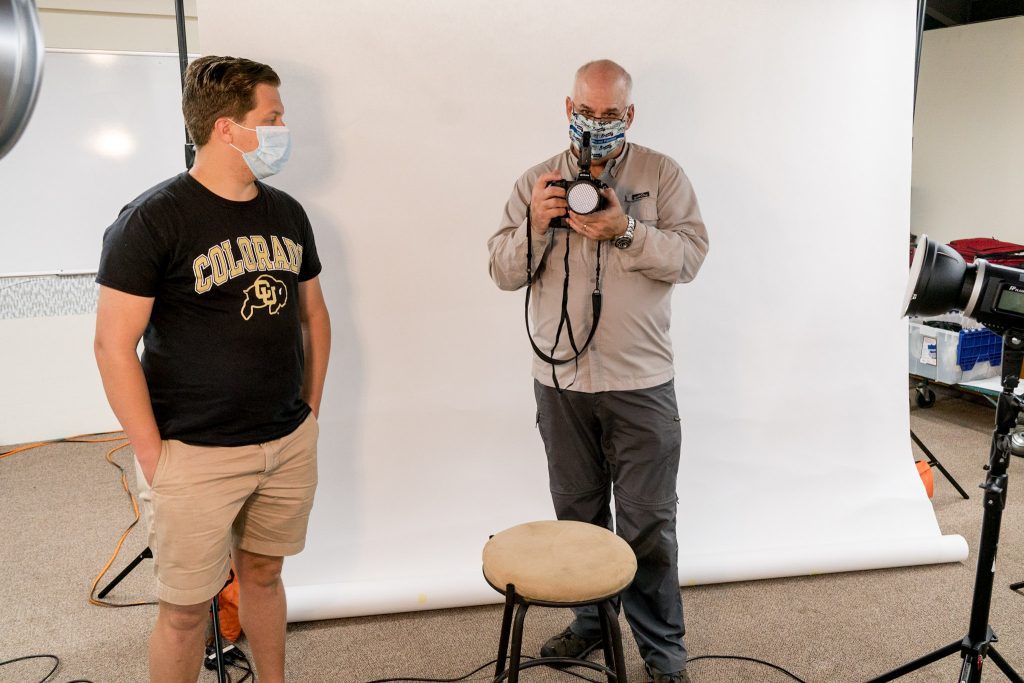
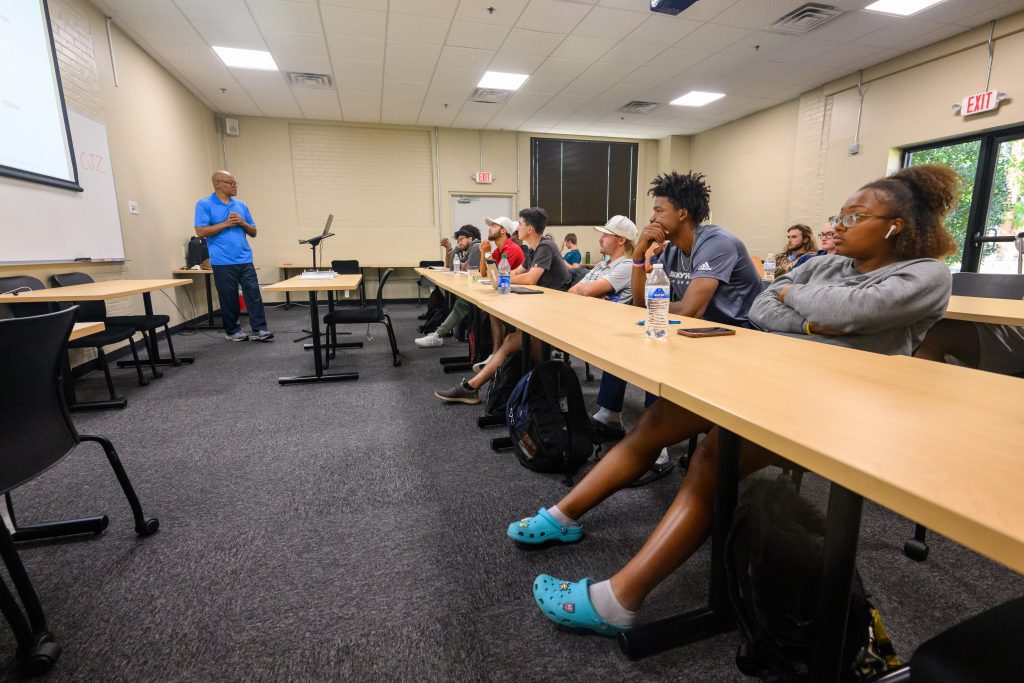
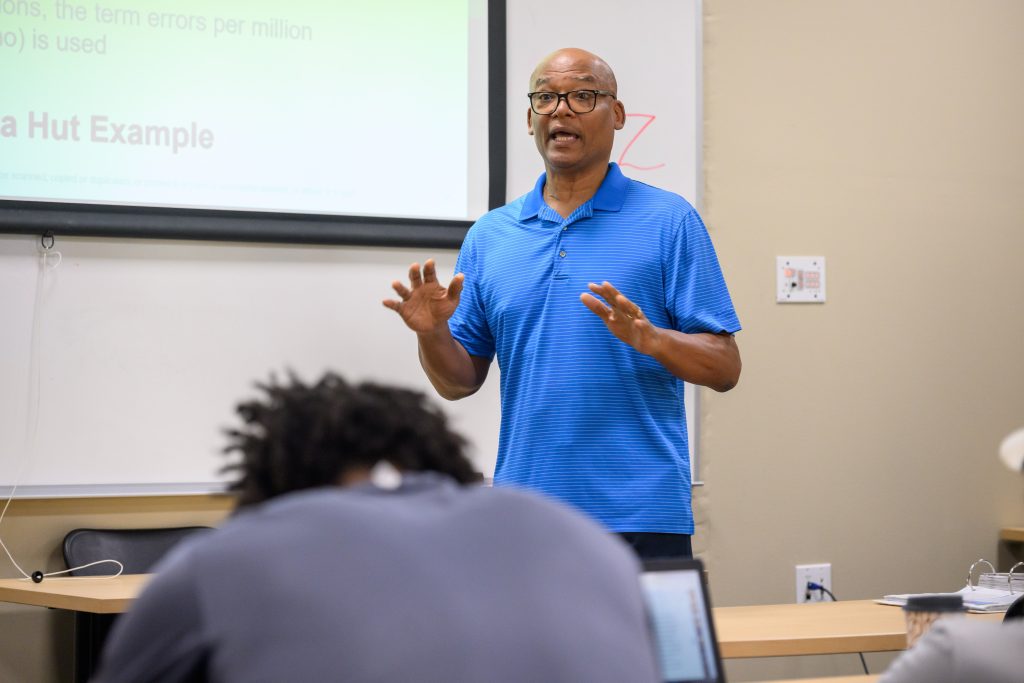
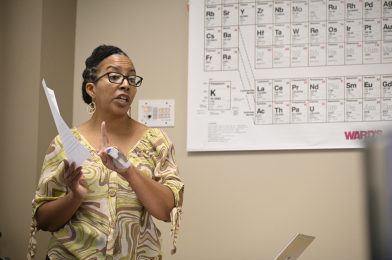
I am demonstrating how to make a portrait with my camera on a tripod with the YWAM School of Photography in Kona, Hawaii, in August 2021. [photo by Dennis Fahringer]
1) Tripod
One of the essential tools you can use is a tripod when doing portraits. Sometimes you may not need to use one, but here are some reasons it can help you.
Consistent composition – This is helpful when your background isn’t huge. Over the years, I had found that when I didn’t use a tripod, I would have more photos that needed to be retouched because I had more in the background than I had planned for the portrait.
Two or more people – I cannot tell you how many times in group photos I have a wonderful picture of people in different frames that are easy to combine into one image in photoshop if you have been using a tripod.
2) Fixed Focal Length Lens
While zoom lenses have their place, and I occasionally use them for portraits, the advantage of the fixed focal length is consistency with the face proportions. The wider you go, and the tighter you go, you change how the face appears. For example, noses can get bigger and the face more distorted with wider angle lenses.
Having a fixed focal length helps keep the headshots consistent, especially when doing many headshots for organizations.
Using modeling lights helps you see the reflections before they appear in the photos. If the subject reacts to something you say, sometimes they move their head, and you may get a glare.
3) Use Modeling Lights
Studio strobes come with modeling lights that you can turn on and off. This helps you see the modeling of the light before you take the photo. Also, this helps see the glare in glasses and shadows cast by people onto others in group photos.
You can also use constant light sources instead of flashes, but the downside to those on-camera hot shoe flashes is not seeing what you are getting before you push the shutter.
If you have no choice but to use a flash without a modeling light, remind yourself to stop and look at the results before shooting many photos.
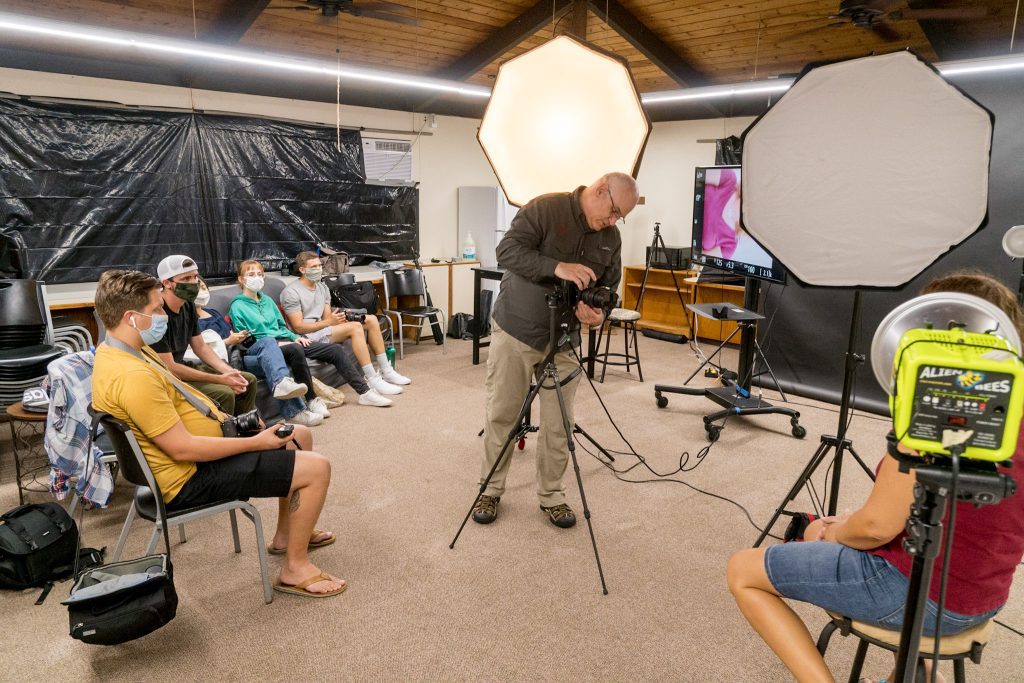
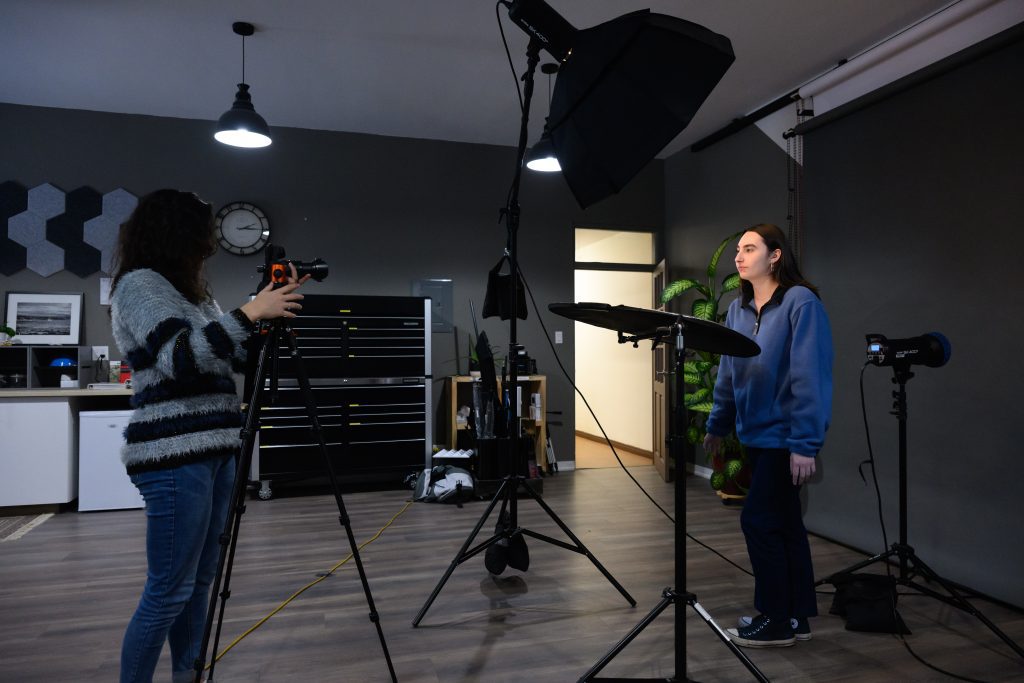
I have my camera tethered to the monitor so the students can see each photo. It is also an excellent way for anyone to see more details than you can on the back of the camera’s monitor. [photo by Dennis Fahringer]
4) Use A Larger Monitor
You can shoot tethered and then glance at the larger screen to see your results. Seeing images larger will help you see details lost in the smaller image on your camera’s LCD.
Sometimes just plugging your camera into a TV using the HDMI connection is all you need to review the images quickly.
5) Review The Images With The Client Before They Leave
The most important thing you can do is let the client see themselves before they leave. I do this all the time. I do not take the time to find the one photo they like over all the others; I am looking to see if they don’t want any of them. If they don’t like them, I ask them what they don’t like so we can continue to shoot until they are pleased with the results.
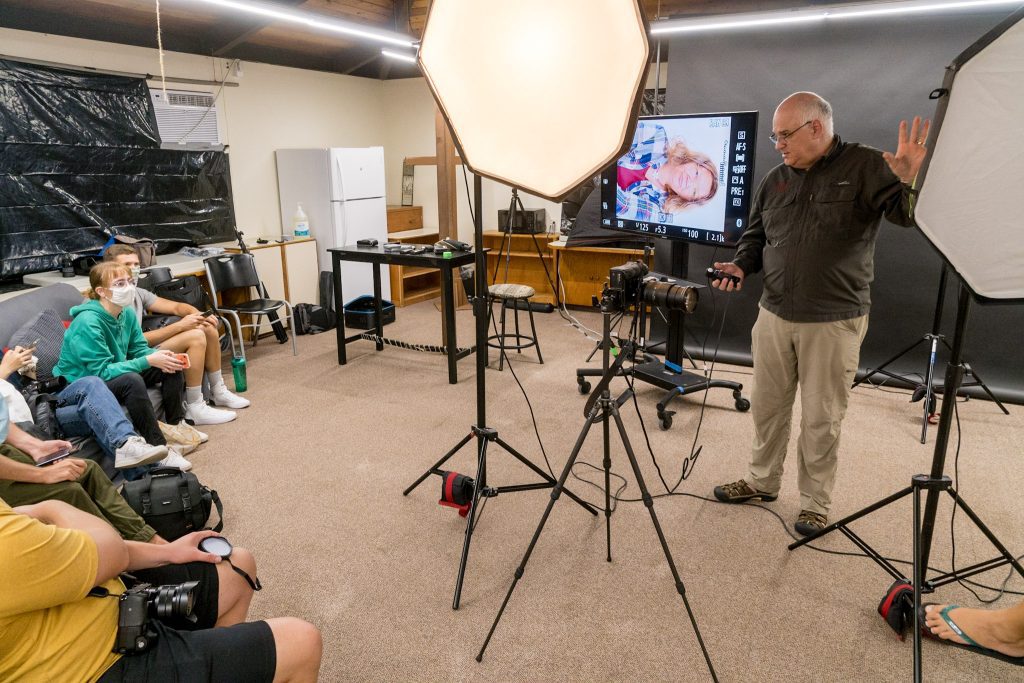
This is a photo of me showing how to get a custom white balance using the ExpoDisc to the YWAM School of Photography in Kona, Hawaii, in August 2021. [photo by Dennis Fahringer]
6) Custom White Balance
I have found that getting a custom white balance is critical to speeding up the editing process. This is even more true when on location. I have shot in a room with a giant red wall beside me. Had I not don’t a custom white balance, finding the correct skin tones would take forever. I speak of my experience of making that mistake before.
Timothy Villalovas [NIKON Z 6, 85.0 mm f/1.8, ISO 50, ƒ/4.5, 1/125, Focal Length = 85]
Timothy Villalovas
[NIKON Z 6, 85.0 mm f/1.8, Mode = Manual, ISO 50, 1/125, ƒ/4.5, (35mm = 85)]
Henry Veon
Henry Veon
Henry Veon
Henry Veon
Ronald Walker
Ronald Walker
Tyler Morris
Tyler Morris
Barron Leung
Barron Leung
Debrinja Watts
[NIKON Z 6, 85.0 mm f/1.8, Mode = Manual, ISO 50, 1/125, ƒ/4.5, (35mm = 85)]
Andrew Mozingo
Christie Lamb
Macy Frazier [NIKON Z 6, 85.0 mm f/1.8, ISO 50, ƒ/4.5, 1/160, Focal Length = 85]
Rachel Rentz
7) Model And Actors Vs. Everyone Else
While everyone needs feedback from you as a photographer for a portrait session, know your client.
Actors who have been around for years in the profession typically need a little direction and may even teach you a great deal by the end of your session.
The average public needs much more guidance. I find that most people benefit once you have an excellent pose to shoot many different photos looking for other expressions. If you move too slowly, people feel awkward and will not enjoy the time. It will also appear that you need more time to be ready.
Those who are just starting as Actors or Models will probably need more direction and coaching and may be similar to the average person. Some people were told they should be models or actors based on their looks.
I can tell that many newbies need much coaching and don’t realize that looks alone are not why people are successful actors or models; it takes an awareness of how you appear to others and the ability to control that, which will determine your career.
Often, I feel like I am watching people pass me by as they reach their destinations while I seem stuck in life. Today I know differently. I often only saw people way into their journey and missed seeing their start.
Last week while teaching three students in their 20s studio lighting, I had an “Ah Ha Moment.”
I turned 60 this year and was reminded that I was 40 years older than these young women.
They were not sure what they wanted to do with the rest of their lives, and in a way, we’re doing a GAP Year type of program by studying photography for three months.
Clamshell Lighting
While teaching them how to use studio lights, I knew I could share some insights that come only with hindsight.
When I graduated from college, the movie Karate Kid came out. There is a scene where the kid is fed up with doing chores around the teacher’s house. So he demanded to learn Karate. Pardon the language, and watch this clip.
I am on the autism spectrum and realized in hindsight that God had given me opportunities through my life that was like 1) Sand the Floor; 2) Wax on, Wax Off; 3) Paint the Fence; and 4) Paint the house.
Mr. Miyagi tells Daniel always to keep eye contact and, from inside, respond.
I wanted to impart to these young ladies that it isn’t the destination but the critical journey. I had learned that God was with me on the trip, but I was always to focus on the destination. However, I think the goal was the carrot I needed to be like Daniel and learn through repetition skills that I would later need to perform from inside and not have to think so much about what I was doing in photography.
I needed to look people in the eye that I was photographing. I would be doing this while looking through my camera lens.
Taken during my time as a photojournalist for The Hickory Daily Record
Sand The Floor: Learning the fundamentals of photography
From the time my dad and mother gave me my first DSLR until the end of my first year working in a newspaper was about five years. I was primarily learning to take available light photos with occasional flash photos.
This was when I mastered how to expose photos properly and understood elemental composition and capturing the moment. Getting the moment was easier for me to know during this time with sports than in meetings.
I had to learn how to listen to people and communicate with them to understand the story I was covering and then capture it to tell that story to the public using primarily photos and adding captions to complete the message.
This is from my story on Philip Newberry, whose parents were missionaries to Brazil. While on Furlough, Philip got spiral meningitis, and they had to amputate his legs and arms to save his life. I did this coverage while working for the International Missions Board in Richmond, Virginia.
Wax On Wax Off: Learning Lighting
One of my primary responsibilities when I worked for the International Missions Board, was doing portraits and covering meetings. As a result, I learned how to light people and objects with lights.
What I was also learning was how to interact with people. I had to meet people and get the best expressions that captured their personalities in just a few minutes. I would often photograph 30 to close to 100 people in a day at some of those conferences.
I would work here for five years. When I left my job here, I spent ten years learning photography and how to talk to people.
During these five years, I also had a wonderful mentor Don Rutledge. He had studied psychology and was teaching me the body language and how to incorporate that into my photos. I would spend hours with him as he was editing coverages worldwide. I asked questions, and he taught me so much.
I did not get any overseas coverage during this time, but I did fly around the USA doing stories on churches and missionaries on furlough.
Paint the Fence: Manager of One-Hour Photo Labs & Computer Sales
Due to the recession, I lost my job, and my wife and I moved in with my parents on Long Island, New York. I would work for Tandy selling computer systems to schools and businesses.
I had bought a PC a few years earlier and understood them well enough to sell them. Next, Tandy sent me to workshops on making sales, which helped me understand marketing.
I also decided this was an excellent time to go to seminary. I had started on this path earlier but took a ten-year detour to learn photography. At the seminary I chose, they had a master’s in communications. I did that program hoping the recession would be over when I finished and then off to work with some missions agency, but this time covering the world.
I managed a couple of one-hour photo labs to pay the bills while in school. This taught me to work with people as a manager and with customers. This also helped me learn my color wheel even better. I was learning that if I saw magenta in the negative, that would print green, and where I saw cyan would print red, for example. This would later help me with choosing colors for clients.
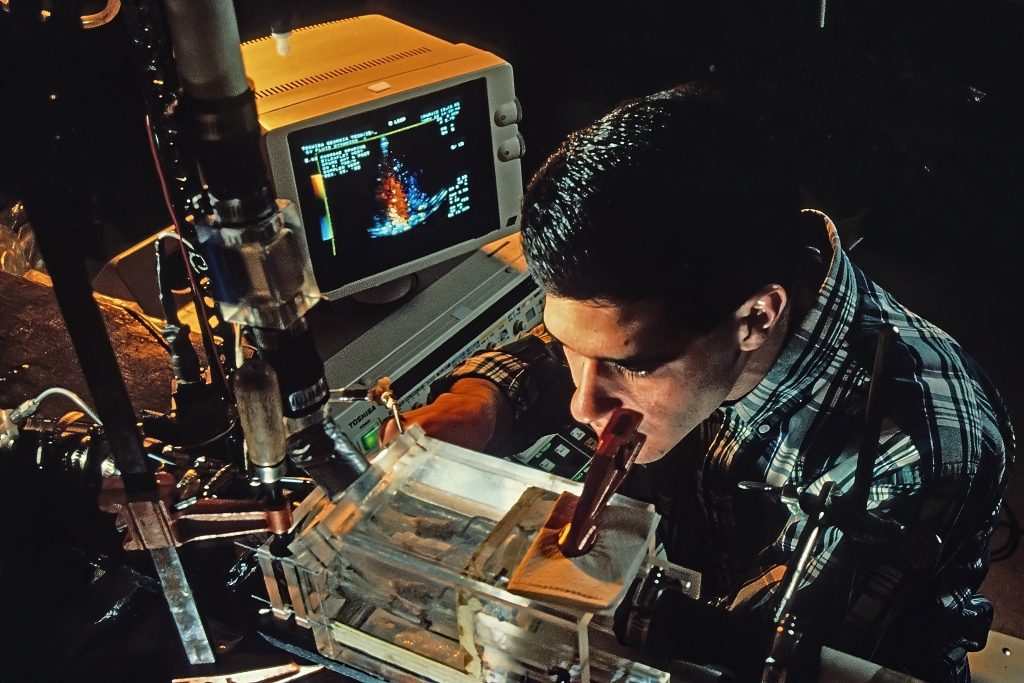
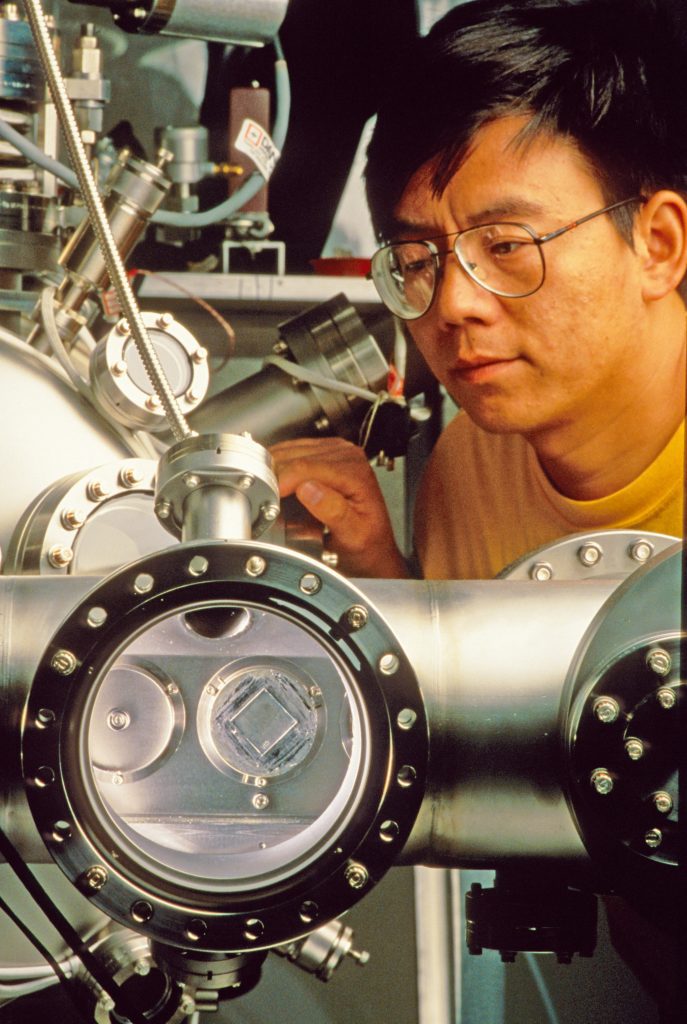
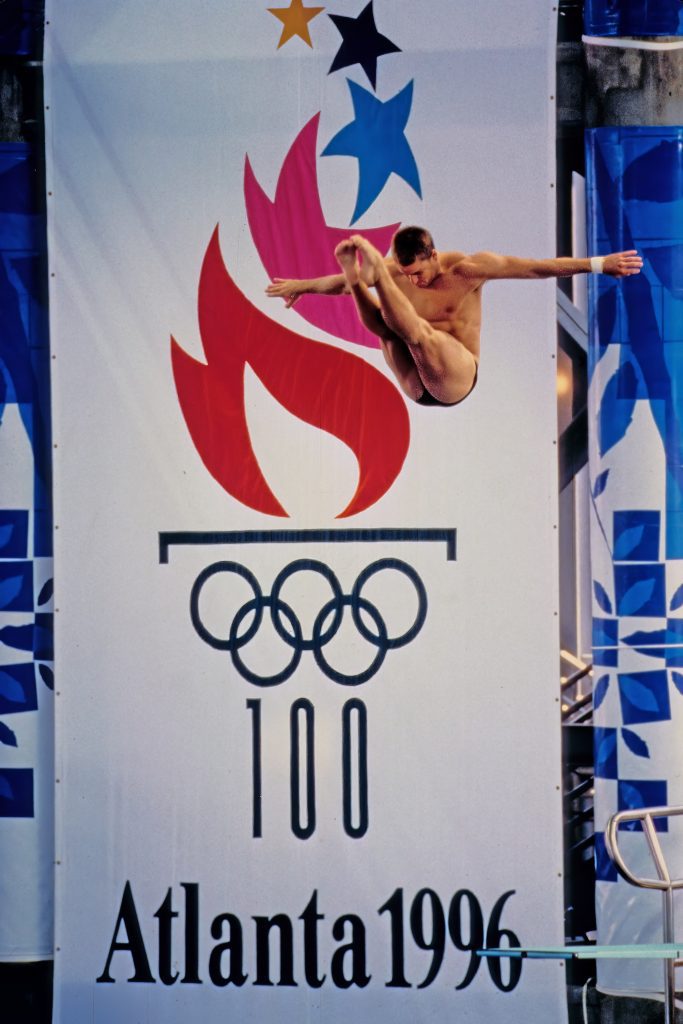
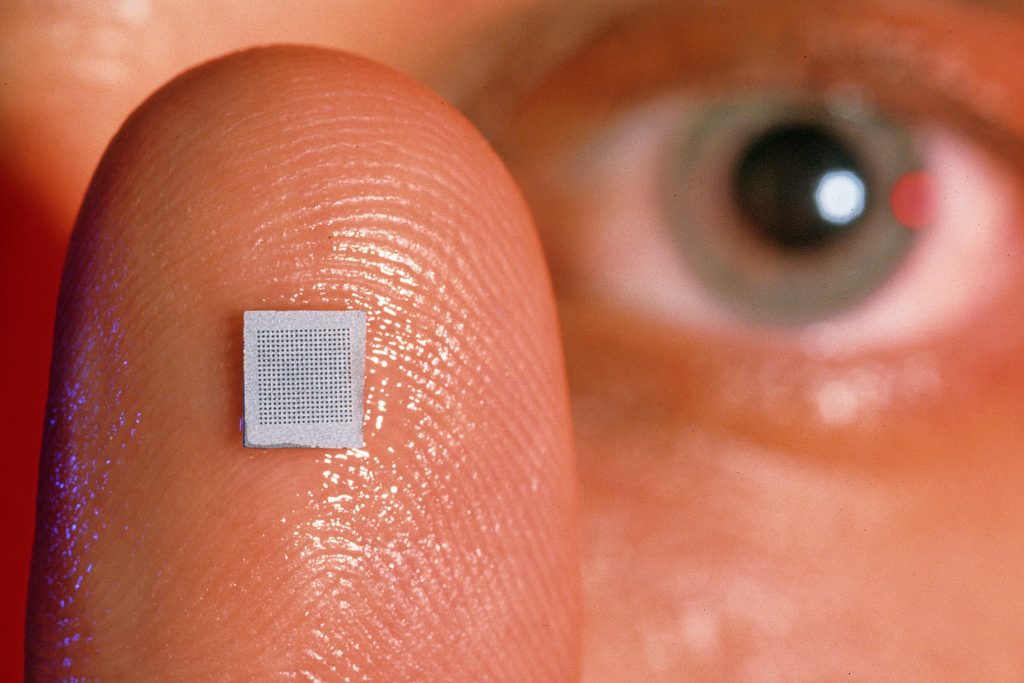
Jeff Ellis, a mechanical engineering student at Georgia Tech, does research on a new heart valve under the direction of Dr. Ajit Yoganathan. Dr. Yoganathan’s current research is in the fluid mechanics of valvular regurgitation.Research with CMOS sensors at Georgia TechDiving during the 1996 Olympics at the Aquatic Center on the campus of Georgia TechMicroneedles give painless shots on December 3/10, 2003. The smaller the hypodermic needle, the less it hurts when it pierces the skin. Researchers from the Georgia Institute of Technology have developed ways to manufacture solid and hollow metal, silicon, plastic, and glass microneedles that range in size from one millimeter to one-thousandth of a millimeter.
Paint the House: Studio Lights on Location
For the next ten years, I worked at Georgia Tech. I would be putting everything I had done before into practice. Everything I shot I would have to process in our photo lab. I would have to do occasional portraits but found myself using studio strobes to light classrooms, coliseums, and research labs.
I was doing photojournalism, recruiting photography, sports photography, portraits, editorial, and just about any style of photography you can imagine.
Putting it all together: Full-Time Freelancer
Since 2002 I have been a full-time freelancer, which means I own a business. My income surpassed my staff job positions in just a few years. I finally was making money without always having a credit card balance.
The primary thing I was doing as a freelancer that I wasn’t doing as a staff photographer was all the business side of the job.
I had to market myself. In many ways, this was me telling my own story. I had been telling other people’s stories for twenty years. Now I would have to tell my own story, emphasizing how I can tell others’ stories to grow their business.
A few years into freelancing, my friend Bill Bangham asked me to go to West Africa for almost a month to do some stories for him.
Today I have been to many countries to tell stories and teach others how to tell stories.
Mother and her little boy carried in kaitenge. They are staying here at the Hôpital Baptiste Biblique in Tsiko, Togo, West Africa.
[NIKON Z 6, 24.0-105.0 mm f/4.0, Mode = Aperture Priority, ISO 1800, 1/200, ƒ/4, (35mm = 32)]
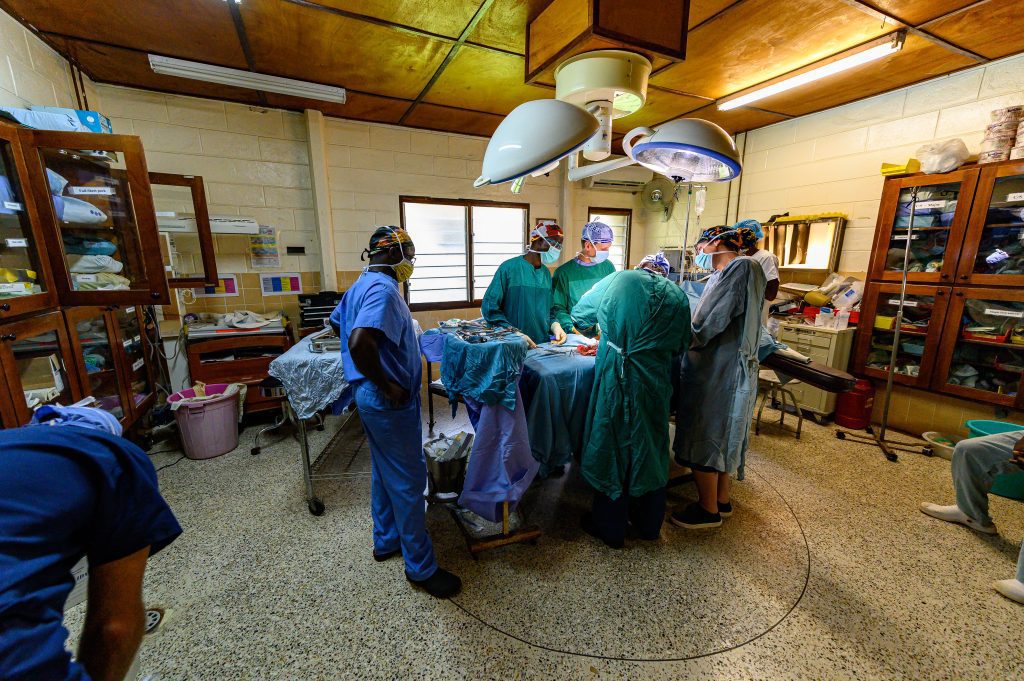
Surgeons doing a bone graft of lower part of leg for a little boy to hopefully help him keep his leg at the Hôpital Baptiste Biblique located in Tsiko, Togo, West Africa.
Surgeons doing a bone graft of lower part of leg for a little boy to hopefully help him keep his leg at the Hôpital Baptiste Biblique located in Tsiko, Togo, West Africa.
[NIKON Z 6, 14.0-24.0 mm f/2.8, Mode = Aperture Priority, ISO 3600, 1/200, ƒ/4, (35mm = 14)]
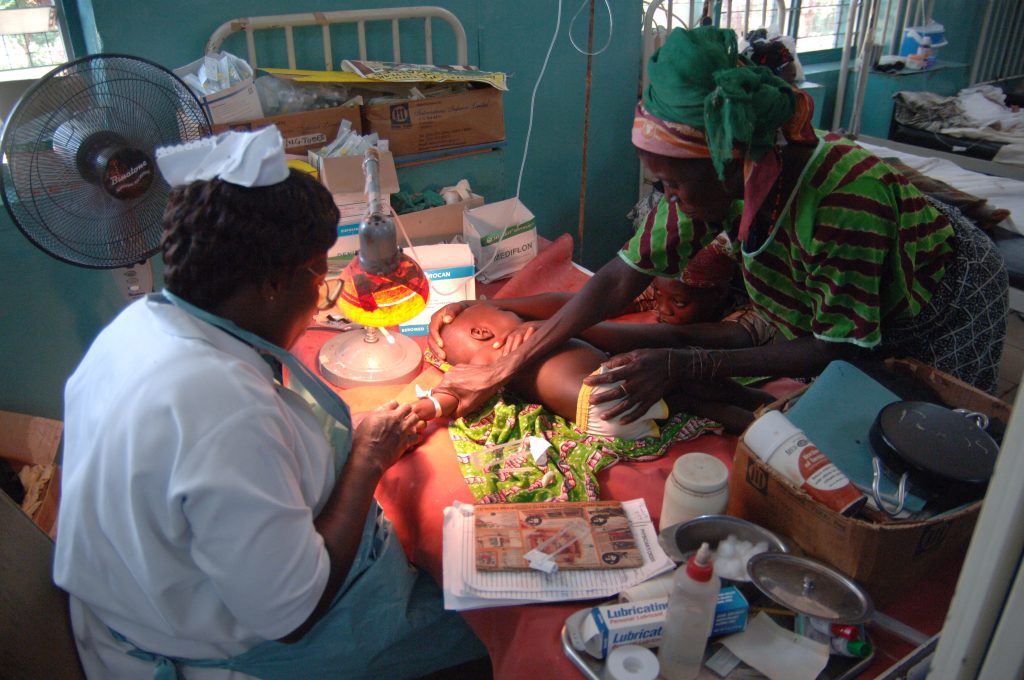
Rose Nantonah the nurse is setting the IV with a small child patient at the Baptist Medical Center in Nalerigu, Ghana. (Photo by: Stanley Leary)
[NIKON D2X, AF Zoom 18-50mm f/2.8G, ISO 800, Ä/2.8, 1/80, Focal Length = 27]
Child is fascinated by my camera and watched me as I was working at the Hôpital Baptiste Biblique in Tsiko, Togo, West Africa.
[NIKON Z 6, 24.0-105.0 mm f/4.0, Mode = Aperture Priority, ISO 1400, 1/200, ƒ/4, (35mm = 105)]
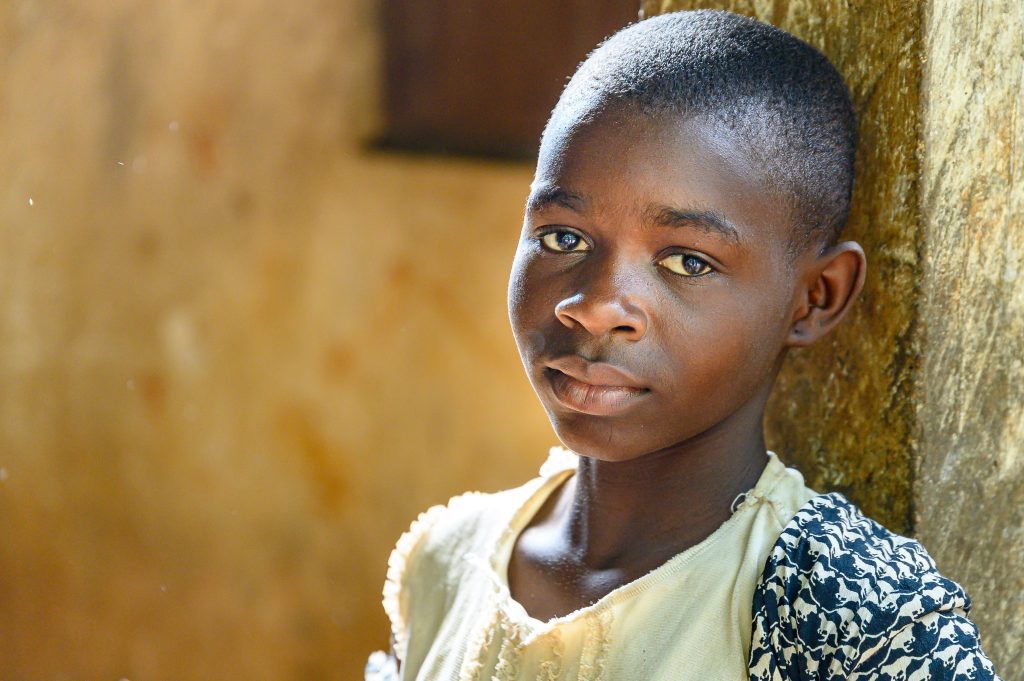
Little boy in Garango. (Photo by: Stanley Leary)
Friends enjoying each other during church service at Eglise Baptiste Biblique in Adeta, Togo, West Africa.
The grand Mosque of Bobo-Dioulasso was built in 1880 in the Sudanese mud style. Bobo-Dioulasso is a city of about 600,000, the second biggest city in Burkina Faso after Ouagadougou, the nation’s capital. West Africa.
Witch Doctor in Togo, West Africa [NIKON D5, 35.0 mm f/1.4, ISO 100, Ä/1.4, 1/2500]
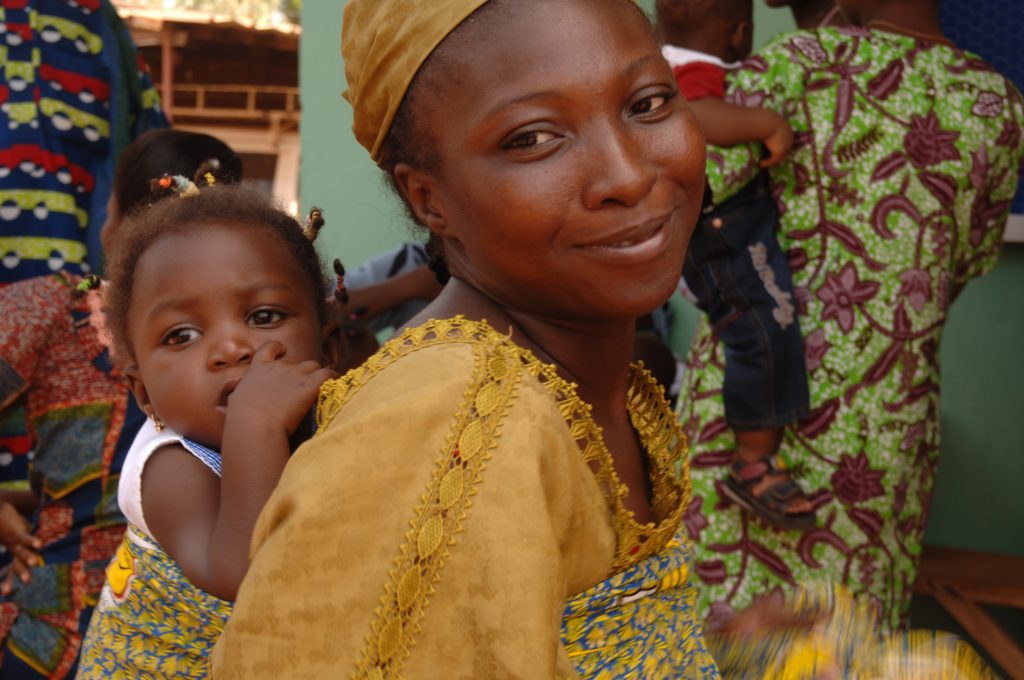
This is a mother and her child outside a church located in Ouagadougou, Burkina Faso. (Photo by: Stanley Leary)
Little boy in Garango. (Photo by: Stanley Leary)
Storytellers Abroad Workshop
Bucharest, Romania
Herăști, Giurgiu, Romania
Storytellers Abroad Workshop
Bucharest, Romania
Herăști, Giurgiu, Romania
Summary
Today I am doing work that I could only do because I had spent years perfecting those skills necessary to do the job today. The only way I could look people in the eye today and let those skills that had become muscle memory work for my clients was from learning like Daniel the hard way.
While I don’t have a Mr. Miyagi who led me to where I am today, I think God was there with me on this journey. I look back today on almost all of those milestones of knowledge and remember the people I met and the stories I got to tell. Those experiences helped mold me into someone with a lot of scar tissue, which translates into wisdom.
In each of those places on my journey, I was making mistakes. I seldom made those mistakes again. Instead, I learned from those moments. However, I was still going to be doing something new in the future; I would make new mistakes and learn from those as well.
While I thought I would be telling stories around the world when I first started at the International Missions Board in 1985, it was twenty years later when Bill Bangham sent me on my first international coverage trip in 2005.
Malcolm Gladwell says:
in my book “Outliers,” when I wrote about the “ten-thousand-hour rule.” No one succeeds at a high level without innate talent; I wrote: “achievement is talent plus preparation.” But the ten-thousand-hour research reminds us that “the closer psychologists look at the careers of the gifted, the smaller the role innate talent seems to play and the bigger the role preparation seems to play.” In cognitively demanding fields, there are no naturals. Nobody walks into an operating room straight out of a surgical rotation and does world-class neurosurgery.
To be a successful photographer is to be a successful artist. It takes time to develop the skills that allow you to create art from within. I am a communications artist; therefore, my work must help tell a story.
I told the students this last week, so they know not to be discouraged but to enjoy the journey.
Since 2006 I have been doing a one-week lighting workshop as part of the School of Photography program of YWAM with Dennis Fahringer in Kona, Hawaii.
This year I was asked by two of his former students to come to Dunham, Quebec, Canada, and teach the same thing, but this time to a school that will be in French and English.
Raphael PaquetJulie Gavillet
This was their very first time leading a School of Photography for YWAM. The leaders Raphael Paquet and Julie Gavillet hosted me during the week and translated me into French.
The students were learning where to place the leading light for a starting position with portraits. They also were learning not to light everything evenly.
I also told about my journey in photography and how it took time before I got the assignments I wanted. I also taught them a little about how to make a living with Business Practices.
You may be interested in a Lighting Workshop. Drop me a line if you are interested.
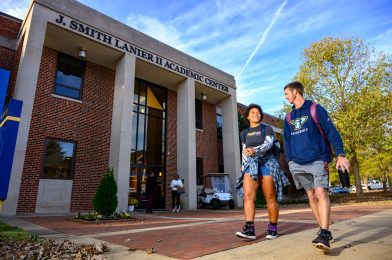
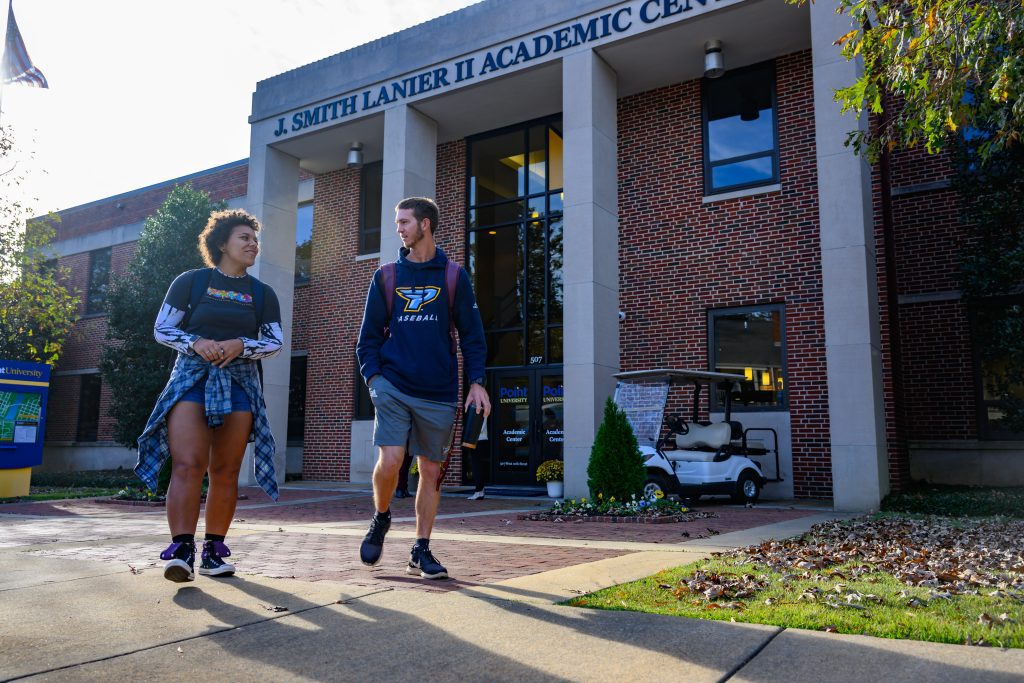
This past week I spent a few days in the small town of West Point, Georgia, photographing a reasonably new college at Point University.
Colleges need strong images to sell their campus life to prospective students and parents.
If you need to recruit, you must show and tell your story. Photos will be a great way to convey what it looks like and feels like to study or work with you.
If you want to do this type of photography, then master lighting. Know how to use off-camera flash and reflectors to make the light work for you.
What A Professional Photographer Provides
Now compare that top photo to the one below. Can you see the difference?
The difference is the light on the subjects. The photographer added light to the people to make them pop out in the photo.
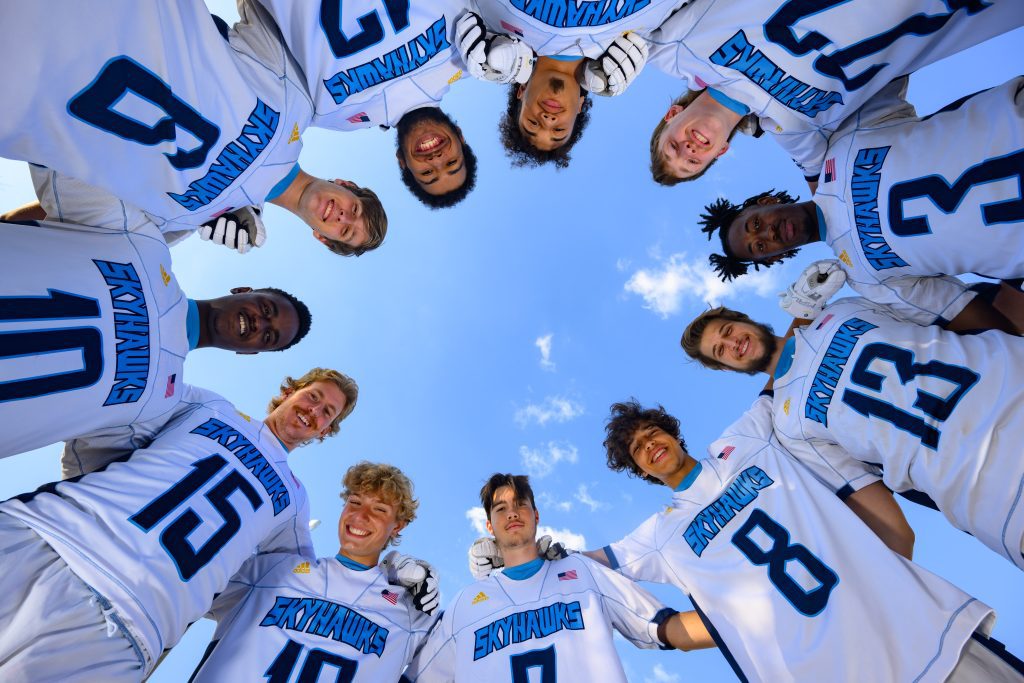
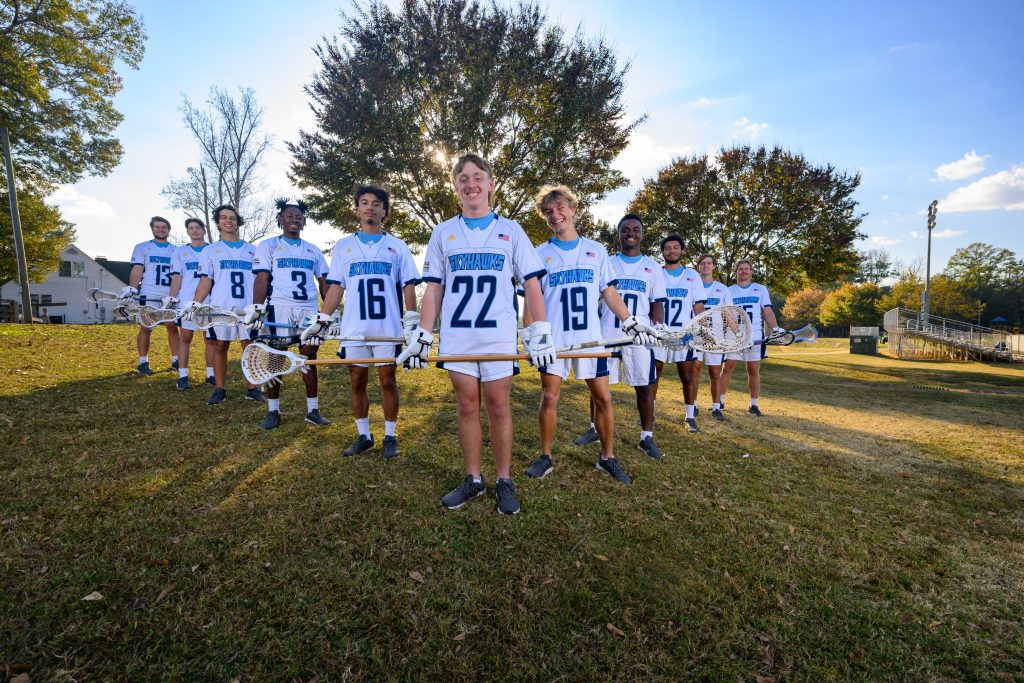
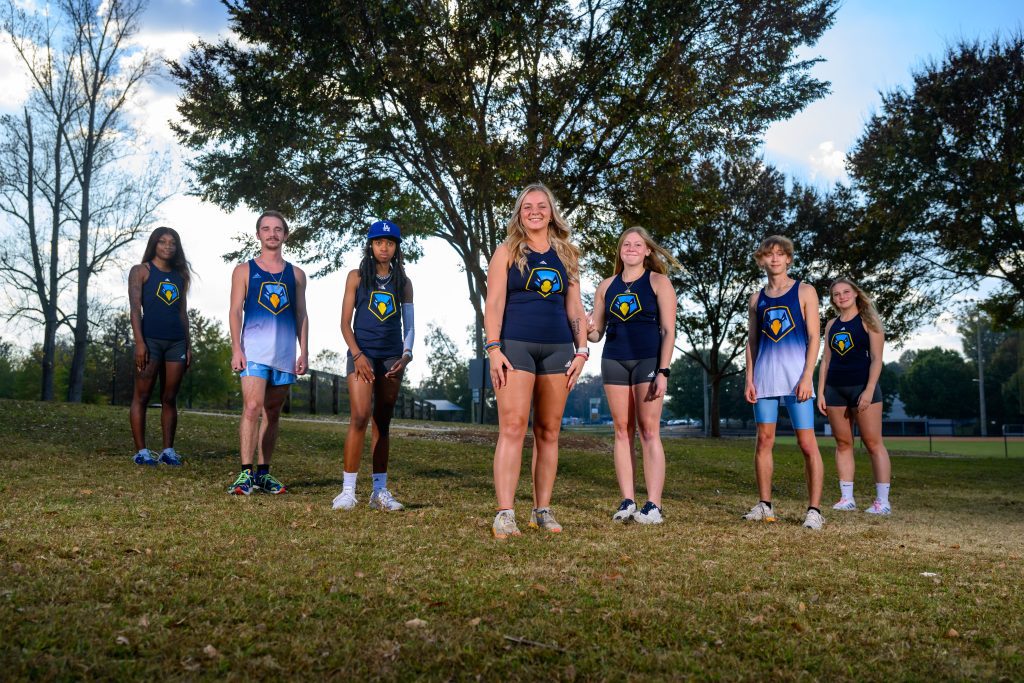
Point University Lacross TeamPoint University Lacross TeamPoint University Cross-Country Team
The majority of the students play a sport. Approximately seventy percent of those who helped us with the photos were athletes.
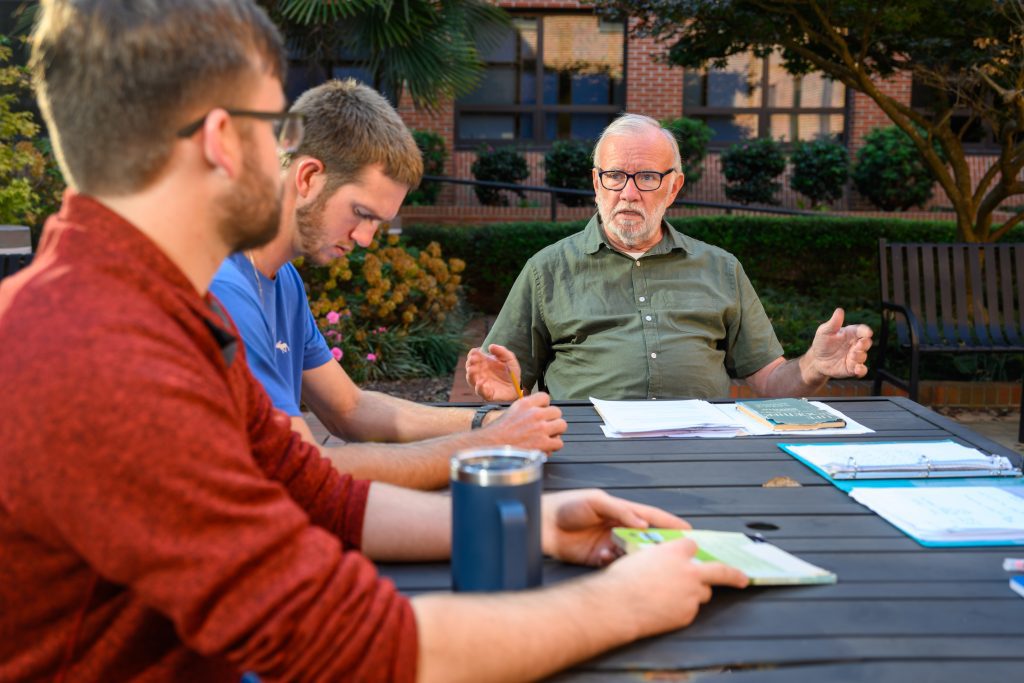
Point University Biblical Studies Class
With approximately 500 students, you get to know everyone pretty quickly.
Dorm Room
Whenever I went to make a photo, we needed to add some light to the image. There are a couple of reasons for this, but almost everyone can understand that they have already been shooting lots of photos with their phones and could tell from the results that they wanted something better.
Friends
I loved doing a lot of portraits of the students. My favorite during my time was these three volleyball players, who you could tell had become good friends.
Point University Alumni House
The town welcomed the school a few years ago. Many of the buildings were donated to the school, like this house they use for Alumni events.
Point University Dining Facility
Every school needs to show its dining facilities. I always notice that if the food is good, the conversations are also good. If it isn’t, then they are looking to leave soon.
Point University Bookstore and coffee shop
Today I think every college must also show some places to hang out and get coffee.
Point University Recreation Room
While seeing classrooms is essential, people want to know what to do outside of class, like playing pool with friends.
Point University Science Class
How big are your classes? That is always something I try and show through photos.
Point University Biblical Studies Class
Now the wide shot shows quickly how small their class size is. For most classes, you also want to see engagement.
Point University
Point University
Point University
Point University
Point University
Point University
I encourage all my clients that I need time for these moments to happen. I try and schedule about 20 minutes to be in a classroom to get those moments of engagement. You have to be there long enough that the students relax and then for a moment to happen. It would be best if you had a few moments from each classroom to pick your recruiting guide.
Point University Student As Pastor
Every school has a few unique things to offer. For example, this school has a network of churches for those students who want to do Biblical studies and have a chance to work in the local churches. Some work as pastors or youth leaders, for example.
No Flash
I kept this photo as an example of why using flash makes a difference in the photo.
Riverwalk
The school is right on the Chattahoochee river and has parks for the students to enjoy.
Internship
Some of the education students have internships in town with different schools. For example, here is one student working in early childhood education.
Point University
Some students are in the downtown of West Point, Georgia, which offers shopping and restaurants.
Communication plays a critical role in everything we do here on earth. We communicate in so many ways.
When we talk to another person face-to-face, we have our words, tone, body language, and the ability to dialogue. Using our ears and eyes, we can observe how our message is received or how we interpret what we see and hear.
When we use words in an email or text, we lose tone and body language. Even the most skilled writers don’t consistently deliver a message that is received and understood as it was intended.
Without dialogue, which is about helping us get feedback and our ability to clarify our message, we are left to the person receiving the message’s interpretation of what was sent to them.
There is another way we communicate: in what we do every day. Our actions each day help people interpret what we are speaking. This is where people can observe how we treat other people rather than just ourselves.
If you know someone pretty well and you get an unusual message from them that doesn’t match the tone of how you perceive them, this usually makes you want to clarify what you are hearing from them.
Now, if you don’t have a relationship with that person, you may or may not take the time to clarify their message.
I fail every once in a while in my communications with others, and most of the time, it is due to rushing my communications. The place I fail more often than others is in written communications.
This is why I have bought software for my business that comes with email templates. I wish I had software for every possible email. I need a template to help me in situations where I need to communicate quickly. It will help me avoid pitfalls that result from needing more time to craft a message that conveys a statement in an appropriate tone and creates a positive response.
If I know that I will have to write a similar email in the future, I save an email I crafted and save it as a template.
When proofreading our work, we know the meaning we want to convey. Because we expect that meaning to be there, it’s easier to miss when parts (or all) of it are absent. It isn’t about just catching grammar issues.
This is why you can make a mistake even if you try to be careful.
Another problem with communication is that your audience also has a role to play in this. It isn’t uncommon for the audience to read a tone into something more to do with how they interpret than the words themselves.
Your choice of words or a saying can trigger an audience’s emotions. The way you said something might remind them of someone they despise.
Summary
Take the time and proofread your work. Try to read for tone.
When reading someone’s words, if you are concerned with the tone of the email, take the time to get some clarification. If possible, talk to them in person, via Zoom call, or via phone call.
The relationship is what communication is built upon. It is also true that how you communicate is how you develop a relationship.
If you think about it, even your best friends and you will often go through a rough patch due to communication breaking down.
The key to being a good communicator is caring for others.
Whenever I create a blog post on gear, I get five to ten times the number of people reading those posts.
There are a few things that people are looking for when they click on one of my blogs on gear.
First, if it is new to the market, they are looking for information to help them know if they should buy this lens themselves.
Second, they want tips on how to use their new piece of camera gear. This is very true regarding camera bodies and different shooting situations. So, I can take the same camera body and do separate blog posts on how to shoot things like Sports, Portraits, Strobes, and Landscapes, and people are interested in my experience.
While not everyone will agree with my assessment, they are interested in seeing if there is something I discovered they haven’t yet experienced.
DSLR to Mirrorless Challenges
My transition from DSLR to Mirrorless was the most challenging change of any camera body, including getting started with the Pentax K1000.
To summarize the difficulty is to understand that with an introductory film camera, you had these adjustments:
ISO – But only once. You set it for the film you were shooting and only changed it when you changed a roll of film.
Shutter Speed
Aperture
Focus – you turned the focus until the image looked sharp.
With the latest Nikon Z9, you have so many options for each of those settings. What makes it even more complex is when you start combining all the options for each of those main settings with others. This is where you get Aperture priority, but do you want to set the ISO or use Auto ISO?
Nikon even has special manuals for Sports, Video, and even shooting in RAW video, for example. If they are on your computer or phone, you can search for the setting you are trying to understand and know the right one to pick for your shooting situation.
They also have a troubleshooting guide. Check it out here.
Footnote
Don’t go on social media and complain that the camera will not do something if you haven’t first read the manual. You will only undermine your credibility in those social media forums.
In his Lettres Provinciales, the French philosopher and mathematician Blaise Pascal famously wrote: “I would have written a shorter letter, but I did not have the time.”
While most people understand this when it comes to writing, the same is valid for photography.
It takes a great deal of time to cut perfect photos down to outstanding ones.
Lately, I am finding that many clients are asking me to help narrow down their selections. So I have to be sure that in my estimates, I have options for clients to request tighter edits, which will be an additional charge to the project.
Cull In, Cull Out
Culling is a process of finding the keepers and discarding the undeliverable images. So, the first thing you must do is determine the keepers.
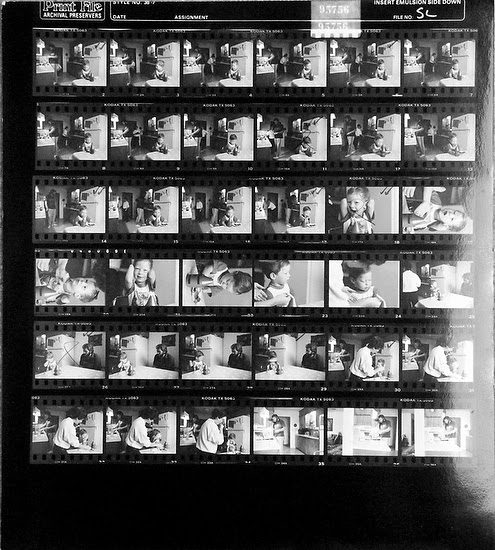
When shooting negative films like Black & White, we use contact sheets to help in the editing process. The negatives were in plastic sleeves that would hold 36 images and then printed on an 8” x10” sheet of photographic paper.
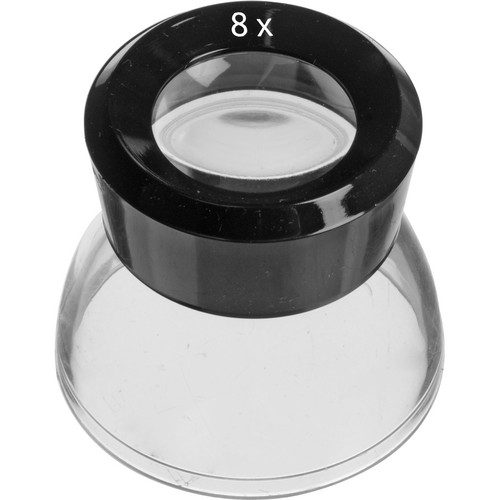
Loupe
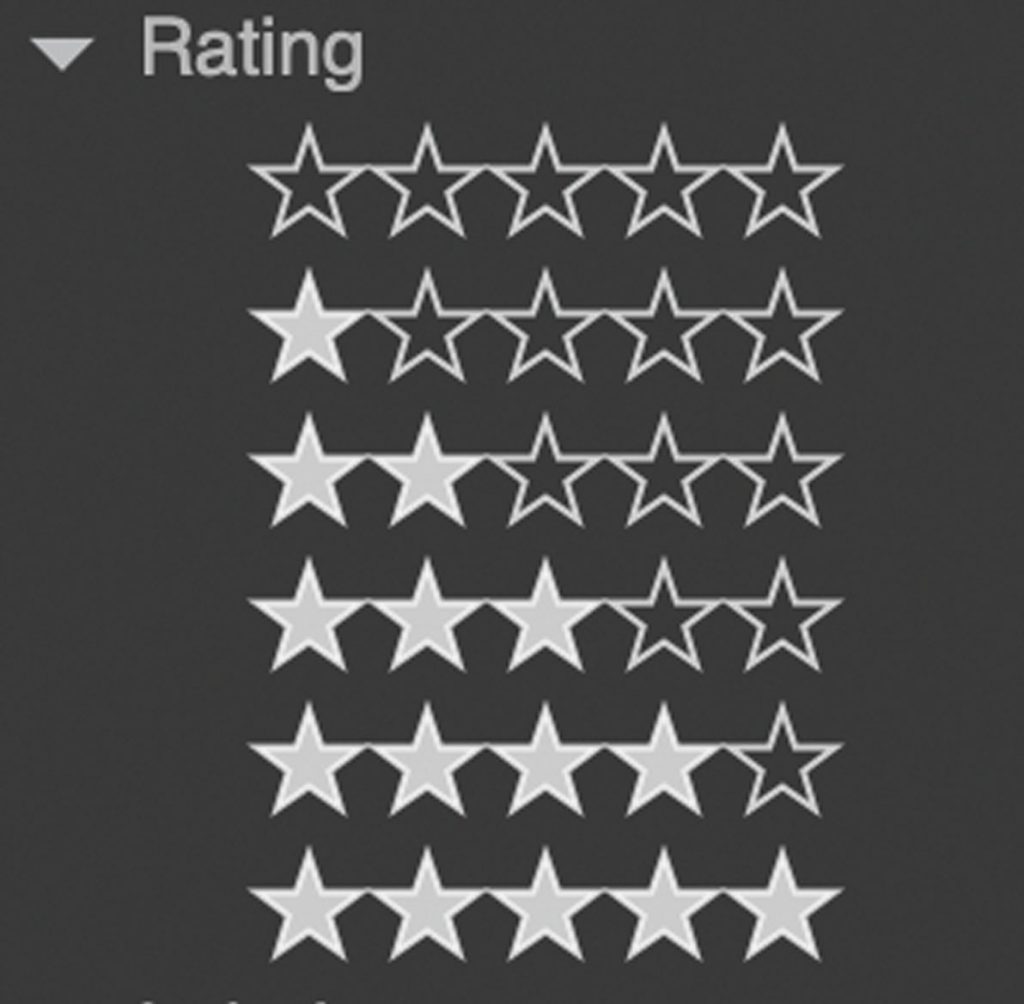
The photographer would use a loupe that would help them look at each photo, and they would then use a Sharpie or Grease Pencil and check the frames. The checks were the Star Rating system, and now that is what you see in the software programs. We didn’t draw stars in the past by hand.
Today’s photo editing software still uses the 5-Star system.
Fair
Average
Strong
Excellent
Outstanding
Most photographers and editors would do the first cull of images, checking those usable and thus getting one check or star for fair or publishable photos.
With Slides or Transparency, we would toss the unacceptable images. But, unfortunately, you kept all the negatives due to needing the longer strip to put into an enlarger to make prints.
I still do this today with digital images. I treat them just like I did my Kodachrome slides. If they are good, I will keep them and do an edit using Lightroom/PhotoShop.
2nd Round of Culling
The process of now going through all the keepers and rating them is the most time-intensive process of culling. I do not do this for most of my clients. I offer this if they want me to do this for them, but I do charge for what is an additional service.
While working on staff at a magazine, I would go back through all my images and then rate them from usable to outstanding; I would do this to help an editor pick the best photos for a story’s publication. However, most of my clients today need the images for more than just a story; they put them into a library they pull from for various projects. So they are asking for a stock photo shoot. Sure there may be the first use in mind, but they want them in their files for other services in the future.
When editing for a magazine story, we would show only the 3s, 4s, and 5s. If they were looking for something we didn’t include, we could always go back to the 1s and 2s to find something.
Sometimes you have enough excellent photos of a person that the designer can pick based on what would work best for a layout—having the person looking left would work better than facing right.
We all know the problem with a group photo. The more people in the picture, the odds of someone having their eyes closed or not having a good expression are most likely to occur. For this reason, I usually don’t get rid of photos where one person has their eyes closed in a snap because the other people may look best in that photo. It is not uncommon that after a client reviews all the pictures, they ask me to cut a person in one of the group photos and replace them in another. This way, everyone looks great.
My default mode for delivering images to clients is to give them all the pictures that are Fair or better than Fair.
If a client wants me to go through all the images and give them the best picks, I must charge for the extra time to do this cull. It can usually take twice as long to narrow down the best speaker image from 50 or more shots to the best 2 or 3 images.
Ideally, you want to have all the images you keep rated. This way, when you need to find pictures, you can search through the metadata that helps you explore the caption or keyword fields. Once you have all the images of “John Doe,” you will most likely want to find the best. Since the photos are already rated, you can narrow your search based on the star rating.
Creating a separate folder/gallery of the best images is something I often do for clients. I have chosen to make this an add-on rather than my standard package because most clients don’t want to pay the higher rate for me to spend more time on their images.
I think it is something to spell out to your customers either way. Your price estimate should tell them what they are getting. If you go that extra mile in your base rate by rating the best images or just giving them the best photos, then charge for this additional work and tell them you are doing this for them.
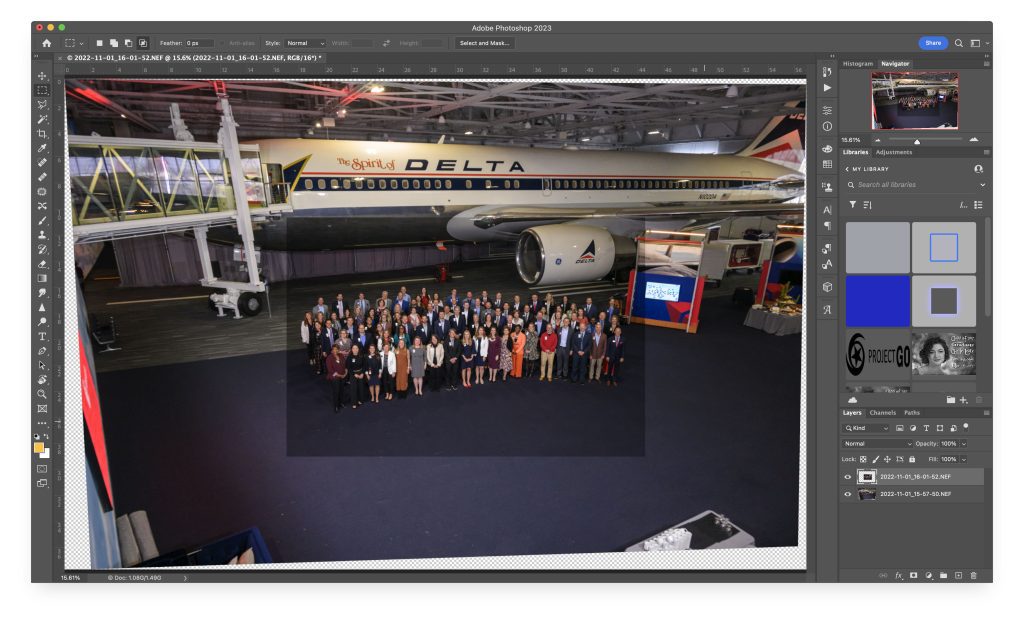
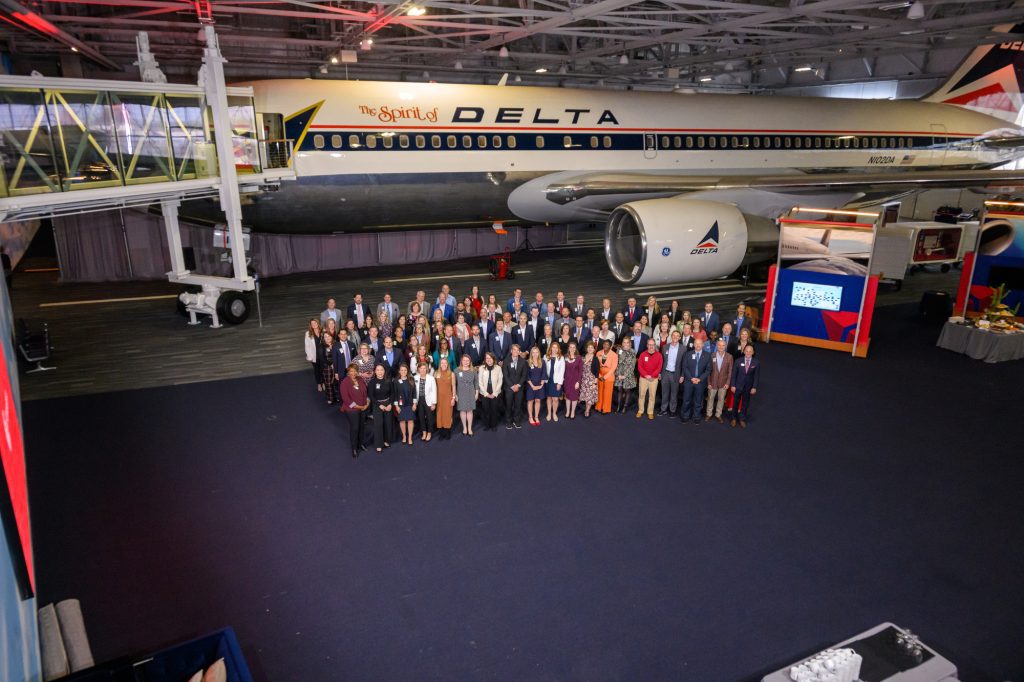
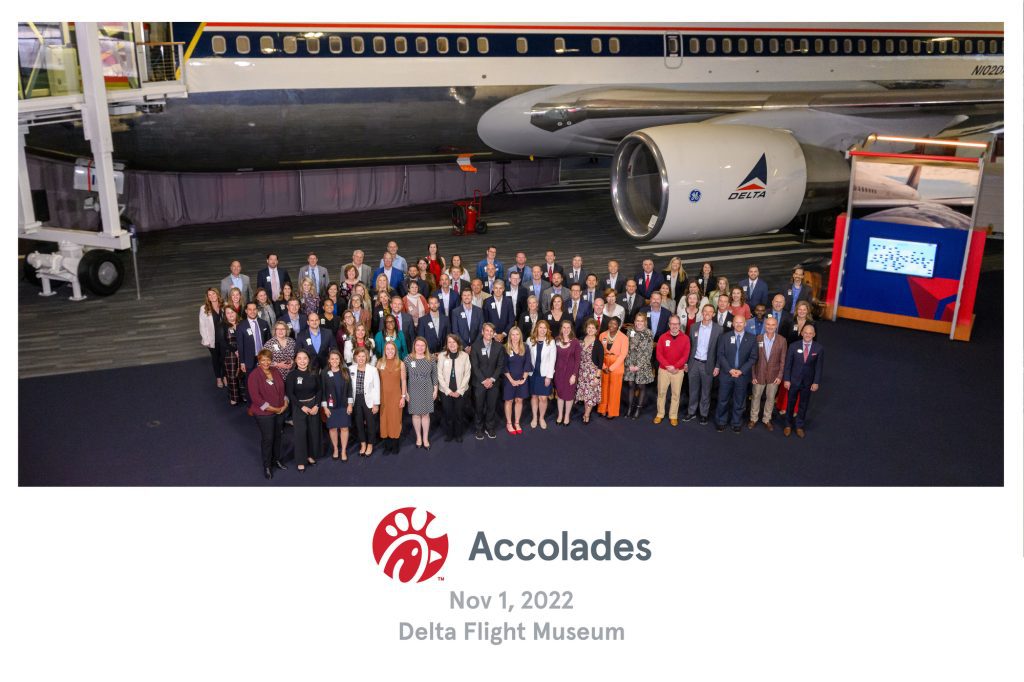
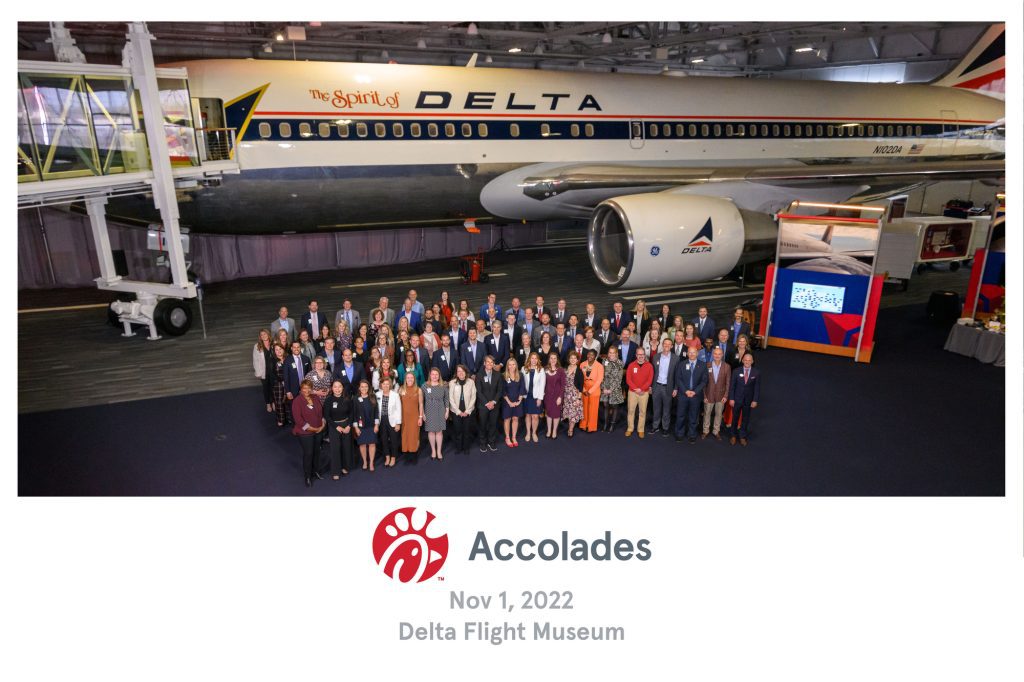
The group photo is the most crucial shot for this event. The client needed the plane included.
I arrived early and set up strobes to light the group. Nothing is worse than having a lot of dark eyes due to overhead lighting creating raccoon eyes.
This photo with no people was my test shot from above, and I would put the people down on the ground in front of the plane.
I am shooting the meeting before this group photo. So I ran up just before they came over and turned on all the lights. I composed the image as I usually would do with a group photo.
Camera Settings for all the photos [NIKON Z 9, NIKKOR Z 24-120mm f/4 S, Mode = Manual, ISO 5000, 1/125, ƒ/5.6, (35mm = 46) + (4) Flashpoint XPlor 600 HSS TTL]
Now later, as I was editing, I panicked. I was too tight, but I like this more. Since I still had my test shot, I thought there was a good chance I could merge the two photos to show more of the plane.
This screenshot from PhotoShop is what it looked like after I Auto-aligned the layers. Then it was just a matter of blending the two by matching exposure. Here is the final result from combining the two photos.
I cropped it a little closer, but I also have that option if they want more of the plane.
Now I gave them one more option as well for this group photo.
I have never had to do this before, but I have had to take people in a family photo and put them in another frame due to expressions. I was familiar with using Auto-Align in PhotoShop from my time shooting flash and ambient real estate photos and combining them into what we now call Flambient photos.
Now you have a way to do more intentionally with a group photo. Shoot test shots and save them if you want to use them in post-production.
Cookie Consent
We use cookies to improve your experience on our site. By using our site, you consent to cookies.