| Nikon D750, Sigma 70-200mm f/2.8 EX DG APO OS HSM, ISO 50, ƒ/7.1, 1/160 |
When I shoot something in the studio, as simple as this setup is here, I test a few things to be sure all the lights are as I want for the final image.
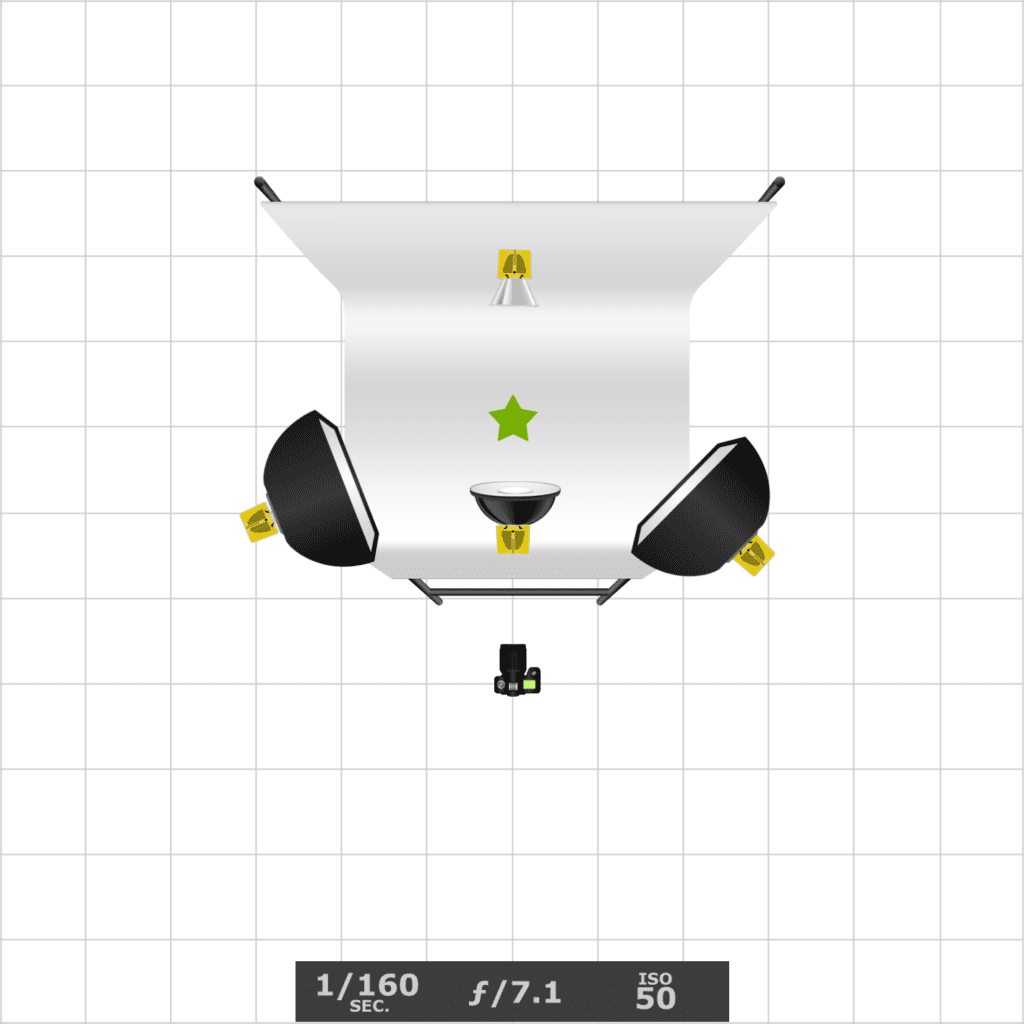
Here is the setup for the photo above:

Watch your backgrounds
One of the things all photographers need to pay attention to is their backgrounds. Now, not just compositionally, but just as important is the golden ratio compared to the subject. For the most part, you want it to be more brightly.
Here, your eye goes to the background, not the subject I want your watch to go to first. Pay attention to this when you are shooting in natural light.
How do you fix this? You can move the subject or your feet and circle the subject until you find a darker background. You can also add more light to the subject. You can do that with a reflector or a flash, for example.
Another thing that can help your photos is a backlight shining on the subject to create a rim light.
Here, there is a light just slightly behind the subject pointed down. Now, here, it is a little too bright. But sometimes, it can work.
Here are a few more examples of backlighting:
The photos show how the background is slightly darker than the subject. With photography, you can take control of this with your camera. In all three portraits, I use an auxiliary flash off the camera to brighten the subject enough so that the sunlit areas in the background are correctly exposed.
Three tips to remember:
- Watch your background
- Use Backlight
- Watch the ratio of light on the subject versus the background.


