Navigating the Car Buying Maze: A Journey Through Transparency and Customer Service

Buying a car can often be more challenging than purchasing a house. In car dealerships, customers are frequently shuffled between rooms while salespeople dart back and forth to the sales manager. This practice not only feels disjointed but often appears to be a tactic to push prices higher. A more transparent approach would be for the sales manager to join the initial conversation with the salesperson and the buyer, discussing all details and upsells like warranties upfront.

This car-buying experience made me reflect on my transparency as a freelance Visual Storyteller. As someone who sells consulting, photography, video, and editing services, how clear am I in my dealings? The customer experience begins when the client first interacts with the business, whether through a website or in person.

This is the listing from the first dealership for the Nissan Rogue S

A Tale of Two Dealerships

My car-buying journey began with a frustrating experience at Mike Reza Nissan of Atlanta. I had my eye on a Nissan Rogue S, advertised as a great deal on Edmunds. I was prepared to pay the asking price, the standard 7% tax, an $18 title fee, and a $25 license plate registration.

However, the salesperson vanished and returned with a price that was $2,400 higher. They claimed the lower price was only for financing. According to state law in Georgia, the listed price should be the total, with only tax, title, and license fees added. Armed with a PDF on deceptive car sales from the State Attorney’s office, I pointed out their violation. The sales manager rudely refused to sell me the car. I reported the dealership to the State Attorney’s office, who confirmed my stance and encouraged me to file a formal complaint. Standing up against deceptive pricing is crucial to protect other consumers from similar experiences.

You had to scroll past 20+ car listings to the bottom of their website to see a disclaimer.

The Good Experience

Contrasting this was my experience with Nalley Infinity of Atlanta, where I found a used 2023 Nissan Rogue SV with 33,200 miles. After the ordeal at the first dealership, Nalley Infinity made the process smooth and satisfactory, restoring my peace of mind.

Transparency in Business

Reflecting on these experiences, I see the parallels in my business practices. As a freelance Visual Storyteller, transparency is key. Whether I’m consulting, shooting photographs, or editing videos, clear communication and straightforward pricing are essential. The customer experience starts online, through my website, and continues through every interaction.

How I Found Out About the Law

I shared my van troubles and the need to replace it with my friend Gibbs Frazeur. Drawing from his dealership experience, Gibbs and his wife faced similar deceptive practices. Thanks to a document his wife had found from the Attorney General for the State of Georgia, they managed to save $4,000. Gibbs recommended printing out page 11 of this document and keeping it handy, which proved invaluable for them. They encountered a dealership trying to add hidden fees after the fact, just like in my situation. However, being prepared with the document empowered them to challenge these practices successfully. Gibbs informed me that the dealership admitted, “Everyone does what we’re doing with adding fees after the fact.” Thanks to his advice, I was ready to stand my ground.

Here is a copy of the state’s policies:

Price Representations

Advertised prices must state the actual total purchase price of the vehicle, excluding only government fees, which include tax, tag, title, and Georgia Lemon Law fees. All additional fees must be included in the advertised price. Any advertisement listing a price “plus” some additional amount will be considered deceptive.

By way of illustration only, not meant to be exhaustive, the following are examples of fees that MUST be included in the advertised price of vehicles:

  1. Additional fees, such as document fees, documentary fees, lot fees, processing fees, administrative fees, customer services fees, and any other terms of similar import;
  2. Additional charges, such as freight charges, transportation charges, destination charges, dealer preparation charges, overhead charges, and any other terms of similar import; and
  3. Dealer-installed options or accessories that are required or are routinely installed, or options which are already installed on the advertised vehicle at the time the advertisement is published, must be included in the advertised price. Only those options installed at the request of the consumer following contact/negotiation with the dealership may be omitted from the advertisement.

This car-buying saga is a potent reminder of the importance of transparency and excellent customer service. As a business professional, ensuring that clients understand every aspect of your service builds trust and fosters long-term relationships.

Why More People Should Be Using a Flash to Improve Their Photos

In the world of photography, light is everything. As a professional photographer, I often edit client photos and notice one common theme: ineffective lighting. This is where using a flash can make all the difference. Let’s dive into why you should embrace the flash and how it can elevate your photography.

The Importance of Flash in Photography

Flash isn’t just for dark rooms or night shots; it’s a powerful tool that can enhance your photos in various lighting conditions. Here are a few reasons why incorporating flash can benefit your photography:

  1. Consistency: Natural light can be unpredictable, changing from one moment to the next. A flash provides a consistent light source, ensuring your photos are evenly lit.
  2. Detail Enhancement: Flash helps to highlight details that might be lost in shadows or low light. It can bring out textures and colors, making your subject stand out.
  3. Professional Look: Using a flash can give your photos a polished look. It helps to avoid common issues like graininess and blurriness in low-light conditions.

Tips for Using On-Camera Flash

Whether indoors or outdoors, an on-camera flash can significantly improve your photos. Here are some tips to get you started:

Flashes were added to the front of the group to offset the shadows created by the lights directly overhead of the group.

Indoor Photography

  1. Bounce the Flash: Aim your flash at the ceiling or a wall to bounce the light. This diffuses the light, creating a softer, more natural look.
  2. Use a Diffuser: Attach a diffuser to your flash to spread the light evenly. This reduces harsh shadows and glare.
  3. Adjust Flash Power: Most modern flashes allow you to adjust their power. Experiment with different settings to find the right balance for your scene.

Outdoor Photography

  1. Fill Flash: Use your flash as a fill light to brighten up shadows, especially in bright sunlight. This technique helps to avoid the harsh contrasts that can occur in the midday sun.
  2. Backlighting: When shooting with the sun behind your subject, use flash to illuminate their face and avoid silhouettes.
  3. Control Ambient Light: Use flash and ambient light to create a balanced exposure. You can adjust your camera settings to control the background light and use the flash to light your subject.

Getting the Flash Off-Camera

While an on-camera flash is convenient, getting the flash off the camera can significantly enhance your photos. Placing the flash at a 45º angle to the left or right of your camera is a great starting point. Here’s why this technique is beneficial:

  1. Depth and Dimension: Off-camera flash creates more interesting shadows and highlights, adding depth and dimension to your photos.
  2. Control: You have greater control over the direction and quality of light, allowing you to shape it to suit your subject and scene.
  3. Separation: Off-camera flash helps to separate your subject from the background, making it stand out more prominently.

Standing Out from Smartphone Photography

Smartphones have made incredible strides in computational photography, but there’s no substitute for a well-placed flash. Using a flash, especially off-camera, can produce results that smartphone cameras can’t match. Here’s how:

  1. Precision Lighting: While smartphones can enhance images through software, they lack the precision and control that a dedicated flash provides.
  2. Creative Flexibility: Off-camera flash allows for creative lighting setups that give your photos a unique look, something smartphones struggle to replicate.
  3. Professional Quality: The quality of light from a flash can’t be replicated by a smartphone’s tiny LED light. Flash lighting can highlight details and create a professional finish that separates your photos.

The Importance of Test Shots

Always take a test shot before diving into your photo session with Flash. Here’s why:

  1. Before Adding Flash: Be sure the photo needs the flash help.
  2. Avoiding Mistakes: A test shot helps you spot potential issues with your lighting setup, such as overexposure, harsh shadows, or unwanted reflections.
  3. Fine-tuning: It allows you to adjust your flash power, positioning, and camera settings to get the perfect shot.
  4. Confidence: Taking a test shot gives you confidence that your lighting is right, so you can focus on capturing the best possible image.

In conclusion, flash can significantly improve indoor or outdoor photos. By understanding how to use on-camera flash effectively and experimenting with off-camera flash setups, you can achieve the quality and creativity that sets your work apart from smartphone photography. Remember, always take a test shot to ensure your lighting is spot-on. Embrace the flash, and watch your photography skills shine!

Inside Out 2: A Beautiful Portrayal of Anxiety

The new summer movie in theaters is Disney/Pixar’s Inside Out 2, which introduces the character Anxiety, a figure many viewers can relate to deeply. While all the emotions play a crucial role in Riley’s mind, Anxiety is the newcomer, constantly battling with Joy over what they believe is best for Riley. Despite their good intentions, this internal conflict leads Anxiety to grow increasingly irrational throughout the movie.

Anxiety becomes panicked after accidentally creating Riley’s destructive belief that “I’m not good enough.” An anxiety attack is vividly depicted in the movie, showing a racing heart, quickened breathing, and an overwhelming sense of panic. Many with anxiety disorders have similar reactions to those Riley experiences.

The portrayal of an anxiety attack in Inside Out 2 is profound, capturing the intense emotional and physical turmoil accurately. The film uses Riley’s crisis to advance the storyline and help viewers feel the emotions tied to such an experience. Multiple psychology consultants aided Pixar in understanding adolescent psychology, enhancing the power and accuracy of the storyline.

My van’s t-joint for my radiator hose broke as I drove on the expressway to a camera club where I was the keynote speaker. We are having to reschedule my presentation. I panicked when the check engine yellow light came on, and the van started acting differently. I was able to get off on the very next exit, where the van died, and I had to be towed.

Managing Anxiety: My Journey

As someone on the autism spectrum, I’ve experienced heightened levels of Anxiety for several reasons:

  1. Sensory Sensitivities: Everyday environments can become overwhelming due to heightened sensitivity to light, sound, and touch.
  2. Difficulty with Social Interactions: Understanding social cues and nonverbal communication can be challenging, leading to social Anxiety.
  3. Need for Predictability: Disruptions in routine can cause significant stress.
  4. Communication Barriers: Expressing thoughts and feelings verbally can be complex, leading to frustration and Anxiety.
  5. Executive Functioning Challenges: Planning and organizing tasks can feel overwhelming.
  6. Sensory Overload: Overly stimulating environments can trigger Anxiety.
  7. Social and Peer Pressure: Conforming to social norms can create additional stress.

These factors can contribute to a higher prevalence of anxiety disorders among individuals on the autism spectrum. Understanding and addressing these specific challenges helps in managing Anxiety more effectively.

Dealing with Anxiety Before, During, and After an Attack

Before an Anxiety Attack

  1. Practice Deep Breathing: It can slow your heart rate and promote relaxation.
  2. Grounding Techniques: Use your senses to ground yourself by identifying things you can see, touch, hear, smell, and taste.
  3. Mindfulness Meditation: Apps like Headspace or Calm can guide you through meditation sessions.
  4. Create a Comforting Routine: Include calming activities like reading or listening to soothing music.
  5. Prepare a Safety Kit: Have items that comfort you, like a favorite book or stress ball.

During an Anxiety Attack

  1. Focus on Your Breath: Return to deep breathing techniques.
  2. Progressive Muscle Relaxation: Tense and relax each muscle group in your body.
  3. Visualization: Picture a peaceful place in your mind.
  4. Use Positive Affirmations: Repeat reassuring phrases to yourself.
  5. Remove Yourself from the Situation: Find a quiet place to sit and breathe calmly.
  6. Cool Down: Splash your face with cold water or hold a cold object.
  7. Engage in a Distraction: Shift your focus to an activity you enjoy.

After an Anxiety Attack

  1. Reflect and Journal: Write down what triggered the attack and what helped calm you.
  2. Seek Support: Talk to a trusted friend, family member, or therapist.
  3. Take Care of Your Body: Ensure you get enough sleep, eat well, and exercise regularly.
  4. Practice Self-Compassion: Be kind to yourself and acknowledge that it’s okay to have difficult moments.

Embracing the Mantra “Life Happens”

As one with autism, anxiety attacks have been a part of my entire life. “Life Happens” has become my mantra, expressing that unexpected and uncontrollable events are a natural part of life. Embracing this concept can be particularly relevant when dealing with Anxiety.

By adopting the mindset that “Life Happens,” you can cultivate greater acceptance, flexibility, and resilience—key components in managing and reducing Anxiety.

The Serenity Prayer: A Tool for Calm

The Serenity Prayer has been a powerful tool for managing my Anxiety. Its focus on acceptance, courage, and wisdom provides a framework for coping with stressful situations.

“God, grant me the serenity to accept the things I cannot change, courage to change the things I can, and wisdom to know the difference.”

  1. Serenity to Accept the Things I Cannot Change: Encourages acceptance of uncontrollable circumstances, reducing feelings of helplessness.
  2. Courage to Change the Things I Can: Empowers you to take action where possible, alleviating Anxiety by focusing on what you can influence.
  3. Wisdom to Know the Difference: Helps prioritize efforts and reduce wasted energy on futile concerns.

Incorporating the Serenity Prayer into daily routines can promote acceptance, encourage proactive change, and foster wisdom in decision-making, providing a calming influence in the face of Anxiety.


I hope this blog post provides insights and practical steps for managing Anxiety, drawing from personal experiences and the inspiring portrayal in Inside Out 2. If you find yourself struggling with Anxiety, remember that help and support are available.

Exploring the Art of Low-Key and High-Key Photo Editing

As a storyteller and brand builder at Storyteller & Brand Builder Stanley Leary, I’m passionate about the different photo editing styles and how they can be used to convey unique narratives. Two prevalent styles in photography are low-key and high-key editing. These techniques influence the mood and feel of an image and reflect different approaches to exposure and post-production. Let’s dive into these styles, their origins, and how they can be effectively utilized in your work.

Low-Key Editing: Preserving Highlight Details

Origin and Concept: Low-key editing is a technique that emphasizes retaining all the details in the highlights. This method originated from the era of film photography, particularly with transparency films like slides. Unlike negative films, slides required precise exposure because overexposed highlights could not be recovered. Photographers had to be meticulous with their exposure to ensure that the details in the brightest parts of the image were preserved.

Shooting Technique: Photographers often underexpose their shots slightly to achieve a low-key effect. This technique ensures that no part of the image is blown out. When shooting low-key, you might use a narrower aperture or faster shutter speed to limit the light hitting the sensor. Additionally, spot metering can help focus on the brightest part of the scene to ensure it’s not overexposed.

Post-Production: In post-production, low-key editing involves carefully adjusting the exposure and highlights to maintain detail. Tools like Adobe Lightroom or Photoshop are essential for fine-tuning the highlights, shadows, and mid-tones. The goal is to create a balanced image where even the brightest areas retain texture and detail.

Practical Example: Imagine you’re photographing a landscape at sunset. By exposing it for the bright sky, you ensure the clouds and sun rays retain their intricate details. In post-production, you can then bring up the shadows to reveal more of the landscape without losing the highlight details.

High-Key Editing: Embracing Blown-Out Highlights

Origin and Concept: High-key editing, on the other hand, emerged prominently from wedding photography. Photographers often prioritized capturing flattering skin tones over retaining all the highlight details. This approach led to images where the background and other elements might be overexposed, creating a dreamy, ethereal look.

Shooting Technique: Photographers generally overexpose their images slightly when shooting for a high-key effect. This can be achieved using a wider aperture, slower shutter speed, or increasing the ISO. Evaluative or matrix metering can help balance the exposure across the entire frame, but it’s often adjusted to prioritize the main subject, like the bride and groom in wedding photography.

Post-Production: In post-production, high-key editing enhances the overexposed areas to create a bright and airy feel. Adjusting the exposure, highlights, and whites in editing software can help achieve this look. The key is to ensure the subject, especially skin tones, remains well-exposed and flattering while allowing the background or other less critical areas to blow out.

Practical Example: Consider a bride in a white dress standing in front of a window. By overexposing slightly, you focus on her glowing face and dress while letting the light from the window create a soft, overexposed background. In editing, you enhance this effect to emphasize the bright, joyful atmosphere of the moment.

Modifying Your Shooting and Editing Approach

Low-Key Adjustments:

  1. Shooting: Use spot metering to expose the brightest part of your scene. Underexpose slightly to protect highlights.
  2. Editing: Carefully adjust highlights and shadows to retain detail across the image. Use tools like the highlights slider to bring back detail in the bright areas.

High-Key Adjustments:

  1. Shooting: Use evaluative metering and slightly overexpose your image to prioritize skin tones and the main subject.
  2. Editing: Increase exposure and highlights to enhance the bright, airy feel. Ensure skin tones remain flattering and well-exposed.

Conclusion

Both low-key and high-key editing styles offer unique ways to tell your story through photography. Low-key emphasizes detail and precision, creating rich, textured images. A high-key, bright, and airy feel can convey emotions like joy and elegance. By understanding and mastering these techniques, you can expand your creative toolkit and better serve the diverse needs of your clients.

Whether you’re capturing the intricate details of a landscape or the ethereal beauty of a wedding, these editing styles will help you tell your story in the most compelling way possible. Happy shooting and editing!

Embracing Uniqueness: The Intersection of Autism and Visual Storytelling

They say when you’ve met one person with autism, you’ve met one person. Each individual’s experience with autism is unique, with its strengths, challenges, and perspectives. After living with autism for more than 62 years, I’m just now feeling like I’m emerging from my cocoon, embracing my uniqueness, and discovering how it shapes my work as a visual storyteller.

As a creative artist who tells stories through still photography and video, I’ve realized that living with autism and being an artist have much in common. Both paths require embracing one’s unique perspective and finding ways to communicate it to the world. For those of us on the autism spectrum and artists in general, the journey to understanding and acceptance can be filled with both challenges and triumphs.

The Unique Perspective of Autism in Art

Autism often brings with it a distinct way of seeing the world. This unique viewpoint can be a powerful asset in visual storytelling. Autism enhances my attention to detail and helps me see nuances others might miss. It allows me to capture moments and emotions deeply, personally, and profoundly impactfully.

However, this uniqueness can also create a sense of isolation. Society doesn’t always understand or appreciate different ways of thinking and perceiving the world. As artists and individuals with autism, we often feel the need to bridge the gap between our inner world and the outside world.

The Artist’s Struggle for Understanding

Artists, much like those with autism, often struggle with the need to be understood. Our creations are extensions of ourselves; when our work isn’t understood or appreciated, it can feel like a personal rejection. But this struggle fuels our creativity and drives us to find new ways to express our stories.

The key is to embrace our differences and use them as a source of strength and inspiration. Our unique perspectives are not limitations; they are the very essence of what makes our art special. By leaning into our uniqueness, we can create work that resonates deeply with those who see it.

Celebrating Uniqueness and Building Connections

So, how do we celebrate our differences and use them to connect with others? Here are a few tips that have helped me, and I hope they can help you, too:

  1. Embrace Your Uniqueness: Recognize that your unique perspective is a gift. Celebrate what makes you different and use them to inform your art. Your authenticity will shine through and resonate with others.
  2. Find Your Tribe: Seek out communities and individuals who appreciate and understand your work. Surround yourself with people who support and inspire you. Online communities, local art groups, and autism support networks can be great starting places.
  3. Tell Your Story: Don’t be afraid to share your journey. Whether through your art or in conversations, sharing your story can help others understand your perspective and connect with you on a deeper level.
  4. Practice Self-Compassion: Be kind to yourself. Not everyone will understand or appreciate your work, and that’s okay. Please focus on the positive feedback and use it to fuel your creativity.
  5. Use Your Art as a Bridge: Let your art be the medium through which you communicate your unique perspective. Visual storytelling has the power to transcend words and connect people on an emotional level. Use this to your advantage.

By embracing our differences and celebrating our uniqueness, we not only enrich our own lives but also the lives of those around us. Our stories, told through our unique lenses, have the power to connect, inspire, and transform. Whether you’re an artist, an individual with autism, or both, your story matters. Celebrate it, share it, and let it shine.

The Power of Storytelling in Photography: Capturing Attention and Creating Impactful Photos

In today’s world, where visual content is consumed at an unprecedented rate, capturing and holding people’s attention is more challenging than ever. As photographers, we wield a powerful tool: our camera. But to truly stand out and make a lasting impact, we need more than technical skills and creative flair. We need to harness the art of storytelling.

Why Storytelling Matters

Storytelling has been a fundamental part of human culture since the dawn of time. It’s how we make sense of the world, share experiences, and connect with others on a deeper level. In photography, storytelling transforms images from mere snapshots into compelling narratives that evoke emotions, spark curiosity, and invite viewers to engage with the scene on a more profound level.

A little girl joyfully jumps rope, surrounded by children playing together in the vibrant community of Tsiko, Togo, West Africa.

Asking the Right Questions

Strong storytelling photos do more than capture a moment; they ask the audience questions. They invite viewers to ponder the emotions and actions depicted. Questions like:

  • Why are they happy?
  • Why are they sad?
  • What are they doing?
  • What’s happening next?

By provoking these questions, you create a sense of mystery and intrigue, drawing the audience into the story. This engagement is what makes your photos memorable and impactful.

Full of curiosity, a young boy in Tsiko, Togo, West Africa, eagerly poses for the camera, capturing a moment of connection with the photographer.

The Photographer’s Journey: Asking “Why?”

To create resonant storytelling photos, photographers must ask themselves a crucial question: Why am I taking this photo? This question is the foundation of your storytelling journey. Here’s how to navigate this journey:

  1. Identify the Story: Before picking up your camera, think about the story you want to tell. Is it a story of joy, struggle, triumph, or sorrow? Understanding the narrative will guide your creative decisions.
  2. Capture Emotion: Emotions are at the heart of every great story. Look for moments that convey strong feelings and capture them in a way that allows viewers to experience those emotions, too.
  3. Focus on Details: Sometimes, the smallest details can tell the most powerful stories. A tear rolling down a cheek, a hand reaching out, or a shared glance can speak volumes. Pay attention to these moments and use them to enrich your narrative.
  4. Compose with Purpose: Composition plays a vital role in storytelling. Think about how you frame your subjects, using light and shadow, and the elements you include or exclude from the shot. Every choice should serve the story you want to tell.
  5. Create Context: Provide context to your story by capturing the main subjects and their surroundings. The environment can add layers of meaning and help viewers understand the broader narrative.
  6. Seek Authenticity: Authenticity is key to storytelling. Candid moments often tell more compelling stories than posed shots. Strive to capture genuine interactions and real emotions.
In their home in Tsiko, Togo, West Africa, a Pastor and his wife share their stories and experiences during an interview, offering a glimpse into their life and faith.

Enhancing Your Storytelling Skills

Continuous learning and practice are essential to becoming a master storyteller with your camera. Here are some tips to help you enhance your storytelling skills:

  • Study Great Storytellers: Look at photographers known for their storytelling work. Analyze their photos and try to understand how they convey emotions and narratives.
  • Practice Mindfulness: Be present in the moment and observe everything around you. This mindfulness will help you notice the subtle details that make a story come to life.
  • Experiment with Techniques: Don’t be afraid to try new techniques and approaches. Experimenting can lead to unexpected and powerful storytelling opportunities.
  • Solicit Feedback: Share your work with others and seek constructive feedback. Understanding how others perceive your photos can provide valuable insights into how effectively you’re telling your stories.
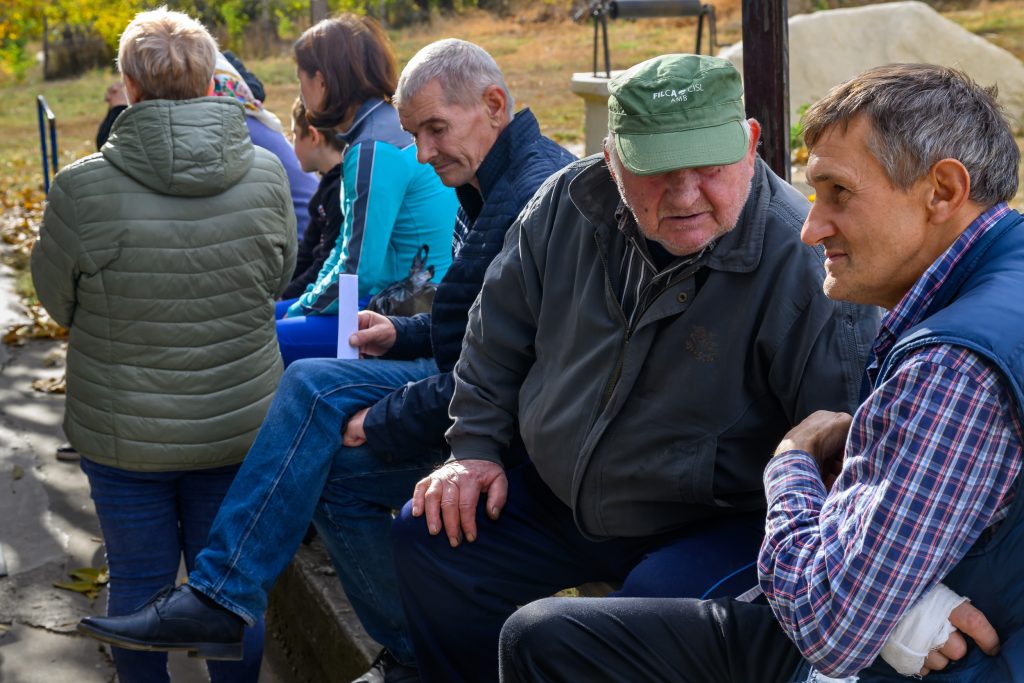
In the Obreja Veche, Moldova community, people wait outside the Golgotha Church to see the Medical Missions team for health check-ups. The local pastor and church planter had struggled to start conversations with residents, as they rarely answered their doors. However, when he brought a medical missions team from the United States to offer free services for a day, the community turned out in large numbers, allowing the pastor to finally engage in the conversations he had long desired with his neighbors.
Conclusion

Storytelling is a powerful tool that can elevate your photography to new heights. You can create images that resonate deeply with your audience by asking the right questions and focusing on the “why” behind your photos. Remember, the key to impactful storytelling lies in capturing emotions, paying attention to details, composing with purpose, providing context, and staying authentic. As you hone your storytelling skills, you’ll find that your photos capture attention and leave a lasting impression.

So, the next time you lift your camera to your eye, ask yourself, “Why am I taking this photo?” Let that question guide you, and watch as your storytelling prowess transforms your photography into a powerful medium for connection and expression.

The Lifeline of Creativity: Why Constant Content Creation is Essential for Success

In today’s fast-paced, content-driven world, staying relevant as a creative professional means constantly producing new content. For storytellers, photographers, and videographers like myself, this is not just a strategy; it’s a necessity. Potential clients must see you as a wellspring of fresh ideas and innovation. Here’s why continually generating new content and how you can effectively showcase it to your audience is vital.

The Importance of Continuous Content Creation

  1. Demonstrates Your Skills:
    • Personal projects are a fantastic way to highlight your abilities. They allow you to showcase what you can do without client constraints, often leading to some of your most creative work.
  2. Showcases Your Range:
    • Regularly sharing different types of content shows the variety of your ideas and the breadth of your skill set. Whether it’s a stunning landscape photograph or a compelling brand story video, diversity in your work makes you more appealing to a broader audience.
  3. Evolves Your Style:
    • Creativity is a journey, not a destination. By constantly creating, you let your style evolve naturally over time. This progression keeps your work fresh and engaging for you and your audience.
  4. Keeps You Top of Mind:
    • Consistently putting out new content ensures that you stay on the radar of potential clients and collaborators. It’s a gentle reminder of your expertise and availability.
  5. Builds Your Portfolio:
    • A robust, diverse portfolio is crucial for attracting new clients. Regular content creation means you always have new work to showcase, keeping your portfolio dynamic and up-to-date.
Chick-fil-A Holcomb Bridge Road & Alpharetta Hwy, Roswell, Georgia

Getting Your Content in Front of Clients

In today’s digital age, there are more ways than ever to get your work seen by potential clients:

  1. Blogs:
    • Write blog posts about your latest projects, industry trends, and creative processes. Blogs are great for SEO and can drive traffic to your website.
  2. Video Platforms (Vimeo/YouTube):
    • Share your video content on platforms like Vimeo and YouTube. These platforms have massive audiences and are great for showcasing your storytelling and videography skills.
  3. Newsletters:
    • Create a regular newsletter to keep your audience updated on your latest work, upcoming projects, and insights. This helps maintain a direct line of communication with your followers and clients.
  4. Social Media:
    • Platforms like Instagram, Facebook, and LinkedIn are excellent for sharing snippets of your work and engaging with your audience. Consistent posting helps build a loyal following.
  5. Printed Promotional Content:
    • Don’t underestimate the power of print. High-quality postcards, brochures, or portfolios can make a lasting impression, especially in face-to-face meetings or networking events.

How Often Should You Post New Content?

While there’s no one-size-fits-all answer, here are some general guidelines:

  • Social Media: Aim for at least 3-5 posts per week.
  • Blog Posts: Once a week or bi-weekly is a good target.
  • Newsletters: Monthly or bi-monthly.
  • Video Content: Aim for a new video every month or more frequently.
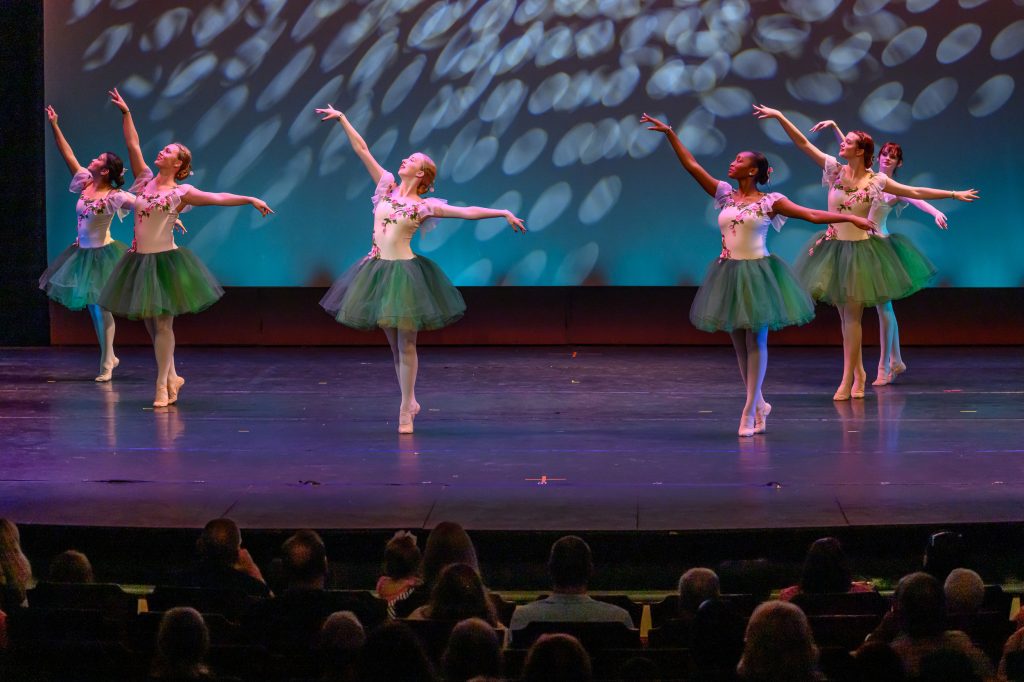
Elite Dance Academy Spring Recital at Springer Opera House

Using a Content Calendar

Planning your content with a calendar can be incredibly beneficial. Here’s why:

  1. Organization:
    • A content calendar helps you stay organized, ensuring you always have something ready to share.
  2. Consistency:
    • Regular posting is key to keeping your audience engaged. A calendar helps you maintain a consistent posting schedule.
  3. Strategic Planning:
    • It allows you to plan content around key dates, events, and campaigns, ensuring your content aligns with your overall marketing strategy.
  4. Time Management:
    • By planning, you can allocate time more efficiently and avoid last-minute rushes.

Conclusion

For creatives, constant content creation is more than just keeping busy; it’s about continually pushing boundaries, showcasing your evolving skills, and staying relevant in a crowded market. By leveraging multiple platforms and maintaining a consistent posting schedule, you can ensure your work gets the attention it deserves. So, grab that camera, start that blog, and let your creativity shine!


Please contact me for more personalized advice or help with your content strategy. Let’s keep those ideas flowing and your portfolio growing!

The Importance of Overshooting: Capturing Dance Recitals and Beyond

Yesterday was a special day for me. I had the pleasure of photographing my daughter’s students from Elite Dance Academy during their Spring Dance Recital at the Springer Opera House in Columbus, Georgia. This venue holds a special place in our hearts because of its rich history and because my daughter works full-time at the box office, conducts ghost tours, and hosts No-Shame Theater every other week. It was a joy to see her in her element and to capture the artistry of her students on such a grand stage.

Why Overshooting is Essential

Photography, especially in dynamic settings like dance recitals, demands a keen eye and quick reflexes. The fleeting nature of “peak” moments – those split seconds where the dancers’ expressions, movements, and lighting converge perfectly – makes overshooting an invaluable strategy. Here’s why:

  1. Capturing the Unpredictable: Dance is all about movement. Unlike posed photography, you can’t predict when a dancer will hit their stride. By overshooting, you increase your chances of capturing those perfect, unscripted moments that define the performance.
  2. Compensating for Inexperience: While I don’t shoot dance daily, even seasoned photographers who specialize in dance know the importance of taking numerous shots. When you’re not regularly photographing a particular subject, overshooting helps mitigate the risk of missing key moments.
  3. Ensuring Coverage: At yesterday’s recital, there were over 80 separate dance routines, ranging from young children to high school students. Shooting around 100 images per dance routine might seem excessive, but it ensures that I have a wide selection to choose from, highlighting each dancer’s best moments.
  4. Capturing “Peak” Moments: Dance photography is all about timing. Those brief, peak moments where a dancer’s skill and emotion are fully displayed can be challenging to capture. Taking many shots maximizes your chances of freezing these moments in time.

No Images found.

Tips for Effective Overshooting

  1. Know Your Equipment: Familiarize yourself with your camera’s burst mode settings. This allows you to take multiple shots quickly, which is crucial for capturing fast-moving subjects like dancers.
  2. Anticipate Movements: Study the dance routines beforehand if possible. Understanding the choreography helps you anticipate when those peak moments might occur, allowing you to be ready to capture them.
  3. Be Selective with Your Shots: While overshooting involves taking many photos, it’s also about being strategic. Focus on moments when the dancers will likely express the most emotion or demonstrate impressive technical skills.

Culling the Images: Finding the Best Moments

Once the event is over and you have thousands of images, the next step is culling – sorting through to find the best shots. Here are some tips to streamline this process:

  1. Initial Pass: Please look at all your images and discard any that are out of focus, poorly composed, or otherwise unusable. This will significantly reduce the number of images you must review more carefully.
  2. Star Rating System: Use a star rating system to categorize your images. Start with broad categories (e.g., 1-2 stars for average shots, 3-4 stars for good shots, 5 stars for the best shots). This helps you progressively narrow down your selection.
  3. Look for Emotion and Composition: Focus on images that convey strong emotions, tell a story, or have excellent composition. These are the photos that will stand out and resonate with viewers.
  4. Seek Feedback: If possible, get a second opinion. Sometimes, another set of eyes can catch details you might have missed and provide valuable insights into which images truly capture the essence of the performance.

Conclusion

Overshooting is a powerful technique, especially when every moment counts and the action is unpredictable. Yesterday’s dance recital at the Springer Opera House reminded me of the beauty of these fleeting moments and the importance of capturing them. Whether you’re photographing dance, sports, or any fast-moving event, don’t be afraid to overshoot. The extra effort will pay off when you see the final images that truly encapsulate the spirit and energy of the performance.

Remember, the key to successful photography is not just the moments you capture but also ensuring you have enough material to choose from to tell the best possible story. Happy shooting!

Embracing Golden Hour Lighting for Naturally Stunning Photos

Photography enthusiasts and professionals alike have long revered the magical moments of the golden hour. This period, occurring just after sunrise and just before sunset is characterized by its warm, soft light, creating an ideal atmosphere for capturing stunning, naturally-lit photos. As trends in photography shift towards more authentic and less edited images, golden hour lighting remains a steadfast favorite.

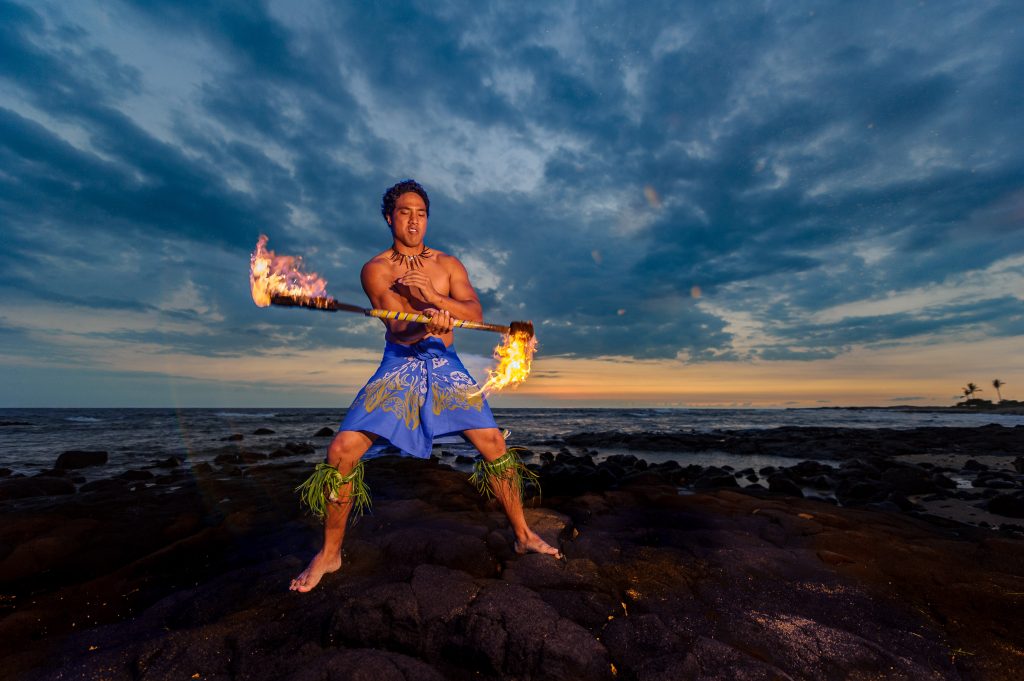
Kona, Hawaii [NIKON D750, 28.0-300.0 mm f/3.5-5.6, Mode = Aperture Priority, ISO 5600, 1/100, ƒ/4.5, (35mm = 55)]

The Beauty of Golden Hour

Golden hour lighting is renowned for its natural warmth and softness. During these times, the sun’s low angle results in longer shadows and a diffused light that wraps gently around subjects. This creates a natural glow that is difficult to replicate with artificial lighting or post-processing.

  1. Warm Tones: The golden hues during this time add a natural warmth to photos, enhancing skin tones and landscapes alike. This warm light can make even ordinary scenes look extraordinary, infusing them with calm and beauty.
  2. Soft Shadows: The light during golden hour is diffused and less harsh than the midday sun. This results in softer shadows that add depth to images without the stark contrast often seen in harsh daylight.
  3. Enhanced Textures: Low-angle light enhances textures, revealing details in landscapes and portraits. Whether it’s the rugged surface of a mountain or the subtle lines of a face, golden hour light beautifully accentuates these features.
Antoine Tarnagda (brown shirt) and Zongo Tarnagda (on the bicycle) in Soumagou. Antoine and Zongo are part of the Bissa tribe. [NIKON D2X, Sigma 18-50mm F2.8 EX DC, Mode = Aperture Priority, ISO 100, 1/125, ƒ/2.8, (35mm = 27)]

Tips for Capturing Golden Hour Photos

Maximizing the potential of golden hour lighting requires some planning and technique. Here are some tips to help you make the most of this magical time of day:

  1. Plan Ahead: The golden hour is fleeting, so preparation is crucial. Use apps or online tools to determine the exact timing of sunrise and sunset in your location. Arrive early to scout your location and set up your equipment.
  2. Use a Reflector: A reflector can help you control the light and reduce shadows, especially for portrait photography. Reflectors bounce light back onto the subject, filling in shadows and creating a more even lighting effect.
  3. Experiment with Angles: Don’t be afraid to change your perspective. Shooting with the sun behind your subject can create beautiful backlighting and flares, while side lighting can enhance textures and add depth.
  4. Shoot in Manual Mode: Golden hour light changes rapidly, so manual mode allows you to adjust your settings on the fly. Pay attention to your exposure, as the light can vary significantly from one moment to the next.
  5. Capture the Glow: Take advantage of golden hour’s natural glow. This is the perfect time for silhouette shots, lens flares, and capturing sunrays filtering through trees or buildings.
In the bush village of Sabtenga, the oldest man in a hat was Musanai Zemnai, the Chief of the Young People, who welcomed the group. [NIKON D2X, 18.0-50.0 mm f/2.8, Mode = Aperture Priority, ISO 400, 1/640, ƒ/4, (35mm = 27)]

Why Golden Hour is a Timeless Trend

The shift towards more natural and less edited photography underscores the enduring appeal of golden hour lighting. In a digital age where images are often heavily processed, the authenticity and simplicity of golden hour photos stand out. This trend celebrates the inherent beauty of natural light, aligning with a broader movement toward authenticity in visual storytelling.

Golden Hour offers photographers a unique opportunity to create visually striking and emotionally resonant images. The warm, natural light enhances the photos’ aesthetic quality and evokes a sense of peace and tranquility. As we continue valuing authenticity and natural beauty in photography, golden hour lighting will remain a cherished technique for capturing genuinely stunning images.

A lady stops just before entering the local grocery store in Herăști, Giurgiu, Romania.
[NIKON D4, 14.0-24.0 mm f/2.8, Mode = Aperture Priority, ISO 12800, 1/160, ƒ/9, (35mm = 14)]

Conclusion

Golden hour lighting embodies the perfect blend of natural beauty and photographic potential. Its warm, soft light creates an ideal setting for capturing visually stunning and authentically real moments. As the trend towards naturally lit photography grows, golden hour remains a beloved and timeless technique for photographers worldwide. So, set your alarm early or prepare for a late afternoon shoot, and let the magic of golden hour transform your photography.

Ocean Isle Beach, North Carolina. [DJI Air 2S, Mode = Normal, ISO 150, 1/240, ƒ/2.8, (35mm = 22)]

The ƒ/16 Challenge: Elevate Your Photography Through Composition

As a photographer, I’ve always believed in pushing the boundaries of creativity and honing our skills to capture compelling stories through our lenses. Today, I want to introduce you to an exciting exercise that will challenge your eye for composition and elevate your photographic artistry: the ƒ/16 Challenge.

Why ƒ/16?

When we shoot with a shallow depth of field, such as ƒ/2.8 or ƒ/1.8, it’s easier to create visually appealing images because the background blurs into a creamy bokeh, isolating the subject and minimizing distractions. While this technique can produce stunning portraits and close-ups, it doesn’t always push us to explore the full potential of our compositional skills.

Almond Standard built his log cabin home himself. It is located in Tignal, Georgia. [NIKON D2X, Sigma 15-30mm F3.5-4.5 EX DG Aspherical DF, Mode = Manual, ISO 100, 1/4, ƒ/13, (35mm = 33)]

Enter the ƒ/16 Challenge. By setting your aperture to ƒ/16, you’ll achieve a deep depth of field, meaning the foreground and background will be in sharp focus. This requires you to carefully consider every element in your frame and use your compositional prowess to guide the viewer’s eye through the image.

Composition Tools for the ƒ/16 Challenge

Here are some compositional tools to help you create compelling images with a deep depth of field:

  1. Leading Lines
    • Use natural or manufactured lines to draw the viewer’s eye through the image. Roads, rivers, fences, and shadows can all serve as leading lines.
  2. Rule of Thirds
    • Divide your frame into a 3×3 grid and position key elements along these lines or at their intersections. This creates a balanced and engaging composition.
  3. Framing
    • Incorporate elements in your scene to frame your subject, such as natural frames like tree branches or architectural frames like doorways and windows.
  4. Symmetry and Patterns
    • Look for symmetrical scenes or repetitive patterns that can create a sense of harmony and rhythm in your images.
  5. Foreground Interest
    • Include interesting elements in the foreground to add depth and guide the viewer’s eye into the scene.
  6. Depth and Layers
    • Arrange your composition with distinct foreground, middle ground, and background elements. This creates a sense of depth and dimensionality.
  7. Contrast and Color
    • Use contrasting colors and tones to highlight your subject and create visual interest. Bold colors can make elements pop, while subtle contrasts can add nuance.
  8. Negative Space
    • Embrace negative space to give your subject room to breathe and create a minimalist aesthetic.
[NIKON Z 6, 14.0-24.0 mm f/2.8, Mode = Aperture Priority, ISO 100, 1/1.7, ƒ/8, (35mm = 14)]

Are You Up to the Challenge?

The ƒ/16 Challenge is not just about technical settings; it’s about training your eye to see the world differently. Here’s how to get started:

  1. Set Your Aperture to ƒ/16
    • Switch to aperture priority mode (A or Av) or manual mode (M) and dial in ƒ/16.
  2. Choose Your Scene
    • Find a scene with potential for depth and interesting elements from foreground to background.
  3. Compose Your Shot
    • Use the composition tools listed above to create a balanced, dynamic image.
  4. Shoot and Review
    • Take your shot, then review it on your camera’s screen. Adjust your composition if needed and shoot again.
  5. Analyze and Improve
    • Review your images later on a larger screen. Analyze what worked and didn’t, and think about how to improve next time.
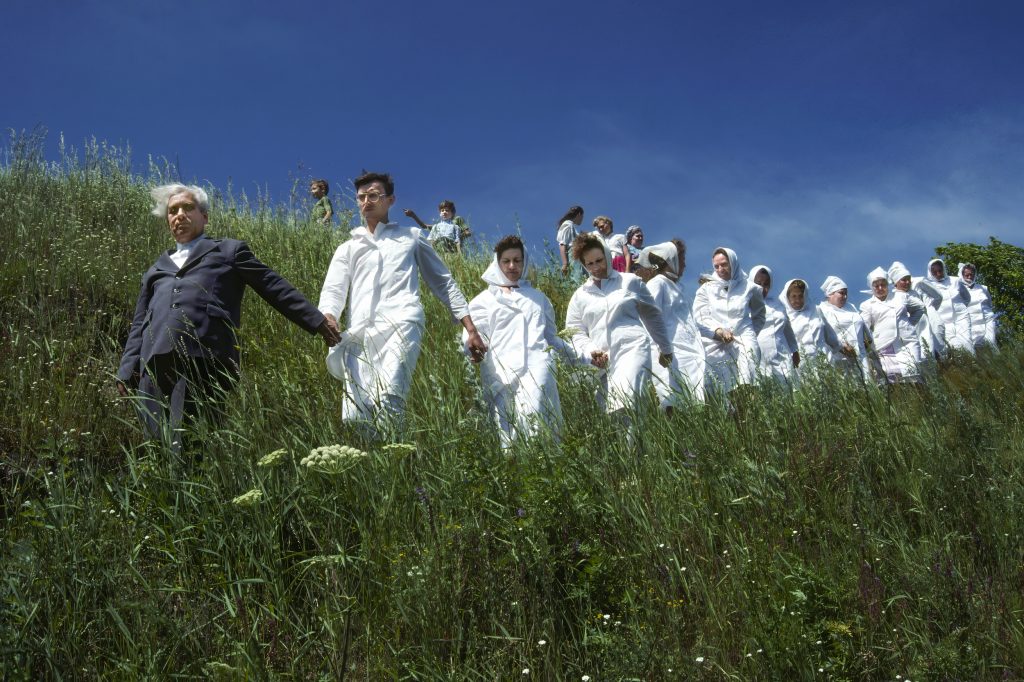
These people dressed in white are going to the Eny River to be baptized and become members of the First Baptist Church in Novosibirsk, Siberia. Thirty-five people are in the group. The person leading them is a deacon in the church. His name is Vladimir Korniyshin. Photo by: Don Rutledge

Embrace the Depth

Taking on the ƒ/16 Challenge will push you to be more mindful of every element within your frame. By mastering the art of composition with a deep depth of field, you’ll become a more versatile and thoughtful photographer, capable of crafting images that tell compelling stories regardless of your aperture setting.

So, are you up to the challenge? Grab your camera, set that aperture to ƒ/16, and let’s see the world through a new lens.

Happy shooting!

Why Not Everyone Will Benefit from Upgrading Their Camera

In photography, the allure of the latest camera gear is hard to resist. With each new release promising higher resolutions, faster autofocus, and better low-light performance, it’s easy to feel that upgrading is the only way to stay ahead. However, the truth is not everyone will benefit from upgrading their camera. Here’s why:

Higher ISO Isn’t Always Necessary

For many photographers, shooting at high ISO settings isn’t a daily requirement. Most digital cameras today perform exceptionally well at lower ISOs, providing crisp and clear images without needing the latest model. If your photography rarely involves dim lighting or fast-moving subjects, an upgrade might be more about wanting the latest gadget than needing it.

Tripod-Based Photography

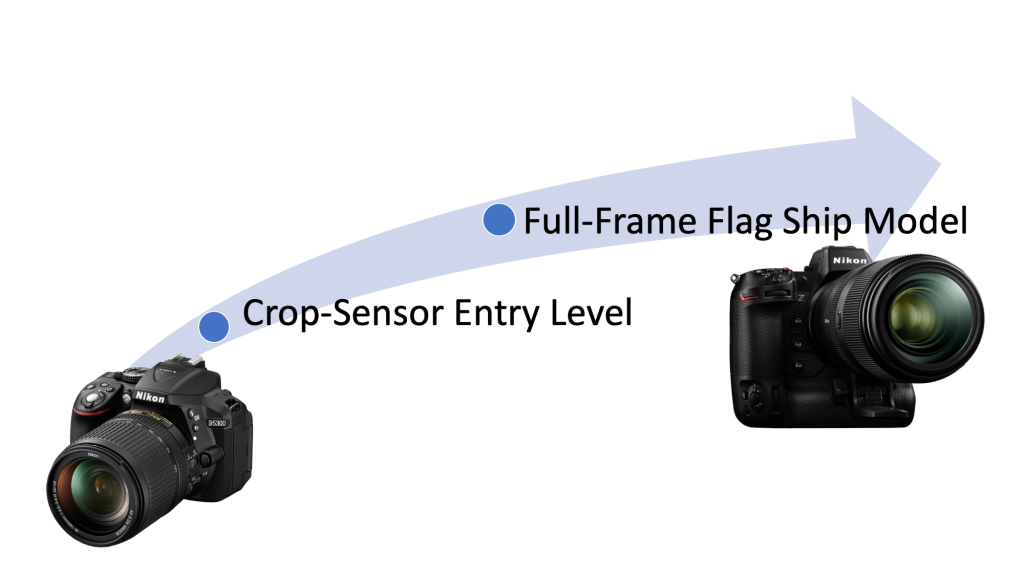
If your work involves using a tripod and your subjects are stationary, such as in landscape, architecture, or product photography, the benefits of upgrading from a crop sensor to a full-frame camera might be minimal. When you’re shooting with controlled lighting and stable setups, the difference in sensor size becomes less critical. Your current gear can likely deliver the quality you need.

Studio Portraits

For portrait photographers who primarily work in a studio setting with controlled lighting and flashes, upgrading your camera might not significantly improve your work. Studio flashes offer ample light, allowing you to shoot at low ISO settings where most modern cameras excel. The resolution and dynamic range provided by even mid-range cameras are more than sufficient for stunning portraits.

Other Photography Genres That Thrive at Low ISO

  1. Still Life Photography: Life involves careful composition and controlled lighting, like product photography. The need for high ISO is rare, making most modern cameras perfectly adequate.
  2. Macro Photography: When shooting macro, you typically control the lighting and your subject’s movement. This allows you to use lower ISO settings and longer shutter speeds with a tripod, minimizing the need for the latest camera tech.
  3. Food Photography: Often involves well-lit environments, whether natural or artificial. With controlled lighting setups, there’s no need for high ISO performance, and your current gear will likely do the job well.
  4. Astrophotography: While it might seem counterintuitive, astrophotography relies more on long exposures and precise settings than high ISO performance. Using a stable tripod and techniques like stacking images can yield excellent results without needing the latest camera model.
  5. Fine Art Photography: Often created in controlled settings, fine art photography can benefit more from the photographer’s vision and technique than the camera’s specifications. Low ISO and careful post-processing are key elements.

Conclusion

Upgrading your camera isn’t always the key to better photos. Assessing your specific needs and understanding the strengths of your current equipment can save you money and help you focus on improving your skills. For many genres of photography, mastering the basics and using the gear you already have will bring more significant improvements to your work than the latest camera upgrade.

Remember, the storyteller behind the camera, not the camera itself, makes a compelling image. Happy shooting!

When Upgrading Your Camera is Worth It

Consider upgrading your camera if you find yourself in any of these situations:

  1. Low-Light Conditions: Frequently shooting in dim environments such as:
    • Event Photography
    • Wildlife photography at dawn or dusk
    • Indoor sports
    • Concert photography
  2. High ISO Performance: Better sensor technology is needed to reduce noise and improve image quality in low-light settings.
  3. High-Resolution Demands: Requiring extremely high resolution for:
    • Large prints
    • Detailed commercial projects
    • Fine art photography
  4. Advanced Autofocus Systems: Benefiting from faster and more accurate autofocus for:
    • Action photography
    • Sports photography
    • Wildlife photography
  5. Meeting Client Demands: When your current gear limits your ability to deliver the quality and detail your clients expect.

If any of these scenarios apply to you, investing in an upgrade can be a wise decision to enhance your creative potential and professional capabilities.

Navigating the Ever-Changing Photography Industry: How Professional Photographers Can Thrive

The photography industry has undergone significant changes over the past few decades, with each wave bringing challenges and opportunities. Photographers have faced numerous disruptions from the transition of film to digital, the commoditization of stock photography, the rise of smartphones, the impact of the pandemic, and the advent of artificial intelligence. But does this mean the professional photographer is a fading presence in society? Absolutely not. Here’s’ how professional photographers can stay in business and thrive in this evolving landscape.

Major Shifts in the Photography Industry

Transition from Film to Digital The shift from film to digital revolutionized how photographers work. It democratized photography by lowering entry barriers allowing more people to take up photography as a hobby or profession. However, it also meant photographers had to adapt to new technologies and workflows.

Stock Photography Market Changes Platforms like Getty Images, influenced by the tech industry and individuals like Bill Gates, commoditized stock photography, driving prices down. This made it harder for photographers to earn a living solely through stock images, pushing many to diversify their services.

The Rise of Smartphones High-quality smartphone cameras put powerful photographic tools into the hands of the masses. This increased competition and reduced the perceived need for professional photographers for casual and even some commercial photography needs.

The impact of the COVID-19 pandemic halted many in-person events, significantly impacting photographers who relied on weddings, conferences, and other gatherings. Even as the world has started to recover, many businesses have cut back on hiring photographers due to budget constraints or shifting priorities.

The Advent of Artificial Intelligence AI can now generate images and enhance photos, presenting both a threat and a tool for photographers. AI-driven tools can assist in editing and managing images, but they also raise concerns about the authenticity and value of human-created photography.

Despite these challenges, there are several strategies professional photographers can employ not just to survive but thrive:

Embrace Technology and Continuous Learning Stay updated with the latest camera technology, editing software, and AI tools. Use these advancements to enhance your work, streamline your workflow, and offer new services that add value for your clients.

Specialize and Differentiate: Find a niche where you can excel and stand out. Whether it’s commercial photography, portraiture, event photography, or a specific style, being known for something unique can set you apart from the competition.

Offer a Full-Service Experience Go beyond just taking photos. Provide end-to-end solutions, including pre-production planning, post-production editing, and even marketing services for your clients. Storytelling, which I excel at, is a powerful tool for connecting with clients and creating lasting value.

Build Strong Relationships Networking and maintaining solid client relationships can lead to repeat business and referrals. Personalized service and excellent customer experiences can make a big difference in client retention.

Leverage Social Media and Online Presence Use social media platforms to showcase your work, tell your story, and engage with a broader audience. A solid online presence can attract new clients and create additional revenue streams through print sales, workshops, and more.

Diversify Your Revenue Streams Explore different ways to monetize your skills. This can include teaching photography workshops, creating online courses, selling prints, or offering consulting services for businesses looking to improve their visual branding.

Focus on Authenticity and Quality In a world flooded with images, high-quality, authentic photography stands out. Focus on producing work that resonates emotionally and tells compelling stories. This can create a strong connection with your audience and clients, making your work more valuable.

Conclusion

While the landscape for professional photographers has undoubtedly changed, opportunities still abound for those willing to adapt and innovate. You can survive and thrive in today’s photography industry by embracing new technologies, honing in on your unique strengths, and continuously finding ways to add value to today’s clients. As a storyteller and brand builder, I’ve seen firsthand the power of authentic, compelling photography. It’s about keeping up with the times while staying true to the art of storytelling through imagery.

Here’s to thriving in the ever-changing world of photography!


Feel free to connect with me, Stanley Leary, for personalized photography services and workshops that can help you elevate your visual storytelling and branding. Together, we can navigate this dynamic industry and create impactful stories that resonate.