Studio strobes or Hot Shoe Flash outside

Walk and Talk with Hot Shoe Flash 

One of my favorite shots to do for organizations is doing what I call the “Walk and Talk.” This is where I have two or more people walk next to each other towards me.

I encourage them to barely feel each other next to each other. This keeps them from walking further and further from each other. The closeness to each other also helps communicate they are friends. This is using the body language of touching or almost touching to help communicate their relationship.

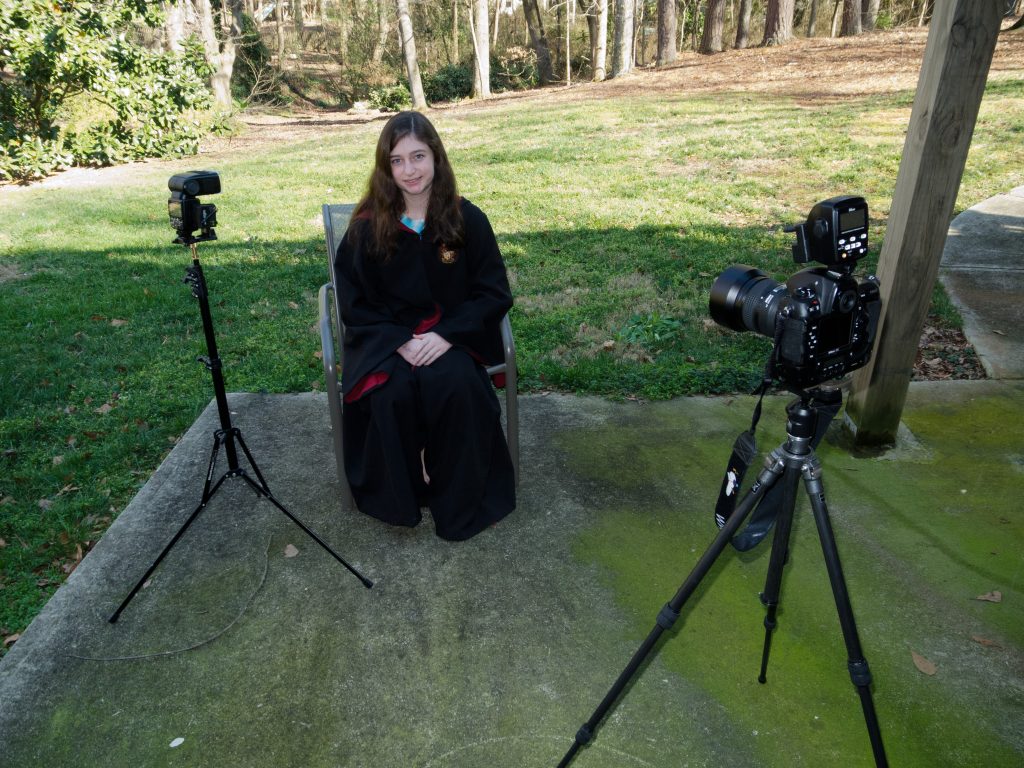
Now here are examples I did while teaching in Kona, Hawaii in February this year. These first ones I was showing the students how to use two hot shoe flashes as fill lights.  I have included the assistant carrying the lights for these examples to show you what they are doing as well.

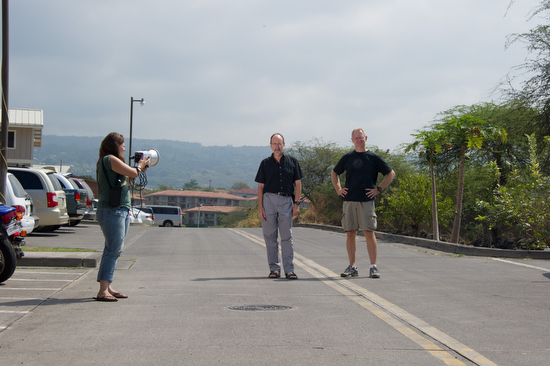
I am talking to the subjects and explaining what I want them to do. No flash went off here.

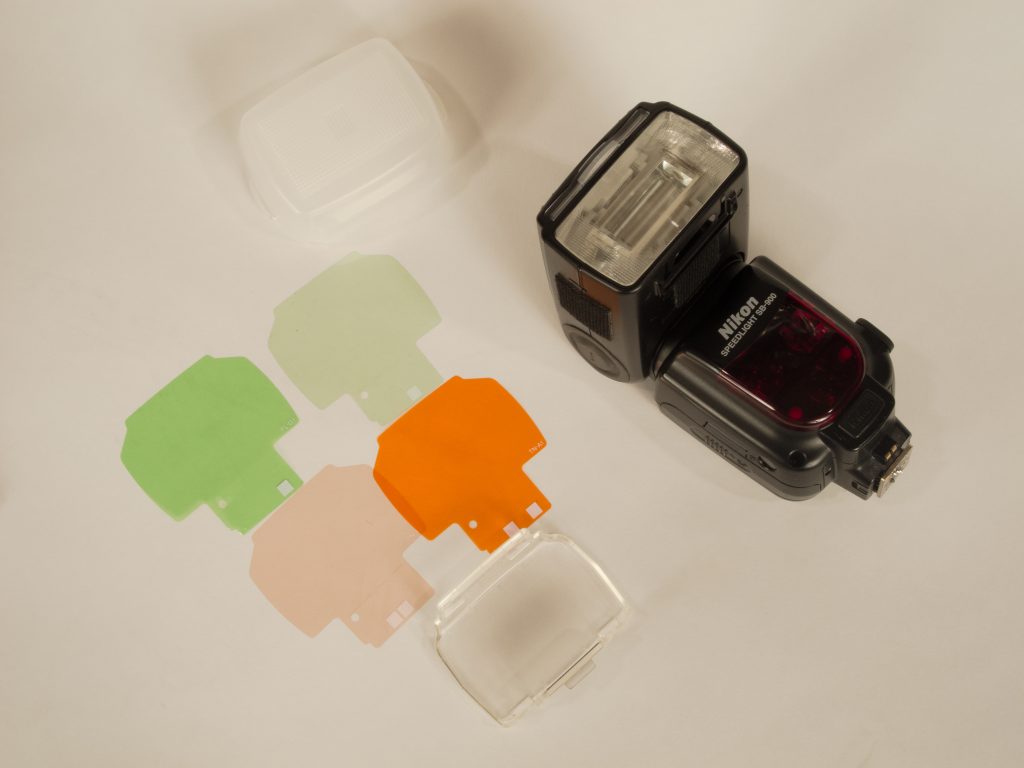
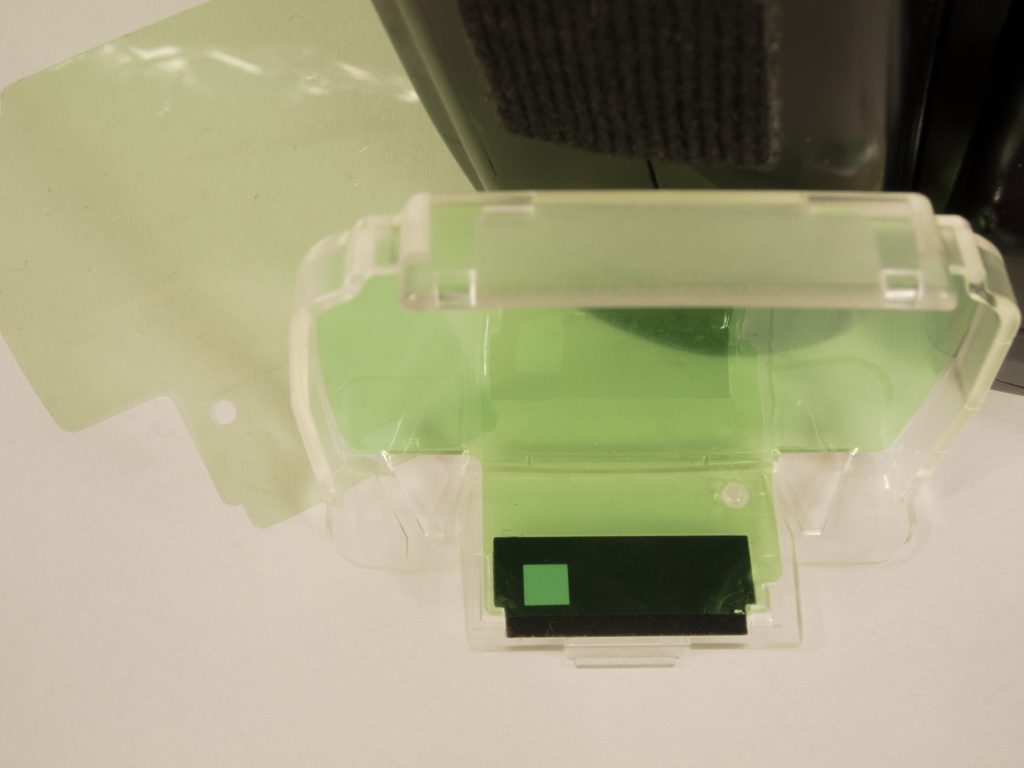
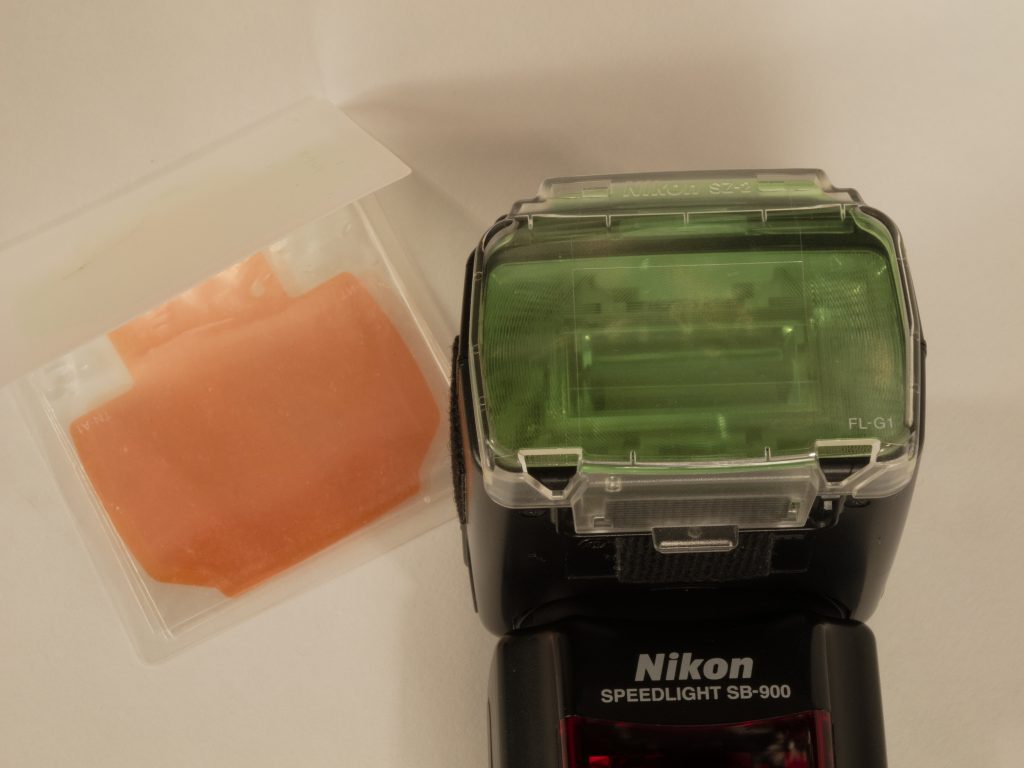
The photo assistant is carrying a Nikon SB900 and a Nikon SB800.  They are zoomed out to 200mm for the SB900 and 120mm with the SB800.  This helps the light go farther, but also keeps the light mainly on their faces.

Notice the assistant must be pretty close to the subjects for the flash to work properly. In addition to the flashes I am using the RadioPoppers PX system to help relay the infrared signal from the Nikon SU800 on my camera to the flashes.

We switched out the subjects so everyone could experience what it felt like doing this exercise and see it being done.

While showing the class how to use the hot shoe flashes there were a few times where I got ahead of the flashes recycling. By not waiting long enough between flashes (2 sec) the flash wouldn’t fire.

Walk and Talk with Studio Strobe

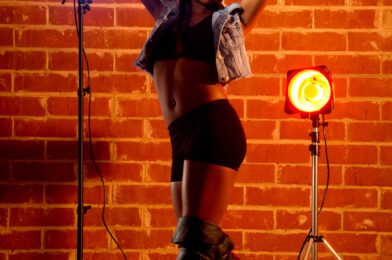
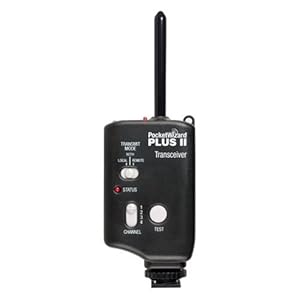
To help everyone see the difference in flashes I also used an AlienBee 1600 being powered by a Vagabond Mini Lithium battery. I was borrowing the Photo Schools radio remotes, but most of the time I now use Pocket Wizard Mini TT1 Transmitter on my Nikon Camera  and have the Pocket Wizard Plus II transceiver on the flashes.


The MiniTT1 will let me shoot at 1/500 sync speed rather than just 1/250.


Now another thing you will notice that is different in these examples is how far away the photo assistant is from the subjects. 


The AlienBee 1600 has the reflector that comes with them on it. So notice that the flash is lighting more of the subjects.  I can change that by just adding a grid, but didn’t for these photos.

The flash is set at about 1/8 power. I can almost shoot on motor drive setting for these photos. The reason is the recycle time is so short.


When I shot these photos not a single time did the flash not fire. I think that when it comes to getting the best expression you need to be able to shoot at any moment and not just when your flashes are ready. 


I would highly encourage using the studio strobe over the hot shoe flash for this reason alone.

Just like I did above, I talk to the subjects and do a few test shots before I have them walk towards me.

After we did some tests to get them moving I then had the start over where they are talking to one another.

As you can see it doesn’t take long for people to relax and the photos to look pretty natural.  I would have changed one thing in these photos. I would have had the assistant put the light on a light stand and get the light up a little higher to help avoid the glare in the glasses.

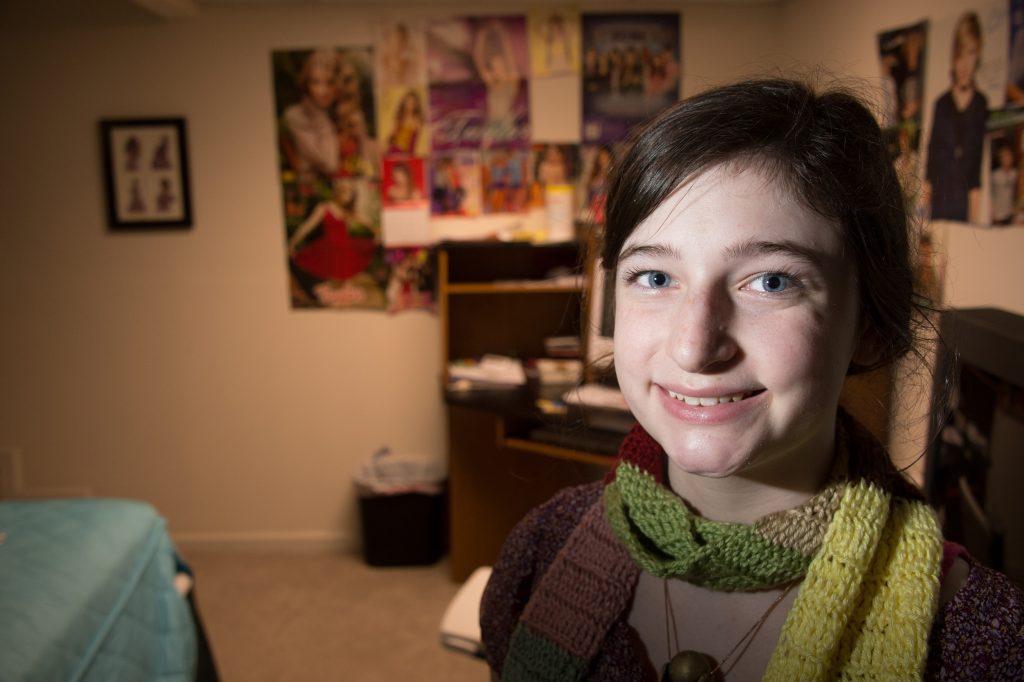
This is just to show that the flashes fired every time. 

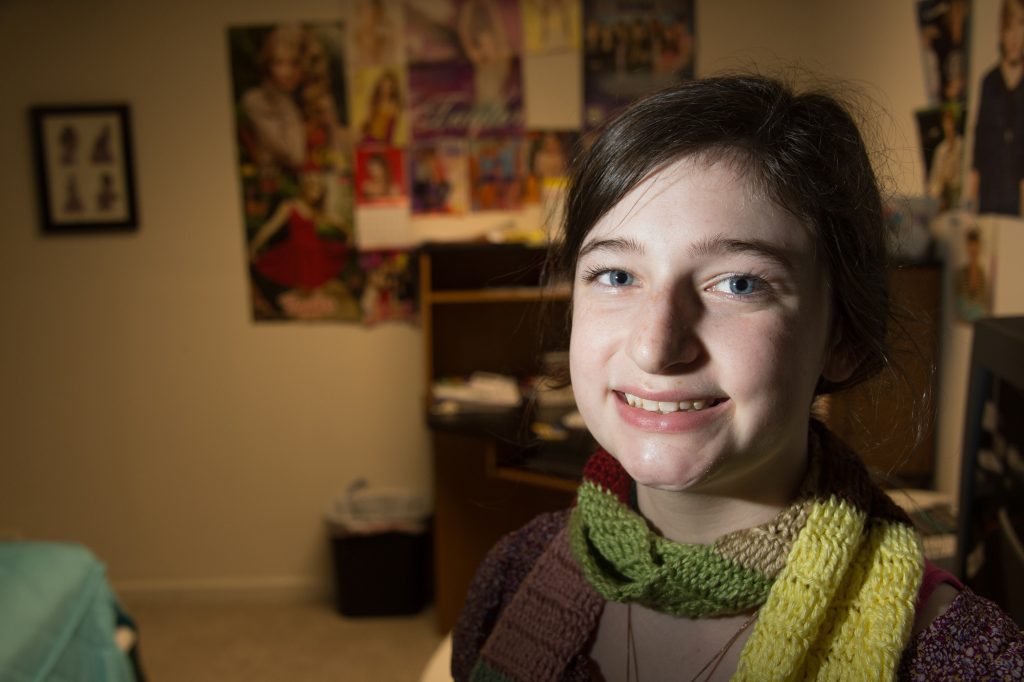
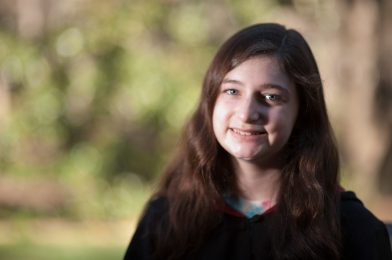
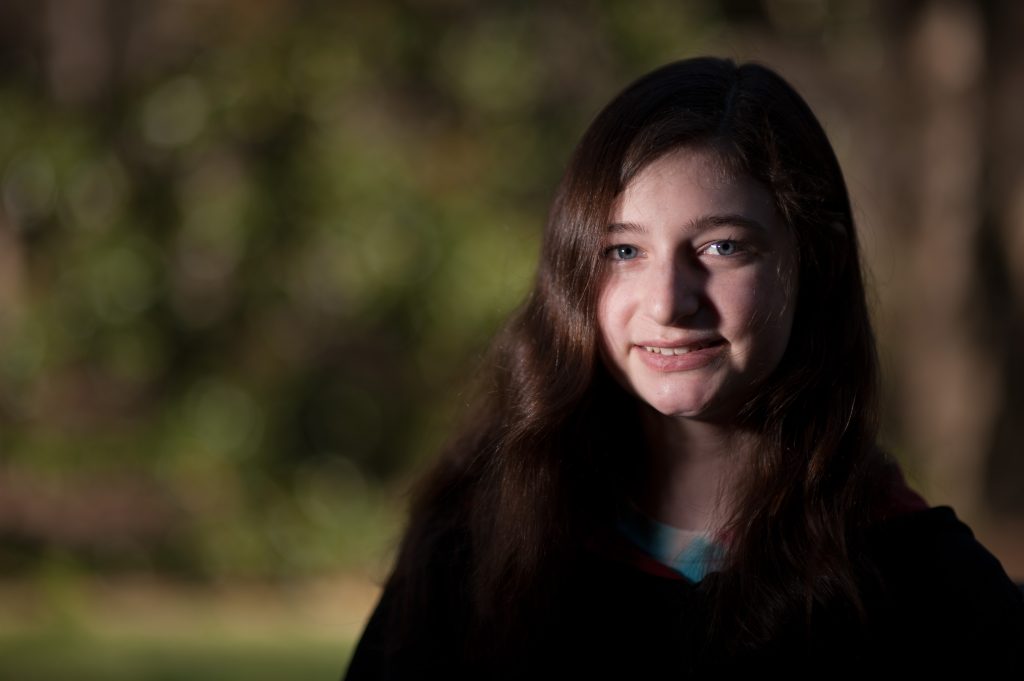
Now look at the photos where the flashes didn’t fire. Besides there faces in the shade the color on their faces isn’t as good. I think that using flashes helps you get the best skins tones outside possible.

Go out and try this yourself.

Often when I am flying around the world it is easier to carry the Nikon SB900 and a Nikon SB800 than carrying the AlienBee 1600 and the Vagabond Mini Lithium battery.  So, depending on the situation I find myself in I can still get the photo with either system.

How to get rid of orange and green backgrounds with flash

Nikon D4, ISO 3200, f/6.3, 1/80, 28-300mm, White Balance: Flash

Have you been getting photos like this with your off-camera flash? The reason for it is you have a mixed lighting situation. The background is tungsten or 3200º Kelvin, and the subject has flash or 5500º Kelvin.

With Lightroom 12.2.1 Release and later, you can use a mask to select the background. The AI in Lightroom does a pretty good job, and then you can color-correct your images this way. However, If you do this on camera, as shown here, it is even faster than having the select images and correct backgrounds. While you can do multiple photos in Lightroom, you still have to take the time to check each one to see if the mask worked. This takes too much time compared to using colored gels to change your flash to match the ambient color temperature.

Nikon D4, ISO 3200, f/6.3, 1/80, 28-300mm, White Balance: Tungsten

Now by doing everything is pretty much the same except for two things that are changed: the flash has an orange gel on it to match the tungsten, and then the white balance for the scene is set to tungsten.

I prefer to put on the orange gel over the flash and then use my ExpoDisc to get a custom white balance by pointing the lens to the flash with the ExpoDisc in front to help me get an accurate skin tone for the subject.

Nikon SB-900 with the gel kit with the flash and the two covers. One at the bottom holds the gels, and the other cover is a diffusion filter. You can use the gels with the diffusion filter as well. There are two green and two orange filters. You can test these, and depending on the lights in the room, one may work better than the other.
The gel slides into the plastic cover, and the hole lines up with a raised piece. When you do, the little white squares will automatically adjust your camera to the correct white balance when on the camera hotshoe.
Here you can see the cover snapped back on the SB-900 with the other gels off to the side in the carrying case.

I prefer not to see the orange and green backgrounds in my photos when using flash. However, if you use the gels, I am showing you here; you will fly through the post-production. Many people try and remove the color shift in the background with post-production, but the time it takes to convert the flash to the correct gel combination is far faster than just color-correcting one image.

Imagine shooting a wedding or an event where you may have hundreds if not thousands of images to color correct if you do not use the gels.

Nikon D4, ISO 3200, f/6.3, 1/80, 28-300mm, White Balance: Flash 

This is with regular flash under fluorescent light. There are more color differences from my experience under fluorescent lights than under tungsten. Just because you see a fluorescent light doesn’t mean it will be green. Some lights are already daylight balanced and will give you proper color with a flash. 

Nikon D4, ISO 3200, f/6.3, 1/50, 28-300mm, White Balance: Fluorescent

Here you can see the shift to a better skin tone and background not as green because I used a green gel over the flash.

While this may take 2 – 5 minutes to set up properly over time, you may cut your time to 2 – 3 minutes. You must see this in your overall workflow. 2 – 5 minutes once or 2 – 5 minutes for every photo you shoot to color correct it. It is your choice. Depending on the situation, you might not have time. If you had the time and didn’t do it, you will wish you had during the post.

Off Camera Flash Examples

Nikon D4, 28-300mm, ISO 100, 1/250, f/4.5, Off-Camera Fill Flash with Alien Bees 1600 and fired with Pocket Wizard Plus System.

Walk and Talk

This past week I was privileged to photograph on a college campus. I was combining two things that give me some of my best photos. By combining off-camera flash and having people moving I get two great results; great expressions and good color.

The very first thing I started with on the assignment was a group photo, but the best results as far as expressions was not when they were standing still, but when they all walked towards me. Now mind you I almost lost my photo assistant a few times. He was having to walk backwards and keep the same distance from the group constant. This was to ensure I had good exposures.

Nikon D4, 28-300mm, ISO 100, 1/250, f/6.3, Off-Camera Fill Flash with Alien Bees 1600 and fired with Pocket Wizard Plus System.

Since I had a good group and we finished early with the group photo, I then broke them up into small groups and then had each of those do what I call walk and talks. We assign one person to talk and the others to listen, not just with their ears but their eyes. So, the person talks. The others listen and then they all are walking towards me.

Thankfully we didn’t have the assistant ever fall this week while walking backwards, carrying lights and watching the subjects to be sure the light was on them.

Nikon D3S, 14-24mm, ISO 200, 1/50, f/5.6, Off-Camera Fill Flash with 2 – Alien Bees 1600 and fired with Pocket Wizard Plus System.

Buildings

I love shooting buildings at dusk. The photo here of the building and the students walking is at 7:55 p.m. and sunset is at 7:58 p.m.  I love this digital camera. You can see all the information, like what time I shot the photos.  While the sky looked better at about 20 minutes after sunset, we had to let the students go to another commitment.

We had them walk through the scene a few times.  The building is being lighted by my two Alien Bees 1600 on full power.  They are being powered by the Vagabond batteries made by Paul Bluff. 

Nikon D3S, 14-24mm, ISO 200, 1/1.6, f/11, Off-Camera Fill Flash with 2 – Alien Bees 1600 and fired with Pocket Wizard Plus System. The flash sync was set to Rear Sync to get the car lights behind the car and not in front of it.

The photo above was taken at 8:24 p.m. and as you can see the sky is much darker blue, but not black.  I use the Alien Bees to light up the building since this campus didn’t have lights on their buildings at night.

Fill flash in the woods

Nikon D4, 28-300mm, ISO 250, 1/80, f/9, Off-Camera Fill Flash with Alien Bees 1600 and fired with Pocket Wizard Plus System.

One of the ugliest lighting is under trees. You get a green cast due to the light going through the leaves. What I did here is used the off-camera flash with the Alien Bees 1600 to kick in light from the front to mainly offset the green light. I also benefited from having light in their face rather than raccoon eyes. Raccon eyes are caused by top lighting, which you see during the day and gives you dark circles around the eyes.

Fill flash in direct sunlight

Nikon D3S, 14-24mm, ISO 200, 1/200, f/13, Off-Camera Fill Flash with Alien Bees 1600 and fired with Pocket Wizard Plus System.

Why use a flash in direct sunlight? You need to avoid raccoon eyes and also if you want you can help drive the audience to the subject by the use of the light as I have done here.

Fill flash inside

Nikon D4, 28-300mm, ISO 3200, 1/125, f/6.3, Off-Camera Fill Flash with Nikon SB900 with the lightest green gel that comes with the system. Also, I am using the Radio Poppers radio transmitters with the Nikon SU-800 and Nikon SB900 so that I do not have to be in the line of sight for the infrared to work in triggering the flash.

When I am inside and people are working like this lady on her computer, you are just as prone to get raccoon eyes as outside. Why? The reason is the fluorescent lights above her are acting like the noon day sun. I have the photo assistant hold the flash and direct it to her face. The Nikon SB900 is zoomed to 200mm and therefore is light using a grid on studio strobes.  It is directing the light to just her face. 

To balance the flash to the room lights I used the lighter green gel that comes with the Nikon SB900 system. To get the correct lighting I took a custom light reading by using the ExpoDisc and had the assistant point the flash to the lens when I did this.  I tried both green gels that came with the camera and the lighter of the two gave the best result in balancing the color with the rest of the room.

The sync speed was set to Slow-Sync. I shot the photos in Aperture Priority on Auto ISO with the maximum shutter speed set to 1/100 so I would avoid the color shift that happens with fluorescent lights.

Tips for Off Camera Flash for +/- exposure problems

Off-Camera Flash Setup with Nikon Speedlights

When I first wrote about using off-camera flash, I realized I needed to revisit the topic and highlight some points.

ISO, Shutter Speed, Aperture, and +/-

A few things will affect your ability to get proper exposure. Let’s set each of these on a Nikon so that everything will work.

ISO – Be sure you are not using Auto ISO.  Start with the lowest ISO and adjust for various reasons.  For example, you may want to up the ISO to help open the background.

Enter the menu and set the Auto FP high sync speed to 250*. Auto FP High-Speed Sync is a flash mode used for fill-flash photography under brightly lit conditions. When set, you can shoot faster than 1/250 sync speed and do this only with your Nikon Speedlight system.

Set the flash setting to Slow Sync or Rear Sync.  I prefer Slow Sync for almost everything. If needed, this will fire the flash, and, the shutter may stay open for longer, but this will freeze the subject when you push the shutter.  If you choose Rear Sync, the flash will fire at the end of the shutter cycle. You may not know when the flash fires using this setting.

Please refer to the older posts on this to learn how to control the amount of light on the subject and how to control the background.

Ambient Light and Flash Combined

Improve your Flash photos by not lighting everything

Flash Over Exposing

First, be sure to turn the flash as far down as possible.  Using the SU-800, it will go to -3 Stops.

If you still feel overexposed, your ISO is usually set too high. Lower your ISO setting.

The background is too dark.

Crank up the ISO and double-check to be sure you have Slow Sync chosen. Otherwise, you will be syncing at the lowest shutter speed, about 1/60. You may need to be slower.

The background is controlled by the camera +/- exposure compensation dial and ISO.

Flash is too bright or dark.

Remember, the control for this is the SU-800 or the master setting in the pop-up flash on the models having this control.

Pass the Pen + Walk and Talk

Getting people doing something gives you better expressions.  I have two techniques for keeping people engaged when I have to set up a situation and then help it to become a real moment.

Pass the Pen

Many schools love to show the seminar setting for a class.  When you photograph in a room with everyone around the table Murphy’s Law states the action will be when their back are to you if you are photographing.

I have a few moments with everyone and explain my dilema.  If I shot this naturally it will take ten times longer due to I am on the wrong side of the table when someone starts to talk.  By the time I shift then the conversation has shifted.

I ask everyone to listen with their eyes and not just with their ears.  This really speeds up the number of usable images.

Typical conference table for a seminar class.

I then ask to borrow a pen and then give it to someone and tell everyone this person will talk.  I ask them to tell us what they did the other day or what they are planning to do that is exciting.  No one can interrupt them and they need to continue to talk until I say pass the pen. 

Even if you do not see the pen the person holds the attention of the group and lets me get the photos catching their various expressions.  Usually we get some laughs and good stories in the process.
Even in small groups I use the pen to help the subjects relax. 
This teacher used a similar technique for classroom discussions.  He had a ball of tape that he would toss to a student who raised their hand to answer a question. He tossed it to the student and when they were done they tossed it back to him.  He was quite impressive with his tosses and catches.
You can see as this student tosses the ball back he is engaged in the class. 

Walk and Talk

When you get people walking and talking they forget about you and engage quickly.  If it is just 2 people I have them walk close enough to feel each other bump occasionally.  I have one person talk and the other listen. I stress the importance of looking at each other and not the ground.  It is amazing when people are in a normal conversation they might look at the ground or off somewhere rather than looking at a person.  However, for a photo to communicate they are interested in each other they must have eye contact.

Again in the group situation I designate who is talking and ask everyone to give them their eye attention and not just their ears.  Off to the left my assistant is walking along with them out of camera range pointing a flash to them.  I normally use the Nikon SB900 with the Radio Poppers PX system to be sure the signal from the Nikon SU800 triggers the flash consistently.  The flash is zoomed out to about 28 setting to light the entire group.
Here you can see the tour guide helping tell the student about the campus.  Now for this photo I am using a Pocket Wizard Plus II to trigger the Alien Bees B1600 being fired off to the right of the group.  They are walking towards me as my VALS (Voice Activated Light Stand: AKA assistant) is carrying the light on a light stand and staying with the group out of the frame.
The couple is walking and talking to each other a good 50 yards from me. I like using the zoom lens so as they walk closer I just zoom out.  My VALS is carrying the Nikon SB900 with the Radio Poppers PX system being triggered by the Nikon SU800 on the camera.  I am shooting with the flash at normal setting and zoomed to 200.
The flash off camera really helps clean up the photo.  Often you will have a shadow on one or more of the people.  The other advantage of the flash winking in is it helps draw the audiences attention to the subjects.
Helping keep the dark skin tones with detail is really improved outside with the off camera flash.  I can power the flash up or down on the Nikon SU800.  Sometimes I make it +1 or -1 as compared to the exposure of the camera.  Only takes a second to look at the histogram and the LCD and see what might need adjusting.  By shooting RAW I still have lots of control in post processing, but being sure shadows have detail is really important when the dark areas can be the subjects face in a photo like this one here.
Take notice that we have details in the white shirt and the dark skin of the subjects in the photo.  This is will work in a printed piece easily.  Remember I have one person talking and the others listening with their eyes.

TTL hot shoe Flash vs Manual Studio Strobe

As your VALS is walking along with the Nikon SB900 as they vary their distance from the subject the camera still compensates being sure the power stays the same.  Of course the assistant has to remain pretty close with a hotshoe flash like the Nikon SB900 because it is not powerful enough to be much more than 10 to 15 feet away.

Now when you VALS is carrying a studio flash that means as they change the distance to the subject the exposure will change.  As they get closer the flash will get brighter and when they move away it will get darker.  However, with a studio strobe they can stay further away, since the strobes are much more powerful than a hot shoe flash.  I seldom am shooting with my Alienbees B1600 much more than 1/4 power.  I am usually at 1/8 power.  I do like to use a grid spot so I am not lighting up the ground leading up to the subjects.  I like to hit the faces and let it drop off a little.

Light diagrams for dancers (Part 2)

 
We liked the lights in the photo to give that backstage feel and decided to rotate some dancers through and go with the best one rather than changing things a great deal.

I like giving my clients options. We tried a few different looks with different dancers. You get a different look by swapping dancers in the same lighting scheme. If we had more time, you could have tried a few more outfits to give you more options.

Photographers need to understand that by shooting vertical and horizontal photos of the same subject, the client now has options that help them do much more from the time they invested with the photographer. More important than the options is the best photo looks even better when they see you tried to get more.

If a photographer only shows one image from the shoot, then a client will wonder why you didn’t try something more. By offering them a variety, they see how the photographer tried different things, but the subject didn’t make it happen. Type, of course, is why you sometimes pay for a professional model who can give you the best expression and body language options as the photographer is trying to do with camera angles, composition, and lighting. 

2
Lighting Diagram for the photo above

These photos are not all that different in lighting, but the difference is in the dancer, the way they pose, and the expression they bring to the moment.

Which one of these do you like the most? Can you tell me why you like it better than the other photos?

Business

Just like you vary the lights and the poses and do everything to give the client choices, do this in your estimates.

I try to offer some options whenever possible. The client may choose the cheapest package, but by providing the opportunity where you had unlimited funds, you could do this; the client appreciates your creativity and willingness to be flexible.

Sometimes I must give an even cheaper package and show that it lacks what they need to show them I can be flexible on price, but they might have to lose something.

I hope you remove the concept of going the 2nd Mile and give superior service by providing the client more options.

Sometimes the subject’s attitude, in combination with the composition and lighting, can create the mood you are looking for.  [NIKON D3S, 28.0-300.0 mm f/3.5-5.6, Mode = Manual, ISO 200, 1/160, ƒ/16, (35mm = 112)]
4
Lighting diagram for the photo of the dancer on the bar
We got a different look with very little change by just bringing the dancer forward and moving the grid to highlight her face.
6
Lighting diagram of a dancer in front of the bar