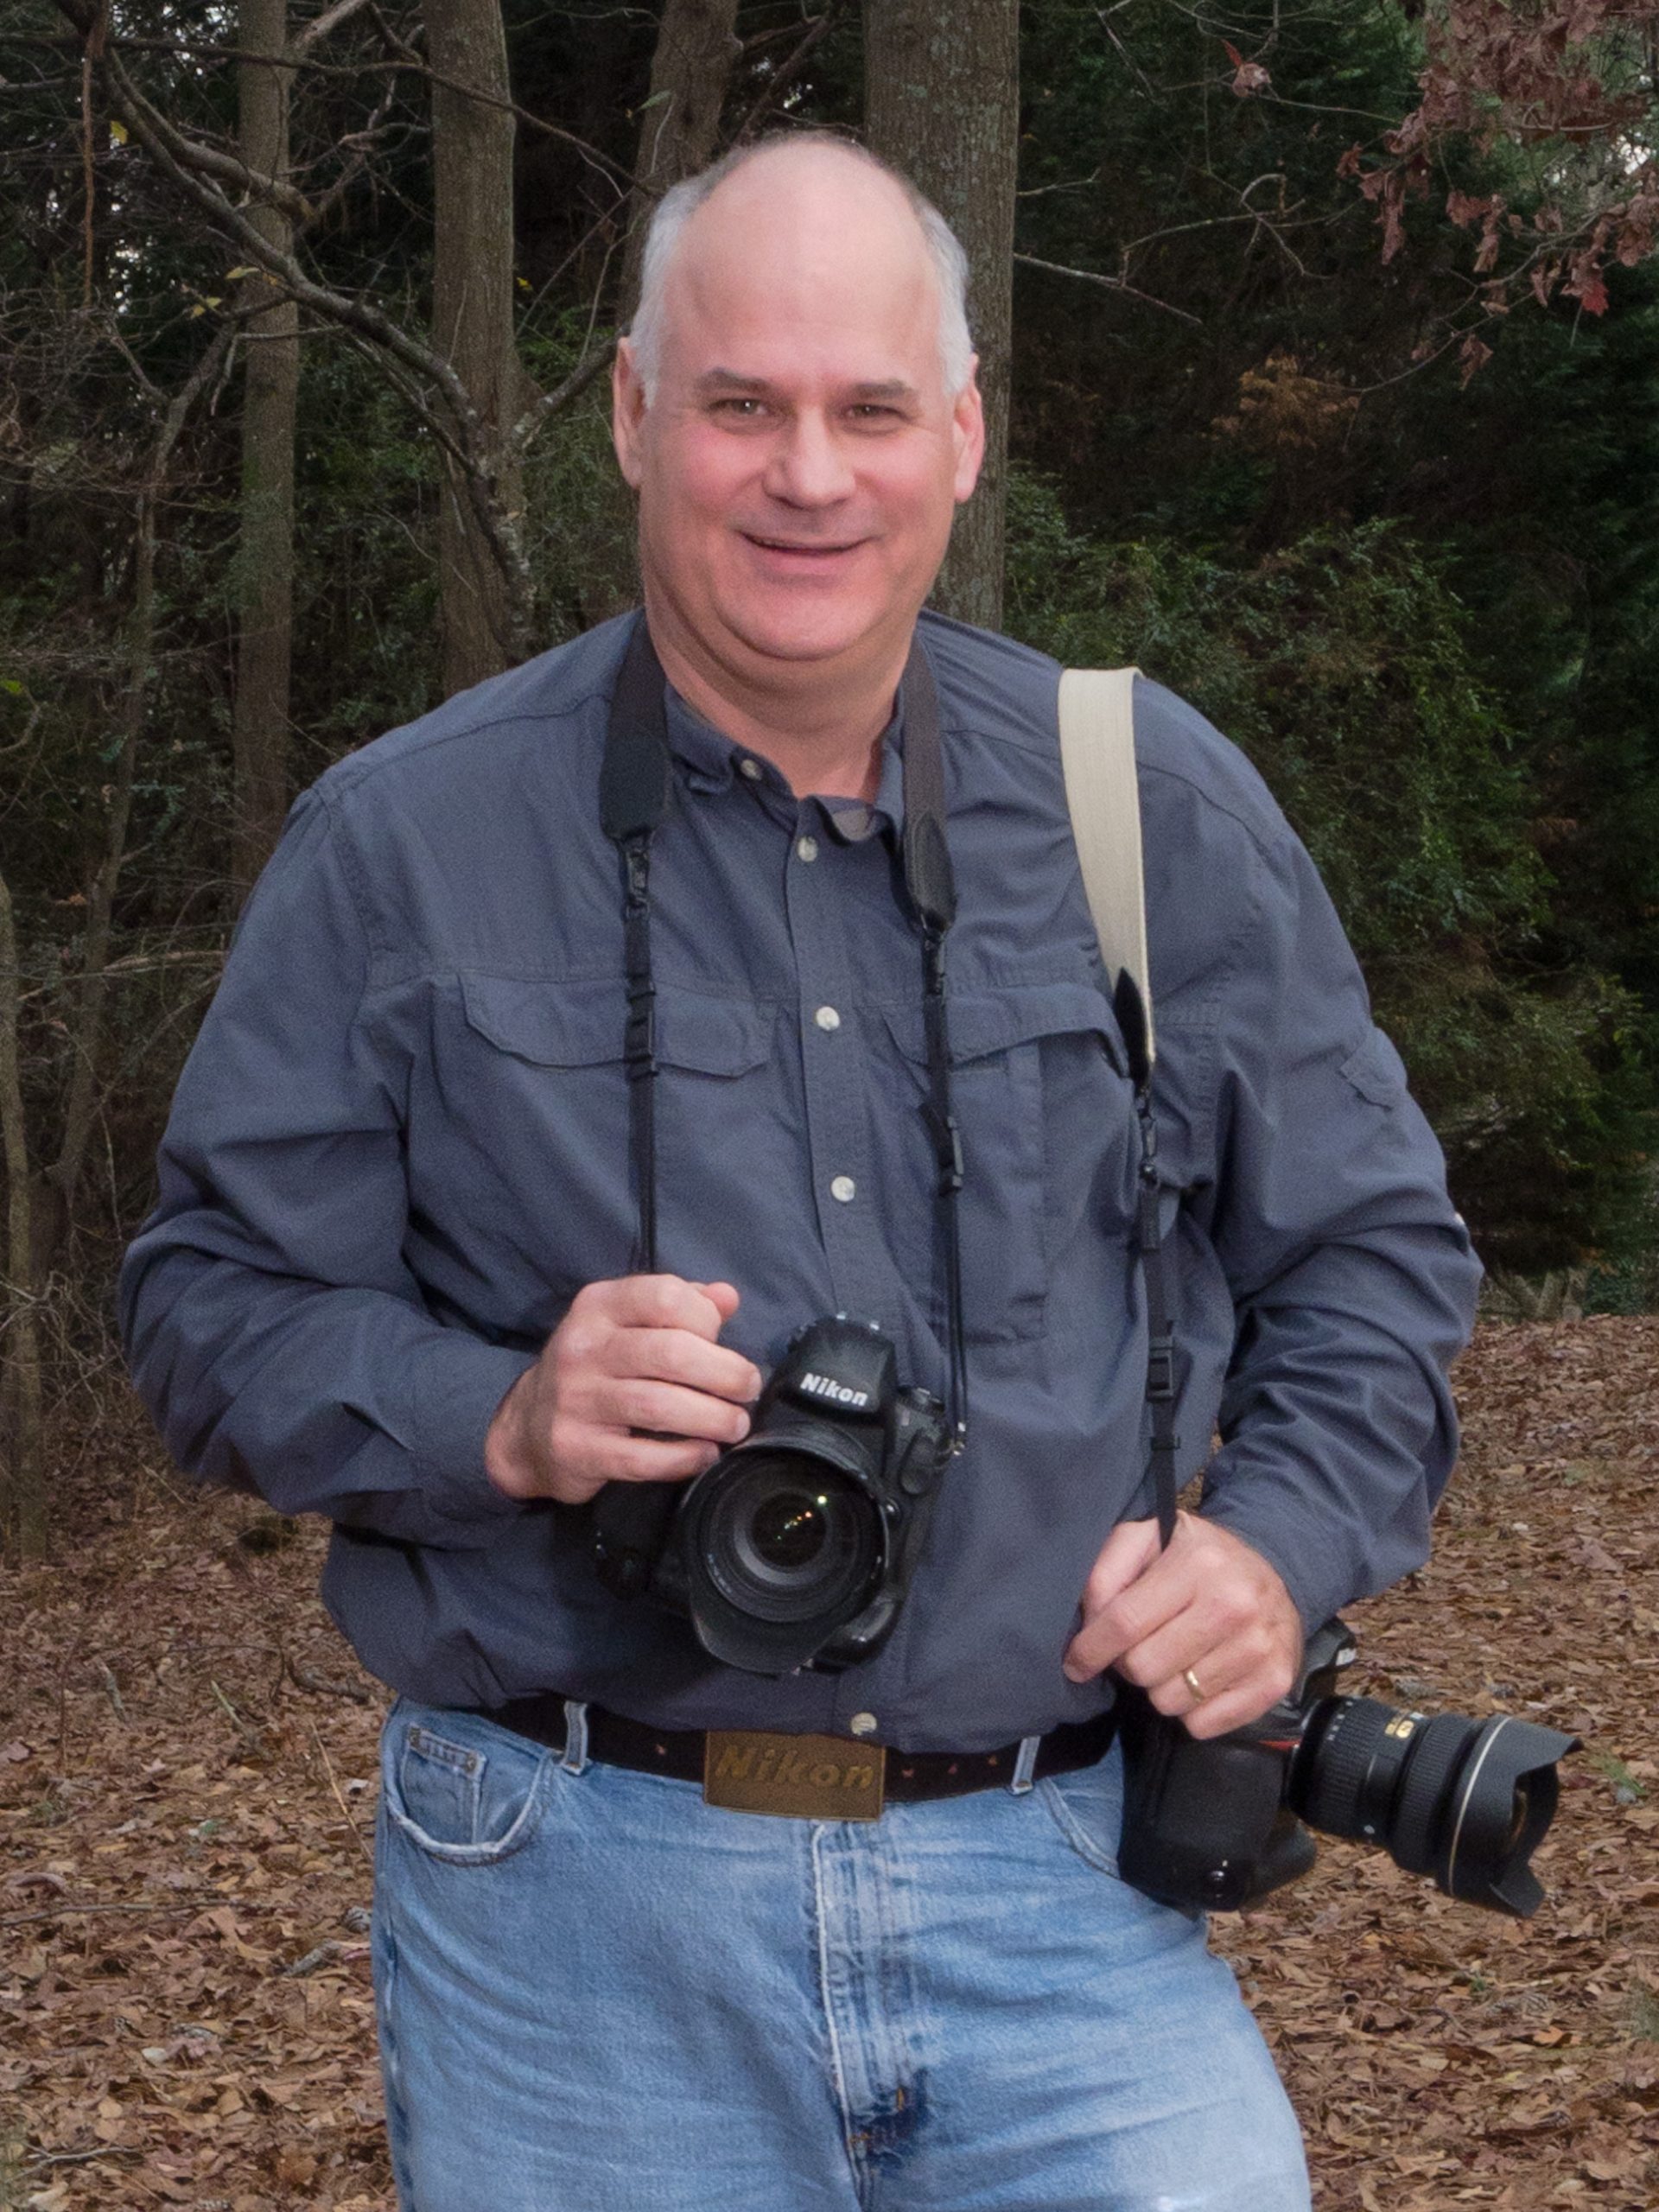
Nikon D4 Analyzing Your Focus

 
Nikon D4, Sigma 120-300mm f/2.8 DG OS HSM, Sigma 2x EX DG APO Autofocus Teleconverter, ISO 28735, ƒ/5.6, 1/2000

FOCUS

The most significant issue I find with many photographers’ sports images is out-of-focus photos. If your focus point is on the subject, it is most likely going to be in focus. So how do you know where your focus point was when you are editing your images?

I have two software solutions for tracking my focus.

Nikon ViewNX 2 software is a great way to see where your focus point was when you shot your image.

In the software, you just click on showing the Focus Point. So I have shown you here all you need to do.

Once you have this, you can see if your focus point was in the right place to be sure your subject is sharp and focused.

I just discovered a new software plugin for Adobe Lightroom called Show Focus Points.   It is a Beta version, and it is free, so if you don’t like it, you have not wasted any money.

I like the information this gives you that is missing in the Nikon Software.

The icons let you know more than just where you tracked for focusing.

I love the information that it gives you. It is a lot more detailed and helps me analyze what went wrong.

The only thing I don’t like is that you cannot make this stay up and just toggle between photos. I hope later on; Lightroom incorporates this into upgrades.

Covering Football: Action, Reaction and more

ACTION!

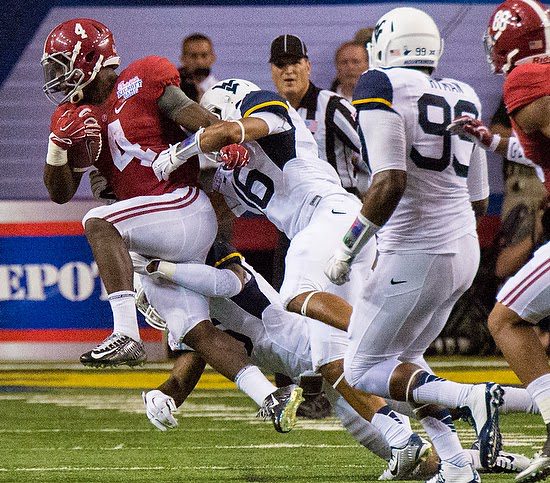
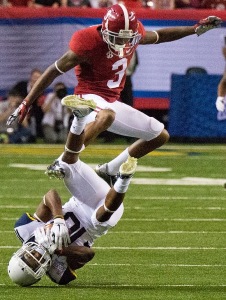
The most apparent photos from a football game are those of the action during the game. If you only shoot this, you will miss much of what the game is about.

Nikon D4,  Sigma 120-300mm f/2.8 DG OS HSM, Sigma 2x EX DG APO Autofocus Teleconverter, ISO 51200, ƒ/5.6, 1/1600

REACTION

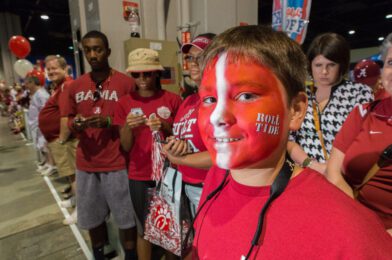
The fans care about the game and its outcome. Look for photos in the stands. The fans’ reactions are just as compelling as the action on the field.

Nikon D4,  Sigma 120-300mm f/2.8 DG OS HSM, Sigma 2x EX DG APO Autofocus Teleconverter, ISO 25600, ƒ/5.6, 1/2000

Go back and shoot more action. It is best to get the big plays. You can turn the camera away from the field during the time between plays.

Nikon D4,  Sigma 120-300mm f/2.8 DG OS HSM, Sigma 2x EX DG APO Autofocus Teleconverter, ISO 25600, ƒ/5.6, 1/800

A lot happens in those stands. So keep your ears tuned in around you as well as your eyes. 

Nikon D4,  Sigma 120-300mm f/2.8 DG OS HSM, ISO 25600, ƒ/5.6, 1/1000

After central touchdowns, many school cheerleaders have traditions of celebrating on the sideline or, like here, in the endzone. 

Nikon D4,  Sigma 120-300mm f/2.8 DG OS HSM, Sigma 2x EX DG APO Autofocus Teleconverter, ISO 25600, ƒ/5.6, 1/2000

After big plays like this one, fans react. Sometimes, coaches interact with the referees on the sidelines. 

Nikon D4,  Sigma 120-300mm f/2.8 DG OS HSM, Sigma 2x EX DG APO Autofocus Teleconverter, ISO 28735, ƒ/5.6, 1/2000

The idea is if you are at a game, it is a big event with many people doing different things and roles. 

Nikon D4,  Sigma 120-300mm f/2.8 DG OS HSM, Sigma 2x EX DG APO Autofocus Teleconverter, ISO 18102, ƒ/5.6, 1/2000

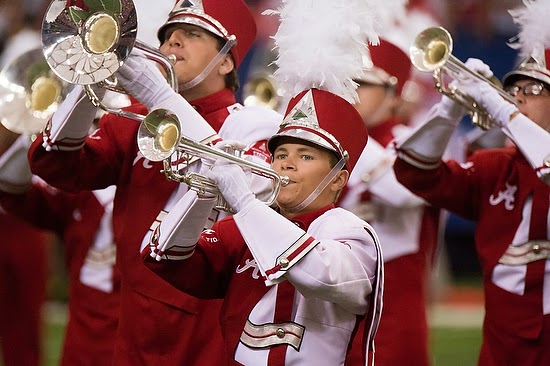
Bands perform before the game, during the game, and at halftime. College bands are a college course, and the games are concerts for them. 

Nikon D4,  Sigma 120-300mm f/2.8 DG OS HSM, Sigma 2x EX DG APO Autofocus Teleconverter, ISO 10000, ƒ/5.6, 1/2000

Not so obvious 

Nikon D4,  Nikon 14-24mm ƒ/2.8, ISO 560, ƒ/5.6, 1/100

I take photos of people I work with on the sidelines during games. I try to send them a copy of the picture. Taking and giving snapshots to volunteers helps build relationships so that the next round, when I need some help with access, these friends now see me as someone they want to help. Look for different angles. 

Nikon D4,  Sigma 120-300mm f/2.8 DG OS HSM, Sigma 2x EX DG APO Autofocus Teleconverter, ISO 25600, ƒ/5.6, 1/1600

I like to go up into or onto press boxes to get a different perspective of the game. Don’t shoot all the action from the same position the entire game. Don’t move around so much that you are missing the action. 

Nikon D4,  Sigma 120-300mm f/2.8 DG OS HSM, Sigma 2x EX DG APO Autofocus Teleconverter, ISO 25600, ƒ/5.6, 1/800

Hopefully, your coverage will cheer editors up. The key is to give them variety. Hopefully, these tips will help you look for different photos at your next football game. 

Nikon D4,  Nikon 14-24mm ƒ/2.8, ISO 4000, ƒ/9, 1/200

Don’t leave early 

Stay shooting after the game. There are still photos to be taken.

Nikon D4,  Sigma 70-200mm f/2.8 EX DG APO OS HSM, ISO 800, ƒ/5.6, 1/100

Working under Mercury-Vapor Lights

If you read my blog regularly, my favorite way to set my white balance is to do a custom white balance setting using ExpoDisc. So here is a quick reminder–skip down if you want to see another way to set your white balance.

Remember under fluorescent and mercury vapor to set the white balance at shutter speeds of 1/100 or slower. Then, after custom white balancing the camera, you can later shoot under a faster shutter speed.

ExposDisc goes in front of the lens, and then you use it to get an incident reading rather than a reflective reading of the light.
Notice the direction of the light hitting the subject. Next, you move to the same position to get the light reading below.
Point the camera toward the direction of the light falling on the subject.

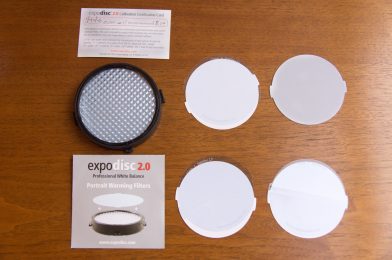
The latest upgraded version has introduced the warming filters you place before the ExpoDisc. They are light blue, and since the camera tries to neutralize the colors will add yellow to your photos, thus warming them up. The actual color blends cyan and blue, adding red/yellow to your photos. Depending on your taste, they come in different densities to allow you to add just a little or more.

Presets in Nikon D4

Check your manual for your camera because this is for the Nikon D4. Then, somewhere in your menu, you can adjust using presets for white balance.


On my Nikon D4, in the menu for White Balance, you can choose up to seven different presets for fluorescent. However, I have found a significant problem trying this method; it isn’t easy to pick the right color because the monitor on the back of the camera isn’t that easy to see color in all situations.

Fluorescent lamps are manufactured to alter the mixture of phosphors inside the tube. Warm-white fluorescents have a color spectrum of 2700 K and are famous for residential lighting. Neutral-white fluorescents have a color spectrum of 3000 K or 3500 K. Cool-white fluorescents have a color spectrum of 4100 K and are renowned for office lighting. Finally, daylight fluorescents have a color spectrum of 5000 K to 6500 K, bluish-white.

Note that on the Nikon D4, you also have a preset for those awful Mercury-Vapor lights. Sometimes I have found that I prefer one of the fluorescent settings under some of the newer mercury-vapor lights when using this system instead of the custom white balance.

Shooting 11 assignments in 4 1/2 hours

 
Nikon D4, 14-24mm, ISO 4000, ƒ/7.1, 1/100

It is widespread when I call photo assistants to tell them I am unsure about what we are doing today. For example, we may be setting up and taking lights down all day long as we go around a college or school campus.

It is widespread for me to shoot what would typically be about 10 to 12 assignments, all packed into one day. So, for example, I filled in 11 locations in 1/2 day on this assignment.

Fuji X-E2, 18-55mm, ISO 400, ƒ/5.6, 1/640

Here is my shot list for Thursday 1/2 day of shooting at a Catholic High School:

  • Science Lab
  • Helicopter Aerial Photo Shoot of Campus
  • Students by statues of Mary & Jesus
    •  Female by herself
    • Male by himself
    • Male and Female
  • Drums from around the World Class
  • Spanish Class
  • Computer Class teaching Adobe Illustrator
  • A small group in the Library
  • Priest Teaching class
  • Priests with students and talking in the lobby
  • Calculus Class
  • Robotics Class

My clients’ skills are to walk into any situation and come away with photos that will engage their audience. Any problem can require special lighting skills to shoot available light and even knowing how to shoot aerial images of campus.

There is no time to brainstorm and come up with many ideas. Instead, I deviseth an approach for a couple of minutes and then execute it in about 30 to 40 minutes. This process includes setting up studio strobes and taking them to our following location. Again, I work with two assistants to make this go quickly.

The hardest part is the client who has not worked with a professional who will make each location look the very best by creating light may not be aware of the time it takes for each site. The client’s reference is to see the local newspaper reporter come in and take a few photos and then write a story. Those photographers typically use no flash or on-camera flash due to the speed they need to work and the fact that most of the time, the photo is Black and White.

Fuji X-E2, 18-55mm, ISO 250, ƒ/5.6, 1/500

 With 30+ years of shooting for colleges, national publications, and major brands, I have enough experience to see the big picture from a high altitude for my clients. So if you need a great perspective to pick the best visual approach for your storytelling, give me a call. Also, call me to schedule a class if you want to learn how to do this yourself.

Underexpose a scene and flash just the subject

Nikon D4, 14-24mm, ISO 11400, ƒ/10, 1/100—off-camera flash using the Neewer TT850 flash & Neewer 433MHz Wireless 16 Channel Flash Remote Trigger with flash at 1/128 Power

You want your photos to pop, then light the subject but not everything else in your photo.

Where do you put the flash? Off camera and create a triangle between you the flash and the subject.

I continue to tell my assistants to just create a triangle and point the flash at the subjects face.

Nikon D4, 14-24mm, ISO 1800, ƒ/14, 1/100—off-camera flash using the Neewer TT850 flash & Neewer 433MHz Wireless 16 Channel Flash Remote Trigger with flash at 1/8 Power

I just shoot the photo and then look at the LCD on the camera. Couple things I am looking for in the photo.

I want to be sure my flash isn’t overpowering and washing out the skin tones. I do this by seeing the photo and checking the histogram. Here is the histogram for the photo above.

I am watching my shutter speed with the Neewer TT850 since it must sync at 1/250 or slower. I am also trying to be sure the background is not too dark or light.

I typically can just set the camera to -1/3 to up to -1 stop underexposed and then just watch the flash setting on the camera.

The radio remote will change the setting on the flash as long as they are on the same channel. Here the flash is set to 1/32 power. You can adjust the power from 1/128th to full power in 1/3 stop increments. Basically a lot of control.

Nikon D4, 14-24mm, ISO 1600, ƒ/14, 1/100—off-camera flash using the Neewer TT850 flash & Neewer 433MHz Wireless 16 Channel Flash Remote Trigger with flash at 1/8 Power

I have found the when I shoot on the Nikon TTL system I cannot control the flash in manual mode. So the flash is very inconsistent and depends on the scene. I was dialing it up or down by 3 stops, but now with the manual setting on the Neewer system I actually have more control.

I am giving up the high speed sync, but that is only necessary some of the time. Most of the time I prefer manual mode where I am in control.

Nikon D4, 14-24mm, ISO 110, ƒ/7.1, 1/100—off-camera flash using the Neewer TT850 flash & Neewer 433MHz Wireless 16 Channel Flash Remote Trigger with flash at 1/4 Power

I like using the light to direct the audience to what I think is most important in the scene. Available light tends to often light everything equally. I don’t like those type of photos.

Nikon D4, 14-24mm, ISO 100, ƒ/11, 1/160—off-camera flash using the Neewer TT850 flash & Neewer 433MHz Wireless 16 Channel Flash Remote Trigger with flash at 1/32 Power

See the photo above with the flash almost not even lighting the people. I then turn the power up to full and look at the difference.

Nikon D4, 14-24mm, ISO 1800, ƒ/14, 1/100—off-camera flash using the Neewer TT850 flash & Neewer 433MHz Wireless 16 Channel Flash Remote Trigger with flash at Full Power

I like the flash popping a subject out from the scene.

I also used the MagMod system to put a 1/2 CTO gel in front of the flash for all the photos.

Love the Nikon D4 & Sigma 120-300mm f/2.8 DG OS HSM for Football

Nikon D4, Sigma 120-300mm f/2.8 DG OS HSM w/ Sigma 2x, ISO 36204, ƒ/5.6, 1/2000

There are a few things that are fundamental technical aspects of a fantastic sports photo:

  • Well exposed
  • In focus
  • Sharp

The Nikon D4 and the Sigma 120-300mm ƒ/2.8 DG OS HSM with the Sigma 2x converter helps me to get the moments and be just right.

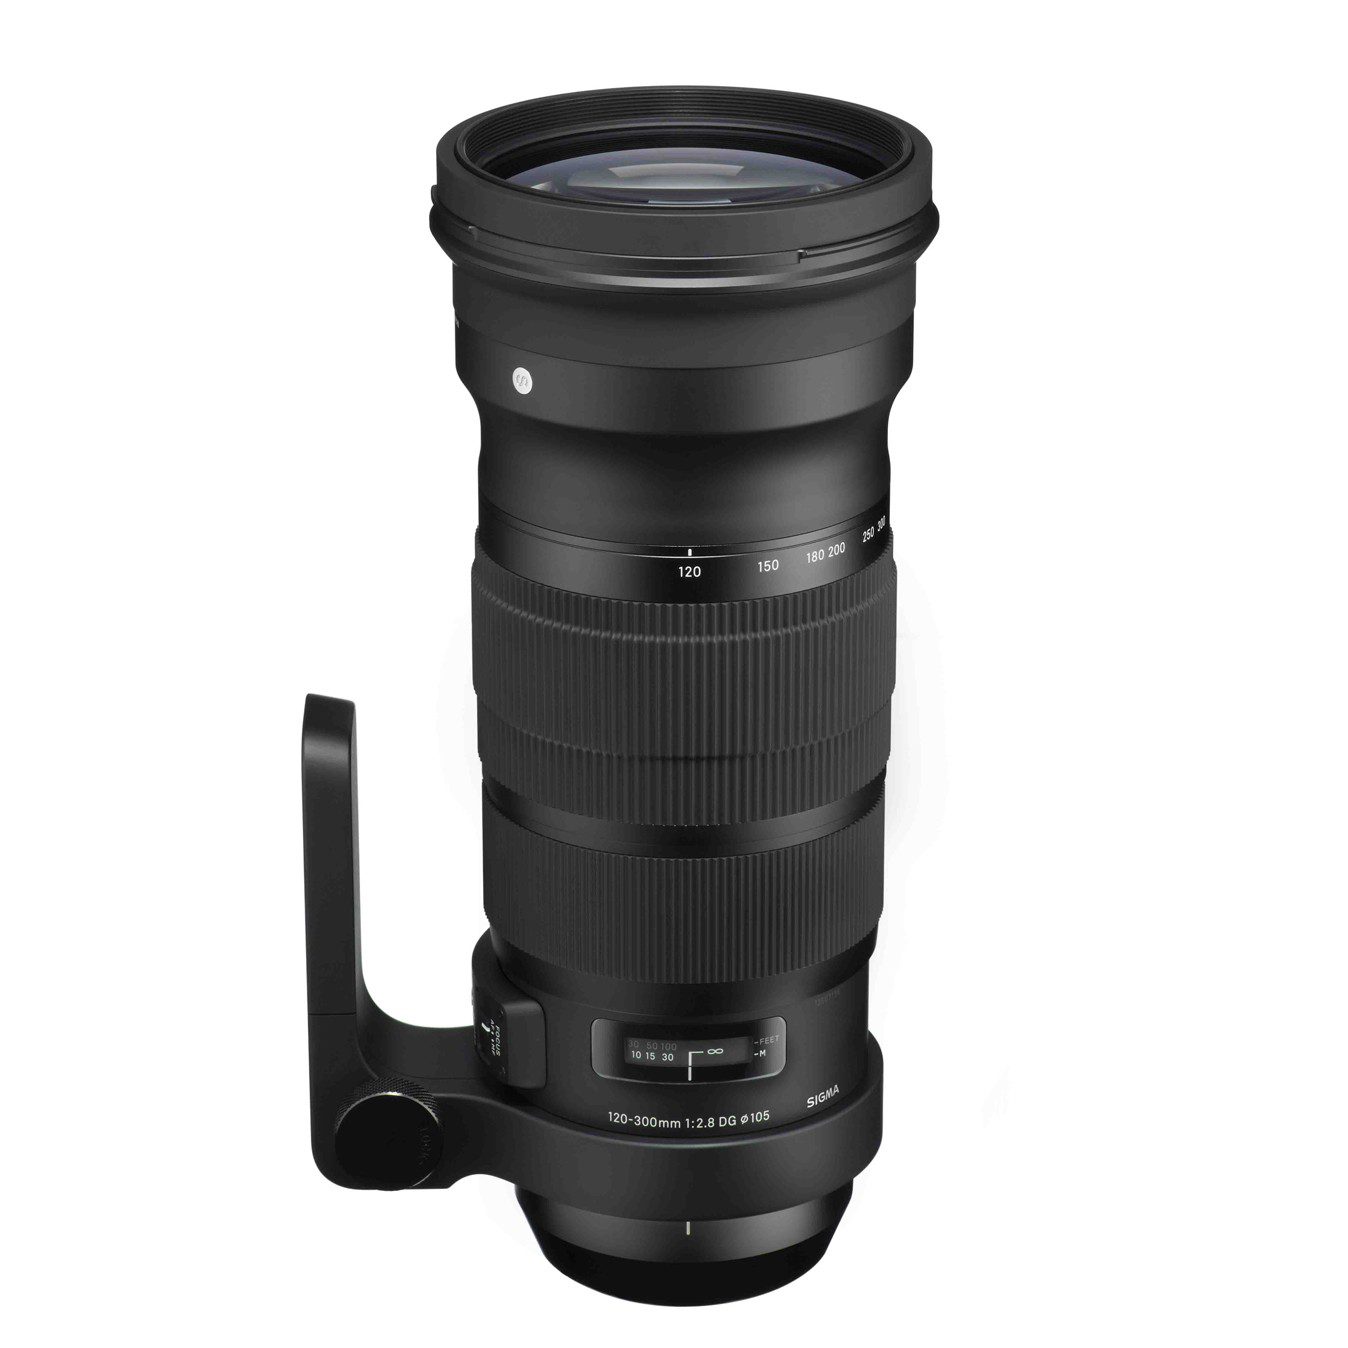
The Sigma 120-300mm f/2.8 DG OS HSM Lens is a telephoto zoom lens featuring a fast, constant f/2.8 maximum aperture. This lens is the first designed under Sigma’s new Sports line, making it well-suited for fast-moving subjects such as wildlife, nature, aviation, racing, and other similar situations.

The built-in OS (Optical Stabilizer) system reduces the appearance of camera shake up to four stops, resulting in a long lens that You can easily use handheld and under low-light conditions. The OS system has two modes; one for general shooting applications and one better suited for panning shots of moving subjects. You can further adjust the OS system to suit your needs through the USB Dock.

 
Nikon D4, Sigma 120-300mm f/2.8 DG OS HSM w/ Sigma 2x, ISO 36204, ƒ/5.6, 1/2000 [While this is a little noisy for my tastes, the dynamic range is pretty good, and the critical thing is it is in focus, sharp and well exposed]

The Nikon D4 camera features a 16.2Mp 36 x 23.9mm CMOS sensor with Nikon’s FX format and the EXPEED3 image processor. As a result, the camera can now extend ISO sensitivity as low as ISO 50 or as high as 204,800 with a standard range of 100-12,800 ISO. Additionally, continuous shooting in FX format for up to 200 shots in ten frames per second ensures the camera will not miss the decisive moment.

D4’s AF sensor utilizes 51 strategically placed AF points designed to capture subjects as you choose: by working together like a net to capture moving subjects or for pinpoint accuracy. Use a single AF point to home in on the exact place on your chosen subject. The 51 AF points focus on an impressive low light level of -2 EV.

D4 aligns its 15 cross-type sensors in the center to detect contrast for both vertical and horizontal lines with lenses f/5.6 or faster. The five central points and three points to the left and right in the middle line are compatible with f/8. With the Sigma 2x converter, the lens is ƒ/5.6, and the D4 could still autofocus in a low light level of -2 EV at ISO 100. Of course, I had a lot more light than that in the Georgia Dome.


ISO 51200 & 25600 with Sigma 120-300mm on Nikon D4

Nikon D4, Sigma 120-300mm f/2.8 DG OS HSM w/ Sigma 2x, ISO 51200, ƒ/5.6, 1/2000

Chick-fil-A Kickoff

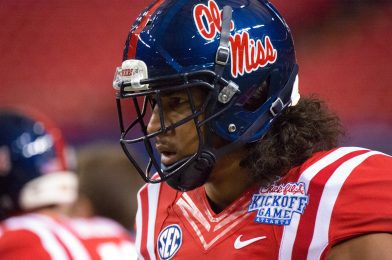
Last night I had the privilege to shoot the Chick-fil-A Kickoff Game between Ole Miss and Boise State. Ole Miss pulled away in the second half from Boise State for a 35—13 victory.

I enjoyed shooting with my Sigma 120-300mm f/2.8 DG OS HSM. I also added a Sigma 2x converter to my gear, which gave me a 600mm ƒ/5.6 lens. So I made the photo with that combination.

Yin-Yang

Photography has more to do with Yin-Yang than anything I have ever encountered.

Yin-Yang is a concept used to describe how opposite or contrary forces are complementary, interconnected, and interdependent in the natural world and how they give rise to each other as they interrelate.

When you change any one of these three, you must adjust one of the other to keep a proper exposure. The Exposure Triangle is the trade-off made all the time in photography.

Nikon D4, Sigma 120-300mm f/2.8 DG OS HSM, ISO 16000, ƒ/4, 1/2000

Sports Settings

Here are my default sports settings for a game with these three:

  • Aperture—While I love the Bokeh at wide open, I tend to shoot around ƒ/4 or ƒ/5.6
  • Shutter Speed—1/2000 If maxing out to the highest ISO, then any need for more light, the shutter speed will drop below 1/2000 when using the Auto ISO settings.
  • ISO—Auto ISO 100-12800, but for some of this game, 100-51200
Warning about Auto ISO—you cannot use manual and keep a constant setting. The meter will adjust the ISO up and down. To indeed shoot Manual Mode, you must turn off the Auto ISO.
Nikon D4, Sigma 120-300mm f/2.8 DG OS HSM, ISO 7200, ƒ/2.8, 1/2000
I love the Bokeh on the Sigma 120-300mm, and with the Ole, Miss dancer opened up to ƒ/2.8. However, for action, I find while I love the ƒ/2.8, I prefer a little more depth-of-field to keep them tact sharp.

Silhouette AND Reveal @ The College Football Hall of Fame Grand Opening

Nikon D4, 14-24mm, ISO 100, ƒ/8, 1/200—off-camera flash using the Neewer TT850 flash & Neewer 433MHz Wireless 16 Channel Flash Remote Trigger With Flash at Full Power

Nikon D4, 14-24mm, ISO 100, ƒ/8, 1/200 NO FLASH

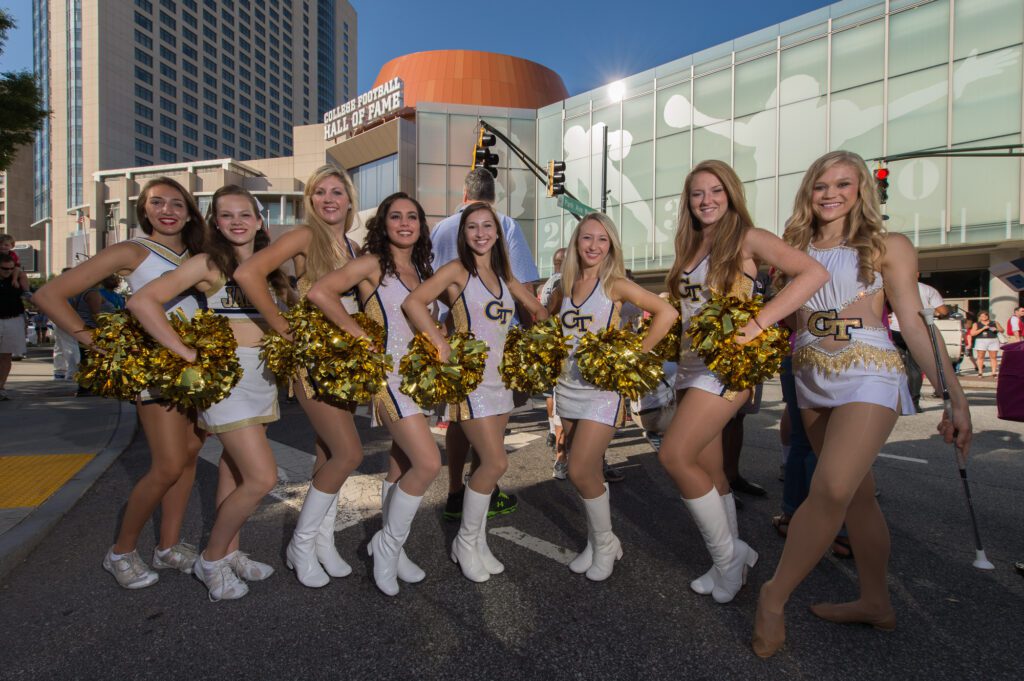
I covered the Grand Opening of the College Football Hall of Fame downtown in Atlanta, Georgia. Here are a couple of photos from today.

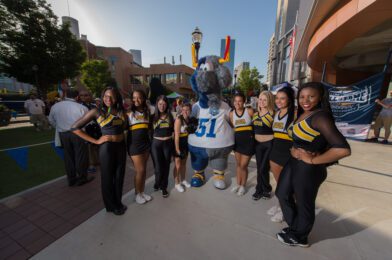
To me, there is a HUGE difference between the two photos above. Don’t you agree?

I think your eyes go to the cheerleaders’ faces much more with the flash photo, where I believe the background draws your eyes first.

I like keeping my flash off-camera all I can, and my assistant is holding the flash off to my left and the Cheerleaders’ right.

Here are more examples of using the same technique. The only thing I am watching is keeping my shutter speed sync below 1/250 since I am using the Neewer flash, but I can shoot 600 full-power shots on one fully charged battery. I carried a second battery and barely had to use it.

Nikon D4, 14-24mm, ISO 100, ƒ/11, 1/200—off-camera flash using the Neewer TT850 flash & Neewer 433MHz Wireless 16 Channel Flash Remote Trigger with flash at Full Power

Chick-fil-A is the primary sponsor of the College Football Hall of Fame and was there giving out samples of their new grilled nuggets. Finding someone with a full tray took me a while because they were going so fast at the event.

 Here I wanted to capture them and the CFHOF behind them. 

Nikon D4, 14-24mm, ISO 100, ƒ/11, 1/200—off-camera flash using the Neewer TT850 flash & Neewer 433MHz Wireless 16 Channel Flash Remote Trigger with flash at Full Power

The Georgia Tech cheerleaders and the lady sampling the grilled nuggets were in the shade, and I “Revealed” them with the flash, or they would have been a “Silhouette.” 

Nikon D4, 28-300mm, ISO 125, ƒ/8, 1/200—off-camera flash using the Neewer TT850 flash & Neewer 433MHz Wireless 16 Channel Flash Remote Trigger with flash at Full Power

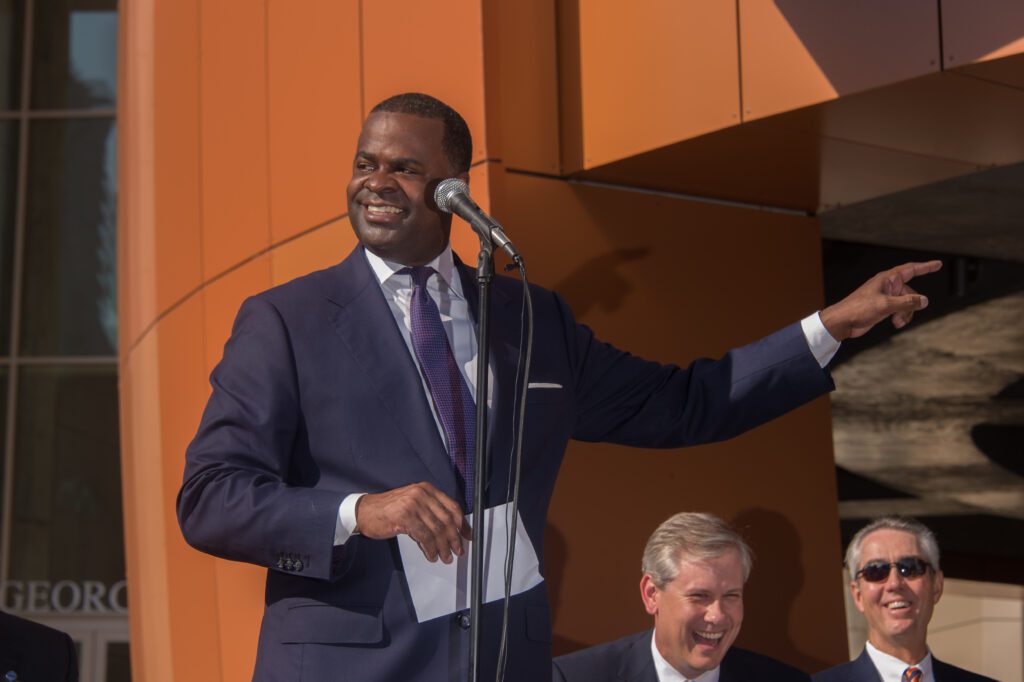
The light was splitting their faces on the stage where speakers like Bill Curry and Mayor Kasim Reed spoke. One side in direct sunlight and the other in the shade. Using the same small hot shoe flash, I had my assistant stand straight in front of them and give them a classic fill light. 

Nikon D4, 28-300mm, ISO 160, ƒ/8, 1/200—off-camera flash using the Neewer TT850 flash & Neewer 433MHz Wireless 16 Channel Flash Remote Trigger with flash at Full Power

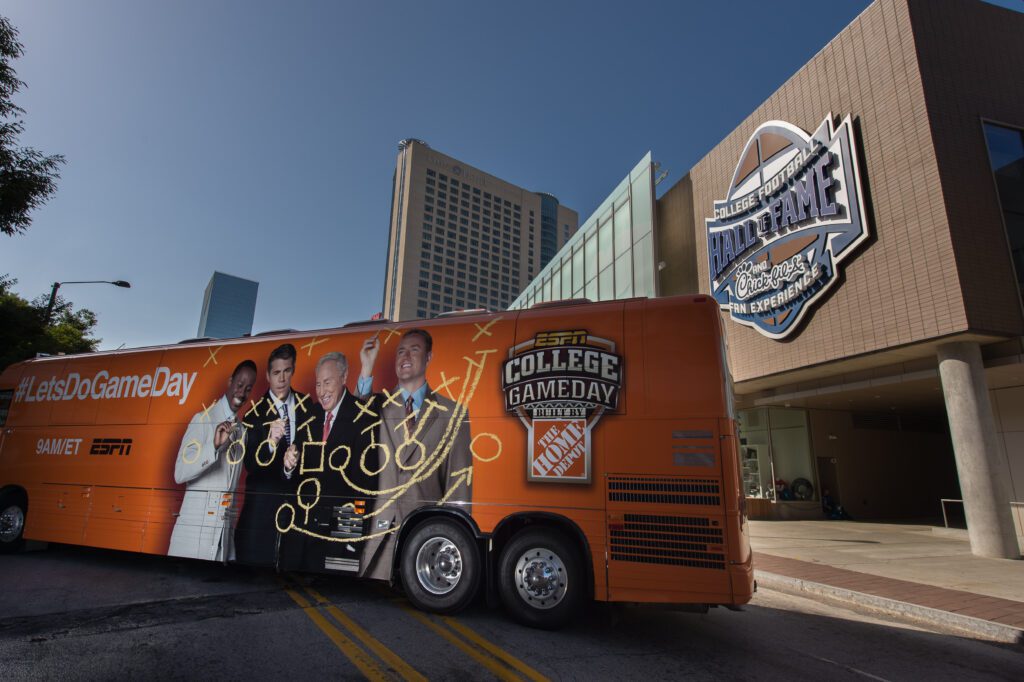
For my departing shot of the day, I saw the ESPN College Game Day bus, but to show the College Football Hall of Fame behind it was challenging; the side of the bus was in the shade, but the CFHOF was in direct sunlight. So I just put the flash on the ground near the bus [I let my assistant go just before I saw this], and on full power, I was able to light up the Sports Anchors of the show on the side of the bus.

[NIKON D4, 14.0-24.0 mm f/2.8, Mode = Aperture Priority, ISO 100, 1/250, ƒ/8, (35mm = 19), off-camera flash using the Neewer TT850 flash & Neewer 433MHz Wireless 16 Channel Flash Remote Trigger with flash at Full Power]

A week from today, the show will be live inside the CFHOF during the Chick-fil-A Kickoff game between Alabama and West Virginia. Why did I use flash so much today? I knew there were be a LOT of media there. My client will be able to see their coverage as well as mine. Like the game of football, I needed to win the quality coverage contest and could not afford ever to have others outdo my coverage. I can afford them to match it, but I can’t afford other media to show better coverage, and I continue to be hired by clients.

Storytellers know thy purpose

The shortest distance isn’t always the best route

Know Thyself

“He who knows others is wise; he who knows himself is enlightened.”
― Lao Tzu

We are familiar with the saying to “Know Thyself” because you can accomplish so much more through understanding yourself. You learn your strengths and limits, which will help you navigate life.

Storytellers need to know the purpose of a story. Why were you hired to tell a story?

I have been driving many times in the Atlanta traffic when suddenly my GPS will alert me to traffic and alternative route to my destination.

Knowing your destination, the GPS helps you navigate and get you to your location in the quickest amount of time.

Great Teachers

One of the best examples I experienced over and over growing up was when a student would ask my teacher a question. The teachers I have the fondest memories of are the ones who could take almost any question and use it to engage the class on the subject. My worst memories are of the teachers who, like in the top illustration, use that red-line approach to everything. They somewhat answer the question but are quick to say something like, “now let’s get back to …” and shut down the class in the process.

The difference is that great teachers know their subject well and know their lesson plans. They see the goal and purpose of the lesson that day. They are willing to take a question and, like the GPS, use this alternative route, which is better than proceeding into what will be a traffic jam.

Great Storytellers are Great Listeners

I have traveled with some of the best writers and loved learning from them. These were all journalists, and we were working together on stories. I was capturing the still images and video while they were responsible for the text.

I have also watched too many writers who are so self-absorbed with where they think the story should go that they kill the story. I remember more than once with more than one writer where they asked a question and didn’t listen either with their ears or eyes and missed the traffic jam taking place and hearing the subject helping to redirect them to an alternative route.

 
Chick-fil-A Cow out on Marietta Street in front of the new restaurant adjacent to the College Football Hall of Fame. [Nikon D4, 14-24mm, ISO 800, ƒ/8, 1/800—Off-camera fill-flash using the Nikon SB-900.  The flash is on the Pocketwizard TT5 and being triggered by the Mini TT1 on the Camera with the AC3 to control the output of the flash]

Today I am sent by news outlets and corporations to capture stories for their audiences. For example, just this week, I was covering the grand opening of Chick-fil-A at The College Football Hall of Fame. My audience was the internal staff and franchise owners. The Associated Press photographer covered the story, and his audience was the public.

Associated Press photographer Dan Goldberg interviews a couple. [Fuji X-E2, 18-55mm, ISO 6400, ƒ/6.4, 1/140]

How the new Chick-fil-A restaurant impacted, those audiences was my assignment. The AP Photographer and I were covering the same subject. Still, because we knew our purpose, we could adjust throughout the story as the subjects in the story helped inform us of new content relevant to the story.

My primary concern in all my storytelling is the subject. If I aim to please the subject and the subject would be happy with the story, then the accuracy is much greater than focusing on what someone else told me about the narrative storyline.

Just like the teacher who knows the purpose of their lesson plan can adjust to bring the class along, I, too, must adapt to be sure I capture how this new restaurant will impact my audience.

Dan Cathy is with one of the staff members from the College Football Hall of Fame reading the story of “A Better Way Ministries” person who built the table. [Nikon D4, 28-300mm, ISO 6400, ƒ/8, 1/200]

As you can see in this photo, I needed my dancing shoes when Dan Cathy, the president of Chick-fil-A, crawled under a table and started talking to everyone from under the table. Just like when the teacher gets a question from a student who can help engage the classroom even more in the story, this was my question moment.

The plaque on top of the table tells the story of the table. [Nikon D4, 28-300mm, ISO 1000, ƒ/5.6, 1/160]

You can read about the table in the photo above. Dan Cathy talked about how this partnership with A Better Way Ministries was similar to their new coffee company Thrive Farmers. The process of picking Thrive Farmers was the realization there was a story there of the farmers. The artisans who made the table have a story, and Chick-fil-A asked them to take a Sharpie and write their account under the table.

The artisan’s story. [Fuji X-E2, 18-55mm, ISO 6400, ƒ/2.8, 1/500]

This unexpected detour helped me reach my destination better than without the detour. You see, the story of how Chick-fil-A was interested in impacting the lives of the artisans and coffee growers by buying their products is how they were impacting those communities. It did a great job setting up the story of how this restaurant will impact the neighborhood near the College Football Hall of Fame.

Highways vs. Back Roads

Great storytellers know that those detours compare the interstate highway to the back roads. Of course, interstate highways are like the straight line from point A to point B, but rarely are they as scenic as the backroads.

I know that when I am the passenger on a drive on the interstate, I am much more likely to take a nap than on the backroads.

The lesson here is simple. If you know why you are doing the story, you will learn how to navigate and take advantage of the opportunities the subjects give you, making your account success.

Photography Tips for Covering Football

 
Nikon D2X, Sigma 120-300mm ƒ/2.8, ISO 400, ƒ/2.8, 1/1250

Action Shots

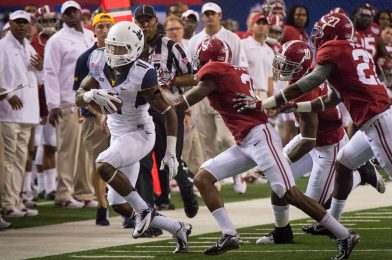
This blog post is about the action on the field and not reactions to that action.

Three things I think you should strive to have in all your action shots on the field:

  1. The Ball
  2. Expression
  3. The competition
While not every great sports photo will have all three, the overwhelming majority of them will have all three elements.


Definition of Sport—an activity involving physical exertion and skill in which an individual or team competes against another or others for entertainment.

Nikon D4, Sigma 120-300mm ƒ/2.8, ISO 12800, ƒ/5.6, 1/1000

I like capturing the expressions of football players. An expression shows the “physical exertion” of players. So the key is to put me in a place where I will see their faces more often.

 
Nikon D4, Sigma 120-300mm ƒ/2.8, ISO 12800, ƒ/5.6, 1/1000

When possible, I recommend covering one team. this way, you can show their team’s faces on offense and defense without running up and down the field over and over to get in front of them.

I generally try to shoot way down the field in front of the teams and prefer standing in the end zones. If they are far away, I use longer glass, like a 600mm lens, and when they are on the goal line, I may switch to my 70-200mm lens.

Why the endzone? Well, they are generally running in that direction and trying to cross the goal line. So when you are on the sideline, they may run slightly in your path, but they could also be running to the other sideline.

Nikon D4, Sigma 120-300mm ƒ/2.8, ISO 12800, ƒ/5.6, 1/1250

While my knees get sore from kneeling most of the time, I think you get better “athletic” moments. When you are low, you make the football players look much higher off the ground when they jump than when you stand. We like our star running backs to look like Roman gods flying when necessary. Remember, the purpose of the sport is entertainment. Flying because I am down low is a lot more exciting than from above, where they look closer to the ground.

Nikon D3S, Sigma 120-300mm ƒ/2.8 with 1.4 converters, ISO 6400, ƒ/4, 1/2000

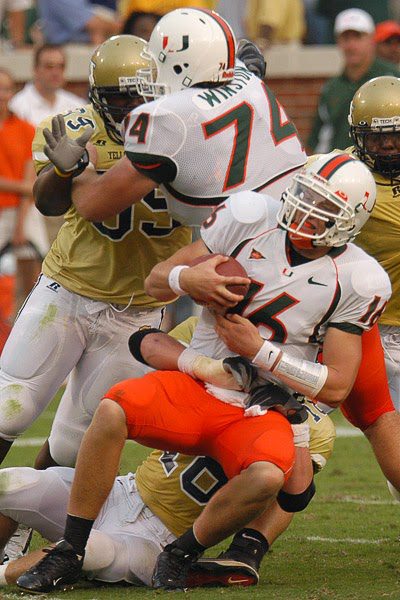
Some of the best defense shots of the game are behind the line of scrimmage. Behind the offense, you capture the sacking of the quarterback. You can also catch the running back. You see, the defense moves the ball forward for their team when they create a loss for the other team’s offense.

I recommend renting long glass lenses rather than buying them. It would help if you had a lens between 300mm to 500mm to cover football, and adding 1.4 & 2X converters get you the longer lens.

Here is the list of gear I use in football

  • (2) Nikon D4 Cameras
  • 14-24mm ƒ/2.8 Nikkor
  • 28-300mm ƒ/3.5-5.6 Nikkor
  • Sigma 70-200mm ƒ/2.8
  • 120-300mm ƒ/2.8 DG OS HSM | S carried in the Thinktank Glass Taxi™ [not in photo]
  • Sigma 1.4 converter
  • Nikon SB-900
  • Manfrotto 294 Aluminum 4 Section Monopod
  • Manfrotto by Bogen Imaging 323 RC2 System Quick Release Adapter w/200PL-14
  • ExpoDisc
  • Shure FP15/83 Lavalier Wireless System
  • RØDE VideoMic Pro
  • Zacuto Z-Finder
  • AWP Knee Pads – Important to save your knees
  • ThinkTank System for lenses using belt and harness
  • ThinkTank Memory Card Holder
  • ThinkTank Airport Security™ V 2.0 Rolling Camera Bag
  • ThinkTank Credential Holder Tall V2.0
Nikon D3S, Sigma 120-300mm ƒ/2.8 with 1.4 converters, ISO 6400, ƒ/4, 1/2000

One last advantage of shooting from the end zones—is BACKGROUNDS. Your background is easier to keep clean and improve impact.

Have fun shooting this fall.

Getting the moment in a portrait with the Nikon D4

 
Nikon D4, Sigma 70-200mm ƒ/2.8, ISO 500, ƒ/5, 1/640—Off-camera fill-flash using the Nikon SB-900 & SB800. The flash is on the Pocketwizard TT5 and triggered by the Mini TT1 on the Camera with the AC3 to control the flash’s output.

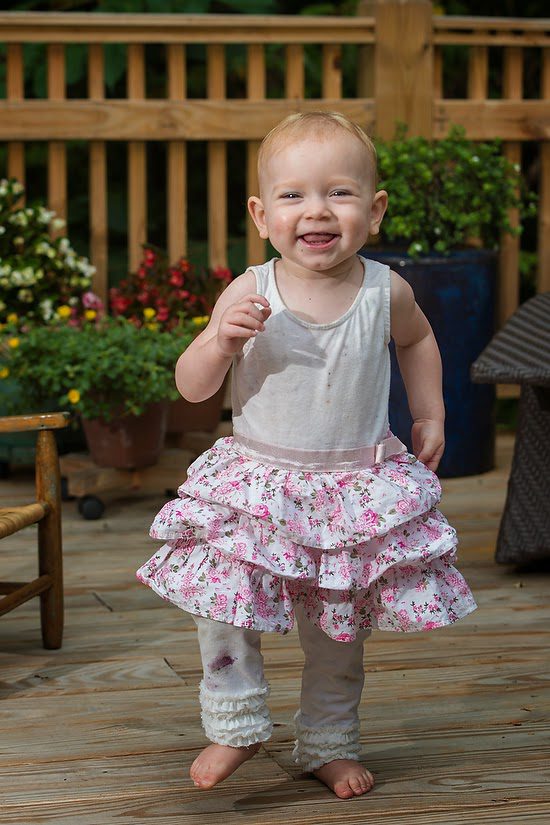
My client recently hired me to capture her granddaughter. She wanted the best expressions and said this was why I wanted to do the photo shoot. I continued to help her with her commercial needs, and she knew I concentrated on getting the “moment.”

Nikon D4Sigma 70-200mm ƒ/2.8, ISO 500, ƒ/5, 1/800—Off-camera fill-flash using the Nikon SB-900 & SB800. The flash is on the Pocketwizard TT5 and triggered by the Mini TT1 on the Camera with the AC3 to control the flash’s output.

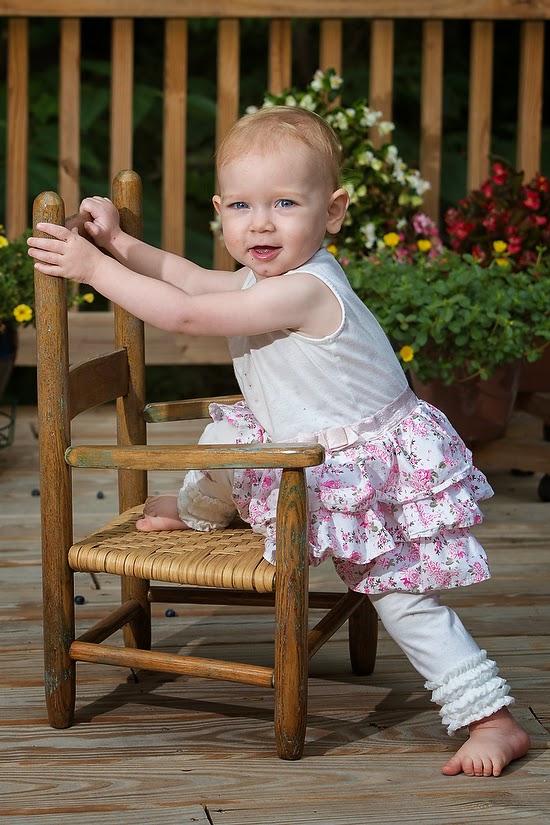
I intentionally shot these on my Nikon D4 to use the off-camera TTL flash system I have come to love. I am using the off-camera fill-flash using the Nikon SB-900 & SB800. The flash is on the Pocketwizard TT5 and triggered by the Mini TT1 on the Camera with the AC3 to control the flash’s output.

We decided to shoot outside on their deck because the little girl was not happy when I arrived inside. However, the mother said she loved the outside, and sure enough, as soon as we went outside, she became another person.

You have to remain flexible. I wasn’t thrilled with the railing, but I liked the plants on the deck.

 
Nikon D4Sigma 70-200mm ƒ/2.8, ISO 500, ƒ/4, 1/1250—Off-camera fill-flash using the Nikon SB-900 & SB800. The flash is on the Pocketwizard TT5 and triggered by the Mini TT1 on the Camera with the AC3 to control the flash’s output.

While the little one loved the outside, she was starting to get a little fussy, so mom gave her blueberries that she just loved, but also gave me many photos with drool.

During some of the time, it was sprinkling, and the other time, it was overcast. So getting a consistent color was achieved by winking in a flash.

Nikon D4Sigma 70-200mm ƒ/2.8, ISO 500, ƒ/4.5, 1/800—Off-camera fill-flash using the Nikon SB-900 & SB800. The flash is on the Pocketwizard TT5 and triggered by the Mini TT1 on the Camera with the AC3 to control the flash’s output.

While I liked the green in the background, I found this oversized recliner I used for a three-generation photo of the Grandmother, mother, and child. I prefer the cleaner background, and had it not been raining, I would have suggested getting off the deck so I could eliminate the railing. A different location would have led to an even better background.

While I love the Fuji system, when it comes to nailing the focus and moment, I still prefer my Nikon D4.

Photographers need repetition to grow

 
Fuji X-E2, 55-200mm, ISO 6400, ƒ/7.1, 1/125, EV -1.7

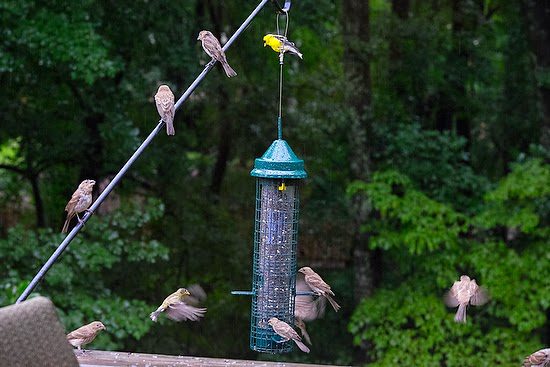
My bird feeders are teaching me a great deal these days. Of course, the feeder doesn’t change daily, but the light and the birds do.

This past weekend I observed we had a lot of fledglings. Fledge is the stage in a young bird’s life when the feathers and wing muscles are sufficiently developed for flight. It also describes the act of a chick’s parents raising it to a fully grown state.

Fuji X-E2, 55-200mm, ISO 6400, ƒ/4.8, 1/420, EV -1.3

Here I watched the House Finch feeding the Fledgling. It was just fun watching this take place, and so I decided I would pull out the cameras and photograph them. Again, the combining of one interest with another enhances the experience.

When I started, the photos were overexposed. This overexposing is because I was shooting in aperture mode. I had Auto ISO chosen with a minimum shutter speed setting of 1/500. I compensated for the exposure by turning the EV to -1.7 and would fine-tune it here and there based on the histogram.

The Fujinon XF 55-200mm was pretty slow with a ƒ/3.5-4.8 aperture. I was getting pretty good results, but we had rain coming down most of the weekend, and I thought this was a great time to test the new Sigma 120-300mm ƒ/2.8.

Nikon D4, Sigma 120-300mm f/2.8 DG OS HSM Lens, ISO 4000, ƒ/6.3, 1/320 EV 0

With the Red Bellied Woodpecker, I was not having to use the exposure value compensation and got great detail in the feathers.

Nikon D4, Sigma 120-300mm f/2.8 DG OS HSM Lens + Sigma 1.4 converter, ISO 4500, ƒ/6.3, 1/500 EV -1.3

However, when the darker Downy Woodpecker visited the feeder, I had to compensate the EV -1.3.

I was having fun, and the thing is, while I was having fun, I was also learning how to check the exposure from bird to bird because that would affect the direction. I could have tried the manual exposure, but the light was changing as the sun would peek through a little and then disappear.

I also enjoyed shooting with the faster ƒ/2.8. I was able to add the Sigma 1.4 converter when I photographed the Downy Woodpecker and got just a little closer to 420mm.

I was also learning about the birds. I downloaded Peterson’s guide to my iPad and enjoyed finding out the names of the birds. For example, at first thought, I had a Hairy Woodpecker, but that is a bigger bird with a longer bill.

Taking photographs allowed me to have the time to zoom in and examine the bird in detail. But, unfortunately, too often, they come and go on the bird feeder too quickly for me to study.

Now you know why so many birders are also photographers. The photos give you a long time to examine the bird.

Do you have something you can photograph regularly, see how your camera reacts in a different light, and also help you grow? If not, I recommend you look. I found mine in my backyard.