Selective focus makes people pop out of photos or makes the backgrounds recede into a blur. And you choose what pops, what blurs, and what fuzzes over.
Where do you want the viewer to focus their attention – the hedge in the foreground, the man in the middle, or the trees in the distant background? Many professional photographers use selective focus to control the viewer’s attention.
The apertures, called f-stops, are fractions. For example, the f-stop ƒ/4 is ¼ (one-fourth) of what one-fourth is, which is a little beyond the scope of this article. Let’s say that an f-stop is a fraction, ok? (ƒ/4 = 1/4th f8 = 1/8th). Typically, these numbers are on the lens: 2.8, 4, 5.6, 8, 11, 16, 22, and so on.
Remember these are fractions: 1/2.8, 1/4, 1/5.6, 1/8, 1/11, 1/16, and 1/22. It compares how much light each number lets through the lens. Therefore, 1/5.6 allows more light through the lens than 1/22.
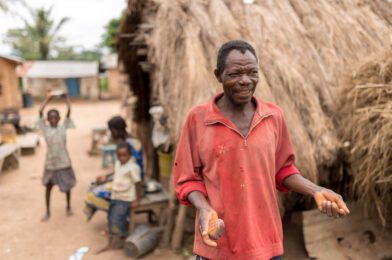
Togo, West Africa [NIKON D5, 35.0 mm f/1.4, Mode = Aperture Priority, ISO 100, 1/2500, ƒ/1.4, (35mm = 35)]
Here’s the creative part: the smaller the opening (f-stop) in the lens, the less light is allowed in. Therefore, a greater area is in focus from the foreground to the background. If you want to throw most of the background out of focus, use ƒ/5.6 rather than ƒ/22.
Today’s digital cameras allow the photographer to vary the aperture, preview the results, and then decide its effectiveness.
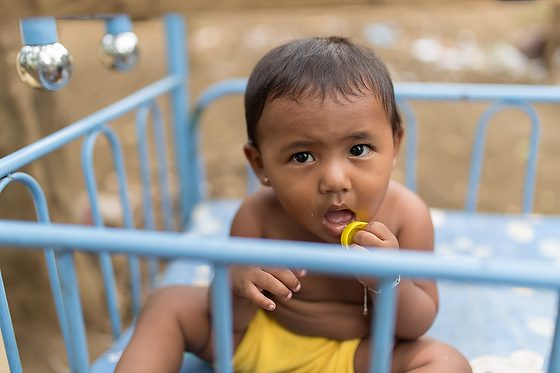
Togo, West Africa [Nikon D5, Nikon 85mm ƒ/1.8G, ISO 100, ƒ/1.8, 1/320]
If you want the subject to “pop,” use a larger lens opening, e.g., ƒ/4 or ƒ/5.6. Like a simple sentence, having one different subject is better.
A smaller aperture (ƒ/16 or ƒ/22) brings the foreground and background into sharper focus or a greater depth of field. It also allows for other compositional techniques to direct the viewer to the photo’s main subject.
Setting your camera’s ISO, shutter speed, and aperture provides more than a properly exposed photograph. You can use these tools to compose and say what you want to say in your pictures.
Experiment using different ƒ-stops. Try setting the camera to the aperture preferred setting. Explore the creative tools available on the camera. If the camera is always set on automatic, it becomes a costly box camera.
Don’t fall in love with an ƒ-stop. Instead, use what helps you for that moment. For example, the danger of always shooting ƒ/1.4 is that you are not giving context to your subject.
Nikon D5, Sigma 24-105mm f/4 DG OS HSM Art Lens, ISO 4500, ƒ/4, 1/100
Here I used ƒ/4, which was just enough depth-of-field to show the lady’s kitchen and cooking.
Nikon D5, Sigma 24-105mm f/4 DG OS HSM Art Lens, ISO 4500, ƒ/4, 1/100
You don’t turn the ƒ-stop/aperture from one end to the other. Use just enough to help you show what the viewer needs to see. Again the ƒ/4 was adequate while shooting with the 24mm to capture the rest of the kitchen.
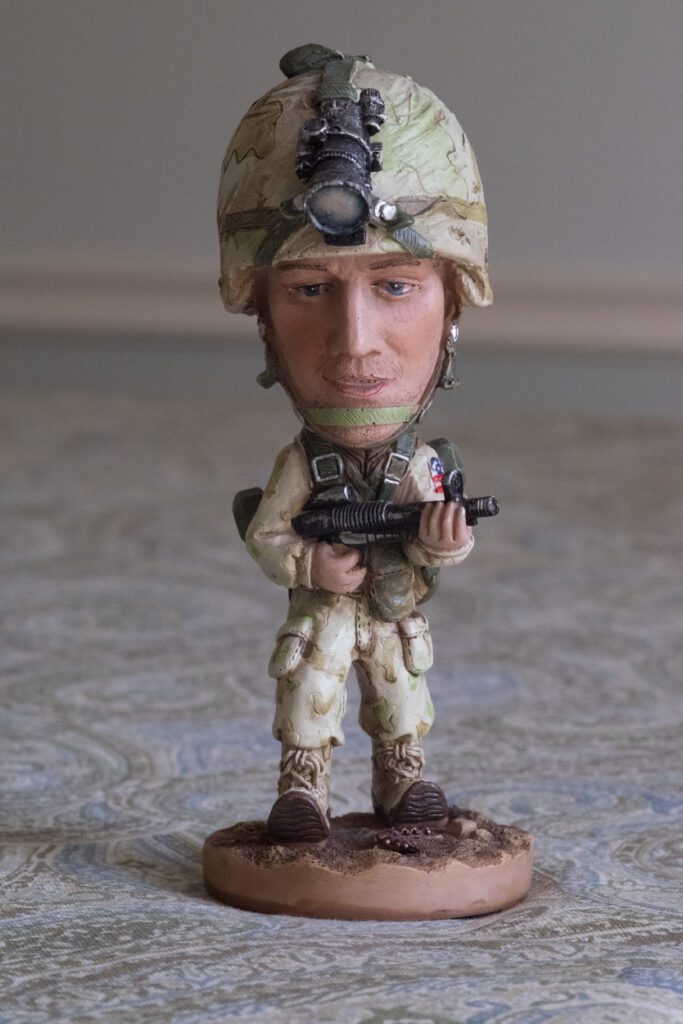
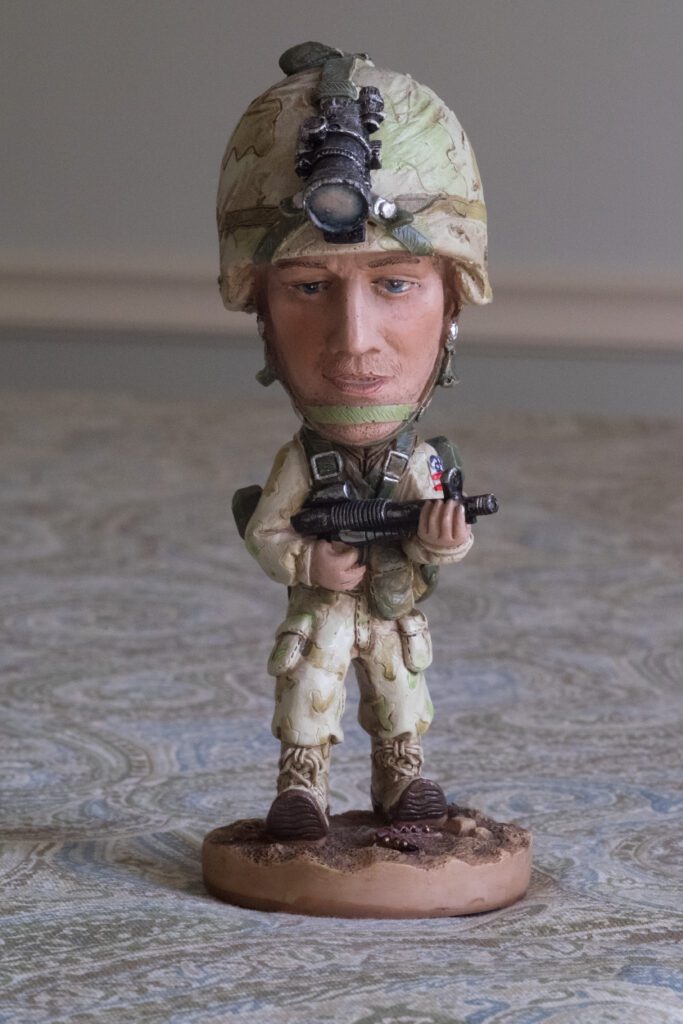
I shoot wide open with the Micro‑Nikkor Macro 60mm f/2.8 D lens. Since I am as close as the lens will let me focus, which gives me a 1:1 ratio, the ƒ-number gets more extensive due to the lens extending and getting further from the sensor.
Notice how much Charlie Brown’s sister Sally is out of focus at ƒ/4.8 vs. ƒ/1.4 in the two photos. The depth of the field is even shallower in the closer photo. How close you are to the subject has as much impact on depth-of-field as your aperture.
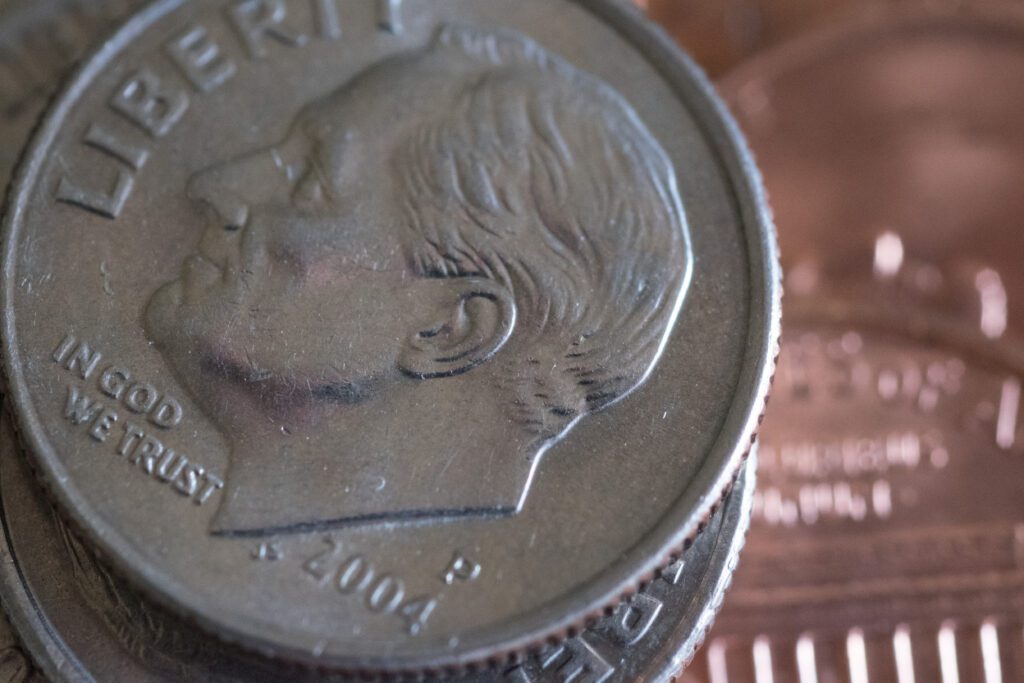
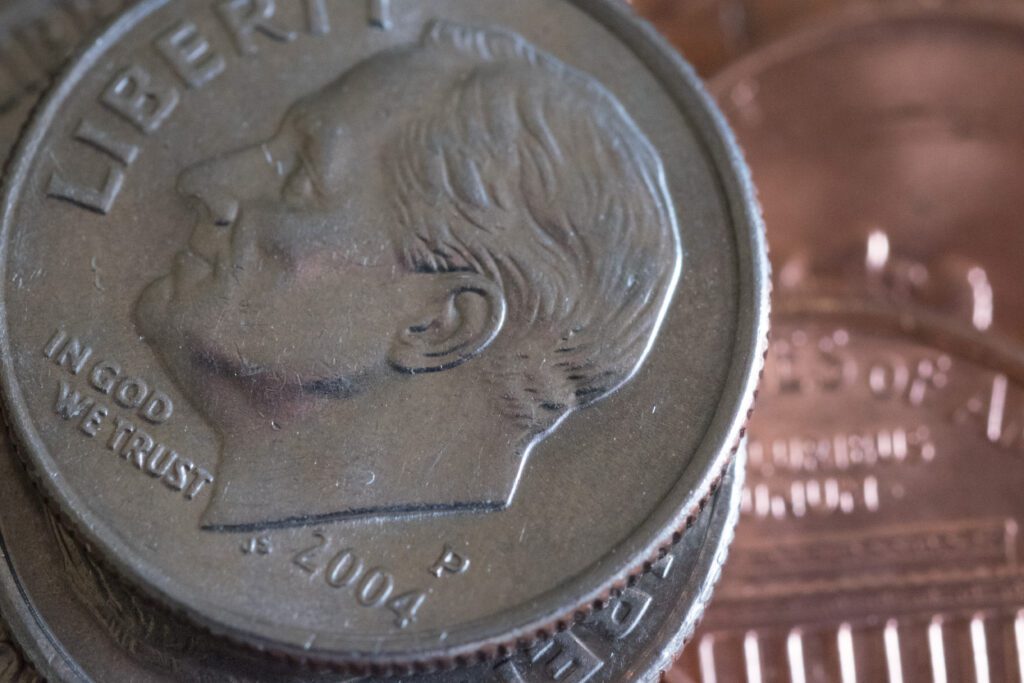
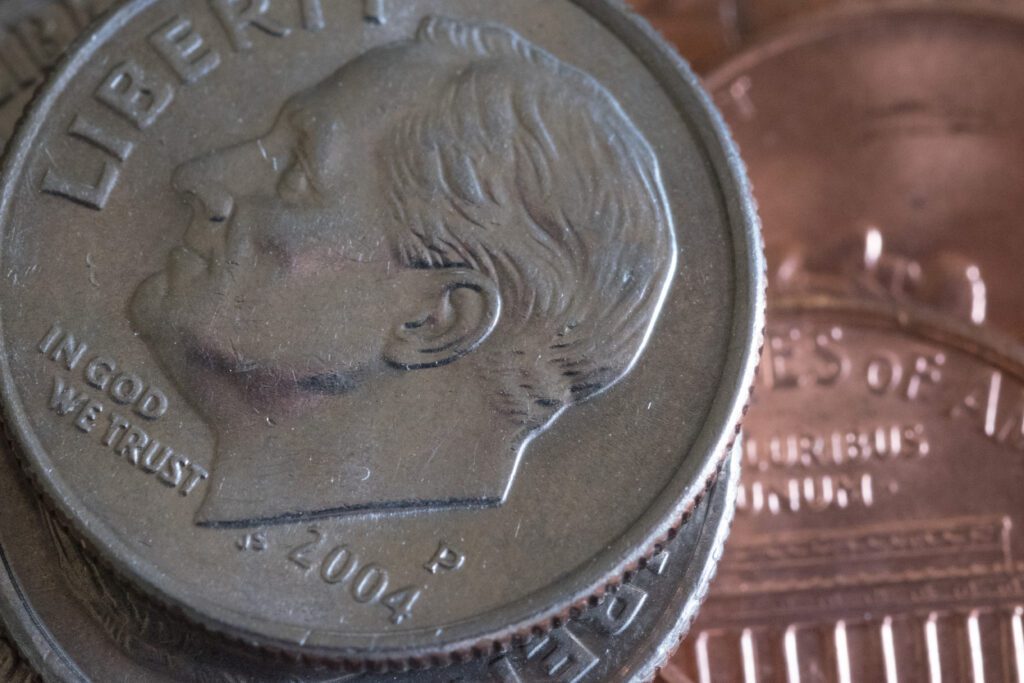
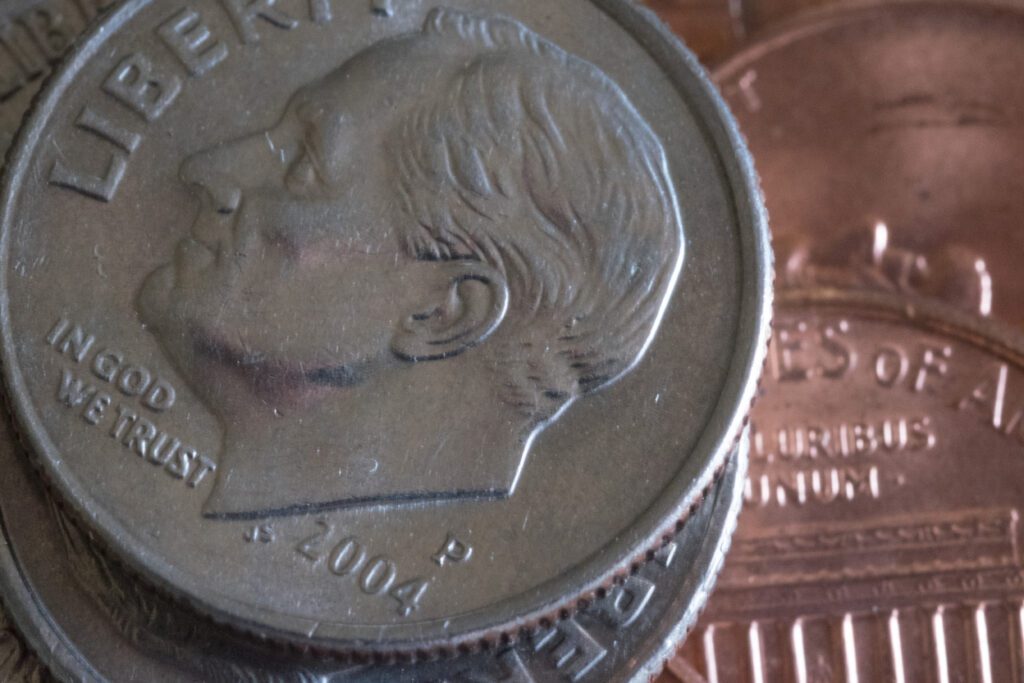
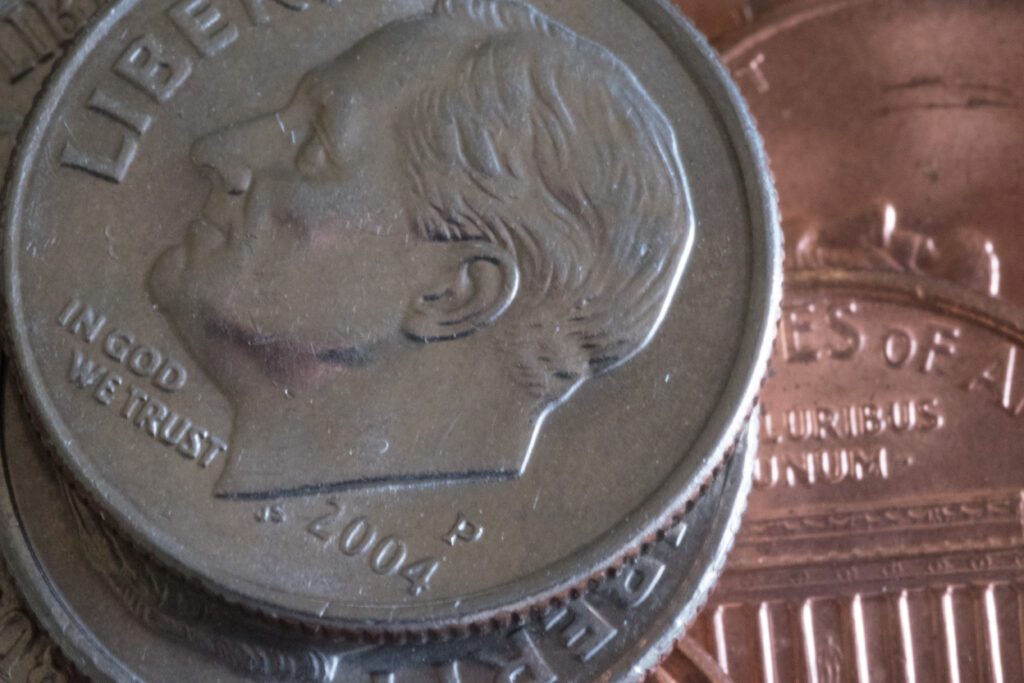
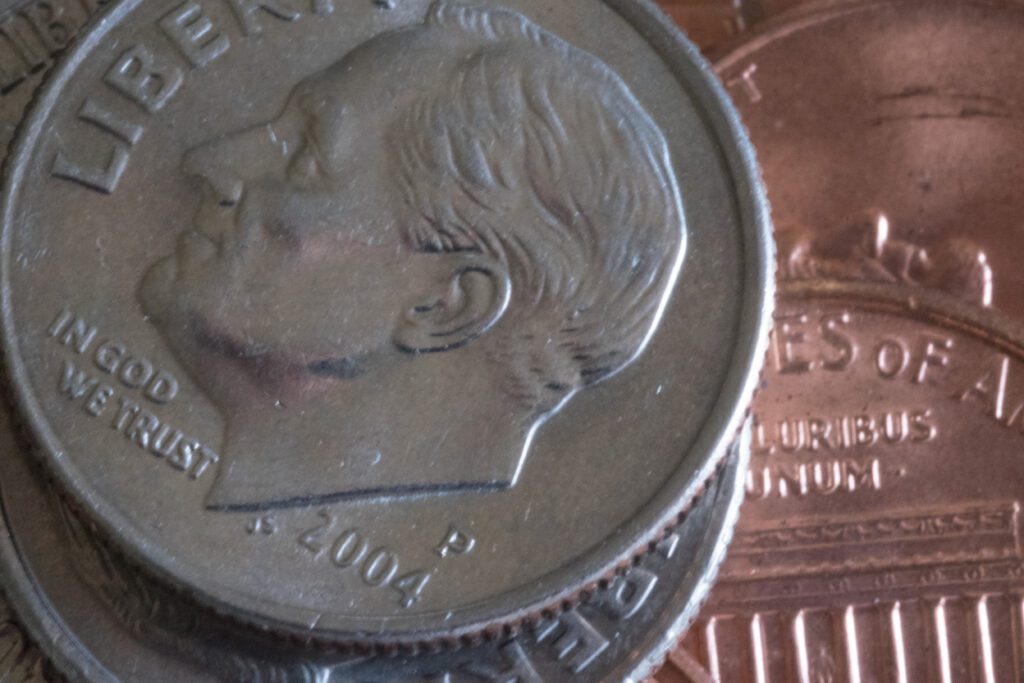
Now, just to let you see how your distance impacts the depth of field here, I just backed up a hair in the lower photo of the ornament with the Micro‑Nikkor Macro 60mm f/2.8 D.
Since I backed up, the aperture opened up a little, so you would think the depth-of-field would shrink, but the opposite happened. Again this is due to the distance to the subject.
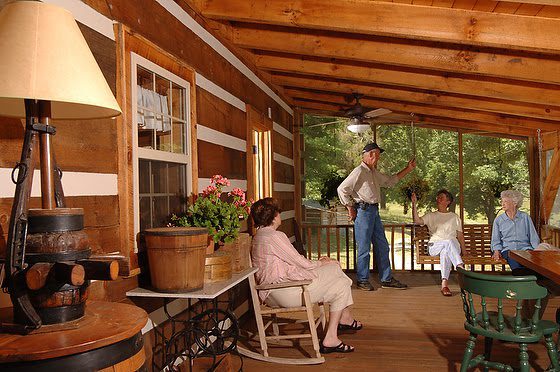
By looking around the industry, you would think that everyone is shooting wide open at ƒ/1.4. However, some places like Country Living Magazine want just the opposite for their viewers.
Why would someone want everything sharp from front to back in a photo?
Many people are looking for decorating ideas and want to see the details. The other thing that a deep depth of field does for the viewer is put them into the space. They can now let their eye roam from front to back in the photo and all around.
A deep depth of field pulls the audience into a scene more than a shallow depth of field. The shallow depth of field helps you isolate a subject within the frame, and the profound depth of field does the opposite and gives more context to the subject within the frame.
When Country Living hires you, they give precise instructions for the greatest depth of field possible in all the photos.
Egypt—Missionary Mike Edens (left) worked closely with Egyptian Baptist pastors to enhance their discipleship and pastoral ministries. These pastors—(left to right) Mikhail Shehata Ghaly and Anwar Dakdouk—took MasterLife discipleship training in Cyprus in 1984
Technically, Depth-of-Field—is the distance between the nearest and farthest objects in a scene that appear acceptably sharp in an image.
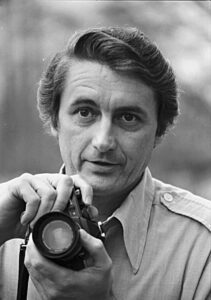
Don Rutledge
I have never met a photographer who understood more about packing more into a frame to tell a story than Don Rutledge.
It takes a lot more skill to take a photo of what appears to be clutter and compose it so that you capture a story than it does to isolate a subject by either getting closer or zooming in.
What Don Rutledge taught me, and yet I still haven’t begun to execute it as well as he did, was to use the environment around the subject to provide context and tell a better story.
He taught me to spend time with a person before I take a photo of them. Spend time getting to know their story; this way, once you know them, you start to see things around them and their body language that help inform the audience through visual clues as to who the subject is as a person and how they interact with people in their world.
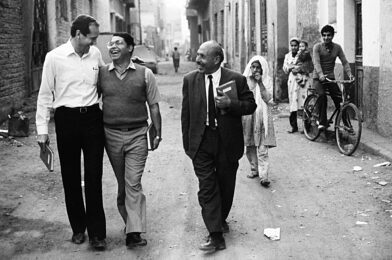
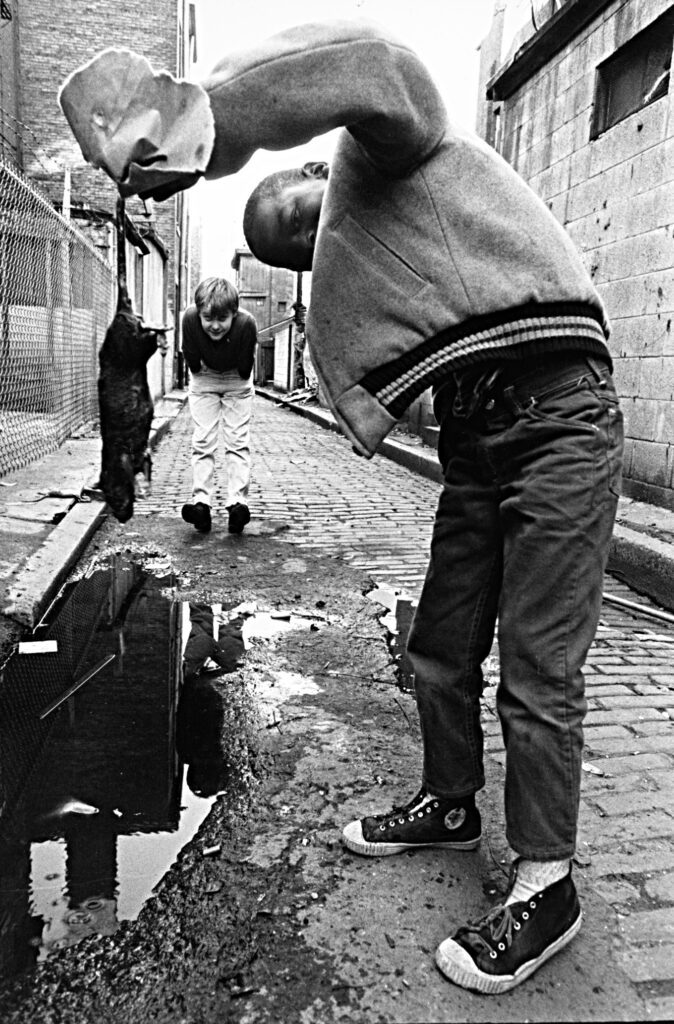
[Photo 2] While legislators around the nation debated the need for rat-control laws–and disputing their funding–Don discovered these two youngsters who proudly displayed the results of their morning hunt. In that section of Cincinnati, Ohio, in, in 1968, rats were not particularly difficult to locate.
Don taught many photographers not to watch the edges of the photograph but to pay attention to the “Depth-of-field” when making the photograph. He wanted to use the thing in the foreground and background more than any other photographer I knew to help tell the story.
In Photo 1, you can see down the street and around the men as they walk in Egypt. While most everyone is laughing as if a joke was just told, notice the woman behind the men. Her expression tells another story.
I can picture this woman being similar to the woman in Matthew 9:20, “If I can just put a finger on his robe, I’ll get well.” Jesus turned—caught her at it.
She is not part of the men’s group, but she is interested in them.
In Photo 2, you see not just the rat being held by the boy, but also his friend and the location of their discovery. His friend’s body language and the alley where they found his body add significantly to the context.
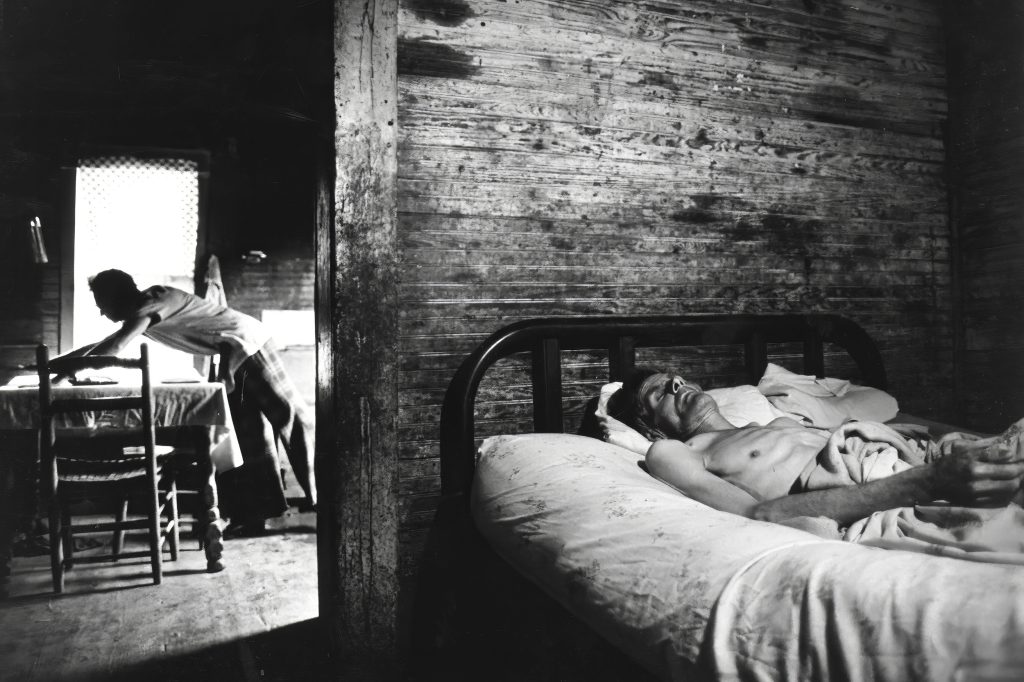
[Photo 3] This is early morning in Mississippi for Luvenia and Bailey King King sleeps as his wife puts breakfast on the table [photo by Don Rutledge]
To get this type of “Depth-of-field,” Don invested time in his subjects. In 1979, Don spent a month living with the King family in Mississippi. He added just enough money to the family budget to not add any financial stress and not change their living standards so he could cover what it was like living below the poverty line in America.
This photo [Photo 3] became a favorite photo of many from the story. The image captures Bailey King and shows how thin he is and how hard his wife worked to provide for the family. It is not a photo of Bailey but of his wife, Luvenia.
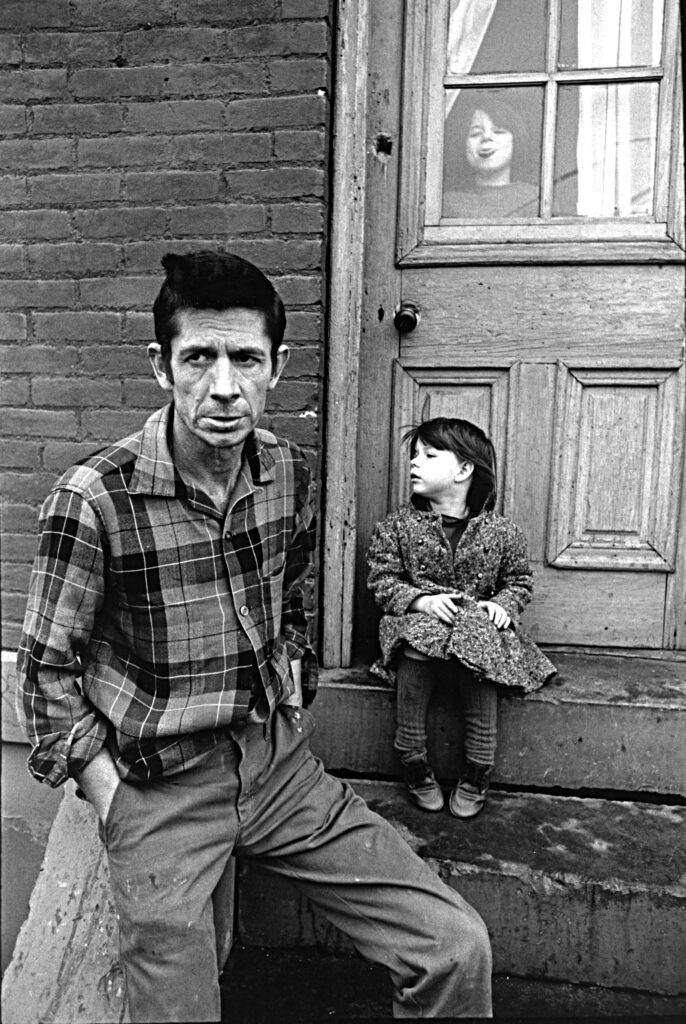
[Photo 4] Appalachian migrant family in Ohio during 1968 [photo by Don Rutledge]
In Photo 4, you can see a father who appears concerned, and his children are visible in the background. The children are like all children, pulling the viewer into the story of a migrant worker who will travel wherever, finding work to provide for their family. Many photographers cropped just above the father’s head and left the boy in the window. The reason is that they most likely would not have seen the boy.
Don had a patience about him that let him be in the moment. He could see things that most missed. Don really and truly had more empathy for his subjects than just about any other photographer I have known.
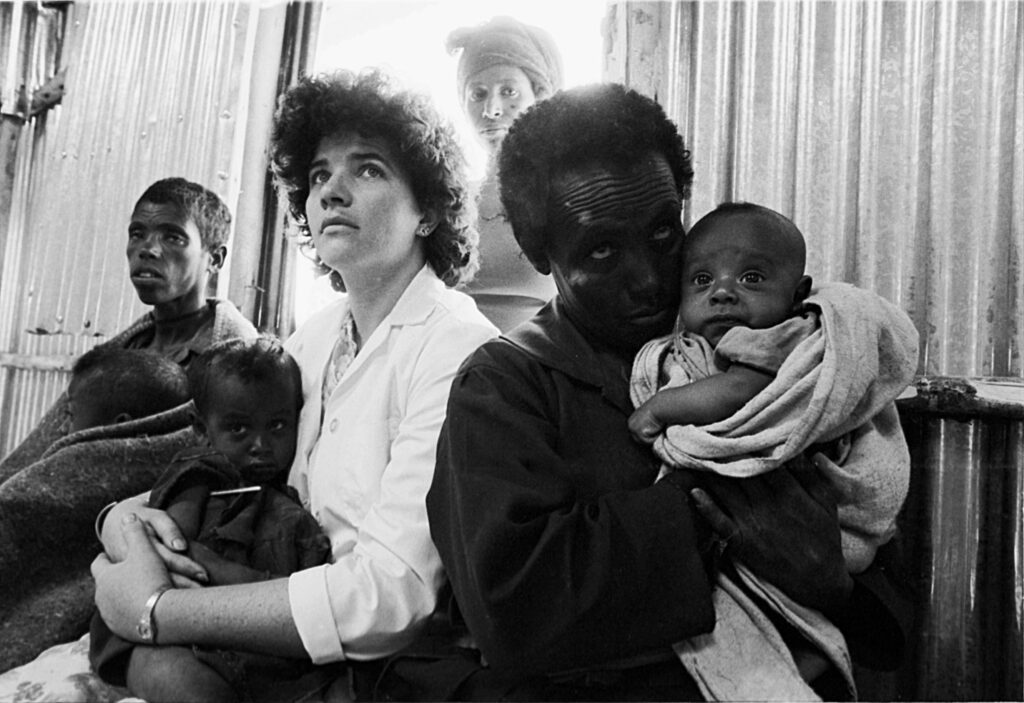
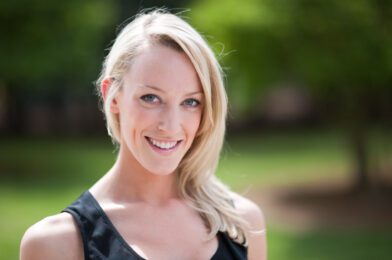
[Photo 5] Africa—Sally Jones (white coat) felt emotions well up inside as she shared this moment with concerned mothers at the Southern Baptist Feeding and Health Care Center’s clinic in Ethiopia.
Many photographers might crop in much tighter on Sally Jones. In Photo 5, Don goes wide and gets close to ensure you see her expression. I remember often seeing the contact sheets of moments like this when Don was editing. He would show me the moment before and after, where sometimes the lady in the background was only there for one of maybe ten frames. She adds so much by helping pull you to the background after seeing Sally. There are more mothers outside, which helps convey the message.
[Photo 6] Israel—Missionary kid Sommer Hicks plays on the rocks of the Sea of Galilee with her dad, Ray Hicks, in the background [Don Rutledge]
So often, photographers become so focused on the main subject that they forget that those around the subject can sometimes offer valuable insights into them. Here we get a glimpse of how everyday life is for Ray Hicks in Photo 6 when we see how much fun his daughter is having at the sea of Galilee Don shot it in a way to bring Ray into the photo and give a context that Don did so well time and time again.
Please look at how often Don uses depth in his photos to tell stories. Here are two coverages of Russia that Don did in the 1980s. Don shot these for a magazine that would typically use only 8 to 12 photos, but look at the depth of his coverage. I recall seeing this coverage on numerous light tables and Dan Beatty commenting on how he could tell many stories whenever Don returned.
Nikon D4, Sigma 70-200mm, ISO 12800, ƒ/3.2, 1/80 optical stabilization on
I love to watch people and especially across the room. The lens that captures these moments the best for me is the Sigma 70-200mm f/2.8 EX DG APO OS HSM for Nikon. Up to 4 Stops of Optical Stabilization makes hand-holding the lens possible in low light, which I was shooting in tonight.
Nikon D4, 85mm ƒ/1.4 , ISO 450, ƒ/1.4, 1/100
I tried to work the room with the Nikon 85mm ƒ/1.4, but I felt like the lens was too loose most of the time, and since I was further away, the depth-of-field was as silky smooth to me as with the Sigma 20-200mm because I was able to shoot at 200mm and therefore compressed the background.
Nikon D4, Sigma 70-200mm, ISO 12800, ƒ/3.2, 1/50 optical stabilization on
The cool thing is shooting at 200mm, and a wide aperture gives the shallow depth of field, making the subject pop out from the room.
Nikon D4, Sigma 70-200mm, ISO 12800, ƒ/2.8, 1/60 optical stabilization on
While technically, there is a separation of the subject from their environment, you now must wait for a moment where you capture the person’s personality. A technically great photo isn’t what makes the photo, but it just merely helps. It still comes down to capturing the moment.
Nikon D4, Sigma 70-200mm, ISO 10000, ƒ/2.8, 1/100 optical stabilization on
While shooting all these photos, the people know me, but I have been working in the room for a while. I started with 14-24mm and introduced myself to people getting them to know I was here and taking photos.
Nikon D4, Nikkor 14-24mm, ISO 12800, ƒ/3.2, 1/100
I am shooting a full-framed image like the one above, with the 14-24mm putting me less than a foot away from the subjects. After shooting these, I start shooting the tighter shots with the longer lens. So I am now further away and picking moments.
Nikon D4, Sigma 70-200mm, ISO 9000, ƒ/3.2, 1/100 optical stabilization on
Now people are more relaxed at the party. They are now into conversations and enjoying one another. When people are conversing is when I get excellent expressions.
Nikon D4, Sigma 70-200mm, ISO 12800, ƒ/2.8, 1/100 optical stabilization on
I also love creating a layering effect by having something in the foreground and background. I think this helps give more depth to the photo, even with the foreground and background out of focus.
Nikon D4, Sigma 70-200mm, ISO 11400, ƒ/3.2, 1/100 optical stabilization on
I love these expressions. They make you want to know what they are talking about.
Nikon D4, Sigma 70-200mm, ISO 12800, ƒ/3.2, 1/100 optical stabilization on
I love shooting tight and isolating subjects but remember, when I write a blog like this, I teach something. The 70-200mm photos are just part of the coverage; I have plenty of wide-angle lens shots to help capture the context.
I think every photographer would benefit from a 70-200mm ƒ/2.8 lens in their bag. I love my Sigma 70-200mm.
When you first think of ƒ/9 you might think of the photo above where you can see from the lady to the sign behind her that most of photo is in focus, but that the far background of the building is out of focus.
I have written on this topic before in a different way and even created a video on it. Here is that link.
This is a little different perspective on the topic using the new Fujifilm X-E2.
Nikon D3S, 28-300mm, 300mm ISO 200, ƒ/9, 1/125
Now in this photo here you might not realize it too is shot at ƒ/9. Two things helps with the silky Bokeh in the background. First, I am now shooting at 30mm verses 100mm at ƒ/9 and second the background is far enough in the background that it is out of focus. It is about 100 ft from here.
Nikon D3S, 28-300mm, 150mm ISO 200, ƒ/9, 1/200
In this photo she is standing not too far from where she was in the first photo. However the shallow depth-of-field is helped by the distance from the building, the 150mm focal length.
Same photo from above but just cropped
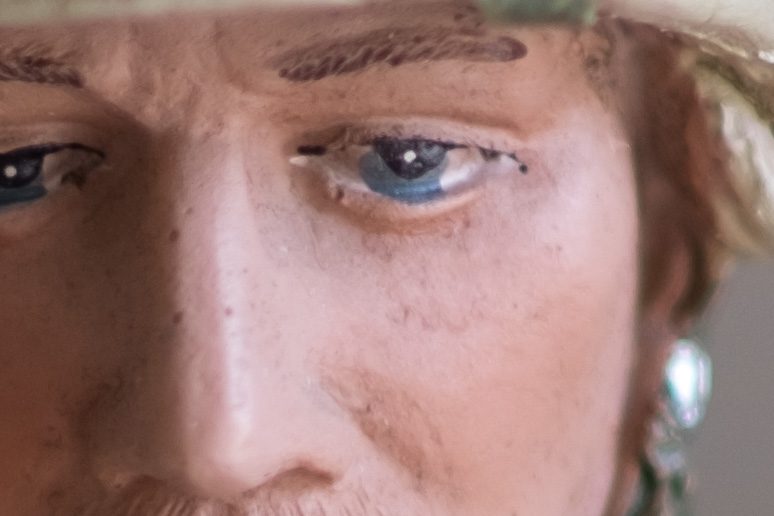
Now when you enlarge the photo you will see the eye closest to the camera is tact sharp. But the next eye is ever so slightly soft, but by her hair by her ear we are out of focus. Things that affect the Bokeh of the background in photos
ƒ-stop: The wider the aperture with everything else the same, then the depth-of-field becomes shallow
Distance to Subject: The closer you are to your subject the shallower the depth-of-field will be.
Subject distance to background: The greater this distance the more likely the smoother look of the Bokeh
Fujifilm X-E2 with Nikon 85mm ƒ/1.4 using the Nikon G AFS lens to Fujifilm Fuji X-Pro1 X-E1 Adapter Aperture Control Ring to connect the Nikon lenses to the Fujifilm camera
ƒ/1.4ƒ/2ƒ/2.8ƒ/4ƒ/5.6ƒ/8ƒ/11ƒ/16
All were shot on tripod at the very closest focusing distance that the lens would focus on the eyes at ƒ/1.4. The only thing I changed was the aperture and the camera adjusted the shutter speed to keep the exposure the same.
Approximately 100% view of the ƒ/1.4
You can increase your depth-of-field by just backing up from the subject and this will increase it for you. Conversely if you want a shallower depth-of-field get closer if the lens allow you.When you are super close you are not looking for BokehMacro photography you are actually needing a large aperture or the photo can look out of focus even when it is in focus.All these were shot with Fujifilm X-E2, Nikon 60mm ƒ/2.8 Micro
I thought I would answer a friend’s question I received the other day.
Hey Stanley, I have a quick question for you. I bought a Canon ƒ/1.4 50mm prime lens last year and I love it. My only issue is that when set to automatic the depth-of-field can be so narrow that a nose is in focus and an eye is out of focus. I’m assuming that the aperture is just too open. Is there a rule of thumb when taking portrait-type shots as a minimal (or max – not sure which is which) aperture? Maybe I just need to stay on aperture priority and ƒ/1.8, or something. What’s your recommendation?
One of the most popular lenses today is the 50mm ƒ/1.4. The reason for the popularity is the silky smooth shallow depth-of-field obtained when shooting at ƒ/1.4. You will see a lot of wedding photographers using these not only to get that look but also because you can use it to take photos when flash is not allowed—like during the ceremony.
Nikon 60mm ƒ/5.6
When you are inside and cannot use flash, the rooms are so dark you need a lens with an aperture of ƒ/1.4 or ƒ/2 to get photos. The problem is that you can only go so slowly with your shutter speed before the pictures are blurry due to movement. If you were photographing objects and not people, you could take a photo with a shutter speed of 1 second, but with people, you need to be shooting at least at 1/30 of a second or faster to avoid movement issues, which will give you blurred images.
Using the lens for portraits wide open at ƒ/1.4 and filling the frame with someone’s face will very quickly give you the results you just described.
There are a couple of things that affect depth of field.
The ƒ-stop/aperture. As you already know, the lower the number, the less depth-of-field you have.
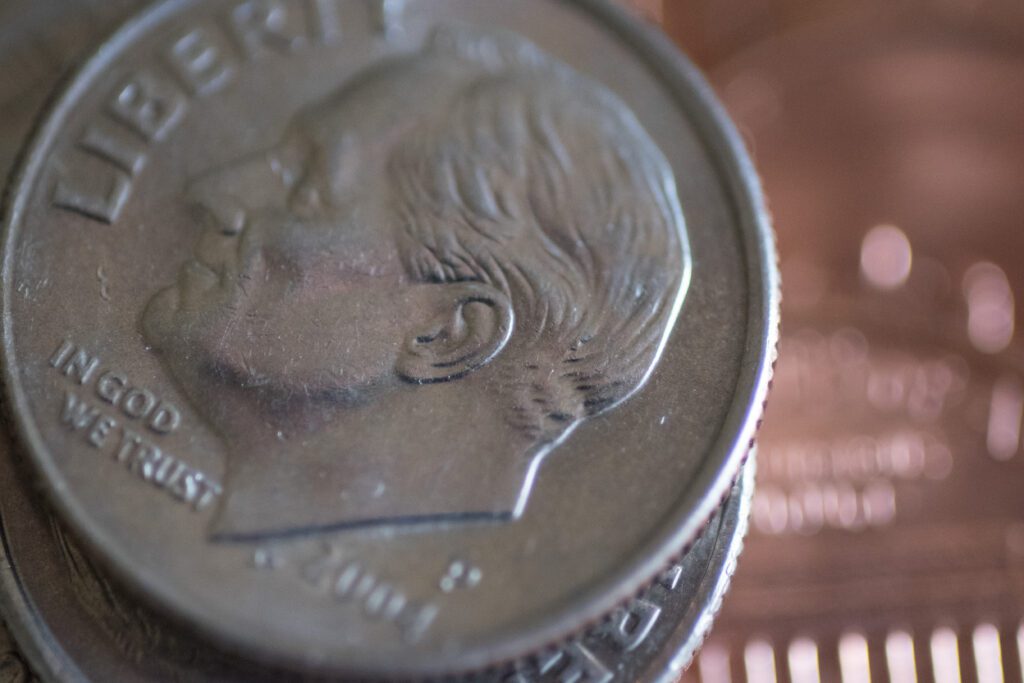
Distance to subject. The closer you get to a subject, the shallower the depth of field when the ƒ-stop stays the same. In macro photography, for example, when you get as close as a 1:1 ratio, you often have to be at a ƒ -stop at a minimum of ƒ /11 to appear in focus. When I do macro photography, the aperture is often at ƒ /45 and still seems like a shallow depth-of-field.
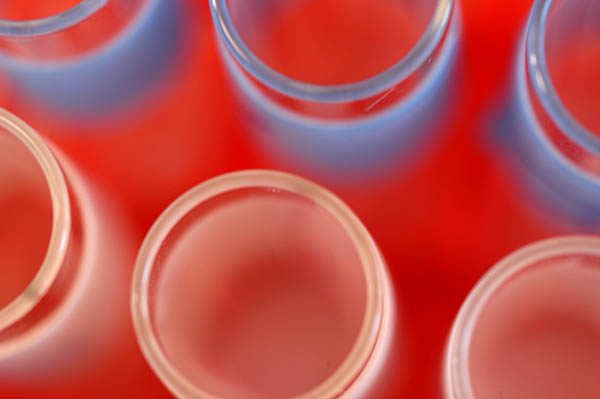
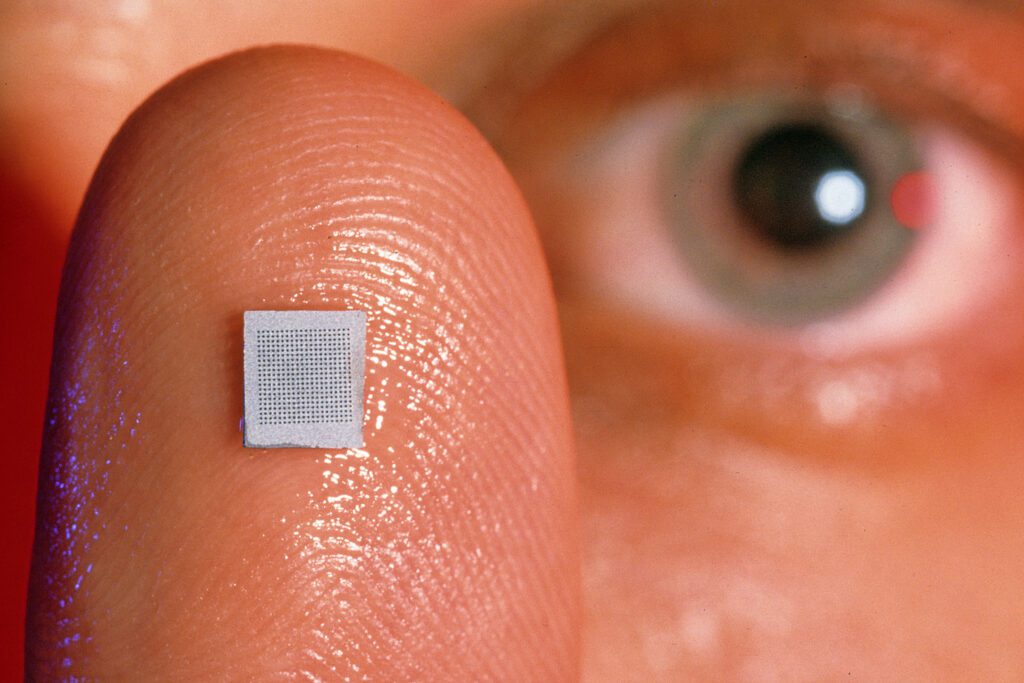
Microneedles give painless shots on December 3/10, 2003 The smaller the hypodermic needle, the less it hurts when it pierces the skin. Researchers from the Georgia Institute of Technology have developed ways to manufacture solid and hollow metal, silicon, plastic, and glass microneedles that range in size from one millimeter to one-thousandth of a millimeter. [Nikon 60mm ƒ/45]
This photo here (figure 3) is at ƒ/45. Again, see how the eye is out of focus. You would think at ƒ/45 everything would be tack sharp, but it isn’t.
My suggestion is the closer you get, you will need to increase the ƒ/stop to keep the facial features of the eyes, nose, and mouth in focus. I don’t mind the ears out of focus. I occasionally will shoot with my 85mm ƒ/1.4 wide open and get a person’s eye in focus, but the number of photos you need to take to get a good picture can increase due to them or you moving. So I usually shoot between ƒ/4 and ƒ/5.6 for headshots to keep most things focused.
When doing group photographs, people are often two or three deep in the photo. In these situations, you need to shoot at ƒ/8 or greater aperture, or the people on the front or back will not be sharp.
If you own a shallow depth-of-field lens like ƒ/1.4, remember, if you want that silky smooth out-of-focus look behind the subject, you need to be sure what you want in focus is in focus. You can move the focus point around on many new cameras in your viewfinder. Shifting the focus point will help you maintain your focus and composition. Focusing in the center of the frame and then recomposing the photo will often give you poor results since the tolerances are so critical.
Practice making portraits at ƒ/1.4, then do some at ƒ/4, and then some at ƒ/5.6. Get comfortable with the look of each aperture, and when you want a specific look, you will feel confident that you can deliver because you have practiced.
Got a question about photography you would like to see me write about, send me a note and let me know at stanley@stanleyleary.com.
Nikon D3S, ISO 200, f/5.6, 1/125, & 300mm using an Alienbees 1600 Flash for fill flash.
“What I need is a telephoto lens.” We’ve all said this. But, unfortunately, it doesn’t take long to discover we can’t get close enough to our subjects with a “normal” lens.
If you have kids in sports or the performing arts, or your interest is photographing birds or wild animals, rules or common sense keep our subjects just too far away for interesting photos without a long lens.
Professional photographers reach for their telephoto lenses for the same reason – to fill the frame with the subject.
A professional photographer may use longer lenses to tie a subject to its surroundings. In an earlier blog post (here), I talked about using wide-angle lenses to show a person in their environment. You can accomplish this by using remote control cameras before an event. For example, it would be safer to use a remote camera to photograph a lion feeding on the carcass up close.
Depth-of-field
One of the photographer’s most creative tools is controlling the depth of field. Depth of field is the area in focus in front of and behind the focus plane. Telephoto lenses have shallow depth-of-field as compared to wide-angle lenses. With either lens, the smaller the f-stop (f/16 vs. f/8), the deeper the depth of field. But, of course, the reverse is true. With either type of lens, the depth-of-field is shallower the more open the f-number (f/4 vs. f/5.6).
Nikon D3S, ISO 200, f/1.4, 1/1600, & 85mm using a Nikon SB900 off-camera triggered by Nikon SU800 for fill flash.
Here is a crop of the above photograph. You can see the tip of the nose, and the eyes are slightly out of focus just behind it. The small area of focus is a shallow depth of field.
By controlling (limiting) the depth of field, you can force the viewer’s attention to only what you want them to see. For example, take a picture of a football receiver catching the ball. If everything were sharp (large depth-of-field), it would be difficult to distinguish the main subject from everything. However, if you were to make the picture with a telephoto lens and a shallow depth-of-field, the player and the ball would “pop.” The “pop” is because you would have isolated the player and the ball from the rest of the picture, thus calling attention to what you want the viewer to see.
Portrait photographers use medium telephoto lenses to draw attention to the face rather than the background in indoor and outdoor portraits.
When you increase the depth of field with a telephoto lens, more focus from the front to the back of the photo makes things appear closer together from the foreground to the background. The wide-angle lens makes things appear farther apart. Objects in a photograph made with a telephoto lens make those objects appear closer together than in “real life.” The longer (more powerful) the lens, the closer together they will appear and the closer they will seem to you. It’s a powerful tool. You can use it to make all kinds of statements.
Sports
Nikon D2X, ISO 200, f/4, 1/1000, & 840mm
A sports photographer may use this technique to show a baseball pitcher in his windup; the scoreboard in the background shows a total count and the bottom of the 9th. You can see, again, from the scoreboard brought up close behind the pitcher, that it is a no-hitter. Now that’s storytelling and powerful photography, thanks to the creative use of telephoto lenses and selective focus.
If the photographer had used a shallow depth-of-field, you couldn’t read the scoreboard or use a wide-angle lens; the scoreboard would have been too far away to read.
Nikon D2X, ISO 400, f/6.3, 1/2500, & 840mm
In portrait photography, a medium telephoto lens shows faces in a more natural perspective than a wide-angle lens’s distortion. A moderate telephoto lens, say, 80mm to 100mm, on a 35mm camera will put you about 5 to 7 feet from the subject for a head-and-shoulders photograph.
Wildlife
When photographing wildlife, the rule is to use a lens of at least 300 mm to fill the frame. You don’t want to be five to seven feet from nature. Wildlife photographers use 400mm, 500mm, 600mm, or even as long as 800mm lenses.
When you shop for a telephoto lens, you’ll find many choices for the same focal length lens. Nikon makes lenses that cost a few hundred dollars to up to $25,000. The ƒ-stop (aperture) is a significant factor in the cost. The lower the number (faster the lens), the more expensive and heavier the lens.
Fast Lens
There are two advantages to faster lenses. First, faster lenses, like ƒ/2.8, allow you to take photos in lower light. A faster lens is essential for the wildlife photographer in the woods at dawn or dusk when the animals are out.
Nikon D2X, ISO 400, f/2.8, 1/1000, & 400mm
The second advantage of the faster lenses is that they allow for a shallower depth of field.
It is possible to rent these longer, faster lenses from some rental houses in major cities instead of buying them.
Before mounting a lens on your camera, ask yourself, “What do I want to say with this picture? What effect will help me to communicate this message to my audience?
What lens will it be?
When you reach for a telephoto lens, it may be for more than to make the subject appear closer. Just as wide-angle lenses not only include more stuff, any lens is a tool you can use to make your point.
Cookie Consent
We use cookies to improve your experience on our site. By using our site, you consent to cookies.


