
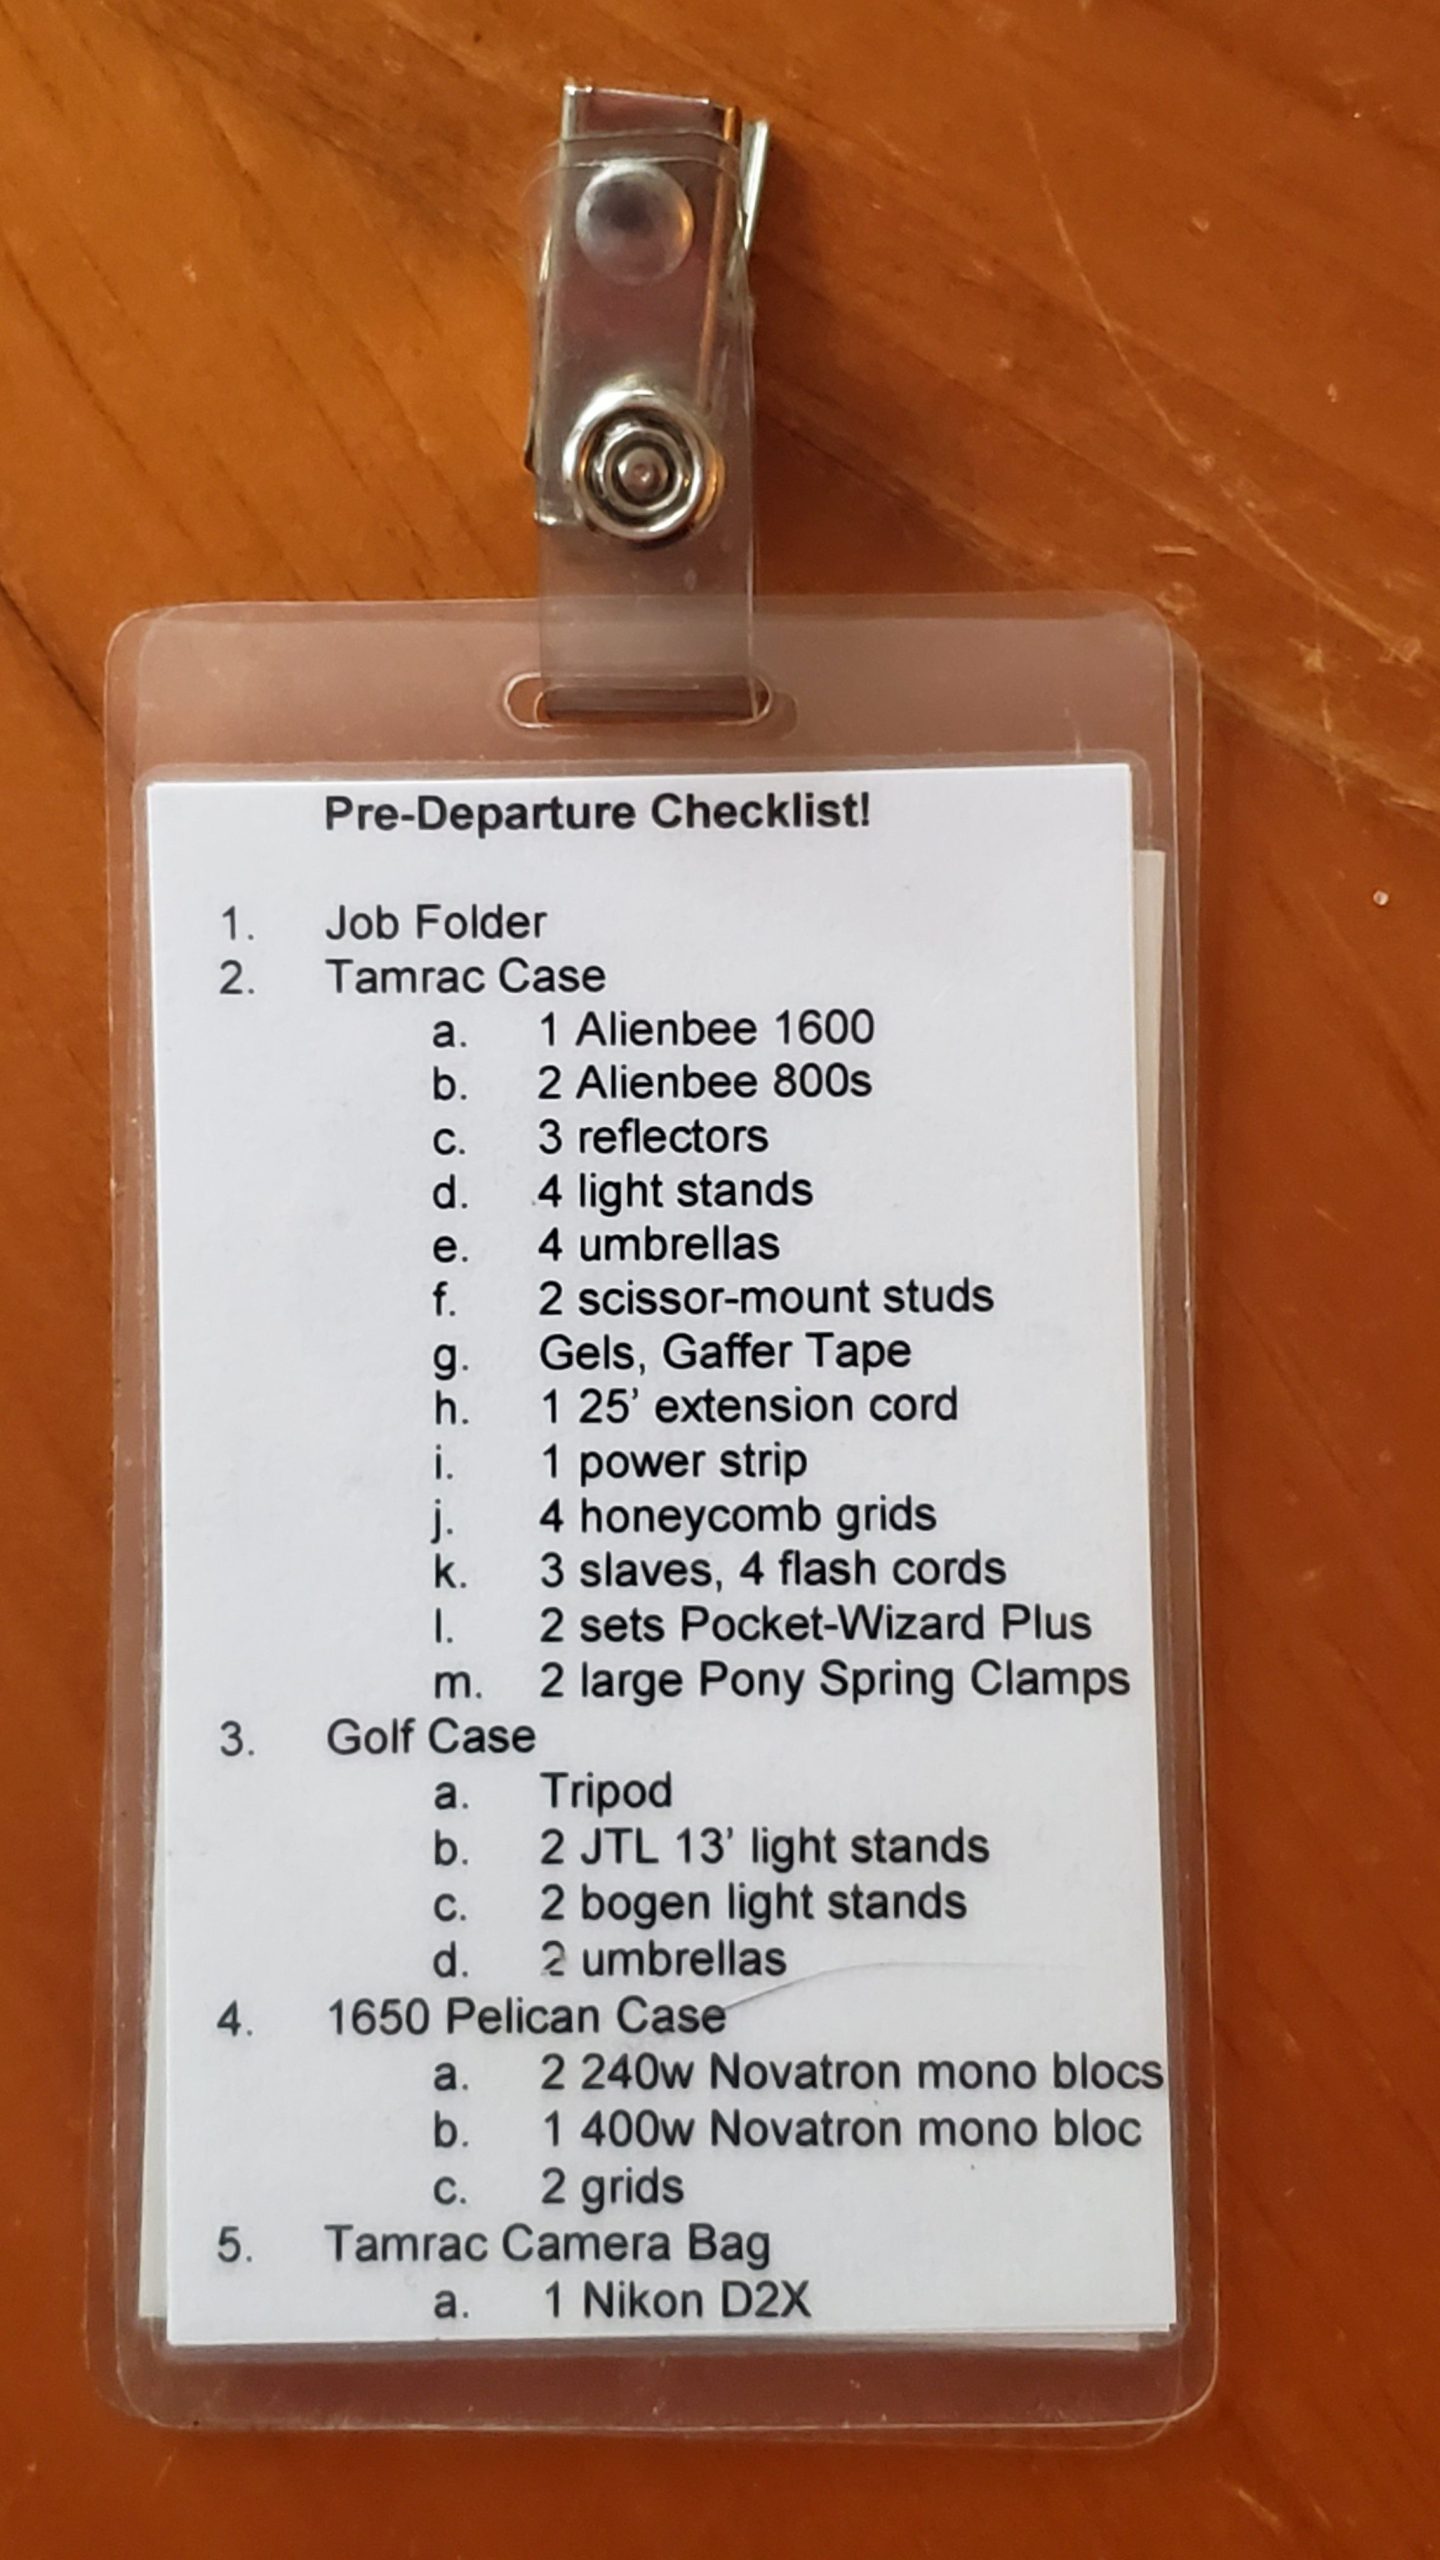
The top photo is one of the laminated lists I used in 2002.
When I mentioned in a recent post about creating a Digital Workflow that you laminate, one person asked for that list.
I have been doing this so long that I no longer need the list, but I came across one of my laminated lists in my van to help me be sure I had everything before I left the house for a photo shoot.
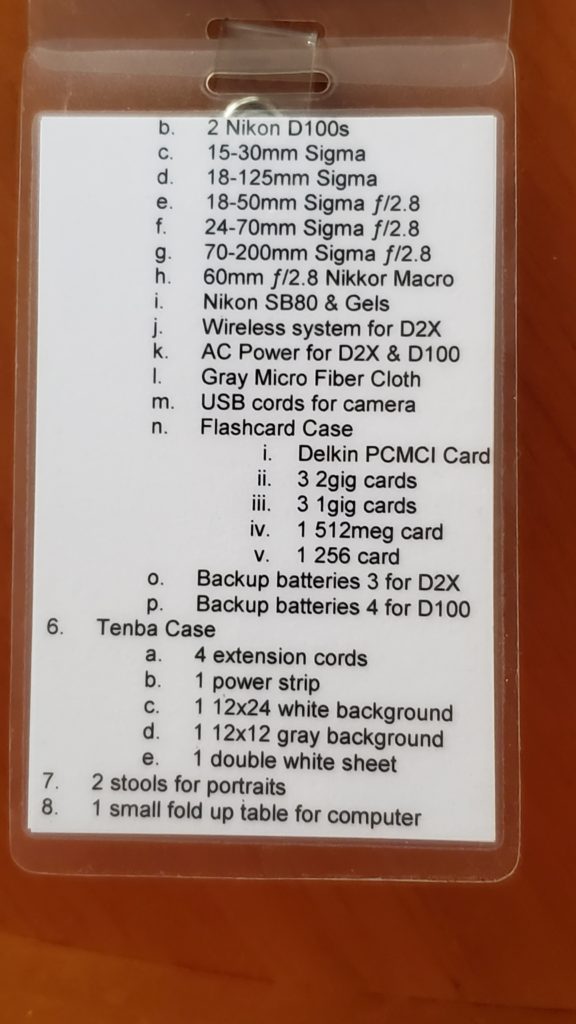
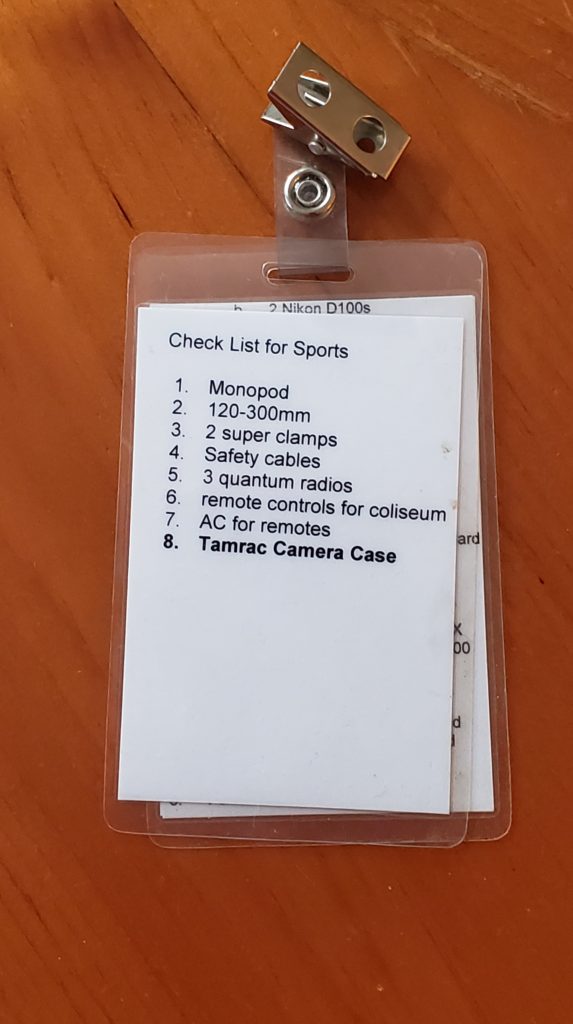
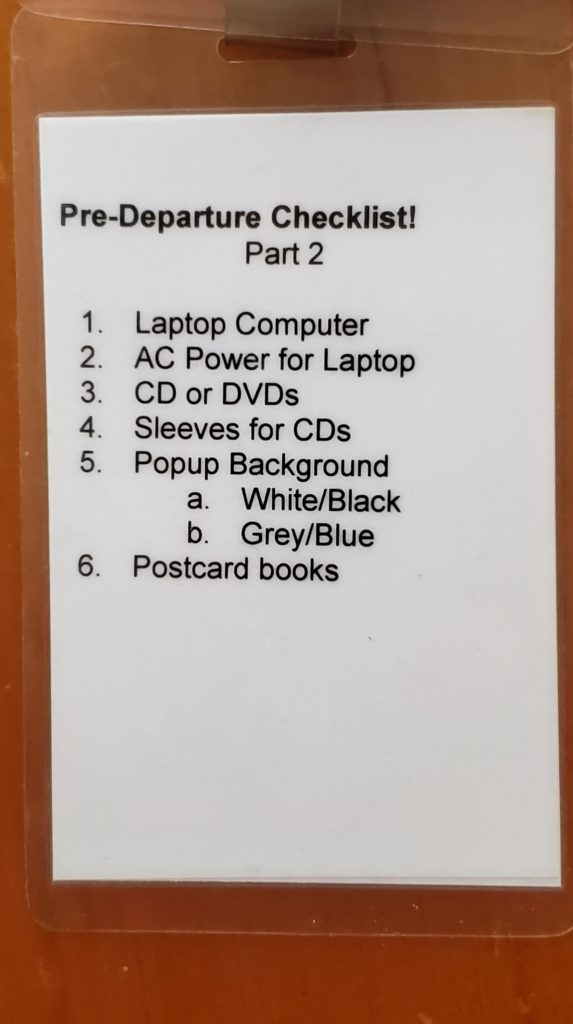
This list had four sides of two laminated cards with a clip.
“Quality is never an accident. It is always the result of intelligent effort.”
John Ruskin
I was shooting many college basketball games then and had to arrive early to put up remotes and turn on my strobes.
I also did many headshots and a couple of shots for a missionary agency.
Each assignment was often so different that I would bring some gear I wouldn’t use for another project.
Today, I still take the time to pack before I leave for a trip or photo shoot the day before.
Here are some things I am doing that impact my Digital Workflow.
Day Before Photo Shoot Preparation
· Charge all camera batteries and other batteries
· Format all XQD Memory Cards for Cameras in Camera
· Inspect all camera sensors with Sensor Loupe
· Clean, if necessary, the sensor with a Cleaning Kit
· Make a list of gear needed for the photoshoot
- Do I need a studio?
- Do I need a tripod?
- Am I doing a video?
- Do I need microphones?
- Do I need a constant light source for video?
· Pack the necessary gear into cases
- If flying, then I will weigh all the cases
- Often, this is rearranging items to stay within the weight limit
- If overweight, I will arrive extra early at the airport to get the Media Baggage Rate. This applies to only working media and not a hobbyist.
Day of Shoot
- Check cameras one last time for battery power
- Pack Van and leave
- Meet contact and brief on expectations and any last-minute changes
- Scout location – Often with client
- Take gear out and assemble what is necessary
- Go to each site and do a custom white balance
- Pick all settings for the shoot
- Sports Settings example for my Nikon D5
- Standard
- If Shooting with Studio Strobes, choose the settings on the camera
- When changing locations, pick the custom white balance [on Nikon, I can store six different WB settings and just like the one needed or do a new custom white balance]
- Go to spots I identified during scouting that would be ideal locations to shoot from just before the best time to be in those locations.
- If there is a long shot list, I will pull this out, ensure I am on track, and help remind me of the next shot or place for the photoshoot.
- Shoot the event
- Check-in with the client before leaving
Post Processing
- Ingest to PhotoMechanic
- IPTC information is filled out, and part of the ingesting process
- Select the keepers
- Delete all untagged images
- Import into because I am shooting RAW
- Using metadata, I select all the photos with the same lens
- Select all with the same lens
- Go to the Develop Module “D” shortcut.
- On the far right, go to lens correction.
- Go back to the Library, pick another lens, and do the same until all photos have been lens-corrected
- Click on the profile and enable the profile for Adobe Color, or select another more appropriate profile by browsing in the menu.
- Tip for choosing multiple images shot in the same scene and making corrections all at once
- Go to settings and then tell it to Match Exposure on all those selected
- ⌘D unselect
- Go through them one by one and check that they are correct. Repeat this step for different scenes.
- Correct for blown-out highlights
- Pull in blacks if necessary
- I often use the Dehaze and Texture sliders.
- For sharpening, I use this technique
- Export all images to sRGB JPEGs Quality 80
- Open PhotoMechanic
- Upload to my PhotoShelter account for the client
I love the updated Adobe Lightroom. I am using three of the controls that, if used correctly, can help out some photos that, in the past, without these controls, would have been so-so photos.
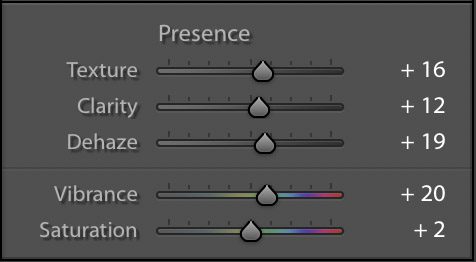
I love the Texture, Clarity, and Dehaze sliders. I cannot recommend them enough.
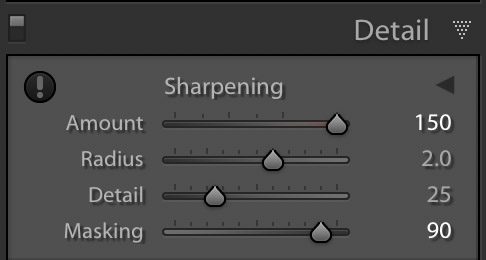
I hold the Option key on the Mac for sharpening while sliding the Masking control. The masking is around 70 for my older cameras, 12 megapixels or less. Eighty is for my Nikon D5, and 90 is for the higher resolution cameras. Once I see the white edges, I slide the sharpening amount to 150.
When your quality isn’t up to standards, it is often because you skipped a step in your Digital Workflow.
“The highest cost of poor quality is when your customer buys it from someone else because they didn’t like yours.”
W. Edwards Deming