The success of a fantastic fireworks shot is the location. You need to know where the fireworks will go off well before they do.
You don’t want to try to line up your shot after they start. You can tweak your composition, but don’t be caught not knowing where they will go off.
Consider clear view verses using foreground or surrounding to help make your fireworks stand out. My favorite shots are those iconic locations in the foreground, like the Statue of Liberty or the Golden Gate Bridge in San Francisco.
Fireworks
Tripod and Cable Release
I recommend using a tripod and a cable release. This will keep the camera as still as possible during a long exposure.
Fireworks
This is the Nikon MC-30 that I have used for years on different Nikon Cameras.
Camera Settings
Manual
White Balance – Daylight
ISO 100
ƒ/8
Bulb Shutter-speed and keep open for two bursts of fireworks using a cable release
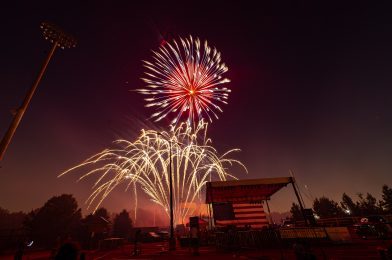
My exposures were from 6 seconds to about 12 seconds on average. I typically might shoot 75 to 100 photos and only really like about 10 of those shots.
Nikon D3S, 14-24mm, ISO 100, ƒ/8, 11 sec
When to press the shutter? When you hear the boom of the fireworks, click the shutter and don’t let go until the end of the second fireworks. The bursting will create those beautiful shapes. You don’t get the same exposure if you shoot at faster shutter speeds. The reason is that as the bright fragments move, you capture them throughout the exposure, whereas the faster shutter speed would freeze them. This is similar to photographing car lights on streets at night. By letting the cars continue to move, you get a trace of the lights through the photo.
Too often people are isolating their subjects so much that the context is lost. If you just give a peak in the photo of things behind the subject you can create depth into the photograph.
In the above photograph I used the ally to help create depth.
Nikon D4, 14-24mm, ISO 1000, ƒ/10, 1/200
See the difference between that photo and the one below?
Nikon D4, 14-24mm, ISO 560, ƒ/10, 1/200
Here I am just capturing some individuals in this same ally. Here I faced the subject and kept the background simple.
Nikon D4, 14-24mm, ISO 320, ƒ/10, 1/200
By just letting some of the background be of the ally in the lower photo you create a little more interest beyond the subject.
Nikon D4, 14-24mm, ISO 280, ƒ/10, 1/200
I am not trying to compare the photos in terms of best expression and moments. I am just trying to show how the composition can create more of a three dimensional photograph over a two dimensional one.
Here all the people were trying to stay in the shade and I like the photograph, but it is a little flat. The tables in front of them help, but compare this to the one below.
Nikon D4, 28-300mm, ISO 250, ƒ/7.1, 1/100
I am using the reflections in the window in the background to help create depth here.
Nikon D4, 14-24mm, ISO 2200, ƒ/10, 1/200
In the photo of the chef garnishing the food, I just have a small slither of sky in the top left hand corner of the photo. This helps with the depth as well as the reflections in the windows.
You will also notice in most of these photos I like working with extreme wide angle lens. I just love my Nikon 14-24mm ƒ/2.8 lens. By me getting close to people even where the background doesn’t help create depth the lens helps bue to the perspective and puts the viewer [you] right there in the ally with me.
Often after you have booked a client there will be some possible changes. Just because you quoted a price does not mean you have to keep that price if the client makes changes to the scope of the project.
“I will be more than pleased to make it happen for you. Since this is a change to what we agreed on I need your approval for the changes before we proceed,” is important to say to the client. You can phrase it however you want, but you need to communicate a few things.
You want them to get what they want.
With changes to the original estimate there are changes to the contract.
Price
What is delivered
Deadline
Possible new expenses
They must approve of the changes in writing for you to proceed.
Willingness to serve
Don’t respond with no to a client unless they are asking you to do more for the same amount of money. Just tell them you need just a minute to revise the estimate to give them an idea what they will cost and any other changes they need to know.
This is why you want to estimate on a project and not give day rates. The only thing you can do on a day rate is if you have additional expenses to meet their request, otherwise when you have the time to do more for them you must.
Give yourself time to respond
It is quite common that a client might catch you off guard and don’t feel bad about asking for a moment to consider their request.
Sometimes the request may mean not just price difference, but to meet their request something else must come off the project due to time constraints.
Sometimes I have to point out while we are running ahead of schedule for right now, but I will not know until the end of the project if I have time to add on this request. I will ask if they mind waiting to see if we have time. If they push then I let them know one of the situations we have scheduled might not get done. I then give them the quote for the price change and wait to see if they want to proceed.
Bait and Switch
If you have given them a written estimate you do not have to worry about them feeling like you have them over a barrel when you give them the increased price quote. There are some people who are actually trying to get more out of you than you estimated. This makes them feel like they got their money’s worth.
You don’t need to feel the pressure to give in to them, you just tell them the price difference and let them decide.
What happens if you forget to communicate a price difference?
You will most likely eat the cost, because you failed to communicate.
It is professional to communicate price changes before doing the work. I have watched too many freelancers turn in invoices that were higher than the quote and the relationship with the client is tarnished at best and destroyed at the worst.
Take care of the paper work as much as you do the creative and you will have customers who will hire you again and again.
Nikon D4, 70-200mm, ISO 10000, ƒ/2.8, 1/800 with Nikon SB900 on camera flash fired at slow sync
While at first glance this photo is quite acceptable the main light is now my flash and not the stage lighting.
Nikon D4, 70-200mm, ISO 2500, ƒ/2.8, 1/100
The second shot is available light and shot only 1 minute prior to the flash shot. This is around 9 pm and on one of the longest days of the year, so there is still some sunlight as the sun sets.
There is not as much “Stage Light” as there will be after the sun sets.
Nikon D4, 70-200mm, ISO 2200, ƒ/2.8, 1/320 with fill flash from SB900.
Here I went to the other side of the stage and shot a similar comparison of the flash and no flash.
Nikon D4, 70-200mm ISO 12,800, ƒ/2.8, 1/400
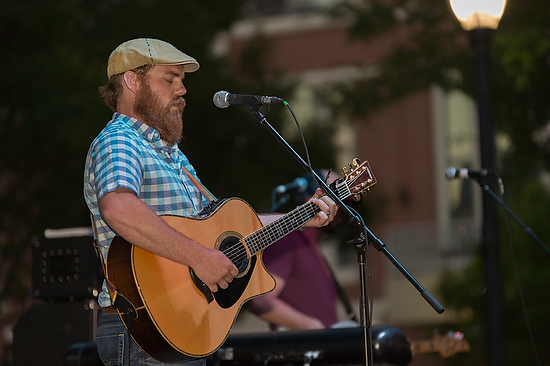
The one reason I was using the flash to begin with is the singer Marc Broussard’s hat is casting a nasty shadow and most of the time his eyes are hard to see. You can see the shadow in the second available light shot.
While the flash fixed this issue as long as it was on my camera it just ruined the mood of the stage lighting.
Nikon D4, 70-200mm, ISO 12800, ƒ/2.8, 1/100
While I now decided to shoot the rest of the performance with available light I now had another problem the light on the lead singer’s face only looked good occasionally Most all the time the light looked like this when he sang. You see a bright spot on his chin and his eyes are in a shadow.
Nikon D4, 70-200mm, ISO 12800, ƒ/2.8, 1/80
Now to get the best photos of the lead singer Marc Broussard I had to pick the best moments where the light and the emotion came together. I think I have this here when Marc looked up into the light and also the emotion in his face worked really well.
Now you know why so often a spot light is used to follow the main character on a stage with stage lighting. You also can see why many theaters have foot lights. These are lights on the floor of the stage at the front aimed up at the actors to get rid of the shadows under hats and those with deep set eyes.
When there is still not enough light at ISO 12800
I have been in the darkest places like Swayze’s Venue in Marietta. Here the punk band moved around so much that I needed flash.
I try my best to always look at the light that is present and go with it before I use a flash.
When Nikon introduced the Nikon D3 the ISO on that camera went to 6400 with no trouble. Then Nikon bumped it up again with the Nikon D3S to ISO 12,800.
My newest Nikon D4 ISO goes to 12,800 comfortably and if you really need it you can bump it all the way to Hi-4 (ISO 204,800). The Nikon D4 has other improvements as well with focusing and especially in video.
Nikon D4, 14-24mm, ISO 12,800, ƒ/2.8 & 1/125
In the photo here of singer Marc Brousard singing at the People’s Fest at Atlantic Station the lighting for the stage was very minimal as compared to other music events. For most other major music events at Chastain Park Amphitheater or Verizon Wireless Amphitheater you could easily shoot people on the stage with ISO 400 or 800.
This is important because for the bigger venues you can actually own a much cheaper camera than you need to capture the event when the light is low.
This is true in sports as well. When you are photographing an NFL game at night the light on the field is much better than when you are shooting in a small town at their high school Friday night football game.
Nikon D4, 70-200mm, ISO 12,800, ƒ/2.8 & 1/100
Do you need to go and buy a Nikon D4 for $6,000 without a lens to take photos? If you want the very best ISO 12,800, but Nikon even makes point and shoot cameras that will go to ISO 12,800.
If you want to shoot events like the People’s Fest at Atlantic Station as I did this past Saturday night then you need a high ISO camera. Minimum of ISO 6400 in my opinion will just barely work before you need to add a flash.
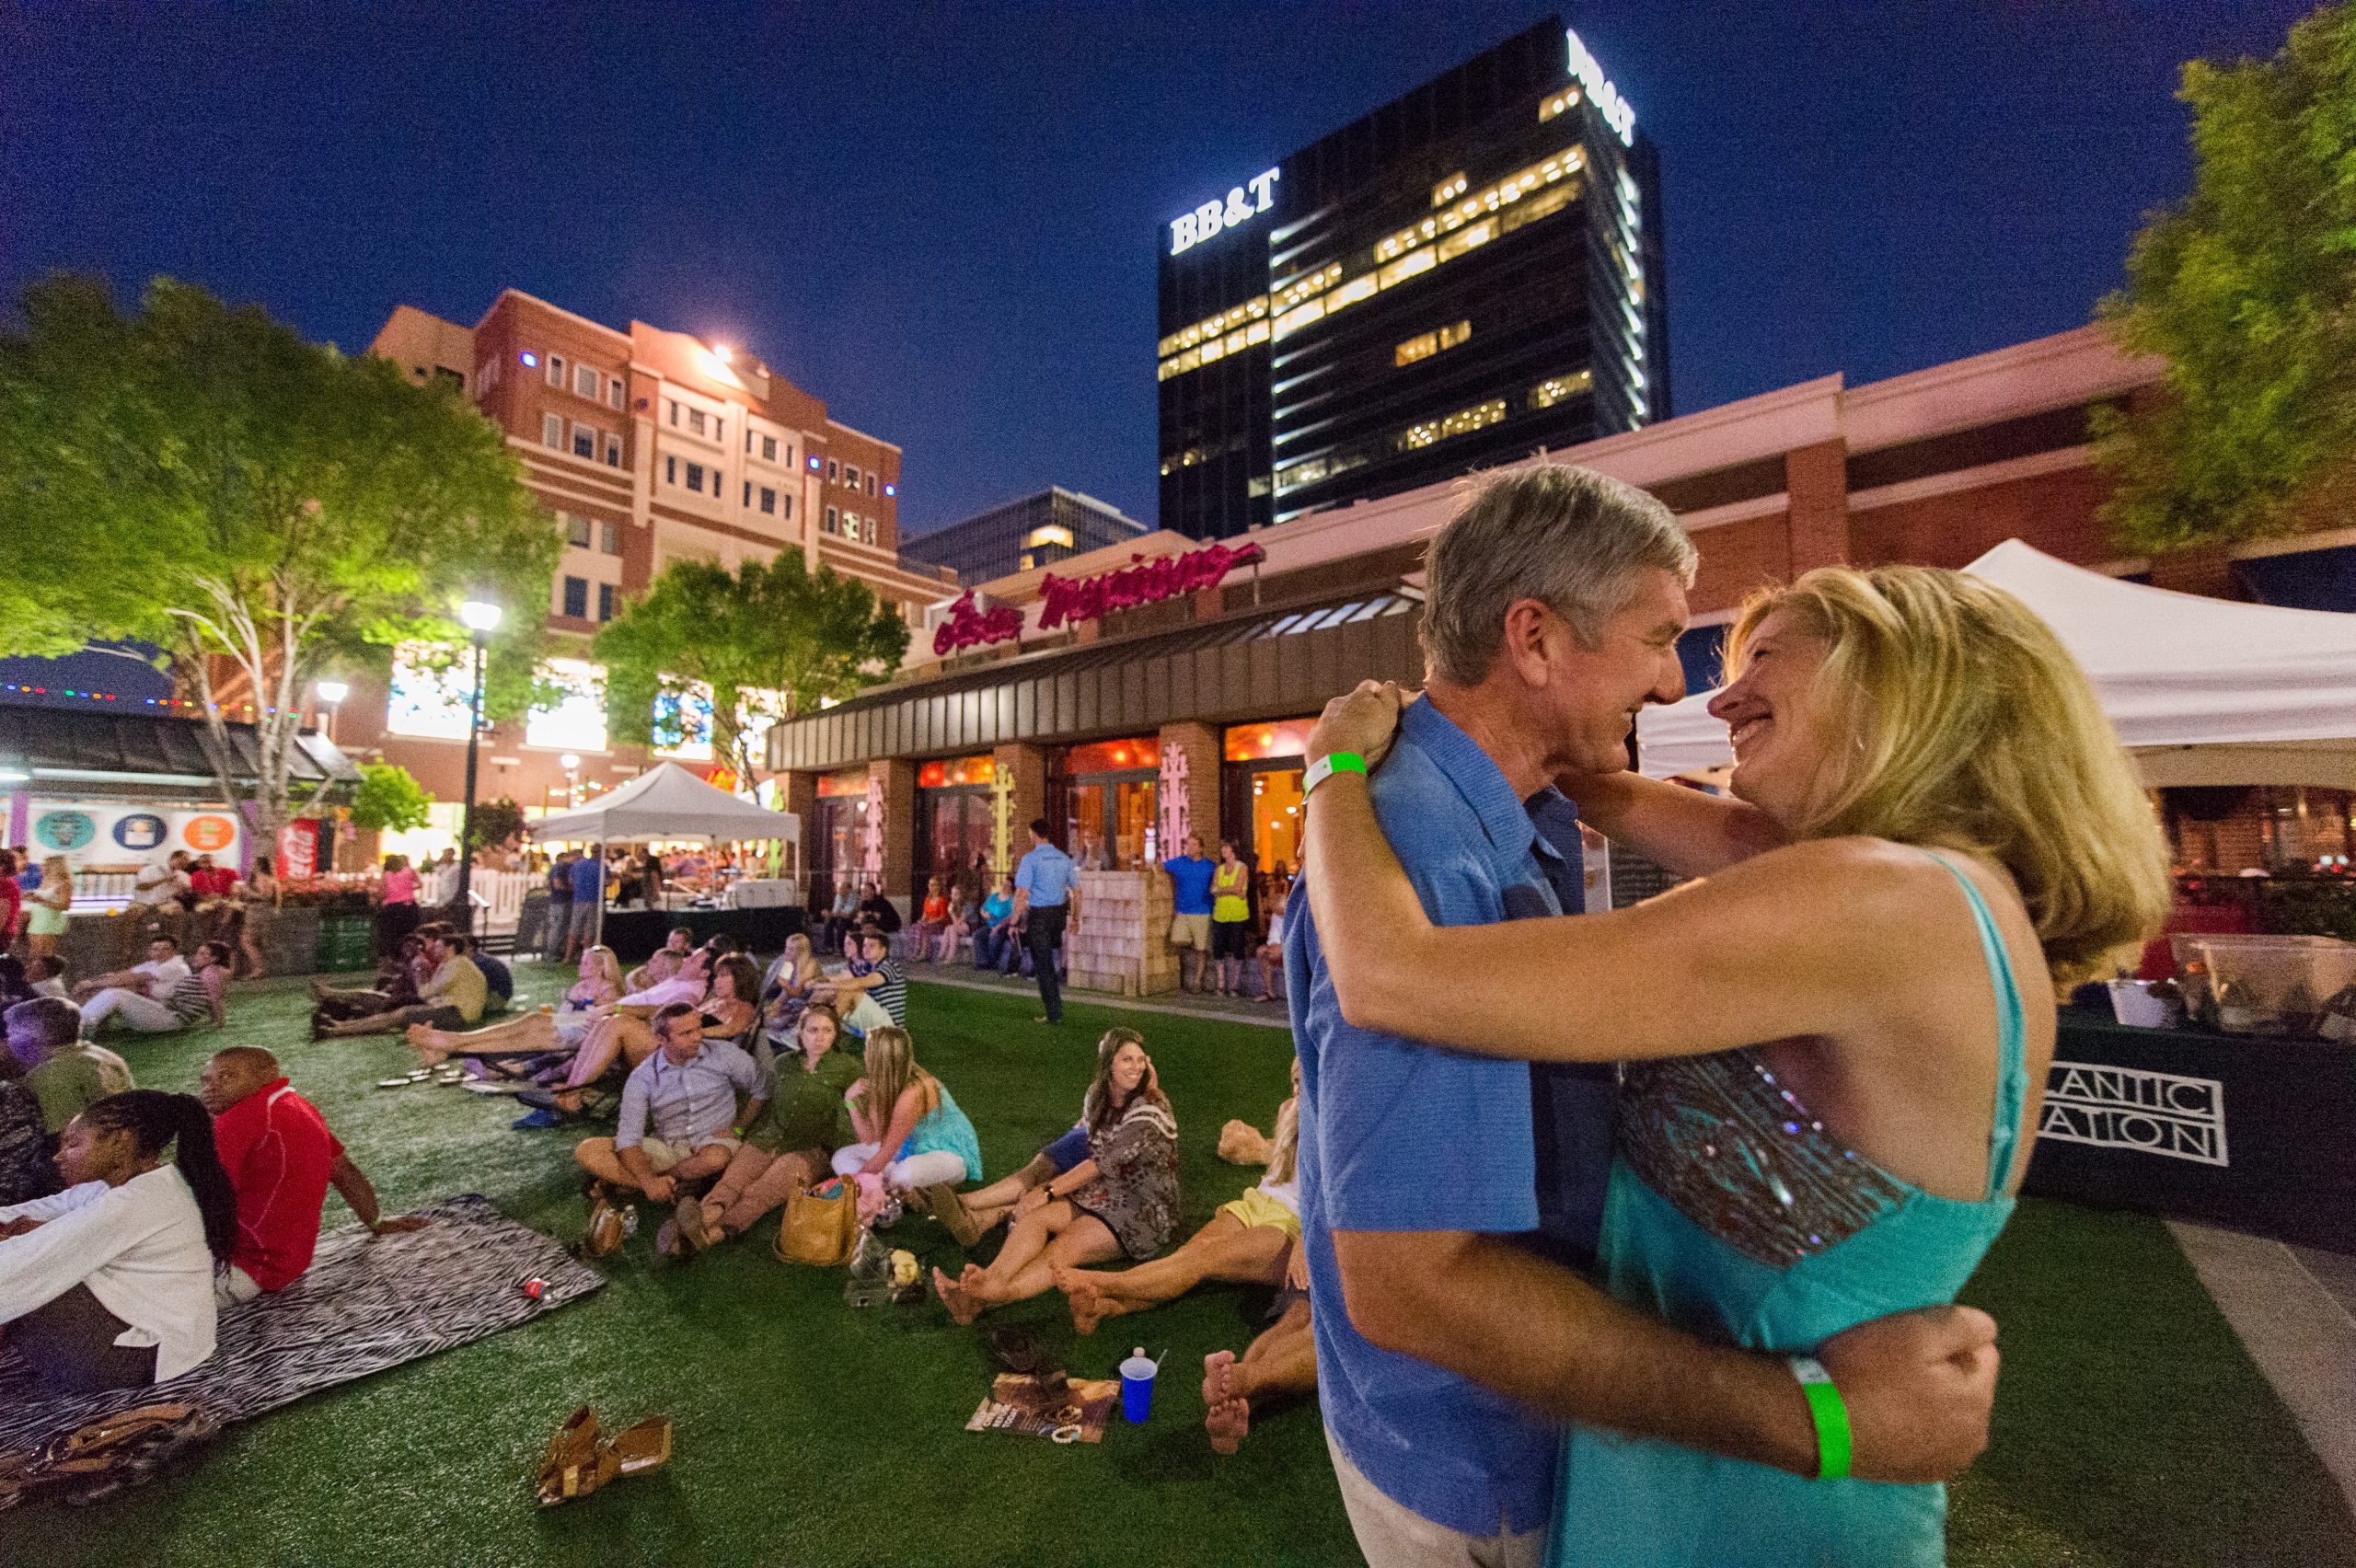
Nikon D4, 70-200mm, ISO 12,800, ƒ/2.8 & 1/125
For the photo of the couple I am hand holding a 70-200mm lens at 1/25 and vibration reduction technology is helping, but if they move they would not be in focus. The light from the stage and surrounding shops is helping light them, but barely. ISO 6400 would have me shooting at 1/10 of second. I doubt seriously that I would have gotten this shot without the ISO 12,800.
With the recent dismissal of the entire photo department at the Chicago Sun-Times we can see the times are changing. But there is no way an iPhone given to a reporter will capture the photos I was getting. Also, just to own the Nikon D4 will not get the same results.
You have to know how the camera works and how to make it work for you to get the best photos.
To remain competitive you need to have the best gear to capture the type of photos of the subjects you want to get paid to shoot. If you don’t have the best possible the guy that is able to show a better image because of their gear will get the job.
Remember, it is the photographer with the best images of the subjects that will get the job and not the most expensive gear.
All this is to say, your images decide if you get hired not the gear, but your gear can hold you back to get good images. If you have great gear and not good images then you still want get the jobs.
http://www.stanleylearystoryteller.com/360Tours/Chicago2/Chicago2.html I just got back from Chicago where I covered the Grand Opening of Chick-fil-A’s newest restaurant on the corner of State and Lake. Be sure and click on the 360º above and drag your mouse to the top and bottom or you can just use the menu buttons to navigate. Be sure to also zoom in and out using the +/- buttons on the menu.
The far right button on the menu will make the 360º full screen. Try that as well for really putting you there.
Maybe you have a place that you need to people to see as if they are standing onsite. My recommendation is to use the 360º Panoramic to help put people in the place.
This is the corner of State and Lake Streets in downtown Chicago, which if you reload the page will start the 360º Panoramic and spin until you are standing on the street corner.
Maybe you have a campus that you would like people to visit and this is a way to help encourage them to see your space. On the other hand maybe you realize many people cannot travel to see your campus and you want them to have the experience of being there. Either way, the 360º Panoramic is a cool way to engage your audience.
I am often getting phone calls from photographers about how to price a stock sale or assignment.
Options
No matter what you are quoting on I recommend giving the buyer a choice.
I like to think of this as a low, medium and high price.
When you order a drink like coffee usually they give you 3 choices: small, medium and large. Using this as your model always try and give the customer up front three choices for your prices.
Why?
Well the way you price will help setup how you negotiate later.
In stock photography you are negotiating how much the photo is used and for how long. By giving them three options you have set some parameters from how you like to price.
In assignment work you are quoting on things like number of photos, when they get the photos, how you deliver them and more.
If you just give them one price you are communicating more of a take it or leave it even if you didn’t mean that at all. When you give options people see you as flexible and may even ask for more flexibility.
If you offer three choices and the other bidder gives only one you can see how you just gave them 3 bids to the guys one and maybe you get the job just due to having an option they can go with without going back and forth. Too Much
If you are not careful you can overwhelm people with too much information. Keep the options simple rather than complex. Sure if you tell them more they have even more options, but they show more than about 5 or 6 options actually works against you.
Downloading a video from YouTube can be tricky. Here is a simple App that will let you not just download, but choose the resolution that might be available for you.
FYI: You must not distribute or financially benefit from that content. It must also come with the express permission of the copyright owner.
This is a great way if you loose your copy to copy your own video from the web for example, or you can use this technique to let someone see your video and then give them permission to download it.
MacX YouTube is a free software that will let you download most YouTube videos. This is great for those presentations when you may not have an internet connection or you don’t want to rely on one in case that fails.
When you open MacX YouTube you get this screen. Just click on the link and copy and paste your URL for the YouTube video. It automatically detects the YouTube video opened in browse. You don’t need to copy and paste the URL manually if you have it open.
It is capable of downloading all YouTube videos in whatever format or resolution, including MP4, WebM, FLV, even YouTube HD video.
As you can see in the screen grabe you are given many ways to download the video. It will convert it to the video format you prefer. I prefer downloading, if available, @ 1080 H.264 MP4 since this is the standard for the internet and works just about everywhere for everyone’s computers.
Vimeo is better design for those who want to share videos across the web. You can upload the video package and then share a link and password protect the video. In addition you can make it downloadable.
So for those who choose to upload and distribute I would recommend Vimeo as a better choice.
With Vimeo they give you options for downloading the video if the person who uploaded it gave that permission. Here you just click on Download under the video and they give you a few choices. As you can see the choices are much more limited than with the MacX YouTube downloader.
In case you need to convert a video I recommend Wondershare’s Video Converter. It can convert video to 158 formats. You can download a trial version and then buy it for $59.95. It works on Windows and Mac platforms.
It will also download from YouTube.
Just drag your files to the screen and then pick the output you choose.
Now you know an easy way to download video from YouTube and Vimeo.
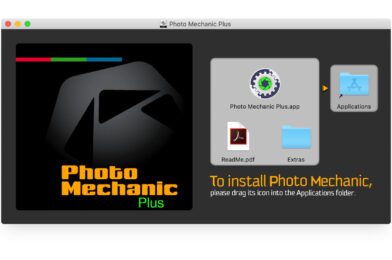
If you were in the press room and watched all the photographers ingest their images, write captions, crop, and upload their pictures to wire services or newspapers, you would find most of them using PhotoMechanic. It costs $150 and works on a PC or a Mac.
Why PhotoMechanic?
The number one reason most use it is speed. It is a stand-alone image browser that is so fast that it is ideal for the pressroom. Most who use it in their workflow ingest their images into this program, and if they need to do more than crop their pictures, they may use PhotoShop or Lightroom to adjust color, burn and dodge, or perform some other image correction.
Many photographers shooting on deadline shoot JPEGs for speed. Some will shoot JPEGs plus RAW and use the RAW to help salvage an image if necessary. Most of these pros nail exposure, focus, and white balance. They also crop or rotate images.
Figure 1
Step One—Ingest
PhotoMechanic allows you to ingest multiple cards at once. Figure 1 shows the screen that lets you customize how you consume. I select the cards and a destination, which is always an external drive. I have it checked that I should eject the cards and only ingest new images when it is done.
Two more things I do before clicking the “Ingest” button is click the renaming of files. Once this is done, it will be the same the next time I ingest this. By the way, I rename all my images using this code: “{year4}-{month}-{day0} {hour24}-{minute}-{second}.”
The most crucial step that makes this program stand out is the ability to embed text into every image I ingest.
Figure 2
You can see the box that pops up when you click on the IPTC Stationary Pad here in Figure 2. As you scroll down, there are more fields than you see here. PhotoMechanic will remember all that you have typed as a default. You can also save these and then load them as needed. For example, if you shoot for the Associated Press, you have to use specific fields, which will be different from the New York Times. You may also have your own style that you want to use. So, I have saved many different forms to help speed up the filling out of this form.
Once I finish this, I ingest. This will put the same IPTC on every image. This way, when I want to modify the IPTC, I only need to change a few things rather than put everything in the form from scratch.
Step Two—First Edit
I don’t want all the images I just ingested, so I will select the ones I want to keep first.
Figure 3
I look at each image and decide whether I want it. If it is a keeper, I type “T,” and the program checks the box. It is now “tagged.”
Figure 4
I then go and select all the “Untagged” images and select all the photos. Then I push “⌘ Command” and “Delete” to move all of them to the trash. Once this is done, I show all the images again.
Step Three—Rating PhotoMechanic lets you rate images using a color code system and/or stars. I primarily use the stars because this is how I marked my contact sheets back in the days of film.
Figure 5
You need to go to Preferences> Accessibility, where I check to use the Star Rating. Now, when I like an image, I can use the keys 1—5 and, if needed, 0 to remove it. A 5 means portfolio quality, and a 1 means it is OK and usable for publication. From there, it is a sliding scale for me.
Step Four—Caption Modification
Now, I go to the bottom right-hand corner of the PhotoMechanics contact sheet and click how many “Stars” I want to show to help narrow down the images I will transmit to the publication or wire service.
Figure 6
Usually, the number of images that sports photographers move from a regular game is about 5 to 6.
Now, I can customize the caption for each photo. PhotoMechanic is cool because it saves keystrokes and helps you correctly spell. In PM, this is called “Code Replacement.”
Go to Edit>Settings>Set Code Replacements. Here, you will select a previously created TXT file containing the rosters of the players for both teams.
Figure 7
One guy has a website that you can go to and create that file for a small fee, which helps save you tons of time captioning players’ names, positions they play, and numbers. Here is a link to help you understand how to use this in PhotoMechanic: http://www.codereplacements.com/.
Step Five—Image Correction if Needed Sometimes, you might need to do some work on the image. Here, the photographer can press “⌘ Command” and “E” if they have selected an editing program like PhotoShop to change a photo or picture.
Figure 8
To designate a program like PhotoShop, go to Preference>Launching and create the link to the program.
Step Six—Upload for Deadline
Could you please upload these images? I am doing this for the Associated Press. I have all the FTP information stored in PM, so I select all the photos, right-click, and click “Upload.”
Figure 9
Figure 9 pops up for me. I click send, and the images are off the photo desk.
Step Six—Keywording When Not on Deadline When I shoot for something other than deadline, I often keyword-image.
Figure 10
To help you with keywords, PM already has a structured list of keywords many stock agencies use, and you can add your keywords.
You can select one or multiple images and then type “⌘ Command” and “I”, which brings up the IPTC pad [figure 2], and then click on the pull-down menu for Keywords see Figure 11.
Figure 11
When you click on it, you will see Figure 10. This way, you can add things like “African American male” to all the photos you selected at one time. Right next to the keyword field is a box with a + sign next to it [Figure 11]. If you check it, it will keep any keywords already in the image and add them. This way, you can go through and select all the photos with women and keyword them and then go and + add those photos where there are flowers in them.
Step Six—Upload to PhotoShelter or Stock Agency
Figure 12
PM already has many FTP logins, such as PhotoShelter, Flickr, and SmugMug. In Figure 12, you can see that I have PhotoShelter. I pick a folder or create a gallery to upload the images.
Screenium software is available through your App Store on Mac for $39.99.
Don’t just describe a person what to do! It’s slow, it’s frustrating and chances are it’s easily forgotten so you’ll have to repeat that lesson at some point. Instead, record a screencast of your instructions and make it available online. What started as a one-on-one tutorial could help thousands of less experienced users all over the world.
I have done a few tutorials for folks and here is one I did on “Exposure Composition”
[youtube https://www.youtube.com/watch?v=HbV1fckAi5E] To make this I used the software Screenium. It is available in the App Store on Macs. It is very simple to use.
You can just record a: single window; a fixed area; fullscreen; or the mouse area. If your Mac has microphone built in then just sit close to the monitor start the session and when you are done stop the recording.
You can then just post your video.
If you have a web camera hooked up you can also include this in the video if you like showing you talking to everyone. Maybe you just want to use that to introduce yourself and then close the window or shrink it and then come back to it occasionally.
Here is one more video I did explaining depth-of-field. It has helped a lot of people see what DOF is all about and how to control it.
[youtube https://www.youtube.com/watch?v=K5BR_5Zvoto] Now I think you can see from those two examples that seeing me walk you through it is much better than me just telling you something—wouldn’t you agree?
I am using Final Cut Pro X version 10.0.8 when working with video, which you get through the App store on your mac. I love the software because you can work in real time and not wait for rendering. That works in the background.
No matter what video editing software you use I highly recommend maxing out the RAM on your computer. I have 16 gigs of RAM on my Macbook Pro 15″. If I had a desktop I would have even more RAM.
You need a fair amount of free space on your hard drive as well. This is why I recommend running the projects off an external drive. The program is on the main drive, but the clips and video are on my external drive.
I recommend 20% or more free space on your main drive. As you fill up the external, its performance will also slow and this is why my next recommendation will improve your experience with Final Cut Pro X.
Second
By default Final Cut Pro X will show you all Events and Projects on all mounted storage devices. You are in essence loading all your projects on all your drives every time you open Final Cut Pro X.
Event Manager X gives you control over your Events and Projects so you can manage what you want to be visible in Final Cut Pro X’s Event Library and Project Library. So, you could have multiple external drives with various projects on them and Event Manager lets you decide what is visible.
Instead of launching Final Cut you launch Event Manager X. As you can see in the screen capture above those with a check are what will show up. Just uncheck and it doesn’t show up in Final Cut Pro.
What the program is doing in the background is moving your “Events” and “Projects” from their normal folders into “Hidden” folders. See the example above.
Now lets say you have a few projects in the works. You finish one and send it for approval to the client. While you wait on their feedback and changes you can then close Final Cut Pro open Event Manager and uncheck that project and event for now. Then just check the event and project you want to work on next. As long as you have that “Re-open Final Cut Pro X” at the bottom, when you click on the button to move the events and projects it will launch Final Cut after it moves everything and then you only see what you are working on in Final Cut Pro.
The reason for using Event Manager X is not to make things look neat in Final Cut Pro X, it is to improve the performance of Final Cut Pro X.
I am still in cruise mode after last week. It takes longer to do everything since I got back. You see I think I need to stop every 45 minutes and find food.
Being on the ship and see those huge anchors made me think of a simple composition technique to improve your photos.
Anchor your subjects.
Nikon D4, 28-300mm, ISO 12,800, ƒ/3.5, 1/160
When you crop off the feet of a subject or in this case the front of the car the subject isn’t well anchored.
Just lower the camera a bit and give the subject a little room at the bottom.
See what a difference the composition is by just moving the camera a millimeter?
The reason so many of us forget to do this is we are looking too much at the subject. You need to scan the edges of the photo and correct for this problem.
Many photographers tend to have too much space above the subject and this is due to centering of the subject.