4 Must-Try DAM Tips from Chick-Fil-A’s Visual Asset Manager

[Copied from an article featuring my expertise in Online Searchable Photography Catalog. Here is the original.]

If you’ve tasted their chicken sandwiches, you get it.

The last time we spoke to Chick-fil-A’s multitalented storytelling extraordinaire, Stanley Leary he shared how he project-managed the implementation of PhotoShelter to help unify the brand’s visual asset management and contributed creative content ideas to get people nationwide obsessed with eating more chicken.

During the Innovation Summit, Stanley shared a few more invaluable nuggets of wisdom about corporate visual asset management that cluckedstuck out.

Watch the entire session below or try the DAM tips out first:

  1. Add keywords as you upload your images to PhotoShelter; they’re “the hot sauce of content.” Adding metadata makes assets in your media library instantly accessible—more discoverable and easier to search for, and speaking from experience, Stanley agrees, “The turning point for Chick-Fil-A for using PhotoShelter more effectively—especially for people who are out there doing journalism and taking pictures and writing normal captions—if you put keywords in, your organization can use them for a lot more than just the initial concept of what you shoot them for…you can move your photos beyond the initial assignment and use them for a lot more,” he said. 

  2. Create a keyword list unique to your organization’s needs. If you’re in retail, make your keywords about your merchandise and brand materials. If you’re in higher education, try adding keywords for location, people, year, and campaign when necessary. Whatever your business may be, make sure your keyword list represents what your users most commonly look for and need. Stanley said, “If the user can not find the photos they’re looking for, it’s not a successful system.” After initiating a live exercise with the session audience—asking them to look at an image and submit their keywords to a group Slack chat, Stanley noted that people’s answers don’t tend to be consistently the same, so you can’t just onboard a team to a DAM platform with zero training. “You need to create a keyword list that’s structured for your organization,” he said.

  3. Sync Google Analytics with your PhotoShelter account to get real-time analytics about the way users search for images and use that to inform your brand’s keyword best practices. Stanley said, “One of the best things that PhotoShelter offers is the Google Analytics [Integration.] If you’re not doing that, you’re missing out on an opportunity because the advantage of Google Analytics is that I can go back to 2006 and I can pull up all the search terms that everybody has searched for within Chick-Fil-A’s PhotoShelter account. So, the best way to massage your keyword list is to look at how people are searching in your catalog. You also, every once in a while, want to go to your user because you want this to be user-friendly.”

  4. Nothing lasts forever, (except PhotoShelter,) so back up your assets because you can never be too safe. Stanley told a cautionary tale about a former colleague who was the President Emeritus at Georgia Tech while he worked there. This former colleague, Wayne Clough, left to become the Secretary of the Smithsonian and eventually came back to Georgia Tech looking for images for a book he wanted to write about his time at the school, but all the archival media was destroyed in a basement flood. His firm advice? “Keep your images in 3 places: Your computer, external hard drive or server, and PhotoShelter,” Stanley said..


White balance 2.0: Saving even more time in post-production


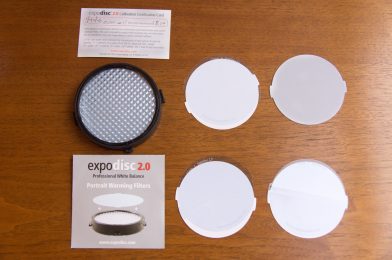
I just recently upgraded my ExpoDisc. The upgrades come with the Portrait Warming Filters. This little addition saves me more steps in Adobe Lightroom and gives me more time to enjoy life.

I have been using ExpoDisc since 2005. George Wallace invented ExpoDisc to help his students at San Jose State to get better exposure to Kodachrome 25. He studied with Ansel Adams and Minor White, where he learned to master the zone system.

I wrote about how to use the ExpoDisc a while back, but here is the basic idea of how it works.

ExposDisc goes in front of the lens, and then you use it to get an incident reading rather than a reflective reading of the light.
Notice the direction of the light hitting the subject. Next, you move to the same position to get the light reading below.
Point the camera toward the direction of the light falling on the subject.

The latest upgraded version has introduced the warming filters you place before the ExpoDisc.


In Adobe Lightroom in the Develop Module, you can adjust the color temperature; this is where I often warm up my photos.
 
Now I no longer need to do this. I currently use the +1 warming filter, which introduces just a little warmth into all my photos.
 
The cool thing is if you don’t want to do this for any reason, you don’t have to use the filter. Instead, if you want it even warmer, just use the +2 or start stacking the filters.
 
The Auto White Balance [AWB] setting on your camera is looking at the scene in front of the lens, and then it will read all the colors it sees and try to make it 18% gray. So if you have a red wall you photograph, the camera will all cyan to make this red wall appear gray.
 
If someone is in that photo, their skin will have a cyan color cast.
 
The problem with 18% gray cards depends on the angle you hold them. You can get a glare which will shift the camera color settings. I have found that every other system I have tried that uses reflective light reading [you point the camera at the device] is not as accurate as when the camera is put into the light, making an incident reading.
 
 
The second benefit of the newer ExpoDisc V 2.0 is it comes with a carrying case. When I first bought my ExpoDisc years ago, it came in the standard filter case, like all other filters you purchased. This new case you can put on your belt if you like and have it readily available.
 
When I first bought my ExpoDisc, I paid more than $120 for the device. Today it comes with more options and only costs $49.95.
 
If you consistently use ExpoDisc, I promise you that you will notice a consistency in skin tone with all your images that will make people see.

Video showing my Digital Workflow

This video will walk you through my basic steps I do with all my photos.

Stanley’s Workflow

  1. Ingest to PhotoMechanic
  2. IPTC information is filled out and part of the ingesting process
  3. Select the keepers
  4. Delete all untagged images
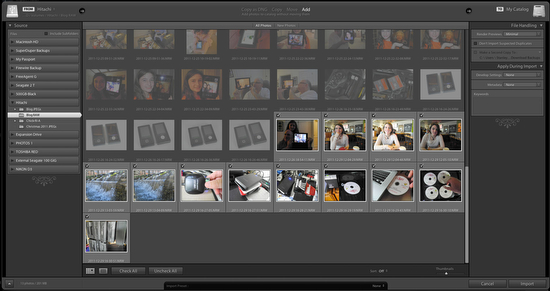
  5. Import into Lightroom, because I am shooting RAW
  6. Select all
  7. Go to Develop Module “D” shortcut
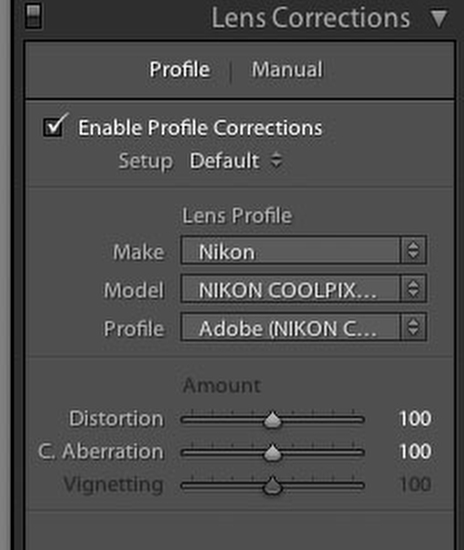
  8. On far right go to lens correction
  9. Click on profile and enable profile
  10. Correct for blown out highlights
  11. Pull in blacks if necessary
  12. Export all images to sRGB JPEGs
  13. Open PM
  14. Upload if necessary
  15. Burn DVD as needed
Here is an earlier blog posts for you on similar workflow issues:
 
May 25, 2013
Shooting Workflow for the Novice Photographer. These are the steps I went through yesterday teaching the camp photographers for WinShape Camps. These were photographers with all levels of skill. We wanted all of them 
Dec 29, 2011
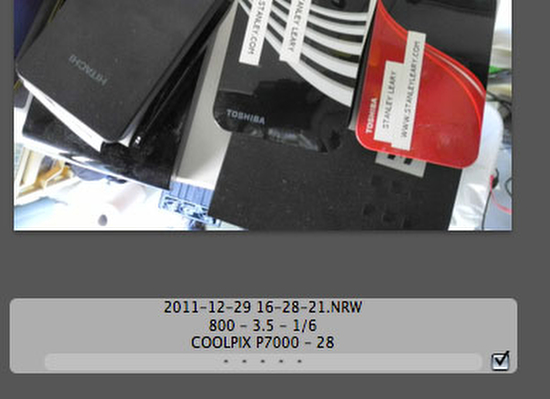
Step 1 – I ingest the images from my Compact Flash Card or SD Cards. My settings for the camera are RAW and I normally use the ExpoDisc to get custom white balance. I shoot in ADOBE RGB color space as well. All the 
Jun 14, 2013
It is a stand alone image browser that is so fast for the pressroom most who use it in their workflow ingest into this program and if they need to more than crop their images then they may use PhotoShop or Lightroom to adjust 
Feb 01, 2012
With XMP, desktop applications and back-end publishing systems gain a common method for capturing, sharing, and leveraging this valuable metadata — opening the door for more efficient job processing, workflow 


PhotoMechanic is a must have for the editorial/sports photographer

If you were in the press room and were watching all the photographers ingest their images, write captions, crop and upload their images to the wire services or newspapers you would find the majority of them using PhotoMechanic. It sells for $150 and works on PC or Mac.

Why PhotoMechanic?

The number one reason most use it is speed.  It is a stand alone image browser that is so fast for the pressroom most who use it in their workflow ingest into this program and if they need to more than crop their images then they may use PhotoShop or Lightroom to adjust color, burn and dodge or some other image correction.

Many photographers shooting on deadline shoot JPEGs for speed. Some will shoot JPEGs plus RAW and use the RAW to help salvage an image if necessary.  You see most of these pros are nailing the exposure, focus and white balance. The most they are doing is cropping or rotating an image.

Figure 1

Step One—Ingest

PhotoMechanic allows you to ingest multiple cards at one time.  In Figure 1 you can see the screen that lets you customize how you ingest.  I select the cards and then select a destination, which for me is always an external drive.  I have it checked that when it is done to eject the cards and only to ingest new images.

Two more things I do before clicking the “Ingest” button is click the renaming of files. Now once this is done the next time I ingest this will be the same.  By the way I rename all my images using this code “{year4}-{month}-{day0} {hour24}-{minute}-{second}.”

The most important step to me that makes this program stand out is the ability to embed text into every image as I ingest.

Figure 2

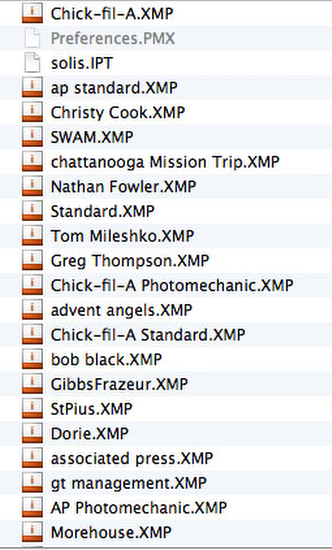
You can see the box that pops up when you click on the IPTC Stationary Pad here in Figure 2.  There are more fields as you scroll down than you see here.  PhotoMechanic will remember all that you typed as a default. You can also save these and then load them as needed.  For example if you shoot for Associated Press you have to use certain fields and they will be different than if you shoot for the New York Times. You may also have your own personal style that you want to use. So, I have many different forms saved to help speed up filling this form out.

Once I finish this I ingest. This will put the same IPTC on every image. This way when I want to modify the IPTC I only need to change a few things rather than put everything in the form from scratch.

Step Two—First Edit

I really don’t want all the images I just ingested, so I am going to select the ones I want to keep first.

Figure 3

I look at each image and decide do I want it or not. If it is a keeper I just type “T” and the program puts a check in the box and it is now “tagged.”

Figure 4

I then go and select all the “Untagged” images and select all the images. The together I push “⌘ Command” and “Delete” to move all of them to the trash.  Once this is done I show all images again.

Step Three—Rating

PhotoMechanic lets you rate images using color code system and/or stars. I primarily use the stars since this is how I was marking my contact sheets back in the days of film.

Figure 5

You need to go to preferences> Accessibility and this is where I check to use the Star Rating. Now when I like an image I can just key 1—5 and if needed 0 to remove them.  A 5 for me is portfolio quality and 1 is it is OK and usable for publication.  It is a sliding scale from there for me.

Step Four—Caption Modification

Now I go to the bottom right hand corner of PhotoMechanics contact sheet and click how many “Stars” I want to show to help me narrow down the images I will transmit to the publication or wire service.

Figure 6

Usually the number of images Sports Photographers are moving from a normal game is about 5 to 6 images.

Now I can go into each photo and customize the caption. Now the really cool thing about PhotoMechanic is saving you key strokes and helping you be accurate with spelling.  This is called “Code Replacement” in PM.

Go to Edit>Settings>Set Code Replacements and here you will select a TXT file that has been previously created. This will have the roster of the players for both teams.

Figure 7

One guy has a website that you can go to and create that file for a small fee and help save you tons of time captioning players names, position they play and number.  Here is that link to help you understand how to use this in PhotoMechanic http://www.codereplacements.com/.

Step Five—Image Correction if Needed

Sometimes you might need to do some work on the image.  Here the photographer can press “⌘ Command” and “E” if they have selected an editing program like PhotoShop to make changes to an image or images.

Figure 8

To designate a program like PhotoShop go to Preference>Launching and create the link to the program.

Step Six—Upload for Deadline 

Now you need to upload these images. Here is what I am doing for Associated Press. I have all the ftp information stored in PM and so I just select all the images, right click and click on “Upload.”

Figure 9

What pops up is Figure 9 for me. I then just click send and the images are off the the photo desk.

Step Six—Keywording When not on Deadline

For when I am shooting for something other than deadline I am often keywording images.

Figure 10

To help you with Keywords, PM already has a structured list of keywords for you to use that many Stock Agencies already use and then you can add your own keywords.

So you can select one or multiple images and then just type “⌘ Command” and “I”, which brings up the IPTC pad [figure 2] and then click on the pull down menu for Keywords see Figure 11.

Figure 11

When you click on it you will then see Figure 10.  This way you can add things like “African American male” to all the photos you selected at one time. Now right next to the keyword field is a box with + sign next to it [Figure 11]. If you check it then it will keep any keywords already in the image and just add your keywords.  This way you can go through select all the photos with women and keyword them and then go and + add those photos where there are flowers in them.

Step Six—Upload to PhotoShelter or Stock Agency

Figure 12

PM has many ftp logins already for you like PhotoShelter, Flickr and SmugMug for example. Here in Figure 12 you can see I have PhotoShelter. I just pick the folder or create a gallery to upload the images.

Stanley’s Workflow

  1. Ingest to PhotoMechanic
  2. Select the keepers
  3. Delete all untagged images
  4. Import into Lightroom, because I am shooting RAW
  5. Make all corrections necessary to images
  6. Export all images to sRGB JPEGs
  7. Open PM 
  8. Upload if necessary
  9. Burn DVD as needed

Digital WorkStation for Photographer

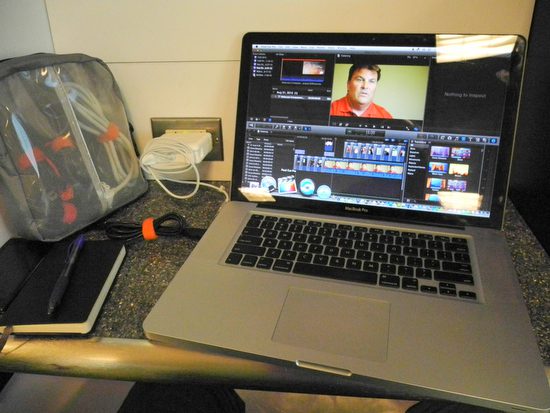
I decided to look at all the software I use on my computer and realized my computer costs a lot more than my Nikon D4 camera which retails for $6,000.

You really need to remind yourself all that you bring to a job for a client. You need to be able to recoup your costs and still make a profit.

Hardware + Software

$2,500  Macbook Pro 15″ 2.66 GHz i7 processor with 8 Gig Ram
$1,900  Adobe Creative Suite
$200     Microsoft Office 11
$150     PhotoMechanic
$150     Lightroom
$300     Final Cut Pro X
$50       SilverFast 8
$120     SoundSlides Pro
$140     FotoMagico
$400     Cumulus
$150     FotoQuote
$49       VMWare Fusion 5
$140     Windows 7
$99       Quicken Home & Business
$20       Disco Burning
$600     Few other software packages

$6,968  Total

Training

To learn how to use the computer and each of the software packages is a lot of time and money.  I cannot realistically put a figure on this, because I have been to so many workshops through the years and then watched so many video tutorials on top of time practicing with each software package.

Realistically if I were to start from scratch to learn all that I know how to do on my computer, I think it would take two to three years of time to start over if I had to today.

Pricing

When you get ready to price your time to work on post production, remember you are a highly trained professional working at a “Digital Workstation” and not just a computer.  Your clients most likely do not have any specialized software on their computers which requires years of training to master.

Your client has no reference for why you need to charge so much for post production when they have a $500 PC computer and a $300 camera and they upload their photos to Facebook within a few minutes of taking them. 

When talking to your client I don’t think they are interested in you quoting all this like I am doing here. No this information is what you need to help you first of all know the real costs of doing business.

Difference between $7,000 Digital Workstation and a $500 computer?

You need to talk to your client in terms of what differences they will notice between what you will give them and if they took it with their camera.

Here are some areas you might want to address:

  • Skin Tones
  • Color Accuracy in their products
  • Larger color gamut 
  • Cropping
  • Leveling of horizons
  • Variety of images
    • Verticals & Horizontals
    • Overall, Medium and Details
    • Perspectives from high and low

This is just a list to get your juices flowing about things your post production work does to give them a superior product.

You learn to talk to them about digital redundancy which you do to insure they have an image. They take a photo and have it only in one place, where you make multiple copies and due to that if an image is corrupted you have copies. This takes up space on additional hard drives and cloud space.

Are you charging enough to recover your hardware, software and training you have in your “Digital Workstation?” This is in addition to the actual time you spend working on the project.

However you want to price it and communicate it to your client is as much creative as they shooting of the images. Be sure you are making money and not losing it.

Meeting expectations comes first

Many in today’s iGeneration have had a childhood of T-ball, soccer, and dance classes where if they just participated, they were given a trophy. I assume most people know there is more to life than showing up on time — but you’d be surprised how often meeting minimum standards will put you way ahead of the competition.

I taught in photojournalism at a local college. Every project I assigned was designed to give the students a real-world experience. They had three assignments: an environmental portrait, covering an event and a photo story.

The students were asked to turn in their assignments as if they were submitting them to an editor. They needed a cover letter to tell me about what they were submitting. They needed a folder with their selects and another folder with all the images they shot. Each of the photos in the selects needed to have a caption embedded in the IPTC fields. Most editors enjoy being able to send a photo to the designer which already has the caption in the photo. 

IPTC fields

IPTC IIM
This shows the Metadata panel of Bridge with IPTC IM, showing these fields are written to the file header. This screenshot shows the fields and includes a short description of what tags can be placed in the fields.

Some students forgot the captions, some forgot the cover letter and, yes, some were late handing them in. While most had everything done properly, we still had some where the captions were lacking the essential five Ws.

  • Who is it about?
  • What happened?
  • Where did it take place?
  • When did it take place?
  • Why did it happen?

I continue to hear horror stories from clients about photographers who didn’t meet their minimum expectations. I even know of photographers who did the work and never handed in an invoice! It is amazing how just being sure all the elements are done for a project and turning them on time (or early!) will be received with excitement.
[vimeo http://www.vimeo.com/12484605 w=500&h=281] One of my favorite creative directors is Tony Messano. He gives sage advice. I can understand why he is asked to judge advertising work all over the world.

Tony expects a photographer to shoot the assignment the way Tony conceives it — but his favorite photographers not only give him what he wants; they go beyond his concept and shoot it their way, too. Often, they will shoot it just as he says and then will push the idea a bit further with lighting composition or another element. They bring something extra to the table.

If you are meeting the expectations of your clients, you are doing better than most others in the industry. To rise to the top, go a little beyond the expectations.

Don’t be satisfied with the trophy everyone gets for just showing up. Be the person singled out for going beyond the call of duty. Never stop looking for a unique approach or something different. The stretching will keep you youthful and nimble in today’s ever-changing marketplace.

Second mile service assumes the first mile served

Today we hear so many talking about second mile service.  

Second mile service is something that comes from the Sermon on the Mount: “If someone forces you to go one mile, go with him two miles” (Matthew 5:41). In biblical times, a Roman soldier could compel someone to carry his pack for one mile, or 1,000 paces (two steps per pace). Jesus told his listeners to stop grudgingly counting their steps and instead to carry the pack a second mile.

Second mile service as Christ was trying to teach his followers is doing what is expected well and then doing even more. Christ’s earlier statement in the Sermon—“Let your light shine before men, that they may see your good deeds and praise your Father in heaven”—was letting the followers know this not only brought favor on them but God was honored as well. This is a good lesson for today’s marketing student about the power of branding.

You are building a good reputation by giving superior service.

What is expected in the “First Mile?”

  • Treating people with honor, dignity and respect
  • Listening to the request of the client
  • Meeting the needs of the client
    • Well exposed photos
    • In focus
    • Photos of what was requested
  • Delivered on time
  • Invoiced in a timely matter

“Second Mile Service” possibilities

  • Early delivery of images
  • Well packaged presentation of the images
  • WOW factor photos
    • Different angle than they have seen before
    • Maybe a print of a special photo
    • Coffee table book of the photos
    • Slide show
  • Hand written thank you note

What is the number one thing you can do? Listen

My Digital Workflow

Step 1 Ingest

Step 1 – I ingest the images from my Compact Flash Card or SD Cards. My settings for the camera are RAW and I normally use the ExpoDisc to get custom white balance. I shoot in ADOBE RGB color space as well. All the settings give me images that are the best possible for editing. Color is almost perfect because of the custom white balance and can be modified easily since they are in RAW format.

Step 2 Use PhotoMechnic for ingesting software

Step 2 – Ingest using the software PhotoMechanic.  I select the card and then I select the destination for all the images. I use + RAW

Step 3 – the destination is an external hard drive

Step 3 – External Hard Drive is chosen so that the wear and tear is not so great on my main hard drive of the computer.  If you shoot as many images as I do you will burn out a hard drive quickly if you use it all the time.

Step 4 – IPTC Information added

Step 4 – Add IPTC information that will go onto every photo from the photo shoot.  Adding the bulk metadata to the caption and keywords as well as embedding credit, copyright and contact information.  I also add information about the location of where the photos were taken.

Step 4 The IPTC information I have saved and tend to load one of the templates saved so I do not have to put in the basic information each and every time for a client.  I have templates for clients like Associated Press, and my personal use as well.  I just load the template and make minor changes.
Step 5 I cull the images down

Step 5 – Culling the images so that I am only keeping the best images or usable images.

Step 5 I check the select button for those I want to keep
Step 6 – select the Untagged Images

Step 6 I go to View and then select seeing only the untagged images and then delete all of them.  Just keeping the tagged images.

Step 7 Open Lightroom and import from the folder of selected images I created using PhotoMechanic

Step 7 Open Lightroom and import the selected images from Photomechanic.  I am just adding these to Lightroom and not copying them.

Step 8 – Select all images and in Develop Module I then enable Profile Corrections

Step 8 Enable Profile Corrections for lenses.  This will correct all the aberrations and imperfections known for each lens that I own and therefore giving me the best quality possible.

Step 9 – I sometimes will add a vignette to the images. 

Step 9 I like to darken the edges ever so slightly and heavy depending on the situation.  I will select all images and add a PC Vignette 1 for slight or PC Vignette 2 for a heavy use like for a formal portrait.  These are found in the Library Module under Custom.

Step 10 – Adjust image

Step 10 – I adjust the image or images.  I will select a group if they are all similar and this way save on time in the editing.  This has a few parts to this:

  1. Hold down “Option Key” while sliding the exposure.  You will see the highlights.  I try and have no white areas on faces for example.  Play with this to get your desired result.
  2. Hold down the “Option Key” and slide the Blacks.  Only if there are black areas do I try and be sure there is a black
  3. Adjust then the Fill Light to open up the shadows.  
  4. I will sometimes use the Recovery to bring in some highlights that might not be recovered when I did the main exposure.  Again play with this for desired result
  5. I then usually add some saturation by using the Vibrance slider. Usually no more than 35. It will affect everything but people.  That to me is really cool, because I don’t like to make the people red for example.
  6. I may do other fine tuning beyond, but these 5 steps are pretty much used every time.
Step 11 Exporting

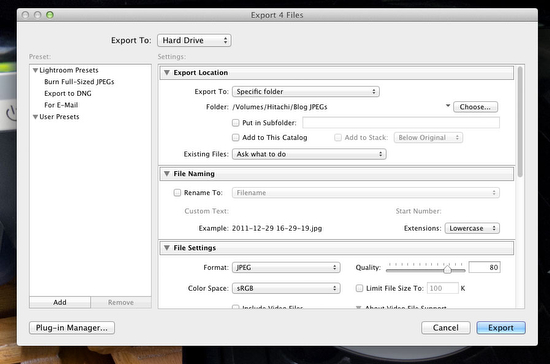
 Step 11 Exporting. Go to the Library module and in the lower left click export.

Step 12 Exporting choices

Step 12 Select a folder to export. I use + JPEGs. I select sRGB as a standard since it is more usable for more situations. I set quality to 80.

Step 12 I keep images all the same size

Very important not to check the “minimize Embedded Metadata” because this will remove all the camera data which many database software programs use to help narrow down the search by date and time that a photo was taken.

Step 13 Making of DVD/CD.  I will drag the folders from here to the Disco Software.

Step 13 Making of a DVD I use the software Disco for the Mac to burn my DVDs and CDs.  The reason is this will let me take very large shoots that need multiple DVDs and spread the project for me over a number of discs.

I name the Disc by year, month, day and time that I burn the disc

Step 14 Print on the Disc using Disc Cover 3

This helps with branding and looking professional for the client.

Step 15 Print using the Epson Photo Stylus R280 Printer

 
Printing on the DVD with Epson Photo Stylus R280

Step 16 Ingesting into Cumulus

Ingesting into Cumulus from DVD

Cumulus lets me search all the images. I am searching all that text I put into the metadata earlier.  I can search and narrow down my search using Boolean searching technique. 

Cumulus helps me later find images using the text search. Once it finds images I can see the thumbnail and it tells me which DVD it is stored.

Disc is put into a binder in chronological order.

Binder is put onto the shelf

Summary

I now have a way to find all the images and have it in two places minimally.  On the hard drive and on a DVD.  I normally also upload these and/or give a Disc to the client.  This makes for the third copy.  Later I will copy the files from the hard drive to another hard drive giving me in essence 4 copies.

I hope this helps you see my digital workflow.

Where do my photos go?

Where do my photos go? You can own the greatest camera and if you haven’t established a workflow for your images you can loose all of them before you ever see them.

For the majority of my photo shoots I can capture all the images on 1 – 16GB card per camera. However, there are some photo shoots and especially when I travel overseas where I will not only fill the 2 cards in the camera I will need to download them and continue to shoot.

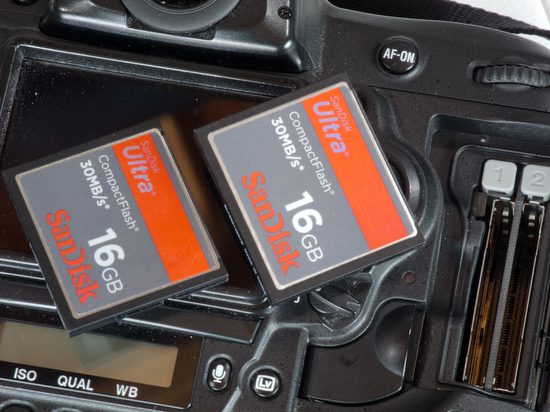
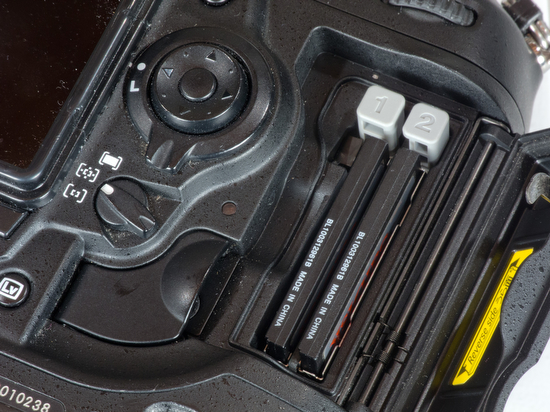
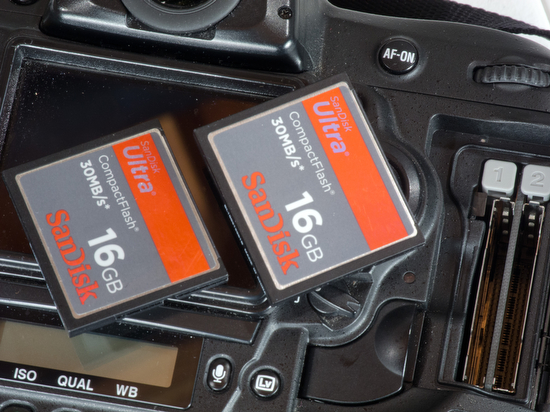
Nikon D3s with 2 – 16GB CF cards in the slots


I am using SanDisk Ultra 16GB CF cards in my cameras

When I am having to download the images and reuse the cards or use more CF cards I ingest them on site with my ColorSpace Hyperdrive memory card backup system.

For some photo shoots I will use one of the Hyperdrives through a day and then pass this along to someone to handle the post processing one day while I am shooting and putting more images onto another drive. At the end of that day I will trade out the drive with the one I first gave to the person for processing.

This lets me not only continue to shoot, but if there are problems with the images I can get a call from the person and if there is dust on a chip for example I would stop shooting and clean the sensor.

The advantage of the Hyperdrives is that I can turn one on and down load my images very quickly and then continue to shoot.

I have two ColorSpace Hyperdrives.  The older model which isn’t UDMA and the newer UDMA model.  I have a 120GB drive in the older model and a 160GB in the newer UDMA model.

For those wanting to travel light, the Hyperdrive with a tablet will let you see your images and have backup of all the images with very minimal computer equipment.

There are two major times where the speed of your cards will become very noticable.

1) When you shoot a lot of images quickly your card will come to a stopping point until the images can be written to the cards. This is when the cheapest, which is usually not the fastest cards, will affect your ability to continue to work.

2) When you are ingesting your cards to either your computer or the ColorSpace Hyperdrives the speed of the cards will determine how long it takes for the transfer.

For the most part unless these are critical to you, you can shoot a slower card that costs much less.

One last suggestion: Always format your cards in your camera and not on you computer. The cameras format in a different way and will give you better performance.