Butterfly Lighting and Foot Lights

Reading Time: 4 minutes

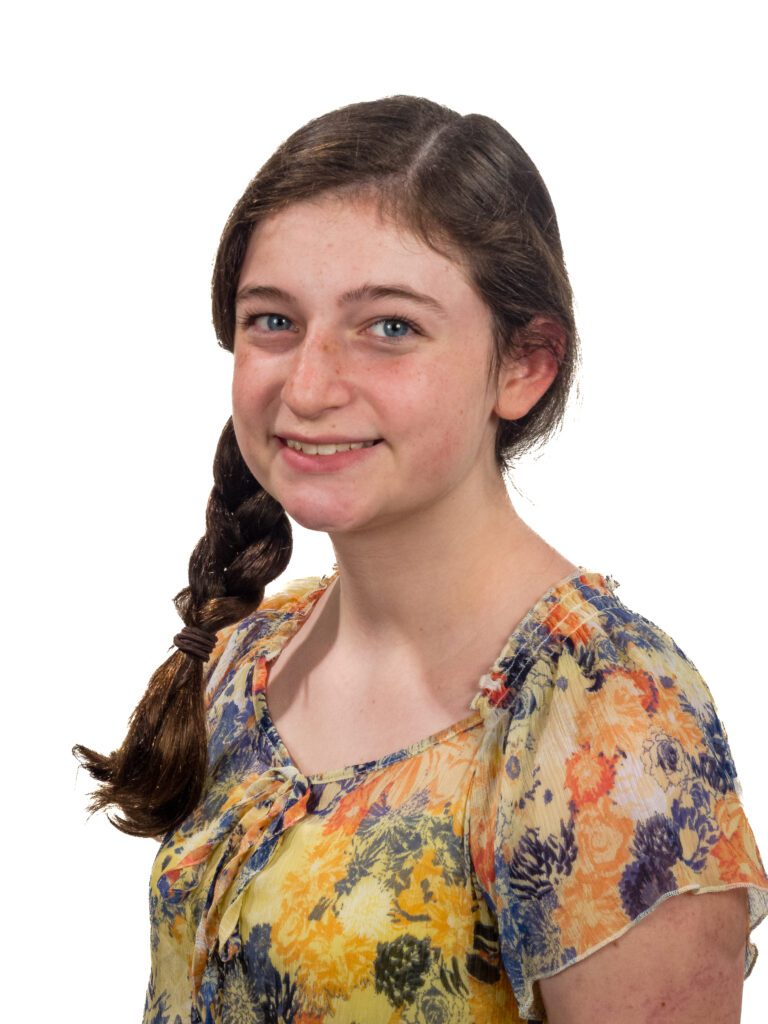
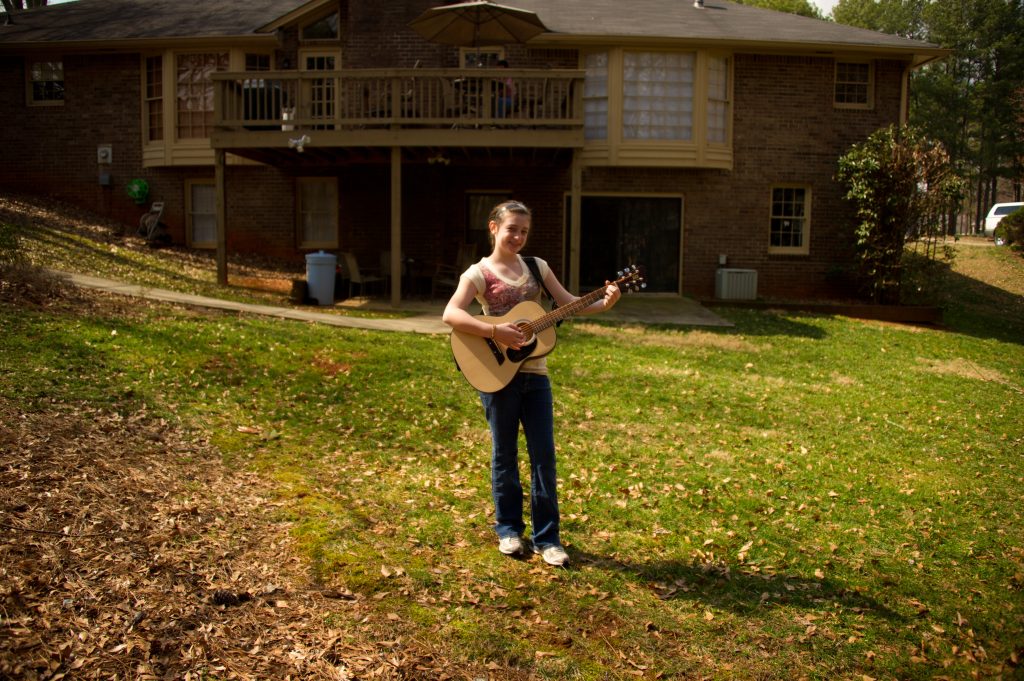
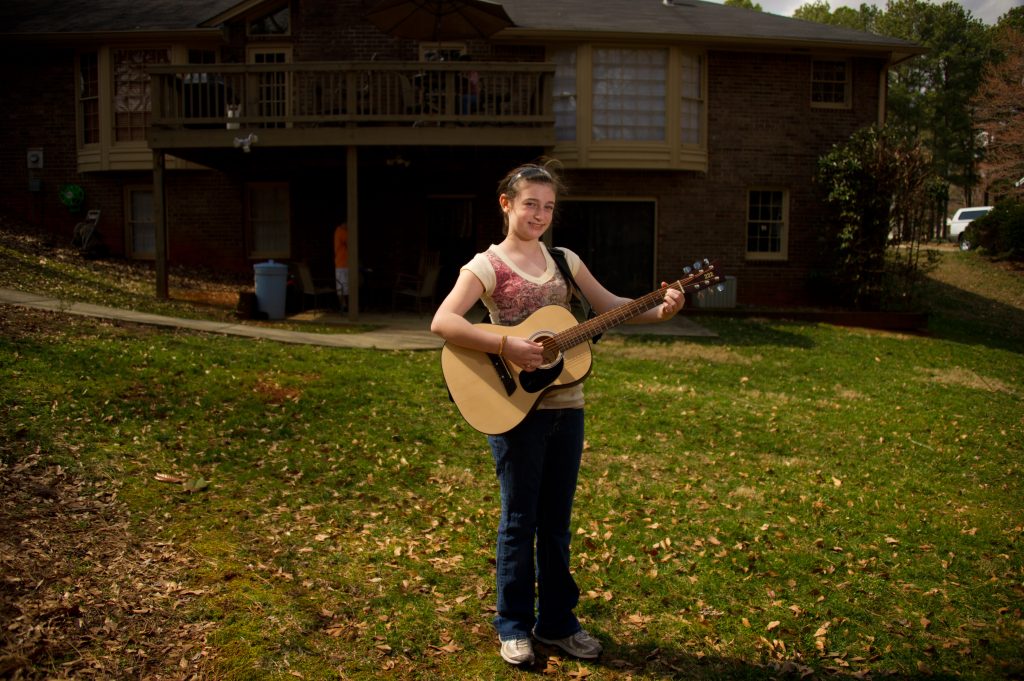
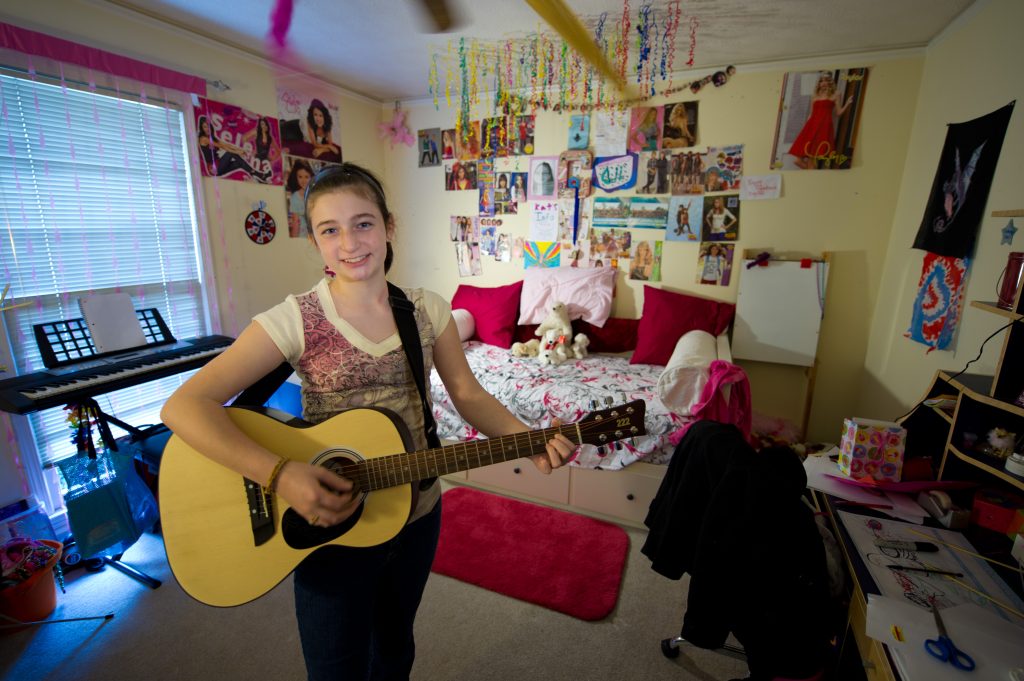
First, always start with no lights before adding lights. This photo at the top shows you the excellent diffused lighting of the open shade on our deck.
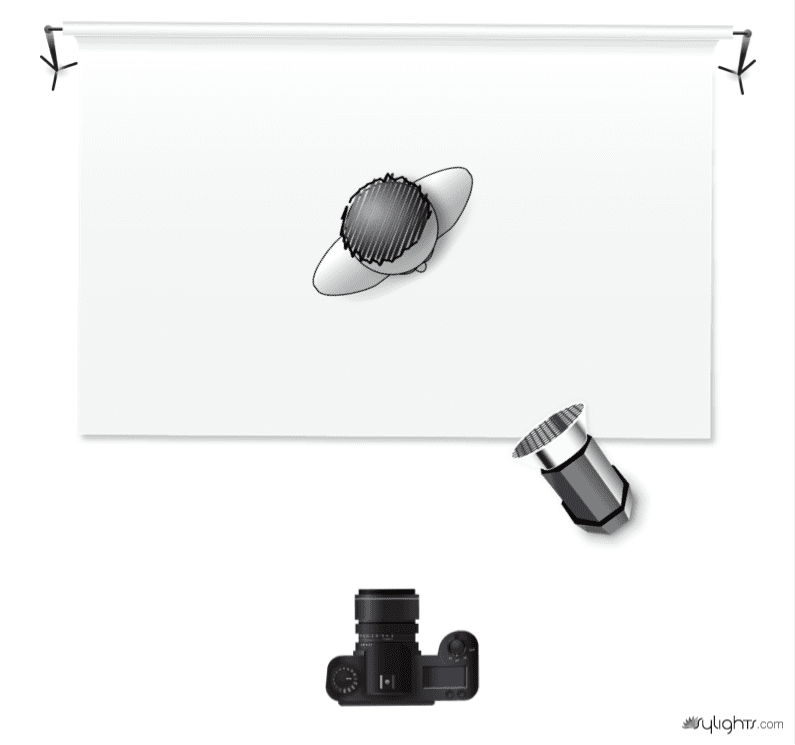
Foot Lights

One of the lights used in theater is the foot lighting. This helps the older actors look younger. So, while they can act better after some years of experience than they did when they were young, they need the footlights to help soften the wrinkles of the skin.

If you go to Broadway and see the stages, you will usually see some lights built in the front of the stage floor near the audience. These lights give you the ghostly lighting children like creating using a flashlight under the chin. Bringing it away from the face looks more like your theater footlights.

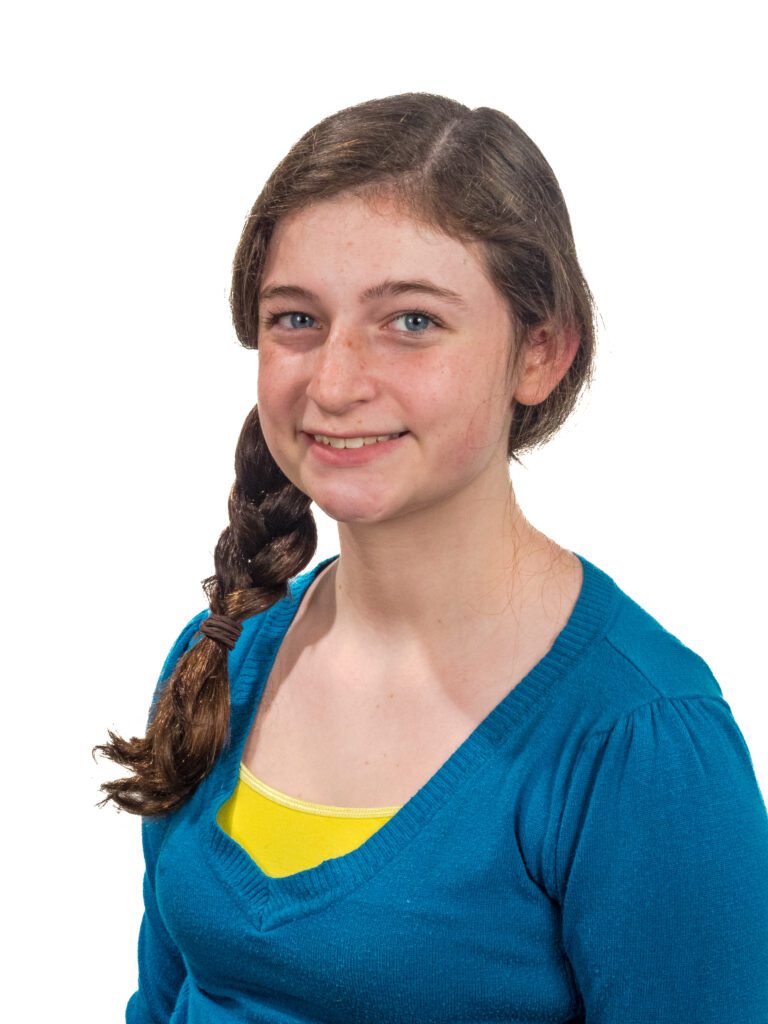
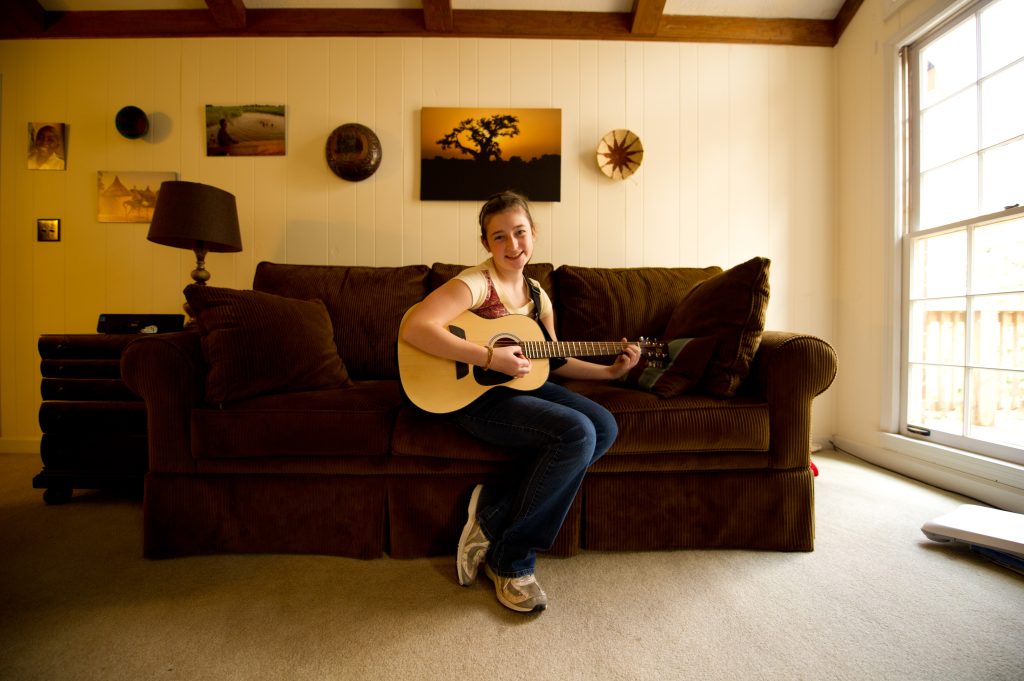
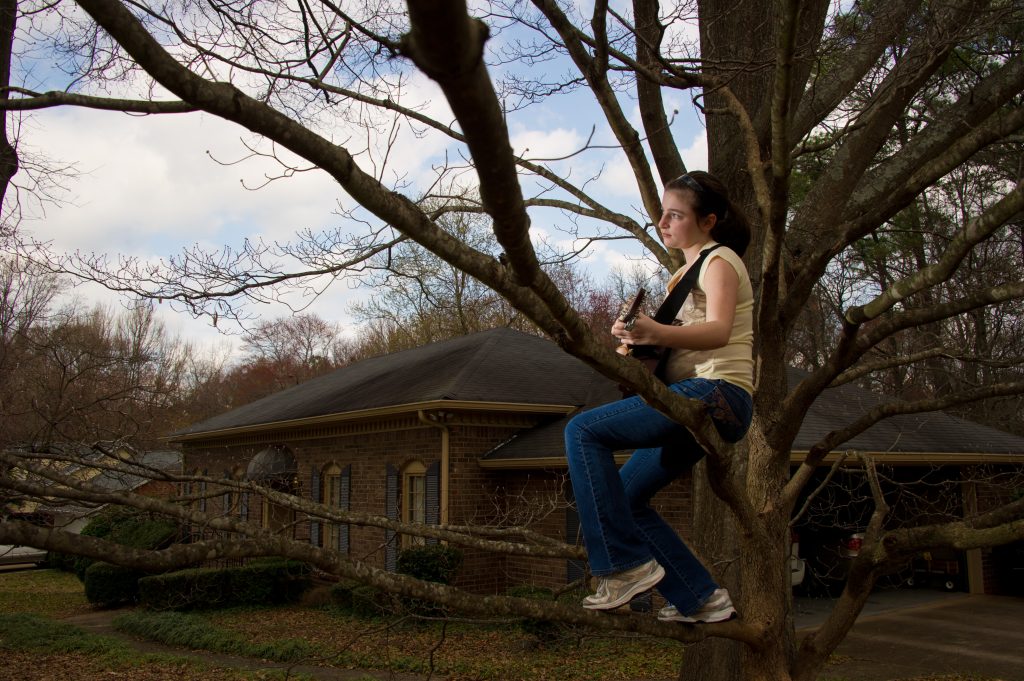
Foot Lighting balancing with available light

In the photo above, we are still getting some overhead lighting from the sky in this outdoor photo, but look in the eyes and see the lower light being very bright.
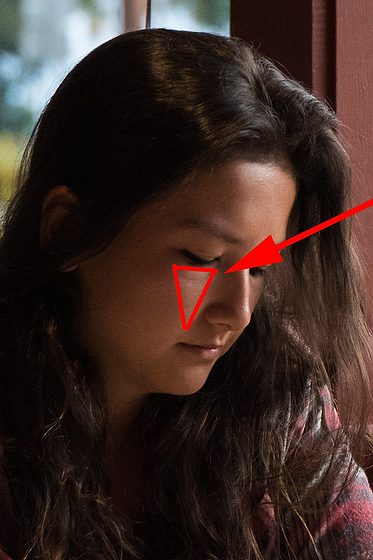
Butterfly Lighting

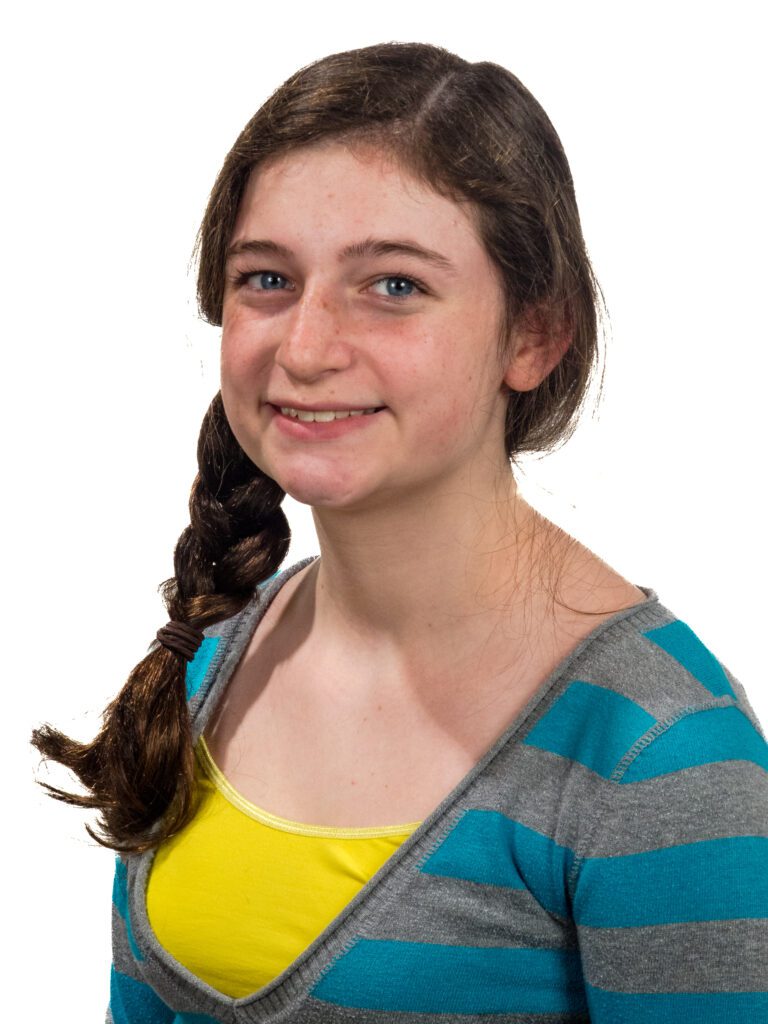
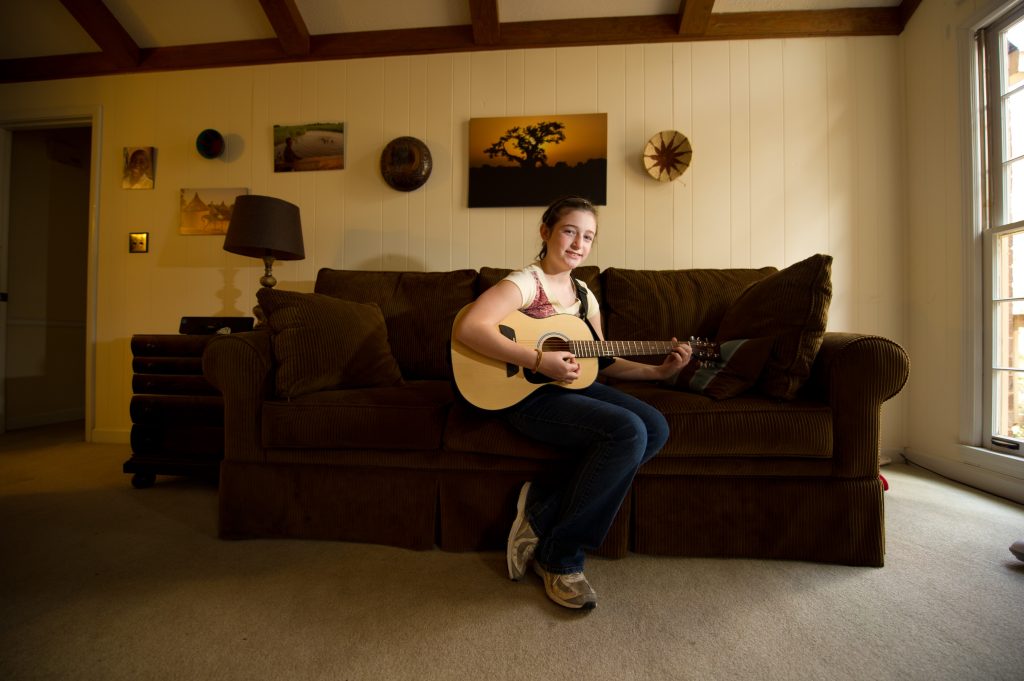
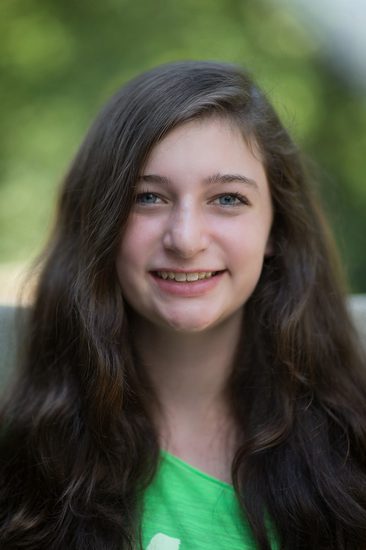
Butterfly Lighting and Foot Lighting combined with available lighting

If you put a light straight above the lens pointing down at a model, you will get a butterfly shadow under the nose. To see this effect, the model must look straight into the camera with no foot lighting.

In the last photo of my daughter, I kept the footlight and the butterfly light the same power and underexposed the overall picture by one stop.
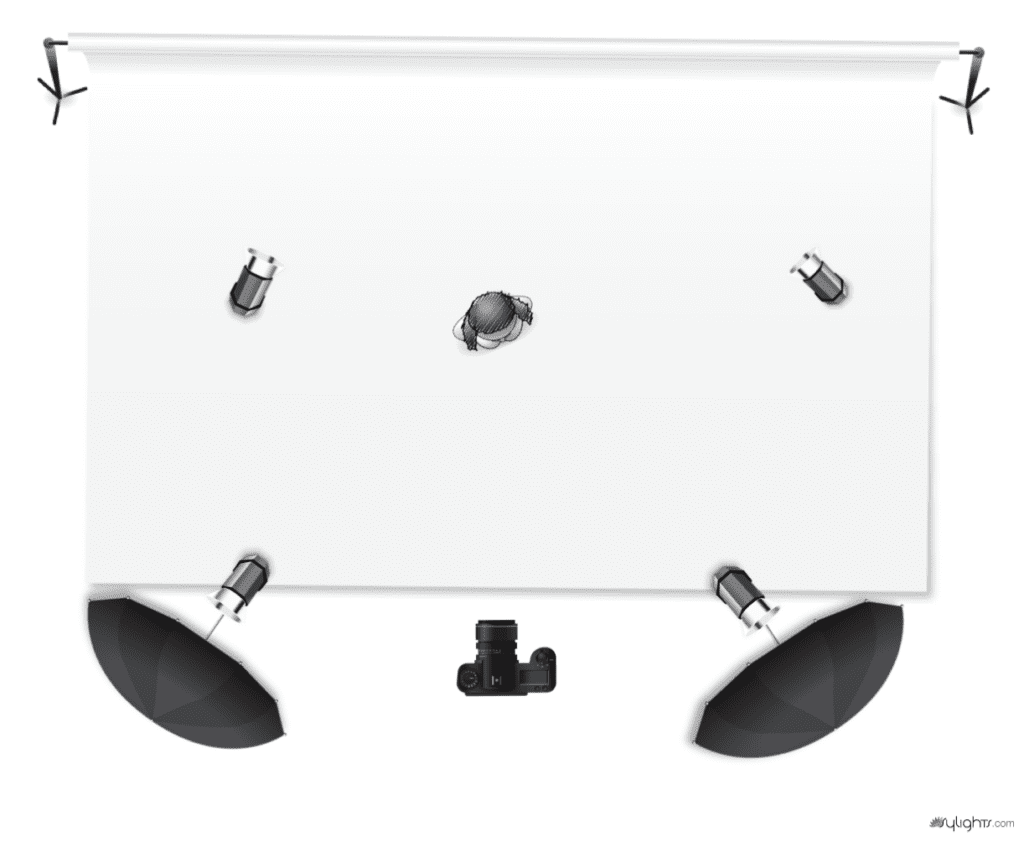
The Setup

Setup: You can see the SB800 on the lower light and the SB900 on the upper light.

To trigger the Nikon SB800 and Nikon SB900, I am using the PocketWizard Mini TT1 on the camera and the Flex TT5 transceiver on the flashes.

I am shooting through the white umbrellas with the soft domes on the flashes to soften the light.

To keep the background blurred, I shot with the Nikon 85mm ƒ/1.4 lens at ƒ/1.4 opening. If you look closely, you will notice that the front of her nose is out of focus as the edges of her face are just behind the eyes.

I am focusing on her eyes.
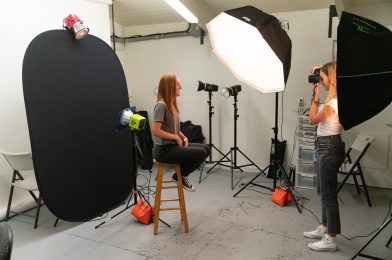
Setup

To control the amount of power from the flashes, I use the PocketWizard AC3, which attaches to the Mini TT1.

The flashes are set to 0 compensation for the photos above, and the camera is set to -1 EV using the exposure compensation dial on the Nikon D4.

I am shooting in Aperture mode.

  • ISO 100
  • ƒ/1.4
  • 1/500

These are the camera settings for all the photos above.

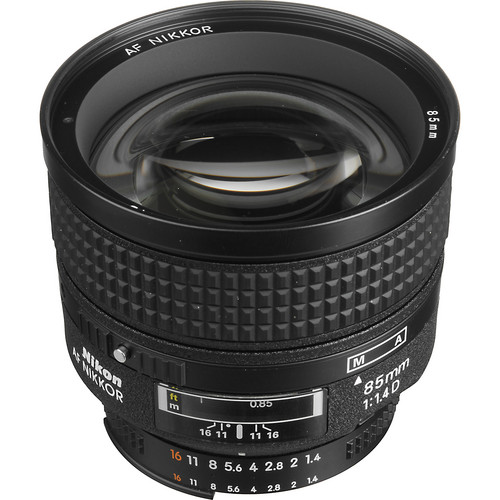
Nikon Telephoto AF Nikkor 85mm f/1.4D IF Autofocus Lens

You must use a lens hood to avoid lens flare when taking these photos.

The Nikon 85mm ƒ/1.4 comes with a lens hood, which is made of metal. You can always buy a rubber off-brand hood if you choose.

Why not use a reflector?

Most photographers will use a reflector to act as a footlight, which is perfect. However, the advantage of using a flash with TTL control is you can control even more so the effect of the footlight.

The best you can do with a reflector is come close to the same value of light as the leading light; however, for some people, you may want to pump it up to be even brighter. 

I suggest going out and trying some of this yourself. You can get comfortable with the setup and try different things to have one more lighting option for your portraits.

Super simple off camera flash portrait

Reading Time: 3 minutes
Nikon D4, 85mm ƒ/1.4, ISO 200, 1/8000

The key to any good photo is the old KISS rule, which is: Keep It Simple, Stupid.

For this portrait of my dad, I chose to shoot outside and use some of the sunny weather we were having down at the beach. We shot this outside on the balcony of our cottage. The location was chosen because it was the fewest steps I needed to make to get a good photo.


Start with the sun backlighting the subject.

One of the reasons I always start with the sun on the back of the subject and not where it is lighting their face has to do with expression. I find i  almost impossible for getting a good expression when people are squinting and straining due to the sun being directly in their eyes.

The benefit of backlighting the subject is that you get a good rim light around it, which will help you separate it from the background.

Look for a darker background.

I like to find a simple background without blown-out highlights. I normally look for a much darker background than I chose here. My point is to be careful, or your blinking highlights will be in the background and distracting rather than complementary to the subject.

Choose a shallow depth-of-field

I am using my favorite portrait lens, my Nikkor 85mm ƒ/1.4, for this photo. When shooting with this lens, you need to be sure that the eyes are the sharpest point in the photo. I still recommend having the eyes be where you focus, even if you shoot this at ƒ/22.

In general, if you are doing a portrait of a person and not an environmental portrait, then the background and surroundings are not really that important. Since that is the case here for this photo, I threw that background way out of focus by shooting at an aperture of ƒ/1.4.

Fill Flash

I love to use an off-camera flash as my fill/main light outside for portraits. Here is a diagram showing where the sun was and the off-camera Nikon SB-900 speedlight placement for this photograph.

You can trigger the off-camera flash in many different ways. I often use the Nikon SU-800, which uses infrared to trigger the off-camera flash. I chose to use the PocketWizard Mini TT1 on the camera with the AC3, which lets me alter the power of the flash from the camera and not the flash itself. This saves you a lot of steps back and forth for tweaking those fine adjustments.

The Nikon SB-900 has the PocketWizard FlexTT5 on it, which receives the signal and talks to the camera’s TTL system to give consistent exposures.


I placed the light 45º to the right of the camera and not quite 45º above the eyes. I am a little lower since my subject has deep-set eyes. 

What is the benefit of the flash, say, over a reflector? If I use the reflector, I will be bouncing the sun into their faces and often getting the squint I was trying to avoid.

Second, I get good skin tones by using the flash, and the color temperature of the flash gives it that “pop” I like to see.

Third, I like seeing a catch light in the eyes, and the flash helps me be sure one is there. I think it helps bring the eyes to life.

Go and try this setup yourself. Adjust it to your conditions and the subject, and see what you come up with.

What clothing works best for a portrait?

Reading Time: 2 minutes

Pick your clothing carefully

There are two types of photos when it comes to clothing: 1) For Portraits and 2) For Fashion.

If the photo shoot is for portrait you need to be sure that the clothing doesn’t distract, but rather compliments the person’s face. The fashion photo shoot is all about the clothing and the model is just there to make the clothing look good.

Look at these three examples of tops for a typical head shot.

Photo #1
Photo #2
Photo #3

To be sure we are concentrating on how clothing can add or distract from a portrait I shot these all the same so that the only difference is really the clothing.

First of all all three outfits look good on the model and the point isn’t about which one you like the most. The point in a portrait photo is which one makes you look more at the model’s face and less about the clothing?

Simple Tips:

  1. Avoid busy patterns as in Photo #1
  2. Choose a solid as in Photo #2
  3. Avoid Stripes as in Photo #3

Each person will look best in one of the following necklines: v-neck, oval or round.

Color choices can be tricky as well. Everyone will look good in Aqua. The reason for this is this is the closest to the complementary color for the skin.

While different ethnic groups have different skin, the general rule is it is more about how light or dark the skin is more than color differences.

However the other factor is our eyes and hair color. Complimentary and the same color are generally good on a person. Complimentary colors tend to make you pop more than the same colors.

The general rule which is often the most difficult to follow is always keeping it simple.


Lighting diagram used for examples

Items:
(2) Alienbees B1600
1-stop brighter on background than lights on subject

White backdrop
I recommend not having it perpendicular to the camera. Slight angle will help avoid light flare caused by light bouncing off background

(2) Alienbees B1600 with bounce white umbrellas

Nikon D4 with 28-300mm
No description for this item.

YWAM School of Photography: Rembrandt Lighting Assignment

Reading Time: 2 minutes

I gave the class an assignment on making a Rembrandt light portrait using just one light with a 10º or 20º spot grid.

Most of the class has never even turned on a studio strobe.

Here is the assignment:

Description:
Rembrandt portrait using one grid light

Items:

Subject
Please get the best possible expression.  It would be best if you saw a triangle on their cheek.  Be sure the triangle includes lighting their eye.

Monobloc with ten or 20-degree grid
You may use any power setting you choose.  Be sure your skin tone is exposed correctly and correct white balance.

Camera
Choose the lowest ISO setting for your camera.  Use a portrait lens 85mm – 100mm; if you don’t have a full frame, 50mm will be OK.

Backdrop
You may also use a black background—no other lights are to be used in this assignment.

Here are some of the student’s results:

Photo by: Lauren R. Tercero
Photo by: Deborah Mataia
Photo by: Francisco Leon V.
Photo by: Katie Suderman
Photo by: Sarah L. Quinones
Photo by: Hastings Franks
Photo by: Annett Rek

Variety is the spice of life

Reading Time: 5 minutes

When covering an event, I try to think of it as telling a story. So there are seven things I try to always have in my coverage. This week, I discovered that my friend Mark Sandlin, Director of Photography for Southern Living, uses this same list. The list is what all photojournalists have drilled into them.

Mark Sandlin, Director of Photography at Southern Living
  1. Opener: Sets the scene for the story
  2. Decisive moment: The one moment that can by itself tell the story
  3. Details: Besides being like visual candy to the report, help often with transitions–especially in multimedia packages
  4. Sequences: give a little variety to a situation
  5. High overall shot: Gives a good perspective on how the elements all fit together.
  6. Closer: Besides the classic shot of the cowboy riding off into the sunset, there are other visual ways to help bring the story to a close
  7. Portraits: These photos are great for introducing the characters of the story

Below are photos from an annual meeting where the investors come in, and the company gives them an overview of what they have done and where they are going.

One thing I am working hard to do is to make each photo have an impact on engaging the audience. I use light, angles, composition, and, most important, expressions of people to engage the viewer. I wanted my photos to help this company communicate they are vibrant and viable in today’s market.

This photo shows how the attendees could interact with the leadership team. I wanted to show them engaging in conversation, so I shot a few to capture not just a good expression finally, but use the environment to draw you in. If you notice, even the lady in the mural seems to be paying attention to the conversation in the foreground.
Details, for me, are a way to have fun. So I am looking for unique angles, colors, and light to help create impact and entertain the audience.
A high angle is usually successful today because it is unique to our everyday l es. Seldom are we tall enough to see this angle, so it looks different than you just walking ar nd. Even the lady in this mural looks from above to see what is below.
The man to the far right is the CEO, and while he will be on stage later in more formal roles, I like to show him as more relaxed and approachable. Again, I am using the lines from the window to help draw you into the picture. I want you to see the conversation first in the foreground, and then you should drift to the background. Again, visual composition keeps you engaged.
While you can see everyone on the panel, and I always shoot the obvious, it isn’t as compelling to me as in other angles below. But I always need to be sure everyone on the panel is well-seen in one photo in case they require this.
As a panelist responds to the question, you will often find that the rest of the panel may or may not be engaged.
In this photo, the CEO is the focal point, and while the other panelist is not looking directly at him, you can see from their expressions and slight turning of their heads to catch what he is saying as showing they are engaged.
PowerPoint presentations can be challenging to capture the slide and the speaker in one photo. Thank goodness they had a spotlight on the speaker and had it balanced. If you organize an event like this–always have a spotlight on the speaker to make them not disappear into the dark.
While this isn’t a close-up portrait, I think it is a lovely portrait of him working in this situation.
As I mentioned, they were streaming on the web, and I have a photo that can help say that for them.
Another high overall shot to help tell another part of the story.

The decisive moment photo should be the one that is used alone and not part of the package could tell the story. Which of the ones above did you see that would work for you?

Did you notice the sequence of the panel? Now the hard part is often a closer. Sometimes you don’t have an ending. No closer is because you want to communicate. There was so much to see. You want to leave the audience visually craving for more rather than wrapping it up to say well, that is everything.

I suggest sitting down before you arrive to shoot a story, thinking through everything you know about the assignment, and making a list. Then, write down on a notepad that you will carry with you the outline of the seven shots. Under each one, list a couple of options for each.

As you shoot your story, check off the photos that you get. Then, use your notepad to get the names of people for the captions.

Once you have everything checked off on your list, don’t stop shooting. I continue to shoot more photos, but now I may be looking more and taking fewer shots. I cherry-pick the moments I think will be better than I already have.

I want to thank my friend Mark Sandlin for reminding me of what I do with every assignment so I can share this with you.

By the way, Mark said he wished he had said one more thing to those attending the class. He wanted to say, “if you haven’t made any mistakes, you are trying hard enough.”

Lens Choice: Just the subject or a story

Reading Time: 2 minutes
Filling the frame with a subject can look quite different depending on the lens’s focal length.
 
In these three examples, the f/stop stayed the same. I moved the camera forward or backward to keep the stuffed ducks the same size in the frame.
c
The 28mm wide-angle lens lets you see the environment around the subject more clearly, as in this photo of What the Ducks.


b
The 105mm short telephoto focal length lens makes the background less distracting.


a
The 300mm telephoto focal length lens makes the background even less distracting.
Which one do you prefer and why? 

You need to understand how a lens choice can help your subject.

You just need to say, “Here is the subject.” Then, consider using a telephoto lens. This will help you make the subject pop out from the background, and all the focus will be on it.

If you need the subject to be part of a sentence where you use adjectives and adverbs to help give context for the subject, move in close with a wide-angle lens. Now, you see what is around the subject as well as the subject.

There are varying degrees to this change. Just as the writer uses simple and sometimes longer sentences to tell the story, the lens helps you make it a simple or complex sentence.

Three Stages of Composition

Reading Time: 5 minutes

Stage One: “Literal” Snapshot – making photographs to describe what you see. 

Typical Snapshot

Typical Snapshot

A snapshot is popularly defined as a photograph that is “shot” spontaneously and quickly, often without artistic or journalistic intent. Snapshots are commonly considered technically “imperfect” or amateurish, out of focus, poorly framed, or composed.

Snapshot – this time with an off-camera flash at 45 degrees

We all start with the literal snapshot and often revisit this Photography stage. These literal snapshots are primarily taken for the photographer. These photos are “memory joggers.” They help you remember the moment.

Inside snapshot without flash.
Inside snapshot with flash at 45 degrees.

Believe it or not, many “professional” photographers never move beyond this point. Since the bride and groom were there with the photographer, the literal snapshots are also like “memory joggers” for them.

Another place I see this is my church. After a team returns from their mission trip, they show their photos. The group laughs because they get the “inside joke.” While not always a joke, it is another memory jogger and not an image that communicates to the audience.

When a photographer realizes that other photographers are getting better-looking photos than they do, they often move to stage two.

Stage Two: “Artistic” Snapshot – making aesthetically pleasing pictures that enhance what you saw

With a 45-degree flash inside the photo, the photographer simplifies the background, bringing more attention to the subject.

In this stage, the photographer is aware of visual composition, exposure, and how to control the depth of field, freeze a subject, or blur the background.

This is where a photographer thinks about being sure the subject is well-composed.Not everyone can see the difference in their photos to get to stage two, but believe me; most everyone can see the difference between a “literal snapshot” and an “artistic snapshot.”

I have written about composition, lighting, and framing in previous newsletters, so I encourage you to review those articles.

Stage Three: “Expressive” Images – images made for public rather than private meanings. Like all art, expressive photography offers universal, often symbolic, statements.

Ansel Adams said it best, “There are always two people in every picture: the photographer and the viewer.” Once you realize this and want the audience to feel about the subject as you do, you want to move beyond just the “rules of composition.”

The subject is in her room. She is leading the light off to the side out of the camera view to highlight the issue and draw you to her.

 Expressive Photography interprets, rather than describes, what we see to others.


There are three aspects to Expressive Photography; see the diagram. All three must be present for the photo to be more than an “artistic snapshot.”

A subject close to the camera and her room around her. Light off to the right, lighting her to draw more emphasis on her.

Abstraction removes literal, descriptive clutter, hones an image’s essence, and encourages unlimited thinking. This might be the difference between listening to music with no words in the tune and with words in the song.

Your mind is free to explore your thoughts. However, if the music has words, it is less abstract, even if it is not sung. For example, hearing Amazing Grace played even without words will give a more literal thought and, therefore, is not as unlimited as abstract music.

If the photo moves too far into abstraction, then the other parts of the triangle weaken and become just an “artistic snapshot.”

Tension presents elements that seem at odds with their context and creates contrasts and juxtapositions that stimulate emotions and the imagination. This is where the photographer helps create a mood within the photo. They may use composition, lighting, and exposure, or in combination, to help move the image beyond just documenting the moment to an interpretation of the moment. Underexpose a little, and you create darkness or gloom. Expose, and you may generate lightness and lighten the mood.

After photographing my daughter in different locations, I started to write this newsletter. My wife said, “Stanley, you’ve got to see Chelle.” So, of course, I had to add another photo after seeing her in a tree playing her guitar. Some of the best images are when you catch the subject doing what they like best.

Human values convey the emotions, beliefs, traditions, and knowledge we understand and share. Genuine smiles communicate across all language barriers, just as frowns and anger will. We often say this is one of the most critical factors of the portrait. So, what are the three most important things about a picture?—1) Expression, 2) Expression, and 3) Expression.

 To make expressive photos, you must first ask yourself what you want to express through your image(s). For example, how do you feel about your subject? I like to boil this down to “Why?” Why should anyone in your audience care about what you want them to see? Journalists are trained to ask Who, What, where, when, how, and why. However, in my opinion, the story’s hook often rests on the why. Your audience will not know if you don’t mind asking yourself why you are making this photograph. I would love for you to comment on which of the photos above are your favorite and why. Do any of them work as “Expressive” images?