Mountain Top Experience is good, but you will need more

 
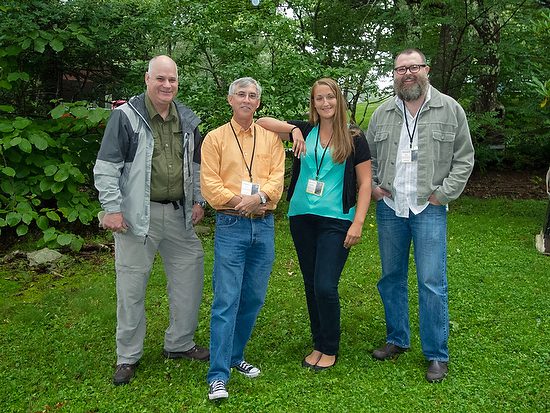
Grandfather Mountain Camera Clinic 2013 faculty from left to right Stanley Leary, Chuck Burton, Lauren Carroll, and Roger May.

Grandfather Mountain is North Carolina’s top scenic attraction

Initially organized in 1952 by Hugh Morton, the camera clinic invites photojournalists to Grandfather Mountain each August to discuss the nuts and bolts of good photography and relevant topics and trends in the field of photojournalism.

This year there were four presenters, Chuck Burton, Lauren Carroll, Roger May, and myself, on various topics.

Chuck Burton talks to the group about “Seeking The Different.”

Seeking the Different

Chuck Burton started his talk with a couple of photos showing how difficult it is to find something unique. His first photo was a photo in Washington DC a few hours before Hillary Clinton was to address a congressional panel on the Benghazi Attack. The oversized desk with Secretary of State Hillary Clinton’s name was in the middle of the photo. In front of the desk were about 20 cameras on the floor, each one holding the place for a photographer.

Chuck then said in this situation, you create something unique.

Then he followed it up by showing a photo of all the remote cameras on the basketball game, and he didn’t have a place to put his. So Chuck then taped two AA batteries on the bottom of his camera to get a photo from the floor. The next photo is the excellent shot he got. Then he showed us the next game how there were now five cameras on the floor doing the same thing.

The point is that shooting every day as an Associated Press photographer; he is always “Seeking the Different” to keep the readers engaged. Photography isn’t about THE mountain top experience; it is about a lot more than that. You shoot a great photo, kick back, and collect the lottery winnings.

Roger May presents “The Importance of the Personal Project and Managing a Kickstarter Campaign.”

Testify

Roger May’s North Carolina license plate is “DOCUMENT.” How appropriate for Roger. His Kickstarter project “Testify: A Visual Love Letter to Appalachia” is his journey to document his heritage in the mountains of West Virginia.

Roger helped us realize that the personal project is quite therapeutic, and after pouring your heart and soul into such a project, you would like to share it with the world. But unfortunately, many individual tasks don’t appeal to companies to publish because they don’t help promote their company directly. So, one of the best ways today to publish a book on your work is through crowdsourcing.

According to the Merriam-Webster Dictionary, crowdsourcing is the practice of obtaining needed services, ideas, or content by soliciting contributions from a large group of people, especially from an online community, rather than traditional employees or suppliers.

Kickstarter is a website that helps artists with crowdsourcing.

Community Newspapers

Lauren Carroll presented “Shine a Light Where There is None: The Importance of Community Newspapers.”

Lauren talked about how much she just enjoyed meeting people from the community, allowing her to shoot sports, features, and even news. While she doesn’t like putting a camera in people’s faces during tragedy, Lauren explains to her subjects how she wants to tell their story to the community.

On top of Grandfather Mountain, we are looking towards Charlotte, NC, from the mountain.

Business practices

I spoke on “Making Money as an Independent Photographer.” I called it “Independent” and not “Freelance” because my friend Kenny Irby pointed out how maybe the word FREElancer communicates the wrong thing.

After the presentation, many folks said you know your talk would apply to every business. Since many in the audience were not full-time photographers and had other careers, they even commented how some of my points were helping them with some business decisions they needed to make.

The reality is that reading business books on starting a small business would apply to photography.

Coin operated binoculars at Grandfather Mountain with the “Swinging Bridge” in the background.

Coin operated vision

Everyone invested in going to the top of Grandfather Mountain and hoping this would help their vision for the future. Instead, it helped to see the bigger picture from a different perspective.

Now that we have all been to the top of the mountain, we need to move forward, take what we learned, and let it help shape our direction.

The Singing Bridge is a mile high above sea level on Grandfather Mountain.

Do you lack a sense of direction?

Maybe you need to put some quarters in a workshop to help you see your future more clearly. Find a workshop on something you would like to learn more about and take it.

Couple of ways to create your workshop. If you like someone’s work and don’t offer workshops, approach them and ask if you could pay them for a day of their time to teach you something they do. You never know. They may take you up on it.

I teach on a variety of topics around photography. If you are interested in a personal workshop or getting a few friends to split the costs, then call me. Here are some of the topics I teach, and if you think of something not listed here, contact me.

  • Business practices for the photographer
  • Hot shoe flash lighting
  • Studio lighting
  • Location Lighting
  • Portraits
  • Poising
  • Product Lighting
  • Missions Photography
  • Humanitarian Photography
I loved playing King of the Mountain as a kid, so this is just me being a kid again on top of Grandfather Mountain.

The More

Famous National Geographic Photographer William Allard gave a presentation at a conference I attended. Afterward, a young kid came up to Allard and said he needed this for inspiration.


William Allard turned to some friends and said you know we need one of these about every three months to keep all of us inspired. Remember, the workshops and seminars are there to inspire, but we must take this inspiration and do something with it.

When you leave a workshop, you need to have an action plan of what you will do differently than before the workshop.

Maybe after hearing Chuck Burton speak, you decide to try one new angle on a sporting event each time you shoot that you haven’t done before. You might take a few minutes and go into the stands to shoot or maybe spend more time shooting the bench rather than the action on the field.

After hearing Roger, May you decide to take on a personal project? You might even want to photograph your heritage like Roger.

Lauren Carroll challenged people to look for stories in their community rather than trying to plan a trip around the world.

Did the Mountain Top Experience do more than bring a tear and touch your heart? If so, we will see some activity in your life that shows the changes.

Photographers are hired for brains and not gear

Surprise

It is pretty standard for me to show up at a photo shoot and find out that the person hiring me is an amateur photographer with a lot of gear. Those amateur customers have great equipment, and we often talk shop.

I mention this because when I meet amateurs, they often talk to me about what they don’t have and what they have in equipment, as if when they get enough gear is when they can turn pro.

One of the groups that hire photographers pretty regularly is agencies. These agencies have camera gear and shoot many photos for their clients. However, when they hire a professional photographer, they rarely hire them because of their equipment; they have that gear just down the hall in their small studio.

They hire photographers for their experience. So here is the concept: now make it better while still accomplishing their intended goal for the photo.

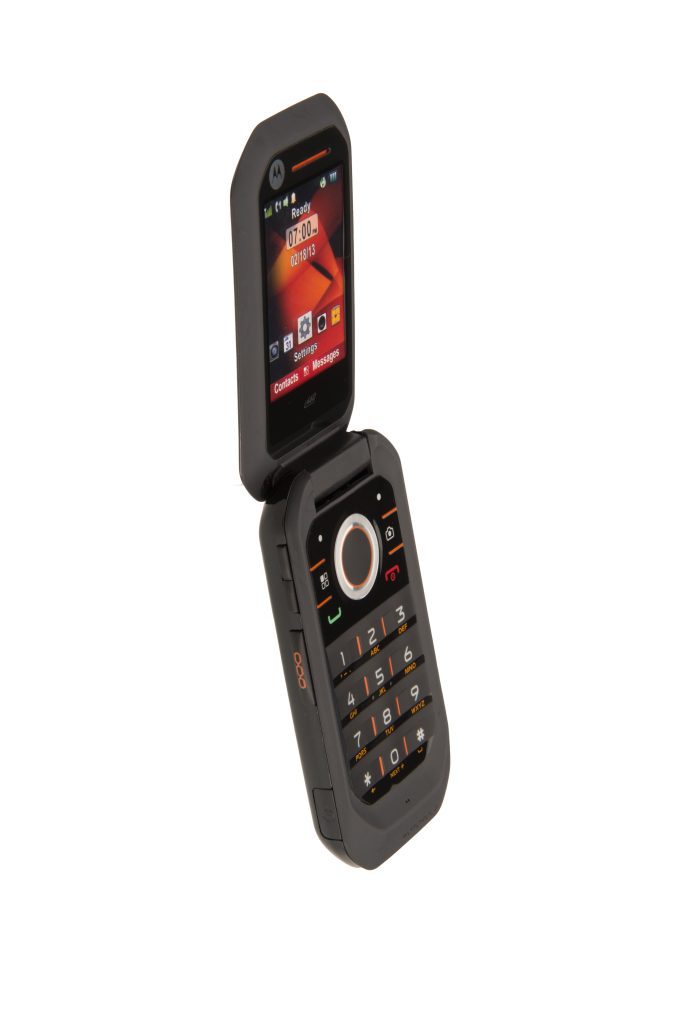
Take this candid photo of a mobile phone. I just shot this a few weeks ago for a website. The creative director hired me for this photo shoot because they didn’t have the gear to take the photo; they hired me to light the phone, create the 3-D feel, and ensure the elements they needed to highlight were easy to see.

There was no glare on the screen, and then you needed details in all the black areas of the phone, which were primarily dark gray to almost black.

I saved them a lot of time lighting the phone and quickly getting what they needed.

I am often hired to photograph black objects. The client knows the black thing is one of the most complex subjects to light and reveal the object’s shape.

Often, once I have done this for clients, they will go out and duplicate the gear and no longer hire me again. As long as they repeat the setup, they are fine until they come up with something new, and then I get that phone call again.

Creativity

Clients contact me for science and technology shoots. Clients get me because of my track record of shooting research that has never been photographed. Research photography is quite different than doing a headshot that you have done many times before with clients. They need me to engage the audience with something often relatively stagnant.

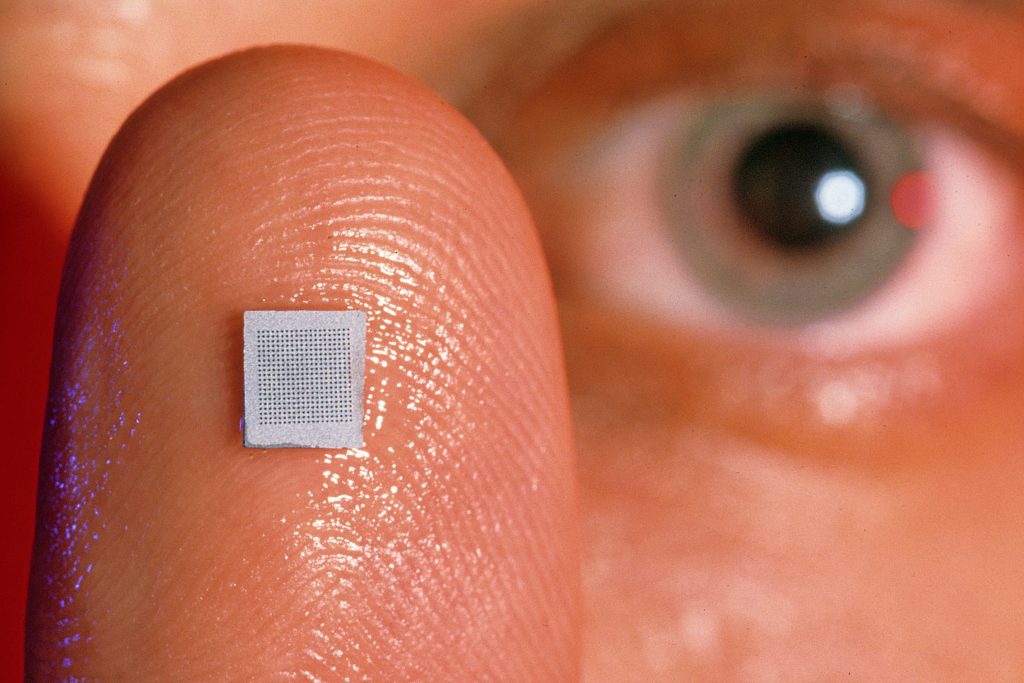
The photo of the researcher holding up the micro-needles on his finger was my idea of communicating how tiny those needles were. When this first came out, the media picked up the photo worldwide. So many talked about the ouch-less needle.

I met the researcher for another assignment when all his gear had just been sent away. So, all we had was his laptop and a spare LCD. He told me his work entailed giving an audience flashlights that would wave in the air, and he had cameras that would pick up those lights, and his software would translate this into music played live by the orchestra on the stage.

I had a Mini MagLight in my camera bag and asked him to wave it around. Then, I converted the flashlight to candle mode, which helped tell the story in one shot.

I had to figure out the three different exposures for the photo and combine them into one image. The exposure of the computer screens, the flashlight, the strobes on the subject’s face, and then two more strobes add color to the photo.

Those are just a few examples where I used my brain to make the photo. Unfortunately, the camera gear didn’t put the picture in “P” mode.

Even if you know how to use the gear and make it work, this isn’t what they are hiring you to do. They are hiring you for your ideas, not just to execute their idea. They can do that without you.

What do you bring to the table besides your camera and lighting gear?

I am switching to USB Flash Drives from DVDs, and I advise you to do the same

Apple kills Flash for websites.

I have a Love/Hate relationship with Apple. When they rolled out their iTouch, iPhones, and iPads, they refused to support Flash—killing it as a platform.

If your website used Flash, you either updated your website to html5 or just started over. You couldn’t afford to have people come to your website looking to hire you and not be able to see your work or maybe your contact information.

Apple may kill Optical Drives.

Apple may have similarly sealed the fate of the optical disc drives back in October 2010 by leaving out the optical drive in their Macbook computers. Soon, it will go the way of the floppy disk.

Today most people are connecting to the internet for software rather than buying CDs. Adobe even went so far as to move most of its software to the cloud. So there is less need for optical drives than a few years ago.

It’s a common misconception that burned digital media’s shelf-life is infinite. However, unlike pressed original DVDs and CDs, which are near invulnerable to degradation, burned media have a relatively short life span, typically between 2 to 5 years, depending on the quality of the media and the handling of the discs. Had this not been the case, there might not have been the move away from them.

USB Flash Drive as an alternative

What will you use going forward instead of the optical drive? For example, the USB Flash Drive or deliver your images through the cloud with online galleries or something like DropBox.

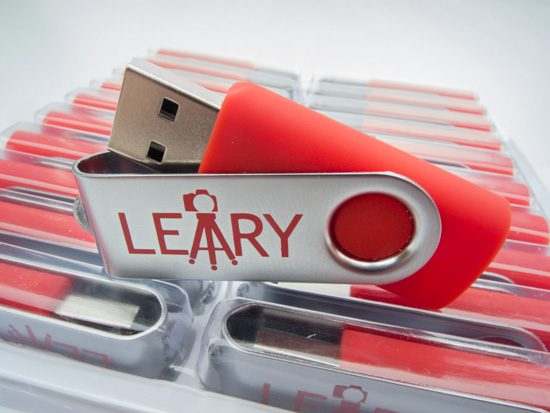
I ordered my USB Flash Drives from http://www.usbmemorydirect.com/ and had my logo on them. The more you order, the cost per unit goes down quite a bit.

Over a year ago, I was getting ready to do this and asked USB Memory Direct for a quote, and they sent this to me:

Below are additional pricing options for our classic styles

Quote 7/24/2012

 I wrote back to them in late July this year and asked for a quote for 50 for the 4G drive. Unfortunately, the price went up a little.

Quote 7/29/2013

 I ordered my on July 31st, and they arrived at my house on August 5th. However, they didn’t promise them before August 12th, so I was pleasantly surprised by the quick turnaround.

While I will continue with some clients to deliver on DVDs, I see these slowly being phased out.

You don’t have to order in bulk.

While buying a couple hundred will save you on unit cost, USB Memory Direct will print in quantities as low as 20. I recommend purchasing the size; you will likely use the most in a more significant amount and then a few in larger capacities in smaller quantities. Hey, buy 100 2G, then maybe 50 4G, and then 20 8G sizes in order.

I recommend starting small and testing the supplier for turnaround time, quality and durability.

USB Flash Drive Benefits

There are a few benefits to using the USB over a DVD or CD. First, putting images on the USB is much faster than burning a disc.

Another benefit is that the USB is a much more stable platform than the DVD. I have gone back to earlier DVDs that worked a few years ago and today do not. I have never had this problem with a USB, but with all digital, if it isn’t in three places, it doesn’t exist.

Once the images have been taken off by the client and put on their computer or network, the USB can be used for other things. They may use this repeatedly and are reminded of me every time they do. It has a similar impact to a postcard I send them that they put up in the office.

USB Flash Drive as deliverable and not archival

I am sure the images are about as safe on a USB Flash Drive as on an SSD drive, for example. But the best archival solution is a system with pictures in three locations.

My use of the USB Flash Drive is to be able to give clients their images using this rather than DVD due to optical drives being less standard on computers.

Checklist for Sharp Photos

Squeeze the shutter  Don’t punch the shutter release

Keep the camera as still as possible. If you can shoot with a tripod, all the better. If you can shoot with a monopod. One of the biggest reasons most people’s photos are not sharp is camera movement.

Shutter Speed and Focal Length work together.

If you are paying attention to which lens you have on your camera and how this affects your shutter speed, your photos may be more sharp than they are. The rule of thumb is to turn your lens into a fraction and use that to set your shutter speed. Put one over the focal length and then use the shutter speed closest to that as the slowest for hand-holding the camera.

A 200mm lens should give you 1/200 shutter speed. A 50mm should be held at least 1/50.  If you do not have 1/200 and the closest shutter speed is 1/250, use this, and don’t go under 1/125.

Nikon D4, Sigma 120-300mm ƒ/2.8 with Sigma 1.4 converter, ISO 900, ƒ/5.6, 1/2000

Subject Speed

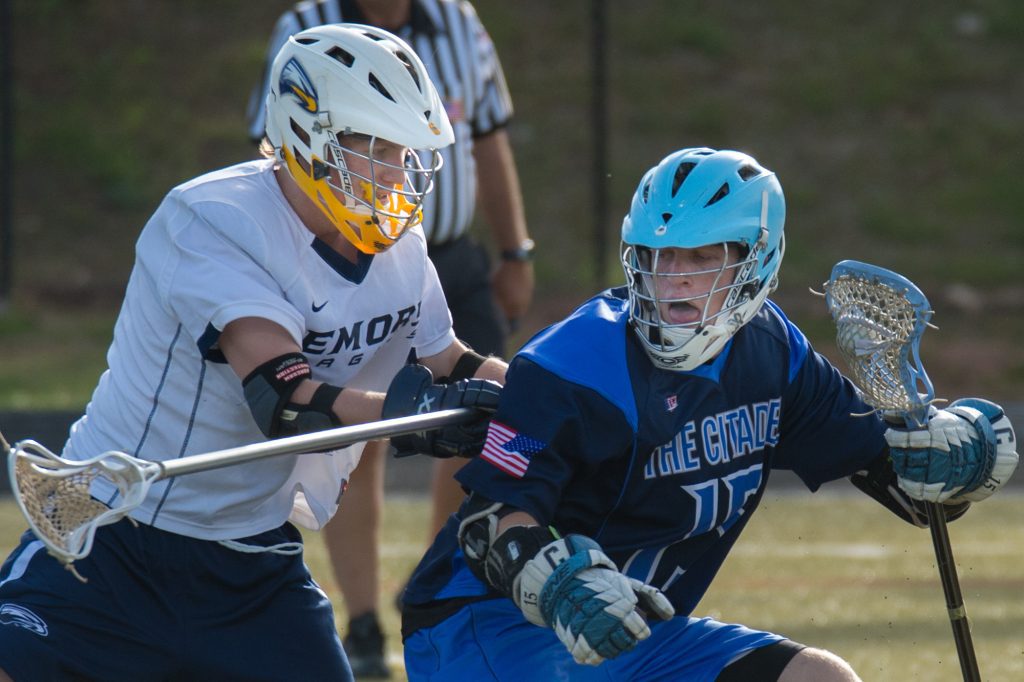
Photographing a building versus a race car is a big difference. You can have a shutter speed that lasts for hours and not affect the sharpness of a photo, but stopping a bullet in flight might require 1/10,000 to freeze the action. I had always heard 1/500 to stop action. From my personal experience, the razor-sharp photos of sports tend to be about 1/2000 for me. 

Aperture 

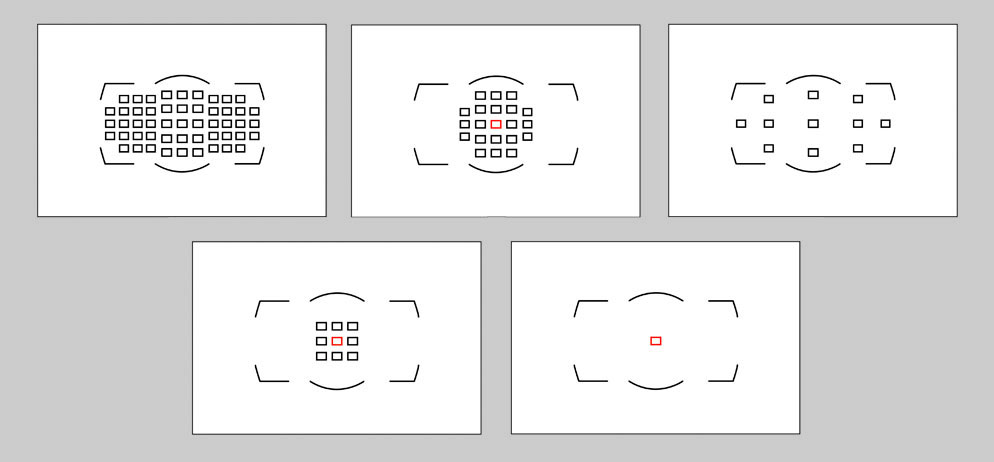
The depth-of-field you choose can make a photo appear out of focus even if it is in focus. For example, when you shoot at ƒ/two and the subject is 15 inches from the lens, the sharp area in front and behind the point you are focusing on is most likely less than an inch. However, move that subject to 15 feet, and your depth of field may now be a foot or more.   Find the balance between ƒ/16, keeping everything in focus and wide open ƒ/2.8 with great Bokeh throwing the background out of focus. I often shoot ƒ/four on a Nikon 400mm ƒ/2.8 to get more usable images. Focus Miss On many cameras today, you can have multiple focus points. My Nikon D4 has 51 different points for focusing. 

Depending on my focus mode, it is either more straightforward to focus or more difficult. The point is that people often need to tell the camera where to focus. When doing portraits, I use the eyes as my focus. If they are turned slightly to the camera, one eye is closer than the other, and I always try to get the closest eye in focus. This is when I may change my aperture to be sure they are both in focus.

With Nikon Capture software, I can check where I was focusing later and see if I missed my focus. After using this to help me, I realized I needed more focus due to me and not the camera’s capability.

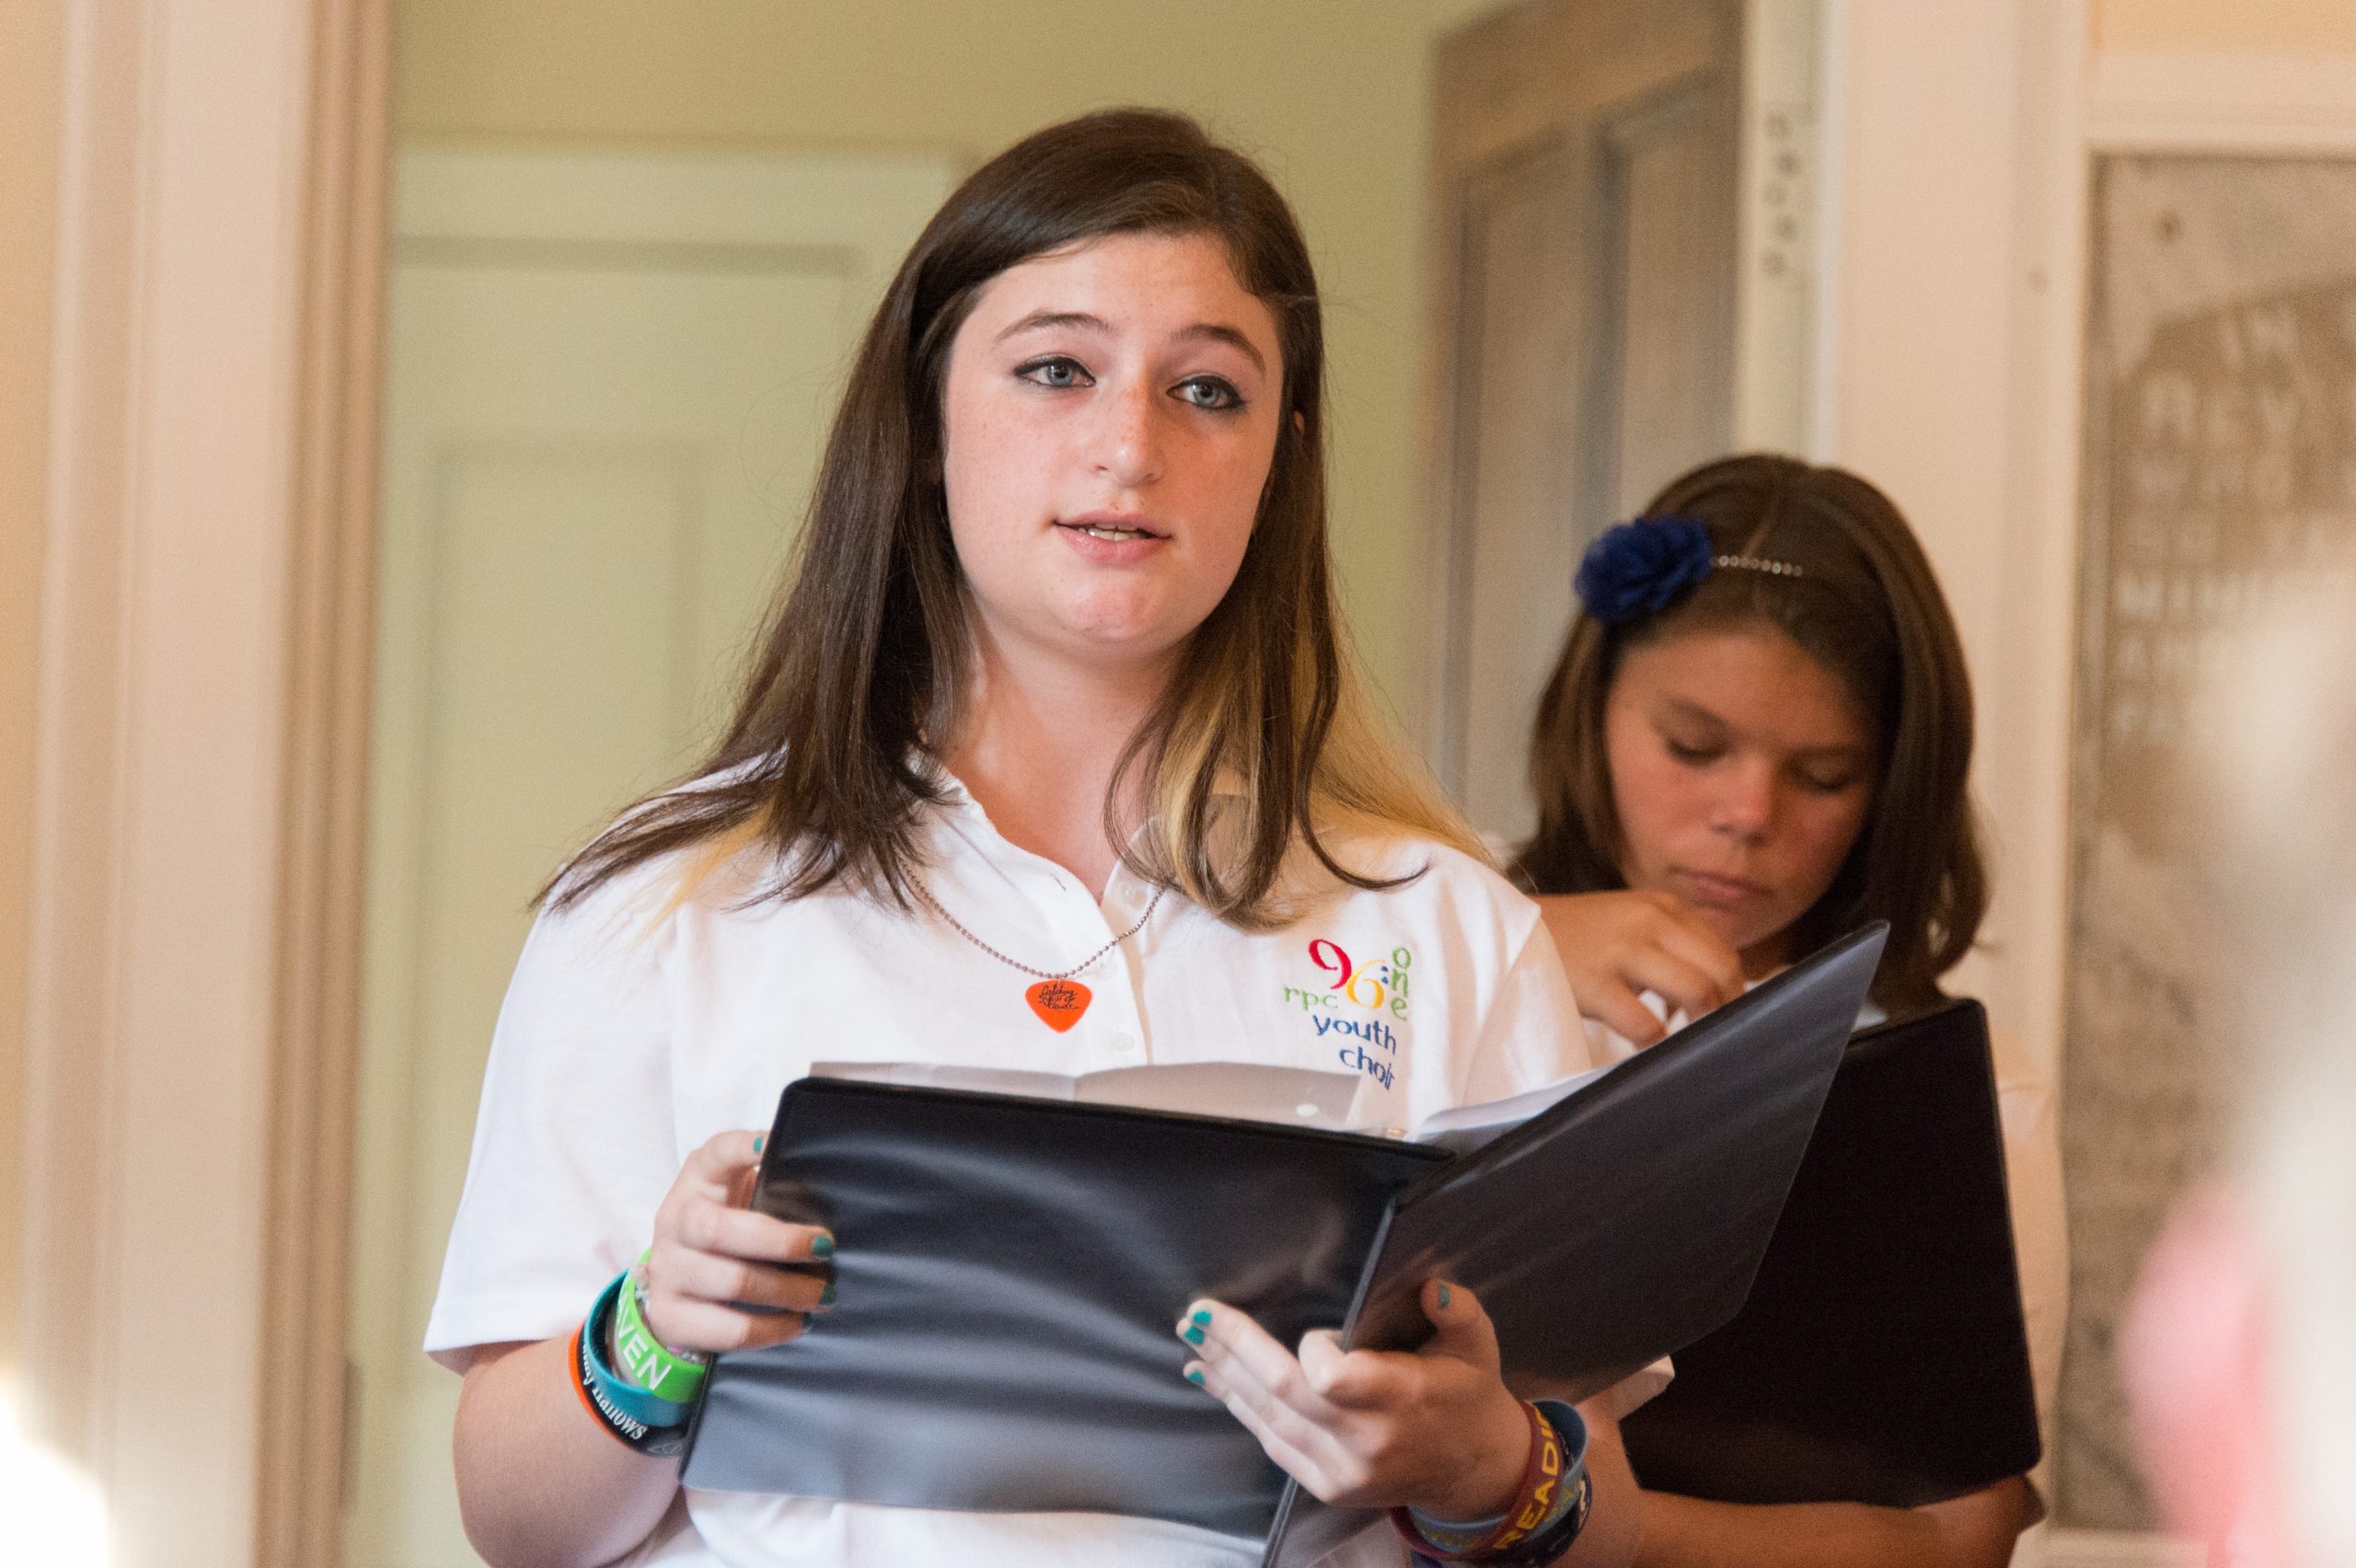
96:one “We Believe” Farewell Concert Historic Sanctuary

Post Processing

I use either PhotoShop unsharp mask or Lightroom to sharpen the image for how it is being used. Most images could use just a little sharpening. If you overdo the sharpening, it will not look good. A little will give it a bit of a sharpness “kick.” Use a small radius (perhaps a pixel or less) and a large amount.

Most photos are only processed with sharpening once I export out of Lightroom.

If I post the photos to the web, I choose the setting here when I export Screen and Standard.

You can make other choices when you export paper quality and influence your choice.

Success as Independent Photographer—Requires People Skllls

According to the Portland Business Journal, people skills are described as:
Understanding ourselves and moderating our responses
Talking effectively and empathizing accurately
Building relationships of trust, respect and productive interactions.

Running a successful business requires good people skills. I think the Portland Business Journal has it right when they describe what it is.

Earlier I wrote here about where my time goes as a photographer.  The majority of my time is spent using people skills to engage with: 1) potential clients; 2) clients or 3) subjects.

If you are insecure then you are going to have to take some risks and get out of your shell or find another career, because your success will be directly connected to your people skills.

Nikon D2X, Sigma 120-300mm with 1.4 converter, ISO 400, ƒ/4, 1/5000

Understanding ourselves and moderating our responses

Understanding ourselves is really about knowing our elevator speech. Why do I want to talk to you and what is my objective. You have to know what you want to accomplish or you will be unintelligible to people.

It isn’t all about you either. You have to learn to moderate your responses so that you are connecting to people and what is important to them.

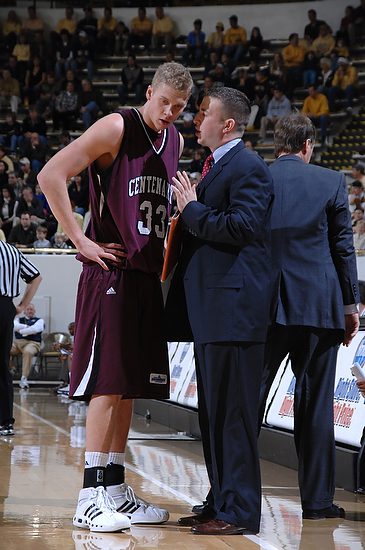
Centenary assistant coach Adam Walsh talks to Justin Glenn (33) during timeout against Georgia Tech during the first half at Alexander Memorial Coliseum. [Nikon D2X, Sigma 120-300mm, ISO 400, ƒ/7.1, 1/200, 4 Alienbees B1600 with sports reflectors, Pocket Wizards used to trigger them]

Talking effectively and empathizing accurately

The first time I talked about anything with people, I made mistakes. I analyzed what I did and why it failed. I started reading books and going to seminars to learn how to be more effective on whatever I was trying to do.

I went through premarital counseling and discovered this alone didn’t prevent mistakes. It was through mistakes I became more effective and developed more empathy.  You see others made mistakes with me and hurt me.

When I did my first few jobs I discovered people abused me if I didn’t have a good contract in place. I learned to communicate expectations I understood from the client and my expectations and have them written for both of us to sign.

When I first contacted people I was asking do you have any jobs for me. Today I research clients more and come to them with ideas of how I could do something for them. I learned over time to learn what was important to others more than what was only important to me. I was learning to empathize.

Nikon D2X, Sigma 18-125mm, ISO ISO 400, ƒ/7.1, 1/350

Building relationships of trust, respect and productive interactions

I have learned that the more people get to know me the more they trusted me. The more transparent the better my business became. I also learned over time that too transparent and letting people hear your thoughts all the time can backfire.  It took years of mistakes to learn how to have more productive interactions.

I learned the more I was helping the client get what they needed or wanted helped me to pay my bills.

I learned that you can share your expertise carefully and they client will appreciate your thoughts. The balance was learning to live with their choice when I didn’t agree with their choices. I was learning to respect their thoughts and opinions.

Even when clients told me they thought I was the expert didn’t mean they would always do what I suggested. What I learned was they were listening and sometimes the timing wasn’t good for reasons I didn’t know.

I started to watch years later my ideas being done by clients. I also learned to not have to get the credit all the time. When they would come back to me later with an idea that I had given to them, I was learning over time to smile and tell them what a great idea.

I also learned to share a little of my personal life when appropriate with clients. I found that they wanted to know about my family, just not all the time.

If you want to be a successful photographer, then develop your people skills.

Record keeping made easy for the photographer

If you have enough business then the paper work can overwhelm you. If you are finding you have a lot of paper work then this is a solution for you.
IRS tips
I wrote earlier on book keeping suggestions. Here is that post for you https://picturestoryteller.com/2013/03/photography-tax-tips.html
This post is on how to speed up that process even more for the successful photographer needing to get control of paper work in a timely fashion.  If you are starting out just a cheap scanner will work until you need to save time.
The paper work

If you are one who hates paper work as much as I then anything that can simplify the process is worth doing.

There are two different places that I must be ready to show receipts for business expenses: 1) IRS & 2) Clients.
I have found that every penny counts when it comes to collecting for expenses from clients.  Many clients want to see copies of your receipts before reimbursing you for those expenses. 
When I was on staff and filling out reimbursement forms I had to have every receipt or not get reimbursed.  When I made so little in those early years this actually helped me get into the habit of collecting those receipts.
While the IRS will accept business journals and credit card statements as proof of expenses in audits, these will not work with some clients.
If the dollar amount of items you purchased and deducted from your taxes was in excess of $75, the IRS will need to see the receipt to warrant the deduction. 
If the penny amount of items you purchased and want reimbursed from the accounts payable department is 1¢ or more they want a receipt.  
Scan your receipts
The best advice I can give you is to scan your receipts–all of them. This way you can easily create a PDF with your invoice and attached all the receipts. 
The best thing I have done to streamline all my book keeping was scanning of my receipts.  While putting as many receipts on a page and scanning them as one document works for business expense reports for invoicing, that really wasn’t working well to keeping track for the IRS.
I use Quicken Home & Business software to handle my banking, credit cards and invoicing.  A few years ago they made it possible for you to attach receipts to each transaction. In addition each transaction could be associated with the correct category on the Schedule C for taxes.
By scanning receipts and using the software Quicken I was able to make filing for taxes just a few hours each year than days it used to take.
Time is money
Well I had actually shifted a lot of that book keeping to spending time every couple of weeks scanning receipts one-by-one. This was taking a lot of time. 
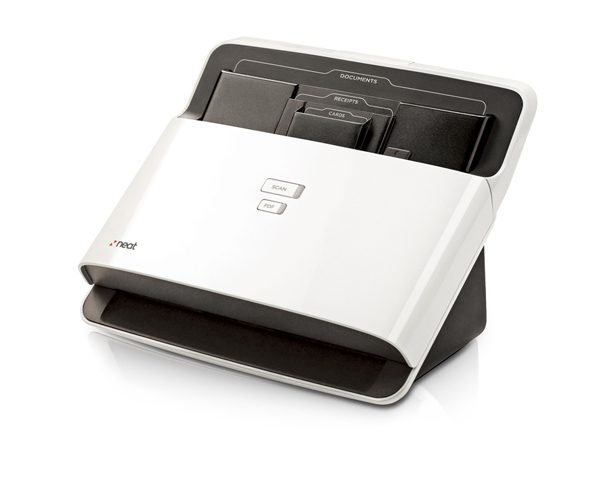
Not all that long ago a new scanner appeared on the market NeatDesk, but the price tag of $399.95 was a deal breaker in my mind. I had a Canoscan scanner that I paid $50 and it was doing the job.
I finally was tired of spending so much time scanning. I decided I would try the NeatDesk and if it didn’t work I would return it and at most pay the restocking fee.  After just a few minutes I was sold.  
I stacked the maximum amount of receipts it would take at a time. NeatDesk will scan in your receipts, business cards, or documents at a speedy 24 pages per minute. Scan up to 50 pages at once – 1 or 2-sided, color or B&W, single or multi-page. Capacity with paper tray:  15 business cards + 15 receipts + 15 letter-size documents.
The really cool thing is it not only scans but reads the text and helps with file naming and categorizing your receipts.
In addition to receipts I used it to scan stacks of model releases and then it created a PDF of them that I put with the photos online for my clients.  
Neat reads and extracts the information from whatever you scan. Receipts become digital records with vendors and amounts, business cards become digital contacts, and documents become fully keyword searchable.
expenses page2
Scan and attach a copy of all your receipts for the client
Saving the best for last
The second most important person on a job beyond the contact to get the job is the accounts payable person. 
Just as you get more jobs with a client by taking more off of their desk that they must do, the faster you get paid when you make the life for the accounts payable people easier.  

How To Correct Leaning Buildings In Lightroom 5

How often do you take pictures where the buildings are falling away from you. Before digital there were two ways to correct this.

By using a 4×5 camera you would get the film to be parallel to the building and then adjust the tilts and swings of the lens mount to get you a photo where the building looks straight.

You could also while printing the photo adjust the easel until you also made the building look correct.

Using Lightroom I was able to take the above photo and correct it to the lower photo.

Here is a video showing you how I did that correction.

[youtube https://www.youtube.com/watch?v=QPhR6kGPxp8]

JPEGs are better than RAW Images unless you check one thing


From 1982 till 2002 I shot film. I had to get it right in the camera. Most of this time I was shooting color transparency where either you nailed the exposure and white balance or you missed it. No fixing it in post.

When I transitioned to digital the parameters for nailing exposure were just as critical as transparencies. Having shot this way for 20+ years I continued to find it strange how many people rely on post processing to continue to fix what can be done in the camera.

One thing however that digital has given us today we didn’t have with film is the ability correct for the lens defects.  This is really cool and can make your images appear sharper and with better clarity than when we shot on film.

PhotoShop RAW Converter

If you are using PhotoShop to work on your RAW images you need to be sure you always click on the “Lens Icon”, select “Profile” and then check on “Enable Lens Profile Corrections” or you should be shooting JPEGs in camera to get the least amount of distortion with your images.

The Lens Profile Corrections helps with the following known distortions with lenses:

  • Vignetting
  • Barrel distortion
  • Pincushion distortion
  • Chromatic aberration

Each lens has been tested and the mathematical algorithms necessary to correct those distortions is what is being done when you select the enable.  The camera manufacturers have all this built into their cameras to correct for this when you shoot JPEGs, but when you shoot RAW you loose those manufacturer corrections.

Before enabling Lens Profile Corrections
After enabling Lens Profile Corrections

Lightroom

You can also do this using Adobe Lightroom in the “Develop Module.” Go to “Lens Corrections” click on the “Profile” tab and then be sure to check “Enable Profile Corrections.”
This is the first step I do with every image that I shoot RAW.  I recommend it becoming your first step for all your RAW images as well.

Rechargeable Batteries and Organization for the Photographer

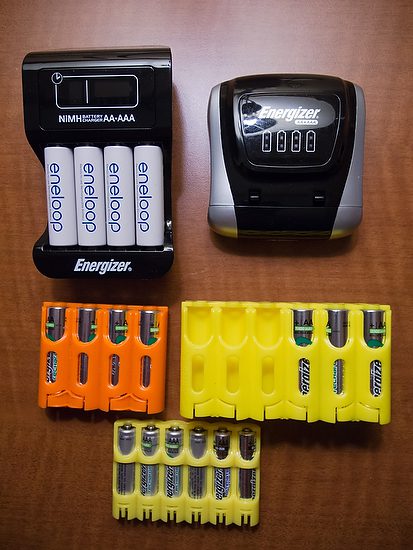
I travel with these two chargers and batteries. I have a good number of the Energizer rechargeable AA and AAA batteries as well as the Eneloop, which I prefer. Here are some tips to keep you energized.

Eneloop

I recommend using these Eneloop batteries. There maybe a better battery, but I am just recommending what I use all the time a prefer.

eneloop XX batteries are the perfect choice for powering photo strobe flash lights; providing more than twice the number of flashes per recharge in less than half the time compared to conventional alkaline batteries!

PowerPax

Always store batteries with the positive and negative terminals away from each other. If batteries are stored with positive and negative terminals touching, they may begin conducting electricity idly, which will discharge them. Storing batteries in their original package will help you prevent this. You can also buy battery storage boxes from specialty storage retailers that will eliminate this potential problem.

I use the PowerPax battery holders for keeping up with my batteries and keeping the terminals from touching one another or other items in my bag.

Here is a quick video for you about their product:

[youtube https://www.youtube.com/watch?v=bEjsy0w4Zro]
Here is one caddy that will carry a complete assortment for most photographers:

A9 Pack | Battery Case $6.95

Holds: 8 – AA’s, 4 – AAA’s and 1 – 9V battery.
Originally designed for pilots, but also great for camping, boating, travel or at home.
Dispenses batteries with one hand for safety and convenience.
Terminal protection at both ends regardless of how the battery is inserted.
Store your batteries in a compact, easy to find caddy.

How to photograph 4th of July Fireworks

Caption: Nikon D3S, 14-24mm, ISO 100, ƒ/8, 8 sec

Location, Location, Location

The success of a fantastic fireworks shot is the location. You need to know where the fireworks will go off well before they do.

You don’t want to try to line up your shot after they start. You can tweak your composition, but don’t be caught not knowing where they will go off.

Consider clear view verses using foreground or surrounding to help make your fireworks stand out. My favorite shots are those iconic locations in the foreground, like the Statue of Liberty or the Golden Gate Bridge in San Francisco.

Fireworks

Tripod and Cable Release

I recommend using a tripod and a cable release. This will keep the camera as still as possible during a long exposure.

Fireworks

This is the Nikon MC-30 that I have used for years on different Nikon Cameras.

Camera Settings

  • Manual
  • White Balance – Daylight
  • ISO 100
  • ƒ/8
  • Bulb Shutter-speed and keep open for two bursts of fireworks using a cable release

My exposures were from 6 seconds to about 12 seconds on average. I typically might shoot 75 to 100 photos and only really like about 10 of those shots. 

Nikon D3S, 14-24mm, ISO 100, ƒ/8, 11 sec

 When to press the shutter? When you hear the boom of the fireworks, click the shutter and don’t let go until the end of the second fireworks. The bursting will create those beautiful shapes. You don’t get the same exposure if you shoot at faster shutter speeds. The reason is that as the bright fragments move, you capture them throughout the exposure, whereas the faster shutter speed would freeze them. This is similar to photographing car lights on streets at night. By letting the cars continue to move, you get a trace of the lights through the photo. 

Nikon D3S, 14-24mm, ISO 100, ƒ/8, 6 sec

Make your photos 3D for interest

Nikon D4, 14-24mm, ISO 500, ƒ/10, 1/200

Too often people are isolating their subjects so much that the context is lost. If you just give a peak in the photo of things behind the subject you can create depth into the photograph.

In the above photograph I used the ally to help create depth.

Nikon D4, 14-24mm, ISO 1000, ƒ/10, 1/200

See the difference between that photo and the one below?

Nikon D4, 14-24mm, ISO 560, ƒ/10, 1/200

Here I am just capturing some individuals in this same ally. Here I faced the subject and kept the background simple.

Nikon D4, 14-24mm, ISO 320, ƒ/10, 1/200

By just letting some of the background be of the ally in the lower photo you create a little more interest beyond the subject.

Nikon D4, 14-24mm, ISO 280, ƒ/10, 1/200

I am not trying to compare the photos in terms of best expression and moments.  I am just trying to show how the composition can create more of a three dimensional photograph over a two dimensional one.

Here all the people were trying to stay in the shade and I like the photograph, but it is a little flat. The tables in front of them help, but compare this to the one below.

Nikon D4, 28-300mm, ISO 250, ƒ/7.1, 1/100

I am using the reflections in the window in the background to help create depth here.

Nikon D4, 14-24mm, ISO 2200, ƒ/10, 1/200

In the photo of the chef garnishing the food, I just have a small slither of sky in the top left hand corner of the photo. This helps with the depth as well as the reflections in the windows.

You will also notice in most of these photos I like working with extreme wide angle lens. I just love my Nikon 14-24mm ƒ/2.8 lens. By me getting close to people even where the background doesn’t help create depth the lens helps bue to the perspective and puts the viewer [you] right there in the ally with me.

Nikon D4, 28-300mm, ISO 100, ƒ/7.1, 1/125

Photographers Need To Stay On Budget

Be ready for changes

Often after you have booked a client there will be some possible changes. Just because you quoted a price does not mean you have to keep that price if the client makes changes to the scope of the project.

“I will be more than pleased to make it happen for you. Since this is a change to what we agreed on I need your approval for the changes before we proceed,” is important to say to the client. You can phrase it however you want, but you need to communicate a few things.

  1. You want them to get what they want.
  2. With changes to the original estimate there are changes to the contract.
    1. Price
    2. What is delivered
    3. Deadline
    4. Possible new expenses
  3. They must approve of the changes in writing for you to proceed.
Willingness to serve
Don’t respond with no to a client unless they are asking you to do more for the same amount of money. Just tell them you need just a minute to revise the estimate to give them an idea what they will cost and any other changes they need to know.
This is why you want to estimate on a project and not give day rates. The only thing you can do on a day rate is if you have additional expenses to meet their request, otherwise when you have the time to do more for them you must.
Give yourself time to respond
It is quite common that a client might catch you off guard and don’t feel bad about asking for a moment to consider their request.  
Sometimes the request may mean not just price difference, but to meet their request something else must come off the project due to time constraints. 
Sometimes I have to point out while we are running ahead of schedule for right now, but I will not know until the end of the project if I have time to add on this request. I will ask if they mind waiting to see if we have time. If they push then I let them know one of the situations we have scheduled might not get done.  I then give them the quote for the price change and wait to see if they want to proceed.
Bait and Switch
If you have given them a written estimate you do not have to worry about them feeling like you have them over a barrel when you give them the increased price quote. There are some people who are actually trying to get more out of you than you estimated. This makes them feel like they got their money’s worth. 
You don’t need to feel the pressure to give in to them, you just tell them the price difference and let them decide.
What happens if you forget to communicate a price difference?
You will most likely eat the cost, because you failed to communicate.
It is professional to communicate price changes before doing the work. I have watched too many freelancers turn in invoices that were higher than the quote and the relationship with the client is tarnished at best and destroyed at the worst. 
Take care of the paper work as much as you do the creative and you will have customers who will hire you again and again.