When doing an interview, you need to do a few things every time.
Fill the frame
When doing an interview, you must carefully choose good composition and background. Pay attention to everything inside the frame.
Get tight on the person you are interviewing.
Kill the Noise
Once you put the microphone in place and have your headphones on, you can hear all the ambient sounds. This is where everyone is quiet for a moment while you listen.
Let’s say you hear the ceiling fan or the air conditioner running. I would turn these off for the interview.
Move to a quiet location if you cannot turn off something like a water fall or water fountain.
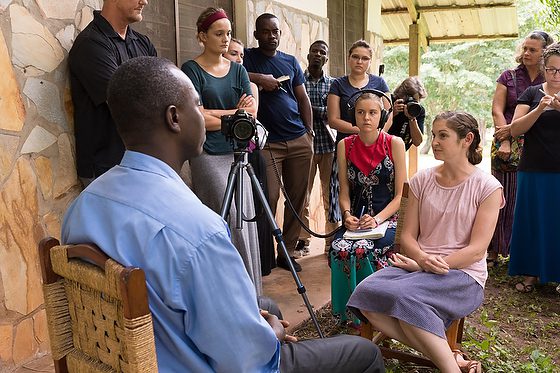
Togo, West Africa
Steady the Camera
Use a tripod or put the camera on a table. Just keep your primary camera for the interview still. If you have a second camera to use, you can maybe put that camera on a slider or fluid head that will let you move the camera during the interview.
I believe you always need one locked camera on a tripod for the interview.
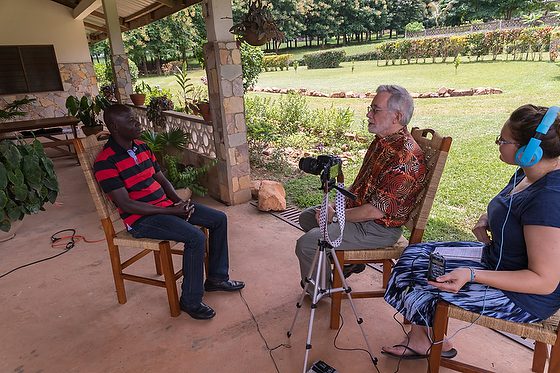
Togo, West Africa
Light the Subject
I suggest finding a great place with light, so you don’t have to use lights. I find the open shade on the side of a building works as well as porches, as you see in these two photos of interviews we were doing in Togo, West Africa.
Audio is King
There are times for different microphones, just as for additional lenses. You need to know the difference between a lapel, camera & shotgun microphone.
Sharpness is Queen
Sharp focus is critical. I advise against shooting ƒ/1.4 for video unless this is your second camera perspective. Have a depth-of-field that is forgiving if the person moves during the interview.
Use manual focus and not Auto-Focus.
Lock Down the lens
Don’t zoom in and out on your primary camera. You can do some of this with a second camera, but be sure at least one camera is locked down, and you have a solid framed shot that is in focus and has enough depth-of-field that the person can move a little and still be in focus.
In Part 1, I suggested the gear you need for your DSLR/Mirrorless camera to do video. This post will do with some basic settings I recommend for the camera when doing a video.
Nikon D5 Video Settings
Camera Video Settings
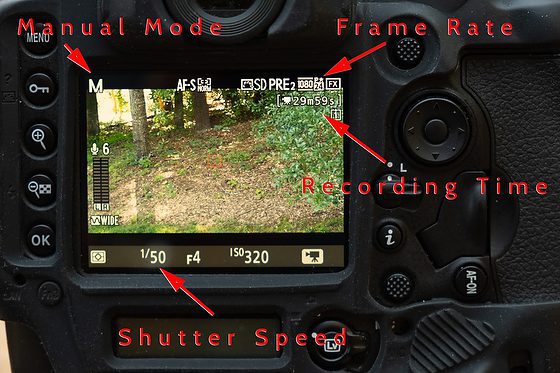
On my Nikon D5, The Frame Rate, Resolution, and Frame Size all show up in the upper right-hand corner of the Live View on the LCD. We need to address all three.
Resolution – I recommend Full HD 1920×1080
While there are many other resolutions like 2K, 4K, 6K, and even 8K, I believe they are overkill for web distribution. Even my friend Ben Smallbone whose credits include the movies: Priceless, Taken, and Steve McQueen: American Icon, to name a few of his movies told me that when it came to distributing their films to movie houses all over the country, they said not to give them anything bigger than 2K.
There are two resolutions in the video, just as there are two resolutions with stills. You have the capture setting and the exported resolution.
While you can shoot, say, at 4k for similar reasons, you would shoot RAW. Your computer must be a top line to process the 4K files. Unless you want to crop in on your video in post-production, I believe there is little to gain for the average project to shoot higher than the Blue Ray Full HD 1920×1080 resolution.
Frame Rate – I recommend 24 Frames per Second
Here is a good video showing why 24 fps is an industry standard for movies.
24 FPS is the Cinematic Look that is used in motion pictures. There are reasons to shoot other FPS, and one worth mentioning is to shoot super high rate to slow down for that “Slow Motion” effect.
Shutter Speed – I recommend 1/48 or 1/50
As a rule of thumb, you want the denominator of your shutter speed to be approximately double the number of frames per second that you are recording. For example, when shooting at 25fps, your shutter speed should be 1/50 of a second. If you have the 24fps and do not have a 1/48, then pick the closest frame rate, like 1/50 or 1/60.
Manual Mode – Shoot this rather than Aperture, Shutter or Program mode
If anything on the camera is automatic, your exposure can change when something changes in the frame, like your subject moves a little. The camera may think the lighting has changed, and it hasn’t. Shoot manual mode and manual focus as well.
Look – use Neutral
You can pick a picture color mode in the video, just like stills. There are modes on most cameras like Standard, Vivid, Monochrome, Portrait, and Neutral. If your camera doesn’t have a Neutral setting, then pick Standard.
When we cover your post-production, you can do more with a Neutral setting than with Vivid. More on that in later posts on making videos with your DSLR.
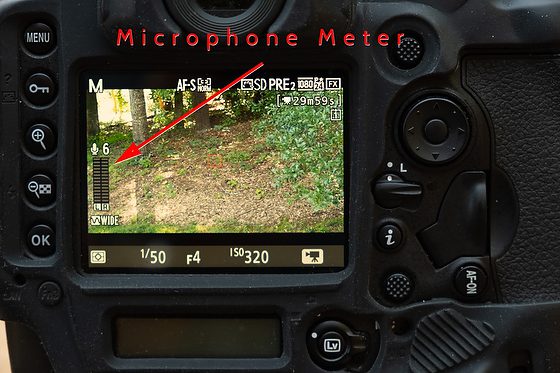
Nikon D5 Audio Level
Audio Recording Settings
You want to have your recording levels set manually and not automatic for the same reasons for the video. When someone stops talking, the Auto level will increase the volume and introduce noise.
Most levels on cameras or a separate recording device like the Zoom Digital Audio Recorders have a way to show you it is too loud.
Most video editors agree that the overall audio level of your audio mix (all of your audio combined) should be normalized between -10db to -20db. I level my videos around -12db with occasional peaks to -8db.
What this means for me on my Nikon D5 is I want the level to peak right up to the last line before it goes red. I have a person talk for a while and then set the sound recording level before recording.
I recommend doing a test video for sound. Set your video settings to get good exposure and audio levels for good sound. Record 30 seconds to a minute and then download to your computer and play using Quicktime or other video software that came with your computer.
Play something on your computer to test sound like the music you downloaded. After setting your speakers for proper volume when listening to your music, play your video. You must change your recording levels if you have to adjust the volume to hear the recording. The biggest problem is if it is too quiet or if too loud and giving you distortion.
Headphone Volume
Be very careful that you are not using the headphone volume as a way to see if the audio level is set correctly. Use the levels for audio the same way you use a histogram. Once you put those levels, adjust your headphone volume to where you can hear adequately.
Picking a location to do an interview
When picking a location, you need to pay attention to two things: 1) Sound in the location and 2) lighting/visual.
I recommend turning on your microphone, putting your headphones on, and listening to the environment. Are you trying to do an interview next to a waterfall or water fountain? That will prove to be difficult to impossible.
Finding a tranquil location would be “ideal,” but not always possible.
Make finding the perfect location weighs sound quality over visual.
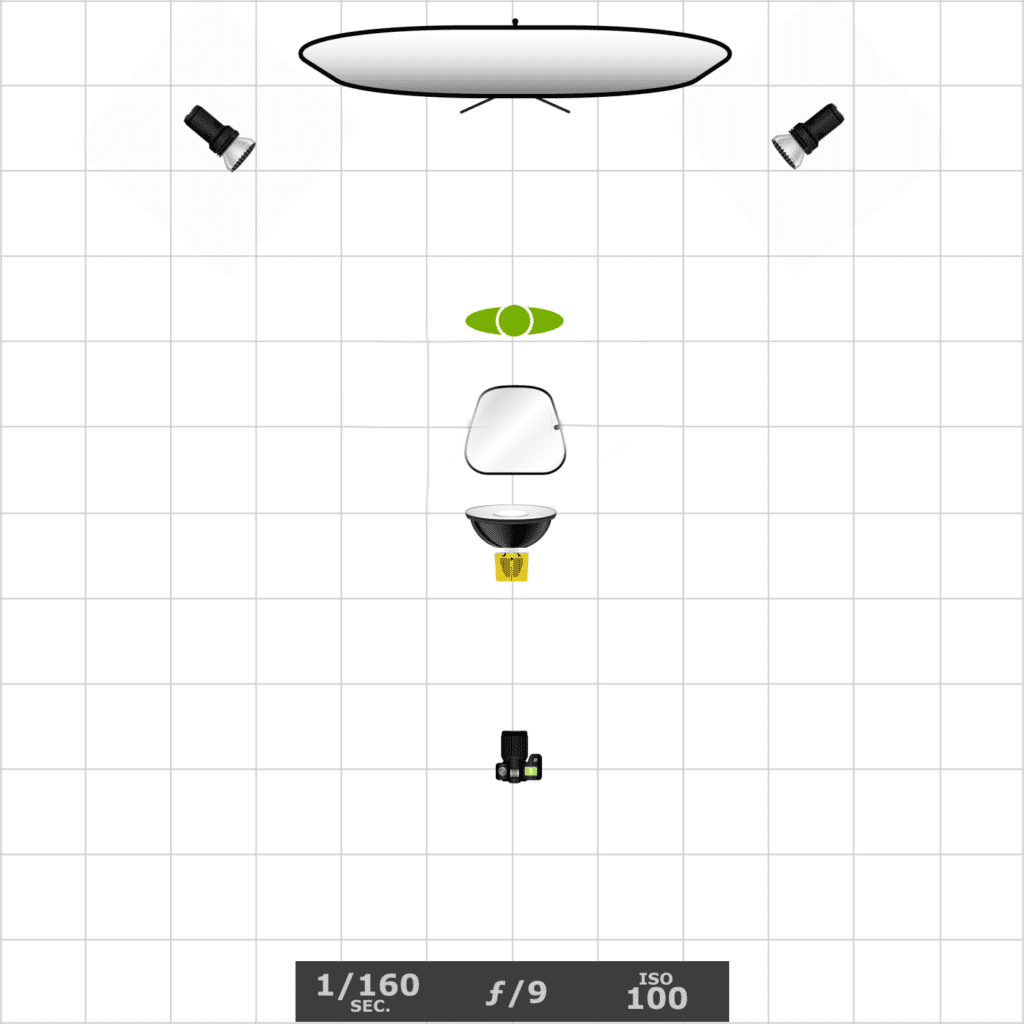
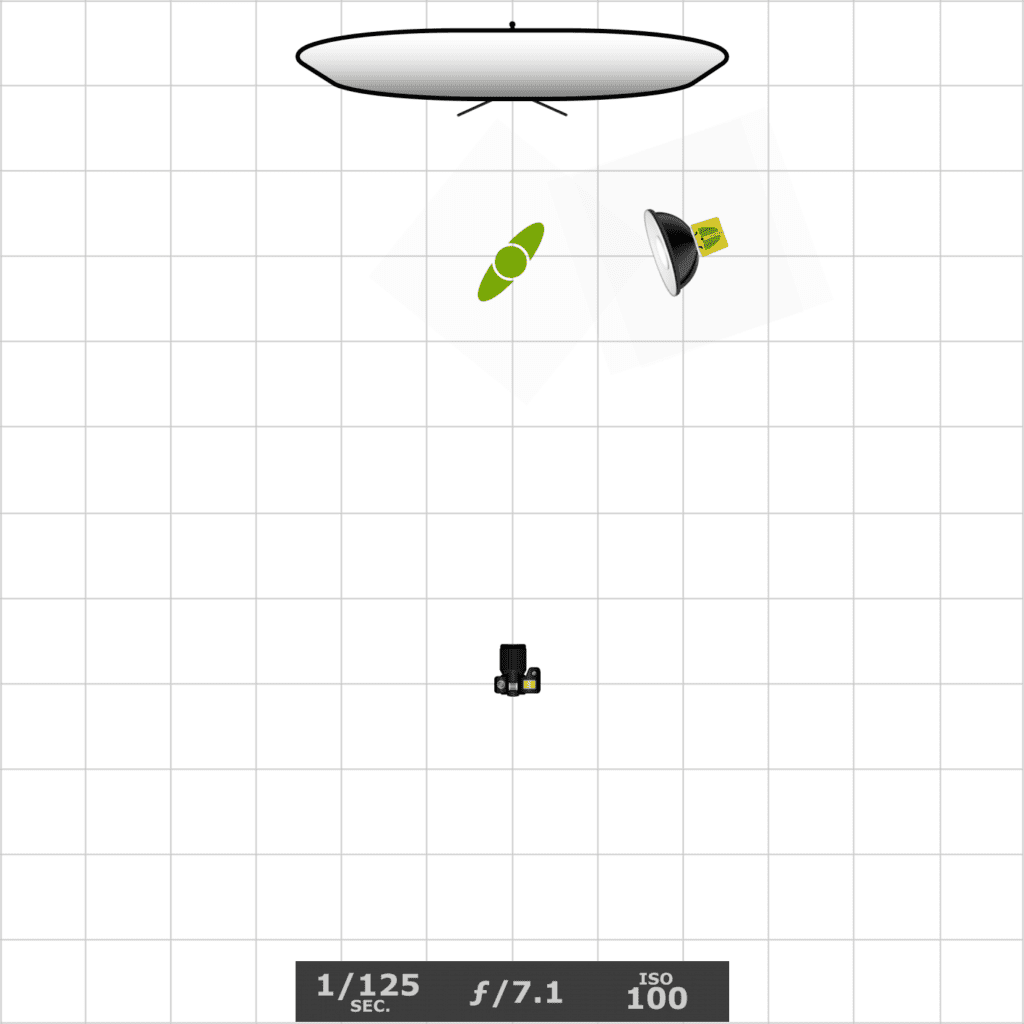
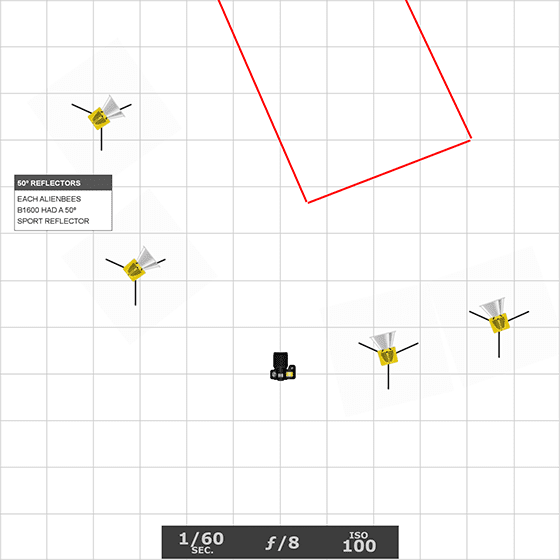
Here is the lighting diagram for the setup for you. I was only using the one Lasolight reflector and took sides off.
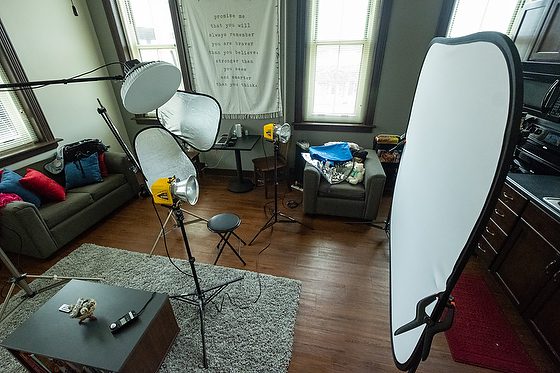
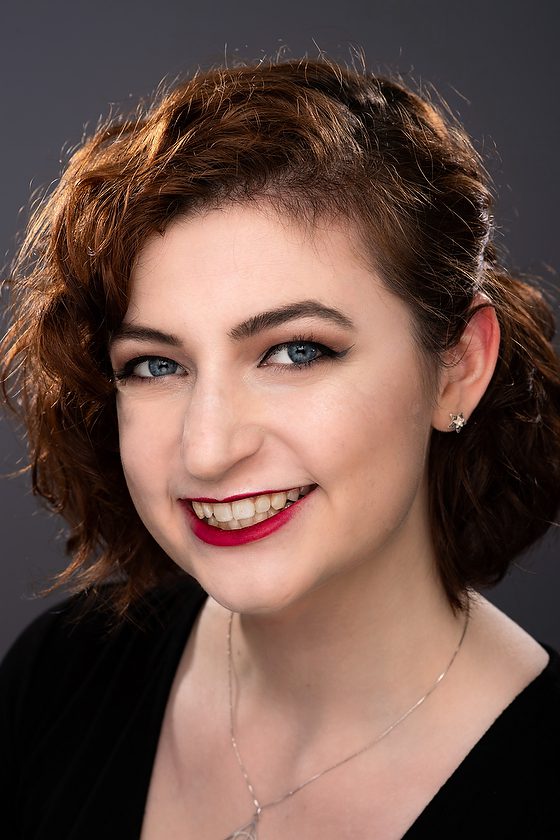
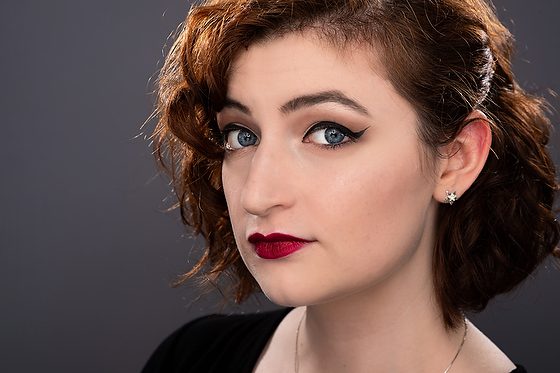
I did some headshots for my daughter and other Columbus State theater students. Here are some photos and the setup I did inside my daughter’s dorm room.
Setup of (3) Alienbees, main light Beauty Dish, Lastolite Triflector MKII Frame + Silver/Gold Panels
They are looking toward the camera’s perspective. The model is in front of the two side strobes.
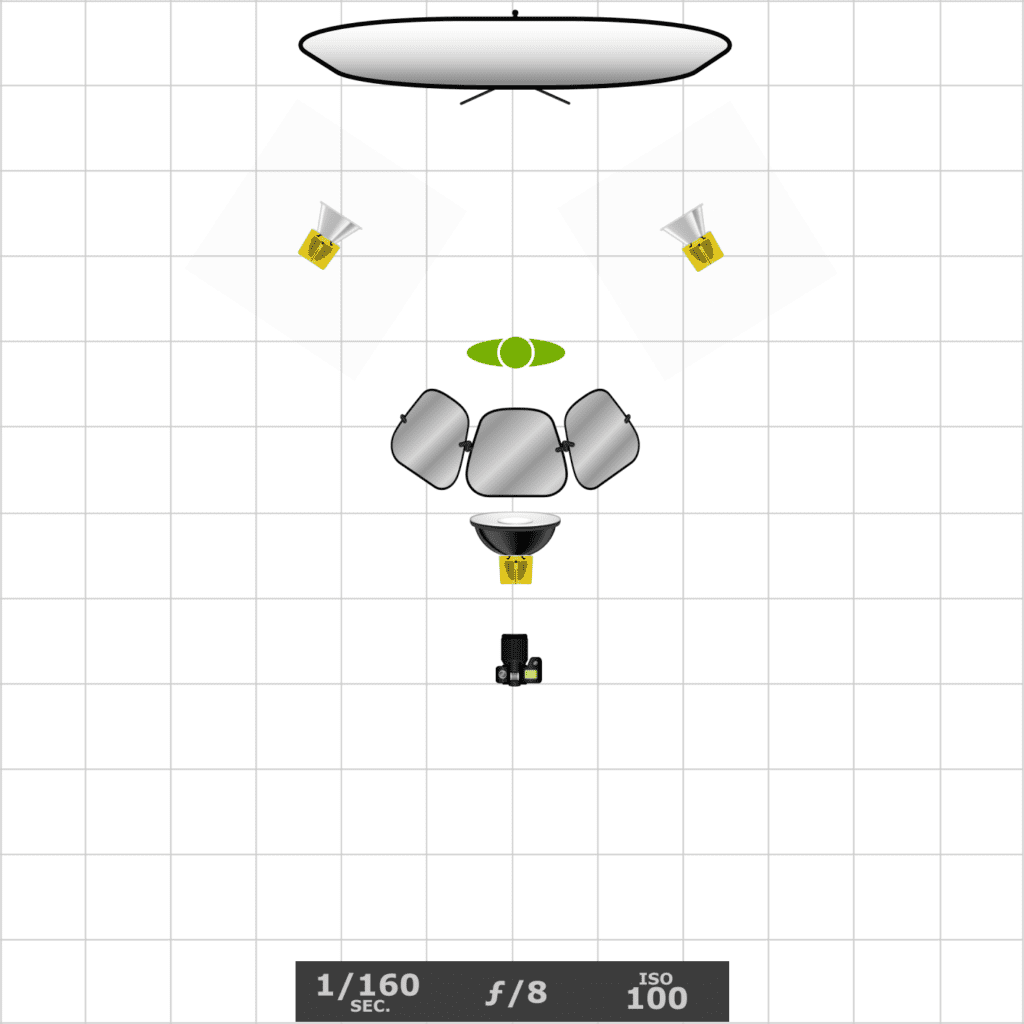
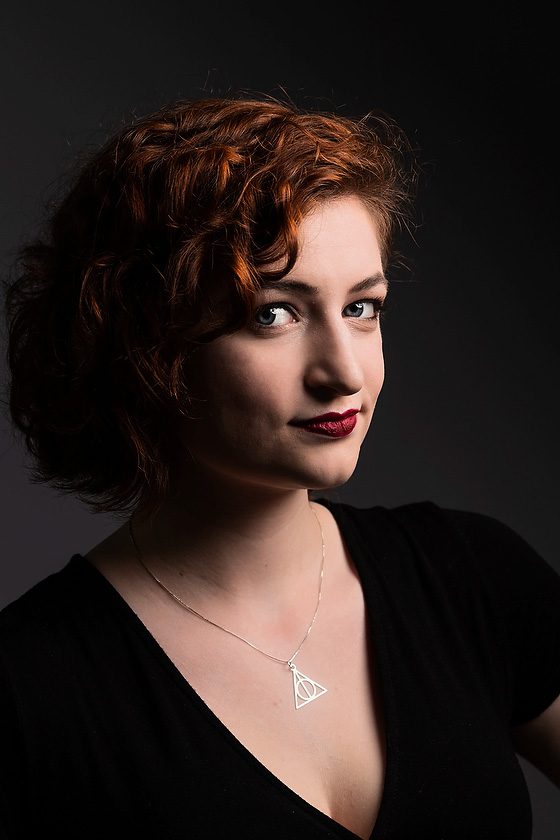
Setup of (3) Alienbees, main light Beauty Dish, Lastolite Triflector MKII Frame + Silver/Gold Panels
By turning the background lights away from the background toward my daughter, I could rim light her. I put 30º grids on the lights to keep the light from hitting the lens and causing a flair.
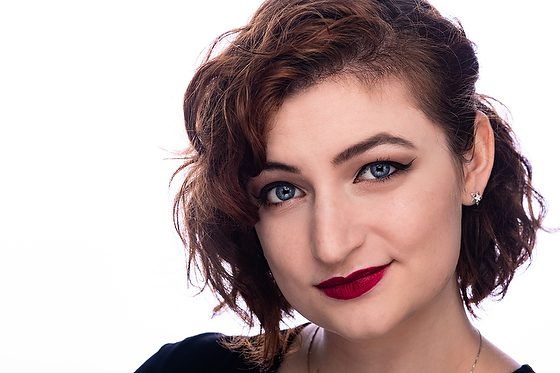
This one shot of Cole is with just the one Beauty Dish light straight above him. It creates what we call “Butterfly” Lighting. The light casts a shadow under the nose that often looks like butterfly wings.
This helps you see why you want to have this as the main light for headshots. It helps create the shape of the face. The shadows created by the cheekbones help contour the face.
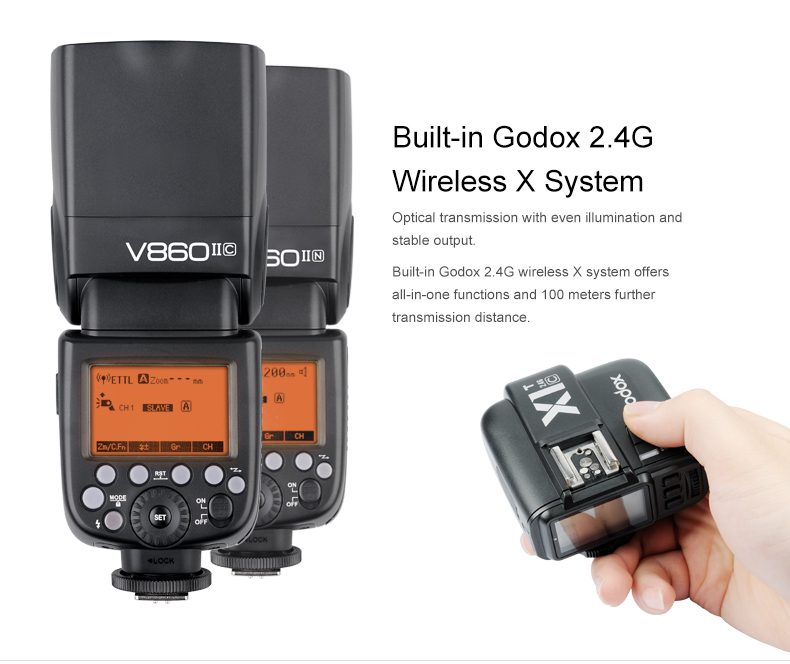
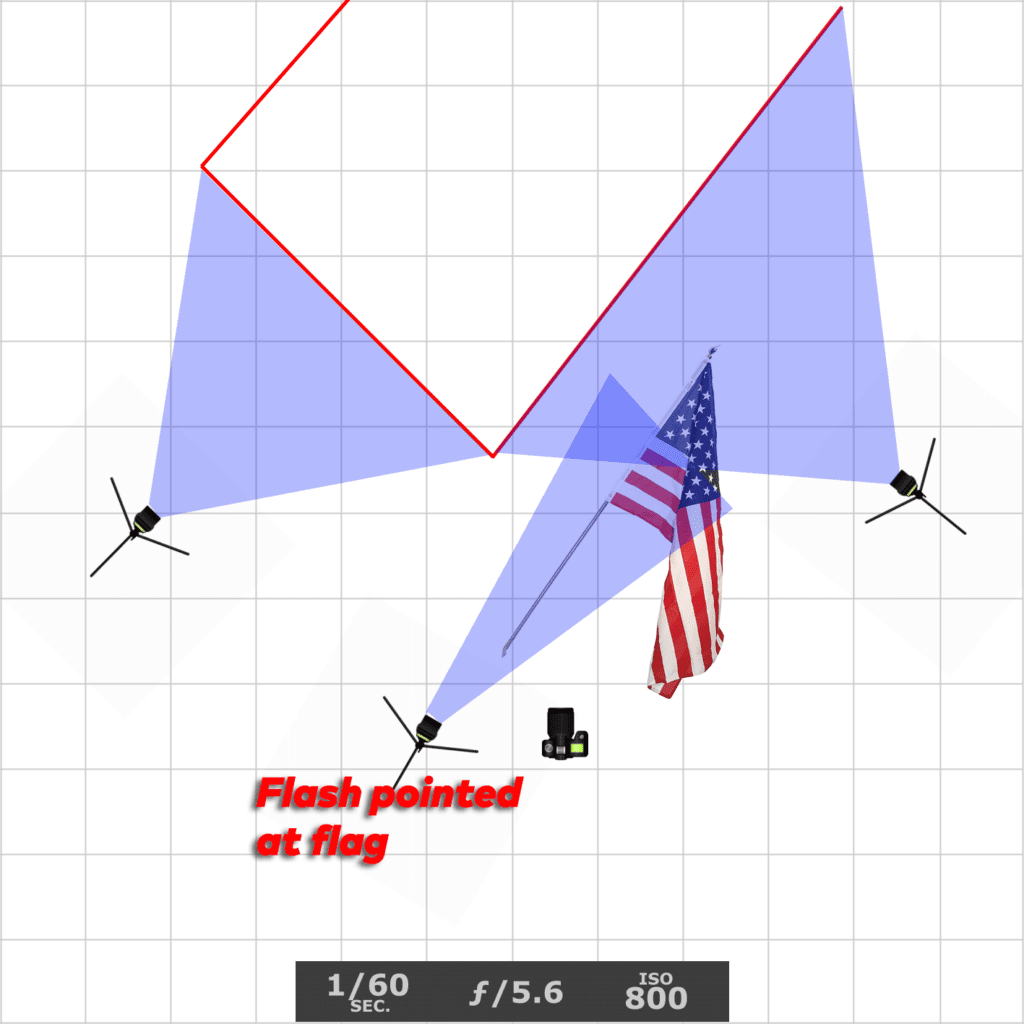
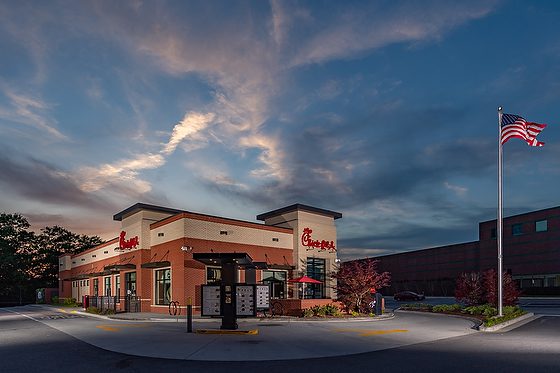
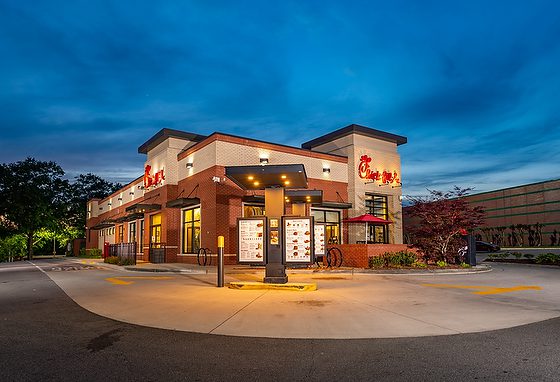
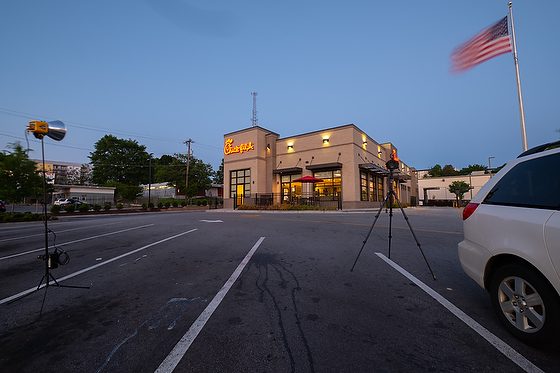
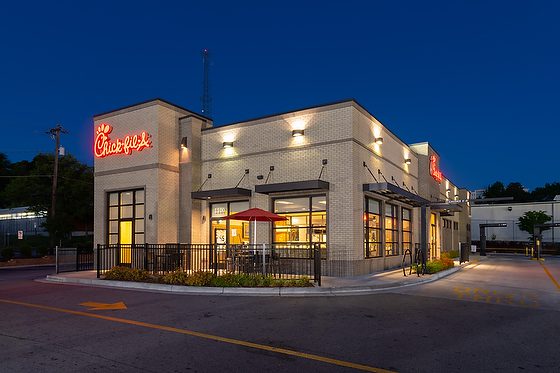
Chick-fil-A Sunnyvale FSU is located in Sunnyvale, California. [Nikon D5, 14-24mm. ƒ/5.6, ISO 800, 1/60–(3) Godox V860IIN + Godox X1NT]The past few posts I have shown you how I use Alienbees B1600 studio strobes to light up buildings for architectural photo shoots.
When flying to San Jose, California for another shoot I decided to only take a smaller case of three Godox V860IIN hotshoe flashes + Godox X1NT transmitter.
Godox V860IIN + Godox X1NT
Now when I shot these I did change the ISO to 800 to let the flashes light up the building much easier than at ISO 100.
After I shot this photo a few times seeing about the change in the light as the sun sets the wind stopped blowing and the flag was no longer waving.
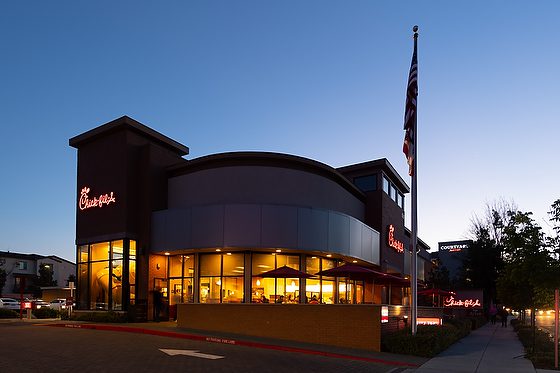
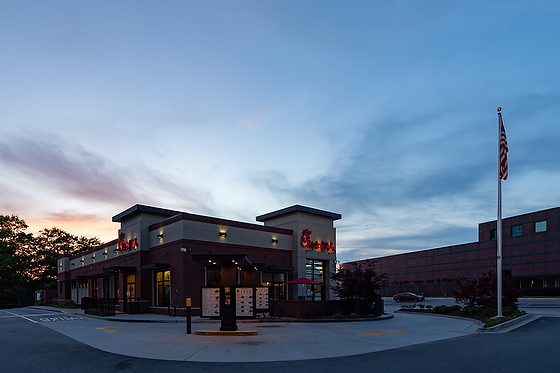
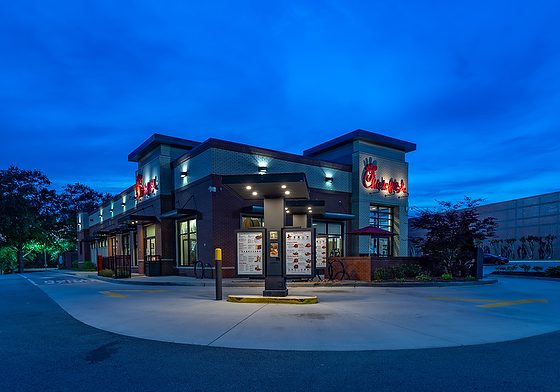
Just so you can see what the flashes are doing here is the photo without the flashes.
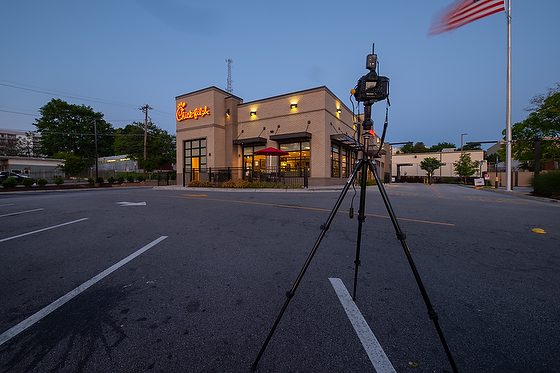
Chick-fil-A Sunnyvale FSU is located in Sunnyvale, California. [Nikon D5, 14-24mm. ƒ/4, ISO 100, 1/2.5]So you can see that you can shoot at ISO 100 here you see this photo below. This was shot 30 minutes after sunset.
While I prefer the sky in this shot the waving of the flag I think made the other photo much better.
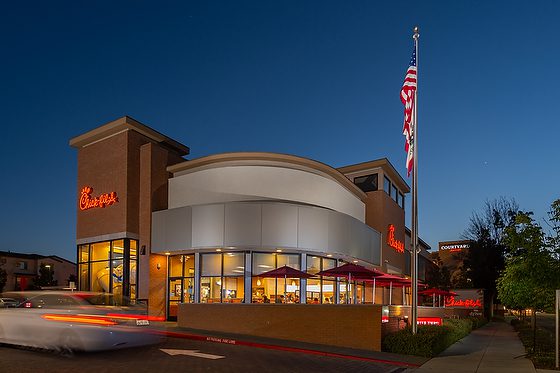
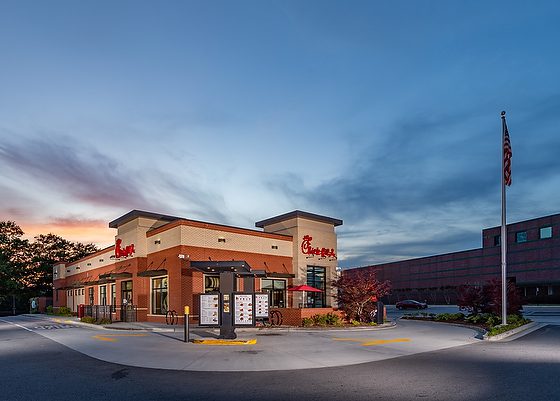
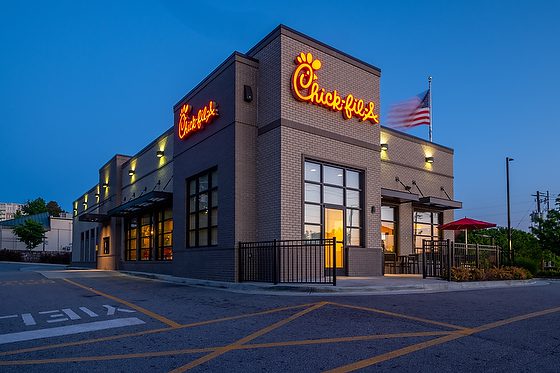
Chick-fil-A Sunnyvale FSU is located in Sunnyvale, California. [Nikon D5, 14-24mm. ƒ/4, ISO 100, 1/2–(3) Godox V860IIN + Godox X1NT]I hope this shows that it isn’t how much gear you have, but knowing how to use it that will make or break a photo.
[NIKON D5, 24.0-105.0 mm f/4.0, Mode = Aperture Priority, ISO 400, 1/6, ƒ/5.6, (35mm = 35)]
Chick-fil-A @ Perimeter at Hammond Drive FSU [Nikon D5, 14-24mm, ISO 100, ƒ/8, 1/60 – 4 Alienbees B1600s] 8:21 pm
Getting a photo like this demands more than just a tripod and waiting for the right time of day.
Here is the result of doing just that in this photo below.
[Nikon D5, 14-24mm, ISO 100, ƒ/8, 1/13] 8:25 pm
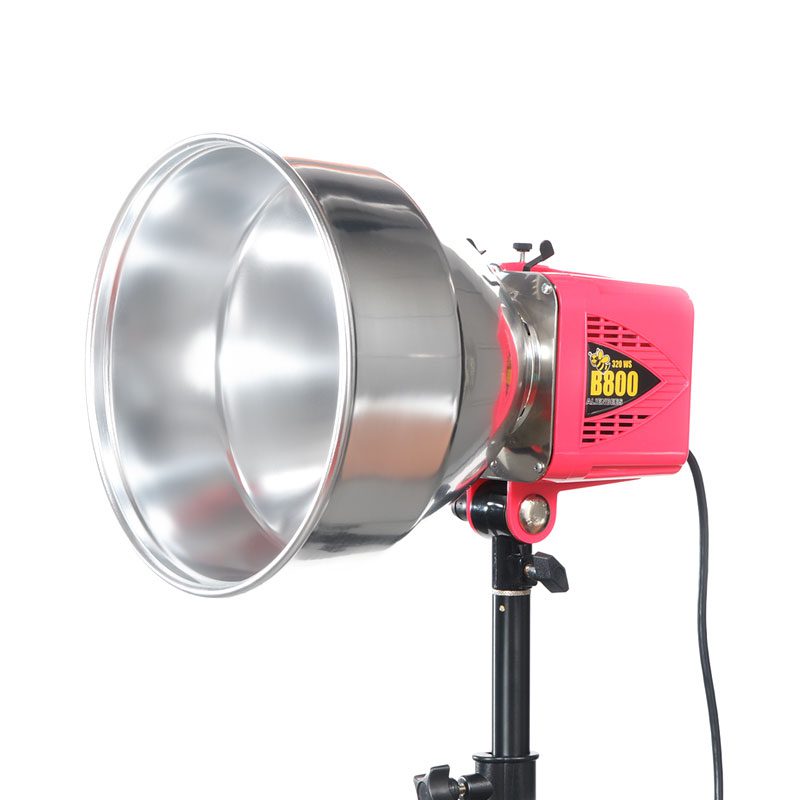
To help light up the building I used 4 Alienbees B1600 strobes with 11″ Long Throw Reflector. This is what I call “Writing with Light”, which is the definition of photography. Sometimes nature needs some help.
Alienbees with 11″ Long Throw Reflector
For half of the photos I shot at ƒ/8 with the Alienbees on full power. Then I cut the power in half on the Alienbees and changed the Aperture to ƒ/5.6.
Sunset was at 8:26 pm. Pretty much you can bet on the best photos of buildings with lights to be 20 minutes after sunset as in this photo shot at 8:47 pm. This is when the lights on the building and inside at matching the sky brightness.
[Nikon D5, 14-24mm, ISO 100, ƒ/5.6, 1 sec] 8:47 pm
Again here is that same scene without the Alienbees adding light to the side of the building.
Just so you know exactly the light at sunset at 8:26 pm here is that photo as well for you to see.
The problem is that the lights on the building are not showing up. We need to open up the exposure for the lights on the building by changing only the shutter speed from 1/13 to 1 second.
Tips for shooting buildings at Sunset
Arrive early and find best angle to shoot building Use Strobes or powerful flashlights to light up building Use a tripod and cable release with the camera Start shooting 5 minutes before sunset Stop shooting about 30 – 40 minutes after sunset White Balance for Sun or Flash Shoot in RAW
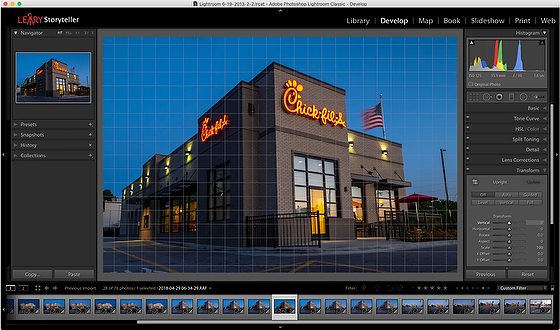
Chick-fil-A West Midtown Atlanta, Georgia at Sunrise. [Fuji X-E3, 10-24mm, ISO 125, ƒ/10, 1.6 sec]
After working on the RAW file in Adobe Lightroom, this is the processed photo.
Here is the photo with just perspective not corrected on the image.
Chick-fil-A West Midtown Atlanta, Georgia at Sunrise. [Fuji X-E3, 10-24mm, ISO 125, ƒ/10, 1.6 sec]
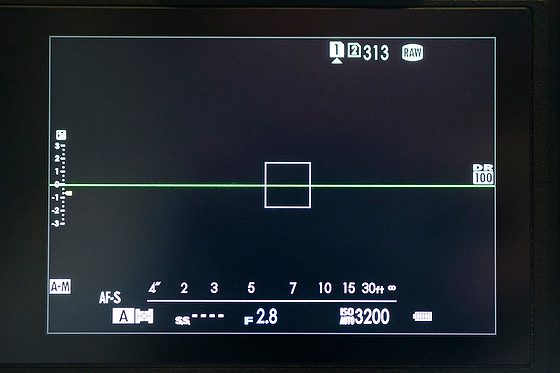
Now when I am shooting on my Fuji X-E3, there is a level built into the camera that can be turned on to show in the display.
When I shot the building photo, it was level from left to right.
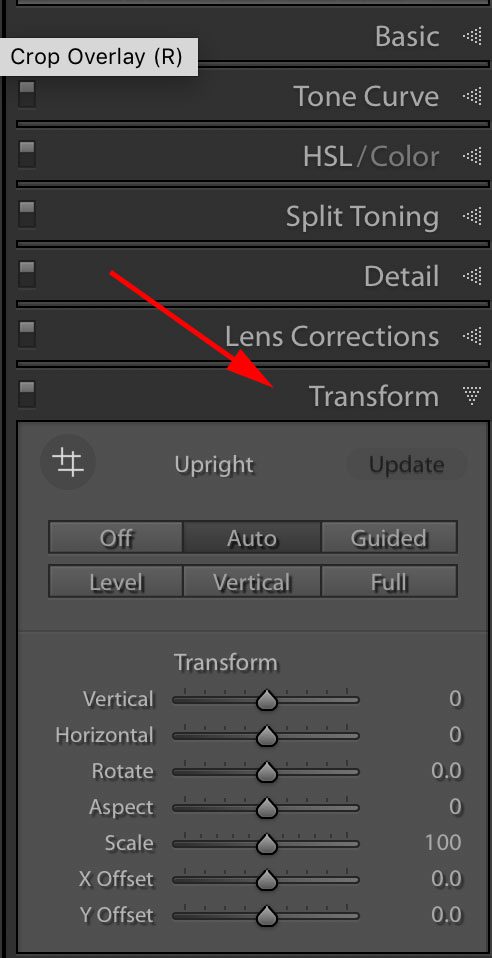
You go to the develop module and the Transform tools in Adobe Lightroom.
You can click on Auto and see if it looks the way you want, and then you can undo the change if you like.
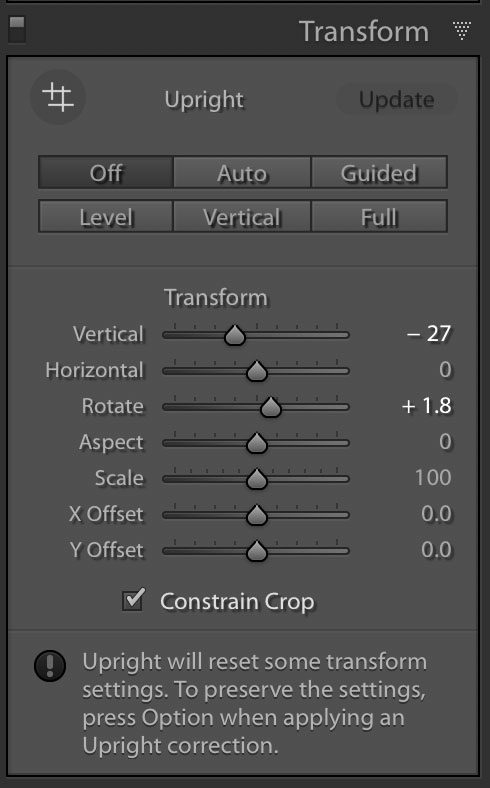
You can also select each of the individual controls and adjust it. A grid will show up so you can get the building’s edges straight. You will need to change the vertical where you correct the building falling away from you.
Be sure to check the Constrain Crop to have a full framed image.
[Fuji X-E3, 10-24mm, ISO 125, ƒ/11, 8 sec] 6:37 am
My mornings sometimes start early for photo shoots. Today I woke up at 5:00 am for a photo shoot at sunrise. Sunrise was scheduled to happen at 6:50 am.
[Nikon D5, Sigma 24-105mm, ISO 100, ƒ/18, 30 sec] 6:12 am
I arrived at about 5:40 am at the location and set up two Alienbees B1600 strobes with 50º reflectors.
[Fuji X-E3, 10-24mm, ISO 125, ƒ/10, 3 sec] 6:35 am
You can see one of the two lights on the left and the other by the flag pole. I shot with the Nikon D5 as well as my Fuji X-E3.
[Fuji X-E3, 10-24mm, ISO 125, ƒ/10, 1.5 sec] 6:37 am
I put the cameras on Manual Mode. I was shooting up to 30-second exposures with an aperture of ƒ/10 to ƒ/22. ISO was 100 on D5 and 125 on the Fuji X-E3.
[Fuji X-E3, 10-24mm, ISO 125, ƒ/10, 1.6 sec] 6:34 am
This photo was taken with just available light. It was shot at 6:34 am. The sun is slowly rising but isn’t up yet. It has 16 more minutes until Sunrise. The sky behind the building looks darker, but the longer shutter speeds make it a dark blue sky.
I find that approximately 20 minutes before sunrise and 20 minutes after sunset, you get the best ratio of the lights inside the buildings and signage versus the nighttime sky is the best. Looking at the photo above, shot at 6:12 am, 38 minutes before sunrise, the sky is too dark for me.
[Nikon D5, Sigma 24-105mm, ISO 100, ƒ/22, 13 sec] 6:30 am
At 6:30 am, it sounds like 20 minutes before sunrise, and the sky perfectly matches the lights in and on the restaurant.
[Nikon D5, Sigma 24-105mm, ISO 100, ƒ/18, 30 sec] 6:20 am
At 6:20 am, I can make the sky look great at a 30-second shutter speed, but the lights start to lose details. Ten minutes later, I get the sky and the lights just perfect.
Here are the tips for Sunrise or Sunset if you want to do this yourself.
TIPS
Before the shoot, arrange to have lights turned on for the photoshoot.
Arrive 1 hour before Sunrise or Sunset
Use Tripod & Cable Release
If using flash, set it to match your Aperture or -1 stop.
Start taking photos at least 35 minutes before Sunrise and 5 minutes before Sunset.
Take photos for about 5 minutes after Sunrise and 30 minutes after Sunset.
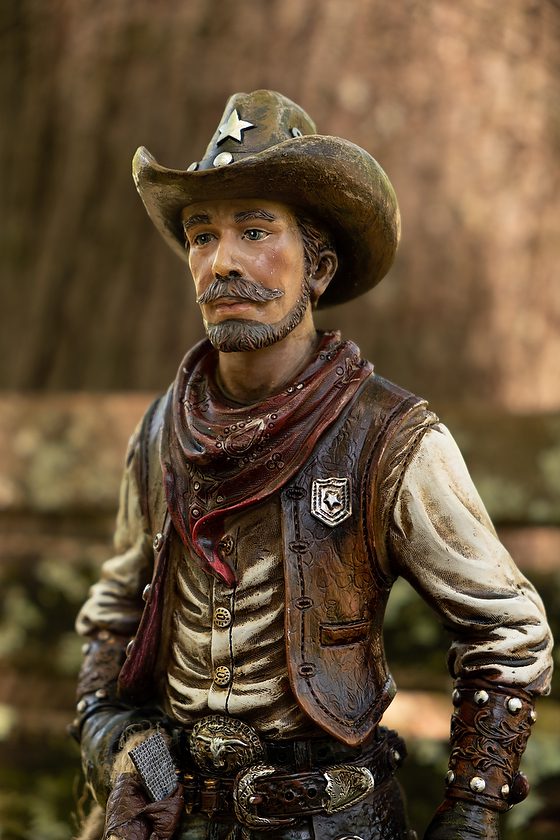
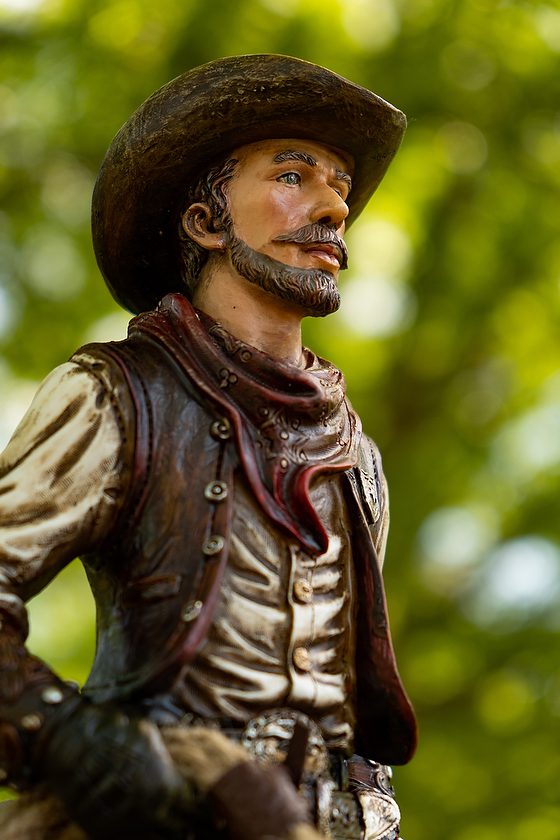
Cowboy Test Shots [Fuji X-E3, 18-55mm, ISO 320, ƒ/4, 1/60]
I bought another figurine today to help teach my student’s photography. Today we took the cowboy figurine outside, looking for suitable locations for shooting portraits.
We found a bend with a tree in the background for the first one.
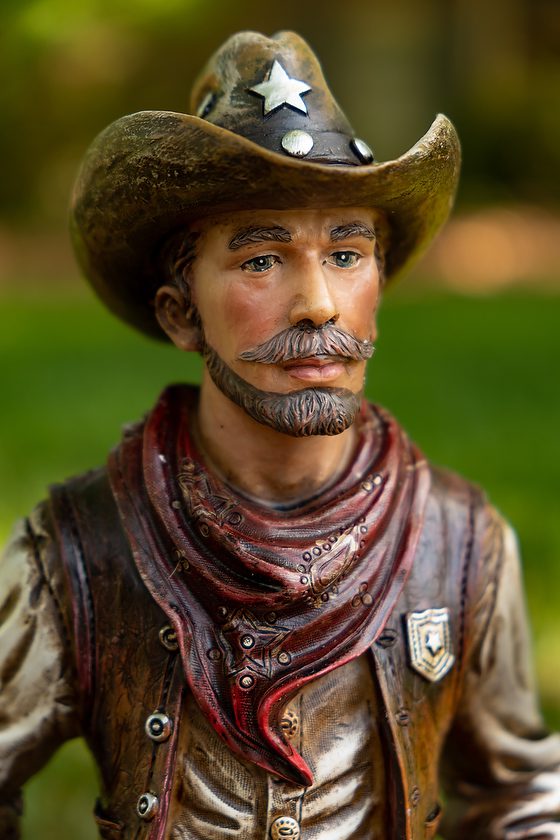
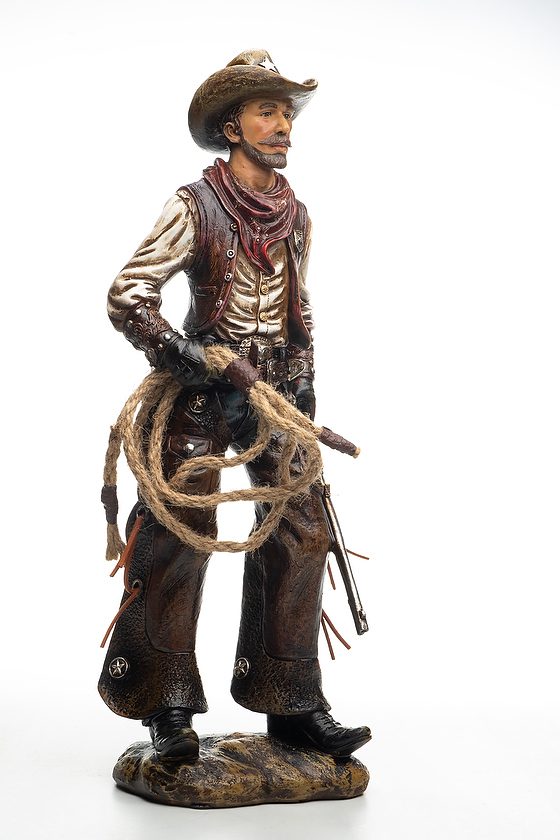
Cowboy Test Shots [Fuji X-E3, 18-55mm, ISO 200, ƒ/4, 1/80]
By moving the figurine, we looked for good light on the face and an excellent background to match.
This is much harder to do than you might think.
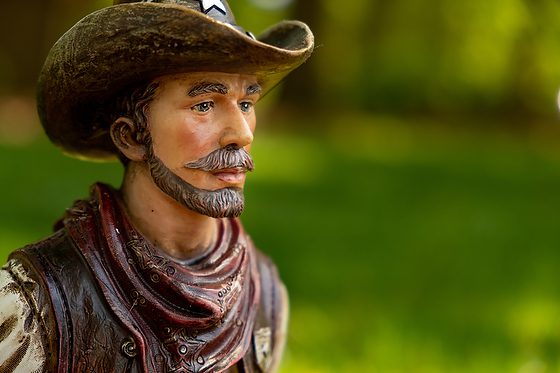
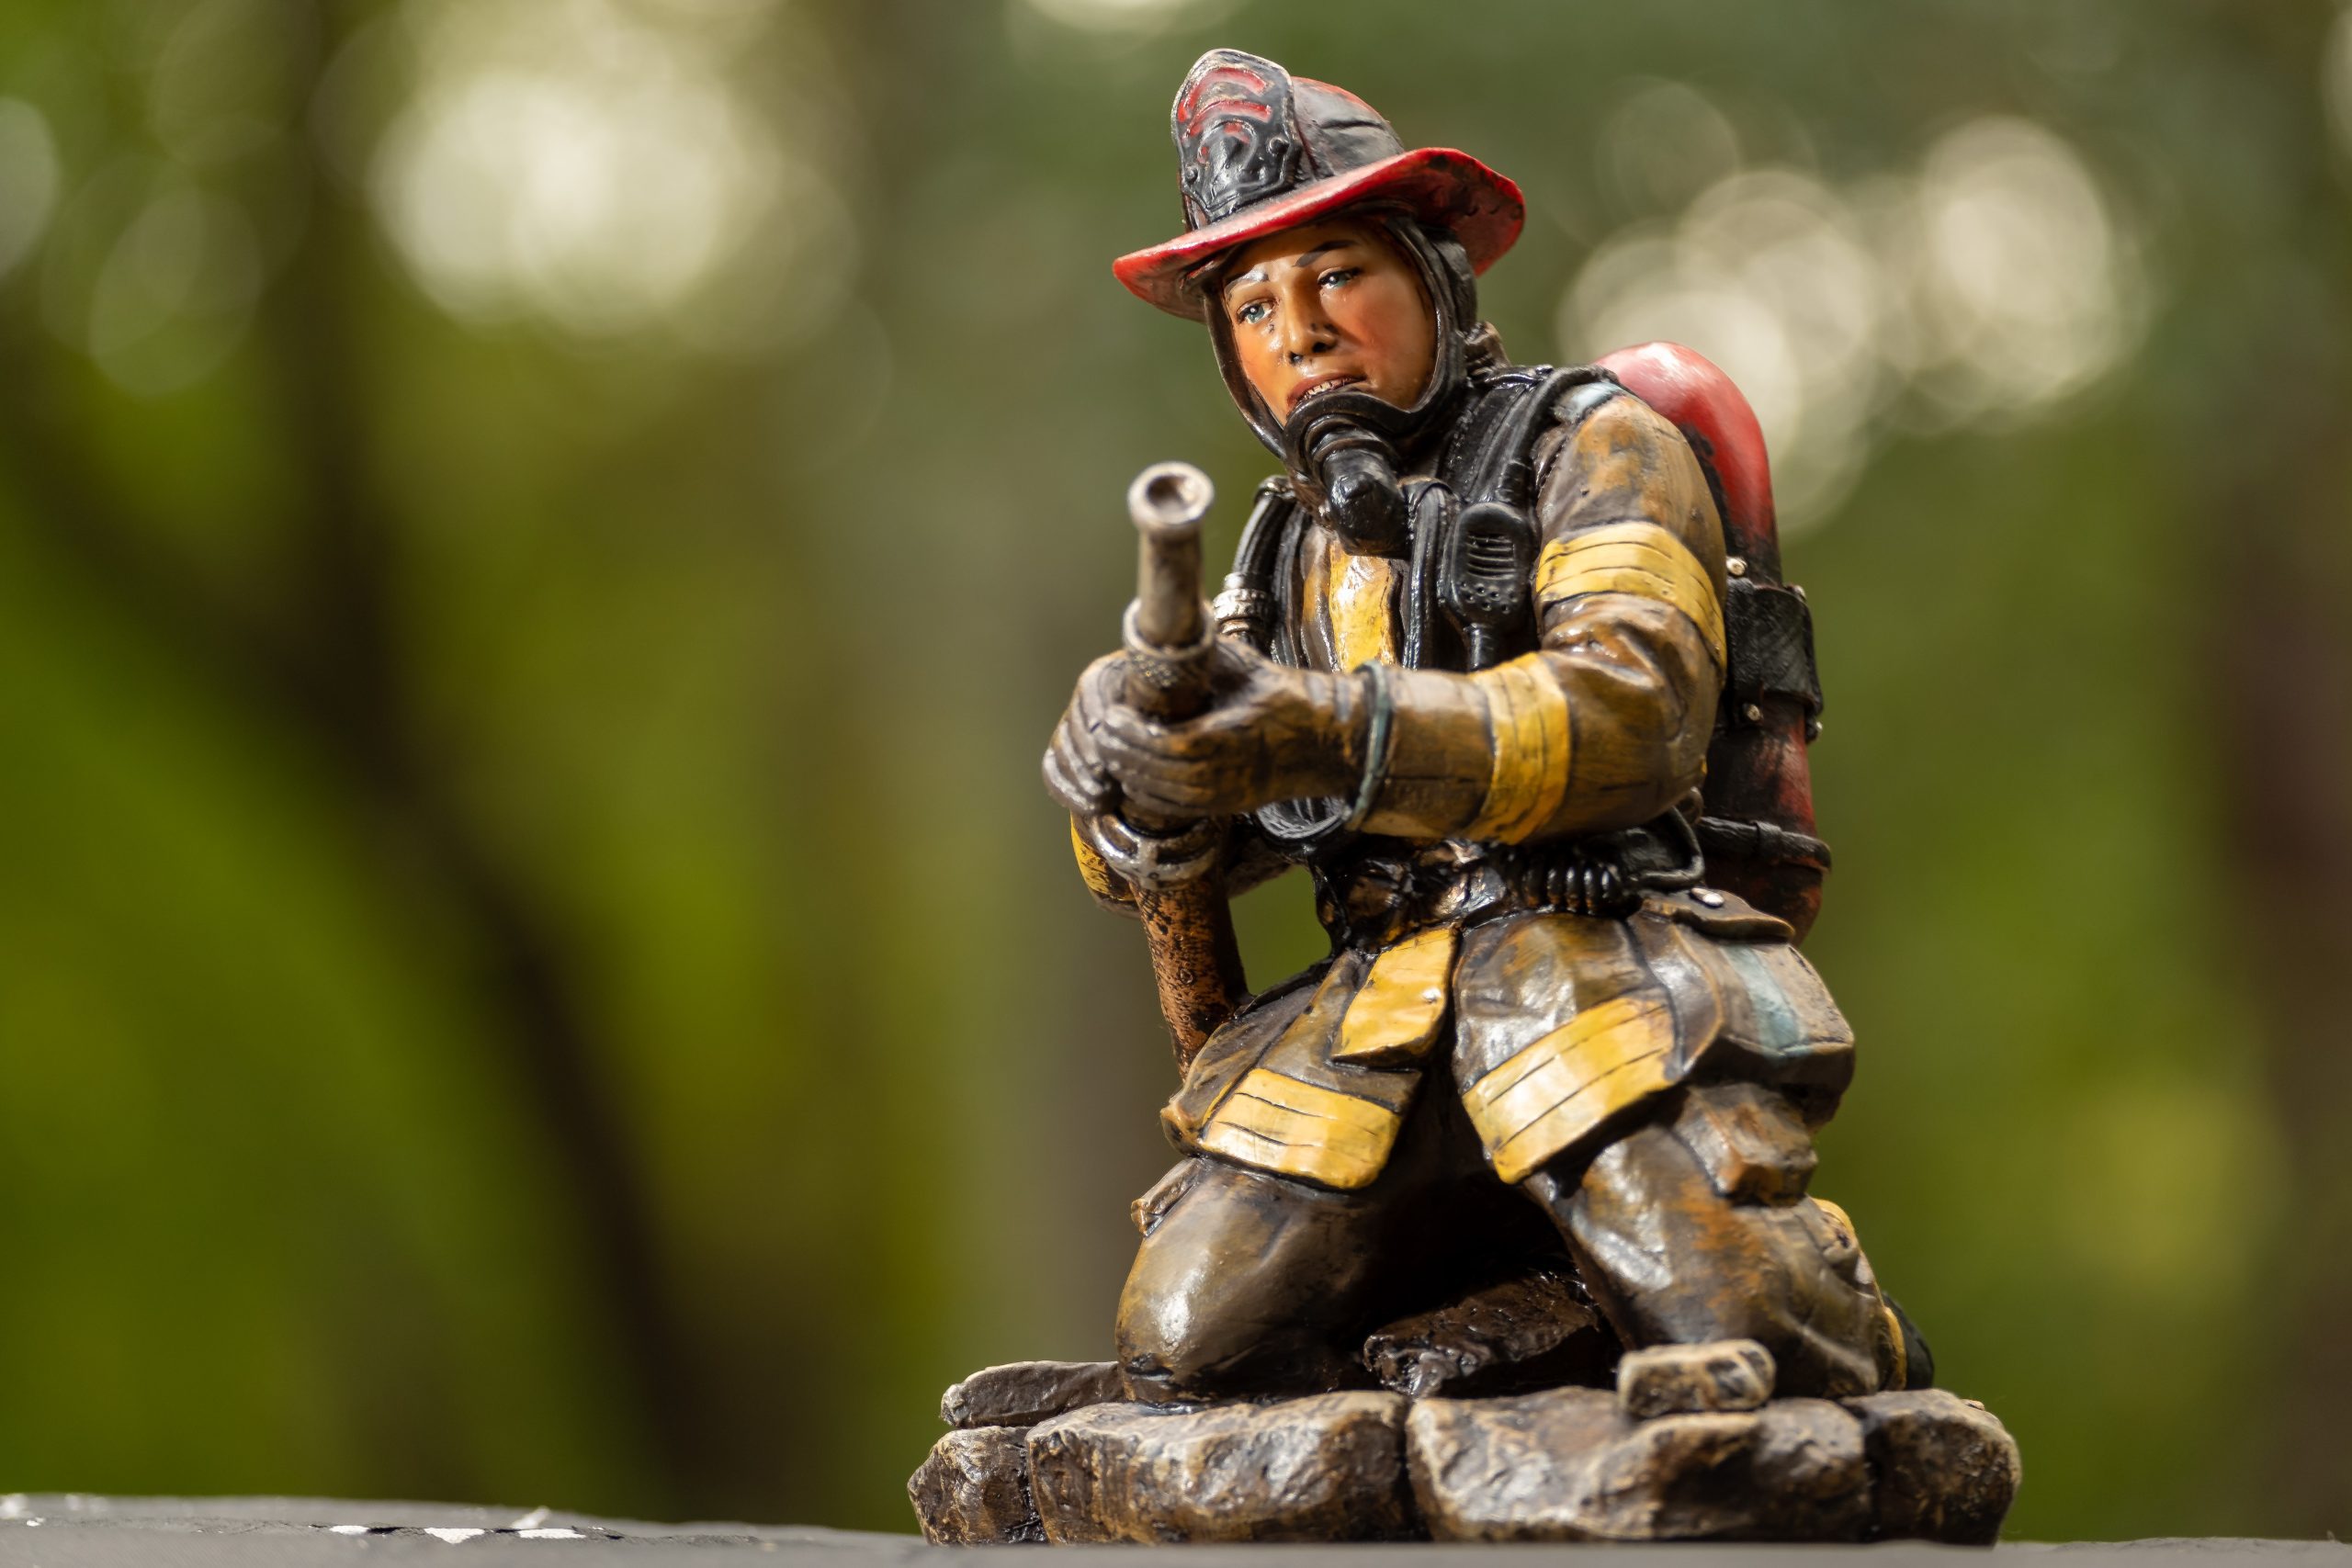
Cowboy Test Shots [Fuji X-E3, 18-55mm, ISO 400, ƒ/4, 1/160]
We started all the photos in full manual mode. We were learning to pick the proper ISO, Shutter-Speed, and Aperture and doing a custom white balance before each new location we chose.
Cowboy Test Shots [Fuji X-E3, 18-55mm, ISO 200, ƒ/4, 1/110]
The first hurdle was nothing more than remembering you are taking a photo. It would help if you looked around the edges of the frame. Can it be cropped out of the picture? Can I get closer?
Just walking closer to the subject, getting as close as you could, and still being focused was an excellent place to start with our figurine.
Cowboy Test Shots [Fuji X-E3, 18-55mm, ISO 100, ƒ/16, 1/125]
Taking a photo in the studio on a white background is simple compared to walking outside and looking for good light and a good background.
Go to the store and buy a figurine. It is a great way to explore the light looking for a good location for a portrait.
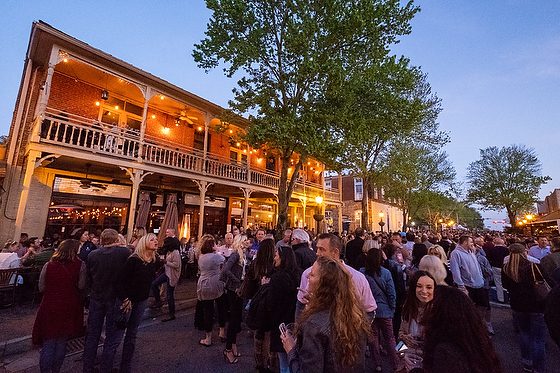
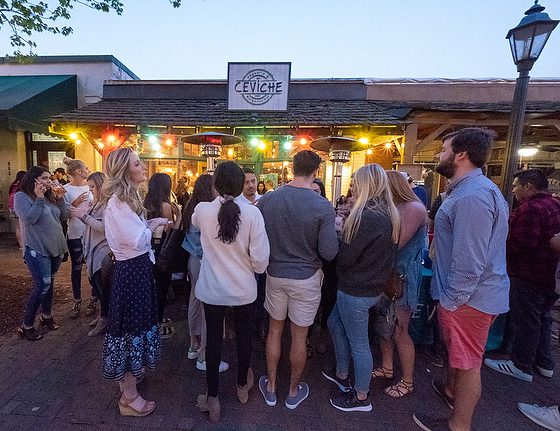
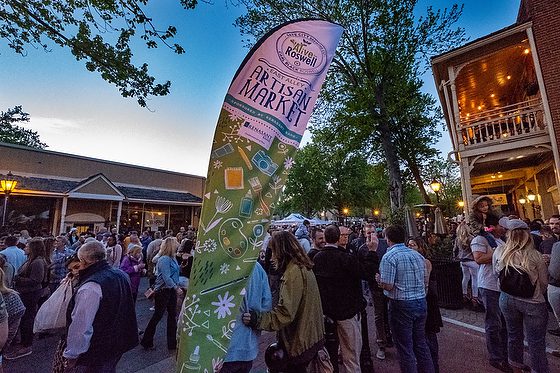
Alive After 5 in Roswell, GA. [Fuji X-E3, 10-24mm, ISO 25600, ƒ/10, 1/55]
Keeping yourself fresh is vital if you do this professionally. I do this by taking a small camera with me everywhere. I take a few photos here and there and, in the process, keep myself fresh for my professional jobs where I am getting paid by a client.
Alive After 5 in Roswell, GA. [Fuji X-E3, 10-24mm, ISO 25600, ƒ/13, 1/25]
I have been teaching one-on-one with a person wanting to pursue photography. We started by shooting in full manual mode. The camera is set where the student must pick for each shot the following:
ISO
Shutter Speed
Aperture
As we reviewed some of the photos shot since the last time we met, the images had significantly improved, but these photos of ducks didn’t work.
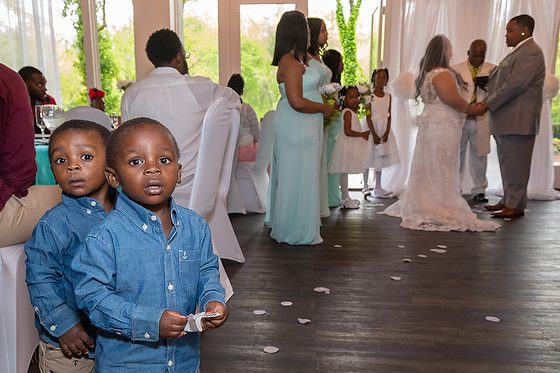
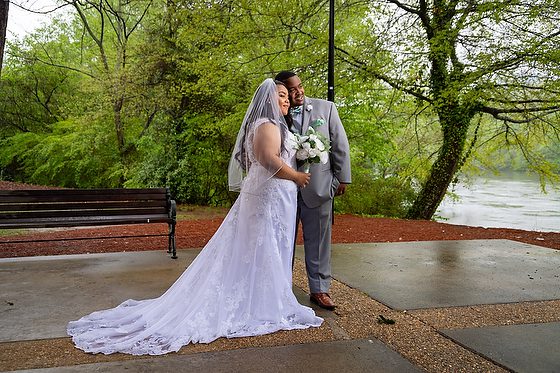
Cyneria & Sadarius Lucas Wedding [Nikon D5, Sigma 24-105mm, ISO 3200, ƒ/7.1, 1/50]
What had happened was the excitement of getting photos had them shooting before they had thought through all the settings.
When shooting the ducks, the person hadn’t thought about what of those three settings took priority and why. I explained how birds like shooting sports. It would help if you froze them, or they would be blurred using the settings the camera was set on before seeing the birds.
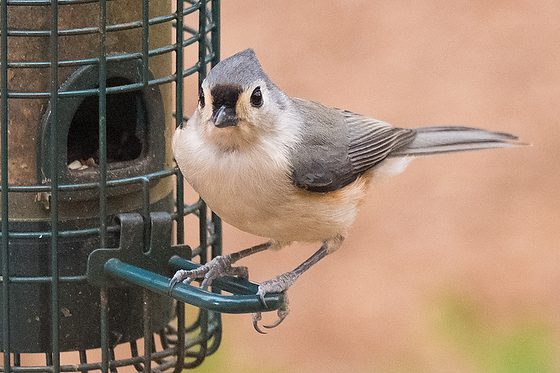
Tufted titmouse [Fuji X-E3, 55-200mm, ISO 4000, ƒ/5.6, 1/1250]
This is when I stopped and talked to the student about how you must slow down your camera settings just before taking photos. If you don’t do this, none of the images will be usable. “I was trying to get the birds before they flew away.” was the excuse. So not one of the photos was functional, but this became a teachable moment.
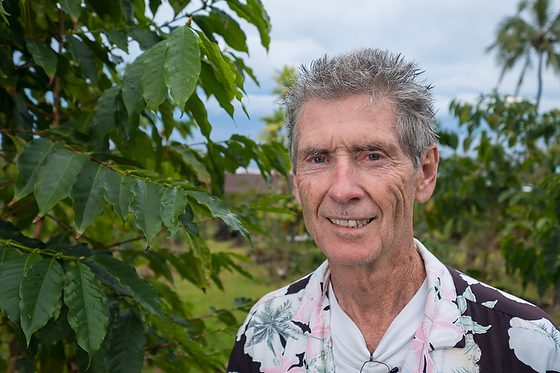
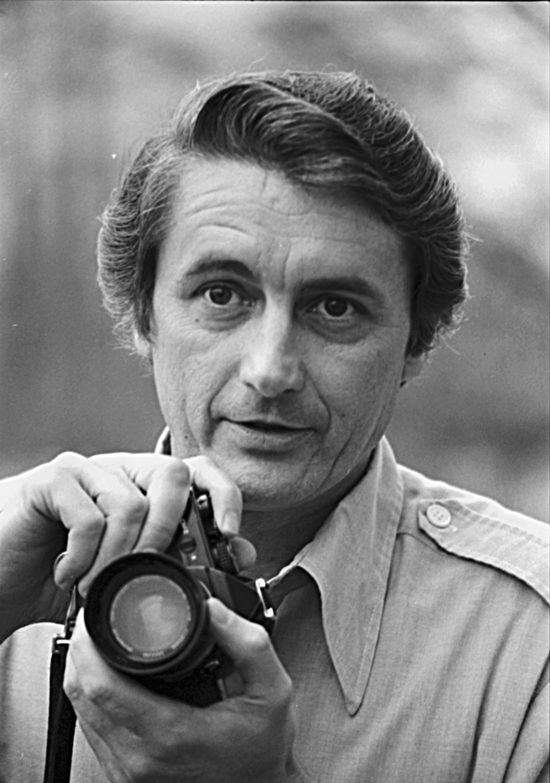
My mentor, coach, and friend Don Rutledge – photo by Ken Touchton
There was a teachable moment with my mentor. A few of my friends would also tell me later how this helped them.
In the days of film, you shot 36 shots, and then you had to change your roll of film. So most photographers would reach into their bags and change their roll of the film pretty quickly.
The problem is when you change a roll of the film, you can make a mistake and not get the leader of the film to catch it. If this happened, you would close the back of the camera, and because you are in a hurry, you take more photos, but none of them are recorded on the film because every time you advanced the film, the film wasn’t moving.
I learned what to do from watching Don, not because he told me what he did. Don would turn his back to whatever he was photographing and change the roll of film. He would always turn the rewind lever to tighten the roll before advancing the film to be sure it caught.
Once the film was changed, Don then turned around towards the action.
Cyneria & Sadarius Lucas Wedding [Nikon D5, Sigma 24-105mm, ISO 800, ƒ/4, 1/500]
When shooting, I often evaluate the scene and realize I need a flash. Taking the time to set that up for the photo here takes time. The image is better because I slowed down long enough to get my moment, put it on a light stand, and then set the flash to work with the scene.
Alive After 5 [Fuji X-E3, 10-24mm, ISO 25600, ƒ/13, 1/150]
#1 Tip: Shoot More
Don Rutledge taught me a great deal. One tip was to shoot stories for yourself. Often these are stories you can return to work on in your hometown. Unfortunately, due to the schedule, you work slower than when traveling and must rush to get photos.
My tip that no one taught me is to ask yourself before taking photos, “Why do I want to take this photo?” What is it you are trying to say with the picture? I am also trying to get in touch with my feelings and not just feel what is happening, but what words describe this feeling?
Then I pause long enough to decide which Aperture captures the scene best. For example, do I need a shallow depth of field where you cannot tell where the person is, but I want you to see the expression, or do I need more context and a greater depth of field?
I am also evaluating what shutter speed will freeze the photo enough to be sharp, or do I need to add motion with a slower shutter speed?
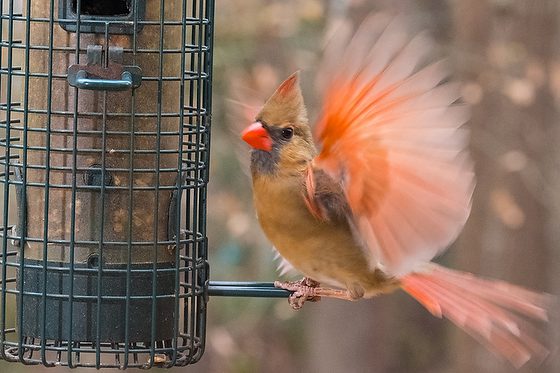
Female Cardinal [Fuji X-E3, 55-200mm, ISO 8000, ƒ/10, 1/280]
A somewhat fast shutter speed with some subjects will still blur like this bird.
You must know your camera and subject to know the proper shutter speed. Over the years, I have learned that faster shutter speeds improve the photo’s sharpness due to camera shake.
The most significant difference in having lots of experience is that when I am in most situations, it is becoming rare that I haven’t shot something like this before.
Don taught me that I need to shoot as much as possible to grow and get the shot.
While I think I have done an excellent job editing my photos, when I submit them to stock agencies, they sometimes catch things I miss.
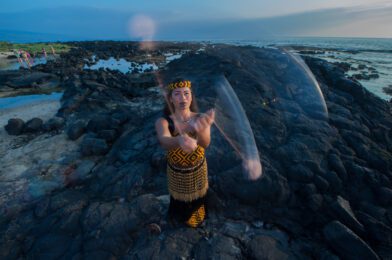
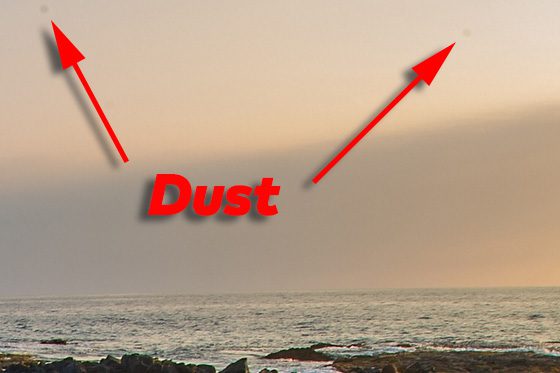
When I first submitted this photo of the Island Breeze dancer with Poi ball in Hawaii. I had missed some dust that had gotten onto the sensor in the top right-hand corner.
This is a 100% enlargement of the right top corner of the photo. Are you frustrated with seeing small dark spots in your images that appear in every picture? If you see them consistently in the exact location (the size and darkness of the spots can vary depending on aperture), you are most likely dealing with dust particles on your camera’s sensor.
I have noticed they show up more at smaller apertures like ƒ/22 or ƒ/16, and there is a light area of the photo where the dust is located.
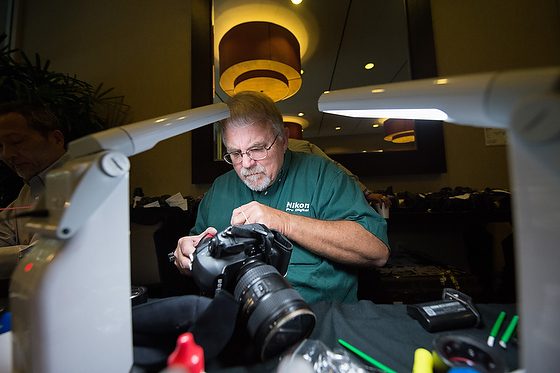
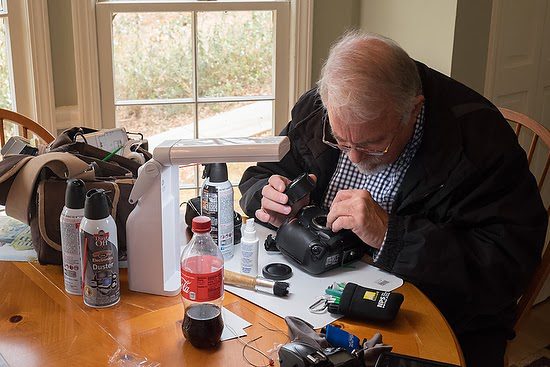
Berrie Smith – Camera Guru
The first thing I do when I notice dust on the sensor is to pick up the phone and call Berrie Smith, who lives near me and has worked for Nikon as a camera technician for many years.
Berrie Smith, the professional camera repairman, is one of the guys Nikon sends out to significant sporting events to provide live repair and sensor cleaning service to the NPS pros covering the event.
Without proper camera cleaning and digital camera sensor cleaning, most photographers have experienced their photographs ruined by unsightly dust spots in their images. These dust spots are characteristically gray/black areas and are usually visible when photographing continuous tone scenes. Cleaning your camera equipment is a great way to ensure it continues working correctly and is also a necessity in today’s digital world. Digital sensors are electrically charged devices that attract dust particles because of their static electric charge. If not cleaned properly, the digital camera sensor will result in images with black spots scattered throughout your photographs.
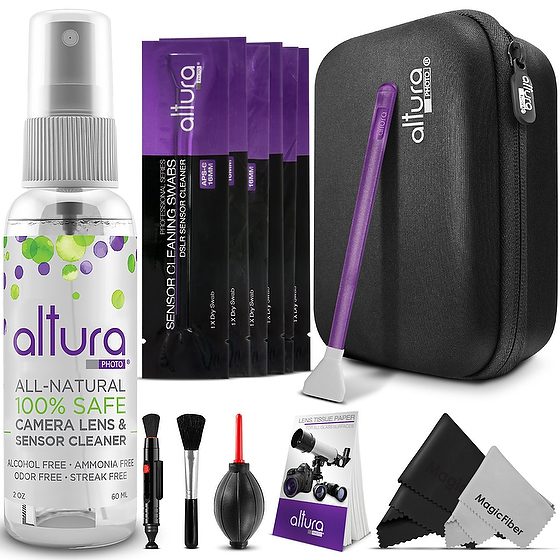
You can buy off-the-shelf sensor cleaning kits and attempt to clean your image sensor, but if you are not careful, you can quickly do a lot of expensive damage. The cost to replace a scratched low pass filter/image sensor assembly ranges from $600 to $1,600 (parts and labor), depending on the camera.
Berrie does repairs for photographers all over the world.
When I travel, I don’t have the luxury of calling Berrie and sending him my cameras to clean. No one wants to touch up every single photo on a shoot in the same spots over and over.
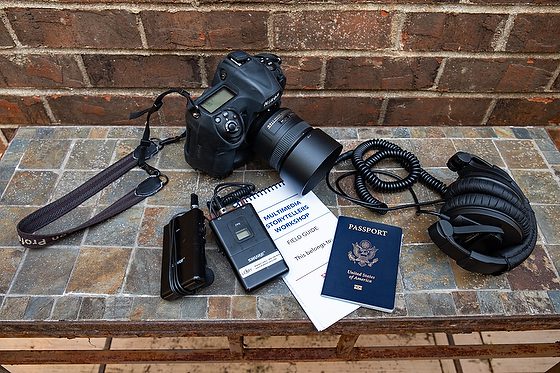
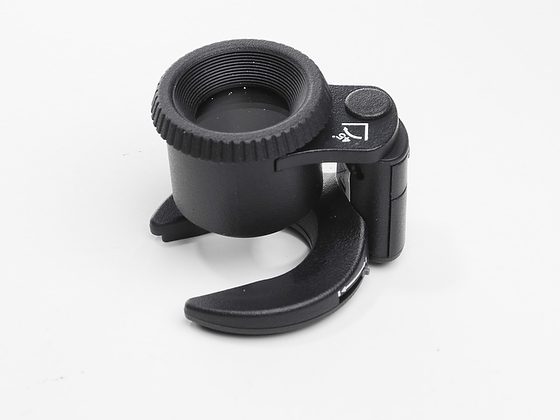
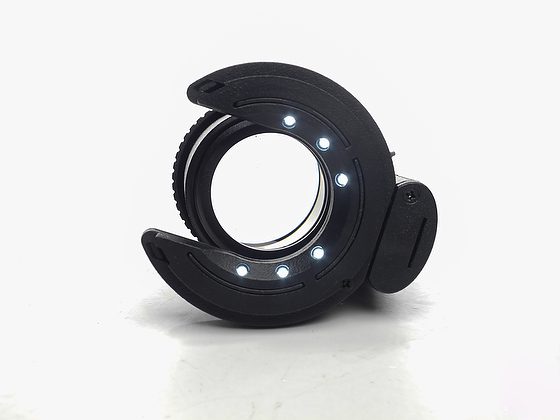
Carson SensorMag 4.5x30mm Camera Sensor Magnifier Cleaning Loupe
What is crucial in the kit is the loupe to examine the sensor up close.
LED Lighted with 6 Bright White LED Lights | Loupe can be adjusted 45 degrees to allow users easier access to clean your sensor
You often need to point the sensor down and use the Air Blower to force air onto the sensor, which often dislodges the dust.
I recommend at least owning an Air Blower just safely to remove dust. If that doesn’t work, then give it to the expert Berrie.
This is Berrie at my kitchen table cleaning my cameras. So how do you reach Berrie? Here you go:
Octane Coffee Bar in West End Atlanta. [Fuji X-E3, 18-55mm, ISO 200, ƒ/8, 1/420]
This is how I start most days–a cup of coffee. Everyone has a time of day that we are most productive. Over time, we will try to be most effective during our sweet spot of the day.
Today more than any other time in my life, trying to get any message to an audience is more like trying to get people’s attention on the highway.
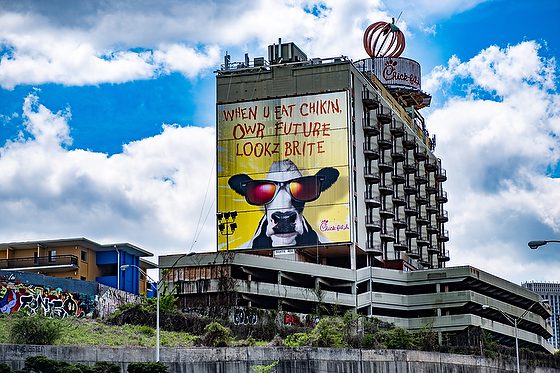
Chick-fil-A Cows Billboard in downtown Atlanta. [Fuji X-E3, 18-55mm, ISO 200, ƒ/4, 1/2400]
Do Billboards Work?
According to the Arbitron study, billboard advertising is effective. According to the survey, 71 percent of Americans “often look at the messages on roadside billboards,” Most Americans at one time or another learned about an event that interested them or a restaurant they later patronized.
However, consumers no longer look at billboards like they did twenty or thirty years ago. While they may still be considered a premium advertising space, consumers are engrossed in their smartphones, tablets, and gaming systems. Eyes are down, not up, for much of our lives.
Six Words or Six Seconds
Six seconds has been touted as the industry average for reading a billboard. So, around six words are all you should use to get the message across.
The Superhighway
In the 1990s, we started to call the internet the Superhighway. Our messaging has become more like a billboard on the highway.
If you can get your message to be short and sweet and it delivers all one needs to know to take action, then you are poised to make people’s daily commute in life worthwhile and more productive.
The More Billboards, The Better.
Making sure your audience gets your message on the highways often requires more billboards. Your statement must be concise. As billboard experts will tell you, if you use a headline that explains your visual, you’re wasting words.
When you are limited to 5 to 10 seconds for messaging, you need to be sure they see it. It would help if you had your billboard on the bypass and downtown to be sure you are reaching your audience.
Engage & Deliver
We all get ticked when someone takes more of our time because they are not well organized. I get even more frustrated when someone has done a great job hooking me and leading me through well-written or visual communication but, in the end, doesn’t deliver.
Before you can talk you must listen.
In most conversations, the person who speaks most minor benefits most, and the person who speaks most benefits least. This is why social media is often preferred over mainstream media; they get to talk and be heard on those platforms.
Instagram, Facebook, Google, Pinterest
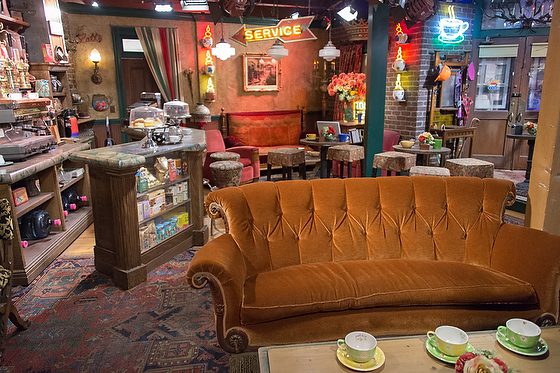
Some Friends TV show set part of the tour at Warner Brothers Studios. [Nikon D4, 28-300mm, ISO 11400, ƒ/3.5, 1/125]
Today due to Starbucks, Seinfeld, and Friends in the late 80s and early 90s, we have the third space–The coffee shop. Today brands realize that people are looking for an experience. They are looking for a place beyond work for an encounter that leaves an impression. They want a place they can interact with others.
BREAKTHROUGH with your audience!
Don’t think of your job as creating content. Think of your job being like a counselor, parent, or friend. If you care for someone, you want to know how they are doing. You want them to be happy.
As a counselor, you are trained not just to take what someone is telling you are being the real problem. Often what they are talking about is a symptom.
As a parent, you tend to know your child’s personality and how that can shape how they see the world and how this can affect their child’s view of circumstances.
As a friend, you often tolerate some traits because you know their heart.
Can you, as a communicator, say you know your audience well enough to know their hopes and fears?
Your breakthrough is probably pretty straightforward, but it will start with understanding others more than just knowing yourself and what you can do.
Sometimes your breakthrough isn’t about your skills or service at all. Often it will be in helping someone with something other than your product.
Look what guides on of the Gold Standard brands the Ritz Carlton:
The Ritz-Carlton Hotel is a place where the genuine care and comfort of our guests is our highest mission.
We pledge to provide the most exemplary personal service and facilities for our guests, who will always enjoy a warm, relaxed, yet refined ambiance.
The Ritz-Carlton experience enlivens the senses, instills well-being, and fulfills even our guests’ unexpressed wishes and needs.
I love the words “Genuine Care” in that first sentence.
Genuine – indeed what something is said to be; authentic.
Jeffery Salter speaks to ASMP Atlanta/SE. Jeffery an editorial and advertising photographer from Miami. Jeffery has created insightful portraits of celebrities, athletes, and CEOs for publications worldwide, and his work has been exhibited widely. [Fuji X-E3, 18-55mm, ISO 25600, Ä/4, 1/35]
How do some photographers get so successful? I think this is one of the reasons many came to see Jeffery Salter.
Capture Integration sponsored the event. Jeffery is one of their clients using their Phase One backs.
It didn’t take long, and someone in the audience asked, “How did you get hired to be on staff with Sports Illustrated?”
Jeffery said while working on newspaper staffs like The Miami Herald; he would look for opportunities to shoot medium format. While most staff photographers would continue to hit all assignments on 35mm SLR film cameras, he was shooting on a Hasselblad or Mamiya 6×7.
He shared how he was shooting for where he wanted to work, not for where he was shooting. He worked hard to have a style that stood out. His photos are surreal and often need much more space to be appreciated than in a newspaper.
He got an assignment to shoot some athletes in their homes from Sports Illustrated. They liked his style and work and, after so many tasks, brought him on staff not to shoot sports action but to shoot the behind-the-scenes of the lives of famous athletes.
Michael Schwarz helped Jeffery Salter with a computer problem before the event started. [Fuji X-E3, 18-55mm, ISO 12800, ƒ/3.6, 1/80]
A little while into the presentation, Jeffery showed his work in Haiti. He shot it all in medium format with Phase One back. “Why are you shooting with medium format? Who is your client?” was asked.
The person asking the question knew that the magazines cannot show a difference between today’s DSLR and Medium format. Jeffery then said he often doesn’t pick the camera for the client but himself. He wants to be able to have his photos later displayed in the Museum of Modern Art as large as they can be displayed.
He is shooting for the next venue and client.
A couple of tips which are not new but Jeffery also subscribes:
Do self assignments
Learn how light works in nature [he shoots a lot of nature]
Build a photo one morning at a time [use strobes to enhance natural light]
Shoot on the very best camera for the situation
Use the histogram to be sure you have it in the camera.
Now one last thing Jeffery shared that I do, but it was good to hear as he often shoots tethered and can open images in PhotoShop or Lightroom and put the curser on highlights and shadows to see the numbers that the computer sees.
Now on the grayscale, you go from 0% to 100% with the amount of light in a scene. The computer records this as 0 to 255.
Jeffery likes his blacks to be around 35 and his highlights around 235. He gets the photo in the camera as he always has from his film days shooting transparencies.
Jeffery also answered some business questions as well. To have experiences like this, I recommend joining ASMP and coming to our meetings. You will be inspired and hopefully become a more successful photographer from what you learn.