Which ISO Is Best For Sports?

This photo was taken during the Georgia Tech vs. Brigham Young 28-19 at Grant Field on September 21, 2002. [NIKON D100, 200.0-400.0 mm f/5.6, Mode = Aperture Priority, ISO 200, 1/1000, ƒ/5.6, (35mm = 345)]
Photographers talk about the ISOs they choose to shoot sports on social media. But don’t they know you always try to pick the lowest ISO possible?

Some photographers post these comments on social media: “Is it possible to get sharp, relatively noise-free images at ISO 16,000? I pushed it to see what I could get away with, and I hit my level of noise tolerance.”

Why would you ever shoot a higher ISO if you can get away with a lower ISO?

The top photo was with my first digital camera, the Nikon D100, in 2002. The game was an early evening game. This photo was taken before sunset when there was still good light. At this point, the sun was low in the sky but still had ample light. The lighting conditions allowed me to shoot at ISO 200.

Photography is all about tradeoffs.

The tradeoff is due to the Exposure Triangle, where you balance 1) Shutter Speed, 2) Aperture, and 3) ISO.

In the days of film, this was a more significant tradeoff than today due to film ISO being much more limiting than today’s digital ISO.

On 4th and 24, Georgia Tech Jason Bender’s punt is caught by Florida State’s #20 James Colzie, who is picked up and slammed by Georgia Tech’s #28 Jimmy Clements. Florida State beat Georgia Tech 41 to 10 on November 5, 1994, for the final score. Shot on transparency film ISO 100.

You can watch the play action in the photo above of Florida State vs. Georgia Tech is here on YouTube.

Search for football photos before 2000, when most photographers were still filming. The noise didn’t exist then, but the grain was very noticeable in sports photos.

Georgia Tech wide receiver Calvin Johnson (21) shaking off a tackle during play on September 16, 2006, at Bobby Dodd Stadium in Atlanta, Georgia. [NIKON D2X, 120.0-300.0 mm f/2.8 + 2X Converter, Mode = Manual, ISO 400, 1/1250, ƒ/5, (35mm = 840)]

As we know, you can usually only get two of the three parts of the Exposure Triangle. Sports photographers want to freeze the action and have it in focus. Therefore, they sacrifice ISO.

As long as you emphasize sharp and in-focus photos, I suggest you always shoot the lowest ISO to achieve this.

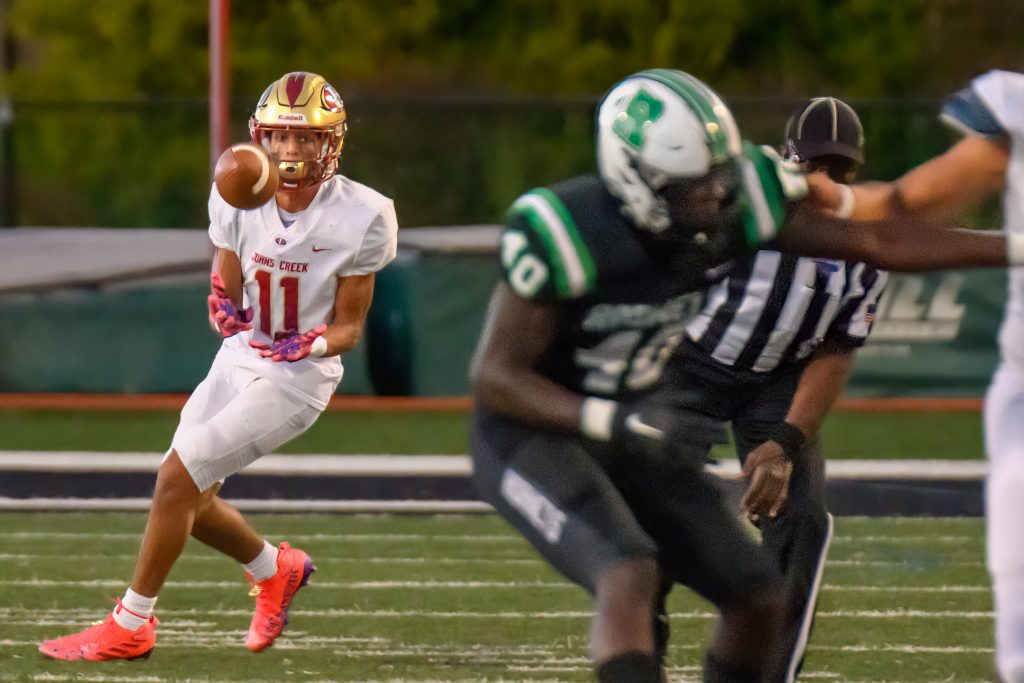
This action shot is inside the Mercedez Benz Stadium without any sunlight. [NIKON Z 9, VR 120-300mm f/2.8G + 2X converter, Mode = Aperture Priority, ISO 20000, 1/2000, ƒ/5.6, (35mm = 600)]

Sometimes, photographers will choose a deeper depth of field because focusing isn’t ideal, and to ensure an in-focus photo, they then have to increase the ISO.

Other photographers shoot at a faster shutter speed to avoid motion and bump the ISO.

The bottom line is that all the veteran professional sports photographers I know are always looking to shoot the lowest ISO.

Today, with some post-processing possibilities, we are not as limited in our choices.

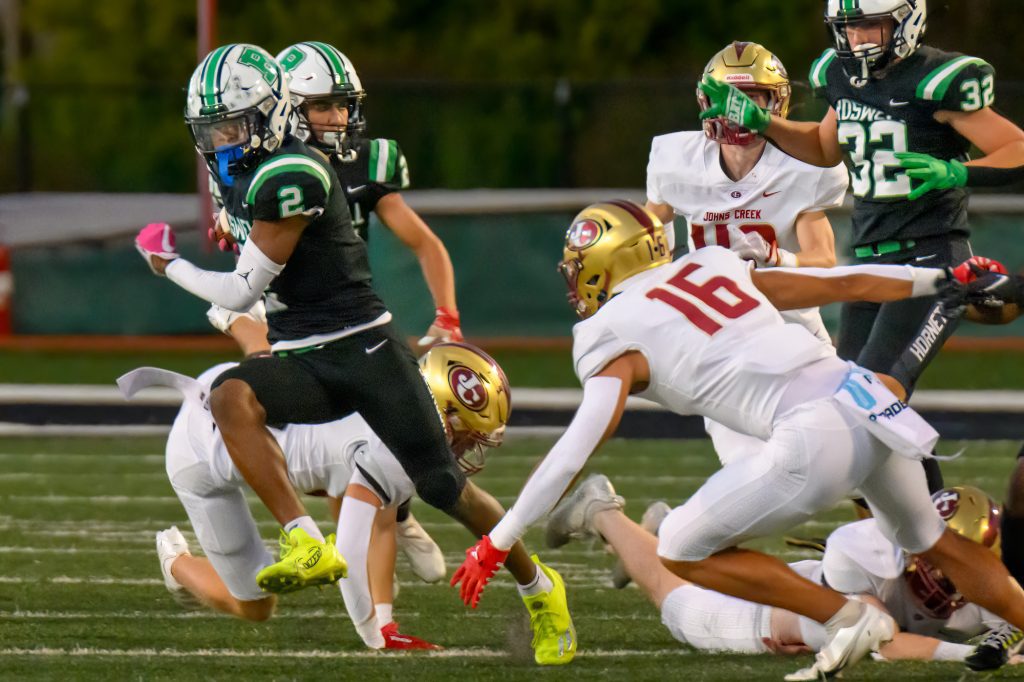
Chick-fil-A Kickoff Oregon vs Georgia [NIKON Z 9, VR 120-300mm f/2.8G, Mode = Aperture Priority, ISO 5600, 1/2000, ƒ/2.8, (35mm = 120)]

Commercial Real Estate Drone Work

Drone photography allows real estate agents to showcase the entire property and all its exterior selling features in a single shot that receives that coveted 12 seconds of focus. What used to take several photos, which research shows most buyers won’t bother scrolling through, drones can capture in a single shot.

The photo above is a composite. I was limited to 400 feet straight above didn’t work so well, so I shot two shots and stitched them together.

In commercial real estate sales, the customer often buys the property without seeing it in person. Instead, they may be an investor from out of town and rely on drawings and photos to understand what they are purchasing.

The agent often wants to pitch the surroundings as value added for a particular plot of land.

When asked to get those aerial photos, I know I am getting pictures looking North, South, East, and West. I also know to get these from around 400 feet and then some at lower altitudes of 200 feet and even lower.

Detail shots in drone work for real estate capture specifics like buildings up close and access roads around the property.

I prefer stills to videos for a straightforward reason–they capture the property quickly for the audience.

Videos are fantastic if the customer wants to take the time to watch them, but they appreciate the still photos to give them a quick overview.

Here are some aerial photos I did today for a commercial real estate client. Which photos would you use as your primary photo if you were limited to just one photo?

ISO 20000+ Unbelievable with Nikon Z9

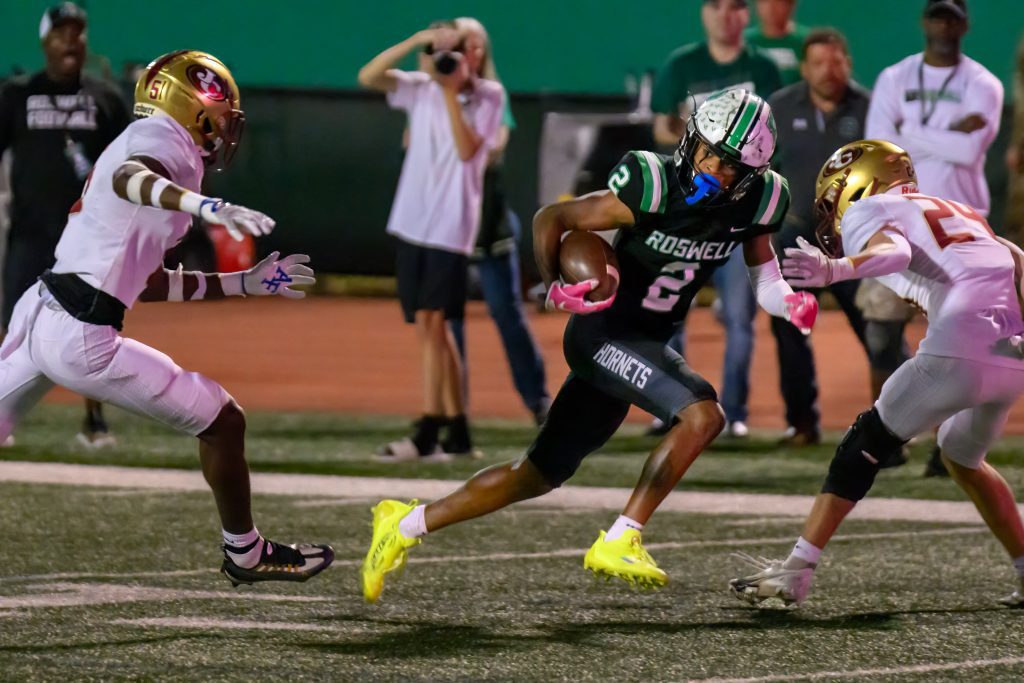
[NIKON Z 9, VR 120-300mm f/2.8G + 2X Converter, Mode = Aperture Priority, ISO 22800, 1/2000, ƒ/5.6, (35mm = 600)]

Getting sharp and in-focus photos of football, one must be sure you are using a fast shutter speed.

For my past two games at the Mercedes Benz stadium covering the Chick-fil-A Kickoff Games, I have been using 1/2000 as my shutter speed.

The primary lens I use with my Nikon Z9 is the Sigma 120-300mm f/2.8G Sport with the TC-2001 2X Converter. I own the TC-1401, the 1.4X converter, but rarely use it.

I also have on my second Nikon Z9 the 28-300mm ƒ/3.5-5.6 lens. This lets me get a lot of different shots without the worry of not having the right lens to get a picture.

As long as the 2X converter is on the Sigma 120-300mm f/2.8G Sport, I am shooting with ISO above ISO 11400. More than half of those action shots are at ISO 25600.

I use Lightroom to lower the noise by sliding the noise to about 40 on that scale.

Today’s cameras, especially Nikon’s Z9, let me get some of the best action shots in my career. Why? Shutter speed has got to be high, and secondarily, the camera must be able to lock in the focus on the players.

I have found that the Nikon Z9 focuses better than any camera I have ever owned, and the lack of noise is incredible at those ISOs I have to use.

Here are more photos with the settings that were used. Bear in mind that since the 45.7MP Stacked backside-illuminated sensor, it lets me crop a lot more than the Nikon D5.

No Images found.

Nikon Z9 using Shooting Menu Bank to go from Weddings to Football

My shutter speed settings for shooting sports are 1/4000 versus for weddings, 1/125, or 1/250.

For sports, my release mode is 20 fps versus for weddings, single frame.

Both of those settings affect my ISO. I use auto ISO for weddings and sports but mainly change the shutter speed.

If auto ISO sensitivity control is enabled, ISO sensitivity will automatically be adjusted for optimal exposure at the selected shutter speed and aperture. In addition, you can choose an upper limit for auto ISO sensitivity control to prevent ISO sensitivity from being raised too high.

TIP

Use the Shooting Menu Bank to save the settings you use for sports in one of the four presets you can even rename. Here are my four banks:

  1. Normal
  2. Sports
  3. Strobes
  4. Fluorescent

Shooting Football With The Nikon Z9 after Firmware & Software Updates

[NIKON Z 9, VR 120-300mm f/2.8G + 2X Converter, Mode = Aperture Priority, ISO 18000, 1/2000, ƒ/5.6, (35mm = 600)]

My first football game with the Nikon Z9 was the Peach Bowl on December 30, 2021. Many changes have occurred since then regarding firmware updates and software updates with Adobe Lightroom and Camera Raw.

Just a few days ago, Nikon updated the firmware to Version 2.11. Lightroom is now version 11.5 with the camera Raw version 14.5.

We are getting a better dynamic range with less noise with Lightroom.

The firmware improved focusing and many other lists of improvements for the camera.

I can say that Nikon improved the camera’s performance since the game last December in Mercedes Benz Stadium.

I also noticed better handling of the files by Adobe Lightroom.

Here is an earlier post on my Z9 settings for sports.

Take a look at the results in the photos.

I was amazed at the slight noise in the photos. Some shots at ISO 5600 with the aperture of ƒ/2.8.

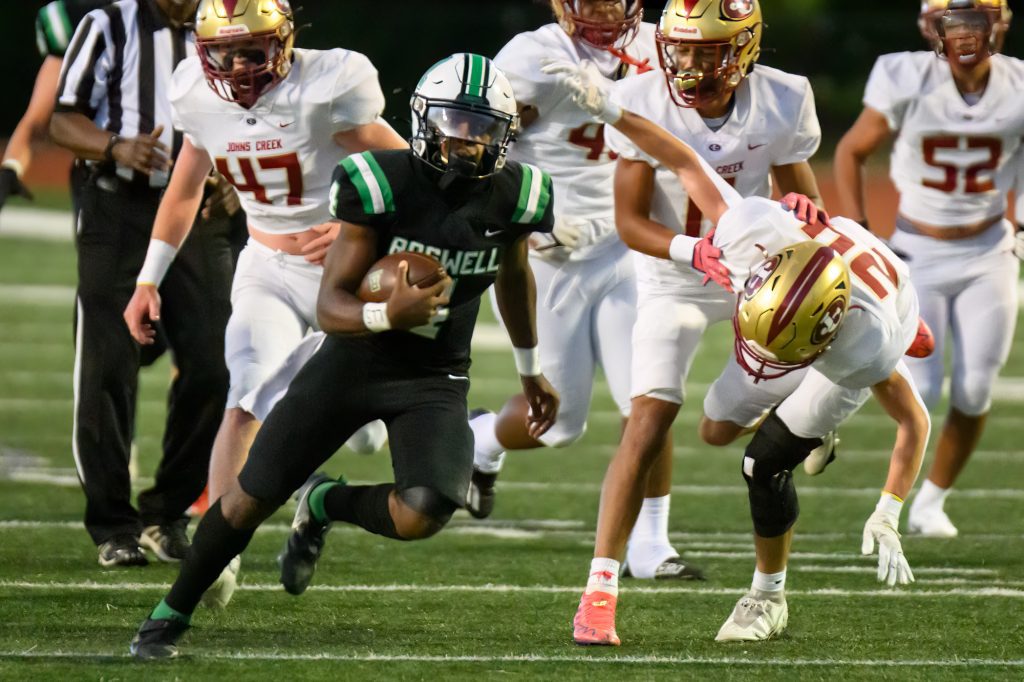
[NIKON Z 9, VR 120-300mm f/2.8G, Mode = Aperture Priority, ISO 5600, 1/2000, ƒ/2.8, (35mm = 120)]

Some action shots are with an ISO 25600, as in this photo below.

[NIKON Z 9, VR 120-300mm f/2.8G, Mode = Aperture Priority, ISO 25600, 1/2000, ƒ/5.6, (35mm = 600)]

Helping A Nonprofit By Producing A Story

The first skill one must master is the crafting of the narrative. We believe that the best students for the workshop are those with some experience as a writer or photographers.

Most of those taking the workshop want to learn to produce videos to tell stories. We teach how to do this alone. Most organizations can fund one person to go and tell a story, some can cover the costs for two people, and very few will be able to send a team. Those who learn to produce video stories without a team understand how all elements work together.

The one student who excelled beyond everyone else wasn’t a journalist but Jon Franz, a creative director. He was a master at creating storyboards, which is a huge help in planning your shot list. Jon was used to the director role but had never done the hands-on camera/audio/video editing himself. Instead, he had always directed others.

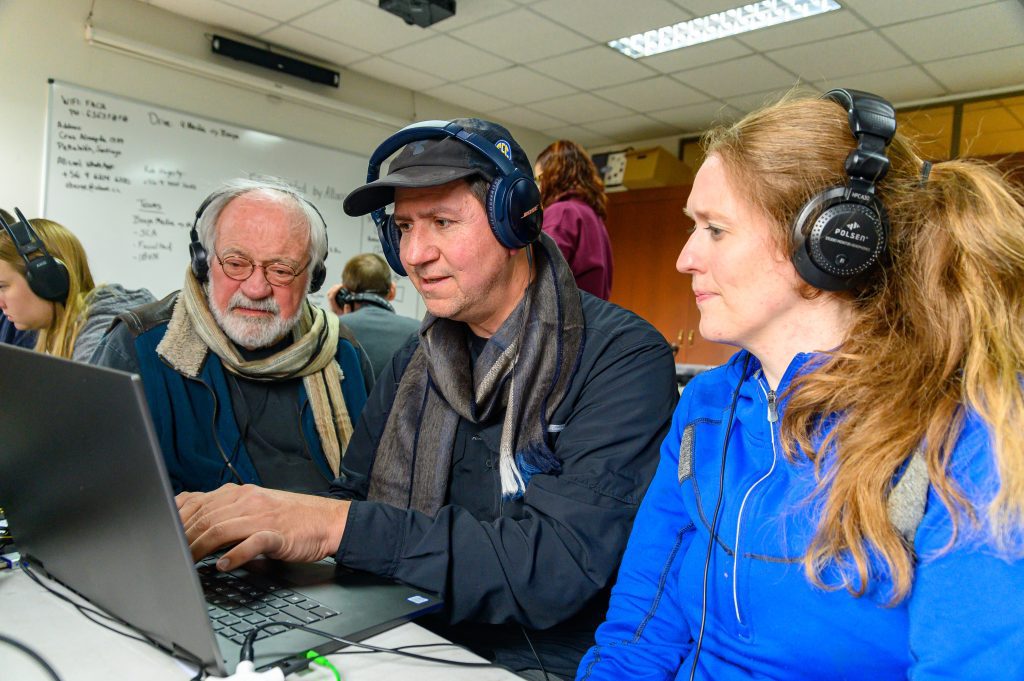
Here you can see Jon Franz, senior creative director for Kimberly-Clark, working with Jeff Raymond, media missionary with the Association of Baptists for World Evangelism, fine-tuning his project on missions in Romania.

Jon says that the workshop was life-changing for his career. He discovered how to do more as just one person producing a story and understood how adding people was about upping the production value. He learned not just how to do it as a one-person band but also to be a better producer.

Those who didn’t have this background were learning how to craft a narrative to tell a compelling story.

While you do not have to have your storyline in this exact order to work, the essential elements need to be present.

Multimedia

The second skill needed to produce these packages is capturing the content using still images, audio, video, and the ability to edit this into a timeline.

One of the workshop participants, Keziah Khoo, is working through her lunch to get her edits done.

We worked around the clock shooting and editing our projects. 

Jon is getting help from a senior editor at ESPN, James Dockery. James loves teaching people how to become storytellers. 

Which is more important?

So which is more important, the understanding of the storyline or multimedia? They are equally important. Both are needed to engage an audience.

Third major Element

The biggest mistake in communication forgets your audience is not there with you.

It would help not just think about the audience but start with them. Why should the audience even care about this story? What would be most interesting to them? After they hear the story, what actions should they be taking?

While I listed the audience last, it should be front and center. After all, there is a call to action for these stories on missions and nonprofits. The core message is that missionaries cannot do it alone and need the audience to give, go, and pray.

If you are interested in putting all these skills together, I can tell you that while all three are equally important, a learning curve and steps are necessary. The instructors serve as coaches to the storytellers. With their experience, they see things that only in time will you master.

I would highly recommend that you first learn a storyline and how to tell one. This skill is just you learning how to tell a bedtime story or a campfire story.

My recommendation for those wanting to be storytellers is to read The Writer’s Journey: Mythic Structure for Writers by Christopher Vogler. You can get this on Amazon. Here is that link

Christopher Vogler is a veteran story consultant for major Hollywood film companies and a respected teacher of filmmakers and writers around the globe.

After reading this book, then start practicing.

A simple thing to do is start practicing by telling bedtime stories. If making things up is difficult, tell the story of how you got your job. The key is that these stories are not timelines of events, but there is a crisis that forces you to seek help.

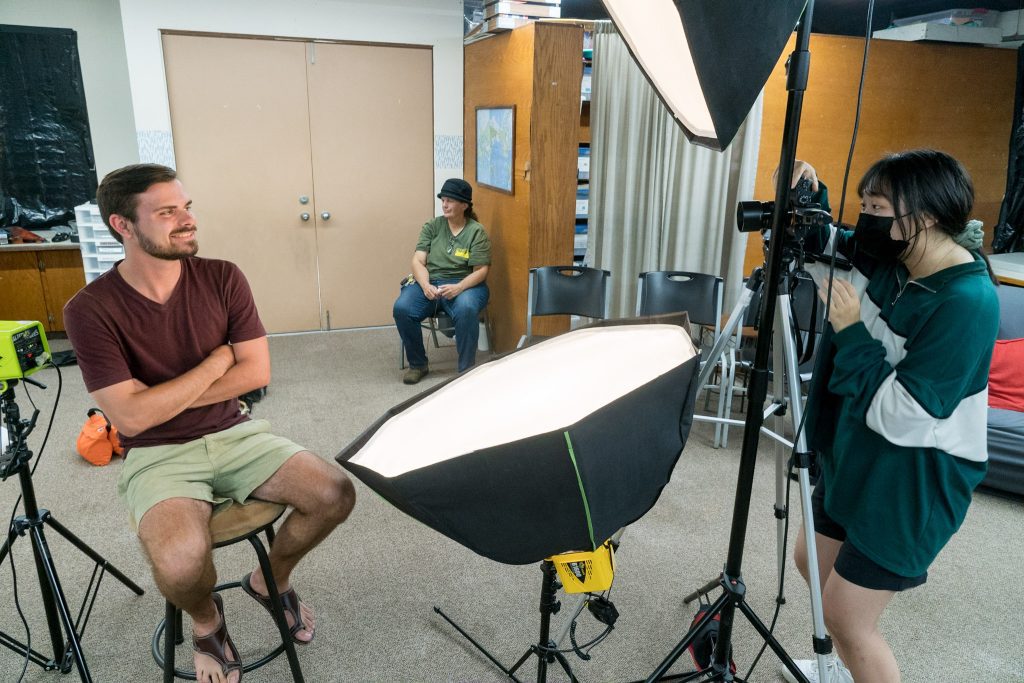
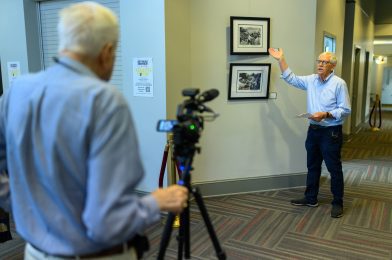
This is me demonstrating how to interview with two cameras. 

Here are some basic guidelines for interviewing a subject:

1. Prepare carefully, familiarizing yourself with as much background as possible.
2. Establish a relationship with the source conducive to obtaining information.
3. Ask questions relevant to the source that induce the authority to talk.
4. Listen and observe.

After you gain the skill of storytelling, then you are ready to capture their story using multimedia. Mastering the storyline and capturing it on camera is what Storytellers Abroad Workshop teaches.

Please get in touch with me if you are interested in a workshop. My contact information is below.

Which Background for Your Headshots?

There are many options for backgrounds for a headshot. However, whether this is an executive, actor, or casual, all backgrounds must have one thing in common there aren’t any distractions behind your subject.

Brittley Woods

Brick backgrounds have become popular in the past few years and can work. However, since they are rarely solid, the pattern of the bricks is much more distracting than something like brush strokes or solid.

Yoko O’Brien New Start Counseling Center

A counseling center’s colors for their logo were teal. So I went to the fabric store and found a velvet-like fabric in teal to use as the background.

Now, this is the same background in the two side-by-side photos. The difference in the look has more to do with how I lit the background. How much light do you put on the background compared to the subject and evenly lit or with spot?

This background is the same in these two headshots. One on the left, I only had the light on the subject. The background is white and lit by the spillover from the leading light. In the right photo, I put light on the background to be sure it was white.

I would say the least often chosen is black. If you prefer it, you must use a hair light to help create a separation between the subject and the background. The separation becomes a merge if the hair or clothing is black. On the other hand, black can look quite good, as seen here with the tuxedo and black background.

What Aperture Should You Use For Group Photo?

[NIKON Z 9, 14-24mm f/2.8G, Mode = Manual, ISO 400, 1/125, ƒ/8, (35mm = 16)]

While setting up for this photo, my photo assistant for the day asked me what is a good aperture to do group photos. The assistant had left another profession in the last couple of years and was still learning the ins and outs of photography.

[NIKON Z 6, 24.0-105.0 mm f/4.0, Mode = Manual, ISO 200, 1/200, ƒ/8, (35mm = 24)]

Here is the light setup for most all my group photos.

Sometimes when doing a large group, I often have a few smaller groups to do, like in this large group. I kept the lights the same and just posed the people in the same space. We removed the risers.

[NIKON Z 6, 24.0-105.0 mm f/4.0, Mode = Manual, ISO 200, 1/200, ƒ/8, (35mm = 48)]

There are a couple of things that affect depth of field. 

  1. The ƒ-stop/aperture – As you already know, the lower the number, the less depth-of-field you have.  
  2. Distance to the subject – The closer you get to a subject, the shallower the depth of field when the ƒ-stop stays the same. In macro photography, for example, when you get as close as a 1:1 ratio, you often have to be at a ƒ -stop at a minimum of ƒ /11 to appear in focus. When I do macro photography, the aperture is often at ƒ /45 and still seems like a shallow depth-of-field.  
[NIKON D3S, 28.0-300.0 mm f/3.5-5.6, Mode = Manual, ISO 200, 1/200, ƒ/9, (35mm = 28)]

Compare these traditional rows of people to shooting down on everyone looking below.

[NIKON D3S, 28.0-300.0 mm f/3.5-5.6, Mode = Manual, ISO 200, 1/50, ƒ/9, (35mm = 28)]

In the first photo, the person on the front row is a few feet from the person on the back row, so I must adjust the aperture to be sure all are in focus.

In the second photo, the distance of each person’s face to the camera is similar. Therefore, the aperture can be a shallower depth of field as compared to the first one.

When you set your aperture and focus, the depth of field in front and behind the subject is called the hyperfocal distance. The link above will let you put your camera, lens, aperture, and distance to your focus point to get the depth of field.

Graphic by Broadway Camera

If you are focusing on the person closest to you, then you will always need a much higher aperture to get everyone in focus. The key is to focus about a 1/3 of the distance from the front of the group to the back. Look at the graphic from Broadway Camera above to show you how this works.

[NIKON Z 9, VR 24-105mm f/4G, Mode = Aperture Priority, ISO 250, 1/60, ƒ/8, (35mm = 24)]

I focused a little on the group. See the photo below with the red box around the lady I was focusing on to get everyone in focus.

Now here is the focal point for the very top photo.

Study the graphic above from Broadway Camera. You will soon see how I use this technique to get the most depth of field with the lowest aperture.

[NIKON D3, 14.0-24.0 mm f/2.8, Mode = Aperture Priority, ISO 200, 1/100, ƒ/4.5, (35mm = 24)]

Why not just shoot ƒ16 or ƒ/22?

If you use the smallest aperture on your lens for group photos, you will have everyone most likely in focus.

Every adjustment on the camera affects something in the final photo. Remember the Exposure Triangle to help you know why you don’t want to shoot at the smallest aperture, if possible.

There is one more adjustment to consider if you are using flash. The power of the flash will also impact exposure.

If you use ƒ/22 vs. ƒ/8, then you will need to adjust for one if not all of these:

  • More flash power
  • Higher ISO
  • Slower Shutter Speed

The higher ISO will introduce noise without a flash, and a slower shutter speed will raise the possibility of blur due to camera movement or subject moving.

[NIKON D5, 35.0 mm f/1.4, Mode = Manual, ISO 1000, 1/100, ƒ/9, (35mm = 35)]

I have repeatedly found that ƒ/8 works most of the time. However, if you have a smaller group but more rows, I might change the aperture to ƒ/11.

Couple Tips

  • Use Flash – You get rid of raccoon eyes due to shadows from lights overhead inside and the sun above outside.
  • Start with 400 ISO inside – With today’s cameras, there is very little difference in photos shot at ISO 100 or 400 as in the past. However, just shooting at ISO 400 makes your flashes are now 2-stops brighter. In addition, 400 ISO helps you shoot at ƒ/8, and recycle time is often better.
  • ƒ/8 – Start with this aperture. Increase if needed to high aperture.
  • Test with Model – I usually have a photo assistant to stand in for test shots. If you don’t have an assistant, just ask someone from the group to help. Check for white balance, exposure, and most of all, set your focus point and have them stand close and the in the back to see if the depth of field is suitable for the photo.
  • Use Computer for Viewing – When possible, put the test photos on a computer screen. It is much bigger than the screen on the camera, and you will see details that are hard to see on the back of a camera.

Which Style Of Headshot Do You Need?

There are many types of headshots. You must factor in a few variables to decide what is best for you, your team, or your organization.

  • Style – The look of the headshot. Lighting, background and expression/feel vary from each style.
  • Time – How long did you spend creating your headshot
    • Hair/Makeup
    • How many outfits
    • Number of locations
    • Environmental location or Studio look
    • Number of photos/looks
  • Price

Headshots for a person rather than an organization are more like Actor’s Headshots. Since this is the primary way you market yourself, Actor Style headshots will get the very best look for you. You spend more time doing hair and makeup. Often you will change your makeup and hair for more looks. Shooting in three or more outfits is normal.

Since these headshots can open or close doors for you, it is vital to spend the time and money to get the best. Therefore, you will spend at least a half day or full day getting a variety of headshots.

Many Actors will have a few headshots that they will submit depending on the role.

Types of Acting Headshots

Kalyn Wood

Dramatic Headshots. These are the bread and butter of most actors. Typically theatrical headshots are very moody, with prevalent shadows and a more intense expression. Very popular for stage actors, this headshot style represents a lot of the lighting found in your typical theater production.

Tyler Morris

Comedic Headshots. Bring out all the personality for these headshots! These images are supposed to be full of life and a bit quirky. The lighting for this style doesn’t have a lot of intense shadows. For film and stage, the lighting of those productions is typically very bright because it makes you feel happier and warmer.

Sydney Rhame

Commercial Headshots. Similar to comedic but with a bit more shadow work, these headshots have a little more variety. In addition, commercial headshots are more relaxed in personality – most casting directors want a simple, casual look (not even a gigantic smile).

Types of Corporate Headshots

LinkedIn / Standard Headshots. The most straightforward style of the headshots. These are what everyone thinks of when you hear “headshot.” The lighting is simple and typically soft, closely matching an actor’s commercial headshot. The personality for these is pretty typical, a friendly, natural smile.

Team Headshots. Effectively these are the same as the LinkedIn / Standard headshots but matched with your colleagues of the company where you’re employed. Many offices with smaller teams will have a webpage dedicated to identifying their staff and making it look professional; they’ll try to have everyone get the same headshot.

Woody Faulk

Presenter / Speaker Headshots. I call these portraits. These images are usually a little more personality-based and better suited to be a 1/2 body or even 3/4. The goal of these images is to be marketing material to show off your personality and expertise for a keynote or event. The lighting can also be more diverse, depending on the mood and message you want your viewers to interpret when seeing these images. Serious topic? Go dramatic. Want to be warm, inviting, and jovial? Go for something with less intense shadows and a giant smile.

Light in photos can be like the icing on the cake.

[NIKON D4, 85.0 mm f/1.4, Mode = Aperture Priority, ISO 800, 1/160, ƒ/1.4, (35mm = 85) Constant lights with softboxes]

One of the most significant mistakes most public relations professionals make when it comes to photography is thinking that their smartphone camera is good enough.

The most significant downside of the smartphone camera is that you cannot use flash with it.

To get high-quality pictures, you need the proper lighting. You don’t just need sufficient lighting but the right light to help capture the narrative for your image; the temperature, the intensity, and whether soft or hard light plays a crucial role in your photography.

[NIKON Z 6, 28.0-300.0 mm f/3.5-5.6, Mode = Aperture Priority, ISO 100, 1/60, ƒ/5.3, (35mm = 98) Off-Camera Flash used]

Just because the sun is out doesn’t mean you will have a compelling photo.

A photographer who knows how to use light with their camera can take something quite ordinary and improve it. The light they add to the photo is like the icing added to your cake.

You don’t need to take my word for why your smartphone images are not enough; look at the number of photos taken daily.

[NIKON Z 6, 24.0-105.0 mm f/4.0, Mode = Aperture Priority, ISO 1000, 1/60, ƒ/4, (35mm = 58) Off-Camera Flash is used]

In 2022, 54,400 photos are taken every second, 196 million per hour, 4.7 billion per day, 32.9 billion per week, 143 billion per month, and 1.72 trillion per year.

The Public Relations Professional’s job is to generate positive publicity for their client and enhance their reputation. However, just having a photo isn’t good enough. It would help if you grabbed people’s attention.

The Poynter Institute reported:

  1. We know that 90 percent of readers enter pages through large photos, artwork, or the display type (headlines, promos, etc.).
  • We know that running a visual element with text makes it three times more likely that the audience will read at least some of the text.
  • We know that headlines are more likely to be read when a photo is nearby.
  • And we know that the bigger the picture, the more likely readers are to read the cutline – to be intrigued.
[NIKON D750, 24.0-105.0 mm f/4.0, Mode = Aperture Priority, ISO 100, 1/800, ƒ/9, (35mm = 62) Off-Camera Flash used]

The word photography means writing with light. Once you understand light, you’ll know to create various creative images.

A camera in the right hand will yield far better results than anyone using it. Professional photographers know how to make the most of light. Sometimes they rise early to capture sunrises or stay late to get the sunset or moonrise.

[NIKON Z 6, 85.0 mm f/1.8, Mode = Aperture Priority, ISO 100, 1/800, ƒ/1.8, (35mm = 85) Off-Camera Flash]

People often manipulate light through reflectors and artificial light to direct the eyes of the audience.

If you know that photos work, try to create images that engage the audience.

Light used well in a photo is equivalent to a well-written story. Don’t use images that bring down your communication. Instead, use light to put the icing on your messaging in photos.

[NIKON D4, 14.0-24.0 mm f/2.8, Mode = Aperture Priority, ISO 110, 1/100, ƒ/7.1, (35mm = 16) Off-Camera Flash]

Hang in there – Give others time

Today I decided to give another visit to the A2D, Analog to Digital, social group of photographers that meets every Friday at Einstein Bros. Bagels in Atlanta.

A2D is a very mixed group of photographers. Besides the mix of professionals and amateurs, what they like to photograph is diverse. Some were into art, some nature, and the list of topics they wanted to photograph was vast.

[NIKON Z 9, VR 24-105mm f/4G, Mode = Aperture Priority, ISO 1250, 1/200, ƒ/7.1, (35mm = 32)]

This group all made me think of my days playing in orchestras and bands. Each instrument was part of a sectional. I was always part of the trumpet section. We didn’t all play the same trumpet part. Some were playing 1st. Others played the orchestration’s 2nd, 3rd, 4th, and 5th parts.

In an orchestra, the different sections were not even using the same type of music. For example, some instruments were reading treble clef, bass clef, alto clef, and tenor clef.

[NIKON Z 9, VR 24-105mm f/4G, Mode = Aperture Priority, ISO 500, 1/200, ƒ/8, (35mm = 24)]

This morning, I was reminded of the diversity when a lady asked how much I would charge to do selective color editing of one of her landscape photos. I realized then that her request was like a violist asking me, the trumpet player, to play along with her music. It just wasn’t going to happen for me. I had never learned to read alto clef.

While I could most likely help the lady with her photograph, I would have had to work on her picture with little experience doing the selective color. It is just not my approach to photography.

[NIKON Z 9, VR 24-105mm f/4G, Mode = Aperture Priority, ISO 560, 1/200, ƒ/8, (35mm = 24)]

The differences between people don’t have to lead to divisive.

If everyone in the group had to have everyone do the same style of photography, most of the group would no longer exist. We each have unique ways of seeing the world.

Learning to stay engaged with people who are so close to your passion will enlarge your worldview. They can stretch you and help you become a better version of yourself.

Since 2002, this eclectic group of photographers has socialized and enjoyed each other’s company.

Here are a couple of things that have helped them overcome some speed bumps with many social groups that fall apart

  1. No politics
  2. No dues
  3. No leaders
  4. No agenda

I did notice that someone would mention having a party or a zoom meeting to complement their social time on Fridays, but it was serendipitous in the approach.

[NIKON Z 9, VR 24-105mm f/4G, Mode = Aperture Priority, ISO 800, 1/200, ƒ/4, (35mm = 32)]

Could you start a similar group in your community? For example, if you live in metro Atlanta, you can join this A2D group at Einstein Bros. Bagels on Fridays from 10:00 am to noon at 2870 N Druid Hills Rd, Atlanta.

It is much easier to walk away from a social group if you don’t think you fit in rather than trying to find common ground. The question that can motivate you to work at it more is whether you are looking for relationships or just someone who agrees with everything you believe.

[NIKON Z 9, VR 24-105mm f/4G, Mode = Aperture Priority, ISO 640, 1/200, ƒ/8, (35mm = 35)]

Nuance in communications is a Lifesaver or Dealbreaker.

The art of communication is so complex at times. But unfortunately, the complexity has more to do with the audience than the messenger.

It is rare when you are communicating with anyone that you don’t understand what you are saying to them.

However, it is more common that we have been on the receiving end of someone trying to tell us something that has us scratching our heads.

“Does that make sense?” is one of the phrases I say too often after saying something to a person. But unfortunately, what can still happen is they can say yes, but we are still not on the same page.

Importance of Formal Estimate

Over the years, I have needed to create a formal agreement for jobs with clients.

Here are topics covered in an estimate:

  • Description of the job
    • Date and time of work
  • Copyright & Usage
  • Terms
    • Whom the agreement is with
    • Payment – when and how
    • Cancelations/Postponement
  • Pricing
  • Deliverables
    • What is delivered
    • When it is delivered

You can include more, but this is an excellent place to start.

I like to think of an estimate as a way to manage expectations. It also helps me WOW the client when I go beyond what I agreed to provide.

When you don’t talk about some of the items in that list is when you have problems.

A client can call and cancel at the last minute. You may have turned down many other jobs since you had reserved this time for their project.

I have communicated that if you cancel, you will pay me 50% of my creative fee and 100% of any expenses incurred. So, for example, you get stuck with airfare, rental cars, and other costs.

My contracts state that if within 48 hours, you pay 100%.

The Nuance!

I can quickly slap those fees on clients, but there is a good chance I may lose the client if I do charge it. So the key here is that you must take some time and think through and weigh the benefits and losses if you do go through and have them pay the cancelation price.

There is another nuance in bringing up topics that could help a client, but just bringing them up can create a problem.

A hot topic with almost every client is getting model releases. But unfortunately, they see it as a nuisance, not a reward.

I have found that helping them see how important it is to have releases to avoid legal problems and their ability to use the photos for more situations than the initial project make it well worth the effort.

Most of the clients embrace getting the model releases. So I hire an assistant to help me get those through the day.

Taylor Hall during the Carpet Capital Collegiate at The Farm in Rocky Face, Georgia. [NIKON D2X, 122.0-300.0 mm f/2.8, Mode = Aperture Priority, ISO 400, 1/2000, ƒ/4, (35mm = 480)]

Team Player

Another nuance is doing your best to say yes to almost any request from the client.

Now, if something is unethical or illegal, then say no.

If you have an estimate and at the last second, the client says to you, “While you are here, can you just take this photo as well?” With the contract, you can oblige them, or if they are overreaching in your opinion, you can say one of two things: 1) to get that for you, there isn’t enough time; what of the remaining lists in the contract do you want to give up? Or 2) Love to help, but since this is beyond the project’s scope, I need to charge more for your request.

Summary

You and the client need to be on the same page during communications. You must state what they are requesting [formal estimate], and if they think something is wrong or missing will let you know.

Try your best to have the time to think through and even phone a colleague before responding. Create a dialogue rather than statements. Always ask them for their response and let them know you are interested in their thoughts.

As long as you work with a client who believes in a Win/Win negotiation, you probably will find common ground. However, you will likely have to walk away when dealing with a Win/Lose negotiator.