Adobe Lightroom’s Solution for Managing Large DNG RAW File Sizes

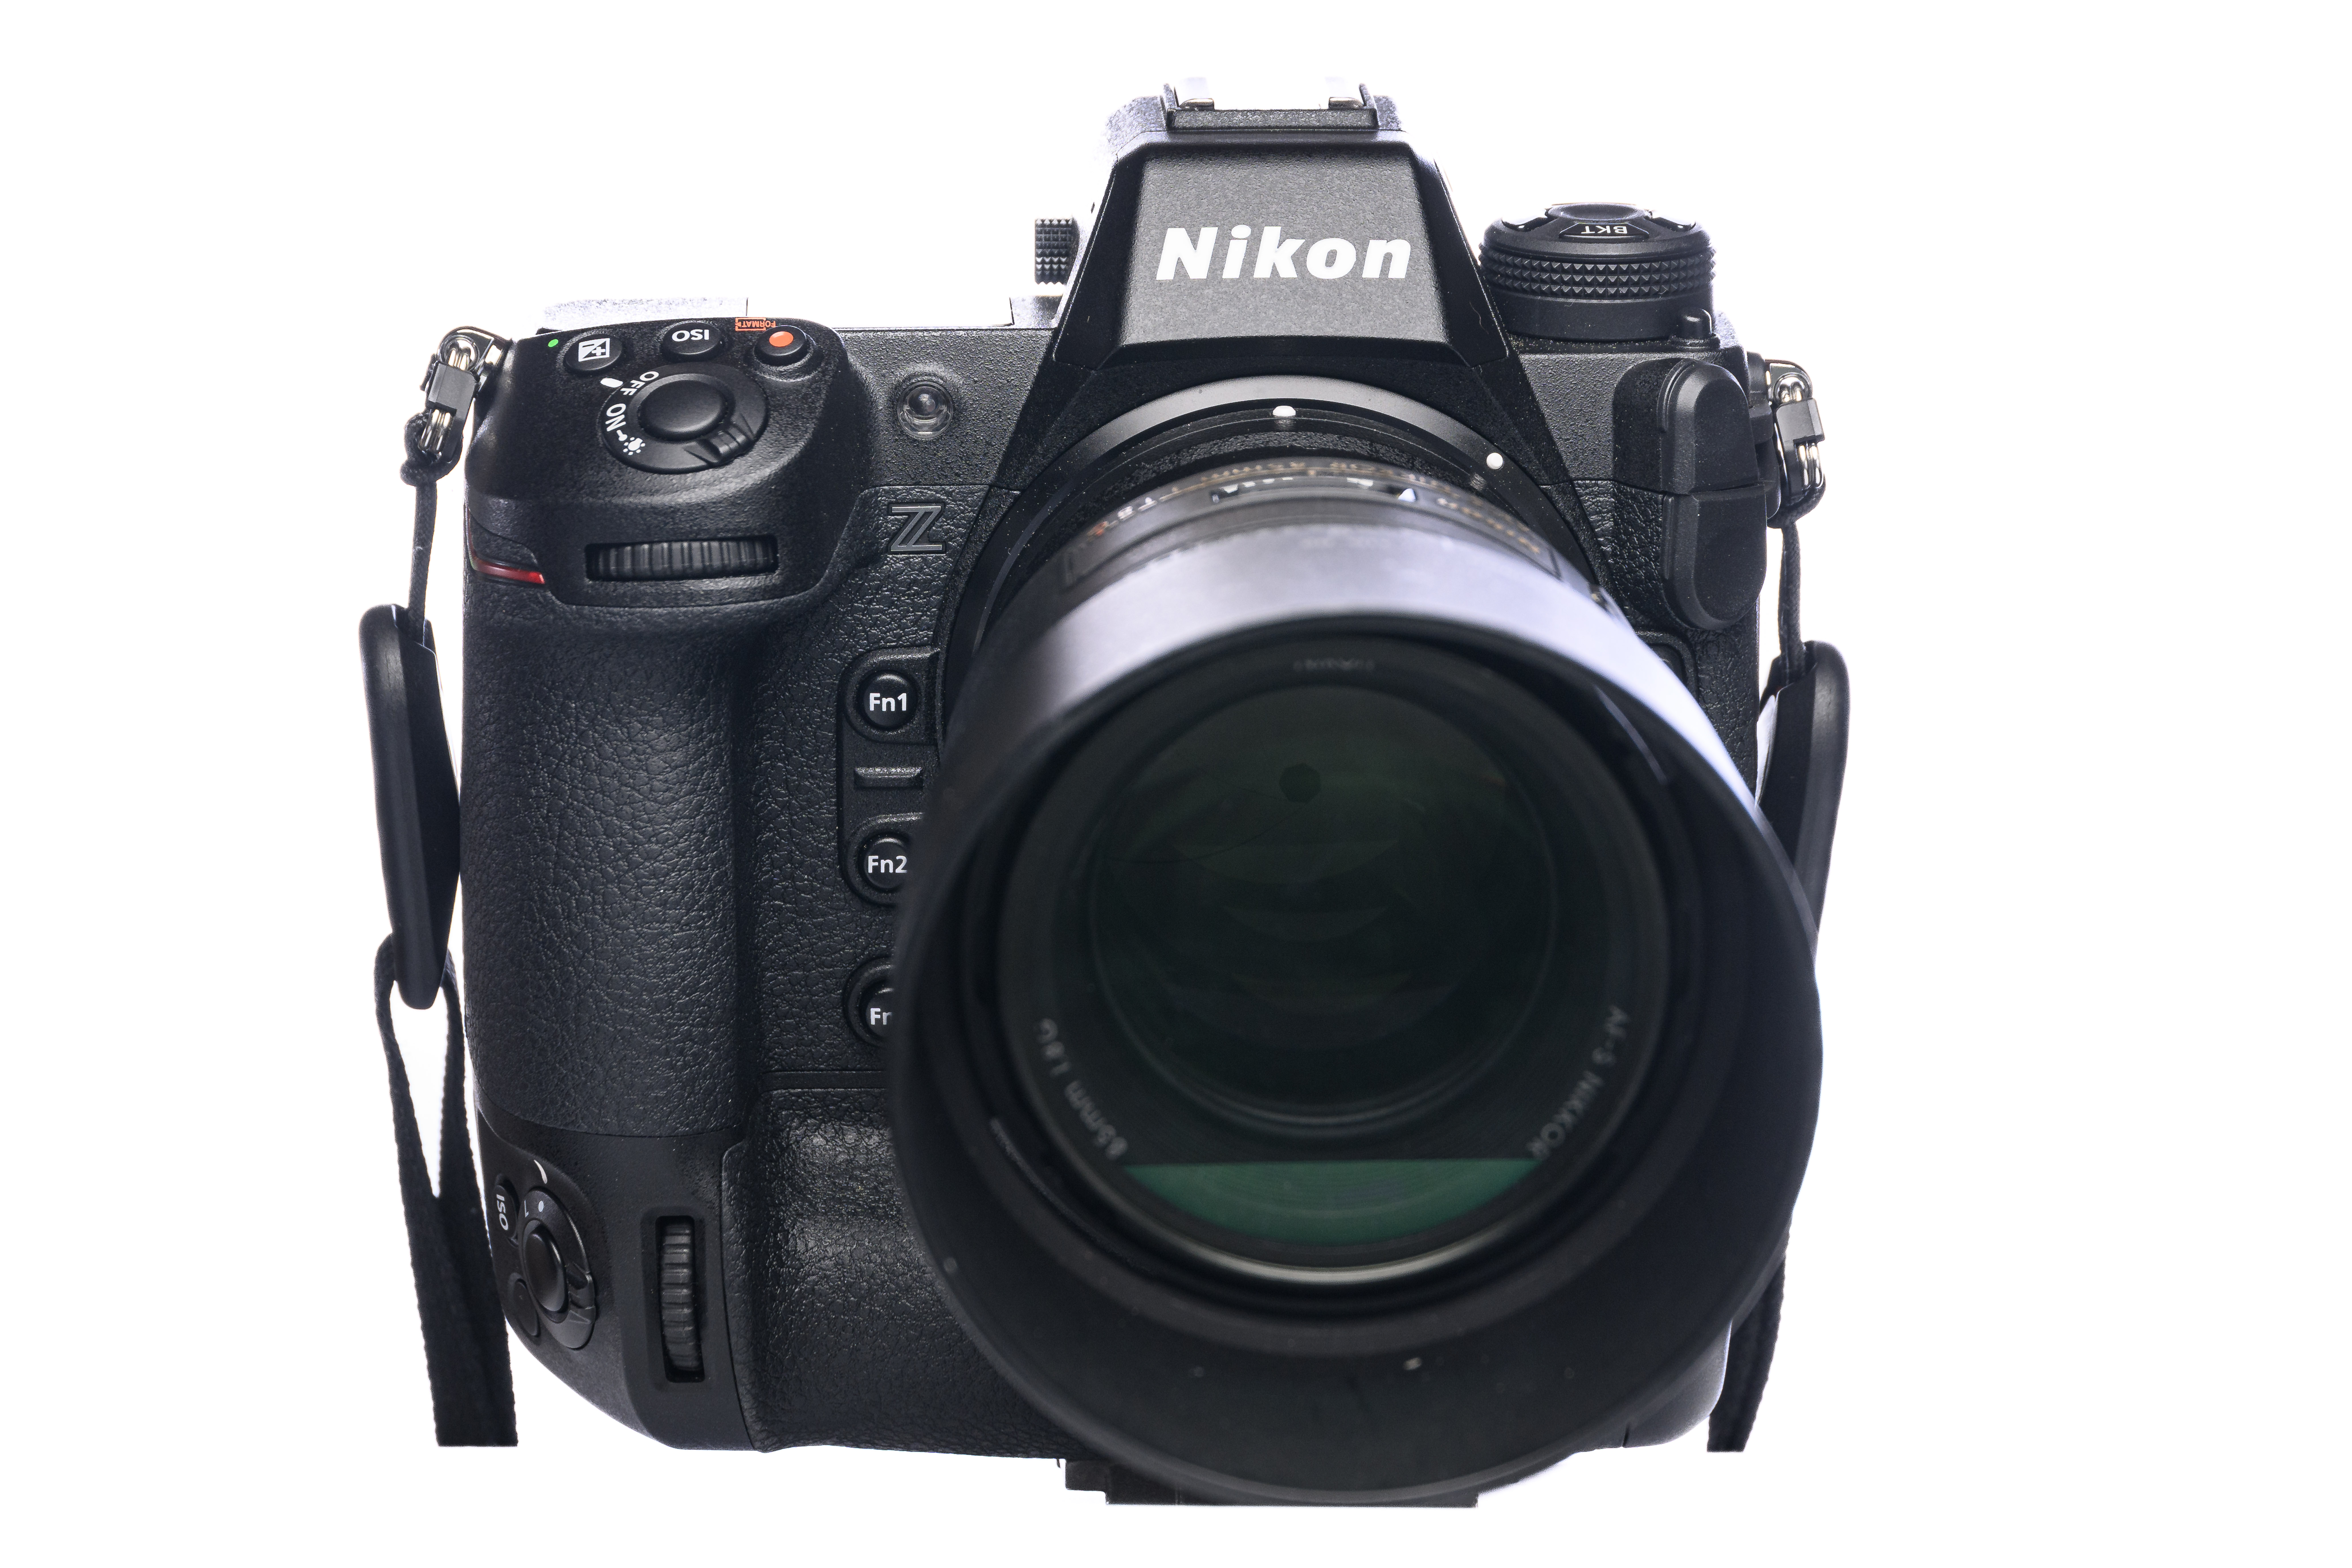
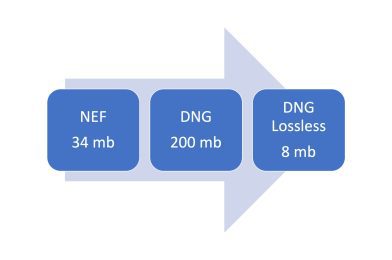
With the release of DXO PureRAW 3 and Lightroom’s new Denoise in the last couple of weeks, many photographers are enjoying the impressive results. However, some are struggling with the new DNG RAW file sizes. For example, I have seen my Nikon Z9 NEF files go from 34 MB to as large as 200 MB in DNG format. As a result, I began to investigate if there was a way to reduce the file size without compromising image quality.

When shooting RAW, you have several choices, ranging from uncompressed RAW to the Nikon Z9 NEF HE*, a high-efficiency file. But what if you want to keep using the DNG format? Well, Adobe Lightroom has a solution that can help.

Lightroom has a feature called Lossy DNG compression, which allows you to reduce the size of your DNG files while maintaining image quality. This compression technique works by removing some of the image data that is considered unnecessary, resulting in smaller file sizes. In addition, the compression is done in a way that is not visible to the naked eye so that you won’t notice any degradation in image quality.

Using Lightroom’s Lossy DNG compression is easy. When you import your photos into Lightroom, you can choose to convert them to DNG files and enable the lossy compression option. Alternatively, you can select your existing DNG files and convert them to Lossy DNG files.

It’s worth noting that Lossy DNG compression is irreversible, so keeping your original files as backups is essential. However, the compression technique can save you considerable disk space, which is especially useful for photographers who take many photos.

In conclusion, if you’re struggling with large DNG RAW file sizes, Lightroom’s Lossy DNG compression technique is an effective solution that can help you save disk space without sacrificing image quality. So give it a try and see how much space you can save!

How do you convert RAW images into lossy DNG?

The following steps explain converting existing RAW images to lossy DNG using Lightroom.

  1. In Lightroom, press the Shift + G key to enter the grid view
  2. Select the photos you wish to convert to DNG
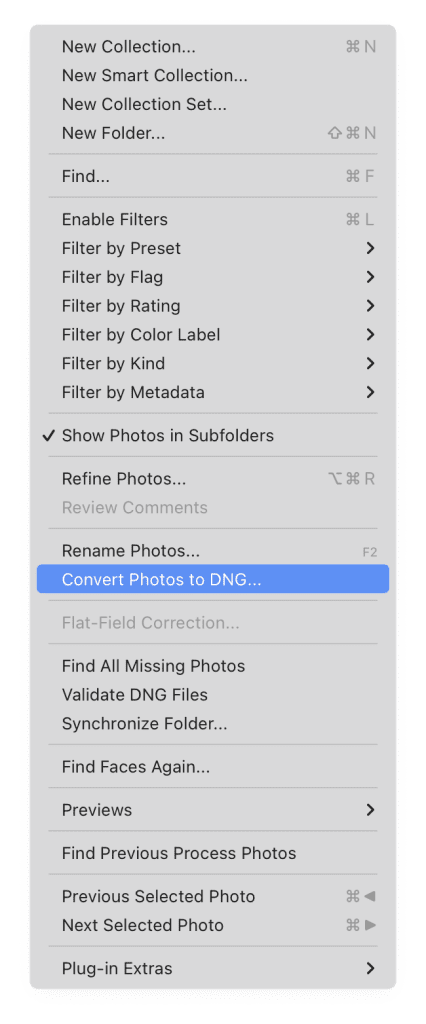
  3. Go to Library > Convert images to DNG
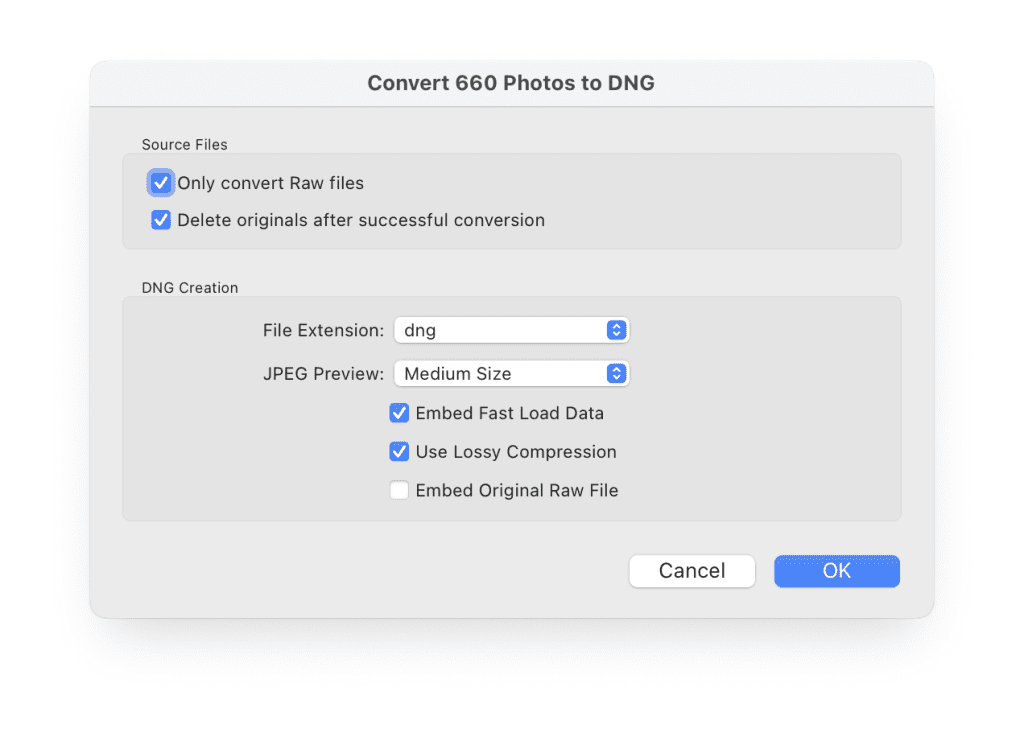
  4. Make sure you select the right preferences in the dialogue box that appears.
  • Only convert RAW files – Select this checkbox to convert RAW files
  • Delete original file after conversion – Select this checkbox to delete original RAW files.
  • File type – Select a lowercase extension
  • Compatibility – Choose the latest version, Camera Raw 7.1 and later
  • JPEG preview – Medium size preview will do just fine; by selecting a full size, the conversion may take longer
  • Embed fast load data – This allows images to load faster in the Develop module, so it is a good idea to have this option enabled
  • Use Lossy Compression – Select this checkbox to convert a RAW file to a lossy DNG file
  • Embed Original RAW file – Leave this box unchecked. This option is provided to have the original RAW file in your converted DNG file, but this will increase the storage size of the file significantly. If you want the original RAW files, save them as a backup.
  1. As a final step, click Ok to convert to lossy DNG. Be prepared, for it may take a long time for the conversion to complete.

I am still keeping my NEF file, this is a way to save on space that the Denoise process creates massive DNG, and I want this to be smaller.

Say Goodbye to Noise with Adobe Lightroom Classic’s New Denoise Feature

[NIKON Z 9, NIKKOR Z 100-400mm f/4.5-5.6 VR S, Mode = Aperture Priority, ISO 22800, 1/250, ƒ/8, (35mm = 165)]

If you’re a photographer who shoots in low-light conditions, you’re no stranger to the problem of noise in your images. Noise is the visual distortion that occurs when shooting at high ISOs, making your photos look grainy and reducing their overall quality. Fortunately, Adobe Lightroom Classic’s latest release, version 12.3, introduces a new Denoise feature to solve this problem.

The Denoise feature in Lightroom Classic uses advanced algorithms to analyze and reduce the noise in your images. It’s designed to be applied to images shot at high ISOs. The new feature is called Denoise or also Enhance.

Cropped to 100% [NIKON Z 9, NIKKOR Z 100-400mm f/4.5-5.6 VR S, Mode = Aperture Priority, ISO 22800, 1/250, ƒ/8, (35mm = 165)]

Adobe’s recommendation is to apply it right away before doing other adjustments. I just applied it to all that needed it and got a cup of coffee before editing all the images.

The default Amount is set to 50, but you can use the slider to tone down or amplify the amount of Denoise in an image. To reset the slider to the default of 50, double-click on the circle. 

To showcase the effectiveness of Lightroom Classic’s new Denoise feature, I took some photos at a high ISO above 20000. As you can see in the examples the Denoise feature does an excellent job of reducing noise without sacrificing too much detail.

[NIKON Z 9, NIKKOR Z 100-400mm f/4.5-5.6 VR S, Mode = Aperture Priority, ISO 25600, 1/250, ƒ/8, (35mm = 195)]

Lightroom Classic’s new Denoise feature is an exciting addition for photographers who regularly shoot in low-light conditions. It’s a powerful tool that can help improve the quality of your images and save you time in the editing process.

[NIKON Z 9, NIKKOR Z 100-400mm f/4.5-5.6 VR S, Mode = Aperture Priority, ISO 20000, 1/250, ƒ/8, (35mm = 400)]

In conclusion, if you want to reduce noise in your images, try Lightroom Classic’s new Denoise feature. It’s a valuable tool that can help take your low-light photography to the next level.

Photographing Red-Shouldered Hawks in Your Backyard: Tips for Non-Professional Birders

Red-shouldered hawks are busy building their nest in our backyard tree, 60 feet off the ground. Did you know that April and May are the peak months for nest building? [NIKON Z 9, VR 120-300mm f/2.8G + 2X, Mode = Aperture Priority, ISO 2200, 1/250, ƒ/8, (35mm = 600)]

As a professional photographer with a background in sports photography, I’ve always been interested in capturing fast-paced action. Recently, I’ve been taking on a new challenge: photographing Red-Shouldered Hawks nesting in my backyard. While I’m not a professional birder and don’t have the patience to be a full-time wildlife photographer, I’ve learned a few things that have helped me capture some fantastic shots. Here are some tips for photographing Red-Shouldered Hawks in your backyard, even if you’re not a professional birder.

photo by: Dorie Griggs

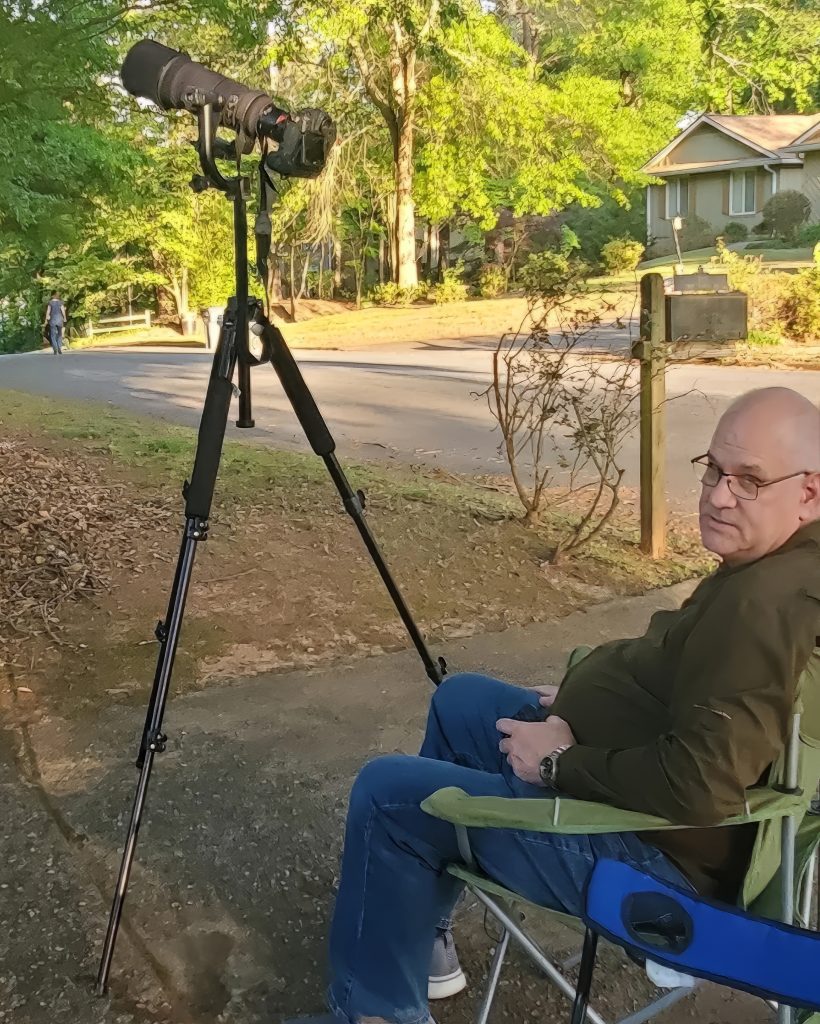
First and foremost, having the right gear makes a huge difference. One of the things I’ve invested in over the past couple of years is a gimbal head to hold my Sigma 120-300mm ƒ/2.8 lens with a 1.4X or a 2X converter. This head allows for more stability and improves the sharpness of the images.

[NIKON Z 9, VR 120-300mm f/2.8G + 2X, Mode = Aperture Priority, ISO 4000, 1/2000, ƒ/8, (35mm = 600)]

In addition, it’s essential to get as close as possible to your subject. However, these Red-Shouldered Hawks are building a nest 60+ feet up in a tree, so having a long glass is crucial. While the longest lens I own gets me to just 600mm, it’s still better than trying to capture these birds with a 70-200mm lens.

Another critical factor is camera technology. I recently upgraded from my Nikon D5 to the Nikon Z9, which has 47 megapixels compared to the D5’s 20 megapixels. This allows for more cropping and greater detail in the final image.

[NIKON Z 9, VR 120-300mm f/2.8G + 2X, Mode = Aperture Priority, ISO 4000, 1/2000, ƒ/8, (35mm = 600)]

Lastly, using the right software can make a big difference in post-processing. Lightroom’s new Denoise feature is a game-changer, rivaling my previous software, DXO PureRAW 3.

When capturing the shots themselves, there are a few tips to remember. First, it’s essential to use a fast shutter speed to freeze the action, and for most shots, I recommend a shutter speed of 1/2500. Operating a motor drive setting can also help capture those quick action shots. While Nikon has introduced the Pre-Release Burst, which buffers images while the shutter button is depressed, it doesn’t work with RAW pictures, so I don’t use it.

[NIKON Z 9, VR 120-300mm f/2.8G + 2X, Mode = Aperture Priority, ISO 2200, 1/250, ƒ/8, (35mm = 600)]

Overall, photographing Red-Shouldered Hawks in your backyard can be a challenging but rewarding experience. With the right gear, camera technology, and software, even non-professional birders can capture stunning shots of these fantastic birds. So get out there, experiment with your settings, and see what photos you can catch!

In conclusion, whether you are a professional or an amateur photographer, trying something new and taking on a new challenge is always exciting. Photographing Red-Shouldered Hawks in my backyard has been a fun and rewarding experience, and with the right equipment and a little patience, it can be for you too. So, keep these tips in mind, and you’ll be on your way to capturing stunning shots of these magnificent birds.

Lights, Camera, Action: Finding the Sweet Spot for Non-Profit Video Length

Image sourced from https://wistia.com/learn/marketing/optimal-video-length

When it comes to non-profit videos, finding the right length is crucial to keep viewers engaged and motivated to support your cause. While keeping your credits short is essential, recent research suggests that longer videos can improve watch time and boost your content in the algorithm.

To increase engagement with your video, it’s crucial to grab your audience’s attention right from the beginning, regardless of whether it lasts for 2 minutes or 12. Failing to deliver your message promptly may result in your audience quickly clicking away. At the same time, some research suggests that human attention spans have diminished to just 8 seconds. Therefore, it is recommended to try to hook your audience within the first 8 seconds for social media video content and within 20 seconds for most other types of video. If you don’t hook your audience by then, you’ve probably lost them.

However, that doesn’t mean you should make your videos longer just for the sake of it. The key is to find the sweet spot where you can deliver all the necessary information without padding your video. Ideally, videos should be 7-15 minutes long, as this range performs best on different channels, according to the Social Media Examiner.

Another source Maestro says, “Videos between 2 and 6 minutes lose viewers rapidly. Videos longer than 6 minutes but shorter than 12 minutes maintain a relatively steady viewership, making this range the ideal length for longer content. After 12 minutes, viewer engagement again begins to decline more rapidly.

PBS Space Time is an excellent example of a popular channel that frequently posts videos in this range but also features longer videos of up to 20 minutes. However, for social media channels like Instagram or Facebook, keeping your videos under 60 or 120 seconds is crucial to capture users’ attention and convey your message effectively.

To make the most of your video content, delivering valuable information, creating visually engaging content, and having a clear message and call to action are essential. Remember, the primary goal is to inspire viewers to support your non-profit, so make sure your video reflects your organization’s brand and mission.

For optimal viewer engagement, limiting videos to under 2 minutes is recommended. Additionally, it’s important to note that audience engagement tends to decrease significantly after the 2 to 3-minute mark. However, if your content requires a longer duration, a target of 6 to 12 minutes could be more appropriate.

In conclusion, finding the right video length balances delivering valuable information and engaging your audience. These comments are about how an audience will see them on something like YouTube or Vimeo. If you are showing them in a meeting, you already have a captive audience like you would have at a movie theater. People will give you more time in these situations. While longer videos may improve watch time, keeping your videos within the recommended 7-15 minutes range will ensure your audience stays engaged and motivated to support your non-profit cause.

Embracing AI: How 2023 is the Year of AI for Photographers

According to Nikon, the single Expeed 7 processor in the Z9 is ten times faster than the dual Expeed 6 in the Z6 II and the Z7 II.

As a photographer, I’ve witnessed several technological advancements transforming the industry, from the shift to digital cameras to the introduction of photo editing software. However, 2023 is shaping up to be the year of AI, and I believe it will be the most significant shift yet.

The idea of “artificial intelligence” is closely linked to “neural networks.” In essence, a neural network is a digital emulation of the human brain. The network’s cells, comparable to neurons in the human brain, connect using synapses – specific connections – much like the “biological” brain. They receive and process signals from the outside.

Therefore, artificial intelligence refers to a non-biological system that can perceive and process information, draw conclusions, and act based on it.

With the latest processors and software, AI is now being put in the hands of the public, and it’s changing the way we take, edit and share photographs. One example is the AI technology inside the Nikon Z9, enabling faster and more accurate autofocus, even in low-light conditions. This technology makes it easier for photographers to capture the perfect shot, regardless of their environment.

Furthermore, AI software like Topaz Photo AI, DXO PureRAW 3, and Lightroom’s latest update with AI masking and Denoise gives photographers the tools to produce higher-quality images for their clients. With AI-powered image processing, we can remove noise, sharpen images, and improve overall image quality with once considered impossible.

Some may fear AI technology will replace human photographers, but I believe it will only enhance our abilities and provide new opportunities. AI technology will allow us to produce more impressive work and take on more significant projects.

These are my milestones with Digital Photography

1993 – Started using Photoshop for photo editing.

1993-94 – Websites for everyday use became available.

2000 – Created the first website and hosted it on Compuserve.

2002 – Nikon introduces the Nikon D100 at $1900, making professional-level digital photography more accessible.

2003 – Digital cameras outsold film cameras for the first time.

2006 – Started a blog to keep in touch with students while teaching photography at YWAM. Adobe Lightroom was introduced, making it easier to edit multiple images at once.

2007 – The iPhone was introduced, changing how people view and capture photos.

2013 – Bought the first mirrorless camera, the Fuji X-E2, to experience a more minor, lighter camera system.

2015 – Lightroom introduces facial recognition in the library module, making it easier to tag people’s names into the metadata of photos.

2018 – Bought the mirrorless Nikon Z6 and sold all Fuji cameras to have one camera ECO system.

2021 – Bought the Nikon Z9 and sold off all DSLR cameras, upgrading to the latest technology.

2022 – In January, I bought DXO PureRAW 2 to help process images from the Nikon Z9, which was not performing well with Lightroom.

2022 – Chat GPT, a new language model for natural language processing, was introduced. Immensely helped write correspondence in emails, blogs, and estimates.

2022 – Bought Topaz Sharpen AI and Denoise to assist in processing high ISO images.

2023 – Bought DXO PureRAW 3, and shortly after that, Lightroom introduced their Denoise feature into the software.

Throughout the years, technology has played a crucial role in shaping the photography industry. From the introduction of digital cameras and photo editing software to the rise of mirrorless cameras and AI-assisted software, photographers have been able to produce higher-quality images for their clients.

In conclusion, 2023 may well be remembered as the year AI technology changed the world of photography, and I’m excited to be a part of this revolution. Embracing AI is the key to taking our work to the next level and providing our clients with the highest-quality images possible. So let’s assume this change and continue to push the boundaries of what’s possible in photography.

Translating a Video Interview from Spanish to English Using Premiere Pro: A Step-by-Step Guide

The video shows how to use Adobe Premiere Pro to translate a video interview from Spanish to English. It covers the steps involved, including importing the video files, creating a new sequence, creating a new caption track, translating and editing the captions, and exporting the final video. The tutorial is presented in a step-by-step format, making it easy for viewers to follow along and complete the process themselves.

Adobe Premiere will give you a transliteration, a word-for-word process. You still need someone to help with polishing it into a translation. Adobe says they are close to releasing updates that will do translations and not just the transliteration in 2024.

Here are a couple of links I reference in the video for you

https://podcast.adobe.com/enhance

https://subtitlestranslator.com/en/

Once you have translated the captions from Spanish to English, it’s essential to have someone check them for accuracy. Even the best translators can make mistakes; having a second pair of eyes can ensure your captions are error-free. Additionally, once you have your English translation, it’s a good idea to edit the captions to ensure they match the video’s timing and convey the intended meaning. This may involve adjusting the placement of the captions, shortening or lengthening them, or even rewording them slightly. By reviewing and editing your captions, you can ensure they are of the highest quality and provide a seamless viewing experience for your audience.

Calling all photographers: Time to make your Estimated Tax payment

As a photographer or any self-employed business owner, you are responsible for paying taxes on your net profit, which is the amount left over after deducting your business expenses from your gross billings. And now is the time to make your Estimated Tax payment.

For those who do not own a business, it might be surprising to see how much expenses can take out of a business’s income. These expenses can add up quickly, from camera equipment to marketing costs, leaving a small net profit for the business owner.

To determine your net profit, you must keep track of all your business expenses throughout the year, including camera gear, studio rental fees, travel expenses, and insurance costs. Then, subtract these expenses from your total gross billings, and you will have your net profit, the amount you must pay taxes on.

For example, if a photographer made $50,000 in gross billings but spent $10,000 on expenses throughout the year, their net profit would be $40,000. This is the amount they would pay taxes on for the IRS, their state, and sometimes their county or city. My average amount of expenses as compared to gross income, is about 52%.

Making Estimated Tax payments throughout the year helps you avoid a hefty tax bill at the end of the year and prevents any penalties from the IRS for not paying enough taxes.

For employees who do not own a business, it may be shocking to see how much expenses can take out of a business’s income. This is a great reminder to appreciate the benefits of being an employee, including having certain costs covered by the company and receiving other employee benefits.

Now is the time for photographers and other self-employed business owners to make their Estimated Tax payments. By keeping track of your expenses throughout the year and subtracting them from your gross billings, you can determine your net profit and ensure you pay the appropriate tax amount.

Here are some tools I use to help with tracking income & expenses:

Demo Request Form | TripLog

In addition to keeping track of expenses, tracking mileage can significantly impact your business’s taxes. For example, you may frequently travel for shoots, meetings, or other business-related activities as a photographer. This is where TripLog comes in handy. TripLog is a mileage-tracking app that allows you to record your mileage automatically or manually. Using TripLog, you can accurately track your mileage and ensure that you deduct all of your business-related travel expenses on your tax return.

Another helpful software that I use as a photographer is FotoBiz. It is a comprehensive tool that allows me to create professional-looking estimates and invoices and helps me track payments and manage client information. With FotoBiz, I can easily customize my estimates and invoices, add my logo, and include all the necessary details like pricing, services, and terms and conditions. Additionally, FotoBiz offers features like tracking job expenses, managing contacts, and generating reports, making it a powerful tool for managing my photography business. Using software like FotoBiz helps me save time and streamline my workflow, so I can focus more on creating beautiful images for my clients.

Quicken Home & Business Download | Quicken

Another helpful tool for tracking expenses is Quicken for Mac. Quicken allows you to easily track your income and expenses and categorize them according to the Schedule C form you’ll use when filing taxes. This makes it easy to see which costs can be deducted and ensure you’re not missing any tax write-offs. Quicken also offers various reports to help you analyze your business’s financial health and make informed decisions.

When storing receipts, I use a scanner app on my phone to scan receipts and attach them to the corresponding transaction in Quicken. This helps me keep track of my expenses and ensures a record of each transaction. This can also be useful if the IRS audits you and must provide documentation for your expenses.

In conclusion, tracking expenses and mileage is crucial for any self-employed business owner, including photographers. By using tools like TripLog and Quicken for Mac and scanning receipts, you can keep track of your expenses and ensure that you’re accurately deducting all of your business-related expenses on your tax return.

Embracing the Advancements in Photography Technology: How it’s Revolutionizing Professional Photography.

We live in an exciting time for photography, as technology is rapidly advancing and changing how we capture and process images. From high-speed cameras to advanced image processors, many tools are available to help professional photographers take their work to the next level.

One such tool is the Nikon Z9 camera, which boasts an EXPEED 7 Image Processor that can handle even the most demanding tasks. With eye-tracking AI technology and the ability to process 52 megapixels of CMOS stacked RAW images at 20 FPS, the Z9 is a game-changer for photographers looking to capture stunning photos quickly and easily. Check out the Nikon Z9 here: https://www.nikonusa.com/en/nikon-products/product/mirrorless-cameras/z-9.html.

Lenses have also improved greatly in recent years, thanks to computer-aided and new motor designs. This has resulted in sharper images and faster focusing, giving photographers more flexibility and control over their shots. Some great lens options include the Nikon NIKKOR Z 24-70mm f/2.8 S and the Sony FE 70-200mm f/2.8 GM OSS.

Memory cards have also seen a significant improvement, with the introduction of CFexpress cards that offer vastly superior speeds over previous versions. This allows for unlimited shooting of 8K video and more. Check out some of the best CFexpress cards here: https://www.bhphotovideo.com/c/buy/CFexpress-2-0/ci/28772/N/4108159058.

Post-processing software like Lightroom has also advanced significantly, including AI technologies that can process multiple images simultaneously and adjust subjects, backgrounds, skies, and more. Some other options include Capture One and Skylum Luminar. Additionally, there are now services that use AI technology to analyze how you edit your photos in Lightroom, making the editing process faster and more efficient.

The new M1 and M2 chips in Apple’s MacBook Pro and other computers have also made significant leaps, allowing for faster image processing and AI technology without waiting overnight for the computer to finish. This is excellent news for photographers who need to deliver high-quality work quickly.

Finally, noise reduction software like DXO PureRAW 3 and Topaz Photo AI & Denoise AI has made significant strides recently, allowing for virtually noise-free images at high ISO. This game-changer is for low-light and night photographers looking to capture stunning photos in difficult lighting conditions.

Overall, many tools are available for professional photographers looking to take their work to the next level. However, with new advancements in camera technology, lenses, memory cards, post-processing software, and more, the question remains: are you using all the technology available to help improve the quality of your work and stay competitive in the industry?

The Power of Storytelling for Small Business Owners: Why Visuals and Transparency Matter

Stepping into Woody’s Barber Shop is like taking a step back in time, where the tradition of quality haircuts and friendly conversation has been kept alive for almost a century: Woody’s Barber Shop, Georgia’s oldest operating barber shop since 1926.

In today’s fast-paced world, businesses must find new and innovative ways to reach their target audience. One of the most effective ways to do this is through storytelling. Storytelling is a powerful tool to help small business owners connect with their customers and create lasting impressions. In this blog post, we’ll discuss the importance of storytelling for small business owners, the role of visuals in storytelling, and the importance of appearing transparent to customers.

Why is storytelling important for small business owners?

As a small business owner, storytelling can help you build a connection with your target audience. Your customers want to know who you are, what you stand for, and what sets you apart from your competitors. Storytelling is an excellent way to communicate all of these things.

This general store in Herăști, Romania, from everyday essentials to local treasures, has it all. The small store owner proudly displays many products that keep her community returning for more.

Storytelling can also help you establish credibility and build trust with your audience. When you share your story, you give your customers a glimpse into the behind-the-scenes of your business, which can make them feel more connected to your brand. People want to do business with companies they feel they can trust; storytelling is an excellent way to establish that trust.

The Role of Visuals in Storytelling

Visuals are an essential part of storytelling. They can help you capture your audience’s attention and communicate your message more effectively. For example, a good photo with a caption can deliver the news and a short video.

Representing the face of Summit National Bank, the public relations officer next to the bank’s iconic logo – a symbol of trust, stability, and community in the heart of Atlanta.

Visuals can also help you establish your brand identity. By using consistent branding elements such as colors, fonts, and imagery, you can create a cohesive visual identity that your customers will recognize and remember.

In storytelling, visuals can help you bring your story to life. For example, if you’re telling the story of how your business got started, you could use photos or videos to show the early days of your business and the challenges you faced. This can make your story more engaging and memorable for your audience.

The importance of transparency

Transparency is crucial for small businesses. Customers want to know who they’re doing business with and what they can expect. One way to appear transparent is to have headshots of your people on the website. This allows customers to put a face to the name and helps establish a personal connection.

Transparency also means being open and honest about your business practices. For example, if your business has had a setback or made a mistake, you must be transparent about what happened and how you’re addressing the issue. This can help build customer trust and show you’re committed to providing excellent service.

In conclusion, storytelling is a powerful tool for small business owners. You can connect with your audience, establish credibility and trust, and create a lasting impression by telling your story. Visuals are essential in this process, helping you bring your account to life and establish your brand identity. And finally, being transparent with your customers is crucial for building trust and establishing a personal connection. Incorporating these elements into your marketing strategy can take your small business to the next level.

Why Name Tags Matter: The Key to Successful Meetings and Events

Name tags may seem like a small detail, but they can significantly impact the success of a meeting or event. Name tags are essential for helping people connect and network, especially in large groups where it can be challenging to remember everyone’s name. Not only do they make introductions easier, but they also help to create a more inclusive and welcoming environment for all attendees.

One of the most important considerations when choosing name tags is to select ones that do not flip or rotate. Nothing is more frustrating than constantly adjusting a name tag that has flipped over, especially during a meeting or event where you want to focus on the conversation. By investing in high-quality name tags designed to stay in place, event planners can ensure that attendees can quickly and easily identify each other throughout the event.

I love this style where you have either side to clip your lanyard. However, this tends not to flip as quickly as a spinning hook on a lanyard with just one hole in the name tag to clip onto.

Another important consideration is the type of name tag holder that is used. Lanyards are a popular choice for events, but it is essential to make sure that they are adjustable so that attendees can position their name tags in a way that is visible to others. This is particularly important when people are seated at tables or in other situations where their name tag might not be easily visible.

In addition to providing basic identification information, many event planners are now incorporating additional details on name tags to help spark conversations and connections between attendees. This might include topics a person is interested in or hobbies they enjoy. By providing this information on name tags, event planners can help to facilitate more meaningful conversations and networking opportunities.

This style tends to flip; many attendees walk around with the back showing rather than their name. So another tip is to make people’s names and your logo smaller.

Overall, name tags may seem like a small detail, but they can play a significant role in the success of an event or meeting. Event planners can create a more inclusive and engaging environment that encourages networking and relationship-building by choosing high-quality, non-flip name tags and providing additional information to help attendees connect.

Analyzing Your Photography Style with Photo Mechanic Plus EXIF Data

As a photographer, it’s essential to analyze and understand your shooting style and preferences to improve and upgrade your equipment. One powerful tool that can help you achieve this is Photo Mechanic Plus. This software allows you to look up the EXIF data of your photos, providing valuable insights into your photography style.

The EXIF data contains information about the camera settings and the equipment used to take a photograph. Using Photo Mechanic Plus to analyze your photos, you can determine which cameras and lenses you use the most and least. This can help you understand your preferences and biases, allowing you to make informed decisions about upgrading or changing your equipment.

Furthermore, Photo Mechanic Plus can help you identify the focal length you use the most on a zoom lens. This information can be precious when selecting a prime lens or a new zoom lens, allowing you to choose a lens that suits your shooting style.

In addition to equipment analysis, the EXIF data can help you identify photo problems. By examining the exposure triangle and other camera settings, you can identify potential issues with the photo, such as over or underexposure, poor focus, or incorrect white balance. This information can help you improve your photography skills and avoid making the same mistakes in the future.

Finally, Photo Mechanic Plus allows you to examine the firmware version and other technical information, providing a detailed analysis of your equipment’s performance. This information can help you identify any issues with your camera or lens and make informed decisions about repairs or upgrades.

In conclusion, analyzing your photos’ EXIF data using Photo Mechanic Plus can provide valuable insights into your photography style and equipment preferences. You can make informed decisions about equipment upgrades and changes using this tool to identify your most commonly used cameras, lenses, and focal lengths. Furthermore, analyzing the technical details of your photos can help you improve your photography skills and avoid making the same mistakes in the future.

Why Quick Turnaround Time is Crucial for Photographers

Cody Hart eagerly awaits his turn to join the action as he watches the RBR Atlanta Classic in Atlanta, Georgia.

As a photographer, always preparing for the next assignment is essential. Turning around jobs quickly is a crucial part of this process. The faster you can process and deliver your images, the more opportunities you will have to take on new clients and projects. Here are some reasons why turning around jobs quickly is essential:

  1. It Frees You Up for Last-Minute Jobs

Last-minute jobs can often be the most exciting and lucrative opportunities. However, you may miss out on these opportunities if you are still working on a previous job. On the other hand, you can accept last-minute jobs and expand your portfolio by turning around quickly.

  1. It Shows Professionalism

Clients expect timely delivery of their images, and delivering quickly demonstrates your professionalism and reliability. In a competitive industry, a quick turnaround time can set you apart from other photographers and help you secure future jobs.

  1. It Keeps Your Workflow Smooth

When you turn around jobs quickly, you avoid a backlog of work. This allows you to maintain a smooth workflow and ensures that you can handle new jobs as they come in.

In addition to turning around jobs quickly, there are other ways always to be prepared for your next assignment. Here are some additional tips:

  1. Keep Your Passport Up-to-Date

A passport is essential for any photographer who wants to work internationally. By keeping your key up-to-date, you will be ready to take on any overseas assignments that come your way.

David & Tami Woods are packing and driving to BoBo from Ouagadougou in Burkina Faso, West Africa.
  1. Have a Go Bag

A go bag is a suitcase filled with all the essentials you need for a last-minute trip. This includes toiletries, clothing, and other necessities. Having a go bag ready, you can quickly pack and head out for your next assignment without worrying about forgetting anything important.

  1. Invest in Wickaway Clothing

Investing in wick-away clothing can be a game changer if you frequently travel for assignments. These clothes are easy to wash in a sink and dry quickly, so you can carry fewer outfits and wash them as needed. In addition, this saves your luggage space and ensures you always have clean clothes to wear.

In conclusion, turning around jobs quickly is essential to being a successful photographer. Delivering images promptly frees you up for new opportunities, shows professionalism, and maintains a smooth workflow. Additionally, keeping your passport up-to-date, having a go bag, and investing in wick-away clothing are ways always to be prepared for your next assignment.