Should You Invest in Gear, Marketing, or Education?

What is holding you back from living your dreams? This is the time of year we set goals for the year.

Often we are thinking budget and about making equipment purchases. I think just as important as investing in yourself and your people through education. 

While it is easy to point to so many things that are obstacles for us, most of these are out of our control. All is not lost.

Chelle playing at the mall

All the books and articles on this topic point to taking control of what you can do. That is your superpower. Decide what you will do in the face of all that life gives you. 

Borrowing from the great Ted Lasso, “Don’t let the wisdom of age be wasted on you.”  

This year I turn sixty years old. I have been working in communications since 1982 while in college. I want to offer forty years of experience to you and your organization. 

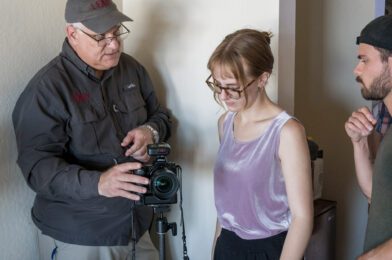
“Scar Tissue is stronger than regular tissue. Realize the strength, move on.” – Henry Rollins 

When I was younger, I broke my neck, was in traction for a month, and then in a body cast for eight weeks.

Through the years, I have many more events that I learned from that made me who I am today.

That scar tissue of mistakes through the years was one way I grew and learned what not to do and what to do next time.

The other way I was learning was from others. Formal and informal education is what taught me just as much as learning from my mistakes and success. 

I am now in a time of life where I want to give back and help others. 

I want to help you realize your dreams and aspirations. I have found that I do have a gift for teaching. It has a great deal to do with the empathy developed from the struggles of learning something new. Also, it came from learning from others.

While working on my master’s degree in communications, I had to take education courses. I had specific classes for Adults, Youth, and Children, as well as courses on teaching principles.

Teaching lighting with the School of Photography with YWAM in Kona, Hawaii. photo by Dennis Fahringer

What this means is I had to demonstrate that I could teach all these learning styles to pass those courses. By the way, I didn’t just get by with these studies; I was thriving. I made the Dean’s list almost every semester for my studies. 

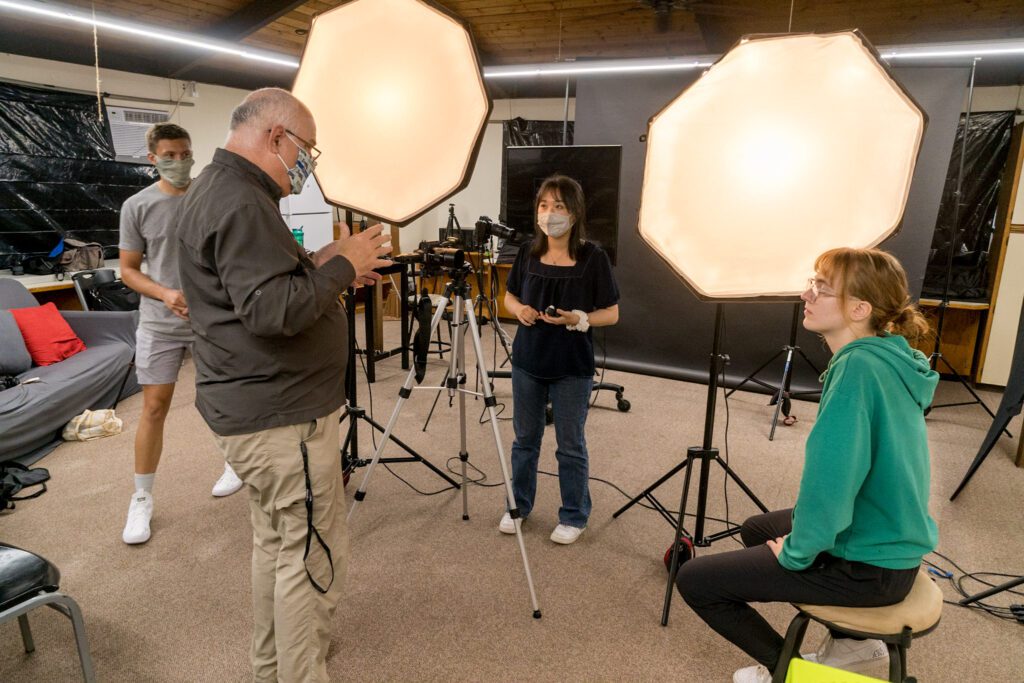
I have learned through the years of teaching in different environments that students learn best when they want to grow and understand a topic. Workshops are where I discovered that almost everyone was highly engaged and wanted to know the subject.

“Stanley’s able to combine decades’ worth of experience in photojournalism and commercial photography with an acute sensitivity to the needs of my photo students. He teaches here in an efficient hands-on way on lighting as well as business practices. Those are just a small fraction of his expertise. It’s a joy each time we invite him back to teach.”

– Dennis Fahringer, YWAM School of Photography


Often in school programs, students are taking courses because they are required. They don’t understand why and usually are not engaged with the content. 

However, the best part of the workshop is that the instructor has the time to get to know you better than in a presentation one does, for example, the Rotary Club. 

The four core learning styles include visual, auditory, reading and writing, and kinesthetic. You will find many who might break this down into more categories, but I think this works pretty well for understanding that people learn differently. 

I have found that you can incorporate those styles in a workshop environment. I have also discovered that when working with a person one-on-one, I can customize my approach even more to that person.

Here are some of the topics I teach on through the years

Organizations     

  • Digital Asset Management – Learn how to spend less time organizing and more time being productive with your assets.·      
  • Photo Selection – Learn how to pick the best photos that communicate your brand. Also, learn about model releases, copyright, and usage concerns so that you do not get into trouble when using photos.

Photographers

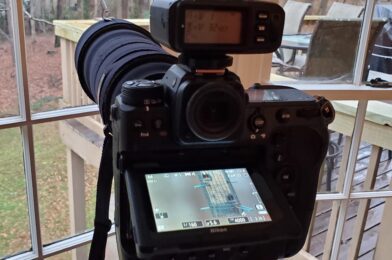
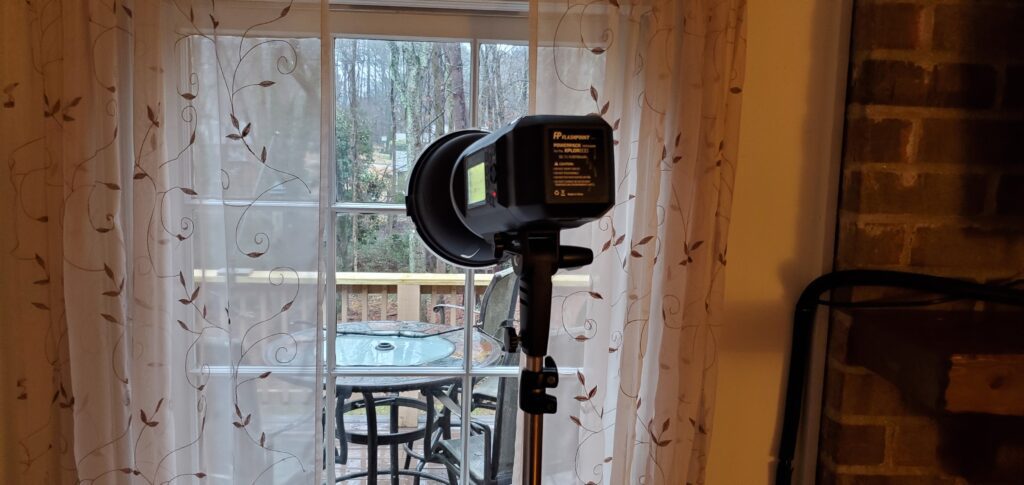
  • One Light Workshop – Learn how to use on flash off camera. You will learn the difference between hotshoe flashes and studio strobes. Light modifiers will also be taught. 
  • Lightroom for the photographer – Learn workflow of shooting RAW with your camera to producing edited JPEGs.
  • Creating your own photo library – Learn how to use Lightroom or Photo Mechanic Plus to organize your photos for easy searching and finding of your photos.
  • Business [separate topics]
    • Basic overview of being a professional photographer
    • Marketing
    • Blogging
    • Newsletter
  • Sports Workshop
  • Posing Workshop

Birds, Nikon Z9, & Flashpoint XPlor 600 HSS TTL

I have preached over and over on my blog about how Flash can improve the colors in your photos.

Flambient is even a new term you will see in photography that was being done long before. This is where the photographer blends available light with Flash.

No Flash [NIKON Z 9, VR 120-300mm f/2.8G, Mode = Manual, ISO 4000, 1/160, ƒ/5.6, (35mm = 460)]

This is without a flash shot of birds on the bird feeder. I am shooting from one window of my house, and I put the Flashpoint XPlor 600 HSS TTL in another window about 15+ feet away, creating a triangle between camera, subject, and light.

Birds at Bird feeder using the Flashpoint XPlor 600 HSS TTL [NIKON Z 9, VR 120-300mm f/2.8G, Mode = Manual, ISO 4000, 1/160, ƒ/5.6, (35mm = 460)]

The hard part of doing this is balancing available light and the flash.

Birds at Birdfeeder Using the Flashpoint XPlor 600 HSS TTL [NIKON Z 9, VR 120-300mm f/2.8G, Mode = Manual, ISO 16000, 1/500, ƒ/5.6, (35mm = 380)]

This, to me, is a little too much flash. What you choose to do will be part of your style and approach.

Birds at Birdfeeder Using the Flashpoint XPlor 600 HSS TTL [NIKON Z 9, VR 120-300mm f/2.8G, Mode = Manual, ISO 16000, 1/500, ƒ/8, (35mm = 600)]

Tip Don’t Use TTL

TTL Flash works by the flash doing a pre-flash, and then the camera takes a picture with the second flash. I think you could risk startling the subject and affecting the one with the actual moment.

Another problem is you will drain your battery for a flash much quicker, with it taking two seconds every time you take a photo.

Processed in Lightroom and Topaz AI Sharpen Birds at Birdfeeder Using the Flashpoint XPlor 600 HSS TTL [NIKON Z 9, VR 120-300mm f/2.8G, Mode = Manual, ISO 8000, 1/250, ƒ/8, (35mm = 600)] Flash set to 1/16 power.

I think you dial in the best settings to take the photo without the flash and then add the sparkle. I suggest having the flash -1 EV of the location you have before.

Birds at Birdfeeder Using the Flashpoint XPlor 600 HSS TTL [NIKON Z 9, VR 120-300mm f/2.8G, Mode = Manual, ISO 5000, 1/250, ƒ/8, (35mm = 600)] Flash set to 1/16 power

Nikon Z9 Backyard Birds

Northern cardinal in our backyard. [NIKON Z 9, VR 120-300mm f/2.8G, Mode = Manual, ISO 8000, 1/500, ƒ/5.6, (35mm = 600)]

“Cardinals appear when angels are near”

– Victoria McGovern

Today we had winter advisory for our area. So, I was having to stay put and decided to use this as opportunity to photograph birds in our backyard.

House Sparrow [NIKON Z 9, VR 120-300mm f/2.8G, Mode = Aperture Priority, ISO 25600, 1/2000, ƒ/11, (35mm = 600)]

When there isn’t snow the photos look like this. The snow changes the lighting, background and when the snow is falling creates more depth with snow surrounding the birds.

Cassin’s Finch & Brown-Headed Nuthatch [NIKON Z 9, VR 120-300mm f/2.8G, Mode = Manual, ISO 2500, 1/640, ƒ/5, (35mm = 420)]

When the snow started to fall the trees were still not covered.

Female Northern Cardinal [NIKON Z 9, VR 120-300mm f/2.8G, Mode = Manual, ISO 2500, 1/640, ƒ/5, (35mm = 420)]

Slowly through the day the snow steadily came down. Changing the look of the same spots where the birds came to feed.

Pine Warbler [NIKON Z 9, VR 120-300mm f/2.8G, Mode = Manual, ISO 2500, 1/800, ƒ/5.6, (35mm = 420)]

One of the fun things to do is research and see what is visiting the backyard bird feeders.

Bluebird [NIKON Z 9, VR 120-300mm f/2.8G, Mode = Manual, ISO 6400, 1/800, ƒ/5.6, (35mm = 600)]

White-breasted Nuthatch [NIKON Z 9, VR 120-300mm f/2.8G, Mode = Aperture Priority, ISO 25600, 1/1250, ƒ/11, (35mm = 600)]
Red-bellied Woodpecker [NIKON Z 9, VR 120-300mm f/2.8G, Mode = Aperture Priority, ISO 25600, 1/2000, ƒ/8, (35mm = 600)]

Eastern Phoebes [NIKON Z 9, VR 120-300mm f/2.8G, Mode = Manual, ISO 8000, 1/500, ƒ/5.6, (35mm = 600)]

My Nikon Z9 Sports Settings

This is what I have found works for me. You may find different results with other settings.

Here are some shots from my coverage of the Chick-fil-A Peach Bowl that I mixed in to show my results.

Michigan State vs Pittsburgh [NIKON Z 9, Sigma 120-300mm f/2.8 Sport, Mode = Aperture Priority, ISO 25600, 1/3200, ƒ/5.6, (35mm = 600)]

Nikon Z9 Sports Settings

These are the settings that I use on my Nikon Z9 for shooting most all sports action. Nikon has made it pleasant to allow photographers to save these settings, so they do not have to remember every little scene they like to use for a style of shooting.

If you go to Menu and under the camera icon, pick the first item, “Shooting menu bank.” I have chosen B, which is my sports menu.

Nikon Z9 Sports Settings

If you toggle into the “Shooting menu bank,” you can rename those settings. Once you choose one of these settings, everything you do to change the menu will be saved in that menu bank. I recommend going ahead and trying all my settings and then tweaking them to your preferences.

Nikon Z9 Sports Settings

When shooting sports, it is widespread for the lighting conditions to change instantly. While the football player runs toward you, they may go from shade into direct sunlight. For this reason, I let the camera do some of my thinking.

Go to the camera icon and look for “ISO sensitivity settings.” Select this, and you will then see this menu:

Nikon Z9 Sports Settings

I turn on the “Auto ISO sensitivity control.” Then I set the minimum shutter speed to 1/4000. You could pick something else. I used to shoot at 1/2000. The ISO setting is what you see in the smaller window below the menu. I set this to ISO 100 and the “Maximum sensitivity” to ISO 25600.

Michigan State vs Pittsburgh [NIKON Z 9, Sigma 120-300mm f/2.8 Sport, Mode = Aperture Priority, ISO 25600, 1/4000, ƒ/5.6, (35mm = 600)]

Why 1/4000? Well, when you are shooting football from the end zone to the other end of the field with a 600mm, you may want to crop. I do crop to get even closer. Therefore this is more like shooting with a 1200mm lens or longer. The longer the lens [CROPPING needs to be factored in], the higher the shutter speed. If you are shooting a 200mm, then shooting at 1/200 shutter speed works pretty well for stationary objects. Following the football field action means your camera moves a lot.

I have found that my photos looked even better at 1/4000 than they did at 1/2000. I am moving the camera, and the player is moving–we are not always in sync. They may Zig while I Zag. That is, they are going opposite my movement, which accentuates the action.

Michigan State vs Pittsburgh [NIKON Z 9, Sigma 120-300mm f/2.8 Sport, Mode = Aperture Priority, ISO 8000, 1/4000, ƒ/2.8, (35mm = 160)]

While I am in Aperture Mode shooting, the camera will always pick 1/4000 shutter speed. If in sunlight I am at ƒ/4, the shutter speed may go as high as 1/8000 at ISO 100, but as the scene changes and the athlete is now in the shade, the camera will automatically drop to 1/4000 @ ƒ/4, and then change also the ISO up until I can still shoot at 1/4000.

The only time the shutter speed will dip below 1/4000 is if the ISO peaks out at 25600.  If my aperture is wide open, the camera is doing everything I would have done manually, but faster than I could ever adjust the camera. That is how you get more shots than the guy next to you.

Nikon Z9 Sports Settings

Next, select the Pencil on the menu and go into the Custom settings bank.

Nikon Z9 Sports Settings

Again just like the Photo Shooting Menu, create a Sports Menu as I have done here.

Nikon Z9 Sports Settings

Next, choose Autofocus in the menu.

Nikon Z9 Sports Settings

Then choose the Focus tracking with lock-on.

Nikon Z9 Sports Settings

I change the “Focus tracking with lock-on” from Normal to 4. What happens when I do this is the delay for the lens to refocus if something occurs between the camera and subject (like a referee). While I am following someone, the camera will not refocus right away. This is something you need to try and pick what you like. You may want the lens to be more responsive and therefore go to set one, letting the lens refocus instantly.

Focus Settings

You want to pick Autofocus Continuous mode for sports.

Nikon Z9 Sports Settings

In the menu, Pencil selections, pick AF Activation under the Autofocus settings.

Nikon Z9 Sports Settings

Then choose the AF-ON only. This will mean when you push the shutter release, it will not focus but fire the shutter to take a photo.

By changing these settings, you will notice the camera will stay in focus and shoot faster frame rate. Great for following a baseball player sliding into a plate and another player trying to tag them, or maybe a football player is running towards you to score. You will find more photos tack sharp in a series.

I generally put my focus point dead center and lock it, so I don’t bump it. I am trying to get photos of moving subjects, and off-center is too tricky. I may crop later for a better composition, but I want the issue to focus first.

Now, this gets a little complicated so pay attention to the highlighted text above.

Here are the selections again with more explanation

Turn off VR on your lens. The simple fact is that VR is a solution to a problem, and if you don’t have that problem using VR can become a problem of its own. VR should generally be off if your shutter speed is over 1/1000.

After doing my findings, someone shared that Nikon came out with their guide for shooting sports. Here is that PDF for you.

More photos from the game

Chick-fil-A: Chick-fil-A Peach Bowl 2021
2021-12-30_21-34-33A
2021-12-30_21-34-33J
2021-12-30_20-32-06D
2021-12-30_19-53-48F
2021-12-30_22-00-50I
2021-12-30_22-20-22A
Chick-fil-A: Chick-fil-A Peach Bowl 2021
previous arrow
next arrow
Chick-fil-A: Chick-fil-A Peach Bowl 2021
2021-12-30_21-34-33A
2021-12-30_21-34-33J
2021-12-30_20-32-06D
2021-12-30_19-53-48F
2021-12-30_22-00-50I
2021-12-30_22-20-22A
Chick-fil-A: Chick-fil-A Peach Bowl 2021
previous arrow
next arrow