I have found that when you take advantage of some features, Photo Mechanic Plus makes the images more valuable.
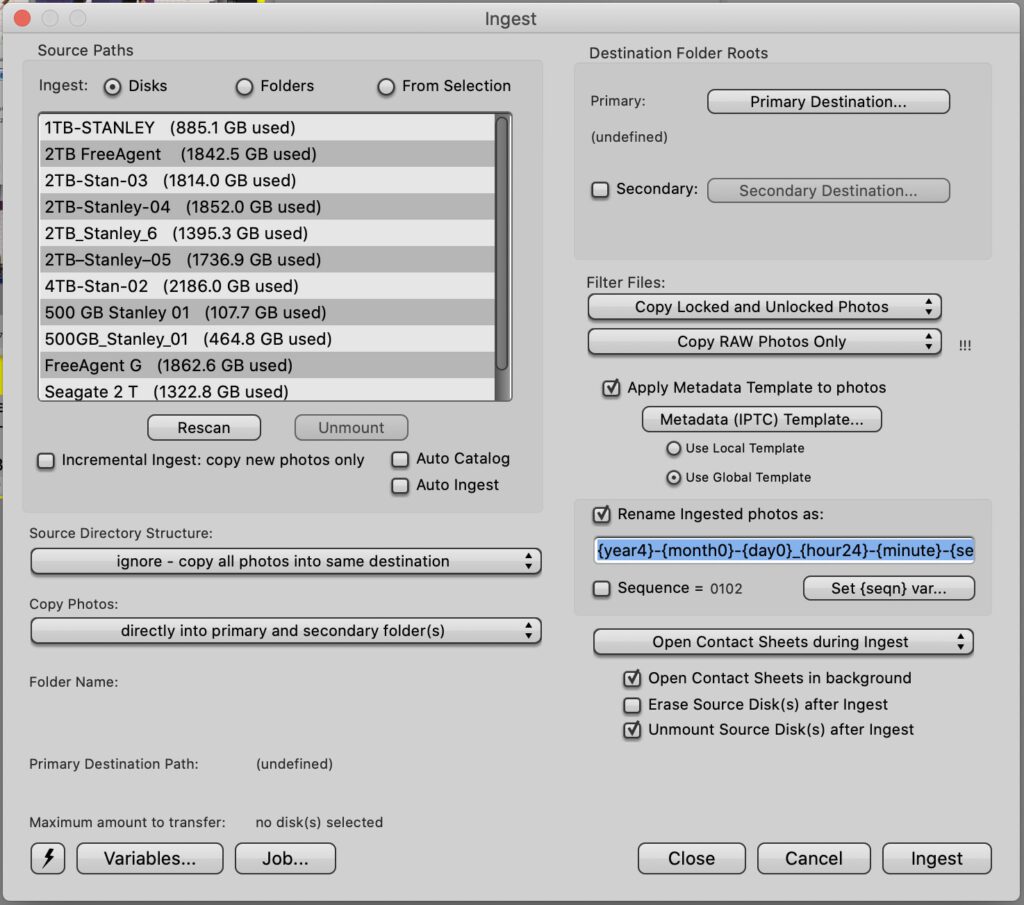
When you INGEST, be sure to rename your files to a system that works for you and, at the same time, apply what I call the IPTC template for your photo shoot.
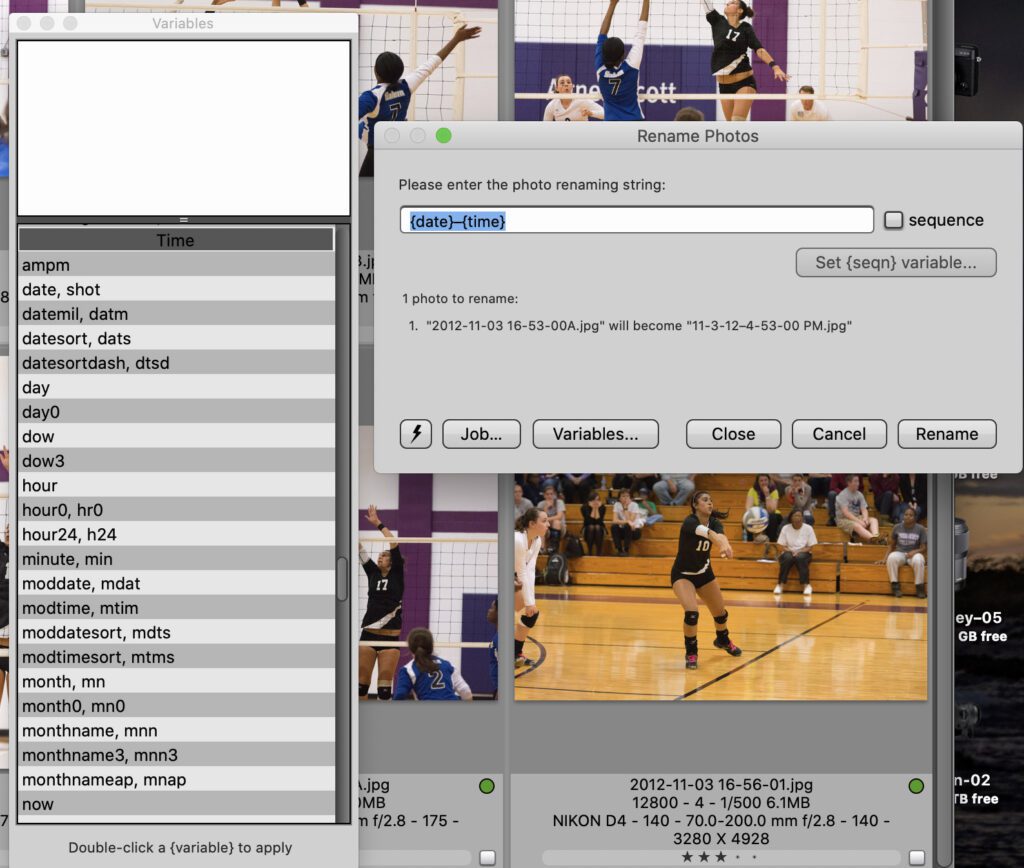
Your camera may use the same file names over and over after each format. I recommend using the Date+Time shot as the file name.
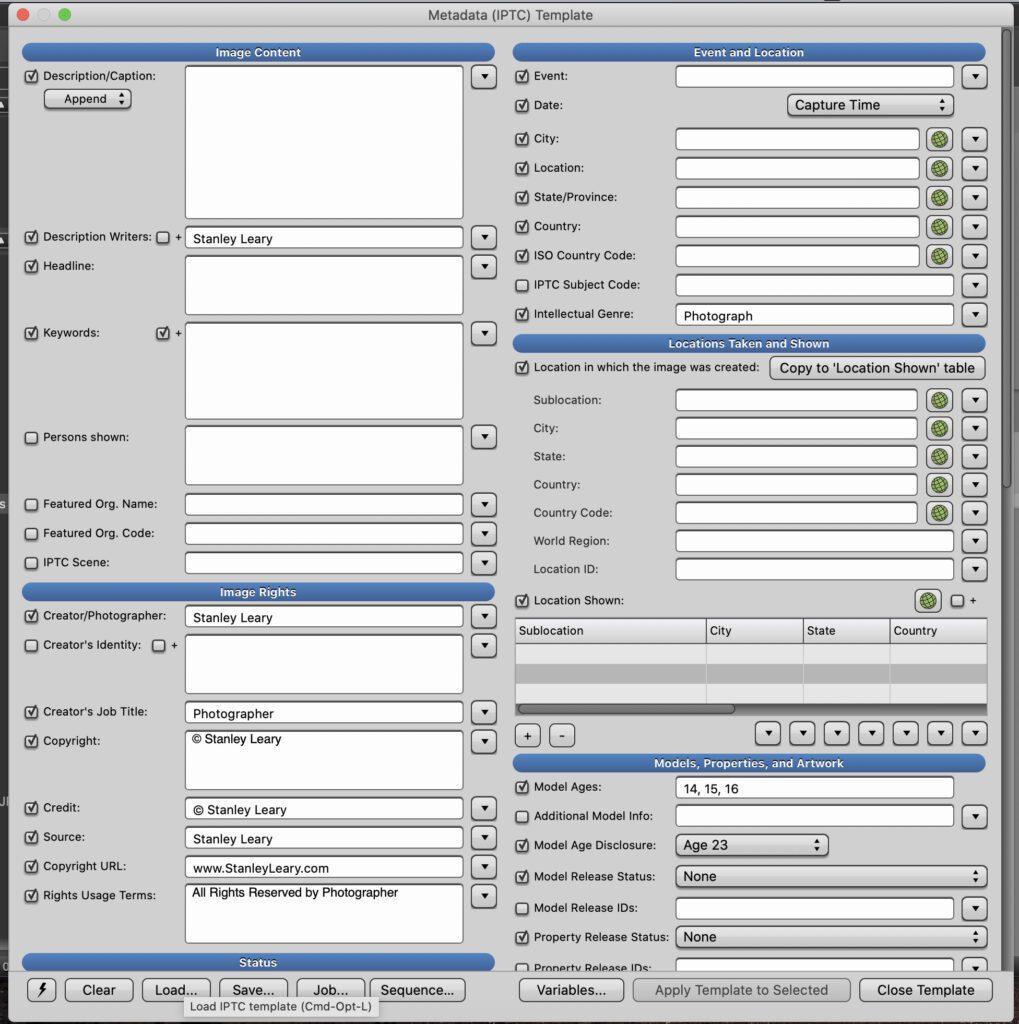
Go to the IPTC fields and fill in all the fields you will use for all your photos. Things like your name, address, that you are the creator and most crucial copyright information.
I recommend that you use this function under the location if you have a camera that can capture GPS. It helps when applying the IPTC. You can now know where you took all the photos. I click on the world, and it will look for the GPS data when it is green.
Once you have all the essential information, go and save this as a template. I have many templates because there are some places I regularly go where I need to change a few things. Say you always shoot college sports. Then that location, some of the captions, and even keywords will be the same. Maybe you shoot a wedding at the same venue. Save that venue.
If you have been saving templates, your first step is to open the template and then modify it with the specifics for the caption, keywords, or something else. If you always shoot at the same wedding venue, go in and put the Groom and Bride’s names in the caption.
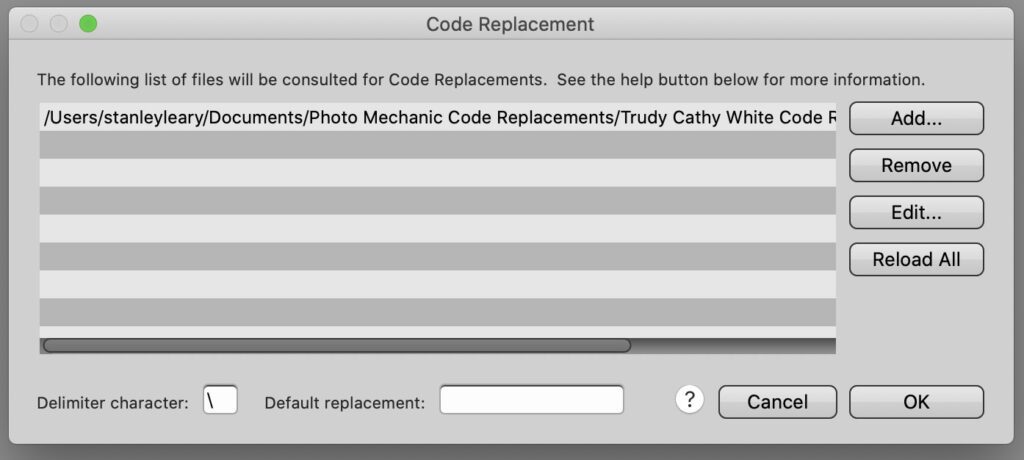
Under “Edit>Settings>Set Code Replacements,” you can select a TXT document. You have two columns. When you first type on the document, put in a shortcut like “bride” and then “TAB” and write the bride’s full name. Now imagine complicated spelling. This will save you a lot of time.
When you hit “RETURN,” the next row does the same thing by saying “groom.” In sports, shortcuts can be jersey numbers that will help you identify players and their positions in games.
Pay attention to the “Delimiter Character” left-hand corner of the Code Replacement screen. You put that symbol in front and behind the shortcut text. When you put the final symbol in, says the caption, the computer puts all that long text in. You can use a shortcut for a long sentence if you like. This is to save you time.

If you create a taxonomy of keywords using this outline without the numbering, this can be used in what Photo Mechanic refers to as a “Structured Keyword.” It will look like this below, minus the bullet points.
- North America
- United States
- Alabama
- Mexico
- Canada
- United States
You can use Microsoft Excel and create your list as well. A column and indent would be the B column and so on. If you save it as a TXT, it can be used as a Structured Keyword list.
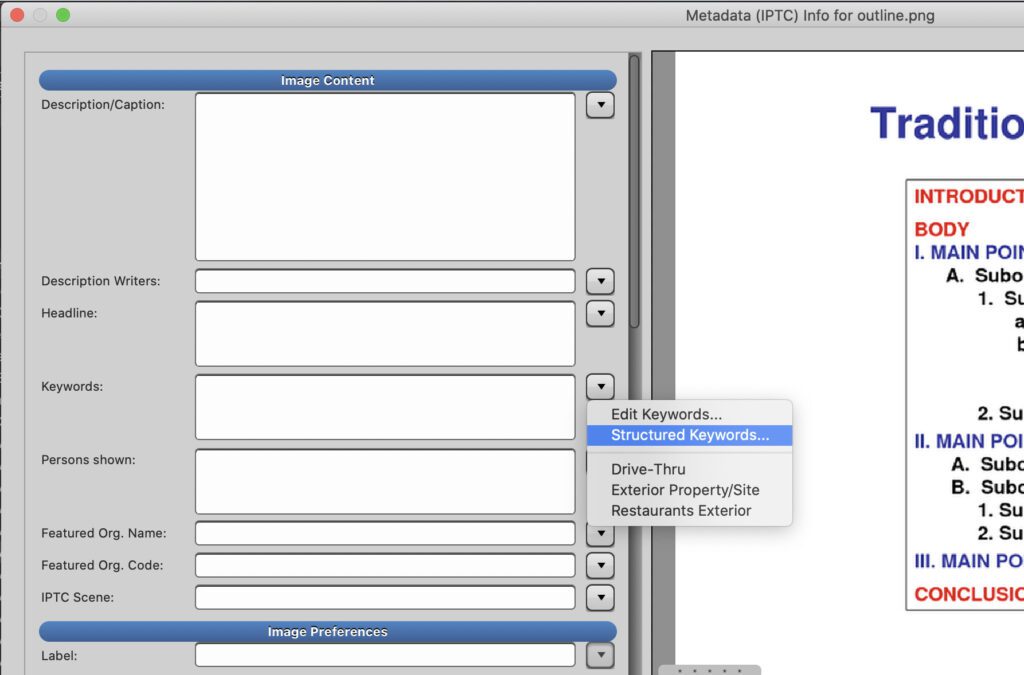
Click on the drop-down menu on the right of keywords in the IPTC screen. Pick the Structured Keywords.
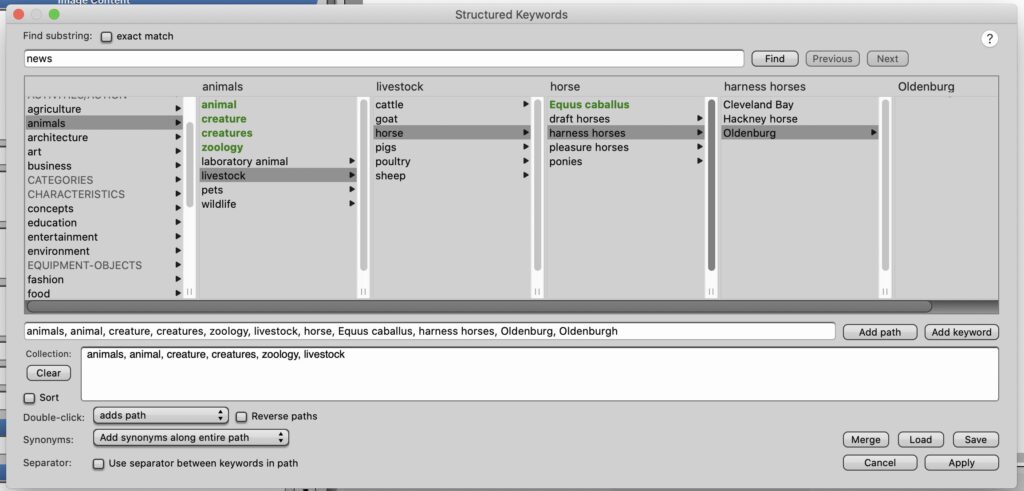
This is the default that comes with Photo Mechanic. I have written my own for different clients.
This lets you quickly add keywords to a photo.
When you have done this just once, the keywords will be under the Structured Keywords, so you don’t have to recreate it if you want to use the same or another one you created. It keeps those as another shortcut.
My last tip is that you can simultaneously apply any of these to multiple images.
Select all the images or selects and then CMD+I to bring up the IPTC. You change anything in this and then tell it to apply to your selection.
You can do the same thing by selecting images and CMD+M to rename all the photos you have chosen.
On average, going one image at a time can take about 5 minutes to write a caption telling us the Who, What, Where, When & How, as well as adding Keywords. But using code replacement, structured keywords, and applying those to multiples when you can–will save you an incredible time.
The last tip. Do this enough, and your speed will increase over time.

