Why Execution (Not Ideas) Will Bring You Success

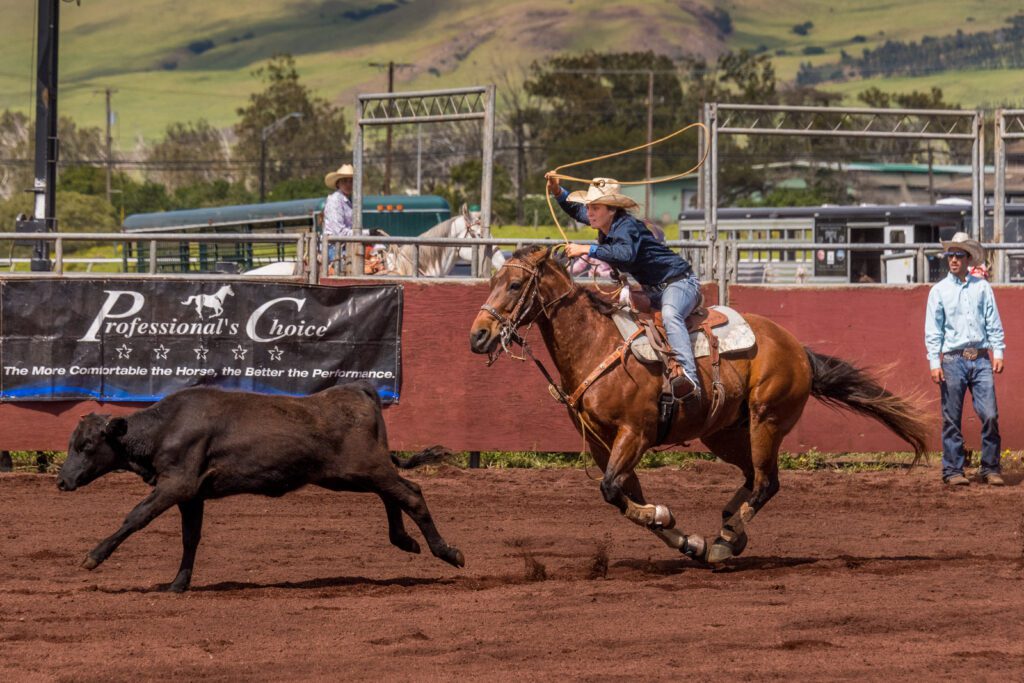
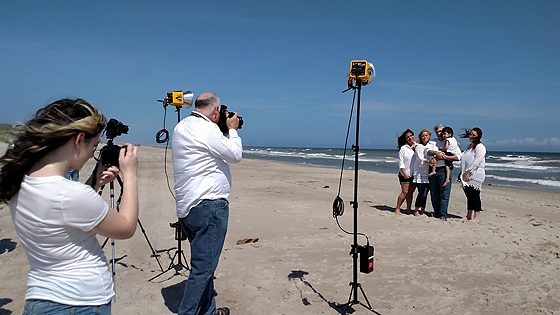
photo by: Dorie Griggs

You know that God has called you to do photography. You even have a great idea of using photography in a way that others have not thought about doing. It is a great idea.

Does this sound like you? Big, powerful ideas are everywhere, and the vast majority will go nowhere. So keeping your big picture in stealth mode will likely make no difference to your ultimate success.

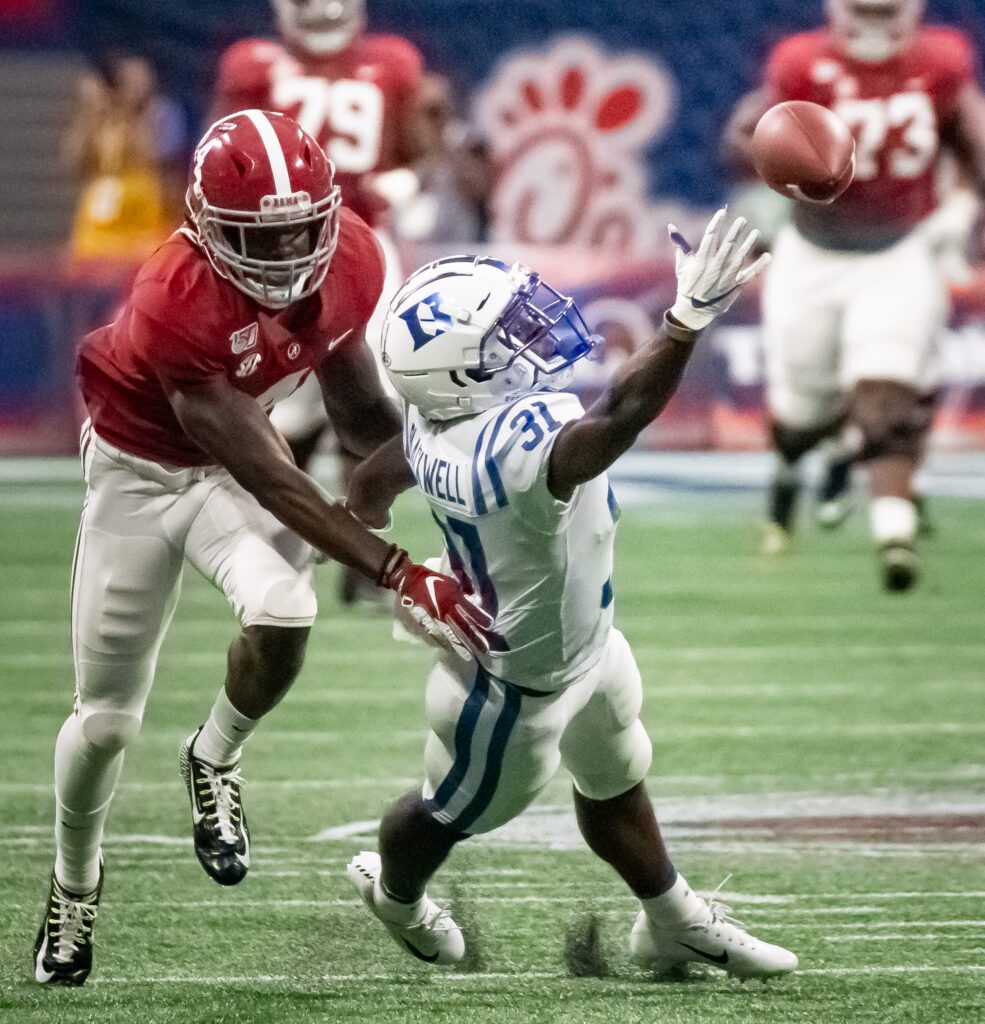
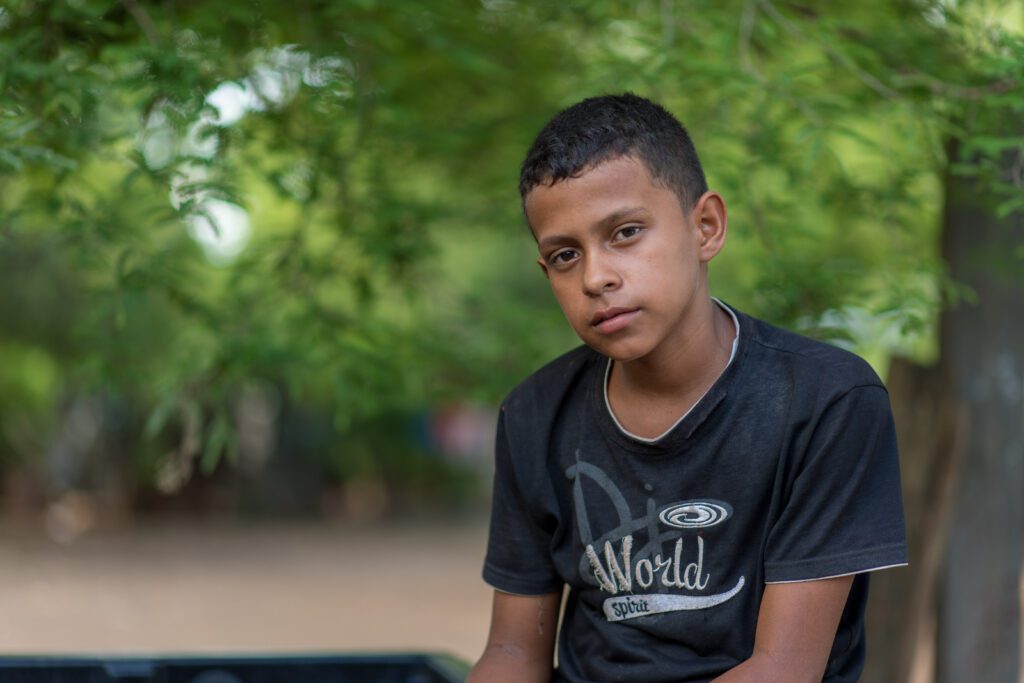
I realized long ago that people were lining up to talk to my mentor Don Rutledge about becoming a full-time missions photographer. I believe there are even more today wanting to use their photography as a way to serve on the mission field.

They want to use their photography for social justice issues and work with NGOs.

I have been teaching photographers how to make this all happen for years. I wrote one blog post, “How to become a humanitarian or missions photographer,” that continues to be read by those searching for how to make it happen.

While I have outlined the things that you must overcome to become a photographer, there still seems to be what I call the “Frozen Chosen” audience.

While there are a few meanings to “Frozen Chosen,” it refers to Christians who sit still in worship. They are lifeless. I am using it here to refer to those Christians who love listening to inspiring messages but never implement those messages into their lives.

Why people fail to act

I have a few reasons why it is so difficult for people to act.

Analysis paralysis. Many people let questions and doubts paralyze them. They believe they can’t start on a goal until they have all the answers to every “what if” scenario. However, no matter how long and hard you prepare, you will never have all the answers to the questions you ask.

Misunderstanding of Goal Setting. Many think setting goals and objectives is writing a list on paper. Goals are about making fundamental changes in your life. Plans are not about a one-time moment but something that changes you over time.

No Destination. I remember learning how to shoot a basketball. My teachers all said the same thing. You must look at the goal and picture the ball going through the net before you shoot. Your destination needs to be precise – something you can visualize and describe to others. Without such a clear view of what you want in life, you’ll be forever changing course and falling short of your potential.

You are distracted by too many goals. You only have so much time and resources, so you need to limit your efforts to that which will be the most significant Return On your Investment. You need to be focused. Yes, you can have more than one goal, but do your best to put your effort on one at a time. Once you accomplish it, move on to the next one.

Don’t seek help. Too many people do not understand that the things we desire most usually will require stuff we do not have to attain. We need mentors, coaches, and teachers to help us on our journey. Just like we often go to a bank to get a loan to buy things like a car or house, we go to people to get their help to achieve our goals.

https://www.youtube.com/watch?v=JZzZERmk05o

Boils down to Execution

I love this clip from Indian Jones where he must take that “Leaf of Faith” to achieve his goal.

Are you expecting the following steps to have no risk? Maybe that is your problem.

You see, there are usually two things that keep us from achieving our goals: 1) Time & 2) Money.

If you have the time and the money to make your dream a reality, then there is no need for a “Leap of Faith.” It is a no-brainer.

I believe God calls those without the resources to make it happen because he needs you to take that “Leap of Faith.”

Why would God call you to do something and not give you the Time and Money to execute it? Because then you could take all the glory.

Without God, I know I wouldn’t be doing this as a career. I know because I cannot explain any of my success as to my abilities. I was born with autism. I have Asperger’s Syndrome.

Autism – a mental condition present from early childhood, characterized by difficulty communicating and forming relationships with other people and using language and abstract concepts.

I cannot believe that God called me, a person with a communications deficiency, to be a professional communicator. I can attest that it has been an arduous journey, but I can also say God made it happen.

Will you take that “Leap of Faith” today?

Cheap and powerful off camera flashes

Nikon D5, Sigma 24-105mm f/4 DG OS HSM Art, Neewer 433MHz Wireless 16 Channel, Neewer T850,

I had a lot of fun capturing the brand new Chick-fil-A food truck tested in Athens, Georgia. It was parked in the restaurant parking lot to show their customers, hoping they would book the car for an event.

This shot was taken at sunset, with the sun setting behind the truck. To show the truck, I put one flash on the side, lying on top of some bushes, to light up the side of the truck.

My assistant pointed the second flash on the front of the truck just off to the camera’s left.

I love using the Neewer T850 with the radio remote. I can control the power output from the radio remote. I just set each flash to a different channel, and then I can vary the power from the camera—no need to walk over to the flash to make a change.

Now I have the more expensive Nikon SB-900 but have found it challenging to use in manual mode and change the power from the camera of several flashes. Also, if you barely move the camera, shooting in TTL can change the moment and how it puts out light. Having the lights set to power gives you more consistent exposures than TTL.

SWPJC – Don’t wait till Next Year!

Dave Black, former speaker at SWPJC

SWPJC March 10 – 12 and Student Workshop 9 – 10

“Next Year” is the common thing I always hear from people when I ask them if they are going to Southwestern Photojournalism Conference this year.

This is the 25th annual meeting of the conference. The conference has changed through the years to reflect the industry as best we can.

In 2007 and 2008, the economy was a brutal hit, and our numbers suffered because everyone’s budgets were hurting.

We added a Student Workshop to the front end of the conference for students to get some one-on-one time with our speakers. This has proven to be very helpful for students to get their work reviewed and talk to the industry leaders.

The industry has been hit hard. Last year Canon and Nikon Sales were down close to 50%. All this doom and gloom doesn’t mean there is no longer a need for photographers.

At the same time, the industry is changing the number of pictures taken last year. That adds up to more than 14 trillion photos annually (14,600,000,000,000). Much more conservatively, if only one billion people have cameras or phones and take less than three photos per day/1,000 pictures yearly, that’s still 1 trillion photos captured annually.

The need for those who know more than just how to push the button is in great demand. People know that with all these photos being created every moment for their “Brand” to be seen, it must break through with images that “Capture the Audience.”

This year’s keynote speaker was Garrett Hubbard [left] at a previous SWPJC.

I know I go to the conference to meet people I can hire throughout the year as projects pop up for my clients. Last year I hired many photographers for projects and continued to look for more photographers. This is where I go to find great shooters and those who see this as a calling.

Esther Havens, past speaker.

Don’t wait for next year anymore. Commit to meeting with other photographers who see this as a calling. Come to Fort Worth this year and connect. Listen to some of the best in the industry tell you where they see things going for the professional photographer.

Go to the website to learn more about SWPJC.org. Then go and book your transportation and hotel. I hope to see you there.

Gary Fong with the Chick-fil-A Cow.

Don’t resort to Next Year when there might not be a Next Year conference. Signup and come while we are still doing SWPJC.

Monday morning devotion–Photographer’s Humility

Nikon D5, Sigma 24-105mm f/4 DG OS HSM Art, ISO 3600, ƒ/5.6, 1/100

WHY?

While teaching the students of the School of Photography at the University of the Nations campus in Kona, Hawaii, I had them tell me WHY they made a photograph.

Asking this question made them quickly realize that they were making a portrait, for example, to capture a person’s personality and communicate it best they could.

Nikon D5, Nikon 85mm ƒ/1.8G, ISO 100, ƒ/4, 1/200

Portrait photography is an excellent example to me, when done right, of how we as Christians should be living our lives.

Philippins 2:1-11

Imitating Christ’s Humility

2 Therefore if you have any encouragement from being united with Christ, if any comfort from his love, if any common sharing in the Spirit, if any tenderness and compassion, 2 then make my joy complete by being like-minded, having the same love, being one in spirit and of one mind. 3 Do nothing out of selfish ambition or vain conceit. Rather, in humility value others above yourselves, 4 not looking to your own interests but each of you to the interests of the others.

5 In your relationships with one another, have the same mindset as Christ Jesus:

6 Who, being in very nature[a] God,

    did not consider equality with God something to be used to his own advantage;

7 rather, he made himself nothing

    by taking the very nature[b] of a servant,

    being made in human likeness.

8 And being found in appearance as a man,

    he humbled himself

    by becoming obedient to death—

        even death on a cross!

9 Therefore God exalted him to the highest place

    and gave him the name that is above every name,

10 that at the name of Jesus every knee should bow,

    in heaven and on earth and under the earth,

11 and every tongue acknowledge that Jesus Christ is Lord,

    to the glory of God the Father.

In portrait photography, you do everything possible to get to know the person. After getting to know the person, you work out a way using posing, lighting, composition and through dialogue with the person, pull out of them that brief moment that captures them in such a way that their closest friends feel like you captured the best of their friend.

You, the photographer, must diminish for the subject to be celebrated. When well-done, people see the person, not all the photography stuff it took to make the photo.

C.S. Lewis writes, in Mere Christianity, that pride is the “anti-God” state, the position in which the ego and the self are directly opposed to God: “Unchastity, anger, greed, drunkenness, and all that, are mere fleabites in comparison: it was through Pride that the devil became the devil: Pride leads to every other vice: it is the complete anti-God state of mind.” In contrast, Lewis states that, in Christian moral teaching, the opposite of pride is humility and, in his famous phrase, “Humility is not thinking less of yourself, but thinking of yourself less.” 

People seek you out not because of your photographic skill when you do a great job as a portrait photographer. They seek you out because of how good your subjects look.

“True humility” is distinctly different from “false humility,” which consists of deprecating one’s sanctity, gifts, talents, and accomplishments to receive praise from others. In this context, legitimate humility comprises the following behaviors and attitudes:

  • Submitting to God and legitimate authority
  • Recognizing virtues and talents that others possess, particularly those that surpass one’s own, and giving due honor and, when required, obedience
  • Recognizing the limits of one’s skills, ability, or authority; and, not reaching for what is beyond one’s grasp
Togo, West Africa [Nikon D5, Nikon 85mm ƒ/1.8G, ISO 100, ƒ/4, 1/200]

Moments like this of this little child in Togo remind me that something greater than me allows these moments to happen. I did not speak her language and did not get to know her as I usually would do for a portrait. However, I believe God worked with us to allow this to happen.

I must acknowledge that most of my portraits happen for reasons I cannot always explain. While I did everything technically to get the photo, the expression and moment itself are always beyond my control. I believe that this is where God takes control.

Humble yourselves, therefore, under God’s mighty hand, that he may lift you up in due time.

– 1 Peter 5:6

Humility isn’t about being a doormat; it’s about being a doorway–a doorway through which others enter God’s presence and power. By focusing on building others up and help­ing others connect with God, we show them the love of God, who desires the best for them.

The #1 Key to Great Photos

Nikon D5, Nikon 28-300mm f/3.5-5.6G ED VR, ISO 1100, ƒ/5.6, 1/4000

Many things go into the making of a photograph. However, only one will indeed be the key to a great picture.

Exposure Triangle

The exposure triangle is a common way of associating the three variables that determine the exposure of a photograph: aperture, shutter speed, and ISO. One must balance all three of these to achieve the desired result, an adjustment of one requiring adjustments of at least one of the others.

If you execute this flawlessly, you still can have a photo that lacks any connection with the audience.

Principles of Composition

In photography, the composition is the arrangement of parts of a scene to form a particular visual outcome. Design can also be about picking a viewpoint to create a pleasing visual effect. In practical terms, the photographer uses both “arrangement” and “choice of viewpoint.” 

In general, composition aims to direct the viewer to see the point of the photograph. The “point” may be an aesthetically pleasing scene or something containing a more complex story. Even a visually disturbing or discordant outcome is the result of efforts in composition. 

The finer points of a particular composition rely on a range of “photographic elements” and the “principles of photographic art” for using them.

When you execute the composition and Exposure Triangle rules together, your photos will look even better but still fall short of connecting with the audience without one more thing.

Previsualization

The greatest proponent of previsualization was Ansel Adams, and it was he who perhaps summed it up best with a single sentence, “You don’t take a photograph; you make it.” Great photographs require you to work out everything that goes into making that photograph before you take it. So how do we mere mortals go about previsualizing our shots?

The first book Ansel Adams wrote started chapter one by explaining this concept to people.

While my work cannot stand up to Ansel’s, I still believe there is a better way to describe this process of previsualization by asking a simple question.

WHY take the photo?

For example, Ansel Adams assumed no one could look at Half Dome and not be moved. Half Dome is a granite dome at the eastern end of Yosemite Valley in Yosemite National Park, California.

When you ask yourself, “Why am I taking this photo” you will get to the core of the element that will help you connect with your audience. This is the #1 Key to Great Photograph.

I love the two words “so that” in the Bible.

“So that” is used as a subordinate clause to show purpose or to give an explanation. It indicates an action producing an intended result or a cause having an effect. In Sentence 1, “so that” in Sentence 2, the first sentence is the action/cause, and the second is the intended result/effect. In the format “So that” Sentence 1, Sentence 2, the first subject-verb clause is the intended result/effect, and the second is the action/cause.

I push my shutter on the camera to inform, imagine, influence, meet social expectations, and express feelings.

Nikon D5, Sigma TC-2001 2x, Sigma 120-300mm ƒ/2.8 DG OS HSM | S, ISO 5600, ƒ/5.6, 1/4000

Show & Tell

I believe that photos alone cannot tell a story. I think, at best, they can capture a slice or a moment. People need words to help understand what is going on in the photograph.

We learned this concept in Kindergarten when we had a “Show & Tell” day at school. The objects your classmates brought into school needed them to tell us why they got them to school. Without their words, we didn’t understand.

Now the best part of “Show & Tell” was that the visuals gave us a great deal of information that the words alone couldn’t do as well and briefly did as the visual.

Here is the formula I think works well for photos that communicate:

Ask Why

|

Previsualize

|

Take Photo

|

Add Words

Ask yourself why I want to take this photograph. For example, how is the situation affecting me, and what do I want the audience to understand that I am experiencing?

Once you know the answer to WHY you must use all your photographic skills to best capture this moment, this “previsualization” is understanding how the best shutter speed, aperture, ISO, composition, and lighting, all controlled by me, can be used to capture what I want to communicate.

I then execute the previsualization and make the photo.

Last we know that the photo by itself will make the audience ask a question. What is going on here? They will need more information to be sure the message is not left up for interpretation. You will then need to marry the photograph with words to complete the communication process.

Example

The protesters are all lying down just like George Floyd did when he lost his life to a cop on his neck. Gwendolyn Dukes, Richard Bonito, and their friends organized a peaceful protest on behalf of George Floyd at the corner of King Road and Hwy 92 in Roswell, Georgia, on June 2, 2020. Dukes said, “Action speaks louder than words,” as to why she and her friends wanted to get out and protest. She said, “We are not mad at the police; we are mad at the system.” They want to see changes for better policing and the more considerable racism in our society and encourage their friends to get out and vote. While Richard Bonito voted in the last presidential election, most in the crowd are closer to Gwendolyn’s age, and this will be their first election.

I think this is a compelling photo, but I want to know more. Now compare this same photo to one using it with words:

Libby Segar leads the group in chanting. She is holding the “Dear White People ..” sign. Gwendolyn Dukes, Richard Benito, and their friends organized a peaceful protest on behalf of George Floyd at the corner of King Road and Hwy 92 in Roswell, Georgia, on June 2, 2020. Dukes said, “Action speaks louder than words,” as to why she and her friends wanted to get out and protest. She said, “We are not mad at the police; we are mad at the system.” They want to see changes for better policing and the larger racism in our society and encourage their friends to get out and vote. While Richard Benito voted in the last presidential election, most in the crowd are closer to Gwendolyn’s age, and this will be their first election. [NIKON D5, 14.0-24.0 mm f/2.8, Mode = Aperture Priority, ISO 450, 1/1000, ƒ/8, (35mm = 14)]

Together with the words, the picture completes the communication process.

Now I am not saying put words on photos always. Captions under photos work just as well.

Use the caption to tell the reader something new. When readers look at the photo, they’re usually confronted with some form of emotion and information (based on what they see in the picture). The caption, in turn, should provide the reader with a piece of information they were unaware of from simply looking at the photo. In short, the caption should teach the reader something about the image.

Now go forth and make photos!

Shooting Gilley’s of Dallas Texas with the Nikon D5

Last night I took in Gilley’s of Dallas with a large group. At the end of the night, I was really pleased with my ability to shoot everything without a flash.

The reason is the Nikon D5 has such a wide range of ISO. ISO 100–104200 can also be pushed to 3 million ISO.

Gilley’s [NIKON D5, 14.0-24.0 mm f/2.8, Mode = Aperture Priority, ISO 4500, 1/250, ƒ/3.2, (35mm = 14)]

Since there was a lot of line dancing, I wanted to crank the shutter speed to a minimum of 1/250. The stage lighting was lighting the people in front, and then the rest of the place was incredibly dark in comparison. However, the dynamic range of the Nikon D5 did a great job. I could pull out all the shadows in Adobe Lightroom from the RAW images.

Gilley’s [NIKON D5, 35.0 mm f/1.4, Mode = Aperture Priority, ISO 102400, 1/640, ƒ/2.8, (35mm = 35)]

Now when the people jumped up on the mechanical bull, I needed to capture this without everyone being blurred. No problem. I set the camera to my Sports Settings.

These are the settings that I use on my Nikon D5 for shooting most all sports action. Nikon has made it pleasant to allow photographers to save these settings, so they do not have to remember every little setting they like to use for a style of shooting.

If you go to Menu and under the camera, the icon picks the first item, “Shooting menu bank.” I have chosen B, which is my sports menu.

If you toggle into the “Shooting menu bank,” you can rename those settings. Once you choose one of these settings, everything you do to change the menu will be saved in that menu bank. I recommend trying all my settings and then tweaking them to your preferences.

When shooting sports, it is prevalent for the lighting conditions to change instantly. While the football player runs toward you, they may go from shade into direct sunlight. For this reason, I let the camera do some of my thinking.

Go to the camera icon and look for “ISO sensitivity settings.” Select this, and you will then see this menu:

I turn on the “Auto ISO sensitivity control.” Then I set the minimum shutter speed to 1/4000. You could pick something else. I used to shoot at 1/2000. The ISO setting is what you see in the smaller window below the menu. I set this to ISO 100 and the “Maximum sensitivity” to ISO 102400.

While I am in Aperture Mode shooting, the camera will always pick 1/4000 shutter speed. If in sunlight I am at ƒ/4, the shutter speed may go as high as 1/8000 at ISO 100, but as the scene changes and the athlete is now in the shade, the camera will automatically drop to 1/4000 @ ƒ/4, and then change also the ISO up until I can still shoot at 1/4000.

The only time the shutter speed will dip below 1/4000 is if the ISO peaks out at 102400.  If my aperture is wide open, the camera is doing everything I would have done manually, but faster than I could ever adjust the camera. That is how you get more shots than the guy next to you.

Gilley’s [NIKON D5, 35.0 mm f/1.4, Mode = Aperture Priority, ISO 4500, 1/100, ƒ/1.4, (35mm = 35)]

Here I am letting BOKEH create the mood for the nightclub. Shooting at ƒ/1.4, let that background go to a silky smooth out of focus while directing your attention to the man in the foreground.

I love the Nikon D5 because it lets me capture anything I can see with my naked eye.

Using a flash to spice up the environmental portrait

Nikon D5, Sigma 24-105mm f/4 DG OS HSM Art, ISO 125, ƒ/14, 1/250

The last assignment I gave the class was to do an environmental photo where their flash will improve the situation. Here is the example we did as a class. I took them here and we ended up with this photo of the school leader Dennis Fahringer.

Nikon D5, Sigma 24-105mm f/4 DG OS HSM Art, ISO 100, ƒ/9, 1/160

I took this photo first as a reference for the before and after. I also made this second photo to show how you would correct this without a flash.

Nikon D5, Sigma 24-105mm f/4 DG OS HSM Art, ISO 400, ƒ/9, 1/100

Now throughout the time we were doing this photo I was explaining to the class the WHY.

Now here is the how on the above photo with a diagram for you.

Dennis Fahringer says, “My wife, Jo, and I have served in Youth With a Mission since 1977.”

Throughout all this time Dennis has been teaching photography to students to equip them to use photography in missions or the secular. For this photo I wanted to show that his students go out into the world with Youth With A Mission to serve.

I felt like the flags of the world behind him capture the missions to the world and the camera helps to show that he is involved in photography.

This week every assignment the students are having to tell me why they took a photo. They must create a caption for every photo even if it is in the studio.

Ideal lighting for PR Headshots

Nikon D5, Nikon 85mm ƒ/1.8G, ISO 100, ƒ/5.6, 1/200, 4–Alienbees B1600, Pocketwizards to trigger flashes

I am teaching a lighting class in Kona, Hawaii, with the Youth With A Mission School of Photography class.

This is one of the lighting exercises I do each year. This is teaching the 3:1 Lighting Ratio. I showed the class the final photo and then walked them back through how to get this lighting. This is all done with a White Background. See below for the same example but with a Black Background.

Here is the setup that I used above. Here you can see one of the students later with the design we were using.

While we have all the lights in generally the places they will be at the end, I turn them all off except the leading light. The main light is 45º to the subject’s left and right of the camera and closest to the topic. Then I took a light reading and also set the white balance. The aperture was set to ƒ/5.6. Then I took this photo.

Nikon D5, Nikon 85mm ƒ/1.8G, ISO 100, ƒ/5.6, 1/200

Then we turned this light off and turned the fill light on. This is the one closest to the camera. Ideally, it would be right behind the camera, but I put it a little off to the side so I am not blocking the light while operating the camera.

I set the light to be one stop less than the leading light. The light was developed to give me ƒ/4, but I kept the camera set to ƒ/5.6, which meant the photo would be underexposed by one stop.

Here is this photo with the same settings as the leading light.

Next, we turned both lights on and double-checked the exposure with a light meter which still was ƒ/5.6. It might have been a 1/10th of a stop brighter, but we kept the camera set to ƒ/5.6.

Here is the combined light photo.

Lastly, I turned two more lights on that are hitting the background and trying to get an even light across. I made this light just one stop brighter than the leading light of ƒ/5.6, so this light was set to ƒ/8.  Here is this photo.

I hope you enjoyed this step-by-step tutorial on how to shoot a 3:1 Lighting Ratio portrait.


This is the same exercise using a black background. Now, you need to understand that the 3:1 lighting ratio allows this photo to be used in many places. The one thing is where it looks the best in a Newspaper compared to another lighting which can make those shadows lose all detail and go pitch black. This allows you to see some modeling of the light to highlight the cheekbones and contours of the face without overdoing it and creating a photo with too much contrast.

Nikon D4, Nikon 85mm ƒ/1.8G, ISO 100, ƒ/5, 1/200

Here is the setup


Assignment Description:
3:1 lighting ratio.  This photo is classic lighting.

Items:

Octobox closest to subject
This light is your main light. Get a light reading with just this first. The light should be 45 degrees off the axis of the camera and 45 degrees above the subjects eyes.

Subject
Your subject should have the main light lighting only part of the face and the shadows should be just a little to show the 3:1 ratio.

(D)SLR
Choose the lowest ISO.  Ideally on full-frame camera a lens close to 85mm and on cropped sensor a 50mm. Set your shutter speed to the sync speed for your camera [in your camera manual] or slower. My camera was 1/250 but I shot at a slower speed of 1/200.

Octobox behind the camera
This is your fill light and get just a reading of this 2nd.  Be sure it is 1/2 the power (1 f/stop less) than the main light. After this is done get a 3rd light reading of both lights which will be the setting for the camera. It can be level with the eyes, but you may have to move up with glasses to avoid glare.

First set the main light and here is what that will look like:


Due to using such a giant softbox, the shadows are not as severe as in our first assignment using the grid light. Some light bounces off a white wall a few feet to the model’s left or right of the camera position.

Turning the leading light off after finding out your setting, you need to take a reading and get the fill light to 1 stop less than the main light. The leading light was ƒ/4, so the fill light should read ƒ/2.8.

This is what it looks like without the leading light on. You can see a little darker, but no accurate face shaping as the leading light is 45º to the side.

SOP 1 Studio Shots


When you combine them, you get the first photo of the model we started with.

The leading light is twice as bright as the fill light. So to show this using math, we would say the leading light has a value of 2, and the fill light has the value of 1.

Where both the main and fill light fall on the face is getting the combined value of the 2 + 1 = 3. However, in the shadows, only the fill light is hitting those; therefore, the discount is only 1.

So the bright areas get three, and the shadows 1 give you a 3:1 lighting ratio.

Now I showed the students how they could add a background light. I put a blue gel over it to show them they can also color the background.

SOP 1 Studio Shots

Hawaii High School State Rodeo at The Parker Ranch

Nikon D5, Nikon 28-300mm f/3.5-5.6G ED VR, ISO 560, ƒ/4.5, 1/4000

Today I had a lot of fun shooting the Hawaii High School Rodeo at Parker Ranch Arena in Waimea on the Big Island of Hawaii.

It was fun because I brought the camera and lens that let me get the action shots I wanted. I didn’t bring my long glass, but rather what I call my go-to lens for capturing just about anything. That lens is the Nikon 28-300mm f/3.5-5.6G ED VR. In this first photo, I shot it at the focal length of 58mm. I wanted to capture the girl doing barrel racing but also capture the Parker Ranch sign.

Rodeo Hawaii High School State Finals The Big Island [Nikon D5, Nikon 28-300mm f/3.5-5.6G ED VR, ISO 500, ƒ/4.8, 1/4000]

I was introduced to Cowboy art by Don Rutledge. We went to the Cowboy museum in Oklahoma City, where I saw the work of Remington and Russell for the first time. They not only painted but did sculptures.

Rodeo Hawaii High School State Finals The Big Island Bullriding [Nikon D5, Nikon 28-300mm f/3.5-5.6G ED VR, ISO 1250, ƒ/5.6, 1/4000]

With the help of Remington and Russell’s work, Don taught me that expression makes the photo. The expressions of the animals and the people in the picture frame.

Hawaii High School State Finals at the Parker Ranch on The Big Island [Nikon D5, Nikon 28-300mm f/3.5-5.6G ED VR, ISO 1250, ƒ/5.6, 1/4000]

What I love about Rodeos is that the cowgirls and cowboys must work as a team with animals. The more they know about their animal and how it likes to get clues from the people on what to do, the better the show.

Rodeo Hawaii High School State Finals The Big Island [Nikon D5, Nikon 28-300mm f/3.5-5.6G ED VR, ISO 800, ƒ/5.6, 1/4000]

I set up the Nikon D5 as I do for all sports shoots. Here is the blog post that goes into a lot of detail about all the settings.

Rodeo Hawaii High School State Finals The Big Island Bullriding [Nikon D5, Nikon 28-300mm f/3.5-5.6G ED VR, ISO 1000, ƒ/5.6, 1/4000]

Now to me, the crazy sport is bull riding. These bulls weigh as much as a car and can crush you just as quickly as a car. That is why the sport is just about 8 seconds long. If you can ride for 8 seconds, you compete.

Rodeo Hawaii High School State Finals The Big Island Bull-riding [Nikon D5, Nikon 28-300mm f/3.5-5.6G ED VR, ISO 1400, ƒ/5.6, 1/4000]

Most of the time, I see the bull riders being kicked off the bull in less than 8 seconds.

Rodeo Hawaii High School State Finals The Big Island Girl’s Cutting [Nikon D5, Nikon 28-300mm f/3.5-5.6G ED VR, ISO 2200, ƒ/8, 1/4000]

The cowgirls have Girl’s Cutting, where they are to lasso the cow. Two of the cowgirls did so in less than 4 seconds. WOW! I was impressed at these high school girls being so good.

Hawaii High School State Finals at the Parker Ranch on The Big Island [Nikon D5, Nikon 28-300mm f/3.5-5.6G ED VR, ISO 1800, ƒ/5.6, 1/4000]

The cowboys have a similar event where they lasso the cow, and then, with a teammate, they wrestle the cow to the ground and tie their feet. This is a skill they use in the fields to capture the cows to give the shots, brand them, and do other things to take care of their herd.

Hawaii High School State Finals at the Parker Ranch on The Big Island [Nikon D5, Nikon 85mm ƒ/1.8G, ISO 100, ƒ/3.5, 1/1600]

It was just fun to see the high school kids having so much fun and learning a skill while playing games.

Rodeo Hawaii High School State Finals The Big Island [Nikon D5, Nikon 85mm ƒ/1.8G, ISO 100, ƒ/1.8, 1/8000]

I was always greeted with a big smile when asking the cowgirls if I could take a picture of them with their horses. They were proud of their horses and the bond they had built with them.

Rodeo Hawaii High School State Finals The Big Island [Nikon D5, Nikon 85mm ƒ/1.8G, ISO 100, ƒ/1.8, 1/1250]

I cannot recommend enough finding a rodeo near you and spending the time to capture the action with your camera.

Be an Anticipator and not a Procrastinator

[NIKON D4, 120.0-300.0 mm f/2.8, Mode = Aperture Priority, ISO 12800, 1/1250, ƒ/5.6, (35mm = 270)

Sydney Rhame [Nikon D750, Nikon 85mm ƒ/1.8G, ISO 100, ƒ/4, 1/200]

Meet recording artist Sydney Rhame. She was a contestant on The Voice a couple of years ago. Here she is singing “Photograph.” By the time Sydney had gotten on the voice, she had already been performing for many years. She started singing at age six and performing at age eight.

Recording artists are practicing all the time. They work hard for years for their “break.”

I spent some time setting up for Sydney. I had not only set up the studio like this for her to make some headshots, but I had also scouted around to get colors to match her clothing.

Sydney Rhame [Nikon D4, Sigma 120-300mm ƒ/2.8 DG OS HSM | S, ISO 320, ƒ/2.8, 1/640]

I found some fall foliage that I could use in the background to compliment her hair.

Alabama wide receiver Jerry Jeudy (4) breaks up an interception attempt by Duke cornerback Josh Blackwell (31) in the Chick-fil-A Kickoff Game at Mercedes Benz Stadium in Atlanta, Ga., on Saturday August 31, 2019. [NIKON D5, 120.0-300.0 mm f/2.8, Mode = Aperture Priority, ISO 22800, 1/4000, ƒ/5.6, (35mm = 380)]

To get to the big games like the Chick-fil-A Kickoff these players put in many practice days and games spanning years of preparation.

Most Folks

I am finding that more people procrastinate in their work than anticipators. People wait until they are near a deadline to start working on a project.

In school, teachers have projects they tell us about long before they are due, but most of us wait until the night before. After we have done a few of these and found out that doesn’t leave us enough time, we may start it a little sooner–like a day or two earlier.

Word vs Photograph

There has been a healthy tension between writers and photographers throughout my career. You will hear photographers saying to writers that I can’t call the subject and change the ƒ-stop.

A writer can more easily make changes in their part of a project at the last second, whereas a photographer has to reshoot to make a change.

When I started, I would pick up a small camera bag and run out the door for the newspaper. Today I realize that the more I plan and prepare for a photo shoot, the better the results.

Today I ask a lot more questions when I get a project. Why do you need these photos or videos? What are you looking for from the project? What is it that the audience to do once they have seen the project?

The questions go on more than just these few questions. Once I am comfortable with their direction and style, I can plan what gear I need for the shoot. Sometimes this requires me to rent equipment.

For most of my projects today, travel is involved. I must book flights, hotels, rental cars, assistants, and more.

Teenager in San Benito, Nicaragua [Nikon D5, Nikon 85mm ƒ/1.8G, ISO 100, ƒ/1.8, 1/160]

Advantage of Anticipating

When you anticipate what I must do for assignments, there is a lot of dialogue with a client. Much of this is in written form between the client and me. The great thing about this process is that I have a paper trail showing how I was proactive and got their approval before executing anything.

When you talk through a treatment with a client in as much detail as possible when the assignment is given, you give yourself and the client the advantage of keeping the costs down and pushing the quality up.

Since I am working in an artistic field for a career, the one thing that keeps you receiving a paycheck is being in demand. Believe it or not but the busiest photographers I know are the ones who are Anticipators and not Procrastinators.

Some things you can do that are disciplines of an Anticipator:

  • Going to clients with project ideas
  • Responding quickly to phone calls, emails, and texts
  • Asking questions when a client gives you a project–Immediately and not closer to the deadline
  • Delivering the photos quickly–Photos processed for the client without quality suffering
  • Creating estimates and invoices quickly
  • Raising concerns and issues before the client realizes a problem–While there are some things you cannot anticipate, you are always trying to take ownership as if the success or failure of this project can make the client be super successful or put them out of business

They say if you want something done, ask a busy person, even though this idea is somewhat paradoxical. 

The reason is that people with hectic schedules have, by necessity, gotten good at realistically estimating how long things take. The interesting thing is once you know someone like this, you are prone to go to them to help you. The one thing you hope never happens is that they say no. They will say no because they know if they can deliver your request or not.

If you find yourself busy and having to turn down people occasionally, it is a good sign that you are most likely an Anticipator. However, if you are desperately trying to find work, you might be a Procrastinator.

How to turn yourself from a Procrastinator to an Anticipator

One of the best things I learned at Georgia Tech working on the communications staff was from our art directors. They had reversed engineered the timeline for producing print projects like view books and magazines.

I would be part of the meetings with the clients going over new projects. The art director then took a few minutes and walked through the deadlines, starting backward.

When do you need this project? Then they would start with that date and say, ” Well, the printer needs two weeks from when they have it to turn it around without any rush fees. Before this, the graphic artist will need two weeks to lay out the piece and then have you sign off on it. This includes two reviews. By the way, your review time puts the project on hold. So if you take 24 hours to approve or make changes, that is how much the project is delayed. If you take a week to support it, we need to move up the date for you to get materials to us.

Before the graphic artist can start work, the writer and photographers must create their content. The good news is often that photography and writing can be done simultaneously.  They both need two to three weeks. For them to stay on schedule, the subjects they need to work with must be available, or that also impacts the program.

Based on this, we need six to eight weeks to produce your project. When working with most new clients, we were often only three to four weeks from their deadlines. Most of the time, we had to move their deadlines out to make things go faster usually meant rush fees from printers and hiring more writers, photographers, and graphic designers to tag team.

The question you must know the answer to for any project is how long do you need to produce your very best portfolio quality of work?

Anticipators are people who are gifted at time management, know how to get the best quality of work, and understand the time they need to make it happen. They are also good at executing their plans and producing quality work, which creates a demand that creates an even higher order because they are known for being busy.