By definition a Child Prodigy is:
A child prodigy is someone who, at an early age, develops one or more skills at a level far beyond the norm for their age.[1] A prodigy has to be a child, or at least younger than 18 years, who is performing at the level of a highly trained adult in a very demanding field of endeavour.
Here is a formal list of child prodigies and as you can see there are no photographers. This past week I had some time to hang out with Dave Black. It was Dave that made this observation about there are no child prodigies in photography.
Why no prodigies?
Photography has been around now for two hundred years and you would think that if it were possible that we would have a prodigy by now.
While I do not know exactly why there are none I do have my hypothesis. Why even care if there are any prodigies? I believe the answer is that this is a learned field and that even if you have an artistic eye you still need to have some training to succeed.
No Degree Required
Photography does not require a degree or certification to practice. If you own a camera you can hang your shingle out as a professional photographer.
Many professionals have tried to create certificate programs to help them in their business. It doesn’t work, because of one simple problem. People will look at your work and not your degree to hire you.
We look no further back in history than to 2012 to see what it takes to be a successful photographer. Why only last year? Well in many articles written about photography, many are saying that due to the camera phone that more photos are made than at any other time in history and that 2012 was the biggest of all time.
While many photos were made last year only some are rememberable. The great photos were not just made because the camera was set on “P” mode [professional mode]. Hopefully, you know I am joking. They are great because the photographer had a vision and knew how to manipulate the controls and/or light to capture what they were wanting.
Abstract Thought Required
“The formal operational stage begins at approximately age twelve [adolescence] and lasts into adulthood. During this time, people develop the ability to think about abstract concepts. Skills such as logical thought, deductive reasoning, and systematic planning also emerge during this stage.
While children tend to think very concretely and specifically in earlier stages, the ability to think about abstract concepts emerges during the formal operational stage. Instead of relying solely on previous experiences, children begin to consider possible outcomes and consequences of actions. This type of thinking is important in long-term planning.
In earlier stages, children used trial-and-error to solve problems. During the formal operational stage, the ability to systematically solve a problem in a logical and methodical way emerges. Children at the formal operational stage of cognitive development are often able to quickly plan an organized approach to solving a problem.”
Formal Operational Stage of Cognitive Development
By Kendra Cherry, About.com Guide
While today’s cameras allow you to point and shoot and come away with an image even for someone blessed with a visual eye needs to know how to manipulate the controls to give them an image that is superior.
Painters can include and exclude from the canvas much easier than a photographer can be selective with a camera. But both the painter and photographer must have a vision of what they are creating for the image to have impact.
Depth-of-field is a tool the photographer learns to use over time. How much will be in focus in front and behind the subject. There are varying degrees to which the photographer decides what is in focus and helps to create more impact by using this creative tool
Motion is either frozen or blurred in photography. While varying the shutter speed controls this the photographer can even choose to add motion to the camera during the exposure to keep a subject sharp and while at the same time blur the rest of the photograph.
Light is the greatest influence in photography. The absence of light alone means there is no photograph to be created. How the photographer chooses to use light helps improve the photograph. Sometimes they may choose to use the available light, light everything or only light part of the photo. They can also choose to vary the light values through out the photograph as well.
Learning these technical tools and how to use them in conjunction with one another to create an artistic image requires abstract thought.
Many photographers are masterful technicians who learn to use the aperture, shutter speed and light to give them different affects.
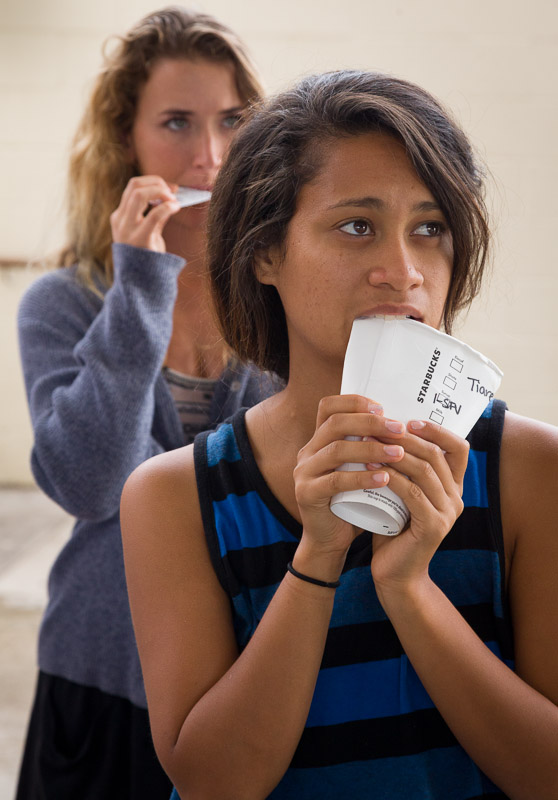
Photographers who specialize photographing people must also master body language. Body language is everything from the very obvious smile down to the subtle pinky finger being raised while drinking tea. To tell stories with people in the photos, the photographer must master the art of body language and all the technical skills of the camera to help make photos that impact the audience.
Photography is an acquired skill
The good news from all this is that even if someone feels like they do not have an artistic eye they can over time develop the skills to become an outstanding photographer. Those who do have an artistic eye must also study and learn how to master the camera and light to make photos or they will never be able to make photos—the camera will do it instead.
Great Visual Storytellers master these skills:
- Depth-of-field—You need to understand how the focal length of a lens and the lens opening in combination affect a photograph. After you understand how this works you need to then be able to look at a scene you want to photograph and consciously make a decision as to what you want in focus.
- Shutter Speed—Not only does shutter speed help you freeze objects and blur parts of a photograph it can determine if you have color shifts in a photograph. You need to master how this impacts the photograph so you can choose how this tool with affect the photograph.
- Light—Seeing light and being able to capture the natural settings is a must. Once you have mastered capturing light as it is naturally, then you can manipulate it to help situations look more natural. You can add light to a scene to improve it. You can add light to overpower the natural light and make it what you want it to be.
- Composition—Studying the masters in art will help you to know how to use compositional techniques to lead the viewer where you want in a photograph.
- Body Language—For the people photographer you need to understand what your subjects are communicating so you can control the message. You are able to anticipate the moment and capture the ones which help the message you want to communicate become clear and concise.
- Combining the techniques—After truly mastering each of these skills will you then be able to see how they are used in combination to create what you want, just like the painter who decides what will go onto the canvas.
While there are no prodigies, there are great photographers. Great photographers are self made through persistence. You can be a great photographer. You need only to master the skills and most importantly have a vision for what you want to appear on your canvas.