There are times when I look at my work I see things getting stale; there is just nothing that pops. You want your work to have visual surprises so that your work engages the audience.
While your work may still pop for your audience because not everyone has seen your work everyday like you, this still doesn’t remove the feeling you have about your own work. If you wait to address this when you clients are thinking your work is stale then you have waited too long.
Through the years I have tried many different things to get me out of those ruts. Here are some things I have used and continue to use at times to help get my creative juices flowing once again.
For the photographer I recommend trying shooting all day with an extreme wide angle lens like a 20mm or even wider. If this is your normal lens of choice try something different like a macro or extreme telephoto. It is forcing you to look at the world differently than you are doing now.
Change your routine. If you eat your breakfast always in the same room, take it outside on your deck or go to another room. Drive a different route to work.
Change your food for a while. Eat at different restaurants or even try a new ethnic food you haven’t had before.
Plan a trip. The process of looking for somewhere to go, planning the logistics and who to go with can help inspire you.
Plan a day trip to a park, an event, or a historic location.
Plan a weekend trip to the mountains, beach or just a bed and breakfast in a town nearby.
Plan a big trip somewhere.
Take a Workshop, Seminar or Class. This can be something in your profession or just something different. If you are a photographer you may take a painting course or go to a college to hear experts speak on something new for you. Enroll in a community college class and learn something totally new and different.
Read something new. To find something to read ask some friends what they have read lately. If you like biographies—Google the topic and put in date ranges to see what pops up. Maybe go to a local library and talk with a librarian for ideas.
Watch some movies or go to play/theater. Look into documentaries or classic movies. Put out a request to your Facebook, Twitter or LinkedIn connections to have them recommend something to you. Don’t just consider what is in the theaters.
Change your diet/health. I joined Weight Watchers after years of going to a gym. I lost 50 lbs and that made a huge difference in the way I see life. I put some of this back on so I now am adding other activities to get back to my ideal weight. It is amazing how much being out of shape can adversely affect your creativity.
Take up a new hobby. Maybe you sign up to learn how to fly a plane. Maybe you volunteer to help with boy scouts or some other civic group. Get involved somewhere that will expose you to people who think differently than you. It is here that your emotions and brain will stretch in new ways of thinking and feeling about the world.
Start trying to make a photo a day. Quickly you will discover that you will have to live with mediocre to accomplish this goal. Maybe the thing holding up your creativity is failure. Take on a project that will be OK if you fail, but give you ample room to have success as well. Maybe the creativity is blocked not by lack of desire but the unwillingness to live with less than perfection.
Most importantly do not measure your life by what you do only—learn to measure your life by learning to just be. For me having my friends around doing nothing, but just there is more rewarding than them always doing for me.
How do you get the photo on top verses the one below? Read on. When you light everything and use a white background this is what you typically get on the bottom. TIP: to get a clean white background, be sure the background is 1 stop greater than the subject. Also slightly angle the background so it isn’t perpendicular to the camera or you will get a light flare caused by the background. (Figure 1)
I like to light parts of a scene and not all of it. If you light everything as done in the photo above it gives a sterile or even feeling of the after life and living in heaven. If I want that look then I might use this lighting setup. The other advantage of even lighting the subject can move and spin and the light will look the same and you don’t worry about shadows in the wrong places.
Figure 1 was done using this setup. There are three lights on the background and two on umbrellas lighting the statue. (Figure 2)
Using the two umbrellas like in Figure 1 I now just used 1 light on the background, but now with a blue gel. Because it takes very little light to affect the white background the two lights on the subject are spilling over to the background and washing out the blue color. (Figure 3)
This is the lighting setup for figure 3. (Figure 4)
By just changing the background from a white background to a black background and everything else the same as in Figure 3, now the blue pops. The reason is the black sucks light as opposed to reflecting light like the white background. (Figure 5)
I personally like to have more drama as in this photo of the golfer with the blue background fading out to black around the edges.
As you can see everything is the same, There are actually two changes: 1) White to Black Background and 2) 4 times the light through the blue gel. Just remember to get the gel to look the same color as you see it, it must be 2-stops brighter on the background than the light on the subject assuming you expose for the subject. (Figure 6)
Just changing the gel and leaving everything else the same I can now decide which color I like best. (Figure 7)
Here is what the setup looks like in figure 7. (figure 8)
Changing back to the white background I again get contamination from the front lights and it goes pink instead of red. (Figure 9)
For me this photo is too pink and there is pink light on the subject. This happens when you are not controlling your lights. Learn to control the lights by not lighting everything up like you do with umbrellas.
Figure 9 setup. (Figure 10)
This is shot on the white background. I changed the setting on the background to -2 stops under the setting of the subject. I removed the umbrellas and put 10 degree grids on the lights. (Figure 11)
Here is the setup for figure 11. Everything goes black except for where the light is hitting. This is how you can control the light and not light the whole room. (Figure 12)
You don’t need to use gels to get a dramatic effect, but the more you learn not to light everything but just parts of the photo is when your can direct the audiences attention in the photo. There is more than just to lighting parts of the photo, you can ratio the light throughout the photo and have some parts not totally black, but slightly darker than the subject. This way you still see those other aspects of the scene, but they are secondary to the main subject. It is like have two or three sentences in a paragraph and you direct the reader to who the main subject is and the the supporting roles.
Here the the light powered down for the white background for figure 11. (Figure 13)
Just changed the red gel to blue and left everything the same as in figure 11. (Figure 14)
You can see all I changed is the gel to blue from red to get figure 14. (Figure 15)
Here you can see I have the power way up, actually 2 stops greater than the subject. This is for figure 5 photo. (Figure 16)
A tip to make your gels last longer. Cut them to the size you use for your strobes and then take gaffers tape and wrap the edges. When you use them on the lights be sure after checking them with the modeling light to turn the modeling light off. They will last longer and not melt or catch fire. (Figure 17)
Some of my gels I have labeled. Here I have the gel on left labeled 3200 Kelvin and 81B. This lets me know I can put this over a strobe to match incandescent light bulbs. The one on the right is 30G letting me know for many fluorescent lights I can balance my strobes to color match the florescent. (Figure 18)
If you like this image I will walk you through the steps to get here. (Figure 1)
I started here and got the exposure to pretty close to the tones in the carving. (Figure 2)
By just adding one light off to the right I got the next image. (Figure 3)
I liked the result, but wanted a little more color in the bowl than I have in this photo. (Figure 4)
Here you can see that the statue is back lit naturally, but can see the first light to the right that I added and the second fill light I added just next to the lens on the left. (Figure 5)
The reason I chose a dark object to light is because it is much more difficult, but also shows you how the light dramatically improves the object. It works similarly with a lighter object, but the results are harder to see sometimes.
I had the object back lighted to be sure you understand the light I am adding truly helps. This is like having people looking at the camera and it is the best angle, but the sun is behind them. By just turning on the flash you get a better result, but there is little to show the shape of the object as compared to getting the flash off the camera.
One flash off camera give nice shaping to the face. (Figure 6)
By adding a fill light just beside the lens on the left, we help not only fill in the shadow side, the photo transforms from an almost black and white look to a color feel. (Figure 7)
Now for all the photos above the exposure compensation was used at -2 stops under what the auto exposure was reading. I had my flashes under exposed or 0. The reason is the camera wants to make the statue a neutral gray when it is actually darker. To compensate I under exposed to fool the meter to get what was correct.
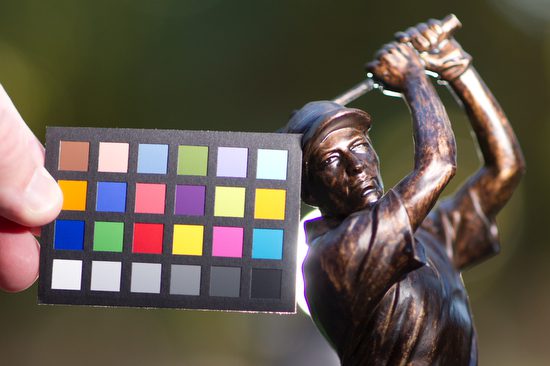
I am using the Mini ColorChecker by x-rite so you can see the color as shot in each situation with this series. This will not just help you see proper exposure, but the color space for each photo. (figure 7)
I wanted you to see you can just use a reflector to help improve the photo, but please pay attention to not just the shadows being improved, pay attention to the colors. (Figure 8)
Shot with fill and you can see not just exposure but color temperature will be different with reflector or flash. (figure 9)
Here with one flash to the right of the camera and one behind the statue you can see ho it improves the tones and the color space. This is why I prefer using strobes over reflectors alone for portraits. Another major benefit with strobes over a reflector, is the reflector gives a constant light source which will cause most folks to squint. (Figure 10)
This was the setup for Figure 11. By the way, I shot this with my Nikon P7000 with the flash on for fill. (Figure 12)
I thought the light behind the golfer was a little distracting, so I moved it to the left out of the photo 180 degrees opposite the main light to the right. The Nikon TTL system is balancing the background -2 Stops under to the flashes which are normal of 0 setting. (Figure 13)
This is the setup for Figure 13. Again I shot this on the Nikon P7000 with the pop up fill flash to help the statue and the camera gear to have some definition. (Figure 14)
Practice lighting with some objects that are dark or even black. See if you can change the mood of the situation by just positioning the lights in different places. Maybe you use the X-Rite Mini ColorChecker to see if you are setting the camera’s white balance correctly to get the best color. If you shoot in Raw you can correct this later, but if you shoot in JPEG you can change it later, but the results are noticeably poor.
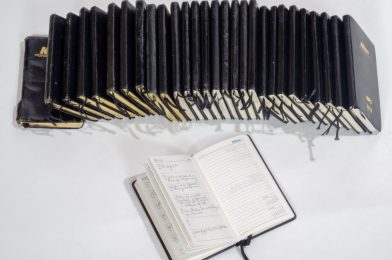
I have been using the Nikon NPS pocket calendars since 1983. The calendars might be more telling of my camera preference than anything else.
My mentor Ken Touchton called to tell me that I needed to show what I might do during a week of my life. He knew that what we do as freelancers, if you are successful, takes more time than a 9 to 5 job with occasional evening events.
I decided to start with a busy shooting week for you and then contrast it with a slower week. I want you to see how some weeks you have no time to yourself. I am not doing this every week, but you must be willing to take on weeks like this to be successful as a freelancer. It is feast or famine in this line of work.
One Week of Shooting
August 29th, Monday
6:00 a.m. Getting up, shower, eat and pack the van
Check emails
7:00 a.m. Leave the house with Photo Assistant
8:30 a.m. – 9:00 p.m. photoshoot
During the day, the CEO asks to get photos for a PowerPoint slide the next day. ( I contacted the person who would be getting the images that night to process the next day to meet me at the meeting and start processing all the photos early. By the way, this person was going to watch my daughter while my wife is out of town)
9:30 p.m. – 11:00 p.m. editing and creating PowerPoint slides from all the day’s images to email to the CEO for him to have three choices to pick from. Put batteries on chargers. Reformat cards and clean cameras.
Check emails
August 30th, Tuesday
6:00 a.m.
Getting up, Shower, eat and pack the van.
Help be sure your daughter is up and ready for the school bus.
Check emails
7:30 a.m. leave house with Photo Assistant
9:30 a.m – 5:30 p.m. cover meeting again.
6:30 p.m. arrive home, cook dinner, and hand over all images to photographer/assistant to process. She will process all the RAW images from the last two days. Edit out bad moments and make JPEGs. These will be burned to DVDs and put in a FedEx package (which I have already prepared) to drop off to be overnighted to the client on Thursday morning.
8:00 – 10:00 p.m.
Unpack van and charge batteries, and then pack for the trip tomorrow
Check emails – Create an Invoice and send the PDF to the client with a W-9 form
August 31st, Wednesday
6:30 a.m. Up and getting daughter off to School. My photo assistant stayed over to get the daughter off to School and be there to meet her later in the day when she came home. (wife is still on the trip)
Check emails
9:00 a.m. leave for the airport
10:00 a.m. – 12:00 Sit at the airport checking emails and corresponding about today’s trip. Also, send thank you notes to the clients on Monday and Tuesday. Check with a Friend/Assistant watching my daughter.
12 – 3 fly across the country
3:30 get to Rental Car location 45 minutes after putting in an address to GPS on the road for 2 hours to place.
5:30 p.m., drop by the site. I will be shooting the next day, meeting the people, and talking for an hour to get an idea of the place.
6:30 – 8:30 go to each with the writer on the project
8:30 – 10 check hotel, unpack and set up a computer as a workstation, check emails, and respond.
September 1st, Thursday
6:30 am up ate and checked emails. (Still planning a photo shoot of the Chick-fil-A Kickoff in a couple of days)
8:00 a.m. – 7:00 p.m. Shooting stills and Video interviews of story
7:00 – 8:00 p.m. go eat
8:00 – 11:00 p.m. editing of images and video
September 2nd, Friday
3:00 a.m., get up and drive 2 hours to catch a 6:00 a.m. flight back to Atlanta
Noon – touch down in Atlanta
Get bags and go to the parking service to pick up the van and drive home
1:30 p.m., finally home
2:00 – 9:00 p.m. Edit video and still images into a 2:30 minute package and send to client for changes and approvals.
Checking emails and phone calls about the next day. Scan all receipts, create an expense report, and email this to the client for the trip.
September 3rd, Saturday
9:00 a.m. Slept in and am exhausted
11 a.m. Wife, Daughter, and I eat lunch
Noon drops daughter off at friends, and my wife and I drive to the Chick-fil-A Kickoff game. Dorie, my wife, has been volunteering in the press box for 18 years, and for a much shorter time, I have covered the games for clients like the teams, wire services, and corporate clients.
1:00 p.m. – 1:00 a.m. cover the pre-game events and the game and then leave
September 4th, Sunday
8:00 a.m. – noon, edit all my images from the day before
1:00 – 4:00 download images from two other photographers, putting together sights and sounds in a 2-minute slide show with audio. Send this to the client to have published on Monday morning.
During that week of shooting, I was still checking my voicemail because I couldn’t take calls while shooting, but the moment I had a break, I would listen and see if I needed to respond. It would help if you reacted quickly to offers or clients moving on to someone else.
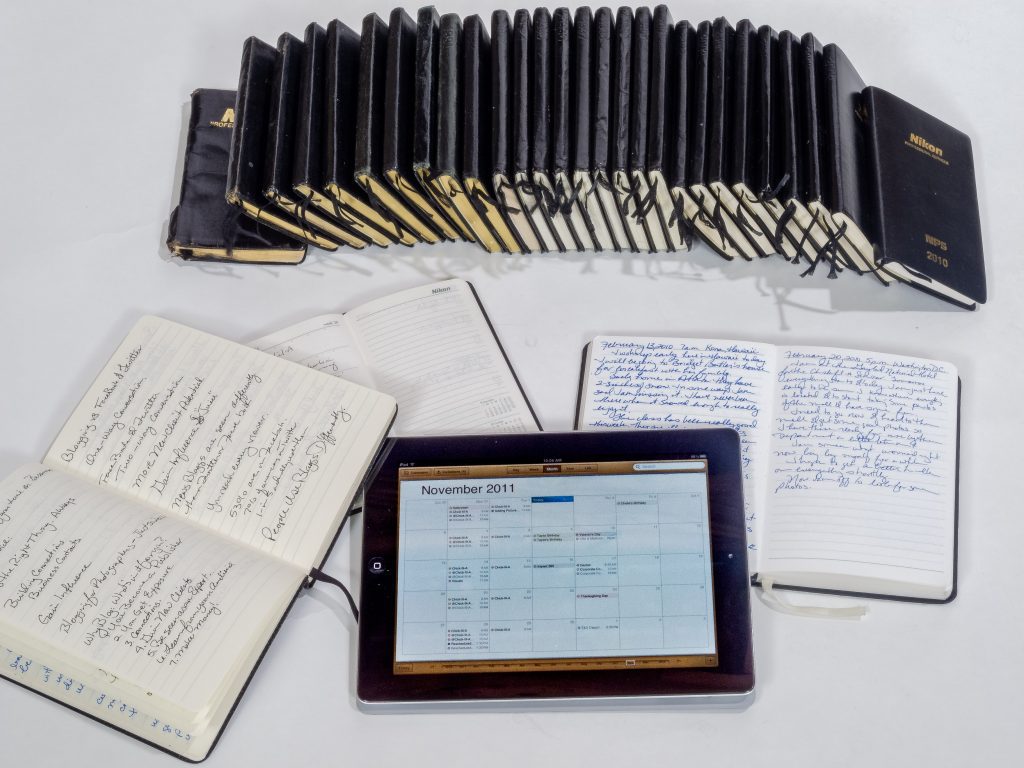
I still like to use the moleskins and NPS calendar even with today’s new technology, which lets you sync your phone, iPad, and computer with your calendar, notes, and contacts.
Non-Shooting Week
September 19, Monday · 6:30 a.m. Shower, breakfast · 8:00 a.m. – 9:00 a.m. drive to Visual Consulting client’s Corporate Offices · 9 – 10 a.m. checking emails and talking to folks in the office by seeing how they are doing. Building relationships · 10 a.m. – 11:30 a.m. two meetings back to back. I listen in on editorial meetings. I am listening to see what they have planned for visuals on projects. Occasionally I ask about what they have planned. Many times I have a list of ideas that I am ready to offer as suggestions. But most of the time I am trying to think more strategically and offering observations when appropriate in the meetings on workflow and procedures. · 11:30 – 1:00 p.m. eat in the corporate dining room. This is actually another long meeting. I try and sit with new folks when I can or sit with some of the team that I work with to get to know them better. I find out what they are working on and see how they are doing. · 1:00 p.m. – 3:30 p.m. more one-on-one meetings with different people in departments around the company trying to be sure they are all aware of how we are there to serve them. · 3:30 – 5 commute home o Making and taking phone calls along the way. Often following up on a conversation earlier in the day. · 5 – 6 p.m Checking on emails and working on connecting with clients
September 20, Tuesday · 6:30 a.m. Shower, breakfast · 8:00 a.m. – 9:00 a.m. drive to Visual Consulting client’s Corporate Offices · 9 – 10 a.m. checking emails and talking to folks in the office by seeing how they are doing. Building relationships · 10 a.m. – 11:30 a.m. meetings · 11:30 – 1:00 p.m. eat in the corporate dining room. · 1:00 p.m. – 3:30 p.m. more one-on-one meetings · 3:30 – 5 commute home o Making and taking phone calls along the way. Often following up on a conversation earlier in the day. · 5 – 6 p.m Checking on emails and working on connecting with clients · evening sometime – write this blog and post it.
September 21, Wednesday · 6:30 a.m. Shower, breakfast · 8:00 a.m. – 11: 30 a.m. o Often posting blog or working on the next one. o Going through my database of 5,000+ contacts and seeing who I have not contacted. Often this then prompts me to categorize those and write an email that I can then blast out to a group that appears to be very personal, but is often to similar audience. An example might be a letter to all those who are at magazines, working for education or maybe church organizations. o Check my analytics on my blog and website · 11:30 – 1:00 try and get lunch with my wife who works from home as well · 1: 00 – 5:00 p.m. o Similar to the morning, but now checking to see how many emails bounced, what links they clicked on if any. o Responding to the responses from the emails. Sometimes they have something else in mind and my email just prompted a call. o Removing people from my database that have lost their job or moved on. Creating a new contact for these companies. This requires some investigation through their website often or a phone call to see who is the best new contact for me. · 5:30 – 7:30 Wednesday evening meal and bible study at our church o Side note. Because of my profession and working in the past on the staff of church organization, I have been asked to help curate missions photography exhibits, teach classes on how to take photos on mission trips and asked to teach Sunday School. While I could teach without a seminary degree, my seminary training helps me pull on resources I have for these classes. I often will use examples of stories I have covered to make points. This is part of my BRANDING.
September 22, Thursday · 6:30 a.m. Shower, breakfast · 8:00 a.m. – 11: 30 a.m. o Checking emails and correspondence. o Combing website to look for new contacts, which then I put in database and send them an email right away. I have created some quick form letters that I customize for the recipient. o Review my presentation for UGA photojournalism students · 11:30 – 1:00 drive to Athens, GA for presentation to UGA o Phone calls while in car to clients and potential clients. · 1:00 p.m. Eat quick lunch · 1:30 p.m. show up at Professors office to catch up and prepare for class · 2 – 4 p.m. teach class · 4 – 4: 30 p.m. answer some questions from students · 4:30 – 6 p.m. drive home o Phone calls while in car to clients and potential clients. · Evening – check some emails and call it a day.
September 23, Friday · 6:30 a.m. Shower, breakfast · 8:00 a.m. – 11: 30 a.m. o Often posting blog or working on the next one. o Going through my database of 5,000+ contacts and seeing who I have not contacted. Often this then prompts me to categorize those and write an email that I can then blast out to a group that appears to be very personal, but is often to similar audience. An example might be a letter to all those who are at magazines, working for education or maybe church organizations. o Check my analytics on my blog and website · 11:30 – 1:00 try and get lunch with my wife who works from home as well · 1: 00 – 5:00 p.m. o Similar to the morning, but now checking to see how many emails bounced, what links they clicked on if any. o Responding to the responses from the emails. Sometimes they have something else in mind and my email just prompted a call. o Removing people from my database that have lost their job or moved on. Creating a new contact for these companies. This requires some investigation through their website often or a phone call to see who is the best new contact for me.
September 24, Saturday · Spend an hour checking emails
September 25, Sunday · Spend an hour checking emails · Spend an hour to couple hours writing blog
Some Tips
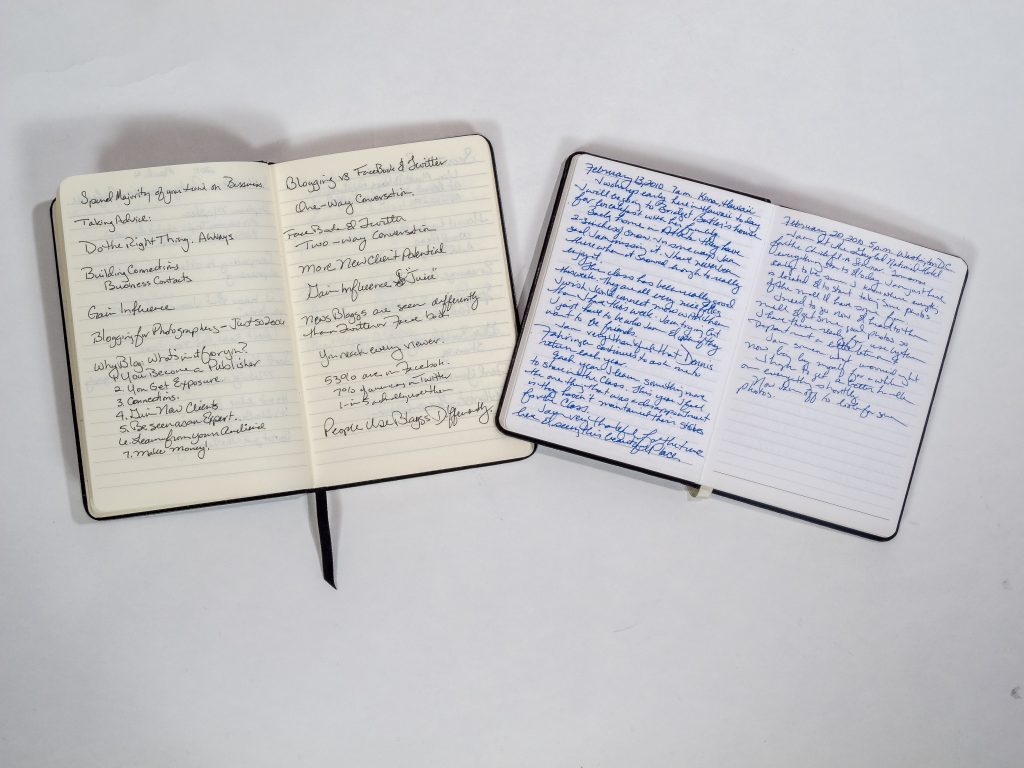
Keep a Journal
I try and journal as often as I can. Writing down the things on my mind is a way to help me process them. I then looked back through this to remind me of a few things. First, I see that I survived what seemed like a significant deal. Second, it keeps me humbled and thankful for all my blessings.
I can now look back and see that I worked very hard to make things happen, but also, because I am reviewing these journals see that often the jobs I have gotten were not because of something I did. ISo many often get jobs for reasons I cannot explain, and a great deal of work I did may have helped, but I can see only God could have opened some of those doors for me.
Could you write it down?
Sometimes I will have an idea, and I would forget about those great ideas in the past. So now I write them down in something similar to my journal. While I now see that some of these “Great Ideas” wouldn’t work, they have helped keep my creative juices flowing. Now I often turn these “Great Ideas” into blogs, or they become a newsletter. Sometimes they have inspired me to write emails to clients that did lead to jobs.
Summary
Have a system that keeps you connecting with your and potential clients regularly. Think often about your clients and what they are dealing with, and see if there is any way you can help lighten their load.
Remember, don’t wait for clients to call you with a project–you call them with tasks they would want to do.