My Digital Workflow

Reading Time: 6 minutes

Step 1 – I ingest the images from my Compact Flash Card or SD Card. My camera settings are RAW, and I normally use the ExpoDisc to get a custom white balance. I also shoot in ADOBE RGB color space. All the settings give me images that are the best possible for editing. Color is almost perfect because of the custom white balance, and pictures can be modified easily since they are in RAW format.

Step 2: Use PhotoMechanic for ingesting software

Step 2 – Ingest using the software PhotoMechanic. Select the card, and then select the destination for all the images.   use + RAW

Step 3 – The destination is an external hard drive

Step 3 – An external hard drive is chosen so that the wear and tear on my computer’s main hard drive is not so severe.  If you shoot as many images as I do, you will burn out a hard drive quickly if you use it all the time.

Step 4 – IPTC Information added

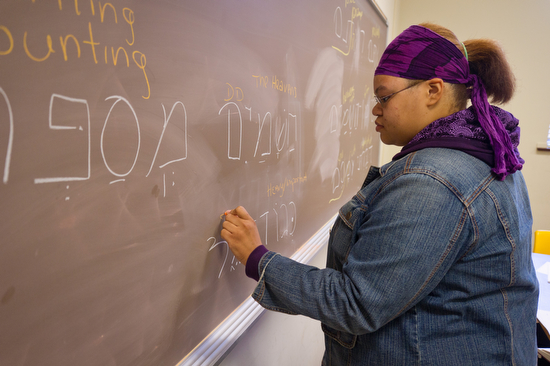
Step 4—Add IPTC information to every photo from the photo shoot. Add the bulk metadata to the caption and keywords, as well as embed credit, copyright, and contact information. Also, add information about the location where the photos were taken.

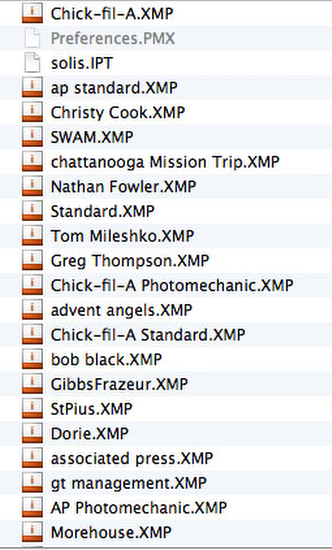
Step 4: I have saved the IPTC information and tend to load one of the templates saved, so I do not have to put in the basic information each time for a client. I have templates for clients like the Associated Press and for my personal use. I just load the template and make minor changes.
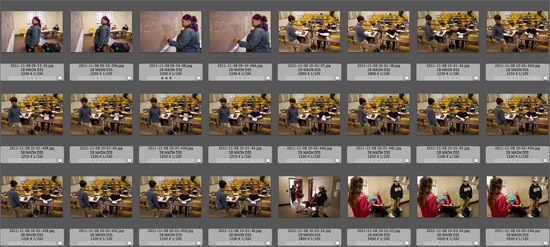
Step 5: I cull the images down.

Step 5 – Culling the images so that I only keep the best or usable photos.

Step 5: I check the select button for those I want to keep
Step 6 – select the Untagged Images

Step 6: I go to View and then select “See only the untagged images,” then delete all of them while keeping the tagged images.

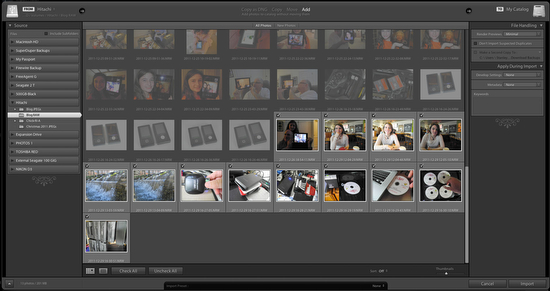
Step 7: Open Lightroom and import from the folder of selected images I created using PhotoMechanic

Step 7: Open Lightroom and import the selected images from Photomechanic. I am just adding these to Lightroom, not copying them.

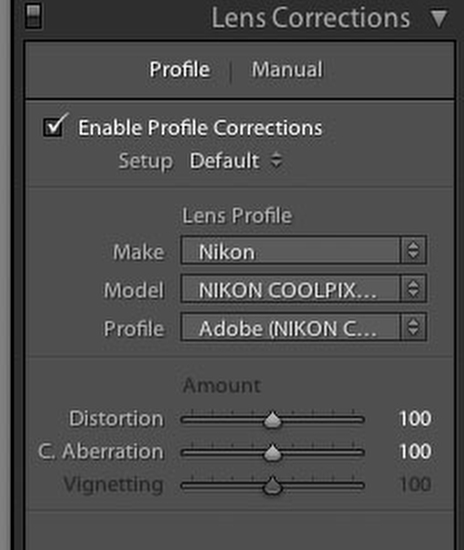
Step 8 – Select all images and in the Develop Module, I then enable Profile Corrections

Step 8: Enable Profile Corrections for Lenses. This will correct all the aberrations and imperfections known to each lens that I own, giving me the best quality possible.

Step 9 – I sometimes will add a vignette to the images. 

Step 9: I like to darken the edges ever so slightly and heavily, depending on the situation. I will select all images and add a PC Vignette 1 for slight use or PC Vignette 2 for heavy use, like for a formal portrait. These are found in the Library Module under Custom.

Step 10 – Adjust image

Step 10 – I adjust the image or images. I will select a group if they are all similar, which saves editing time.  He has a few parts to this:

  1. Hold down the “Option Key” while sliding the exposure. You will see the highlights. Try to have no white areas on faces, for example. Play with this to get your desired result.
  2. Hold down the “Option Key” and slide the Blacks.  Only if there are black areas do I try to be sure there is a black
  3. Adjust the Fill Light to open up the shadows.  
  4. I sometimes use Recovery to bring in some highlights that might not have been recovered when I had done the main exposure.  Gain play with this for the desired result.
  5. I then usually add some saturation by using the Vibrance slider, usually no more than 35. This will affect everything but people. This is cool because I don’t like to make people red, for example.
  6. I may do other fine-tuning beyond, but these five steps are pretty much used every time.
Step 11 Exporting

 Step 11 Exporting.  Go to the Library module, and on the lower left, click export.

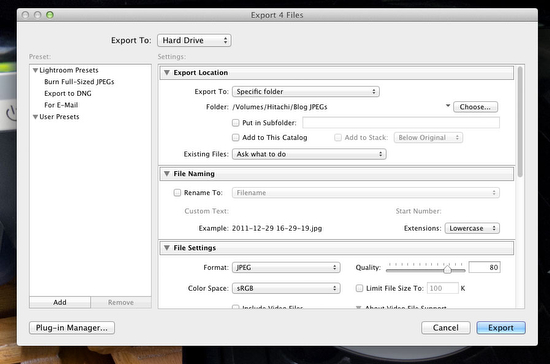
Step 12: Exporting choices

Step 12: Select a folder to export. Use + JPEGs. Select sRGB as a standard since it is more usable in more situations. Set quality to 80.

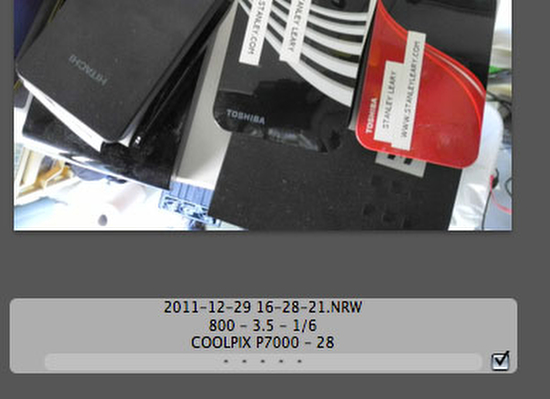
Step 12: I keep images all the same size.

It is very important not to check “minimize Embedded Metadata” because this will remove all the camera data, which many database software programs use to help narrow down the search by the date and time that a photo was taken.

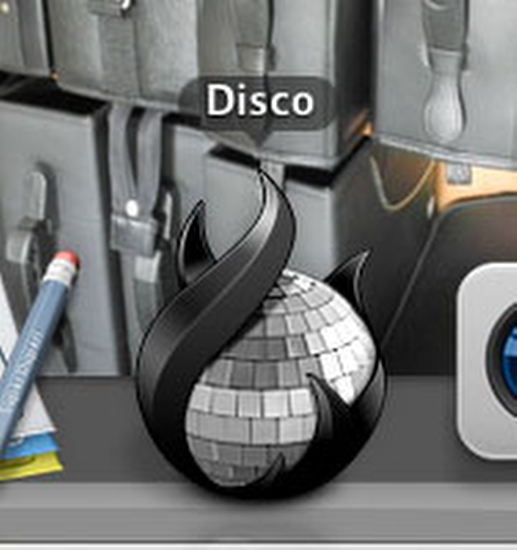
Step 13: Making of DVD/CD. Will drag the folders from here to the Disco Software.

Step 13: Making a DVD: I use the Mac software Disco to burn my DVDs and CDs. This allows me to take very large shoots that need multiple DVDs and spread the project over several discs.

I name the disc by year, month, day, and disc time that I burDisceDiscc

Step 14: Print on the disc using Disc Cover 3

This helps with branding and looking professional for the client. 

Step 15: Print using the Epson Photo Stylus R280 Printer


Printing on the DVD with Epson Photo Stylus R280

Step 16: Ingesting into Cumulus

Ingesting into Cumulus from DVD

Cumulus lets me search all the images. I am also searching for all the text I put into the metadata earlier. I can use the Boolean search technique to narrow down my search. 

Cumulus helps me later find images using the text search. Once it finds an image, I can see the thumbnail, and it tells me which DVD it is stored on.

Disc is put into a binder in chronological order.
The binder is put onto the shelf.

Summary

I now have a way to find all the images and have them in two places minimally: on the hard drive and on a DVD. I normally also upload these and/or give a Disc to the client. This makes for the third copy. At the end, I will copy the files from the hard drive to another hard drive, giving me, in essence, four copies.

I hope this helps you see my digital workflow.

How to become a humanitarian or missions photographer

Reading Time: 7 minutes

New church and well being built in Becanchen, Yucatan, Mexico. [Nikon D3, ISO 200, f/8, 1/100, 24-120mm]

“I feel God calling me into missions photography …” or “I want to be a humanitarian photographer and would like to meet you,” are two things I am hearing almost weekly now. 

To make this dream a reality is to engage your head and your heart in this journey.

Reasons not to become a humanitarian/missions photographer

1. The field is overcrowded. If you live in a major city like Atlanta you are very much aware of traffic jams.  Another great comparison is going to Universal Studios or Disney World.  You are going to stand in a very long line because this is a very popular job. This field is not just crowded, every day more and more people are wanting and trying to become photographers.

Fernanda washes clothes and makes hammocks for a living in Akil.  Her son Roberto Carlos has finished school and wants to go to college. They live in the Yucatan in Mexico. [Nikon D3, ISO 200, f/5, 1/8, 24-120mm]
2. Most photographers do it for free.  Translation–it is very difficult to make a living. How will you compete against others who will not only do it for free, but pay their way to cover a cause around the world?
Mayan family at their home in the Yucatan, Mexico. [Nikon D3, ISO 200, f/5.6, 1/250, 24-120mm]
3. It requires a large financial investment.  You need cameras, lenses, flashes, memory cards, computers, software, and training to use all this.  Did you notice the list was multiples? Everything requires a backup because equipment will fail and you must still deliver.

4. It is a business. Since the 1970’s staff jobs are actually dwindling.  More and more photographers are freelancers who must pay higher taxes and higher healthcare insurance than their staff counterparts.  Don’t forget you need camera insurance and liability. You must first be a business person and then a photographer.

 
David Woods stopped on our drive to BoBo from Ouagadougou, Burkina Faso for our lunch. You need to be able to eat a variety of food when you travel. [Nikon D2X, ISO 100, f/8, 1/320, 24-120mm]

5. You have to be outstanding and not average. If you watched American Idol then you have a good comparison to this industry, but the numbers are greater.  Everyone owns a camera and many think they can make great photos. American Idol auditions hundreds of thousands to get it down to 25. If you go back to past seasons not all of those 25 finalists are making a living at it. The odds are similar in photography. There are many great photographers, but they didn’t have the complete package to make it.

6. Everyone owns a camera and can make a photo. Think about this for a while. Why pay you to photograph something when they can take it themselves?

7. 95% of your time you are not making pictures. Even the most successful National Geographic Magazine photographers spend only a fraction of their time shooting. Most of the time you are researching a topic or an organization trying to find ways you can help them achieve their goals.


Diane Zuma plays with water at well in Koudougou, Burkina Faso. There are two types of wells in this area: one which is open and not safe to drink from and this one which is deep and is covered and much safer to drink. (Photo By: Stanley Leary) [NIKON D2X, AF Zoom 18-50mm ƒ/2.8G, ISO 100, ƒ/5, 1/320]

8. It’s not about you. If you want to take pictures because you have an interest in something, well unless an audience is willing to pay you to see your work there is no career for you. The most successful photographers today are not focused on telling a story with their camera–they are focused on connecting the subject with the audience to achieve a goal.

There is no AAA roadside assistance in Burkina Faso. My host David Woods repairs the truck that just lost a belt on the side of the road. [Nikon D2X, ISO 100, f/2.8, 1/2000, 24-120mm]

Here are some questions you need to answer

1) Why do you want to be a photographer? If your answer is I like to take pictures and meet people, then keep on doing this as a hobby.  If you want to tell the stories of some people you have met, you still need to keep this a hobby.

Humanitarian and missions photographers are goal focused. When I am photographing an orphan I am wanting to help them find a parent. Some who will see my photos may give money to cover their housing and food until they find a parent and this good, but my goal is to move people’s hearts to take this child in.

My goal is not to tell the orphan’s story. Do you see the difference?

Surgeon Danny Crawley is in theatre doing a hernia operation and Comfort Bawa, theatre assistant helps him at the Baptist Medical Centre in Nalerigu, Ghana. (Photo by: Stanley Leary) [NIKON D2X, AF Zoom 18-50mm ƒ/2.8G, ISO 400, ƒ/2.8, 1/160]

2) Why should you be the photographer? If the goal is to do something, why are you the best selection and not a professional photographer who has given their life to not just taking pictures, but to the cause? If the goal is to get an orphan adopted why would anyone want to have a photographer shoot it that has never helped anyone get adopted verses the photographer that does. Think about it why not hire William Albert Allard who made the famous photos of the little shepherd boy who lost his heard to a reckless driver in Peru? Allard’s photos moved the readers of National Geographic Magazine to replace his herd and then some.

A mass of people wait for medical treatment at the Baptist Medical Centre in Nalerigu, Ghana. They are all waiting for Dr. George Faile to see them that day.  [Nikon D2X, ISO 400, f/2.8, 1/25, 18-50mm]

3) What are you doing to be the very best photographer? Organizations that want to achieve their goals are not going to let just anyone photograph for them.  Actually they want to keep most photographers away from their projects.  Many photographers will do more harm than good.  Too many photographers are just trying to build a portfolio rather than help.

I am called to be a photographer
Just like a professional musician you will need to study the craft and find a teacher/mentor.  Even in Star Wars Luke had to find Yoda to help teach him the skills to become a Jedi Knight. My suggestions:
Take classes in the following:

a. Business and marketing – You need to understand how to price your work, how to negotiate with a client and most importantly how to find a client.
b. Psychology – You need to be able to work with a variety of people from all walks of life. You need to be able to get to know people in the most intimate way possible in the shortest time possible, because you will be telling their story as an expert on their life.
c. Photography – You need to know how to make your camera do what will work in any situation. You need to be able to not just capture something, but help capture it in a way that sets the mood as well as captures the moments. To do this you will need to master: Aperture; Shutter Speed; Hot Shoe Flashes; Studio Strobes; Available Light; Composition and much more.

We ate in a coffee growers home in El Aguilia, Mexico. [Nikon D3S, ISO 12800, f/5.6, 1/60, 14-24mm]
2. Study the masters – You will need to become a master.  Remember the organization will hire the person they think is best suited to help them achieve their goal. You need to become the expert they want on their team. The best way to do this is to study all the great photojournalists that have gone before you. You need to know why their work was so successful.

3. Study with a master – Take a workshop with someone who is known for storytelling that also is known to help organizations meet their goals.  I will be teaching you how to photograph in another culture, how to tell the story and reach your audience with the message.

4. Go to seminars and workshops to get inspiration.  You will be able to hear successful photographers talk about their work. The room is often filled with current masters of humanitarian and missions photography.

5. Get critiqued to learn – Don’t show your work to just get pats on the back. Show you work to people who can point out the basic things you are missing early in your career and as you grow can teach you about the nuances. If your purpose is only to show your work and have everyone applaud only – well then you need to keep this as a hobby, because even the masters of the craft look for ways to get even better.

Mike Davis’ list of five things in good photos

Reading Time: 3 minutes
 
Mike Davis speaks on photo editing at the Atlanta Photojournalism Seminar.

Creating images that last beyond the day has been Mike’s mission in settings as diverse as National Geographic Magazine and The Albuquerque Tribune, The White House and pdxcross.com

Mike Davis started his presentation by giving us his background as he transitioned into his educational part of the program on how he does photo editing by walking into the audience.

He got right up in a person’s face and asked if this changed their presentation. You bet it did.

Mike took the time to demonstrate what he meant by the house to the group. A photographer’s Distance from the Subject, not lens choice, makes a big difference in the impact of a photo.

Distance to the Subject is one of the five things that make a difference in good photos.

Five things that impact the effectiveness of a photo:

  1. Color
  2. Light
  3. Composition
  4. Moment
  5. Distance to the Subject

In an earlier blog, I talked about the Distance to the Subject and how to maximize putting your audience into your photographs using a wide-angle lens. Click here to read it.

(Nikon D3, 14mm, ISO 6400, f/3.2, 1/100) I love the wide angle that puts the viewer inside this little room (closet).

As Mike went through photos and took a photo shoot from all the images down to the 6 – 7 images he would pick for a photo story, the layout was more from how the photos created a mood. Then, he could lay them out chronologically or systematically as most people do; this is why so many seek his expertise.

“Mike Davis is a virtuoso. He can take a pile of photographic notes and chords and arrange them to make a breathtaking score. Back in early 2001, I was struggling to put together a cohesive portfolio from my work…”

– Scott Strazzante, Staff Photographer, Chicago TribuneChicago, Illinois

To lay out photos based on emotions, the photographer will have had to use those five elements to help create a photograph that communicates on a gut level. Mike Davis talks as he is editing photos and puts into words some of his gut reactions to the images.

This photo is a much better “moment” than before or after because the person’s hand almost touches the bucket. Once they felt it, the anticipation element was gone. The difference with Mike is as he eliminates the images from a gut reaction–he can articulate why his gut reacted a certain way.

I love getting up close and pulling the reader into the scene. I also like light, the colors, and the moment I caught here.

Mike enjoyed using PhotoMechanic for editing. It is my favorite as well. It doesn’t help with editing individual photos like PhotoShop or Lightroom, but this software lets you quickly sort your picks and put identification in pictures.

Mike also talked about how he knows photographers take a series of photos where the photographer will work the same angle and composition for the right “moment.” The moments rise and fall.

You can see how the teacher turns his head in the series of photos, and there is one moment that captures the moment better than the rest. The series shows the photographer working on it. They are looking for the “Decisive Moment” where it all comes together.

When you edit your photos, look for all five elements and how they make a difference in the ones that stand out from the rest.

Shoot enough photos that you have some comparisons to look at and see differences in people’s expressions and body language from one frame to the next.

If you don’t see it, get someone to look with you through your photos. They don’t have to be a pro to see which ones they like better. They may even tell you why or acknowledge it is a gut reaction.

12 Presentation Mistakes Photographers Make—and How to Avoid Them

Reading Time: 3 minutes

After two days of watching photographers present their work, I was inspired and frustrated. Some presentations were outstanding—thoughtful, well-prepared, and engaging. Others, unfortunately, missed the mark.

For more than twenty years, I’ve helped organize and evaluate photo conferences. Our team often discusses which speakers we’ll invite back. At this recent event, a few of us were in the audience taking notes, not just to learn but to scout. As always, the same issues came up.

Here are some tips I’d give any photographer who’s preparing to speak publicly:


1. Prepare Your Presentation

Don’t wing it. Set aside time to plan what and how you’ll say it carefully.

In the old days, I watched photographers show up with loose slides minutes before presenting. Today, the digital version of that is dumping a folder of images on your desktop and clicking through them with no structure. Organize, edit, and rehearse. Respect your audience’s time.


2. Know Your Goal

What’s the one takeaway you want your audience to leave with?

If you don’t know your core message, your audience won’t either. Boil it down to something that can be shared clearly in your time. Don’t try to cover your entire career—focus on one story, lesson, or insight that genuinely matters.


3. Tell a Story, Not a Resume

Avoid talking too much about yourself or what you plan to do next. Instead, share a real project and what you learned from it.

Maybe it’s the moment you discovered a key storytelling technique, or a mistake you’ll never repeat. Give your audience something authentic and valuable.


4. Give the Audience Something They Don’t Already Know

You were invited to speak because people have already seen your work.

So don’t just replay what’s on your website or portfolio. Add value:

  • How did you find the story?
  • What obstacles did you face—legal, emotional, or logistical?
  • What gear, apps, or workflow choices made the project possible?
  • What happened after the story ran?

As Chris Matthews says on his Sunday show, “Tell me something I don’t know.” That’s what keeps people engaged.


5. Use Multimedia Wisely

You’re a visual communicator—so let visuals do the talking.

Show a 2–5 minute edited multimedia piece with audio and narration. Let it tell the story first, then use your speaking time to explain how it came together. Short, well-produced examples are far more effective than a long, unedited slideshow.


6. Don’t Depend on the Internet

Never assume the Wi-Fi will work. Streamed videos that stutter or fail will derail your presentation fast.

Bring everything on your computer, ready to run locally. Better yet, have a backup plan—a jump drive, an external hard drive, or a second computer.


7. Respect the Clock

Going long doesn’t make you essential; it makes you inconsiderate.

If you have 30 minutes, plan for 25 and leave 5 for questions. Running over your time hurts the conference schedule and your reputation. Demonstrating professionalism means finishing strong and on time.

(For conference organizers: don’t hesitate to cut off a speaker who goes over—trust me, the audience will silently thank you.)


8. Plan for Questions

Audience questions are a gift. They clarify your message and show where your content hit home.
Leave at least 5 minutes for this. Often, the best connections happen in that exchange.


9. Know Your Audience

Adjust your talk to who’s in the room. Students, pros, and editors all need different takeaways. The same presentation doesn’t fit every crowd.


10. Practice, Don’t Memorize

Run through your talk several times—out loud. Practice transitions between slides and make sure your visuals align with your points. Don’t memorize word for word; aim to sound conversational and natural.


11. Manage Your Nerves

Even seasoned speakers get nervous. Arrive early, test your setup, and breathe. Once you start, focus on connecting with your audience, not performing for them.


12. Always Have a Backup

Digital gremlins love to appear at showtime.

Keep a full copy of your presentation backed up on:

  • A USB flash drive
  • An external hard drive
  • A cloud folder you can access offline

Final Thought

The best presenters leave their audience wanting more, not wishing it had ended sooner.

Like good storytelling, good speaking is about clarity, connection, and care for your audience. If you apply the same thought and preparation to your talk that you do to your photography, your presentation will shine.