Scanning old negatives

 
Pentax K1000 & Pentax 135mm lens, Kodak Tri-X  [April 7, 1982]

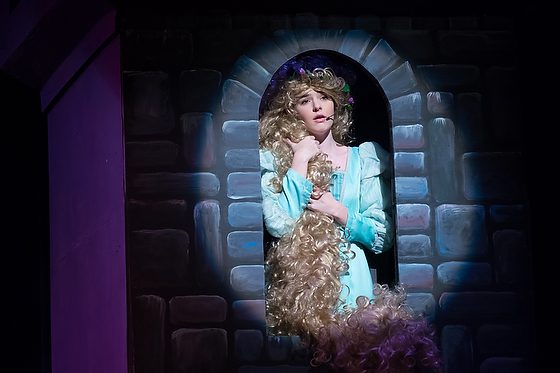
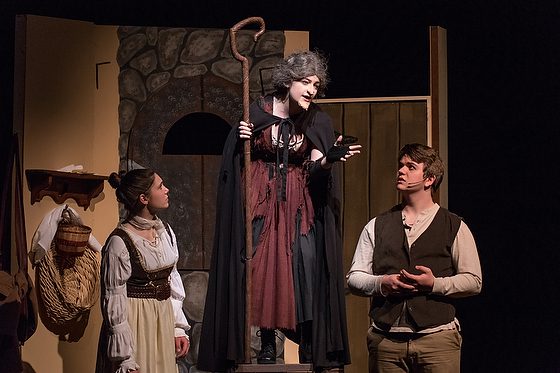
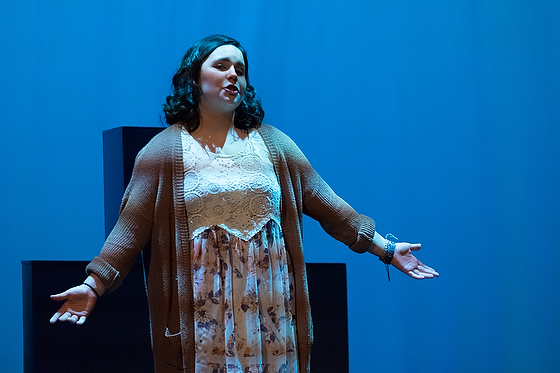
My daughter loves theater, and this made me want to pull out some photos I shot during college at East Carolina University’s theater doing Show Boat.

To scan my negatives, I used the Nikon Coolscan V-ED [Adorama has one for $739]. On Amazon, it sells for $2,000.

A high-performance dedicated film scanner from Nikon, the CoolScan V ED offers high-quality scanning of 35mm slides, 35mm film strips, APS film (with optional IX240 film adapter), and prepared slides (with optional medical slide holder). The Scanner-Nikkor ED glass lens offers a 4,000 dpi optical resolution, while the 3,964-pixel linear CCD image sensor and 14-bit A/D input (8-/16-bit output) provide true-to-life, brilliant results.

Nikon’s own LED illumination technology ensures accurate color with no warm-up time or risk of heat damage. Scan times are as fast as 38 seconds including image transfer to display, and as fast as 14 seconds in preview mode. Automatic color/contrast compensation helps you achieve accurate results, while the ICE4 advanced digital image correction suite of technologies helps to restore old slides to their original glory. Additionally, the included Nikon Scan 4 software provides a comprehensive and easy-to-use interface for managing your scans.

The CoolScan V ED has a convenient plug-and-play USB interface, while one-touch scan and preview buttons will have you scanning film in no time. PC and Mac compatible, the CoolScan V ED also comes backed with a one year limited warranty.

Pentax K1000 and 50mm lens, Kodak Tri-X

If you have scratches and spots like in this photo, you must use PhotoShop to clean up the image.

SilverFast 8

Now Nikon has stopped supporting it, so to make it work on my Macbook Pro, I bought the software SilverFast 8.0. This software is even more advanced than the original Nikon software I used years ago.

 
Now the learning curve is a little steep to get used to scanning with the software. You can see the version and what I set up for when I downloaded the software. You pick your scanner.


There are a lot of videos already made that you can watch to help you step by step. Just Google SilverFast 8 and look for just the videos; there are many to choose from.

Pentax K1000 and 50mm, Kodak Tri-X

There is one this great about the scanner. Compared to the time spent in a darkroom working on print forever burning and dodging, with the scanner and PhotoShop, you can get far superior results.

I hope this inspires you.


Multimedia Storytelling–NEED to know vs. WANT to know

 
Last year’s storytelling workshop in Lisbon, Portugal [Fuji X-E2, Fuji XF 18-55mm, ISO 6400, ƒ/13, 1/450]

When teaching workshops on storytelling, we always like to get a feel for what the students want to learn from the experience.

There are some very consistent things people want to learn from a storytelling multimedia workshop. One of the top things listed usually involves software. They want to learn how to use Final Cut Pro X or Adobe Premier Pro, for example.

Now, if we created a workshop based on what people talk about, most would leave the workshop not much better than when they came. Even the things they don’t mention are sometimes at the top of the list.

The workshop location is a HUGE factor in people choosing to attend. They might not sign up if the workshop were somewhere down the street from them versus some exotic place like Cuba, Paris, or Bucharest, Romania.

What students list at the very bottom of their desires to learn is audio.

Click on the photo to see a larger one.

Here is the timeline inside Final Cut Pro X on one of my most recent projects. The interview is the foundation for the project, and the sound for this is what is driving the entire project. What the subject is talking about influences what images should accompany the words.

While we teach how to interview and get the sequencing of the interview in an order that helps engage the audience and tell the story. The interview sound must be clear, or all else is a waste.

Shure FP1 with the WL183 (Omnidirectional) microphone

Quality Sound

The foundation for every multimedia/video project is the soundtrack. Here are two microphones I use all the time, but regardless of what microphone you choose, you must know how to use it and set the microphone levels to get the sound just right.

Shotgun Røde Video Pro Microphone

People will not watch your project if the sound is of poor quality. However, they are more likely to care if they sound high quality and the visuals are mediocre than if they were reversed.

Which Microphone?

My recommendation for anyone going down this storytelling road is to invest in a lavalier microphone. One with a long cord of 20′ will work great for interviews and is reasonably priced. You can get one for about $23 from most stores.

I like this microphone because it picks up sound close to it and drops off pretty quickly, so you can put this on someone’s collar and get their voice, and lavalier will diminish ambient sound around the room.

The shotgun microphone is excellent when you don’t want to see the microphone, and depending on how you place it in relationship to the subject can give you a charming sound. It takes more practice to use this over the lavalier.

NEED to know vs. WANT to know

Now back to the headline. While learning sound is not all that sexy, based on everyone pretty much ranks this at the bottom of what they want to know; it is the foundation of the project. Good sound is equivalent to good exposure with your photography/video, but the difference is that it is more important.

I did a simple package on how I did boxes years ago. It is pretty easy to edit once you have the voice-over recorded. See if you can see how the sound drives the project.

http://www.stanleylearystoryteller.com/Chick-fil-A/Multimedia/_files/iframe.html?=560×470
Here you can see the package I produced. The box was in 2008 when I used an audio recorder and photos. But this is the backbone of the video to understand that the soundtrack becomes the timeline for the project.

http://www.stanleylearystoryteller.com/Chick-fil-A/soccer/_files/iframe.html?=550×481

Advice to those wanting to learn multimedia/video

The most important tip I can give you is to be open to the professional teaching you. Try your best to hear what the professional says you NEED to know versus what you WANT to know. Don’t filter out what you think is unnecessary or not that interesting.

Pour yourself into every step of the process of learning a skill. The reason you do this is not that you can pass a test, but instead that you will master the subject.

Do you want a surgeon who passed their tests or knows about your procedure? Just as a surgeon who didn’t pay attention except to the exciting parts of medical school will lose a life, so will the storyteller who only learns what they want to know. They, too, will lose the life of the story.


Here is another example. Listen to the soundtrack and see how it moves the story along.

https://player.vimeo.com/video/68857225


New Camera Gear Can Create Panic


When my wife and daughter help me with assignments, and it comes time to pack up, they bring the gear to me, and then I put it away.

Often as we are doing this, the client is nearby, and my wife explains how I have a particular place for everything and how she doesn’t want to cause me to panic.

New Gear Creates Panic

Photography is excellent for those who tend toward Obsessive Compulsive Disorder. Of course, no one wants to be OCD because it can be debilitating. But camera bags and all this gear work great for organizing your stuff.

Here you can see my Think Tank Airport Security™ V2.0 Rolling Camera Bag, That I use all the time.

Once you get your bag all set with your gear, for the most part, the equipment has to go in the exact location, or it will not fit. But then, all it takes is buying just one more piece of gear that requires you to reconfigure your bag.

So the other day, I did just that and a day later took off to Houston, Texas, for a job. I reached for a piece of gear I use all the time, and it wasn’t where I always put it.

When I didn’t have the gear, I thought of a story in the Bible that captured my emotional state so well.

Luke 15:8-9
“Or suppose a woman has ten silver coins and loses one. Doesn’t she light a lamp, sweep the house and search carefully until she finds it? And when she finds it, she calls her friends and neighbors together and says, ‘Rejoice with me; I have found my lost coin.’

While on the job, I was on a short timeline and out of town. I quickly adjusted and got the job done, not using that piece of gear. I must have left that gear on the fireplace where I was putting things while rearranging my camera bag.

Last night after returning from Houston, I, too, searched my house. When a cleaner comes to our home, she tends to put things away, and sometimes it takes us a little while to find them. So I knew she had been at our house around that time and thought maybe she had moved it somewhere.

I asked my daughter and wife if they had seen my gear. They had no clue as to what I was describing. Not finding stuff went on for a few hours. Finally, I decided to go and get out of the house to clear my head and get something to eat. Later I returned and continued to look.

It is essential to note that unique gifts often accompany the challenges of Asperger Syndrome [which I have]. Indeed, a remarkable ability for intense focus is a common trait. But unfortunately, I could not let go until I resolved this issue.

Beating myself up

I then remembered I had some boxes that the new gear came in and wondered did I throw them away accidentally. I have more jobs soon and was upset that I would have to go to the camera store and replace the gear. It would be around $800. No one just casually replaces something for $800.

Finally, I gave up after finding an older piece of gear and realizing I could use this temporarily. But unfortunately, the rechargeable batteries in the equipment were dead. So I went to my bag and looked for the chargers–which also had been moved around.

I found my gear as I took one of the rechargers out of my bag.

Memory Issue

Once a memory is created, you must store it (no matter how briefly). Many experts think there are three ways we keep memories: first in the sensory stage; then in short-term memory, and ultimately, for some memories, in long-term memory.

Important information is transferred from short-term memory into long-term memory. The more the information is repeated or used, the more likely it is to end up in long-term memory or be “retained.”

Usually, I do a pretty good job of remembering my organization changes because I am physically moving the gear and thinking about what I am doing it normally sticks. If, however, I get a phone call in the middle, this can affect my memory recall.

Forgiving Myself

The hardest part of an event like this in my life is the ability to forgive myself. It is more complex most of the time to forgive myself than others.

“Holding on to anger is like grasping a hot coal with the intent of throwing it at someone else; you are the one who gets burned.” –– Buddah

Benefits of forgiveness:

  1. Lowers stress levels
  2. Lowers your heart rate
  3. Lowers blood pressure
  4. It helps you sleep better
  5. It enables you to live longer

I could feel my body relax once I found it, and then as I began to forgive myself for my memory lapse, I also felt the stress release.

Had I lost the gear, I would have bought replacement gear and then also had to forgive myself so that I could move on.

Losing gear will happen again in the future when I cannot find something. The key to success is allowing yourself to be human and make mistakes.

How to Create HD 360º Panoramic


First of all, you are going to have to invest some money in these items:

  1. Fisheye Lense – I recommend the 180º that creates a circle image. I have the Sigma Fisheye 8mm f/3.5 EX DG Circular Fisheye Autofocus Lens for Nikon AF for $899.00
  2. Nodal Panoramic head – link for some on B&H. Expect to pay about $500
  3. Panorama Image Stitching Software – I use Panoweaver 9, which runs for $299.00
  4. Good tripod to put a panoramic head on
  5. Release cable – I use an infrared remote with my Nikon D750
  6. Adobe PhotoShop – While you can use the panoramic so you can fix the floor if you don’t want a logo there. $600
Click on it to see the larger version
So here is my camera with my nodal panoramic head on a tripod.
 
 
Here is a side view
 
 
Now the other side


You will take four photos and then stitch them together with the software. Next, I create a Cubic Panorama, the six sides of a cube.

Use a remote to keep the camera very still.

 
I then export that image to PhotoShop. Using PhotoShop is where I will remove the tripod, as seen in this photograph.
 
 
To get rid of the tripod [why I use PhotoShop], I go to filter and select vanishing point
 
 
Next, I select the cloning tool, hold the option key, and select the area I want to clone from to fill over the tripod.
 
 
Because I chose the vanishing point, the cloning will keep all the dots in perspective and makes for easy patching. Great for floors where tiles and other patterns are not always squared but more often slightly askew.

Now, I am using the more expensive Panoweaver to have something that works on mobile devices like the iPad and iPhone. There are two versions created; one is flash based and has the little planet view that you see at the top and below. I have you fly down into the panoramic, creating a video-like feel to the panoramic.

Now, if that were all there is to this, it would be super easy. However, after doing this for about ten years, I have found that the knowledge of stitching helps you pick better locations. For that reason, if you enjoy them and would like me to create them for your place of work or something else, give me a shout.

How to see a photo 4 different ways

 
Little Planet Version

Here is the same photo, but I am showing it to you in 4 different ways. The top image is what we call the Little Planet view.

It would help if you had special software to do all these photos. Some Apps exist to help you create pictures similar to these with your phone–just not as consistent and precise as the way I did it with a tripod, fisheye lens, and particular nodal head on the tripod.

iPhone Apps
Android Apps

Photo #2 360º Panoramic gut stretched horizontally

Photo #2 is the same but extended to a large horizontal photo. Often this is cropped with less sky and ground to give a more strip print. This photo would then be like the inside of a cylinder.

Photo #3 Cubed 360º Panoramic

Photo #3 is the same photo, but instead of how it would appear inside a ball, this is how it would appear inside a box. Again, the first four panels are the sides, then the top and bottom are the last two.

This last one is an interactive 360º panoramic. You can watch it; it will rotate and let you see the 360º cylinder, or you can click on the menu arrows to go up and down or change direction. You can also just put your mouse and, while clicking and holding, drag the image up, down, and sideways to control it yourself.

What would you say if Eugene Smith was on the front row listening?

Don Rutledge was the speaker on the second day of the Atlanta Photojournalism Conference in 1975. The night before, William Albert Allard had blown away the group with his work on the American Cowboy. The first time anyone had spoken to the group and gotten a standing ovation.
 
Following Don Rutledge would be Eugene Smith. Don admired Smith’s work more than any other photographer at the time. Eugene Smith is sitting right in front of Don during this talk.
 

Don Rutledge
photo by: Ken Touchton

Listen to Don’t talk here:

There are three types of photographers

Snap Shooter
Gimmick Shooter
The fullness of Photography Shooter

The Snap Shooter enjoys taking pictures. The Gimmick Shooter uses tricks to keep your interest. Finally, the Fullness of Photography shooter uses his eyes, brain, and heart to shoot.
Don got those three elements from Ernest Haas.

The Fullness of Photography Shooter I will call the concerned photographer. They identify where people are in this world.

Now all of us can drift away from being concerned. Photographers use excuses. Many photographers use reasons like lack of time to dominate situations.

The concerned photographer listens and looks. They put it all together and stand flat-footed in this world. We are tuned into the moments in the zone and can anticipate those peak moments.

1) We need to learn to turn handicaps into advantages.

SIDE NOTE

I used to travel with Don doing stories for the Black Star photo agency. These would be features that he could take at his own pace. Later I understood how this was Don’s way of training himself to have muscle memory when he had to rush.

Don pointed out that all photos are taken at a fraction of a second, so it isn’t a lack of time–it is a lack of discipline we lack in these times of having to work quickly.

2) We complain about photo editors who don’t understand. To update this a bit, it is anyone you are shooting for today.

Our problem is often our ego. We think we are a great photographer. So we often say or want to speak to our clients if you only gave me a chance. “This is where a picture is worth a thousand words,” says Don, with the audience laughter following.

Don’s advice is to shoot the photo the way you want to and show it to them when they crop it poorly. Then, talk to them about what you were trying to say.

IMPORTANT!!!!!! Don said you would probably not be heard the first or second time. But you are educating people over time.

I watched and wrote about how long it took Don to turn around organizations in my thesis. Here are links to it.

Storyteller: Master’s Thesis on Don Rutledge: Chapter OneJan 16, 2013
For this reason, this writer is doing his thesis on Don Rutledge for publication. Don has worked for the Black Star photo agency in New York for over thirty years. During this time, he has also worked for the Home Mission and 
https://t86.1e3.myftpupload.com/Storyteller: Master’s Thesis on Don Rutledge: Chapter TwoJan 12, 2013
Don was born in Smithfield, Tennessee. The family moved to Murfreesboro, Tennessee, south of Nashville, shortly after being born. “Good ole’ home folk,” is what you would say about the Rutledges. They lived on a farm 
https://t86.1e3.myftpupload.com/
Storyteller: Master’s Thesis on Don Rutledge: Chapter ThreeJan 13, 2013
Master’s Thesis on Don Rutledge: Chapter Three. HOME MISSION BOARD, 1966 TO 1980. When Walker Knight went to the Home Mission Board of the Southern Baptist Convention in 1959, he was handed a photo story
https://t86.1e3.myftpupload.com/
Storyteller: Master’s Thesis on Don Rutledge: Chapter FourJan 15, 2013
When Dr. Keith Parks went to the Foreign Mission Board in 1975, his responsibility was to head up the mission support division. Establishing one of the finest communications departments possible was one of the goals that 
https://t86.1e3.myftpupload.com/Storyteller: Master’s Thesis on Don Rutledge: ConclusionJan 16, 2013
To a non-Christian, Don would have been considered crazy for taking the positions with Southern Baptist. Going to the Home Mission Board was a step down in pay and prestige for Don Rutledge. Why would
https://t86.1e3.myftpupload.com/

Bottom line Don is telling us we need to prepare for some “Show and Tell.”

Next, Don warns us to have our Egos and Abilities in check with each other. We need to know our abilities and not have our egos way out and in front.

Now Don also mentions that being a part of an institution like LOOK Magazine helps a photographer. It will open doors for you and give you a budget to work with. However, there is a downside to an institution for a creative. You will find that they want to stop you and make you fit their system.

Just know that being a creative photographer and wanting to change the world sometimes will take time, time for you to educate those around you about the work you are producing. You must be able to articulate your vision to help them see it.

Face Recognition with Lightroom 6

It takes time to explore new or upgraded software, so all I am writing about is just what I discovered and loved immediately with the latest Lightroom upgrade. As I discover all the new bells and whistles in Lightroom 6, I will write about them if I see something worth my time. For example, I downloaded Adobe Lightroom 6 and fell in love with the Face Recognition feature. Open a collection and then click on the little face [red arrow pointing to it], and it will bring up all the faces, just like what happens on Facebook when you upload images, asking you if you want to tag people.

Click on the image to see larger.

Throughout my career, I have shot large projects and had to go through and identify everyone in the photo. Now I can at least scan a complete shoot and put the names that Lightroom sees into every image’s metadata.

Now when you go to each photo, you can check to see the names of people. If the face isn’t recognized, you can still click on the box at the bottom, as I have done here, create a box, and type in the person’s name.

Click on the image to see larger.

Here it missed Philip Lin, and I went back and then typed his name into the photo.

Click on the image to see larger.

It puts all the names in alphabetical order based on the first letter in the name. Now, while the photo isn’t captioned left to right as you would have in the caption, having all the names from a large 3,000 + images in each photo is a huge time saver.

It put the names in two IPTC fields: 1) Keywords & 2) People Shown.

When you export, you can remove all the names or add them with a click. The names are all saved in your RAW files.

I can see almost all my friends who are photojournalists and need to have names with all their photos being thrilled with this feature. The other group of photographers that will benefit is anyone who keeps a database of pictures and needs to search for them to find people.

I know of one client I have that this feature could improve their image archive system almost overnight.

Photographers be like farmers in the Springtime–Prepare the fields


Fuji X-E2, Fuji XF 18-55mm, ISO 1000, ƒ/4.5, 1/500

This time of year is when you can drive around your neighborhood and see a significant difference in lawn care. This photo shows just the difference spreading Weed & Feed with the watering can make in the appearance of your lawn.

Only the farmer who faithfully plants seeds in the Spring, who reaps a harvest in the Autumn.
 
B. C. Forbes
Fuji X-E2, Fuji XF 18-55mm, ISO 2500, ƒ/4.5, 1/500

A few weeks ago, I tackled the problem of bare spots in my yard. Well, they are more significant than spots. There is a lot of shade, so this will always be an area that needs more work than the sunny sections of the yard.

I went to HomeDepot and bought Powermate 10. 43 cc 2-Cycle Gas Cultivator to help turn the soil with the Rebel tall fescue, pelletized limestone, & Vigoro 15m weed & feed.

Just two weeks later, you can see the results of a much greener yard in these photos.

Fuji X-E2, Fuji XF 18-55mm, ISO 3200, ƒ/4.5, 1/500

Here you can see the areas I didn’t cultivate did not produce as much grass. Some grass seed and fertilizer fell in those areas, but the difference was in the turning the soil about 2″ – 3″ that buried the seeds and helped them grow.

Just celebrating Easter at our church reminded me of the Parable of the Sower that Jesus told.

Matthew 13: 3-9
“A farmer went out to sow his seed. As he was scattering the seed, some fell along the path, and the birds came and ate it up. Some fell on rocky places, where it did not have much soil. It sprang up quickly, because the soil was shallow. But when the sun came up, the plants were scorched, and they withered because they had no root. Other seed fell among thorns, which grew up and choked the plants. Still other seed fell on good soil, where it produced a crop—a hundred, sixty or thirty times what was sown. Whoever has ears, let them hear.”

Photographer Tips:

You reap what you sow. We have all heard this before, but what can a photographer learn from this? First, you must return to your present clients and reconnect with them. Next, you need to give them more information about you and what new things you are doing. Reconnecting with clients is like fertilizing your yard.

Now some ground is hard as a rock. So first, a farmer uses a tiller to break up dirt that has not been farmed or has become extremely hard. Next, a farmer uses a cultivator to loosen the soil in an existing planting area, weeding the area during the growing season, and mixing compost into the ground.

You may have to do a lot of leg work and go and beat the pavement finding those new clients. You may need some good examples to leave with them through your website, e-newsletter, or printed material. You may need to get friends working with those potential clients to help introduce you and break the ice for you.

Competition:

Even Jesus knew that your competition would try and sabotage all your good work. So he told a parable about it as well. It follows the Parable of the Sower:

Matthew 13:24-30
Jesus told them another parable: “The kingdom of heaven is like a man who sowed good seed in his field. But while everyone was sleeping, his enemy came and sowed weeds among the wheat, and went away. When the wheat sprouted and formed heads, then the weeds also appeared.

“The owner’s servants came to him and said, ‘Sir, didn’t you sow good seed in your field? Where then did the weeds come from?’

“‘An enemy did this,’ he replied.

“The servants asked him, ‘Do you want us to go and pull them up?’

“‘No,’ he answered, ‘because while you are pulling the weeds, you may uproot the wheat with them. Let both grow together until the harvest. At that time I will tell the harvesters: First collect the weeds and tie them in bundles to be burned; then gather the wheat and bring it into my barn.’”

They didn’t have weed & feed in those days. We as photographers may not have the weed control to put out either, but the lesson is clear others will try and attack you at times. Be careful at trying to fix this–you could damage the excellent seed you planted.

The message is straightforward having a big harvest requires you to work the field. First, you must get that tiller and break up the harsh ground. Next, using the cultivator to mix the seed and fertilizer would be best. Finally, you will need to water the field if you expect to see a crop worthy of harvesting.

You can’t reap what you do not sow.

Telephoto or Wide-angle Lens?

 
Nikon D4, AF-S NIKKOR 28-300mm f/3.5-5.6G ED VR, ISO 6400, ƒ/6.3, 1/100

Should you use a Telephoto lens or a Wide-Angle lens? Well, that all depends.

Here I walked across the street and up a small hill and shot back at all the First 100 Campers sleeping over the night in the parking lot for the Grand Opening of Chick-fil-A at Northeast 8th Street in Bellevue, Washington. The First 100 get free Chick-fil-A for a year.

I did a great job showing the campers in front of the store.

 
Nikon D4, AF-S NIKKOR 14-24mm f/2.8G ED, ISO 9000, ƒ/8, 1/100

Here I walked a lot closer and shot it with the 14-24mm at 14mm to emphasize all the tents in the parking lot.

Which photo is better?

Well, that all depends on what you are trying to say. I am covering this story because Chick-fil-A is just now with this Grand Opening getting into the Seattle, Washington market.

I think the first photo shows the city of Bellevue and even the corporate offices of Microsoft just next door to Chick-fil-A. The lower photo could almost be shot anywhere because the emphasis is more about what is the same at the grand openings–tents in parking lots.

Now, if I only needed one photo, I would shoot the top photo, but I am a seasoned journalist and know to cover it completely, so I shoot them all and even more angles. Getting a variety of angles is critical when you are telling the story. The array of photos is especially true in multimedia, where you may show both with other images in a series. For example, you may talk about the campers and how this is in the city of Bellevue.

The question is not just which is best, but why not shoot both and then decide later as you figure out what you want to say? Maybe you will need both.

The Kodak Carousel

I own a Kodak Carousel projector. For me, it was a magic lantern to the past. I loved how simple it was to operate.

I regularly created slideshows for my work, synchronizing two or more projectors to a soundtrack. The audio tape had two tracks: left and right for stereo. One track was for mono sound, and the other was for code to control the projectors.

The other day, I got hooked on the TV show Mad Men. According to the show’s pilot, “Mad men” was a slang term coined in the 1950s by advertisers working on Madison Avenue to refer to themselves.

I watched the show yesterday about the agency working with Kodak on their new slide projector, which they wanted to promote the wheel aspect of the tray.

This scene is not only a masterfully written explanation of what advertising executives do but also gets to the heart of the power of photography.

Here is that scene for you to watch.

While the power of images is used all the time by Madison Avenue to hook us on products and services, I think Don Draper’s image selection in the pitch gets to the real power of photography for the individual.

I love this speech by Don Draper:

Fujifilm X-E2, FUJINON XF 18-55mm, ISO 6400, ƒ/3.2, 1/220

Yesterday at our church, I took a few photos to preserve such a fun service. I shared this photo on my Facebook page, and many shared it. People loved it not just because their kids were in the picture but because of their own “nostalgia.”

I loved it because this year’s church created a unique family service. So often, parents of little toddlers feel pressured to keep their kids quiet in a “big church” here; they want the families to feel welcomed.

I have never seen this many kids at our church during a Children’s Sermon.

Fujifilm X-E2, FUJINON XF 18-55mm, ISO 3200, ƒ/3.8, 1/500

I also captured my daughter singing as part of a quartet. I was incredibly proud.

Today’s photos help me remember and appreciate my wonderful family. This photo is from Easter 2001, fourteen years ago, when my daughter was just two years old.

We might not be showing our photos on a Kodak Carousel projector anymore, but the image lets us travel the way a child travels. Around and around and back home again to a place where we know we are loved.

Ever wonder what happened to your camera???

The other day I was trying to take photos with my Nikon D4, and it would just not focus. There was a delay when I pushed the shutter until the camera fired. 

I looked to see if I had set the timer. I didn’t select it. So now I am telling myself, what the &#%!@?!? 

I had put the Pocketwizard TT1 on the camera and was attempting to fire off the camera flash.  

I can report that this took a couple of days to figure out. Not proud of how long this took. 

The problem was the flash control on the Nikon D4 was set to Red-eye reduction. To change those settings, you push the flash button on the top of the camera and turn the main command dial. See the illustration here. 

  Here are the choices on the camera for you.

I do not remember ever changing this, so this is why I had a tough time isolating this problem.

Quick solution 

Most all cameras have a way to reset the camera to factory settings. However, the time it takes to figure out what setting the camera changed may take longer than just a quick reset. On the Nikon D4, you find the two buttons with the green ●. You can find them by the ISO and WB buttons on the back of the camera. 

Just push these two buttons, which will likely solve most of your problems.

One more way on the Nikon D4 camera [most cameras have this function] is to find all your current settings and change that one item.

I am writing this blog as much for myself as anyone else.  

Here is an interesting factoid: When you take good notes, you will remember things well enough that you rarely have to look at their notes again.

It seems that writing anything down makes us remember it better. But, on the other hand, not writing things down is just asking to forget. So it’s a kind of mental Catch-22: the only way not to have to write things down is to write them down so you remember them well enough not to have written them down.

Now you may know another reason I do a blog. It helps me to go through the process of writing something down, and in the process, I have discovered I remember more things. Another thing is I now have an online database of topics I can find later when I am having trouble remembering or I want to share with someone who asks me a question.

Nikon D750 Settings


I was asked what my settings were for the Nikon D750. Here are most of those settings, but I want to be sure you know that these are not what I use every time. I do modify these based on situations.

However, this is how I generally leave the camera set.

  • Aperture Priority
  • Slow Flash Sync
  • Auto Focus – Single
  • Auto Focus – Auto set to find faces
  • White Balance A1
  • RAW
  • Matrix Metering
  • Auto ISO
    • Lowest ISO 100
    • Highest ISO 12800
    • Shutter Speed 1/500
 

I am post-processing all images through Adobe Lightroom 5.7.


The first thing I am changing on these settings is White Balance. I will Custom White balance most of the time using the ExpoDisc.

The second thing I am changing is the Auto Focus. Again, I will choose a single point using the 51 pts to move the tiny box around the viewfinder where I put it most of the time on the subject’s eyes.