Photographing birds at a feeder in the rain

We just love watching the birds at a feeder on our deck each day.  Of course we have to chase away some of the squirrels. 

I was wanting to shoot some photos and it was raining–then I thought let me show you how to do this in the rain.

We enjoy our bird feeder and the birds that visit us.
6
By using a flash I can somewhat capture the bird in flight.  Actually I startled the bird with the flashes.
3
Here is the simple setup.  I did this while it was raining and so I covered the flashes with zip lock bags to keep them dry.
4
Since it was raining it was darker than normal and the flashes helped light up the birds but the background disappears.
2
I decided to put one flash pointing to the background (see setup below) to help keep the background from disappearing.  However the birds had stopped for a while visiting when I was doing this.
1
The Nikon SB900 flash to the far right is set on 200mm zoom.  This helps put the light on the distant trees.  The light to the right is lighting the bird feeder and any birds.

Part 2: The exotic location might be your backyard

1
I am always looking for interesting visual elements.  While this won’t win a Pulitzer it is different and I think makes you take a second look.

On our local TV station Channel 11, an NBC affiliate, they are promoting doing random acts of kindness. I get goose bumps when I think of all the mission projects our church is involved in. A good number of the mission partners we work with were actually started by members of our church.

One that I go to often is the North Fulton Community Charities.  We donate clothing and things we are no longer using to the Thrift Shop. North Fulton Community Charities (NFCC) is a non-profit human service agency dedicated to preventing homelessness of individuals residing north of the Chattahoochee River in Fulton County (Alpharetta, Johns Creek, Milton, Mountain Park and Roswell). NFCC assists families with basic needs such as food, rent and utilities, and clothing during short term emergencies.

2
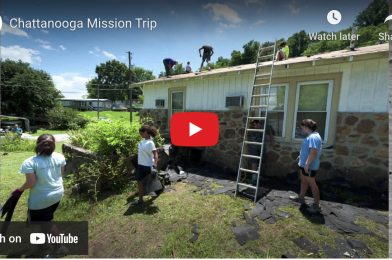
The Roswell Presbyterian Youth group works on an older ladies home.  They scrapped the old paint off.  They have sanded the boards and also filled holes. 

If you are a professional communicator you can create your own blog and tell the stories of those in your community.  You can help educate those around you about the needs and opportunities for others to serve in their community.

3
You can see the places they sanded and see how the new fresh coat of paint will help the home last longer against the elements.

The age of service starts young in our church.  The vacation bible school had a competition last week. The kids all brought in pennies and see which class raised the most money to help with a charity.  They raised over $1,000.  This was children as small as the toddlers.

4
I am using a flash off camera to be sure you can see the youth as they work.  If i didn’t the faces would be primarily back-lit and the flash helps you see their faces.

The other cool thing about this project to me is you don’t have to have money to get involved.  You can give of your time.  Volunteer your elbow grease and make a difference.

5
Bill Silzle, chemical engineer and member of Roswell Presbyterian, donated his time to replace a garbage disposal on the same house they are painting.  I think he maybe over qualified.

I believe my gift in these project is creating compelling images that helps tell the story and inspires others to get involved.  This fall our church is going to have a display of photography up in what we call “Main Street.”  it is the major hall of our church that folks walk through where we will hang large prints (20″x30″) to help tell the story of our mission projects around the city, nation and world.

We will have captions to tell you where the photo was taken and what the church helped with the charity. After the exhibit runs for a couple months we will then take the prints down and put them in other locations through the church.

What are other ways you can use photography to help charities?  Leave your comments below.

Grand Opening for New Chick-fil-A in Chicago

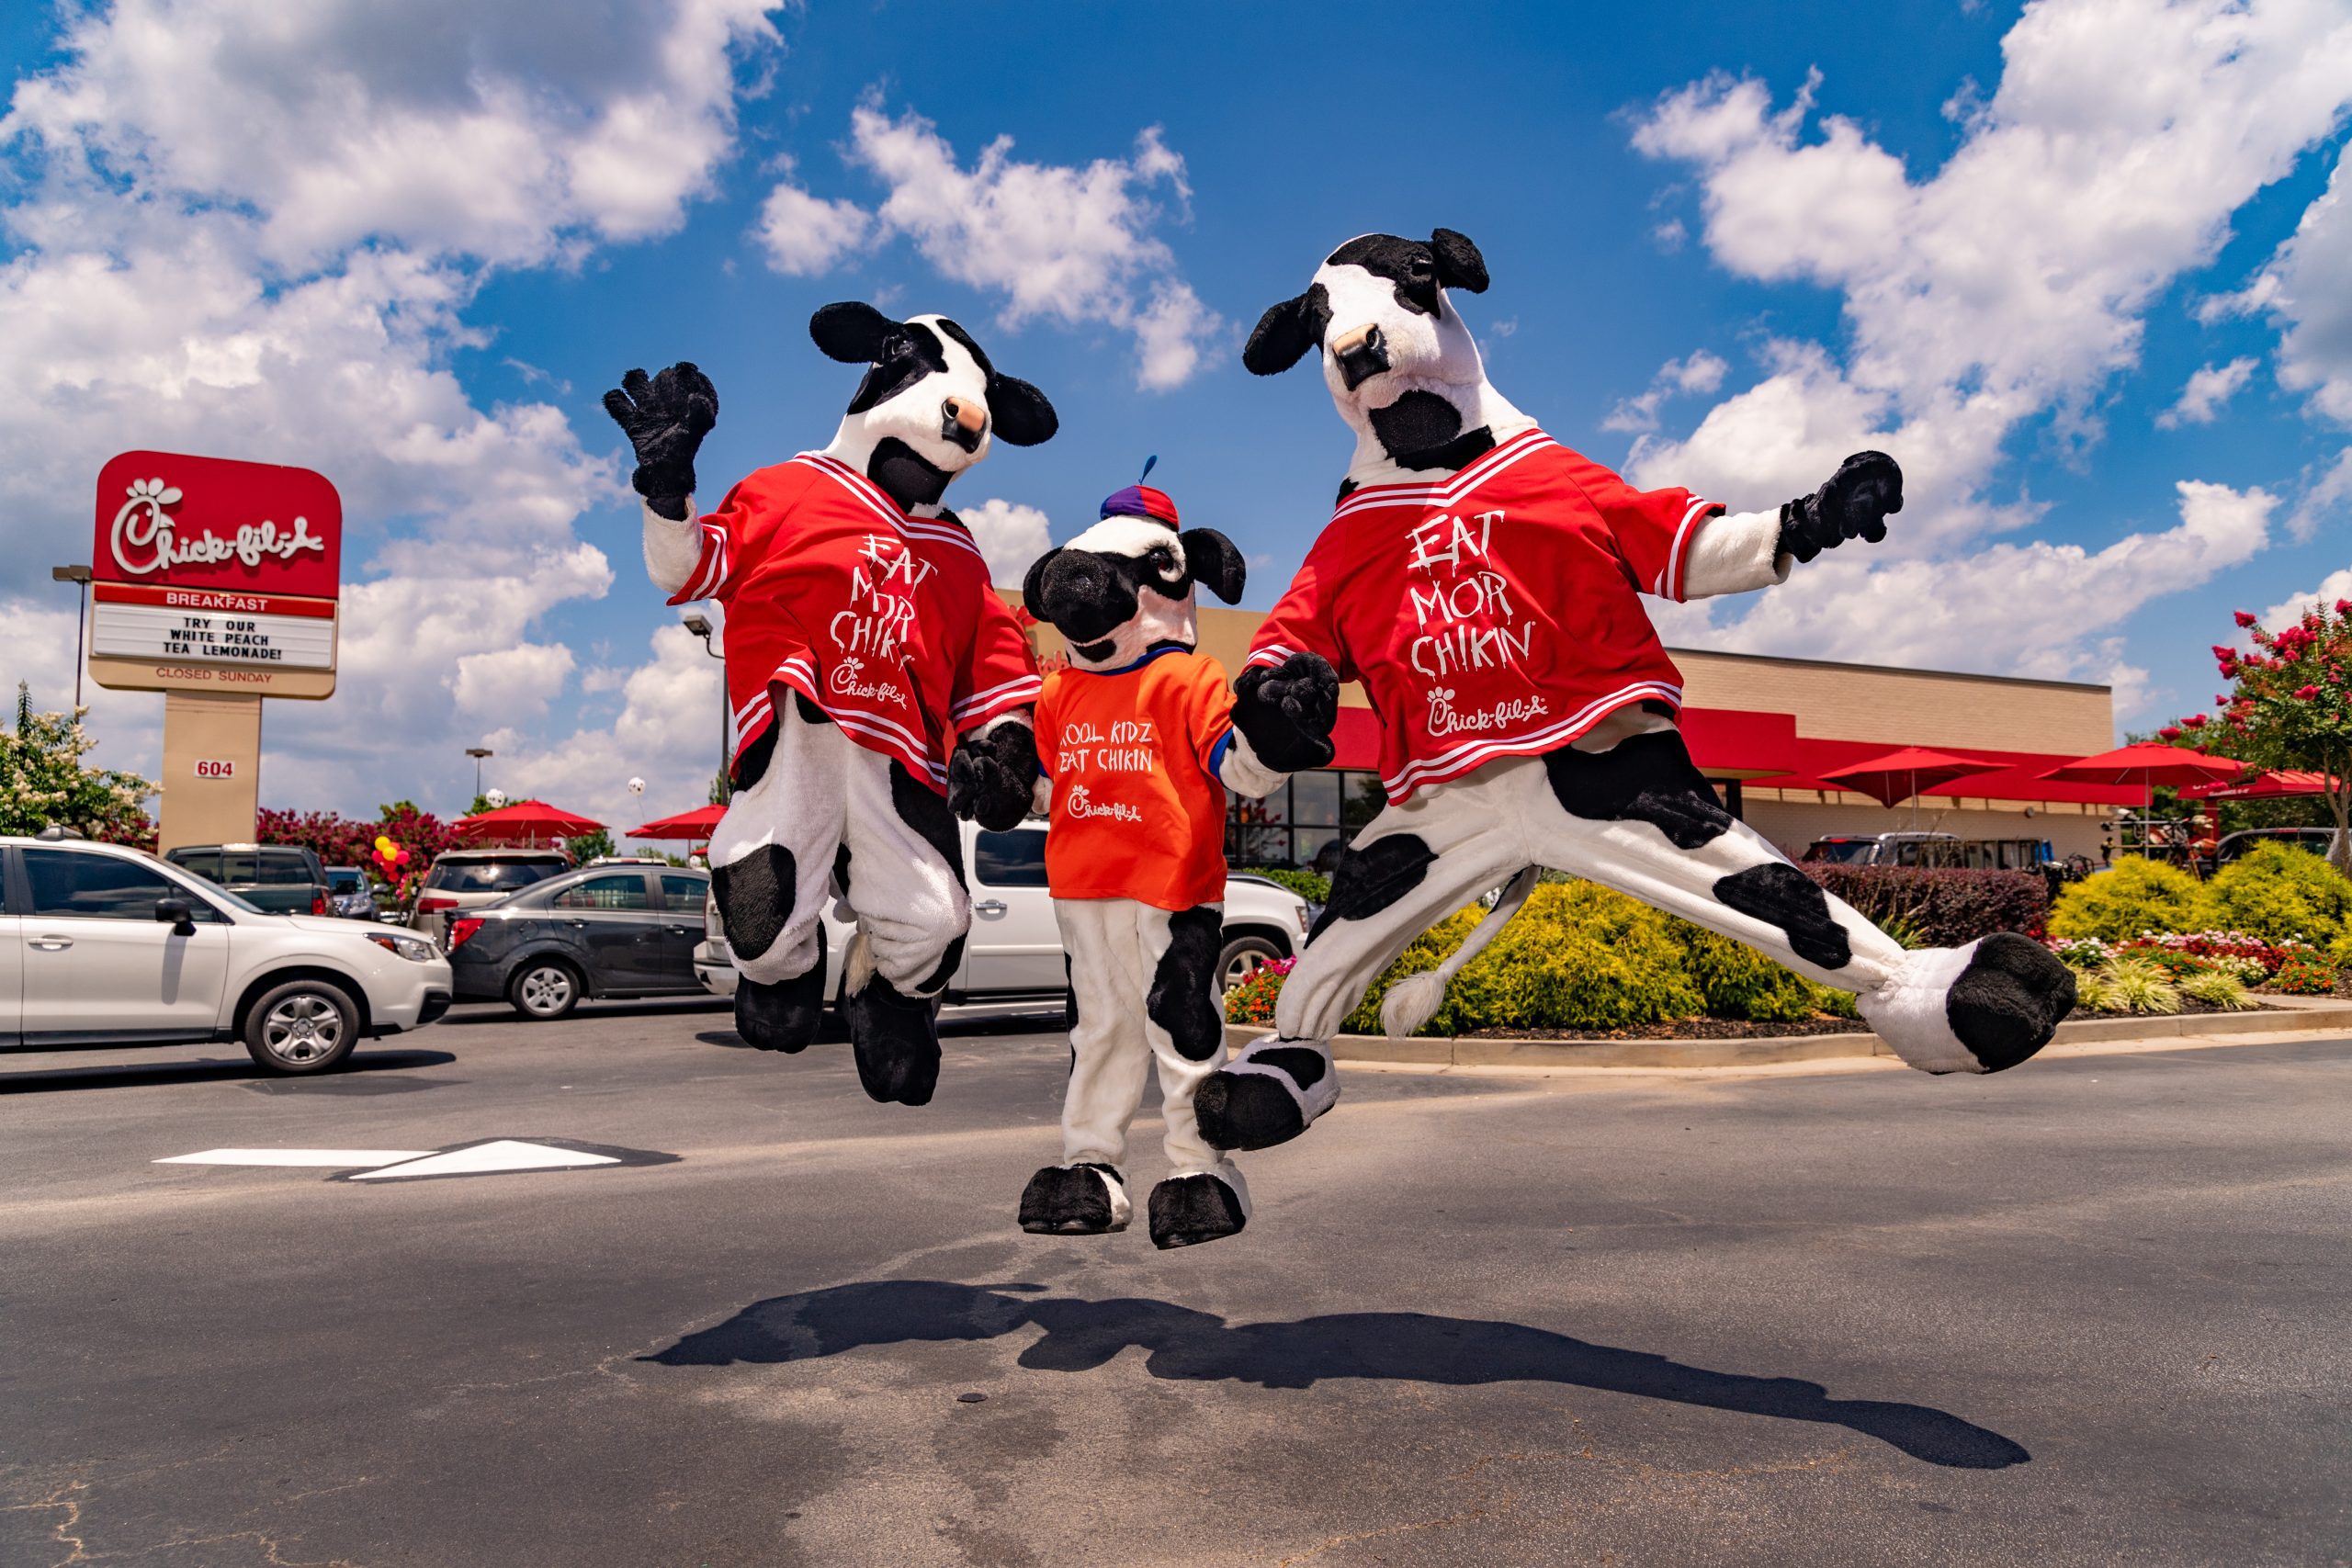
This past week I was in Chicago for the grand opening of the first Urban downtown location for a Chick-fil-A. So many of the people of 1,500+ stores employees wanted to see the location.

So, we took them there virtually with a 360 panoramic shot.

I can show you two exterior shots of the place. I did some interior shots just for them to see, but for proprietary reasons I can’t show you those. Maybe this will make you want to get on the plane and go.

What do you think of these two street views?

4
New Chick-fil-A in Chicago

2
Sidewalk in front of Chick-fil-A
Here are some more 360 panoramic shots I have done for Winshape Retreat Center in Rome, Georgia WinShape

Now the other thing is if you like these you can see how Winshape Retreat Center hired me to do the same thing to show off their facilities. This is part of the foundation created by the Cathy family that started Chick-fil-A.
This facility is what they use for marriage retreats and groups to use when they are not doing conferences. They need groups to be able to take tours of their place and they cannot always go to Rome, GA to see the location, so the 360 panoramic let’s them visit virtually.
Can your company or nonprofit use this technology? Give me a call if you want me to help create these for you.

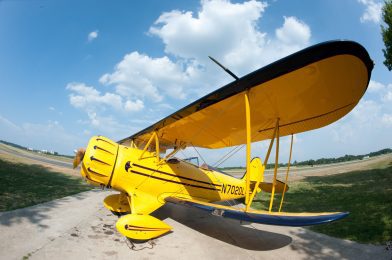
Sometimes you need a unique lens like the Fish-Eye.

Waco YMF Biplane

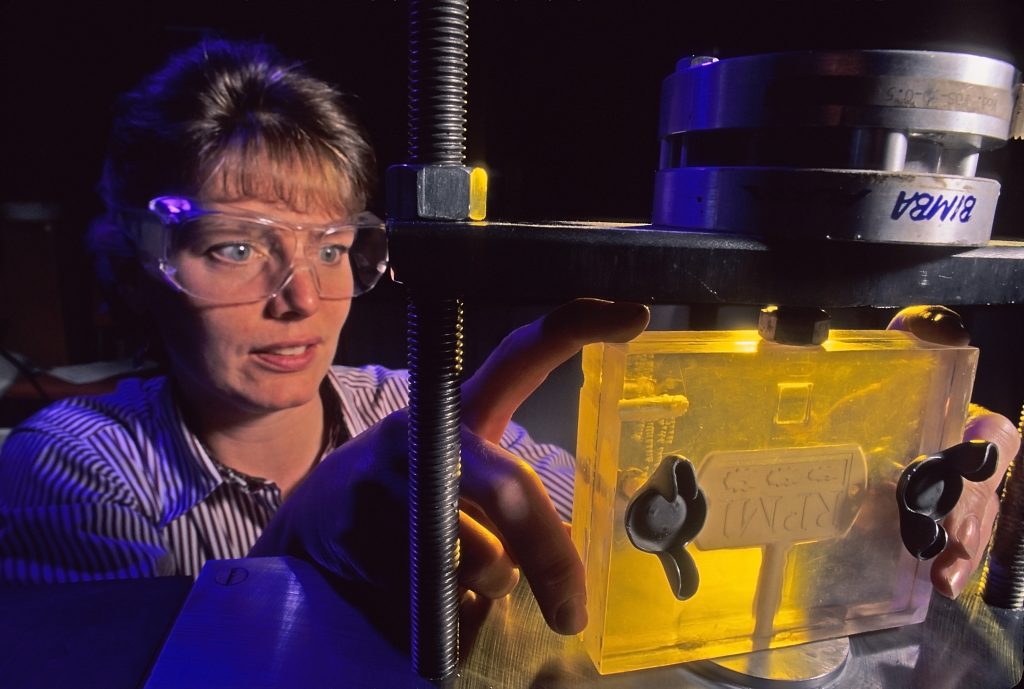
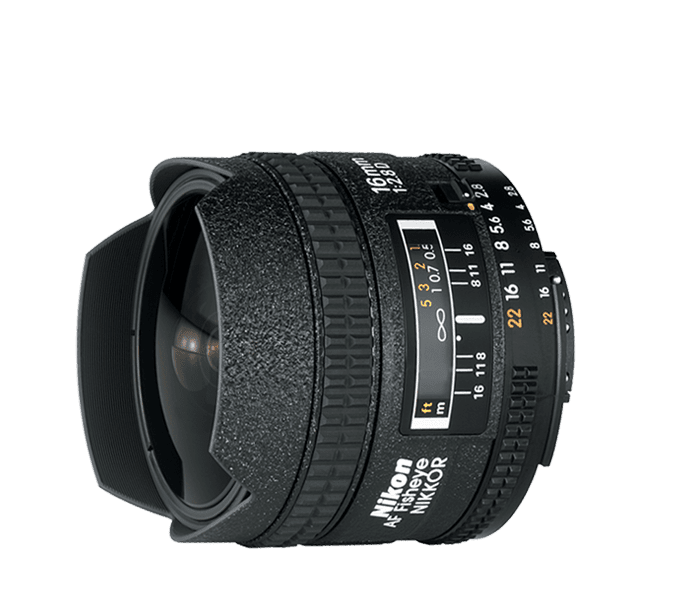
Years ago, I found myself in some pretty small areas. While photographing research labs, I was photographing what felt like the inside of a closet. So finally, I bought a fish eye 16mm Nikon f/2.8 lens. It gives me a 180-degree view.

Example of using the wide angle to capture research in a very tight space.
Looking closely, you can see the photo’s glass wall to my far left. I am less than a foot from the subject when making this photo. Thank goodness for the super wide-angle lens.
Nikon 16mm ƒ/2.8

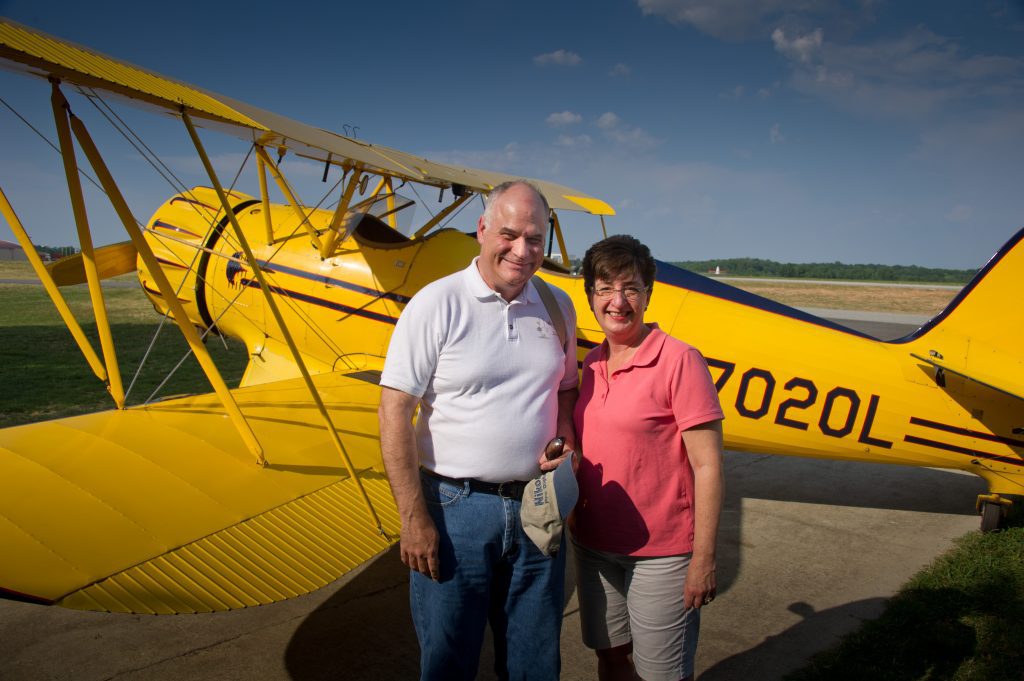
This past weekend, it came in handy to help capture what it was like to ride in a biplane for my wife and me.

Here is Dorie and me before our flight over to Atlanta.

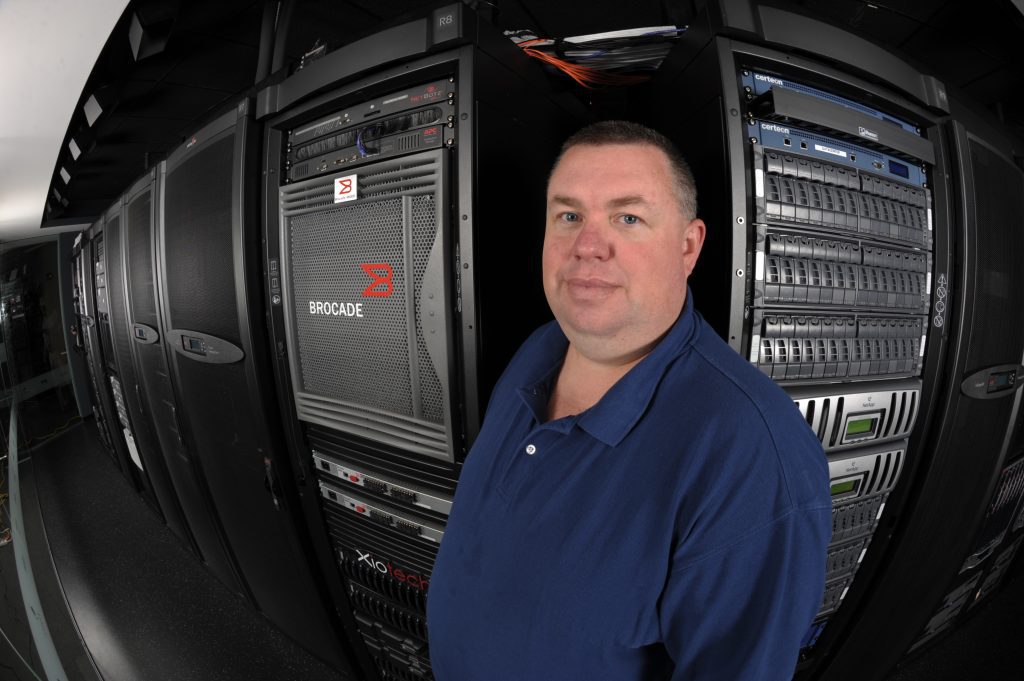
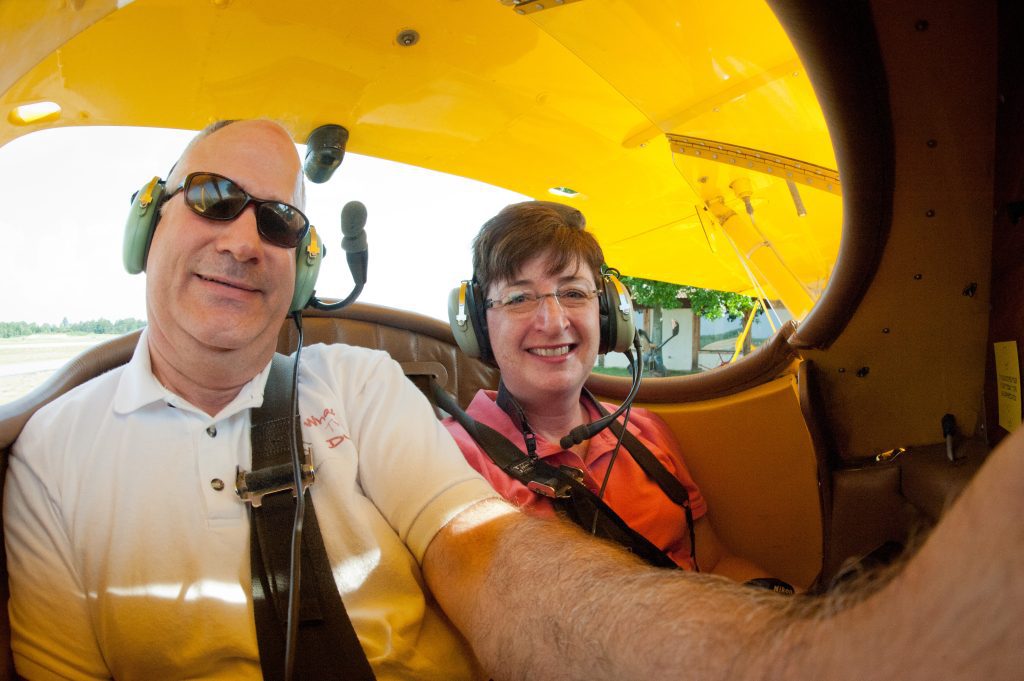
Any standard wide-angle lens would give me a portrait at best and not capture the environment. So if you have very little space, this lens will help you capture the small room.

In a tiny cockpit, the 16mm lens helps get both of us into the photo.

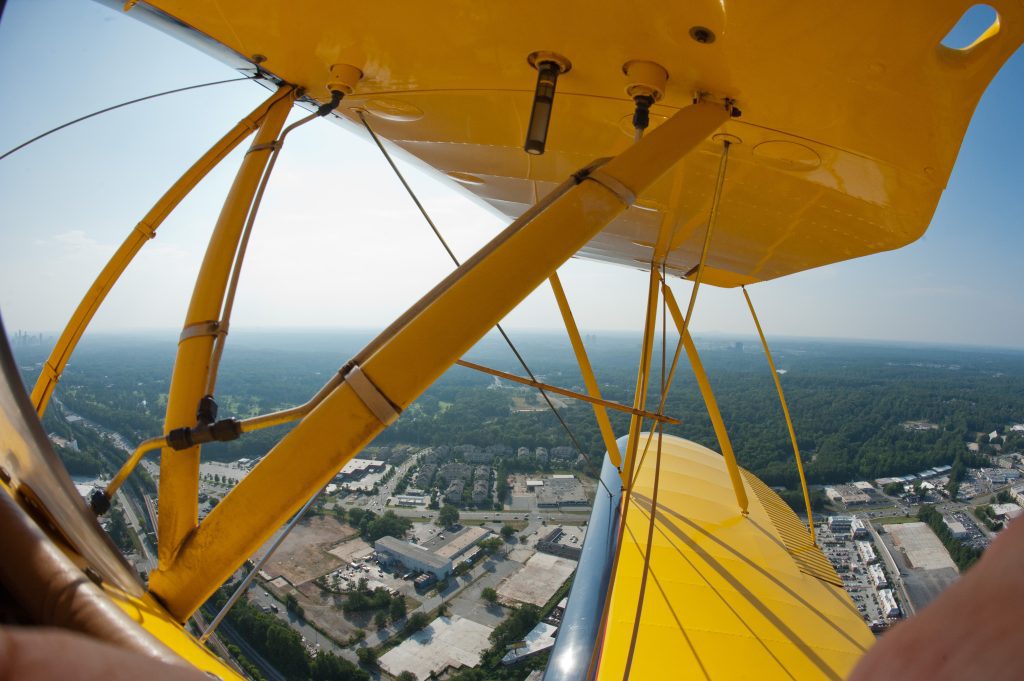
Sometimes you have a big sky and want to capture the things close to the camera and the expanse around it. Here shooting out of the cockpit, I caught the feeling I had being in the cockpit and looking out. What did I want the photo to do for you–I wanted you to get an excellent feel for flying. How did I do?

When photographing with a wing below you is brutal if doing aerial photography, but to show where you are, the 16mm captures the view from the cockpit.
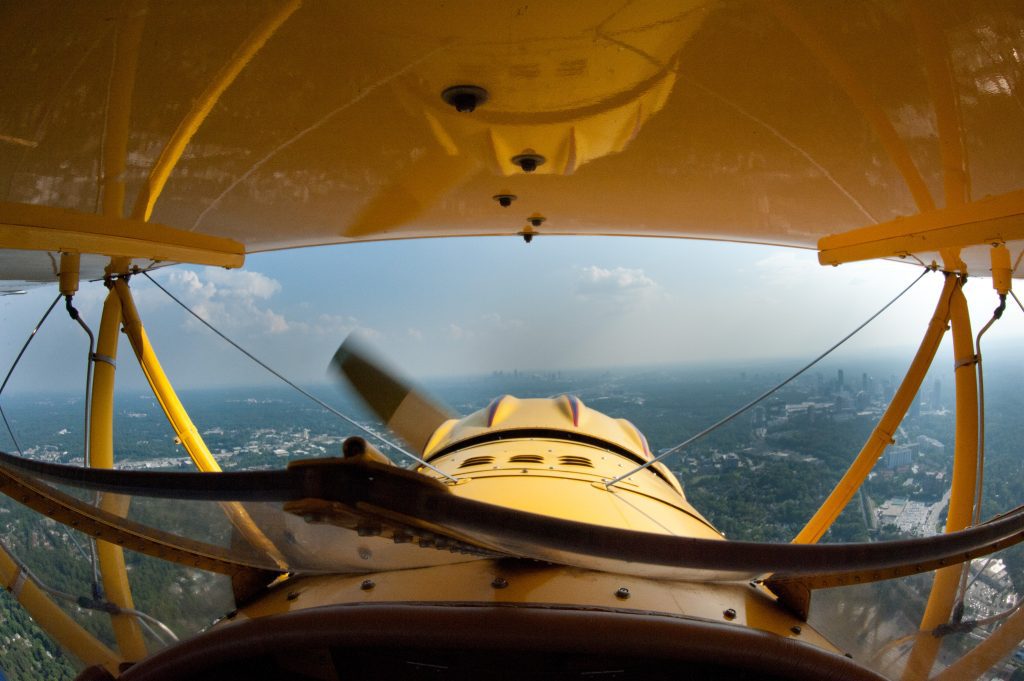
The 16mm gives you a 180-degree view of the front of the plane.

When you are in tight spaces like a room the size of a closet, the 16mm helps you get wide enough. What surprised me is how often, in the big open spaces, the 16mm can work and give you a unique and intimate view.

What are some ways you have used a fish eye lens? Let me hear from you in the comments below.

Clothing for photographers

There are a couple things a photographer must think about when it comes to their clothing: 1) comfort and 2) pockets.

Tropical Vest/Jacket goes for $120
The Vest

The travel vest is one clothing item that has been very popular with photographers. Today there are more options.  I have a friend Garret Rutherford that really has me thinking a lot about style. When I was really young I didn’t care at all about it, I just wanted to stay warm or cool. I think you do need to be aware as a photographer what you look like because it will affect your pictures.

Just like camouflage helps a photographer blend into the forest so as not to scare aware animals they are trying to photographer there are appropriate types of clothing that help you be understated in different environments.

[youtube https://www.youtube.com/watch?v=D3yVZS16QFE]

Here is a new jacket to the market that can help you carry some items, is breathable material and is fashionable for the photographer. Here is a link to buy it and a video to show you it in use.

[youtube https://www.youtube.com/watch?v=gS9hUnp-c7c]

Shirts and pants

ExOfficio Bugsaway Halo Check Shirt

My favorite store for travel clothing is REI.  They carry the ExOfficio Bugsaway clothing.  It has an odorless Insect Shield® Repellent Apparel helps keep biting and potentially disease-carrying insects at bay and shirt also provides UPF 30+ protection from the sun.  After about 70 washes you have to retreat the clothing.  A trick a friend taught me that with most other clothing without the bug repellant you can just spray your collar and edge of the sleeves–it will keep the bugs out.

For me I like that the fabric dries fast so you can wash the shirt in a sink and wear it again only a few hours later. This is important going to some places in the world where you don’t have washer and dryers available.

They make pants as well and you can get pants that look very similar to dress pants or cargo pants if you need more pockets for all that camera gear.

Here is a little video showing the shirt.

Hats
REI Vented Explorer Hat

When you are traveling and out side a lot you need to protect your head–especially if you are follically challenged as I am.

I look for material that wicks away moisture and helps keep me cool.  This REI Vented Explorer Hat has a polyester inner headband that wicks moisture away from your brow and speeds the evaporation process and therefore works like an air conditioner for your head.

While baseball style caps can keep the sun off the head I like to put my ears and most of my neck in the shade as much as I can.  When I moved to Fort Worth to live from Long Island, NY my friends told me the difference between the sun and shade felt like a 20° difference. My thought is use my hat to create that cool shade for my head.


Shoes

One of my friends who shoots around the world was asked at a camera club meeting what was the most important piece of equipment for his work–his shoes he said. If I have the right kind of footwear I can then get to the place to make the photo.

Vibram FiveFingers KSO Multisport Shoes

While I haven’t bought the Vibram FiveFingers KSO Multisport Shoes I do think they are a great visual to make my point.  A shoe that is comfortable and fits well will let you do just about anything.  While these might be comfortable and great for the athlete, I would recommend another shoe for most photographers–we tend to be still and not needing to run while taking photos.

The Keen Bidwell Slip-On Shoes are great for travel through airport security, they look a little more low key than the Vibram FiveFingers.  The shoes also have KEEN.CUSH™ footbeds contain polyurethane and memory foam to provide ample cushioning and support.

Keen Bidwell Slip-On Shoes

Look at your shoes first for comfort and then for fashion so you can blend in with the crowd.

What tips do you have for folks about clothing for the photographer?  You can share them below in the comments.

Your interests can lead to more

1
Some of the planes flying in formation

This weekend I went to the Good Neighbor Day Open House Airshow at DeKalb-Peachtree Airport. This brought back memories from my time in Civil Air Patrol in high school.

This made me think of how an early obsession playing GI Joe grew through the years in my life. It was this interest in getting dressed up in military outfits that led me to Cub Scouts, Boy Scouts and then to Civil Air Patrol.

2
Pitts aerobatic plane doing stunts

I learned in each organization new things that people who wore those uniforms got to do. This interest was expanded and led me to enjoy technology. I learned in CAP for example how planes fly and how to use a compass and map to get around. You had to know this to help with search and rescue missions.

While at the air show I met a friend who grew up just blocks from the airport. He was so influenced by the airport that he went to Georgia Tech and majored in aerospace engineering.

3
Crowd watches a Pitts Plane

While he is not doing that today, he too was seeing how an interest helped to start a journey.

4
Army had some of their helicopters for the crowd to see up close.

Can you remember earlier interests and did this help lead you to where you are today?

5
The A-10 Warthog (Thunderbolt II)

6
Paratroopers presenting the colors

Writing for a blog has opened my eyes to differences between words and pictures

What will I blog about today? Then the idea comes.  Often I have had a lot of ideas that I could easily write about, but I have no visuals to show.

However, I can look at photos and then find something I can share that I learned and have an example to show you.  I prefer to work this way.

Today I am doing the opposite.

When I write I have a slow build up to when the storyline is established. Once this happens I write away and the time after I finished the idea to editing the final product is very short.

One of the ways I come up with a storyline is through reading or conversations. They spark an idea and then I might Google to research and gather more material. I might find a quote that helps make the point more emphatically than my wording can do. Coming up with a lead or a hook for me is the when the story then just flows quickly onto the page.

1
Graph to show how I work with words to a story.

When I work in photography to tell a story the workflow is so different. I may have an idea or been given one by someone to cover.  I usually make phone calls and talk to the subjects before showing up.  At this point I have already got a pretty good idea of the story.

Once I arrive I allow the story to go another direction and try not to force it. I do see if things are going as I expected and if they are then great, if not I must then decipher what the story really is all about.

To me the pinnacle moment with the photography in story telling is when I have a moment that tells the story pretty much by itself.  Once I have this “decisive moment” I then continue to shoot.  I look for ways to introduce the subject/story.  I look for detail shots to use as transitions or even points in themselves about the story.  I look for a way to end the story visually as well.

When I leave I have all the visual content I will need.  I cannot call back and get a photo I missed—I can when I write.  I can call back and ask for clarification when writing.  Sometimes this can even change the story, but with photos I would have to go back and reshoot to fill in any holes in the story and I have done that before.

2
Graph showing how I work using photography to tell a story.

No matter which medium you use you must understand your audience really well to contect with them and have the message delivered and understood.

I was reading Temple Grandin’s book “Thinking in Pictures Expanded Edition: My Life with Autism” where she writes about Uta Frith, a researcher in cognitive development psychology who coined the concept of “theory of mind.” It is the ability to attribute mental states to oneself and others and to understand that others have beliefs, desires and intentions that are different from one’s own. Frith uses this example to talk about it:

For example, Joe, Dick, and a person with autism are sitting at a table.  Joe places a candy bar in a box and shuts the lid.  The telephone rings, and Dick leaves the room to answer the phone.  While Dick is gone, Joe eats the candy bar and puts a pen in the box. The autistic person who is watching is asked, “What does Dick think is in the box?” Many people with autism will give the wrong answer and say “a pen.” They are not able to figure out that Dick, who is now outside the room, thinks that the box still has a candy bar.
Professional communicators must be able to understand the concept of the “Theory of mind.”  They must be able to correctly understand the reactions of the audience.   
What I am amazed at is how both writers and photographers don’t understand the other mediums.  I am amazed at writers who can communicate in such a way that I am transported into their world.
One thing I constantly come up against with many folks when they are word folks and not visual is what photos they think will work with their story.  If they were there they see a snapshot and it brings back their memories–they do not know how the audience will see the photo.  They lack “Theory of Mind” when it comes to visuals.  
Many of these writers know how to take pictures and get good exposures, but do not know how visually lacking their photos are.  They have what I call incomplete sentences.  Most of the word folks that are not visual but take photos will take photos of the nouns of their story.  Here is John, here is his home, and here is where he works is what they make photos of for their stories.  They don’t see the photos telling the stories and showing the character of John and if he is a warm person and how much he cares for his family and work. 
The writer uses words to lead the audience to where they want to go.  It is a very linear approach and very different to the photograph when telling a story.
Photographs unlike words play to a different parts of the brain.  How they communicate is based a great deal of the shared experiences of people. Photographers are looking for triggers to help communicate. Over simplifying the process is like looking at just face expressions to communicate moods of a person. Smile can communicate happiness and frown can be sad. 
The writer can control their message better because they can be sure the audience doesn’t drift off to something in a scene by not including it in the story they write even when the photographer has to contend with them in the photo. 

“Gone with the Wind” –75th Anniversary

There are a lot of events in the Atlanta area to celebrate the 75th anniversary of the book Gone with the Wind.

If you’re in or around the city, consider these venues:

— The exhibit Atlanta’s Book: The Lost Gone With the Wind Manuscript (June 4-Sept. 5) at the Atlanta History Center features the final four chapters of Mitchell’s recently rediscovered manuscript (once thought to have been burned by her husband after her death). The exhibit also features the first-ever public display of Mitchell’s writing desk.

Margaret Mitchell House tours showcase the Crescent Avenue apartment (which she affectionately called “The Dump”) and feature exhibits on Mitchell’s pre- and post-GWTW life, along with details on the making of the movie.
Other GWTW-related doings in Georgia:

Marietta Gone With The Wind Museum: Scarlett on the Square, June 10-11, will stage a tribute to Mitchell with several cast members from the movie, along with question and answer sessions and a literary panel.

— On June 11, the Road to Tara Museum in Jonesboro will feature costumed storytellers linking the history of the town with stories from the book.

1
In 2003 the BBC sent a reporter to the Road to Tara Museum to film for the special on “Gone with the Wind”  It was rated in the top book favorites of all time for the BBC audience.


2
At first we just posed with the BBC reporter and the Scarlett O’Hara look alike.
3
We had a little more fun with their expressions.

Today I would shoot it differently than I did in 2003.  I would want to shoot later in the day to have the lights in the house show up.  I would have more dramatic lighting by not lighting everything as evenly as I did here.

I enjoyed shooting this and remembered it when I saw the latest news about events celebrating the book this year.

Roswell Georgia Remembers

Take you camera with you this holiday–you will be glad you did and sorry if you left it at home.  While many of today’s events are situations you cannot stop and have to go with the flow, you have to think more to clean up the backgrounds and get the right angle to tell a story.

While these are not going to win the Pulitzer they do keep me shooting and looking.  This exercise of the eyes and brain will lead you to better photos.

Do you see the variations in types of photos below?

1
First woman guest speaker, Captain Donna C. Rowe, Army Nurse Corps Vietnam 1968-69, hopes her talk helps them invite more women veterans in the future.

2
Crowd of about 6 – 7,000 listens to Guest Speaker Captain Donna C. Rowe.

3
Veteran pauses for a portrait after handing out flags to children and adults.

4
Roswell Faces of War Memorial

5
Crowd at the celebration

6
Pledge of Allegiance

7
Presenting of the colors by Piedmont Chapter of the Sons of the American Revolution

Stop shooting from standing height only to improve your photos

Getting low not only gave a different perspective, but let me tie the people in the foreground to the signage in the background to help give context to what is going on with them.

Most of us all take pictures from standing height. It’s convenient more than any other reason.

So few people vary their shooting position relative to subjects, so that when you do your photos have stopping power. There are basically 2 approaches that I recommend trying every time you photograph a subject: 1) bird’s eye view and 2) worm’s eye view.

I put the camera on the floor for this photo.  This takes some practice to be able to shoot this low and compose.  I have worked on this and can see what I am getting without always looking through the viewfinder.

Get as low as you can and shoot up to the subject. This is called the worm’s eye view for obvious reason.

At almost every Chick-fil-A grand opening, the first 100 customers arrive 24 hours and camp out to get Chick-fil-A for a year for free.

Get up above the subject to help give us the overall perspective. This is called the bird’s eye view.

To get the birds eye view I rented this crane for me to go up above.  I like using helicopters for this, but the helicopter would have created such a down draft of wind on all those tents it just wasn’t worth risking it.

When you get low and high also vary the lens you choose. Shoot a wide, standard and tight shot from each perspective of low and high.

If you do this regularly you will find that as you explore the subject you may discover the unique angle not only has stopping power, but also may give you a decisive moment and perspective that tells the whole story in one photo.

Remember if a subject made you stop and take a 2nd look with your camera it most likely stop other folks as well—if you work at it to find the most interesting perspective.

Photos used by permission of Chick-fil-A

Off Camera Flash – Blog post 2 of 3

example
(8+ Nikon SB900s) = (1 Alienbees 1600)
(8 x $510 = $4,080) vs ($360)

Comparing my AlienBees 1600 manual flash to my Nikon SB900 TTL flash can be tricky.  It is more like apples and oranges they would say.

One thing you can compare is the guide number.  This translates into what the f/stop would be at say 10 feet.

The guide number for an AlienBees 1600 is 354 with a standard 7″ reflector. That means it will provide f/22 at 10 feet, full power at 100 ISO. The 11″ reflector will get you f/45 at 10′.  The Nikon SB900 provides a guide number of 132 giving you about an f/13.2 at 10 feet full power.

The Nikon SB900 has a zoom head, which is like having a few different reflectors build in.  The f/stop can go up as you zoom from 14mm to 200mm.

Manual Flash Advantages
  • The studio strobes system AlienBees has more available modifiers, ie. Soft boxes, grids, etc.
  • Modeling light for studio work, letting you see approximately what you will get before you fire the flash
  • Can be used with an inverter, when away from available AC power. While this does cost more you will be able to use it just about anywhere.
  • Faster recycle times.
  • No overheating issues as compared to the Nikon SB900.  They recommend you stop shooting after 10 shots on SB900 to let it cool.  (I just sent my unit in for overheating)
  • It would take 8+ SB900s to equal the output power of 1 AB1600.  With SB900 running about $510 it would cost $4,080 to equal the one AlienBees 1600 priced at $360.

If you need to shoot at f/16 outside the only way to do that is to either buy 8 – SB900s or 1 – AB1600.

TTL Flash Advantage

  • Works on “AA” Batteries
  • Can shoot above the sync speed of 1/250.  You can take flash photos outside at 1/8000 second if you choose.
  • Can shoot at lower f/stops outside life f/2 or even f/1.4
  • Light and much more portable than studio strobes
  • Small enough to hide behind objects in the scene of a photo, verses the larger studio lights

Stay tuned for more information.

Off Camera Flash – Blog post 1 of 3

Alienbees
Alienbees 1600 Manual Flash

You are ready to take that next step in photography—getting your flash off the camera.  Today there are basically two directions to choose: 1) Manual Flash or 2) TTL Flash.

When I made this jump there was only the one choice of “Manual Flash.”  If I were starting over and having to make that decision it would be very difficult one to make.

sb900
Nikon SB900 TTL Flash

 
This first blog post will give you an understanding how each system works.  In the blogs following this I will go into the advantages each system has over the other.

Manual Flash

There are 3 settings on a camera that impact the photo when you push the shutter with flashes.

  1. ISO – This is the light sensitivity setting.  The lower the number the more light is needed to make a good exposure and conversely the high the number the less light is needed.  As a general rule the lower the number the less noise in a digital image, so the idea is to always pick the lowest number you can.
  2. Shutter Speed – this is what controls how long the shutter stays open.  The longer the more light that will reach the sensor and the shorter time will decrease the amount of light on the sensor.  The longer the shutter stays open the more existing light will be factored into the exposure.
  3. Aperture – This is what controls how much light is passing through the lens to the sensor.  This is an algorithm that is expressed as a fraction.  The number you see is actually the bottom number of the fraction.  The larger the number the smaller the opening.  Think of it like getting a piece of a pie.  If you get 1/8 of the pie you have a lot less than the person getting ½ of the pie.

If you had the camera set to take a perfectly exposed and in focus photograph and then added a flash, the flash will most likely over expose the photograph.  You must take into account the flash output to get a well exposed photo.

The easiest way to know what the settings on your camera will be with a flash is to use a flash meter. 

To keep everything simple, we will first use a room that is totally dark.  If you stand where the subject is and fire the flash you can use the meter to tell you what to set your camera.  You need to tell the meter two pieces of information:

1) What is your sync speed?  What is the fastest shutter speed your can take a picture with a manual flash?  This will be in your owner’s manual.  Many cameras use 1/125 or 1/250 sync speed. 

2) You need to tell the meter what ISO you will be using.

flash meter
Flash Meter

Once those settings are put into the flash meter you just need to put the incident dome facing the flash and where the subject will be sitting or standing for a portrait.  You can plug the sync cable into the meter to trigger the flash or a different mode letting you just first the flash and it will sense the flash.

After you fire the flash the meter will tell you what f/stop or aperture to set the camera.

TTL Flash

To figure all the above you just put the camera flash on TTL mode and take the picture.  You will pick the aperture on the camera and the camera will tell you if the photo is under or over exposed.  For all the same reasons your camera may over or underexpose photos without a flash will be pretty much the same reason it does it with a flash.

Check back for more posts on flashes.