Capturing Holiday Moments: Tips for Stunning Photos

The holiday season is the perfect time to take memorable photos of friends and family in front of beautiful Christmas trees, dazzling light displays, or festive events. However, many images fail to capture the people and the setting effectively, leaving faces in shadow or the background overexposed. To help you avoid these pitfalls and create stunning holiday photos, here’s a handy list of tips and common mistakes to avoid.


Tips for Amazing Holiday Photos

1. Get Close and Use a Wide-Angle Lens

  • Position yourself closer to your subject rather than zooming in. A wide-angle lens captures more of the setting (such as a Christmas tree or festive decor) and adds depth and connection.
  • Wide-angle perspectives are especially great for showing the scale of large decorations or vibrant street scenes.
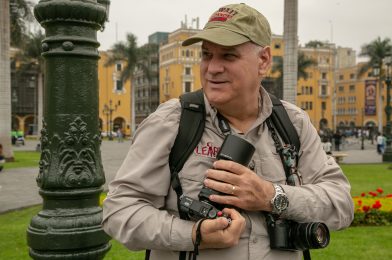
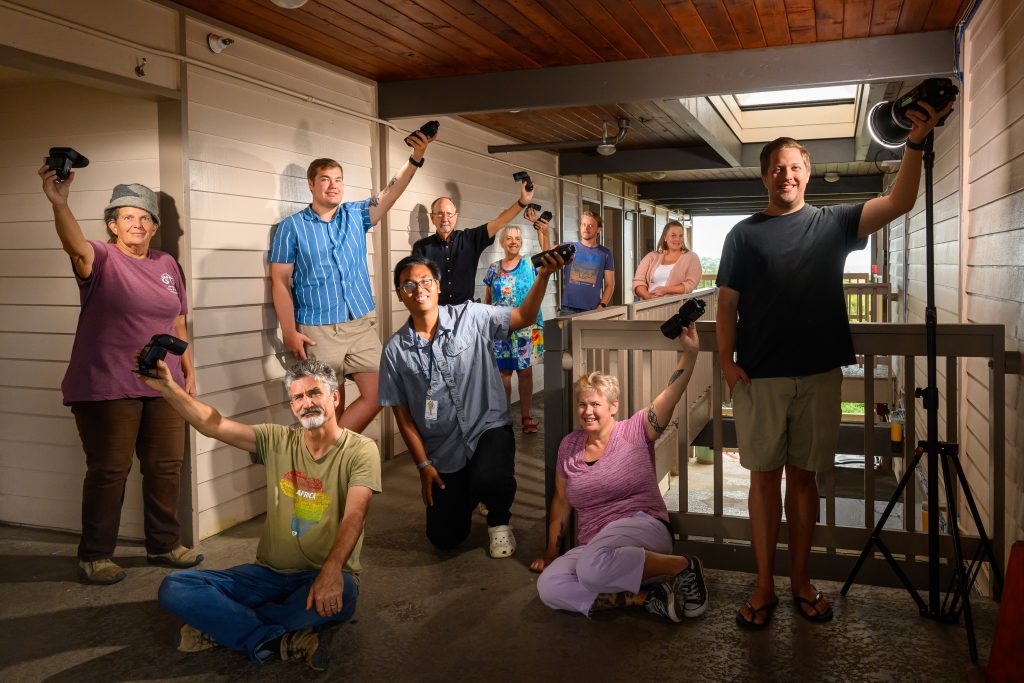
I spent time with my Uncle Knolan Benfield, who taught me a great deal about photography, in Kona, Hawaii, where we taught lighting to the School of Photography for Youth With A Mission.

2. Use External Light Sources

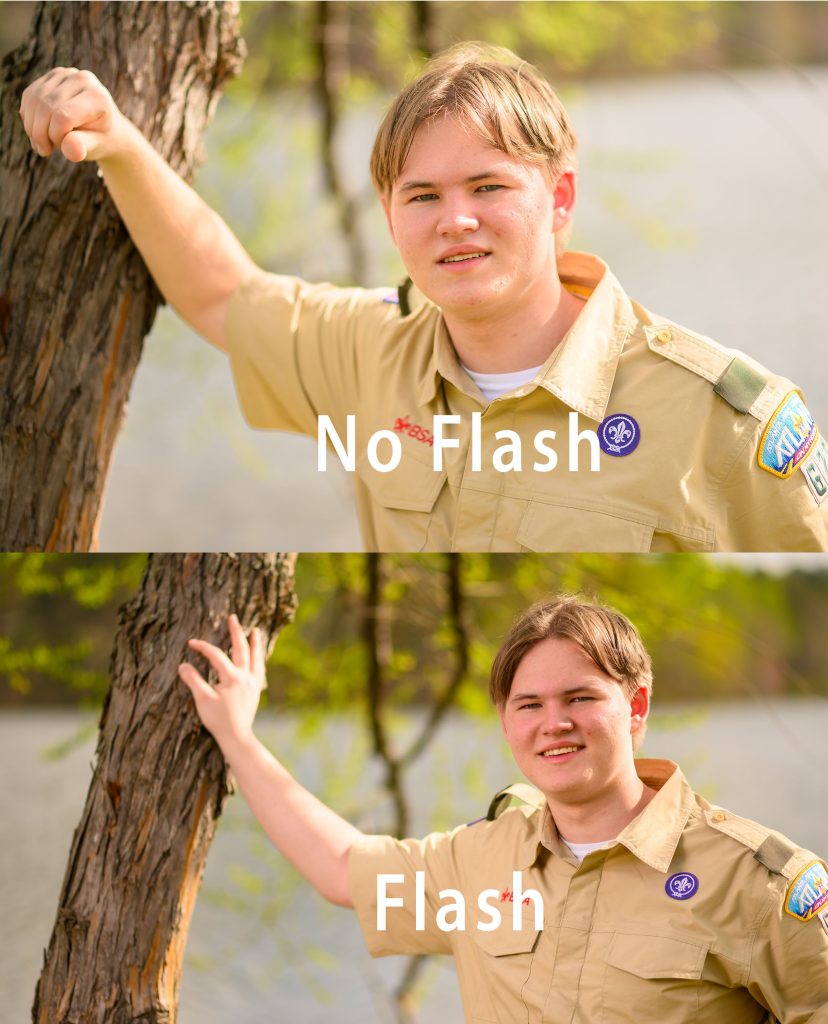
  • Cell Phone Flash: Turn on your phone’s flash for better lighting on your subject.
  • Buddy System: Ask a friend to shine their phone flashlight toward your subject. Position the light at an angle to reduce harsh shadows.
  • Portable Ring Light: If you’re feeling extra prepared, bring a small, portable ring light for even lighting.

3. Find the Right Background Balance

  • Compose your shot to showcase the people and the background. For example, crouch slightly or shoot from a lower angle to include both faces and the Christmas tree topper.

4. Adjust for Low Light

  • Use your phone or camera’s Night Mode to capture more detail in dim settings.
  • Use a tripod or steady the camera against a solid surface for sharper images in low light.

5. Experiment with Angles

  • Don’t always center your subject; try placing them off-center to add creative flair.
  • Play with reflections, like ornaments or puddles, to create unique compositions.

Common Mistakes to Avoid

1. Skipping the Light

  • Faces in darkness are the most common issue. Don’t rely solely on ambient light, especially when the background is brightly lit. Use a flash or external light source to illuminate your subject.

2. Staying Too Far Away

  • If you’re too far back, your subjects might look like silhouettes against the bright background. Move closer to ensure they’re the stars of the photo.

3. Overexposing the Background

  • Many cameras struggle to balance light between the foreground and background. If your background looks blown out (too bright), reduce the exposure or try HDR mode to preserve details.

4. Ignoring Composition

  • Avoid placing your subjects in front of cluttered or distracting backgrounds. Instead, position them against precise, symmetrical, or aesthetically pleasing settings.

5. Relying Only on Automatic Settings

  • While automatic settings can be helpful, take a moment to explore manual options or use apps with adjustable focus and exposure for better control.

A Real-Life Example

Last night at the Fox Theatre in Atlanta, I noticed many people trying to capture the grandeur of the organist or the stunning stage behind them. Unfortunately, their faces were often in shadow, making it hard to appreciate the moment fully. They could have transformed their photos into beautifully lit memories by simply using their phone’s flashlight or asking someone to light them up with a flashlight.


Don’t let poor lighting or Composition keep you from capturing the magic this holiday season. With these tips and a little creativity, your photos can bring smiles for years. Happy holidays and happy shooting!

Tips for Starting Out: Insights from My First Meeting with an NPPA Mentee

I recently had the pleasure of meeting my NPPA mentee for the first time. She’s just starting in the photography business, and as we talked, it became clear that she had some basic questions about the business side of things. It reminded me how critical it is to get those foundational elements right. Here are a few key tips I shared with her to set her on the right track:

1. Keep Every Receipt in Your First Year

When starting, it’s better to over-document than miss something important. Save every receipt. Whether it’s for a lens you bought, software you downloaded, or even parking fees for a shoot, keep those records. At the end of the year, you can determine what’s deductible, but you can’t claim what you didn’t document.

2. Use Software to Track Your Transactions

I recommended a tool like Quicken to help her track every financial transaction—credit card purchases, debit card payments, checks, and deposits. By staying on top of this from the beginning, you’ll clearly understand your cash flow and be prepared for tax season. It’s also a good way to identify trends in your spending and adjust accordingly.

3. Log Your Mileage

If you use your car for business, those miles can add up to significant tax savings. I’ve been using the TripLog app, which makes tracking mileage effortless. Just remember to categorize your trips as personal or business so you can provide accurate records if the IRS asks.

Additional Tips for Starting Out

4. Separate Personal and Business Finances

One of the first steps is to open a dedicated business bank account and credit card. Mixing personal and business expenses can lead to confusion and missed deductions. Keeping them separate makes your bookkeeping cleaner and your accountant happier.

5. Invest in Insurance

Make sure you’re insured—both for your gear and your liability. Accidents happen, and having coverage can save you from financial disaster. Many organizations, like the NPPA, offer insurance options tailored for photographers.

6. Build a System for Organizing Files

Whether it’s client contracts, invoices, or your portfolio, create a system for storing and organizing your files. Use cloud storage solutions like Dropbox or Google Drive, and back everything up regularly. I recommend a 3-2-1 photo backup system—three copies of your files stored on two different media types, with one copy offsite.

7. Start Networking Early

Relationships are the backbone of any business, especially in photography. Join local photography groups, attend workshops, and don’t hesitate to reach out to potential mentors. You never know where your next client or collaboration will come from.

8. Learn the Basics of Contracts

Always use a contract for your jobs. It doesn’t have to be complex, but it should outline the scope of work, payment terms, and what happens if things don’t go as planned. A good contract protects both you and your client.

Final Thoughts

There’s a lot to learn when you’re just starting, and it can feel overwhelming. But you’ll set yourself up for success if you focus on building good habits early—tracking receipts, logging mileage, separating finances, and networking.

As I shared with my mentee, the key is to stay organized and proactive. Mistakes will happen, but the more prepared you are, the fewer surprises you’ll face. Remember, asking questions and seeking guidance, as my mentee did, is a significant first step in growing as a photographer and a business owner.

Balancing Storytelling and Information in Business and Nonprofit Messaging

In today’s crowded communication landscape, standing out requires more than just sharing facts and figures. Whether you’re a business or a nonprofit, storytelling is the secret weapon that connects you emotionally with your audience while inspiring action. But how much of your messaging should lean into storytelling, and how much should deliver the critical information your audience needs to make decisions? Let’s explore this balance and outline how to craft a strategy that resonates and drives results.

The Power of Storytelling in Messaging

Stories create emotional connections. They’re how humans have communicated values, lessons, and experiences since the dawn of time. For businesses and nonprofits, storytelling has the potential to:

  • Engage your audience: A compelling narrative captures attention and invites people to invest emotionally in your mission or product.
  • Make your message memorable: People may forget a statistic, but they’ll remember how a story made them feel.
  • Humanize your brand: Sharing real stories about the people you serve or the impact you’ve made makes your organization relatable.

The Role of Information in Messaging

While storytelling connects emotionally, information builds trust. Your audience needs to understand the “what,” “why,” and “how” of your offering:

  • What are you offering?
  • Why does it matter?
  • How can they take action?

The details matter here: statistics, features, benefits, and clear calls to action turn interest into support or sales.

Coffee baristas Solomon David Ndunguru and Greyson Tizo Majiyakunde are part of the Harakati Coffee program, launched in 2017 to equip individuals in Dar es Salaam and across Tanzania with essential skills for a career in coffee. Initially focused on monthly week-long training sessions covering barista skills, job readiness, customer service, and hospitality soft skills, Harakati has since evolved into a social enterprise. Today, it offers top-notch training while creating sustainable, value-added products. Learn more at harakaticoffee.com.

The Ideal Balance: 70% Storytelling, 30% Information

For most businesses and nonprofits, a 70/30 split is an effective way to structure messaging:

  • 70% Storytelling: Lead with stories that evoke emotion and connect your audience to your mission or product. Showcase the human impact, the transformation, or the vision you’re working to achieve.
  • 30% Information: Follow up with the essential facts and figures your audience needs to take action. Be concise and straightforward—this is where you provide the rational foundation that supports the emotional appeal.

Putting It into Practice

Here’s how this could look in action:

  1. Opening Hook (Storytelling): Start with a relatable story or a powerful anecdote. For example, a nonprofit might share the journey of a single individual whose work changed their life. A business might highlight a customer’s success story.
  2. Supporting Information: Once you’ve captured attention, transition into the specifics. What problem are you solving? How does your product or service work? What’s the evidence of your impact?
  3. Call to Action: End with a clear, compelling call to action that ties back to the story. Ask your audience to donate, sign up, purchase, or engage.

Example: Nonprofit

  • Storytelling: “When Maria fled home with her two children, she left everything behind. Thanks to your support, Maria now has a safe place to live and a job that helps her provide for her family.”
  • Information: “Last year, we helped over 1,000 families like Maria’s rebuild their lives through our shelter and employment programs.”
  • Call to Action: “Your gift today can help more families like Maria’s find hope. Donate now and make a difference.”
Ursala Phoenix trains with her coach, Wlaa (pronounced Will-eh) Weeks, at the Wellbridge Athletic Club. Since joining, her stamina has soared, helping her thrive at the CDC and in everyday life!

Example: Business

  • Storytelling: “John struggled with back pain for years until he discovered our ergonomic office chair. Now, he works pain-free and with better focus.”
  • Information: “Our chairs are designed by experts and backed by a 10-year warranty, offering the perfect combination of comfort and durability.”
  • Call to Action: “Transform your workspace today. Shop now and experience the difference.”

Your Next Steps

Think about the stories you have at your disposal. Who have you helped? What transformation have you enabled? Lead with those narratives, then back them up with solid, concise information. By striking the right balance, you’ll capture your audience’s hearts and equip them with the knowledge they need to act.

Would you be ready to tell your story? Reach out to me by clicking on the “Let’s Talk” button above, and let’s craft messaging that connects and converts.

Why Photographers Should Use ChatGPT for Captions, Keywords, and Feedback

ChatGPT is an excellent tool for photographers, helping streamline tasks like writing captions, generating keywords, and refining storytelling. When used wisely, it can significantly speed up your workflow—but remember, AI isn’t perfect. You must provide it with clear, detailed information to get valuable results and, most importantly, double-check everything it generates. I often find that ChatGPT rephrases or changes my intended message, requiring me to tweak the output to align with my vision. Relying solely on AI to do all the work is a mistake; think of it as an assistant, not a replacement. You’re still the storyteller, and your voice matters most.

Think of it as an assistant, not a replacement.

Photographers know that capturing a stunning image is only half the job. Whether you’re showcasing your work online, submitting it to clients, or building your portfolio, strong captions and effective keywords are essential. Yet, many photographers need help finding the right words to match their visuals.

This is where tools like ChatGPT can be a game-changer. If you’re a photographer looking for feedback, caption help, and keyword ideas, let me show you how AI can help you take your storytelling to the next level.


Why Captions and Keywords Matter

  1. Captions Tell the Story: A great photo might grab attention, but the story behind the image keeps your audience engaged. Captions provide essential details that a photo alone can’t convey—the who, what, where, when, and why.
  2. Keywords Boost Discoverability: For photographers who upload their work to websites, photo libraries, or social media, keywords are critical for being found. Effective keywords improve searchability, ensuring your photos reach the right audience.
  3. Feedback Improves the Image: When sharing your work for feedback, it’s essential to understand how viewers interpret your image. ChatGPT can provide critique to help you improve your technical and storytelling skills.

How ChatGPT Can Help Photographers

With tools like ChatGPT, photographers can refine their storytelling and marketing by:

  1. Writing Better Captions: ChatGPT can craft detailed, engaging captions if you provide some key details.
  2. Generating Keywords: AI tools can analyze images and suggest relevant, searchable keywords.
  3. Providing Constructive Feedback: By describing your image to ChatGPT, you can get feedback on composition, lighting, focus, and storytelling impact.

What to Provide ChatGPT for Better Captions and Keywords

You must give it the right information to get the most out of ChatGPT. Remember, the AI can only analyze what you tell it—it doesn’t know your photo’s context unless you provide it.

Here are some essential details to include when asking ChatGPT for help:

  1. Who: If people are in your photo, provide their names or roles if possible (e.g., “Sarah, a college student, bowling with friends”).
  2. Where: Share the location. Be specific if relevant, like “Atlanta Bowling Alley” or “Rocky Mountain National Park.”
  3. What: Describe the activity or subject. For example, “a joyful woman mid-bowling throw with friends cheering in the background.”
  4. When: Mention the time of day, season, or event (e.g., “an evening game during a Friday night outing”).
  5. Why: Why did you take this photo? Was it a personal project, a client commission, or part of an event?
  6. Mood or Story: What feelings or story does the image convey? Is it a celebration, a moment of peace, or something more emotional?

By including these elements, ChatGPT can write a caption that complements your photo’s story, making it far more compelling for viewers.


Example Workflow: Using ChatGPT for Feedback

Let’s break it down with a quick example. You upload a photo of someone bowling and provide this:

Photo Description: A young woman bowling with a big smile. She’s wearing a navy shirt and colorful bowling shoes. Her friends are cheering in the background under bright lights. The photo was taken at a local bowling alley during a night out with friends.

What ChatGPT Generates:

  • Caption: “A joyful moment at the local bowling alley as Sarah celebrates her throw while friends cheer her on during a Friday night outing.”
  • Keywords: Bowling, celebration, friends night out, group activity, colorful lighting, bowling shoes, happy young woman, fun sports.
  • Feedback: “The subject’s smile and body language create an engaging focal point. Consider softening the bright background lights for a cleaner look and ensuring the bowling ball isn’t cropped to strengthen the composition.”

Tips for Getting the Best Results

  1. Be Descriptive: The more details you provide, the better the caption and keywords.
  2. Share Intentions: If you want ChatGPT to write for a specific audience (e.g., Instagram, clients, or stock libraries), include that in your prompt.
  3. Request Feedback: Don’t hesitate to ask for constructive feedback on lighting, composition, or storytelling impact.
  4. Iterate: Refine your prompts if the output isn’t quite right. Ask ChatGPT to tweak the tone or add more keywords.

Final Thoughts

Photography is about visual storytelling, but words can elevate your images and expand their reach. ChatGPT is a tool that can help photographers save time, improve captions, and get valuable feedback—but it works best when you provide context.

Next time you’re stuck trying to caption a photo or find the right keywords, turn to ChatGPT, by sharing the who, what, where, and why behind your image, you’ll unlock better captions, more assertive keywords, and more straightforward storytelling.

So, photographers, start using AI as part of your workflow—because great stories deserve to be told visually and verbally!


My Test & Results

Here are three photos I uploaded to ChatGPT using my simple prompt. You can see the response and how valuable this could be for someone wanting help and feedback.

Give me a caption for the photo, Keywords for the photo, and lastly, critique

ChatGPT said:

ChatGPT

Caption

Firefighters and loved ones honor a fallen hero during a solemn memorial service, showcasing respect, unity, and tradition as the casket is carried toward its final destination.


Keywords

  • Firefighter Funeral
  • Honor Guard
  • Memorial Service
  • Fallen Hero
  • Uniformed Ceremony
  • Fire Rescue Tribute
  • First Responders
  • Line of Duty Death
  • Brotherhood and Tradition
  • Casket Ceremony

Critique

Strengths:

  1. Composition: The leading lines of the casket and crowd naturally guide the viewer’s eye toward the central focus — the pallbearers and the casket adorned with the “Rescue” emblem.
  2. Emotion: The photo captures a deeply respectful and solemn moment, with participants’ body language and expressions conveying a sense of loss and honor.
  3. Depth of Field: The focus on the pallbearers and casket keeps the scene crisp, while the slightly blurred background provides context without distraction.
  4. Lighting: The natural light illuminates the subjects well, casting soft shadows and adding depth to the photo.

Areas for Improvement:

  1. Cropping/Framing: The red fire truck to the far right dominates part of the image, pulling attention away from the central scene. Cropping slightly or repositioning could better emphasize the emotional focus.
  2. Perspective: A slightly lower camera angle might enhance the sense of grandeur and respect, emphasizing the significance of the procession.
  3. Highlights Control: Bright reflections off uniforms and faces, particularly where sunlight directly hits, could benefit from post-processing adjustments to balance exposure.

Overall Assessment:
The photograph beautifully captures the honor and reverence of a firefighter’s memorial, evoking emotion and telling a powerful story of respect and sacrifice. Minor adjustments in composition and post-processing could elevate the image even further.

You said:

Give me a caption for the photo, Keywords for the photo, and lastly, critique

ChatGPT said:

ChatGPT

Caption

A dedicated surgical team collaborates in the operating room, demonstrating precision, focus, and teamwork during a life-saving procedure.


Keywords

  • Operating Room
  • Surgical Team
  • Medical Procedure
  • Surgeons at Work
  • Healthcare Professionals
  • Teamwork in Surgery
  • Life-Saving Operation
  • Focused Collaboration
  • Medical Mission
  • Surgical Instruments

Critique

Strengths:

  1. Composition: The image has strong framing with the surgeons and patient as the focal points, naturally drawing the viewer’s eye to the surgical scene. The surgical instruments in the foreground add depth.
  2. Lighting: The light source illuminates the surgical area effectively, creating contrast between the bright focus on the procedure and the darker surrounding areas.
  3. Emotion and Storytelling: The teamwork and focus of the surgical team tell a compelling story about dedication and precision in healthcare. The facial expressions and body language of the surgeons convey professionalism and concentration.
  4. Sharpness and Detail: The textures of scrubs, gloves, and instruments are crisp, and the image maintains clarity even in a high-detail environment.

Areas for Improvement:

  1. Foreground Clutter: The table with instruments is prominent, slightly competing for attention with the main surgical team. A slight adjustment to the angle might reduce its dominance.
  2. Lighting Balance: While the surgical area is well-lit, there are parts of the image where shadows could be softened to maintain overall clarity and consistency.
  3. Distractions: The reflections on the right and background cabinet details slightly distract from the central action. A cleaner background or less reflection would strengthen the visual focus.

Overall Assessment:
This is a powerful image that effectively captures the intensity and collaboration of a surgical team at work. With slight refinements in framing and lighting balance, the photograph can achieve even greater impact while retaining its storytelling strength.

You said:

Give me a caption for the photo, Keywords for the photo, and lastly, critique

ChatGPT said:

ChatGPT

Caption

A joyful moment at the bowling alley as a young woman celebrates her throw, surrounded by friends cheering in the background.


Keywords

  • Bowling Alley
  • Fun with Friends
  • Bowling Celebration
  • Sports and Recreation
  • Group Activity
  • Happy Young Woman
  • Bowling Ball and Lane
  • Celebratory Moment
  • Night Out Fun
  • Laughter and Excitement

Critique

Strengths:

  1. Emotion: The subject’s joyful expression and body language convey excitement and fun, making the image relatable and dynamic.
  2. Composition: The central subject is well-placed with a clear focus, while the blurred background adds context without competing for attention.
  3. Lighting: The colorful and dynamic lighting creates a lively atmosphere, enhancing the vibrancy of the scene.
  4. Depth of Field: The shallow depth of field effectively separates the main subject from the background, drawing the viewer’s eye to the action.

Areas for Improvement:

  1. Highlights and Lighting Control: The bright light behind the group in the background creates slight distractions. A softer, more diffused light could reduce its overpowering effect.
  2. Cropping: The lower part of the image, including the bowling ball and shoes, feels slightly cropped. Adjusting the framing to include the full hand and ball could strengthen the overall composition.
  3. Background Distractions: While the blurred background is effective, the lighting and gestures of the friends might slightly detract from the subject. A slight repositioning or angle adjustment could improve focus on the bowler.

Overall Assessment:
The image successfully captures an energetic, celebratory moment, showcasing the fun of bowling and shared experiences. The subject’s genuine expression draws viewers in, making it a strong and engaging visual. With minor refinements to lighting and framing, this photo could be even more impactful.

Unveiling the Power of Photo Analysis with ChatGPT

Today, I stumbled upon a fascinating feature of ChatGPT: the ability to upload a photo and request an analysis. As a professional visual storyteller and photographer, this opens up a world of possibilities for understanding and enhancing my work. I explored this tool further and realized how valuable it could be for photographers and visual creators at all levels. In this post, I’ll share my experience and offer tips on how to make the most of this feature.

Discovering Photo Analysis in ChatGPT

ChatGPT provided a detailed analysis when I uploaded a photo, examining the image’s composition, context, and storytelling elements. It’s like having a fresh set of eyes to critique my work and uncover insights I might have overlooked. This discovery got me thinking about how to use this tool more effectively. Here are some ideas for prompts to get different information about your photos.

Prompts to Enhance Your Photo Analysis

  1. Critique Your Photos
    • Ask for a detailed critique of your photo’s composition, lighting, and storytelling.
    • Example Prompt: “Analyze this photo and provide feedback on composition, lighting, and overall impact.”
  2. Find Keywords for Metadata
    • You can use ChatGPT to generate keywords based on the content and theme of your photo. This is incredibly useful for organizing your library or sharing images online.
    • Example Prompt: “Suggest keywords for this photo to help with metadata and searchability.”
  3. Understand the Story
    • Get insights into the narrative your photo conveys.
    • Example Prompt: “What story does this photo tell, and how can it connect with viewers?”
  4. Improve Technical Elements
    • Ask for tips on improving specific technical aspects of your photo, such as exposure, sharpness, or color balance.
    • Example Prompt: “How can I enhance the lighting and colors in this photo?”
  5. Generate Creative Ideas
    • Use the analysis to spark creative ideas for future projects or to find unique angles to explore.
    • Example Prompt: “What creative elements could I add to make this photo more impactful?”
  6. Historical or Cultural Context
    • For photos taken in unique locations or with historical significance, ask for insights into the setting or elements within the image.
    • Example Prompt: “What can you tell me about the cultural or historical context of this location in my photo?”
  7. Audience Engagement
    • Request help crafting captions or stories to accompany your photo on social media or blog posts.
    • Example Prompt: “Write a compelling caption for this photo to engage my audience.”

Why This Matters

As a storyteller, having tools that provide feedback and inspiration is invaluable. Whether you want to refine your craft, organize your library, or create engaging content, leveraging photo analysis can make a significant difference. It’s like having a collaborative assistant who offers constructive input to elevate your work.

Next time you need help improving a photo or want to find ways to connect with your audience, try uploading an image and experimenting with prompts. The results might surprise you and lead to fresh perspectives in your visual storytelling journey.


I asked it to give me keywords for this photo

Here are suggested keywords for this photo, including a reference to its location near Kensington Palace:

  • Location: Kensington Palace, London, UK, park, pond, lake, urban wildlife
  • Activity: bird feeding, interacting with wildlife, nature interaction, outdoor activity
  • Animals: swans, pigeons, seagulls, ducks, waterfowl, birds
  • People: woman, smiling, interacting, close to nature
  • Environment: water, shore, park setting, autumn, fall
  • Emotion: joy, connection, lively
  • Clothing: winter coat, scarf, seasonal attire

These keywords will help enhance the discoverability of the image for metadata and search purposes. Let me know if you’d like further refinements!


I asked: What story does this photo tell, and how can it connect with viewers?

This photo tells a heartfelt story of care, community, and resilience. A healthcare worker attentively checks the blood pressure of a young child, held closely by her mother, with another child looking on. The setting appears modest, highlighting the importance of accessible healthcare in underserved or rural areas.

Connection with Viewers:

  1. Emotional Impact: The child’s hesitant expression, combined with the caregiver’s focus and the mother’s protective presence, creates an emotional resonance, inviting viewers to empathize with the family’s situation.
  2. Universal Themes: Themes of caregiving, health, and human connection transcend cultural and geographical boundaries, making the image relatable to a wide audience.
  3. Call to Action: For organizations, this image can be used to raise awareness about the need for healthcare access in vulnerable communities or to highlight the work being done by nonprofits and medical outreach teams.

The key to connecting deeply with viewers is emphasizing the human element, the shared experience of striving to provide care and nurture, even under challenging circumstances. Let me know if you’d like suggestions for captioning or further storytelling!

The Difference Between Snapshots and Concept-Driven Photos

We all take pictures. Some are casual snapshots that preserve a personal memory, while others are carefully crafted to convey a message or evoke an emotion. When you understand the difference between these two approaches, you can elevate your photography from a simple pastime to a purposeful art form.

Chelle and Dorie, during our family vacation at Universal Studios in Orlando, Florida.

Snapshots: Capturing Moments for Personal Use

Snapshots are typically informal, spontaneous, and personal. You often take them without considering composition, lighting, or storytelling. Think of your phone gallery filled with photos from a family barbecue or a quick selfie with friends. Snapshots prioritize the memory over the artistry, serving as a visual diary for personal consumption.

During a Storytellers Abroad Workshop, we went out to the village of Herăști, Giurgiu, Romania, where I got a photo that tells about the culture. The smiling man humanizes this, and the waving gesture creates an immediate sense of warmth and welcome. The boys’ expressions suggest a carefree and joyful moment, inviting viewers into their world. The horse-drawn cart loaded with firewood contrasts with modern forms of transportation, giving insight into a way of life that might be simpler or rooted in tradition. The rural setting, with dirt roads and a figure in the background walking with a stick, paints a broader picture of the community and its pace of life. The greenery and modest homes suggest a close connection to nature and a humble lifestyle. This photo communicates themes of rural life, hard work, and community. It goes beyond being a nicely composed image by telling a story of resilience and joy in everyday moments. It captures the subjects and context of their lives, making it relatable and engaging to a broad audience.

Concept-Driven Photos: Communicating a Purpose

In contrast, concept-driven photos require intention. You design these photos to communicate an idea, tell a story, or convey a feeling to a broader audience. Consider composition, lighting, and subject matter when creating these images to ensure they align with your purpose. Professionals often use concept-driven photos in travel photography, advertising, or journalism.

Concept photos aim to resonate with the viewer, making them stop, think, or feel something—whether it’s wanderlust from a travel shot or empathy from a documentary image.


Tips for Shooting Travel Stock Photos vs. Family Vacation Photos

If you want to transition from taking casual vacation snaps to creating purposeful travel photos, these tips will guide you:

Travel Stock Photos

Travel stock photos target a public audience, often with the intent to sell or promote a destination or concept. Here’s how to approach them:

  1. Research Your Destination
    • Learn about the culture, landmarks, and unique aspects of your location.
    • Seek out off-the-beaten-path spots to offer a fresh perspective.
  2. Tell a Story
    • Decide what you want the viewer to feel or understand from your photo.
    • Add context, such as locals interacting with the environment or cultural elements that set the scene.
  3. Focus on Composition
    • Use the rule of thirds, leading lines, and framing techniques to guide the viewer’s eye.
    • Incorporate symmetry, patterns, and textures.
  4. Capture Quality Lighting
    • Shoot during the golden hour to capture warm, soft light.
    • Embrace varying weather conditions and use them creatively.
  5. Think About Marketability
    • Avoid including logos, brand names, or identifiable people unless you have model releases.
    • Create versatile photos that fit different themes or uses.
  6. Include Negative Space
    • Leave room for text overlays, which is essential for stock photo usability.

Family Vacation Photos

Family vacation photos are personal and meant for sharing within a small circle. While they don’t require the same level of precision, applying some thoughtful techniques can enhance them:

This photo of my daughter Chelle on the right with the tour guide, who has a similar hairstyle and dress, tells a delightful story of a family experience intertwined with a cultural and literary exploration. The image captures two individuals smiling warmly while dressed in Harry Potter-themed scarves, standing in Cecil Court, a location rich in history and literary significance, believed to have inspired Diagon Alley in the Harry Potter series.
  1. Prioritize Moments Over Perfection
    • Capture candid moments that reflect genuine emotions.
    • Focus on authenticity rather than technical perfection.
  2. Use Familiar Contexts
    • Show your family enjoying the environment. Include iconic backdrops to place the memory in context.
  3. Mix Posed and Candid Shots
    • Blend posed group photos with spontaneous action shots to add variety.
  4. Experiment with Angles
    • Shoot from a child’s-eye view or a high vantage point to create interest.
  5. Include Details
    • To add texture to your vacation story, highlight close-ups of hands holding ice cream, footprints in the sand, or a favorite souvenir.
  6. Make Use of Editing Tools
    • Enhance colors, adjust exposure, or crop distractions with simple edits, but avoid overdoing it.

The Takeaway

Snapshots and concept-driven photos have their place, but understanding their differences helps you approach your photography more clearly and purposefully. Whether you’re documenting a family vacation or creating stock images for a global audience, knowing your intent is the first step to elevating your work.

Why Every Professional Photographer Should Join a Photographer’s Association

Joining a professional photographer’s association can be transformative for your career. It provides community, resources, and financial advantages. Here’s a breakdown of a few major organizations and their benefits.


1. Professional Photographers of America (PPA)

PPA, the largest nonprofit trade association for photographers, has over 30,000 members, including wedding, portrait, and event photographers. Members benefit from resources such as customizable business forms, copyright advocacy, and discounted insurance options. Additionally, the organization offers education via workshops, webinars, and competitions to help refine skills and build credibility.


2. American Photographic Artists National (APA)

APA primarily supports photographers in the commercial and advertising sectors. Members often include those creating images for brand campaigns, products, and lifestyle photography. APA provides access to professional development tools, including portfolio reviews, industry networking opportunities, and exclusive discounts on production tools and services​.


3. American Society of Media Photographers (ASMP)

ASMP is tailored to editorial, advertising, and media photographers. Members can access legal support, business templates, and health insurance options. ASMP also advocates for photographers’ rights and provides educational resources to support sustainable business practices​.


4. National Press Photographers Association (NPPA)

NPPA focuses on visual journalists, including photojournalists and documentary photographers. Its benefits include legal advocacy, ethics guidance, and training programs on emerging trends in visual journalism. NPPA also offers discounts on gear and software to its members​.


Financial and Professional Advantages

Many of these associations provide practical benefits like:

  • Discounted insurance: Coverage for equipment, liability, and data loss at reduced rates.
  • Education and certification: Access to workshops, webinars, and certification programs that can enhance credibility and earning potential.
  • Legal support: Guidance on copyright and contracts, and in some cases, legal representation for disputes.
  • Networking opportunities: Access to industry events, portfolio reviews, and exclusive job boards.
  • Discounts: Reduced pricing on software, gear, and other photography tools.

My Memberships

I am a proud American Society of Media Photographers (ASMP) member and the National Press Photographers Association (NPPA). Both organizations align closely with my work as a visual storyteller, supporting my professional development and advocacy for photographers’ rights. I’m also part of the Atlanta Press Club, which broadens my network and keeps me informed about the industry’s latest trends.


Joining a professional association is not just a financial investment—it’s a commitment to your growth and the photography community. Find one that aligns with your niche and start reaping the benefits today!

Why You Can’t Find Those Photos You Paid That Photographer to Shoot

Imagine this: you’re rushing to put together a presentation, social media post, or annual report, and you know there’s a perfect photo from that event you paid a photographer to capture. But no matter where you look, you can’t find it. Sound familiar?

The problem isn’t just where the photos were saved—it’s how they were saved. Let’s unpack why this happens and what can prevent it.


The Common Ways Photos Get Lost

  1. The “I’ll Just Download It” Approach
    You received a link to download the photos, saved them to a random folder on your computer—maybe named something vague like “Event Photos March 2023”—and forgot about it. Over time, that folder got buried in your hard drive or lost when you switched devices.
  2. Cloud Chaos
    You uploaded the images to Google Drive, Dropbox, or another cloud service, but they’re scattered across folders without clear labels. Searching for “event” or “team photos” brings up dozens of results, none of which you need.
  3. Cryptic File Names
    Your photographer sent you files like “IMG_2451.jpg” or “DSC_9876.jpg.” Those names mean nothing to you, and without additional information, finding specific photos becomes a guessing game.

The result? You waste time searching—or worse, give up entirely.


A Better Way to Organize Photos

Now, picture this: you’re not just staring at random file names the next time you open your photo folder. Instead, each photo has invisible “notes” attached to it. These notes include details like:

  • Who is in the photo (names of key people)?
  • What is the photo about (event name or description)?
  • When it was taken (exact date and time).
  • Where it was taken (specific location).

These details act like breadcrumbs, leading you straight to the photos you need without wasting time searching or guessing.


How Does This Happen?

The secret is hiring a photographer who delivers beautiful images and prepares them for your future self. This is done by embedding helpful details (called metadata) into each photo before handing them off to you.

For example:

  • Instead of sending you “IMG_1234.jpg,” the photographer embeds names, event details, and location data into the image.
  • You can search for photos by person, event, or place—even if years have passed.

This is especially useful for organizations with long histories or global operations. When your team needs images for storytelling, marketing, or archiving, these details make it easy to find precisely what you’re looking for.


Why It Matters for You

Without these details, those photos become just a pile of pretty pictures no one can use. Years from now, no one in your organization will remember who was in that group shot, what event it was from, or even where it was taken.

While cloud storage or AI tools can help sort photos by basic features (like faces or colors), they can’t tell the full story. That story—those specific details—can only come from the photographer who was there.

So next time you hire a photographer, ask them: Will my photos be ready for the future? If they embed details into the pictures, the answer will be yes.


Want to make sure your photos are as organized as they are stunning? Let’s talk. Together, we’ll create visuals that are as easy to find as they are to admire.

Capturing Moments That Matter: Photographing Investiture and Retirement Ceremonies

One of the most enjoyable aspects of my work as a professional photographer is being invited to the Richard B. Russell Federal Building in Atlanta. The United States District Court for the Northern District of Georgia often asks me to document judges’ investiture ceremonies or retirements. These occasions, held in the largest courtroom on the 23rd floor, are steeped in tradition, emotion, and, yes, a bit of humor.

This courtroom has hosted some of the most significant cases in our country’s history, including the trial of Eric Rudolph, the Olympic Park bomber. But the atmosphere transforms from serious deliberation to lighthearted celebration during investiture or retirement ceremonies.

Ruth Ann Pannell Crider tells one of the many stories about growing up with Judge Pannell as her father and her brother, Charles A. Pannell III, look on.

The Unique Joy of Judicial Ceremonies

What makes these events truly memorable are the roasts. Colleagues, friends, and family take turns sharing humorous anecdotes, some of which gently poke fun at the honoree. These moments of levity often provide a unique insight into the judge’s personality, making them all the more enjoyable to capture.

The Honorable Alan J Baverman holds up the transcript of what the Honorable Charles A. Pannell, Jr. said at his retirement. He is ready with some juicy stories to even the match.

I vividly recall Judge Pannell’s Retirement and Portrait Presentation. The ceremony featured some of the best storytelling I’ve ever heard, with former Governor Roy Barnes delivering a particularly entertaining tribute. Judges, as it turns out, are sharp decision-makers and masterful storytellers.

Former Governor Roy Barnes

My role is to capture the day’s emotions: the laughter, the pride, the nostalgia, and sometimes even the tears. These images become treasured keepsakes for the judge, their family, and the court.

Judge Pannell’s family and himself enjoy a laugh while Roy Barnes roasts.

A Photographer’s Approach to Events

Photographing ceremonies like these requires a thoughtful approach. Here are some ways photographers can ensure they capture the essence of an event:

  1. Anticipate the Moments
    Listening carefully to speeches and conversations helps you anticipate reactions—a laugh, a smile, or a sentimental glance. The ability to predict these moments ensures you’re ready when they happen.
  2. Work with the Lighting
    The courtroom on the 23rd floor was recently renovated, so the lighting is pretty good for the available space, so no flash was necessary.
  3. Focus on Expressions
    Genuine emotions tell the story of an event. I aim to capture the nuances of a judge’s reaction when a funny anecdote is shared or the pride on a family member’s face. These are the images that resonate most.
  4. Frame the Context
    Including courtroom elements, like the judge’s bench or the iconic seal of the United States Courts, adds depth to the story and reminds viewers of the occasion’s significance.
  5. Capture Group Dynamics
    The camaraderie between colleagues is a key part of these events. Photos of shared laughs or hugs among the judges and their peers highlight the relationships that make these ceremonies so unique.
Governor Roy Barnes is asking the Honorable Steve C. Jones asked if he could have a rebuttal after Honorable Charles A. Pannell, Jr. Since the tradition is the honoree gets the last word, Barnes’ request is denied.

Why I Love This Work

It’s a privilege to be part of such meaningful events. Every ceremony reminds us of the importance of storytelling, whether through words or images. It’s an honor to witness history in the making and to document the moments that define it.

The Honorable Charles A. Pannell, Jr. gets his rebuttal from all those friends, former colleagues, and family who told stories of their time with him.

The Richard B. Russell Federal Building holds a special place in my heart, not just for its grandeur or history but for the people who fill it with laughter, camaraderie, and stories worth remembering. Each event I photograph here reminds me why I dedicate my life to storytelling through the lens.

The Art of Real Estate Photography – Why a Pro Makes All the Difference

When it comes to selling a home, first impressions are everything. Recently, I had the pleasure of working with a client preparing to sell their home. They wanted their listing to stand out in a competitive market, so they called me to photograph their property, knowing the importance of showcasing it in the best possible light—literally.

Today, I’ll explain what went into this shoot and why professional photography is worth the investment. I’ll also share a few before-and-after shots to see the transformation and the final gallery images I delivered to the client.

The Challenge: Turning a House into a Home Buyers Will Love

When I first walked into the home, I could see the potential. It was a beautiful property but didn’t show its best side under standard lighting conditions like most homes. Harsh shadows, uneven light, and cluttered spaces can distract buyers. Even the best smartphone couldn’t do justice to this space without the right tools and techniques.

The Process: Professional Tools for Professional Results

Here’s how I approached this project:

  1. Tripod for Stability and Precision
    A steady tripod is non-negotiable in real estate photography. It allowed me to take multiple exposures of the same shot, ensuring every detail was perfectly sharp.
  2. Multiple Exposures for HDR Magic
    The dynamic range of most spaces is too much for a single photo to handle. Bright windows often blow out, or the corners of a room fall into darkness. I used multiple exposures to capture the highlights and shadows, blending them seamlessly for a balanced final image.
  3. Flash to Eliminate Shadows
    Even with multiple exposures, natural light often isn’t enough to create a clean, inviting look. I used off-camera flash to fill the shadows, making the spaces feel bright, open, and welcoming. This also ensured accurate and vibrant colors.
  4. Post-Processing Expertise
    The final step was combining all these elements in post-processing. The magic happens here, from blending exposures to fine-tuning colors and removing minor distractions.

The Results: Before and After

The lead photo shows some before-and-after examples from the shoot. On the bottom, you’ll see how the space looked with essential lighting and a smartphone attempt. On top of that, you’ll see the transformation after applying professional techniques. Notice how the room looks brighter, the colors are more vibrant, and the space is more inviting.

The Final Gallery

Here are some of the final images that were delivered to the client. These photos that buyers will see first can distinguish between a home sitting on the market or selling quickly.

Why It Matters

Smartphones are great for casual snapshots but can’t compete in real estate photography. A professional approach ensures every detail is considered, from lighting to composition to post-processing. It’s an investment that pays off by attracting more buyers and showcasing your property at its best.

If you’re preparing to sell your home, don’t leave your first impression to chance. Let me help you create a visual story that excites buyers about your property. Contact me today to learn more about my real estate photography services.

Revitalize Your Photography Archive: A Guide to Organizing Years of Photos Without Workflow

Getting organized might feel overwhelming if you’re a photographer with years’ worth of scattered digital files on CDs, DVDs, old external hard drives, or legacy software like Apple Aperture. However, reining in your archive is incredibly freeing: it speeds up your workflow, safeguards your work, and brings order to the creative chaos. Organizing your images is not just about tidying up; it’s about finally making your entire library accessible and preserving it for the future.

Embrace the Benefits of a Cohesive Archive

Having an organized archive means finding images fast, saving time on projects, and even improving your creative process as you discover patterns and themes. The mental map you’ve held onto for years—remembering vaguely where images were stored among stacks of discs or folders—will shift as you create a new order. Recognize that, initially, this reorganization might seem confusing as old habits and paths give way to a system, but this transition brings long-term clarity and efficiency.

Converting Aperture Libraries to Lightroom Classic

If you’ve relied on Aperture, you know it’s no longer supported on newer macOS versions, which makes tools like Avalanche for Lightroom invaluable for transitioning smoothly to Lightroom Classic. Avalanche maintains original file structures, recreates folders and album hierarchies, transfers keywords, and preserves face tags. It even handles edits like exposure, contrast, and other basic adjustments using machine learning. If Lightroom doesn’t support specific Aperture edits, Avalanche places those images in a review folder so nothing is lost in the shuffle. Avalanche provides a straightforward browser interface that detects all connected drives, so you don’t have to hunt for archived files.

For more details on using Avalanche to migrate Aperture libraries, you can check their website for guides and system requirements.

Why Upgrade to a NAS

Many photographers store files across multiple hard drives, but this approach carries significant risk. Hard drives can fail, get misplaced, or become corrupted over time. A Network-Attached Storage (NAS) system like Synology provides a centralized, secure archive beyond essential storage with RAID configurations, creating redundant copies to protect against single-drive failures.

Synology NAS systems can also monitor each file’s health and automatically repair corrupted data using features like Btrfs (a file system known for its data integrity and self-healing properties). This setup ensures that if bit rot or corruption occurs—common risks for files stored on standalone hard drives—the NAS can automatically correct the error using redundant copies.

Incorporating a NAS into your workflow is especially beneficial for photographers, as it supports the 3-2-1 backup rule: keeping three copies of each file on two different types of storage, with one copy stored offsite. Using a NAS with Lightroom lets you securely access your files from any networked device, streamlining your workflow and future-proofing your archive with built-in data protection.

Workflow Overview: From Ingesting to Organizing

To create a seamless workflow: (my workflow)

  1. Ingest & Cull with Photo Mechanic Plus: Start using Photo Mechanic for initial file naming, culling, and basic metadata. This keeps your files organized and saves you time in Lightroom.
  2. Edit in Lightroom Classic: After importing culled files into Lightroom, edit for color, exposure, cropping, and dodging/burning. Lightroom offers powerful tools to enhance image quality without altering the original file.
  3. Final Storage: Export JPEGs and store them in a cloud-based system like PhotoShelter, and include them in your Photo Mechanic catalog for easy retrieval. This dual system ensures your photos are secure and accessible.

Visualizing Your Setup

To illustrate this organization, imagine your NAS as the center of your workflow, supporting your archive and daily work needs. All files are backed up in the NAS, and Lightroom accesses files directly for edits. Photo Mechanic is the initial entry point for organizing new images. With cloud integration, your JPEGs and essential metadata remain accessible to clients and collaborators, ensuring your archive is well-organized and actively helpful.

This process will take time, but as your new system takes root, you’ll gain flexibility, speed, and creative control over your work.


If reading this makes you feel ready to take the plunge but unsure where to start, I’d be delighted to help you transform your photo archive into a structured, easy-to-use library. From converting Aperture files to setting up a customized NAS system and streamlined workflow, I offer one-on-one consultations to make your process as efficient and user-friendly as possible.

To get started, you can reach me directly at [email protected] or call (404) 786-4914. Let’s work together to put you back in control of your images and create a powerful, organized archive you’ll enjoy using.

Honoring Veterans in Roswell—Why Local Assignments Matter to My Craft

Each November 11, Roswell, Georgia, gathers to honor veterans with an event that feels as personal as it is profound. Today’s ceremony at Roswell Area Park was no different. As attendees reflected on the bravery and sacrifices of our veterans, I found myself drawn once again to cover this event, not just as an observer but as a storyteller, capturing moments that speak to shared community values and connections.

Roswell, Ga., Mayor Kurt Wilson, an Army veteran, delivers remarks honoring local veterans for their service and sacrifices during the Veterans Day ceremony at Roswell Area Park Pond on Monday, Nov. 11, 2024.

Documenting Veterans Day events here, close to home, goes beyond honoring veterans and preserving community stories. It also gives me a regular opportunity to stay proficient in my craft, keeping my eye sharp and my equipment in top shape. Photography, especially in documentary and storytelling genres, is a skill that benefits from consistent practice in various environments. When capturing Roswell’s Veterans Day event, I’m honing my ability to find meaningful angles and frame shots naturally and anticipate the split-second emotional moments that make stories resonate.

This year, the event featured powerful highlights: Roswell Mayor Kurt Wilson, an Army veteran himself, spoke from the heart, expressing gratitude to those who served; veterans seated in the front rows received a visible place of honor; and the Sons of the American Revolution Color Guard presented the colors, bringing a solemn tradition to the community ceremony. Standing on the banks of the Roswell Area Park Pond, I caught glimpses of the ceremony reflected in the water—a reminder of how our community traditions mirror those around the world.

In Europe, many recognize this date as Armistice Day, with similar ceremonies marked by silence and wreath-laying, while Britain’s “Poppy Day” symbolizes remembrance. Being able to capture these moments for Roswell on a day with such global significance is a humbling reminder of the shared history and respect communities everywhere hold for their veterans.

My images from today were shot for Zuma Press, a platform that puts these local stories on the national and even international stage. By covering events like this, I’m able to create images that highlight Roswell’s distinct character and the universal language of respect and honor. Whether photographing global workshops or local community events, each assignment brings something new, helping me grow and stay connected to my craft and community.