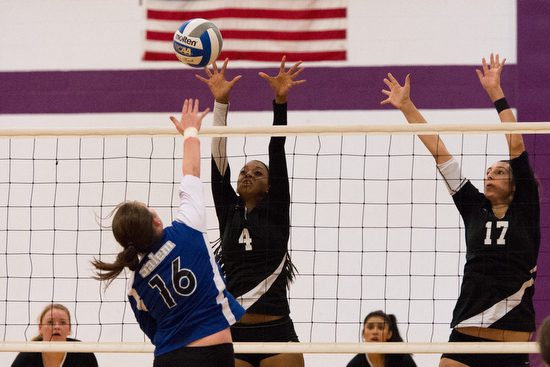
Shooting Volleyball with the Nikon D4 using available light

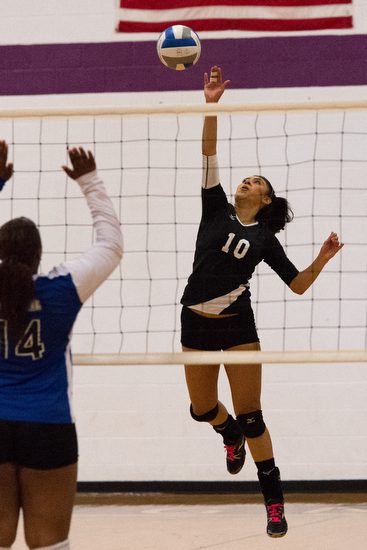
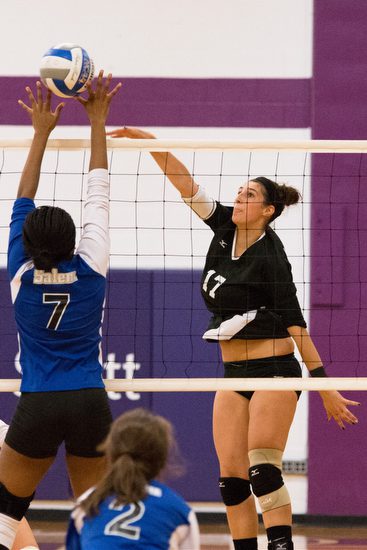
Nikon D4, 70-200 ƒ/2.8, ISO 12,800, 1/1250, ƒ/4

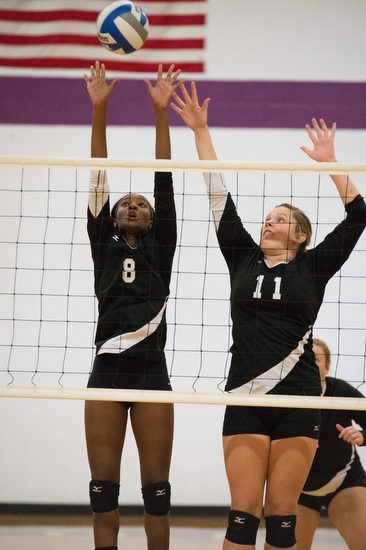
Today I shot a volleyball game with just available light. I was pleasantly surprised at how nice the quality of the images were for shooting under sodium vapor lights.

The Nikon D4 is something I wish I had back in the 1980s.  During those years I was shooting sports every week for the daily newspaper that I worked back then. Now I only occasionally shoot sports.

While the Nikon D4 has the high ISO capabilities the new technology of vibration reduction also contributes to the photos being sharper than I can remember.

Nikon D4, 70-200 ƒ/2.8, ISO 12,800, 1/800, ƒ/4

White Balance Setting

To insure I got the best skin tones possible, I used the ExpoDisc.  I put the ExpoDisc over the lens and pointed it towards the lights in the gym.  I also slowed the shutter speed to 1/100 to be sure I was not catching the lights during a cycle.  After doing this for both of the Nikon D4 cameras, I cranked the shutter speed preference in the Auto ISO settings to 1/2000.

Nikon D4 Exposure Settings

  • Aperture Priority
  • Auto ISO
    • Lowest ISO 100
    • Highest ISO 12,800
    • Shutter Preference 1/2000

I also was using the Vibration Reduction on the lens to help improve sharpness due to handholding the lens.

Nikon D4, 70-200 ƒ/2.8, ISO 12,800, 1/1250, ƒ/4

With the Nikon D4 you also have auto focus setting as well to choose from. 

Auto Focus Setting for the Nikon D4

  • Continuous Auto Focus
  • 21 Grouping
  • Kept it centered and locked it
  • Focus Tracking on Long
  • Shutter on C-H 10fps
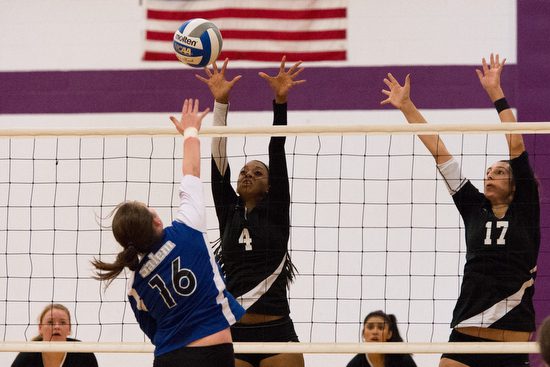
Nikon D4, 120-300 ƒ/2.8, ISO 12,800, 1/1000, ƒ/5.6
My Favorite Angle

This is my favorite angle for shooting volleyball. However, the one thing I would have loved even more was to shoot from a slightly higher angle. The reason for this would help me keep the net from trying to refocus my lens.

Why I like this angle is I can show the team I am covering. You can see their face expressions and while I cannot see the other teams faces, I can see the competition in the body language.

The good thing in shooting up a the players is it gives them this Greek gods feel.  I like athlete looking like they are bigger than life.  Shooting up at them helps to create this feel.

There you have it, my settings and secret weapon, the Nikon D4.

Nikon D4 @ ISO 12,800 still not enough

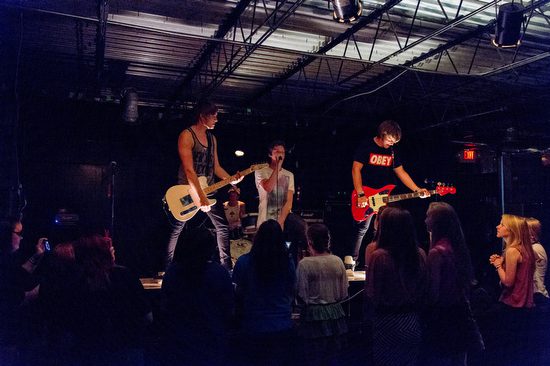
Nikon D4, 28-300mm, ƒ/5.6, ISO 12,800, 1/60

When Available Light Isn’t Enough

My daughter has a favorite band called Late Night Reading. This is a link to their MySpace page where you can listen to their music.  They are a pop-punk band started in 2009 when they were all just sophomores in high school.

I was fascinated at how the bands build their fan base using social media and then going to small venues like Swayze’s Venue in Marietta. This is where they played Thursday night when I went along to help chaperon my daughter and her friend going to the concert.

My wife reached out to see if they mind me shooting some photos. We were doing this as much to make my daughter happy with photos of her with the band as to just have some fun ourselves.

You can see more of my photos here on my PhotoShelter account.

My daughter is in the middle with her friend she brought from school on the right.

The good thing about shooting the headliner is that they always have a few opening acts. Well this meant I could do some test shots and tweak everything so when the Late Night Reading band took the stage I was ready.

As you can see in the first photo I was only getting to shoot at about 1/60 for a shutter speed.  While I had my 85mm ƒ/1.4 to shoot with the problem then became a depth-of-field issue.

Why was 1/60 and ƒ/1.4 not good? This is a pop-punk band. They and their fans move like crazy. I am not sure with all their head banging that they are not moving faster than many of the athletes I photograph.

While the shutter speed was better at ƒ/1.4 I was having a terrible time getting many usable shots unless they paused for a moment.

Nikon D4, 14-24mm, ISO 5000, ƒ/5.6, 1/60

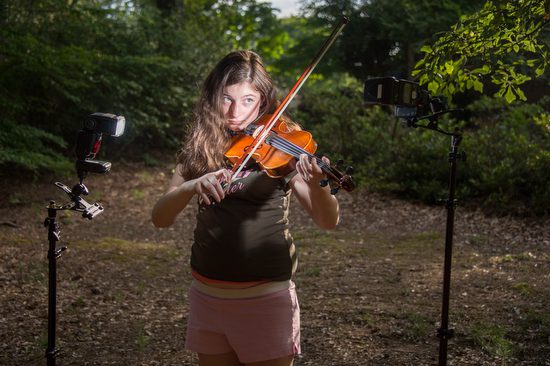
I went back to the car and pulled out my hot shoe flashes, PocketWizard and Light Stands.  I used the same lighting gear used in this photo here of my daughter playing her viola.

I put the two lights stands all the way up as high as they go. Pointed the strobes to the stage zoomed all the way out for most of the photos and changed the zoom to a little wider if I moved them close to the stage. The SB800 was zoomed to 105mm and the Nikon SB900 was zoomed in to 200mm.

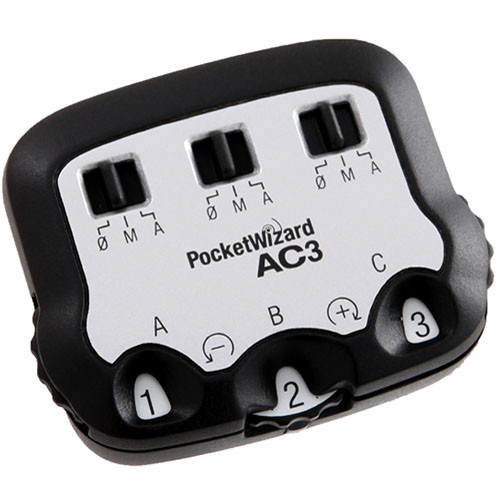
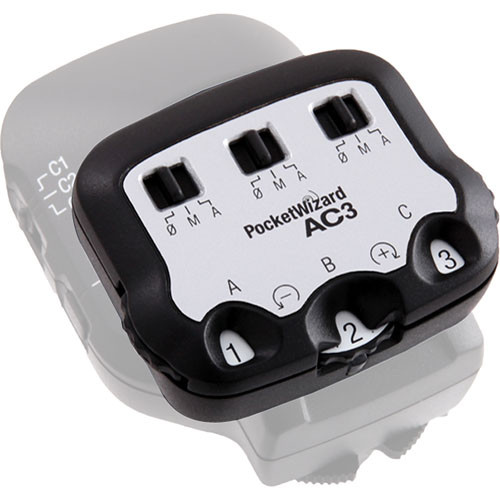
The strobes are on the PocketWizard Transceiver TT5 and They are on Manfrotto 5001B Nano Black Light Stands and the Manfrotto 175F Justin Spring Clamp with Flash Shoe to hold the flashes. I am triggering the TT5 using the PocketWizard Mini TT1 and PocketWizard AC3.

I turned the ISO up to about ISO 5,000 because I didn’t want the background to go totally dark.

Nikon D4, 14-24mm, ISO 5000, ƒ/5.6, 1/60

One of my favorite photos is of the bass player. I liked working from the side of the stage because I put the strobes in front like typical stage lights would be placed.  This meant I was getting more cross light from the side and shadows were helping give more depth to the photos than from the front of the stage.

Nikon D4, 14-24mm, ISO 4000, ƒ/5.6, 1/60

TIPS

  • Shoot test shots of available light before adding lights
  • Always have strobes with you
  • Use off camera strobes 
  • Use higher ISO to open up the background when shooting with strobes

If you are a parent, taking photos of your kids favorite activities and sharing them with them and their friends is a good thing to build long lasting relationships.

Camera bodies and the importance of simplicity

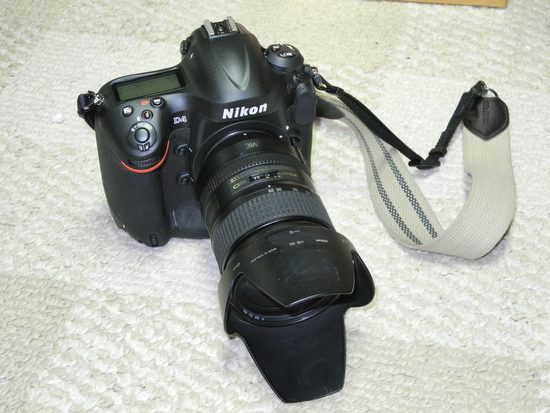
Nikon D4 with Nikkor 28-300mm

Importance of Simplicity

It is very common when I am out taking photos as a professional that people will often hand me their camera and ask me to take a photo of them with their friends.  They see my gear hanging around my neck and shoulders and figure, he knows what to do.

Camera manufacturers have not gone the way of Steve Jobs when it comes to camera design. Frankly, I think most every camera is quite difficult to use. Even these point and shoot cameras that people hand to me and want me to take a photo of them with their friends are complex.

One of the first things I often and wishing I can do to improve those photos for folks is to turn on their flash outside. This will help get rid of those awful shadows in their eyes making them look like racoons.

Just try and pick up four or five different cameras and quickly turn on the flash. It is quite difficult.

Ideally when I make a switch to a new camera system I would like to just trade all my cameras at once and then buy the latest gear. This is how I did it in the days of the film cameras.

However, today these professional cameras are not $1,000 for the top of the line cameras. Just one Nikon D4 costs $6,000 or what I would have spent to replace all five of my film cameras.

With film I carried five cameras. I had two black and white cameras and two color cameras. I had slower daylight film for outside and high speed tungsten indoor film in the other cameras. I also had a backup camera.

The good news today is I do not need five cameras. I need two or three cameras. Today, most pros carry two cameras for one major purpose–backup. You cannot afford to be on a job and the camera stop working and not have another camera to finish the job.

The other reason most pros also like a second camera is to avoid switching lenses on bodies too often. Each time you switch a lens you run the chance of dust getting on the sensor. The other problem is the time it takes to switch lenses can be the difference of getting or missing a shot.

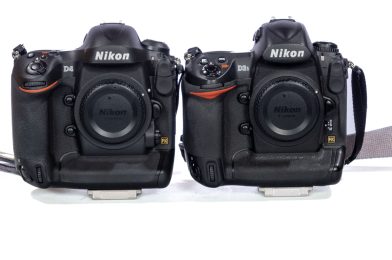
Different cameras can cost you a shot. The difference in the Nikon D3s and the Nikon D4 is not so great that in a hurry you know which one is in your hand. However, the minute you decide to change how you are focusing you will realize you have the other camera in your hand when you try and change it.

Since I have been shooting digitally, I am usually having to buy a new camera at a time and sell some old gear. It just is difficult to order two $6,000 cameras for a total of $12,000.

Every time I make the switch to a new camera till I have all identical cameras I find myself getting very frustrated. It isn’t that the new camera isn’t better designed, it is the problem that the improvements made changes.

It would be easier to have four cameras. Two studio and then two DSLR journalistic cameras. This way when you are shooting high resolution stock images of products you had your primary camera and backup all the same. Same for the journalistic camera that helps you do video in the field and shoot at high ISO.


Financial Revelation

Back in the days of film, my gear was easily 1/4 to 1/3 the cost of what I need today.

When I shot film I didn’t need a computer, PhotoShop or Lightroom and all the gear to insure color accuracy of the monitors. 

A professional photographer today will most likely have two pro cameras costing $3,000 to $25,000 each and a computer digital workstation (Computer, Photo Software and calibration devices) which run from $5,000 to $15,000.

So when you are shocked at why their prices are higher today when there is no film you know it is due to the cost of digital.

In the days of film photographers could keep their cameras for easily five years. Today, you can keep your camera that long, but your competition will have gotten the latest digital camera that let’s them make photos you cannot on your present camera. You keep up to stay competitive, which now costs more than ever.

How to keep it simple?

Buy all the same type of cameras and stay with the same manufacturer of camera so the learning curve is shorter. While the cameras are quite complex the key to simplicity is not to introduce different cameras.

This is how I love to carry my cameras, Two Nikon D4 cameras with one having a 14-24mm ƒ/2.8 and the other with the 28-300mm ƒ/3.5-5.6 VR. Yes I have many other lenses I will use, but this is my default.

I shoot now with two Nikon D4 cameras. I want to keep it simple. I also carry my Nikon P7000 with me all the time. I like to keep my eye fresh so when I am on the job I am thinking about the shot. It would be just like a musician who practices every day so that when they perform they are at their best.

Super simple off camera flash portrait

Nikon D4, 85mm ƒ/1.4, ISO 200, 1/8000

The key to any good photo is the old KISS rule, which is simply put Keep It Simple Stupid.

For this portrait of my dad I chose to shoot this outside and use some of the sunny weather we were having down at the beach.  We shot this outside on the balcony of our cottage. The reason for the location was it was the fewest steps I needed to make to get a good photo.


Start with the sun back lighting the subject

One of the reasons I always start with the sun on the back of the subject and not where it is lighting their face has to do with expression. I find it almost impossible for getting a good expression when people are squinting and straining due to the sun being directly in their eyes.

The benefit of the back lighting of the subject is you get a good rim light around the subject, which will help you separate the subject from the background.

Look for a darker background

I like to find a simple background that is not have blown out highlights in the background. I normally look for a much darker background than I chose here. My point is to be careful or your blinking highlights will be in the background and distracting rather than complementary to the subject.

Choose a shallow depth-of-field

I am using my favorite portrait lens for this photo, my Nikkor 85mm ƒ/1.4.  You need to be sure that the eyes are what you are focusing on and the sharpest point in the photo when shooting with this lens. I still recommend having the eyes the place you focus even if you choose to shoot this at ƒ/22.

In general if you are doing a portrait of a person and not an environmental portrait, then the background and surroundings is not really that important.  Since this is the case here for this photo I threw that background way out of focus by shooting at an aperture of ƒ/1.4.

Fill Flash

I love to use an off camera flash as my fill/main light outside for portraits. Here is a diagram showing you where the sun was and the off camera Nikon SB-900 speedlight placement for this photograph.

You can trigger the off camera flash many different ways. I often use the Nikon SU-800 which uses infrared to trigger the off camera flash. I chose to use the PocketWizard Mini TT1 on the camera with the AC3 which lets me alter the power of the flash from the camera and not the flash.  Saves you a lot of steps back and forth for tweaking those fine adjustments.

The Nikon SB-900 has the PocketWizard FlexTT5 on it to receive the signal and talk to the cameras TTL system to give you consistent exposures.

I placed the light 45º to the right of the camera and not quite 45º above the eyes.  I am a little lower since my subject has deep set eyes. 

What is the benefit of the flash say over a reflector? If I used the reflector I will be bouncing the sun into their face and often getting the squint I was trying to avoid.

Second, by using the flash I get good skin tones because of the color temperature of the flash will give it that “pop” I like to see.

Third, I like seeing a catch light in the eyes and the flash helps me be sure one is there. I think this helps bring the eyes to life.

Go and try this setup yourself. Adjust it to your conditions and the subject and see what you come up with.

Can you send me some of those photos Stanley?

Hey Stanley can you send me some of those photos?

The camera phones just were not cutting it for my family while we are on vacation at the beach.

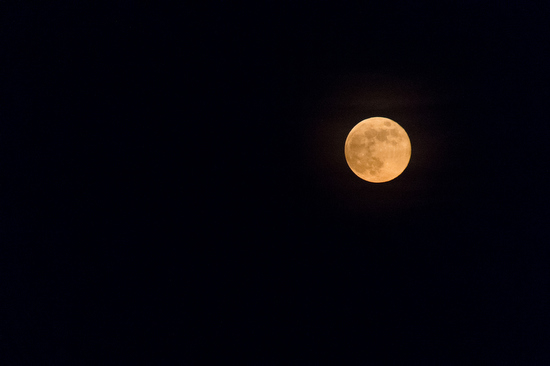
So last night my wife even tweeted: “Can’t wait to see @stanleyleary’s photos of this moon. http://t.co/AdngV9H0″

It never fails when I pull out my nicer camera I get these comments.

Shot on Nikon D4 with 28-300mm, ISO 10,000, ƒ/5.6, 1/200. I had it on 2X crop mode so this lens is now a 450mm for this photo here.

Shot on Nikon D4 with 28-300mm, ISO 12,800, ƒ/5.6, 1/80.

The moon was shot last night. Now I walk out on our balcony and see the 4th of July Parade forming down the street. How lucky can you get?  All I had to do is find my camera and walk outside on the balcony to get most of these photos.

Before running to get the camera I told the family about the parade. The first response was, “Can you send us some photos?”

After shooting some of the parade I wanted to capture the family enjoying the parade from the 3rd floor balcony on the beach house we were staying in at Ocean Isle Beach, NC.

After getting some photos from the balcony I went down to the street level to shoot a few close up shots showing people’s faces in the parade.

What is the lesson from this blog? Always have a camera with you and I want to add to have your good camera nearby for opportunities as they arise.

You see I didn’t know about the parade. It was our first time at Ocean Isle Beach on July 4th. We had stayed here numerous times before as a family, but never during the holiday.

3 Light Modifiers for Flash

Bounced Light into Umbrella Silver/White 

These examples show using a bounced light into an umbrella outside and everything stays the same except the shutter is slowed down to allow more of the ambient light of the outdoors to light the background for us.

Using an Alien Bee B1600 on 1/32 with bound sliver/white umbrella

Nikon D4, Nikkor 28-30mm, ISO 200, f/5, 1/200

Nikon D4, Nikkor 28-30mm, ISO 200, f/5, 1/100

Nikon D4, Nikkor 28-30mm, ISO 200, f/5, 1/50

Nikon D4, Nikkor 28-30mm, ISO 200, f/5, 1/25

Shooting the light through a white umbrella 

Everything is the same in the example above but we changed the light modifier to shooting through the umbrella verses bouncing.  See if you can see a difference.

Nikon D4, Nikkor 28-30mm, ISO 200, f/5, 1/25

Nikon D4, Nikkor 28-30mm, ISO 200, f/5, 1/50

Nikon D4, Nikkor 28-30mm, ISO 200, f/5, 1/100

Nikon D4, Nikkor 28-30mm, ISO 200, f/5, 1/200


 Shooting with a 10º Spot Grid

This is going to another extreme of not lighting everything but mainly just the model’s face. Other than the light not lighting the shirt can you see any other differences?

Nikon D4, Nikkor 28-30mm, ISO 200, f/5, 1/200

Nikon D4, Nikkor 28-30mm, ISO 200, f/5, 1/100

Nikon D4, Nikkor 28-30mm, ISO 200, f/5, 1/50
Nikon D4, Nikkor 28-30mm, ISO 200, f/5, 1/25

These are just wider shot of the same thing above so you can see the light fall off from the grid light.

Nikon D4, Nikkor 28-30mm, ISO 200, f/5, 1/25

Nikon D4, Nikkor 28-30mm, ISO 200, f/5, 1/50

Nikon D4, Nikkor 28-30mm, ISO 200, f/5, 1/100

Nikon D4, Nikkor 28-30mm, ISO 200, f/5, 1/200

I used the PocketWizard Mini TT1 to trigger the flash

I used the PocketWizard Plus receiver on the flash to trigger the flash

 Try this yourself and see what kind of results you get. Maybe try a large white bed sheet to shoot your flash through and bounce to see if you get different results using it over your umbrella or soft box.

Hot Shoe Flash Lighting

Nikon D4, 28-300mm, ISO 200, f/5.0, Nikon SB900, Nikon SB800 fired using PocketWizard Mini TT1 , PocketWizard AC3 and PocketWizard Transceiver TT5.

I enjoying using our backyard as a background. First of all I don’t have to light everything and we love the trees.

For this photo I wanted to tie our daughter playing her viola to the outdoors.

This is a wide shot to show the flashes.  They are on Manfrotto 5001B Nano Black Light Stands and the Manfrotto 175F Justin Spring Clamp with Flash Shoe to hold the flashes.

I am shooting in TTL mode and after I take a shot I am using the compensation dials on the camera and the PocketWizard AC3 to adjust my exposure.

In this photo of the PocketWizard AC3 A is set to a +1, B is set to +2 and C is set to a +3 compensation.
The PocketWizard AC3 sits on top of the PocketWizard Mini TT1 in it’s hot shoe.  You can also use the Nikon SU-800 to do the same thing.

In the first photo I have the camera at -1 compensation and the flash on her face at 0 Compensation and the hair light at +2 compensation.

You really just have to play with this to get the results you want.

Here we are shooting more in the woods than in the first photo. Here the camera is -1 1/3 EV.  The flashes are at +1 EV.
She is getting some sunshine from the left and the flashes are lighting the shadow side of her face.

We moved again around the backyard to a different background.  Also changed the lighting a little here as well. The camera is set at -3 EV and the flashes are on the right set at +2 EV and the one on her left at +1 EV.
This is the actual lighting setup for the photo just above it.

I am using an -1 EV so as to not loose the background but just tone it down a bit. The flash to the right is +1 EV and the hair light flash is +2 to help separate her from the background.

The lighting setup for the above photo.

The idea with the two hot shoe flashes was to use them to compliment the lighting outside.  I used one light to help separate the viola player from the background by putting the flash up high and using it as a hair light would be used in the studio.  I am using the other flash as the main light and using the natural light to control the background.

Because I am outside I am using the PocketWizard radio remote system to be sure the signal is reaching the flashes. 

Once you master the use of the one off camera hot shoe flash and you are ready to expand try this exercise yourself. See what results you come up with using your camera and flashes.

Nikon D4: Tethering & 11 FPS Tips

Nikon D4 with 85mm f/1.4

Photoshop is complex

Photoshop got its start with a father and his two sons Glenn, John and Thomas Knoll back in 1988.  Not even the Knolls know all you can do with Photoshop.

It is quite common to go to some of the Adobe Photoshop users conventions and have a speaker show you how they got a result and on the same stage are the developers saying this is knew to them.

Nikon Cameras are complex

About two years ago when the Nikon D3S was just introduced, I was at a basketball game shooting with my new Nikon D3S. Next to me was Bob Rosato, who was a staff photographer for Sports Illustrated, getting a phone call just before the game started.

I could hear Bob saying he didn’t know the answer to the caller. After hanging up, Bob looked at me and said that was Nikon calling asking him what settings he was using for sports.

This has been the case for many years with these new cameras that have complex computers in them. You have so many focusing modes to choose from. You can shoot is S, CL, or CH modes for how many frames the camera will fire when you push the shutter. Then you have which focusing modes you can choose from. Single, 9 group, 21 group, 51 group, Auto and then each of these in combination with the shutter mode gives you different results.

On top of those setting you have back focus settings for tracking your focus.

Who wants to be a millionaire?

Once you buy one of these cameras you will be heavily invested in learning all you can do the type of photography you do. This is important to point out that the cameras will do more than most any pro would ever use them to do. However, you must master it for your niche´.

Very quickly you will want to use a life line like they do on the TV hit show “Who wants to be a millionaire?” Sooner or later most pros will phone a friend to help them out. Even after reading the huge camera manual you will find yourself overlooking a detail.

So this week I get a call from my friend Paul Abell, a sports photographer, who shoots most of the pro teams and college teams in every sport. “Hey Stan, are you having trouble with your Nikon D4 follow focusing?” was the question from Paul.

Paul figured he had some setting in the camera not set correctly, because he knew Nikon would not introduce a camera with focusing issues after Canon had done so just recently.

I had not experienced the issue and told him I would look into it. Next day, I get another phone call from Paul. He had figured out the problem and wanted to tell me.

The answer is on page 112 of the camera manual.

Nikon D4 Camera manual page 112

My camera came from Nikon set on 10fps, but Paul’s came with it set on 11fps. Once he switched to 10fps he was getting great results.

Camera manual stays with the camera

Most pros keep their new camera manual with their camera these days because of the situation Paul ran into. I don’t know anyone who has memorized those huge manuals. My Toyota Sienna, which costs a lot more than my camera has a manual about half the size of the Nikon D4.

Until you have mastered all you need on the camera, keep your manual in the camera bag with you.

Tethering with Nikon D4

I have been tethering my camera to the laptop for studio shoots for many years. One of the main reasons l like to do this is with headshots. I may go to a company and do over 100 headshots in a day.  The department hiring me wants to match each headshot up to a name.

I use the Nikon Camera Control Pro 2 when I tether. It lets me put into the IPTC fields the name of each person before I shoot and then every time I shoot a photo the name of the person is embedded into each photo. I put in the name of each person before I shoot.

When I got my D4 I continued to do the same thing. However, now I had to change something. Earlier I wrote how with the Nikon D4 you can now embed this IPTC in the camera. (Earlier Blog)

I have enjoyed doing this, but now when I tether I must turn this off or the IPTC I use in Nikon Capture Control Pro 2 will not embed.

Nikon does a great job of telling the camera owner about what can and cannot be done, but for those of us who have trouble learning by reading, you need to practice.

Practice before you perform

It is very important to sit with your camera manual and read everything that you need to do what you shoot. Then practice shooting situations that are exactly like you will do for a job.

Paul was practicing in the backyard with his kids running at him to check the follow focus on his Nikon D4. He was having trouble. He sat down with his manual and then walked through all the settings and this is when he say parenthesis around his problem.

I hope by me sharing here about what I and other pros are learning about their Nikon D4 cameras will help you get the most out of your camera. Read your camera manual and then practice shooting changing the settings to see how you can get the most out of your camera in any given situation.
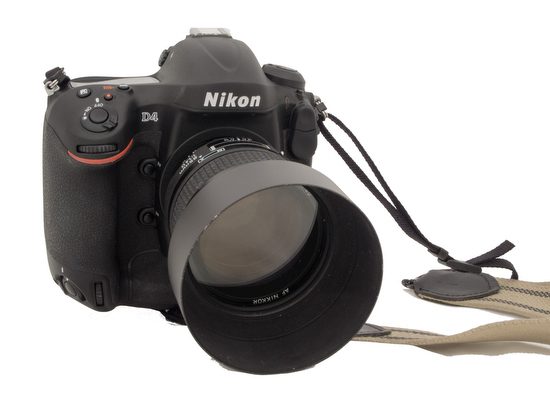
Nikon D4 & Nikon D3S Differences

While the cameras appear very similar, there are differences with shooting still images.

Now that I have practiced shooting with the camera for the past few days, I have noticed a few changes I had to get used to. First, I prefer to have two identical cameras. I like not to think about any differences between cameras while working. The D4 has some button changes from the D3S.

The buttons are not exactly alike, so I can see myself making some errors. So, I will try to replace my Nikon D3S with another Nikon D4 very soon.

The Nikon D3s are great cameras, and if it had not for the changes in all the buttons, I might have lived with the slight differences in the cameras’ still image shooting. However, while the changes might be significant improvements, adjusting my shooting from camera to camera could cost me an image.

I think Nikon did think through this and still made the changes because some of the functions are improvements.

There are more differences on the back than on the front. While many buttons appear the same, they are not all the same.

I am not going into every button difference here in this post.  I just wanted to highlight some that I use all the time.

First, the metering mode choices are located in very different places. The options are the same, but you now push the choice at the top left and rotate the thumb dial to select the various metering modes.

I seldom use the average meter and pick between the spot and the matrix.

One difference is the metering choices. The Nikon D4 has removed the dial on the viewfinder and moved it to the left-top menu.
This is the back of the Nikon D3S

The following significant change for me is the focusing modes. On the Nikon D3S, you just flipped the dial on the back, and depending on whether you had the camera in AF-S or AF-C, different functions were tweaked in the menu.

On the Nikon D4, most choices are now visible on the top menu when you push the AF button on the front and use the thumb or index finger dials.

This is the back of the Nikon D4
This is the Auto Focus button on the Nikon D4. You push the button to change functions and turn the aperture or shutter dial.
This is the Auto Focus button on the Nikon D3S
Nikon D4: When you push the AF button on the front of the camera and rotate the thumb dial on the back, the AF switch changes from AF-S to AF-C.
Nikon D4—When you push the AF button on the front of the camera and rotate the index finger dial, you change the AF-C to many different options. This is the third choice.
Nikon D4—When you push the AF button on the front of the camera and rotate the index finger dial, the AF-C switches to many different options. This is the d51 point.
Nikon D4 – When you push the AF button on the front of the camera and rotate the index finger dial, you change the AF-C to many different options. These are the d21 points.
Nikon D4—When you push the AF button on the front of the camera and rotate the index finger dial, the AF-C switches to many different options. This is the D9 point.
Nikon D4—When you push the AF button on the front of the camera and rotate the index finger dial, you change the AF-C to many different choices. This is the single [ ] that you move around.
Nikon D4—When you push the AF button on the front of the camera and rotate the index finger dial, you change the AF-C to many different choices. This auto function locks in on faces and other subjects based on algorithms.
Nikon D4: When you push the AF button on the front of the camera and rotate the index finger dial, you change the AF-S to one of two choices: Single or Auto.
These are the dials on the Nikon D3S. The lock button on the Nikon D4 has been changed to the meter, and the lock function is now in the menu rather than a dial.
This is the Nikon D4. Having the meter choice here is nice in some ways. I miss the lock button from the Aperture, and the shutter is no longer here. However, it is still accessible in the menu.
This is the Nikon D4. You will notice a new red dot on a button. This is for the movie function as the start and stop function. The rest is the same.

There will be even more updates as I get used to the new Nikon D4.

Nikon D4: Still breaking it in

Nikon D4, ISO 500, f/5.6, 1/2500, 28-300mm

I am leisurely just getting use to the new camera. I like having some vacation days down at Jacksonville Beach, Florida shooting some photos for fun before needing to shoot a job with the camera.

It is very fast at locking in the focus. This is very impressive. Also, I am equally pleased at the buffer.  You can shoot NEF Raw files as fast as you could shoot JPEGs on previous cameras–this is how it feels.  I am sure technically there is a difference.

(Nikon D4, ISO 400, f/5.6, 1/2500, 28-300mm) This is an eagle’s nest with the young eagle flapping it’s wings waiting for mom to come back to the nest.

 I was shooting a eagle nest and played with shooting it on high speed frame rate.  It just zips through and you are almost creating a movie with just still frames.

(Nikon D4, ISO 900, f/5.6, 1/2500, 28-300mm) This is how my family got to see the eagle’s nest that was in the marsh area of the coast.  We took an air boat ride with Fl Crazy Fish Air Boat Ride.  It was a lot of fun.  The guy who took us out was a biology major and really showed us a lot of the marsh and told us about the wildlife.

I will continue to shoot some on vacation, but next week I will shoot a large job with it and then I will be able to know how it responds when I am shooting 2,000 – 3,000 images a day.

This is how I recommend starting with a new camera. Shoot some fun things that are not a job.  Read the manual. Test some of the new functions that the camera manufacturer built into the camera.

You need to be fully aware of your equipment so that you are able to concentrate on the subject and not your gear. Get to know your gear so you can make it do what you need without much thought having to go into it, because you have already mastered the camera.

Nikon D4: Breaking it in

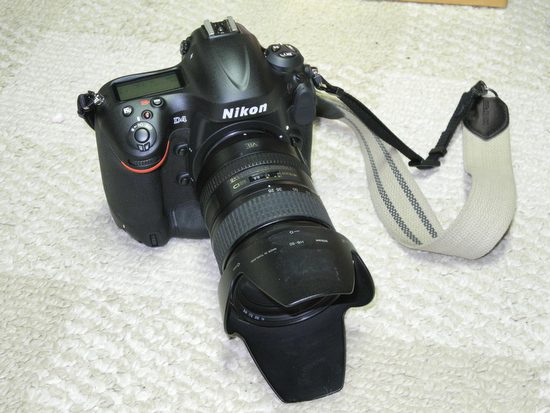
Nikon D4 with 28-300mm

I got the newest high end Nikon and I will blog about it a few times as I become more familiar with it.

The first thing I do when I get a new camera is to become familiar with it. I do this before I shoot a job with it.


Camera Manual

Here is the direct Nikon US link for the D4 manual.

This is the first camera that I downloaded the manual and put it on my iPad to read using Kindle Reader.

The reason I left the camera manual and a few other things unopened is to help later when I want to upgrade I can sell the camera with all the peripherals that came with the camera in mint condition.

While I do have the manual, I try to first see how much of the camera is similar to my last Nikon. In this case I am comparing it to the Nikon D3S.

Similarities and Differences

One thing I like to do right away is try and customize some of the settings like I had on the older camera. On the Nikon D3S and Nikon D4 you can assign custom functions to your buttons and dials on the camera.

Info Button

One major upgrade is the graphics display of the Info Button. You can see which button you are changing. You need a graphic with so many controls. I am excited to see a camera company upgrade their menu to include graphics.

If you are wondering what I have learned about the controls is there are more buttons which some take a on the roll I used to used custom settings to create.

IPTC

The really cool thing I discovered with my Nikon D4 was it has built-in support for 14 of the more important IPTC fields.

The D4 and the IPTC Preset Manager software support the following IPTC fields:

Caption
Event ID
Headline
Object Name
City
State
Country
Category
Supporting Category
Byline
Byline Title
Write/Editor
Credit
Source

You can save 10 Presets of these.

Besides doing this in the camera you can also type all these on your computer PC or Mac and then put them on your memory card and import them into the camera. That software is available from Nikon here http://tooldl.nikonimglib.com/iptc/index.html.en

It requires an up-to-date version of Microsoft Silverlight to download. here is that link http://www.microsoft.com/getsilverlight/Get-Started/Install/Default.aspx

In addition to the usual USB and HDMI connectors, the D4 also incorporates an Ethernet port, mic and headphone jacks, and a connection for Nikon’s wireless transmitter.

Connections

One of the other things you notice other than all the new buttons are the connections on a D4.  Nikon added to the D4 an Ethernet port, headphone jack and a connection for the wireless transmitter, which wasn’t on the Nikon D3S.

I will work on testing some of these in the next few weeks. Come back and look for posts talking about this later.

First Shots

Nikon D4, ISO 2000, f/5.6, 1/100, 28-300mm
Nikon D4, ISO 640, f/5.6, 1/30, 28-300mm

I shot a few images at my church’s Palm Sunday services. I am pleased with all the images from the Nikon D4.  When comparing the Nikon D4 to the Nikon D3S images there was minor differences.

Nikon D3S, ISO 12,800, f/8, 1/200, 14-24mm

Nikon D4, ISO 900, f/5.6, 1/30, 28-300mm

I think the D4 focusing is a little quicker and locks in a hair bit faster, but for the most part this situation wasn’t the best test for really low light.  I will test this even more in the next few weeks.

How much do you cost?

Fuji X-E2, FUJINON XF 55-200mm, ISO 500, ƒ/6.4, 1/500

My stepson looked at his first paycheck and asked, “Who is FICA?” This was his first hard lesson about where the money goes – the cost of doing business.

Much of the money we pay for a service doesn’t stay with the service provider.

According to Dun & Bradstreet, “Businesses with fewer than 20 employees have only a 37% chance of surviving four years (of business) and only a 9% chance of surviving ten years.” Of these failed businesses, only 10% close involuntarily due to bankruptcy. The remaining 90% close because the company was unsuccessful, did not provide the level of income desired, or was too much work for their efforts.”

So many good photographers have to turn to other ways to make a living, not due to a lack of photographic skills but poor business practices.

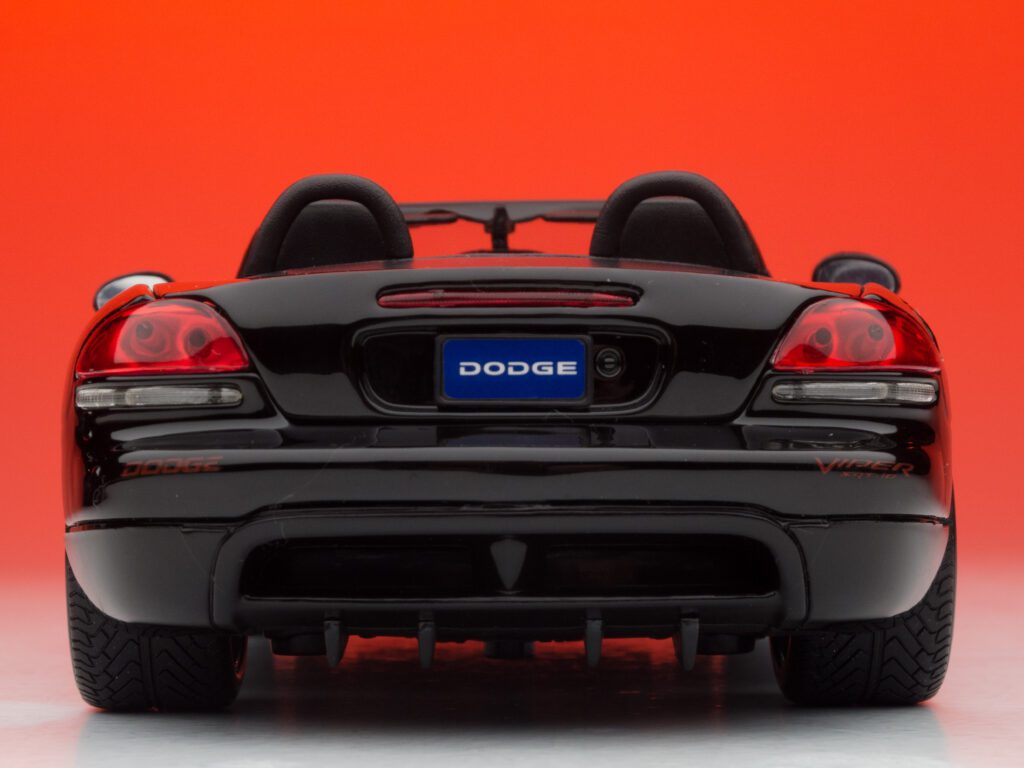
Dodge Viper [COOLPIX P7000, , Mode = Manual, ISO 100, 1/1000, ƒ/6.3, (35mm = 105)]

Two things caused their businesses to fail: 1st – they didn’t know the actual cost of doing business, and 2nd – they could not promote themselves.

In 2001, I left a staff position and started full-time freelancing. My business has averaged a 20% growth rate each year for the past six years. Many of my colleagues ask me how I do it.

This coming week I am going to Hawaii to teach business practices for the third year at the University of Nations in Kona. First, I require the students to calculate how much it costs them to live for a year. I’ve found that even the older students who have been on their own for a time typically do not know what it costs them to live.

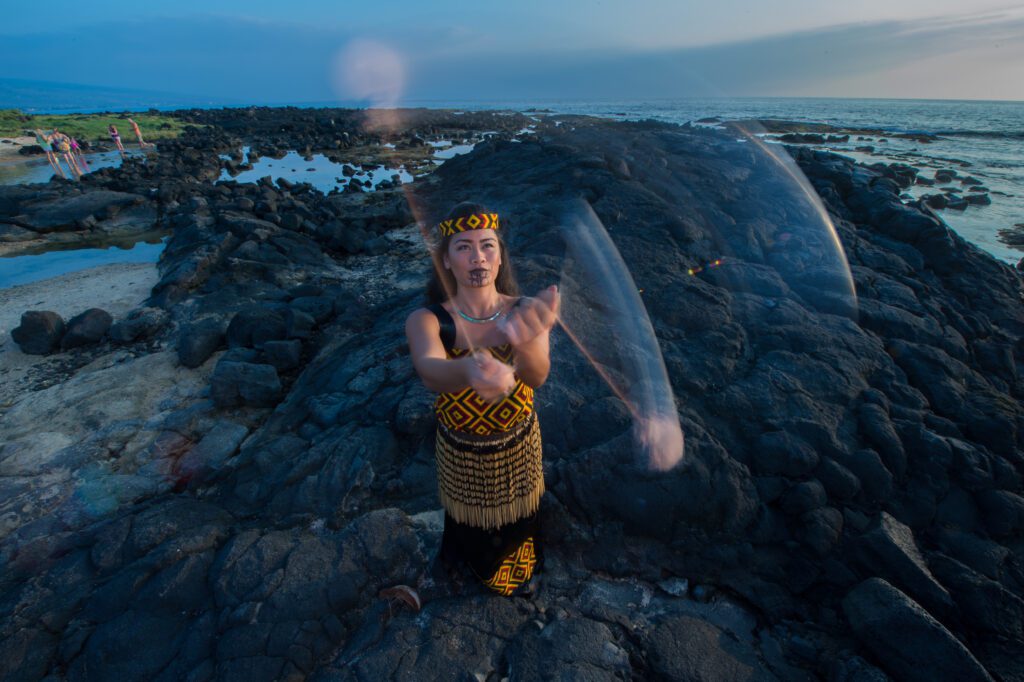
Island Breeze [Nikon D4, AF-S NIKKOR 14-24mm f/2.8G ED, ISO 200, ƒ/22, 1/15]

No matter the profession, if you do not know your cost, you cannot estimate what you are worth in the marketplace.

Once you know your cost and decide how much net income you want to earn, it is easy to determine what to charge for each project to reach that goal.

Take a moment and think of everything needed to do your job. Here are some categories from the National Press Photographer’s Association list I use. Just substitute your terms for similar types to figure out your annual cost of doing business.

  • Office or Studio
  • Phone
  • Photo Equipment
  • Repairs
  • Computers (Hardware & Software)
  • Internet (Broadband, Web site & email)
  • Auto Expenses (Lease, Insurance & Maintenance)
  • Office Supplies
  • Photography Supplies
  • Postage
  • Professional Development
  • Advertising and Promotion
  • Subscriptions & dues
  • Business Insurance
  • Health Insurance
  • Legal & Accounting Services
  • Taxes & Licenses
  • Office Assistant
  • Utilities
  • Retirement Fund
  • Travel
  • Entertainment (meals with clients)

Add your desired net income to your annual business expenses, and divide that total by the number of projects you reasonably expect to do in a year. The answer gives you the average per project you must charge clients to pay those bills, stay in business and live the way you want.

Now you must find out if the marketplace will sustain this charge.

On average, you need to charge $1,000 per project to reach your goal. If the services you provide are what people can get anywhere, they will shop for price. If the going rate in your community is $1,200, you are in good shape. If the going rate is $900, you need to cut your overhead—you’re hoping for income, business expenses, or both.

The key to earning what you want comes down to service. You must be able to demonstrate to potential clients that you offer something more if you want/need to charge more than other photographers do.

I have found that I need to know about the subjects I cover more than other photographers do. In addition, I deliver my images a lot faster than most others do. I also listen carefully to what clients say they want and try to meet their needs and go beyond their expectations.

It was a revelation when I first determined my cost and income goals, just as my stepson’s response to FICA and other deductions from his pay were for him.

I do my best to keep my overhead low, but even close to 50% of my gross goes to business expenses. It was shocking to see what I must charge to pay the bills. This knowledge was the fire I needed to get me to put the time and effort into finding ways to make me more valuable to clients and to find those clients by seriously marketing myself.

Do you know what you cost?