Hand held light/flash meter

Flash/Light Meter simplifies lighting

I think anyone using studio strobes will greatly benefit from a flash meter. Here is the older Sekonic Meter I use most of the time. 

The primary thing I use the flash meter for is getting the exposure for my subject. I always start here when shooting. The light I am measuring is the main light, because it is lighting my subject, not because of how bright it is.

Once you have this reading you can then take other readings. If you have two lights hitting the subject as in this photo below I wanted to control the contrast in the photo and using a flash meter was very helpful.

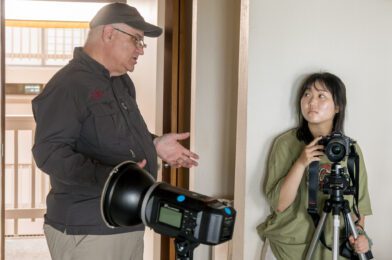
This is Masha, one of the School of Photography 1 students I was teaching in Hawaii a couple weeks ago. She was my model as I taught the class how to ratio lights.

In a very classic lighting setup like this the main light is 45º to the axis of the camera and subject. The second light is one the same axis as the camera, which is perpendicular to the background.

I took a reading first of the main light that is 45º to the right of the camera. ƒ/8 was the reading for the main light on ISO 100 and sync speed of 1/250.  I turned this light off and then worked at setting the second (fill light) behind the camera to ƒ/5.6, which is 1/2 the power of the first light.

Once this was set I turned both the lights on and took another reading and the combined ƒ-stop was ƒ/9.

Taking reading of the background for the top photo of the soldier

When I made the photo of the soldier I knew I wanted the background which was white to be two stops brighter than the subject. The subject was ƒ/16 and therefore background is ƒ/32.

Some people prefer to getting a reflective reading off the background, but either way the reading needs to be two stops greater than the subject.

Many photographer will measure the background with the lights on it at full power and then set the main light on the subject by under exposing by 2 ƒ-stops.

For the portrait of Masha, I had a black background and put a blue gel over the flash and metered the background to be 2 ƒ-stops under exposed as compared to the subject. In the photo of Masha the background was just a tad brighter than ƒ/4, which was 2 ƒ-stops darker than the ƒ/9 of the two lights combined hitting her face.

You can do all this using your histogram, but lets just say the explanation of how to do it is a lot more complex than this for using the flash meter.

Portfolio Review

Tiare Nuualiitia (foreground) and Maile Powell listen to some of Stanley’s instructions for lighting project for School of Photography 1 in Kona, Hawaii. Photo by Dennis Fahringer

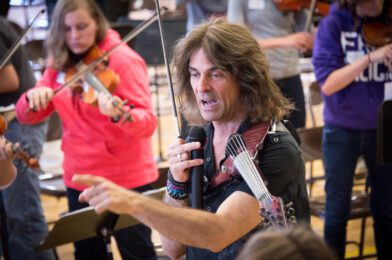
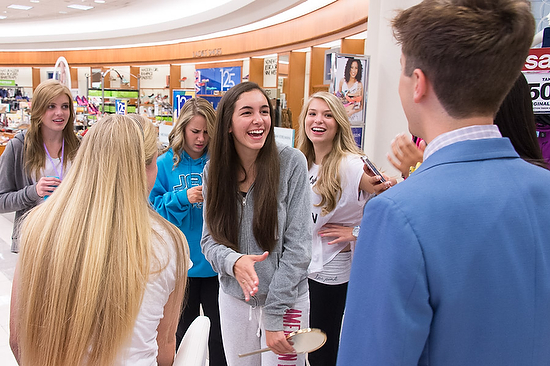
Having your work reviewed can be a real nail biter for sure. While I was teaching in Kona, Hawaii Dennis Fahringer took this photo of the students listening to me. 

Each one of the students would be talking to me later about how difficult the assignments were, but now on the other side of them are grateful for the assignment.

Joanna Pinneo (center) reviews portfolios during the Southwestern Photojournalism Conference

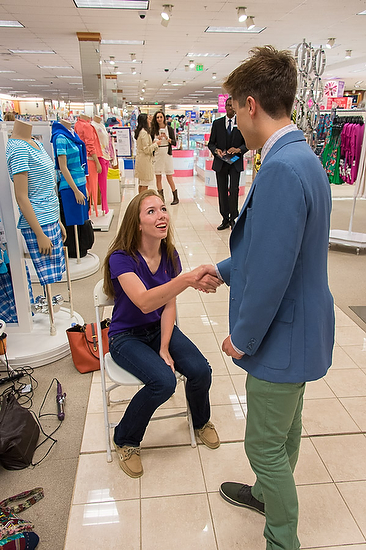
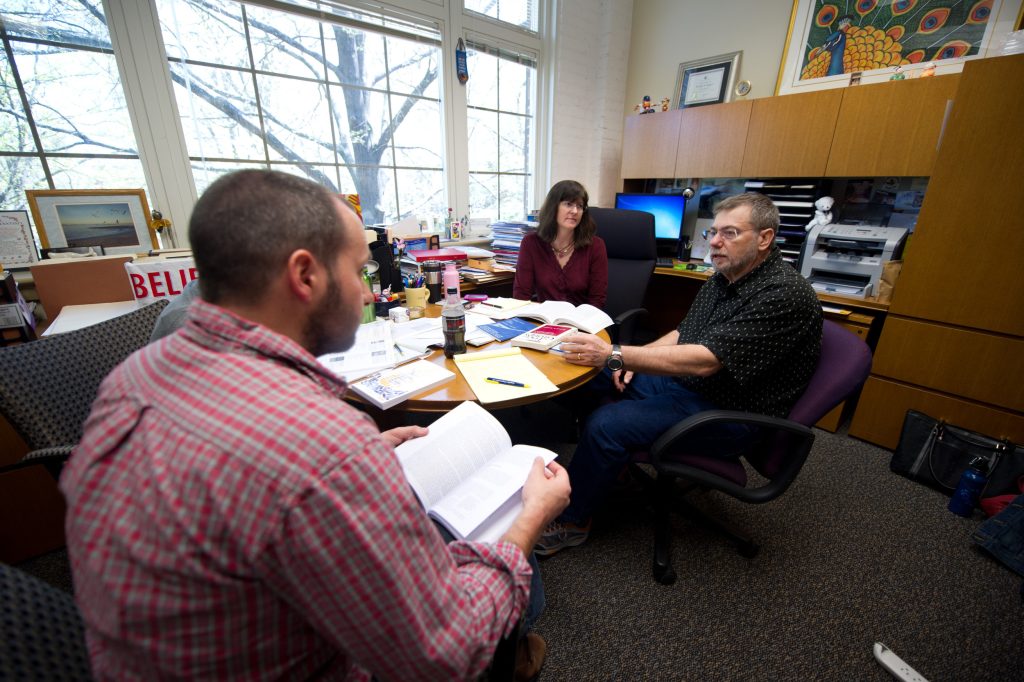
During the Southwestern Photojournalism Conference students, pros and amateurs all wanted some time to have their work reviewed.  Here Joanna Pinneo is reviewing a photographers work.

You can even see in the guys body language how interested he is in her opinion.

Ayssa Fleming has her work reviewed by Bill Bangham during the School of Photography 1 in Kona, Hawaii.

Masha Shulgina has her work reviewed by Bill Bangham during the School of Photography 1 in Kona, Hawaii.

Franziska Escher has her work reviewed by Bill Bangham during the School of Photography 1 in Kona, Hawaii.

Stanley’s Tips for a Portfolio Review

  • Let your work speak for itself. Please don’t tell people all about the photos, if the photo doesn’t do a good job of that on it’s own then maybe it shouldn’t be in the portfolio. If the person looking at the photos wants to know more they will ask.
  • Listen for what is not said as much as what is said. Often when reviewing a new photographer’s work I am looking desperately for something good in the midst of snapshots. I want to encourage you, but I don’t want you to think everything is great either. If I don’t say anything about a photo, believe me it is because I am not impressed. If you ask me I might try to find something good to say, however, if you are fishing for compliments your work isn’t that good.
  • Portfolio review isn’t about praise of your work. If your work is the greatest of all time then maybe you will get a WOW and I wish I had your portfolio comment. You should be looking for pointers on what to do next time to make the photo better. 
  • Millimeters are critical for great photos. One example of how a millimeter can make or break a photo is just the difference in the camera’s point of view and the subject’s eyes. Just tad bit high and you look down at the subject. Eye level with the subject is something quite different than just a little lower and looking up. As you get better this is what you are looking for the little things to improve your work.
  • There are stages of growth in photography. Early in your career you may need some really basic tips to help improve your photography. At this point someone talking to you about a millimeter of difference will not help you. You have a lot of work to do before they can talk to you about those differences.
  • Establish a relationship if possible. You need to pick people to review your work that you can go back to later and show them again. They will be able to then see your growth and frankly if you paid attention.
  • Ask always if you can follow up and how. Plan to go out and shoot as soon as you can after your review. Work on the tips they pointed out to you and then somehow get them to see your revisions in that portfolio. You might just need to show them one project you are working on and get their feedback.
  • You never arrive at the top. There is always room for growth. Always seek out feedback on your work for the rest of your career. If you are not growing then you are dying. 
Justin and Ashley Veneman (on right) review a students work during the student workshop at the Southwestern Photojournalism Conference in Fort Worth, TX.

Dave Black, center, reviews a students work while other students look on and learn from the critique. In the back is Patrick Murphy-Racey (Tennessee hat) and Bob Carey who are also leaders in the workshop.

Anacleto Rapping (far left) and Joanna Pinneo (far right) review a student’s work at the workshop.

This photo was take around 1:00 am. Dave Black stayed up until 2:00 am critiquing work of anyone who wanted his thoughts during the workshop.

Center stage isn’t always the best photograph

Heartbridge performs at the Ohana Gathering on Thursday night in Kona, Hawaii.

When you are assigned to cover an event be careful not to focus all your attention on the center stage.

Loren Cunningham is the keynote speaker for the Ohana Gathering.

You have to get the center stage of course, but just look around and maybe even go outside and you might be surprised as to what you find.

Here I found that if I color balanced for the tungsten lighting on the stage the sky went even to a darker blue at dusk.

Photographers with Macs should travel with 2 external hard drives

When I travel I always carry two external hard drives. With the Mac computer you can have a complete copy of your hard drive on an external hard drive.

Making of mirror backup

I use the SuperDuper software to create a duplicate hard drive of my computer.

There are a few benefits to having a copy of your hard drive. First of all it is a backup. If your computer hard drive fails and is not recoverable then you have everything on your backup hard drive. Well you will have almost everything, from the time you backed it up till the time you use it all that material will be lost.

When the software launches it will look like this screen to the right. The hard drive on your computer is on your left and then the hard drive you are backing up to is on the right. 

There are a few options, but I pick the full backup. The first time it backs it all up and later it will only add the changes.

For the Mac user when you have an external hard drive that has everything on it, you can borrow another person’s Mac and launch your computer.

Turn the computer off and then when you launch the computer just hold down the option key until you see your hard drive pop up as an option. Just click on your hard drive and now you are on your computer. Now it is not quite as fast as if it were built in, but it works great.

If your computer is giving you trouble then running repair permissions from your external hard drive will let you do an even better job of clearing up errors on your main hard drive.

You see your computer cannot fix something that is running. The only way to fix it is to run it from another hard drive sometimes.

To run “Repair Permissions” go to your utilities folder and click on Disk Utilities. It looks like the icon here with the stethoscope on the hard drive. Pick the hard drive you want to repair and then click on “Repair Permissions”

Now one more software I recommend buying is DiskWarrior. This software will do major repairs to your hard drive for you. However you must either use their CD or an external hard drive to run it. It really improves the performance of my computer.

I recommend running it about once a month.

It does more than just repair permissions. If your computer crashes ever, run DiskWarrior to clean up any damage done.

The reason I use an external hard drive to backup my system is to have a duplicate with me in case of emergency and to help me improve the performance of my main hard drive.

Hard Drive for Pictures and Video

My second external hard drive is where I put all the photos and video I shoot on jobs. I never put them on the main hard drive.

First of all shooting with a Nikon D4 in RAW mode creates a 24 mb file. My first hard drive was only 40 mb.  It will not take long to fill a hard drive shooting in RAW mode.  Videos are easily hundreds of megs in size as a bare minimum. Some run a few gigs and having this size file will wear out your primary drive if you put them on and off repeatedly.

Beyond Travel

I have more than one backup of my primary drive. I have at least two more of these back in my home office. I also have multiple backups of the photos on different hard drive.

My recommendation is to always carry at least two external hard drives to do at least at a bare minimum what I am doing.

Photography’s Business Tripod

Gitzo GT-0531 Mountaineer 6X Carbon Fiber tripod

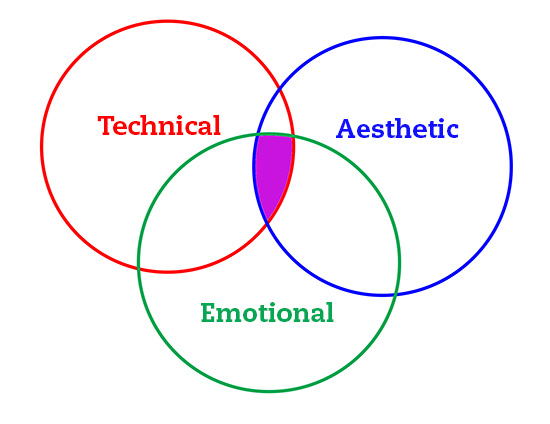
There are three aspects to a photography business that if you do not attend to will result in a unsteady and fallen business. I have listed the three areas here with just some examples.

Quality Control – This is the core product of your business. Everything it takes to deliver the product to them is in quality control.

  • You must have a product that you deliver consistently that meets a high standard.
  • Your paper work needs to be in order. Your accounting needs to be also of high caliber.
  • You basic interaction with customers and clients needs to be professional.

2nd Mile Service – This is the little extra things you do to help out your client. It is not necessary, but you do this to just make things better.

  • You need to do little things like sending hand written thank you notes to customers after doing a job.
  • This is where you over deliver in some way. 
  • You can improve your presentation. Maybe you decide to spend a little more on the packaging of your product or deliver it earlier than promised.

Emotional Connections – You are connecting beyond your product to the person.

  •  Maybe you have a client that is going through a tough time and while they are buying a certain product you decide to give them the upgrade. Instead of the 8×10 you upgrade them to a 16×20 or just give them the 16×20.
  • Maybe a client has a nonprofit that they support and you decide to give a gift to the nonprofit in their name.
  • You take time to recognize them on their birthday in some way.

You need all three to become and remain successful. Doing all three all the time will separate you from your competition. If you are not doing all three, then you are slowly going out of business.

Tip for covering events

This is a tip I learned today from my fellow photographer friend Nathan Fowler.

If you are covering a meeting then take photo of the schedule as the very first photo on the camera. This way you can easy reference it.

Your camera will by default show you the last photo you made and there for to start at the beginning is just a click to next photo which takes you back to your first. This way you can pull up the schedule and review it easily. 

Why do this? How often are in in a dark room in the back covering a meeting and cannot see the schedule. On the LCD on the camera it is lit up easy to see. You can zoom in and read the details.

I will be doing this for now on, how about you?

My response to all those who ask how to do “Missions Photography”

Young photographers and old, but all those fairly new to missions, want to know how to start photographing missions. Their attitude and communication says they are ready and should be doing this now. This is my opportunity to empty out all those emotions that are running through my head and articulating what I’m feeling, without risking saying something to someone that I’ll regret. So here is that letter I often write to get it off my chest and never send. By the way this could also apply to doing NGO work as well.


Dear ___________________:

I get contacted almost weekly from someone wanting to do missions work.  Your request to know how to get into the field is similar to all those other contacts. You reference seeing others going on mission trips or even a short term trip yourself. Your desire seems to be to do this full-time using your photography to capture missions.

Let’s just be honest with one another—traveling the world and taking pictures just sounds fun. It has to be better than what I am doing here every day.

I believe there are four phases to becoming a missions photographer: 1) The call; 2) The Preparation; 3) The Affirmation & 4) The Corporate Sending.

The Call

You hear the call from God that this is what he wants you to do. How you hear that call is different for every person. One of the most famous calls is of Isaiah in the Bible.

Isaiah 6:8

Then I heard the voice of the Lord saying, “Whom shall I send? And who will go for us?”

And I said, “Here am I. Send me!”

The Preparation

If you were called to be a ditch digger, a doctor, a pastor or a communications person each of these would require you to become more proficient and develop that talent.

For the most part this would entail some formal training and some on the job training. Doctors go to college, then medical school and then they do a residency. My recommendation for most photographers wanting to cover missions abroad is to get some formal classroom training, work with some pros and then do a residency type of position for a year or two, just like the medical doctors do.

The Affirmation

You need others to affirm this call. Before a person is accepted into a Seminary to further their biblical studies they must have a letter of affirmation from a sending church. So to a photographer should have this same type of an affirmation where people are confirming not just that you know photography but are using it now to further the gospel.

The Corporate Sending

You need a client who is willing to pay for the content you are creating. Some missions agencies of different denominations have positions for journalists and photojournalists. You must go through an interview process just like you would if you were to be a church planter. They want to see examples of you doing now what they will send you to do somewhere else.


Where are you on these steps?

From your correspondence with me it appears you think you are ready now, but I have some hard questions for you.

What are you doing in missions right where you are?  Would God call someone to do missions photography in your neighborhood?

God hasn’t put you in Africa or somewhere else—he has you here. You are in a mission field. Do you think it is all that different just because you are in a different town, state or country?

You are like so many others who live right here with me in Georgia.  Right near me in Clarkston, GA are refugees from all over the world. There is even a book on one of these groups “The Lost Boys of Sudan.” Here is a link to that book http://www.amazon.com/Lost-Boys-Sudan-American-Experience/dp/0820328839.  Missions of the cross-cultural experience it is right there.

I am sure there are opportunities in your community for a cross cultural experience if that is where you need to serve.

Here is a NGO that works with the refugees http://friendsofrefugees.com in Georgia.

How will it be any different for you to shoot in some city in Africa than right where you live? Too many “Christians” think that missions are like a worship service. Missions is so far removed from a worship experience. Missions agencies send their missionaries to those places of highest need. Those places are where there is less than 2% of Christians in the population. This is like going to solitary confinement as compared to going to a place where the people are like you.

If you don’t like working in the secular world now, then you are not ready for the mission field.

Now up to this point I have only addressed your willingness to do mission work. Now I want to address another concern I have for missionary work.

Do you think God deserves our very best effort? Based on the assumption he would want us to do everything we could to be prepared, how well prepared are you for the call? Have you taken the talents you have been given and refined these?

Christ selected 12 disciples and then spent three years training them before they were sent out completely on their own for good. He did an internship program with them where they went out and then reported back to him.

Lets just say you have really prepared as best you can. You went to a photography school and got your training. Now you are working somewhere to get your apprenticeship time in. Just like a medical doctor must do a residency, so too you must work somewhere with supervison.

Now comes another perspective. Who will send you? If you think agencies or churches will be the supportive body to help pay for the expenses of you traveling the world to tell the story of missions why would they send you?

Another way to think of this, think of it like National Geographic Magazine. Should they send you to cover a story or someone like a William Allard, Joe McNally, Steve McCurry, Joanna Pinneo or some of their many proven professionals?  I would think they would send the person who has a strong portfolio and track record of delivering content.

So too the church and agencies should send the person best because it is good stewardship of what God has entrusted them. Sending someone because they are willing is a good way to burn relationships on the mission field.

I hope you see mission coverage can be where you are now. You should be producing content of the stories in your neighborhood. If you are able to produce solid content right where you are now—which is the mission field, then those groups that can send you to foreign mission fields will see you as a good stewardship choice for them.

Remember the Apostle Paul was not readily affirmed by the disciples. Church history shows us there is a time from his calling until the time he was sent out as missionary from the church. Paul’s Damascus road experience was when he was about age 34 [Acts 9:1-9]. Paul was not sent by the church until he was age 47 with Barnabas [Acts 13:2-3]. He preached in the synagogues in between, but sent out was not for years. He first worked in his neighborhood. If it was good enough for Paul, why not you?

This may sound harsh, but I feel you need to hear this from someone and it might as well be me.

Maybe the thing you need to do is pray for God’s guidance and let him lead you. You might be surprised at all the doors that open through him verses by our own hands.

Sorry I am so pushy with this, but I am really sad to see so many people wanting to go overseas when the largest mission field in the world is here. More missionaries come here of all types of faiths to proselytize than any other country of the world. Who should God send to your neighborhood or city to do mission work? Could it be that he has already called someone–YOU?

Your backyard is your first mission field. This is where you will refine your craft and get the affirmation of others. It is here that your friends will then recognize your calling and send you.

Your call doesn’t always mean now, but you now knowing your path. Keep the faith and fight the good fight.

Stanley

Stanley Leary
Storyteller
Roswell, Georgia
404-786-4914
mailto:[email protected] | www.StanleyLeary.com
http://blog.Stanleyleary.com   http://twitter.com/stanleyleary  http://www.facebook.com/stanley.leary

9 things you need to do before going freelance full-time

Stanley teaching at YWAM School of Photography 1 in Kona, Hawaii [Photo by Dennis Fahringer]
 
Here is a checklist I recommend going through to go full-time freelance. You may think of even more to add to this list.
 
Microsoft Excel Home Budget Template

Create a home budget – You need to have a budget on what you need to survive. This includes housing, food, healthcare, car payments and entertainment to name just a few. My recommendation is if you have Microsoft Excel is to use their home budget to help you get a solid number of what you need to live. Break this down from yearly to monthly amounts.

NPPA Cost of doing business calculator

Create a business budget – You need to know all the expenses beyond your home budget that you need to run your business that also can be written off your taxes as legitimate business expenses. I recommend using the National Press Photographer Association’s “Cost of doing business calculator.” Some things that you could be moved from your home budget to this list would be your phone. You will need to know what you need to run your business monthly and yearly. Things like a website, advertising, Internet connection and other items are things you must have even if you are not shooting a job.

6 months of savings that is equal to both your home and business budgets combined – This is a bare minimum you will need. The odds are pretty high that you will not have a regular stream of income for anywhere between 6 to 18 months.

Don’t quit your full-time job until it gets in the way of your freelance business – I would even recommend seeing if you can go from full-time to part-time with your employer so you are transitioning over a longer period of time. You can offer to go on contract with them and give them 2 – 3 days a week and then you have 3 – 4 days to build your business.


Buy all necessary equipment before you go full-time – You really need to have your basic camera gear, computers, software and any office equipment that you need to do your business paid for before you start freelancing. While you may have budgeted a figure each month for the business for all this equipment you will be putting some of this money away for when things break or need replacing.

Debt free – Ideally having no debts except for a house payment would be perfect. I do want to spell out why this is very important. If you purchase things on credit you could be paying 10% to 20% more for everything you purchase. When the difference between paying bills and going bankrupt is often just a very thin line your business failure is much higher by carrying unnecessary debt.

Synchronize your photography ambitions with your lifestyle desires – If you want to be a war photographer and have a family these are two incompatible desires. You might be able to delay your family dream for a while, but most likely will have to change what you photograph later. Another example is photographing for nonprofit or faith based group and be family oriented. Often these groups pay so little and many expect the photographers to raise their own support. Examine your ambitions. Maybe the reason you want to do certain kind of photography is really your desire to help people. When you get to this core value there maybe other ways to shoot for say green companies that have more money to pay a livable wage.

Alex Garcia, photographer for the Chicago Tribune, talks with a student about her work during the student practicum at the Southwestern Photojournalism Seminar in Fort Worth, TX last February.

Find a business coach/mentor – they do not need to be a photographer; just a successful businessperson will do just fine. They can help listen to your issues about running your business and ask questions that help guide you to being successful.

Create a business plan – If you need a loan to start you will need a business plan for the bank. If you are set, still do a plan for yourself. It will help guide you and make decisions that you need to make every day. This will be your compass. You can contact the US Small Business Administration in your area and they can help you. Often this is free.

Can you think of suggestions to add to the list?


Freelance Advice: Easier to get a job with a job

I had to share these photos of the eight point buck that was in our backyard in Roswell, GA. [Nikon D4, 28-300mm, ISO 1250, ƒ/5.6, & 1/2000]

The old cliché “It is easier to get a job when you have a job” is like the other cliché “It is easier to get a loan when you don’t need one.”

If you are unhappy in a job there is a good chance that those around you and even your boss will notice this attitude. Once you assess your situation and eliminate the unpleasant requirements of almost any job, you may need to find a new job or even career.

Many people will plan their exit strategy. If it is a career change you may need to go to school and maybe you can do this nights or even online. If it is just the wrong workplace and not a career change then you can start right away.

[Nikon D4, 28-300mm, ISO 1000, ƒ/5.6, & 1/2000]

It is better to be proactive than to be fired, because explaining the reason you need a job to a new employer because you lost your job is a red flag.

If you see the business struggling it is better to get out of there before you are laid off for similar reason.

The freelancer also needs to be aware that showing current project work is equivalent to having a job.

Another reason people leave companies is to increase their income. Other companies would love to hire someone away from another company that helped improve the company’s bottom line. Come and help us do what you did for your previous employer. Often this will be for better pay.

After helping the new company you may pick up a few more skills that another company will again lure you to them because of your high performance.

The Citadel playing North Georgia College in Rugby. [Nikon D4, 28-300mm, ISO 900, ƒ/5.6, & 1/2000]

Self-Assignment

The freelancer’s best way to get a great gig is through the self-assignment. Just like it is easier to get a job with a job.

If you are a truly creative person you will have many ideas that you cannot get companies to buy into.

I have a theory about this problem of good idea and no companies wanting to do it. The lack of an example is why most companies do not take on these great ideas.

The self-assignment allows you the flexibility to do a job the best way you know how. To execute that idea as best you can without interference from a client. This way you have the best example possible.

Roswell Presbyterian Church middle school mission trip to Chattanooga, TN where they are helping widows with their homes. [Nikon D3s, 14-24mm, ISO 200, ƒ/3.2, 1/1250]

I have done self-assignments for my church and denomination.  One of the first things I needed for my proof of concept was access to people and places. I wanted to show that telling people’s stories using still images, video and audio together is one of the most powerful ways to communicate.

I also know that most of the stories I have done in the past for churches had emotional hooks and were not just dry factual events.

Every year I still will take some time and cover something our church is doing. This helps keep my storytelling skills sharp. I enjoy doing it because they are not paying me and therefore no one is really able to tell me what to do. I am pretty much my own client. By giving them the package to use at the end they are thrilled. Next time I show an interest in helping I get even more access and help.

After getting the final package finalized I am now able to shop around with my concept with an example.

You can do a soft sell where you send the package in an email to potential clients. You are sharing it as entertainment.  “Take a look at what my daughter did this summer with her youth group helping widows in Chattanooga,” might be what I say to them. The clients you have to enjoy seeing what you are doing. In the process they may warm up to the concept and hire you to shoot something similar for them.

There are a couple of ways to do self-assignments. You can take on a larger project that you can work on over and over until it is just right or you can take on smaller projects and just do more of them.

Refining process

One of the best things you can do for a self-assignment is to show work that is portfolio worthy. This is where it has a WOW factor. To achieve this level it may be necessary to do like they do in Hollywood for movies—many takes.

You may show up one day to work on your project and just take a point and shoot to make visual notes. You will notice what works and what needs some help. For what I do this may mean realizing the light in the room is better in the morning than the afternoon or that I need to bring some lights to light the room.

I would then take these visual notes and use them to help me storyboard the concept. After talking to people and working with their schedules I would then setup the times to start shooting. After each step I would come back to the storyboard and see how it is going.

Often what the storyboard I started with will in no way resemble the end product. I will have discovered a better storyline than what I started with and therefore I make adjustments and let the story lead me rather than me forcing my concept on the situation. [This is very important to me when I later help sell to clients. I tell them what I started with and how I changed it to make it better.]

Presentation

When I have finished the package and start sharing it, I will also blog about the process.  I may have been blogging all along. I want to tell the behind the scene story because this is what helps clients and potential clients see me as an expert.

Here is an example of a finished project I did for Chick-fil-A where they gave out sandwiches to first responders and victims of Hurricane Sandy.

[youtube https://www.youtube.com/watch?v=VxDdW7HwJQ4]

Take it slow with the self-assignment

Musicians work on difficult passage of music by slowing it down to work on playing the notes and getting the rhythm just right. Once they have that then they work on the interpretation to give it that swing, funk or melodic feel.

The top musicians are paid really well because when they see the music for the first time they do not need to practice it a few times before playing it. The reason for this is they practice for the most part 8 to 10 hours a day working on music of all styles. This means when they see a difficult passage they have already played something similar recently and are able to execute on the fly.

My mentor, Don Rutledge, was always finding stories and going and doing them all by himself. He would: find the story; write the story; and photograph the story and then send it out for syndication. Most other photographers I knew seldom picked up their cameras like Don when they were not on assignment.

One day I asked Don why he did these self-assignments. He explained how he could slow down and take his time when doing them. He could visit longer with the subjects and do everything on his time and not have a deadline speeding him up.

I remember a few times where Don would have started a story and then decide to go back another day to do more work on it.

Don said that slowing down and shooting stories like this on his own made it possible for him to shoot better for his clients when they hired him. Like the studio musicians of Hollywood Don’s self-assignments were his practice times.  One you do something over and over you are able to start to see the nuances and it is the nuances that separate your work from the pack.

Your best and worst client

I believe the best client you could ever work for is yourself. Take on a self-assignment that will get you out of the bed and fired up to do some work today. For me I look for a project that will help an organization improve people’s lives.

The worst client I have is I. I am rarely ever satisfied with my work. I could always do something to make it better. What I still get upset about is something not working out the way I wanted and I am unable to go back and do it the way I wished I had in the first place.  This is why for most everything I do I would love a second chance to do it again and better.  If it were not for deadlines and budgets I am not sure I would finish projects. I am too much of a perfectionist.

Collaboration

Today many of the projects I want to work on require collaboration. I have had people help with voice over work, help get me places and introduce me to people.

Maybe you have a self-assignment that you need some help with. Have you thought of asking me to collaborate? Give me a shout and let me know your passion and maybe I can work with you.

Did I tell you what I love doing the most? I love helping people realize their dreams.

Nikon D4: Sports Camera Setting

In an earlier blog post, I gave you my standard settings for the Nikon D4 for how I shoot. Here is a link to that post.

These are the settings that I use on my Nikon D4 for shooting most all sports action. Nikon has made it pleasant to allow photographers to save these settings so they do not have to remember every little scene they like to use for a style of shooting.

If you go to Menu and under the camera, the icon picks the first item, “Shooting menu bank.” I have chosen C, which is my sports menu.

If you toggle into the “Shooting menu bank,” you can rename those settings. Once you choose one of these settings, everything you do to change the menu will be saved in that menu bank. I recommend going ahead and trying all my settings and then tweaking them to your preferences.

When shooting sports, it is prevalent for the lighting conditions to change instantly. While the football player runs toward you, they may go from shade into direct sunlight. For this reason, I let the camera do some of my thinking.

Go to the camera icon and look for “ISO sensitivity settings.” Select this, and you will then see this menu:

I turn on the “Auto ISO sensitivity control.” Then, I set the minimum shutter speed to 1/2000. The ISO setting is what you see in the smaller window below the menu. I put this to ISO 100 and then set the “Maximum sensitivity” to ISO 12800.

While I am in Aperture Mode shooting, the camera will always pick 1/2000 shutter speed. If in sunlight, I am at ƒ/4, the shutter speed may go as high as 1/8000 at ISO 100, but as the scene changes and the athlete is now in the shade, the camera will automatically drop to 1/2000 @ ƒ/4 and then change also the ISO up until I can still shoot at 1/2000.

The only time the shutter speed will dip below 1/2000 is if the ISO peaks out at 12800. If my aperture is wide open, the camera is doing everything I would have done manually but faster than I could ever adjust the camera. That is how you get more shots than the guy next to you.

Under the custom settings bank (Pencil Icon), I go into the autofocus setting.

I changed the “Focus tracking with lock-on” from Normal to 4. What happens when I do this is the delay for the lens to refocus if something occurs between the camera and the subject (like a referee). While I am following someone, the camera will not refocus right away. This is something you need to try and pick what you like. You may want the lens to be more responsive and go to set one, which will let the lens refocus instantly.

Focus Settings

I set the camera to AF mode. I also run this in continuous focus mode rather than single.

I go into the menu, select the AF activation under custom settings, and choose “AF-ON only.” This means it will not focus on the lens when I press the shutter. It will only fire the camera. I am using the AF-ON button on the back of the Nikon D4 to focus.

By changing these settings, you will notice the camera stays in focus and shoots at a faster frame rate. Great for following a baseball player sliding into a plate and another player trying to tag them, or maybe a football player is running toward you to score. You will find more photos tack sharp in a series.

I generally put my focus point dead center and lock it so I don’t bump it. I am trying to get photos of moving subjects; the off-center is too tricky. I may crop later for a better composition, but I want the issue to focus first.

Now, of the 51 different focus points, you can choose groups of these to help with focusing. I went with Nikon’s suggested 21-point dynamic-area AF.

Here are suggestions by Nikon in the manual:

The only other setting is on the lens that I turn on VR.

Nikon helps to continue solving photography’s number one problem

Photos are not sharp

While the photo above is not terrible, it isn’t sharp. Look at the enlarged section here below.


The reason the photo isn’t sharp is not due to the camera or lens. The number one problem facing most photographers today is soft images due to camera movement.

No matter the camera you are shooting, a tripod is the best thing to combat camera movement. Your images will be the sharpest possible if your subject is perfectly still during the exposure.

The second thing you can do is to increase the shutter speed. The rule of thumb is to turn your focal length into a fraction. Put one over your focal length and then find the closest shutter speed on your camera, which is faster than it, and you are generally good to go. 

I was shooting at a focal length of 112 in the photo above. I would convert this to a fraction of 1/112 and then shoot to the closest shutter speed, which would have been 1/125 for my camera. However, I was at ISO 6400, ƒ/5.6, and 1/50. I needed to go up by more than one stop for this photo.

For various reasons, I couldn’t raise the shutter speed. To raise it would have been to push the ISO to 12,800, but the D3 didn’t look all that reasonable at 12,800. I was already wide open, so that I couldn’t open the aperture anymore. I couldn’t shoot with a tripod in the hair salon because I would be in the way of customers.

Nikon to the rescue

Nikon added two lenses to some to help with the camera shake. These lenses help with vibration and reduce the camera shake by counteracting it. They call these lenses VR, which is an acronym for Vibration Reduction. Nikon VR lenses use two angular velocity sensors, one that detects vertical movement (pitch) and the other horizontal movement (yaw), with diagonal motion handled by both sensors working together. The sensors send angular velocity data to a lens microcomputer, determining how much compensation is needed to offset the camera’s shake and sending that information to a duo of voice coil motors that move selected lens elements to compensate for the detected motion.

If you ever go on a cruise, the ships have similar devices called gyroscopes that help stabilize a boat in rough water. If you have ever been on a ship and still felt the roll of the sea, this is because there is a limit to how much they can compensate.

The compensation of the Nikon VR II lenses equals four stops. This means that if you were shooting handheld with a camera lens at 1/60, you should get the same sharpness as if you were shooting at 1/1000. So you should be able to handhold a 1000mm lens at 1/60 based on this technology. But if you have ever handheld a 600mm lens, you know few can hold one up.

The VR system can also detect the use of a tripod, recognize panning―an instance in which you wouldn’t want the lens to compensate for movement―and address the specific shake caused by the ongoing vibration patterns produced when shooting from a moving vehicle. From my experience, you want to turn off the VR function when shooting from a tripod.

Nikon D4, AF-S NIKKOR 28-300mm f/3.5-5.6G ED VR, ISO 12,800, 1/80, ƒ/5.6 300mm

I am shootishootikon D4 instead of the D3 above a few years later. I can now shoot ISO 12,800 and have the newer AF-S NIKKOR 28-300mm f/3.5-5.6G ED VR, a VR II technology.

I am hand-holding this lens and just loving the results.

This is cropped area of the photo above. Notice how sharp the eyelashes are in the photo.

When I started shooting professionally 30 years ago, I used the Nikon FM2 film camera. Let me list a few things that have changed, making the above photo possible, which I could have never done before.

  • Autofocus lenses
  • The highest ISO I shot in 1982 was ISO 400 for color, and today, I regularly shoot ISO 12,800
  • Vibration Reduction (letting me handhold images four stops slower)
  • In-Camera White Balance today (Only Daylight, Tungsten, and BW film in 1982)
In 1982, Nikon had a 50-300mm that weighed 6lb 2.8oz

The lenses were manual focus early in my career and weighed much more than today. They are not as sharp as today’s lenses due to the ability of computers to help in the design today.

Today, this 28-30mm lens only weighs 28.2 oz and can focus faster than I could ever do with a manual lens.

Nikon has helped me take photos I could never have taken before in available light, helping me provide services to my clients that have never been done before.

My go-to lens

The AF-S NIKKOR 28-300mm f/3.5-5.6G ED VR lens might as well be bolted onto my camera. I use other Nikon lenses, but this is always my first choice in most situations I shoot. This lens with the Nikon D4 is one of the best combinations in camera gear today.

Nikon D4: Normal Camera Setting

These are my settings for everyday shooting. Regular shooting is more photojournalistic for me, and I use many available lights and lenses from the 14 – 300mm range.

The first thing I do is select my shooting menu bank in the menu. I have saved two primary shooting setups.

I have normal for most average situations and shooting using studio flash. You can rename these to whatever you like to use. I have occasionally set up a sports menu bank as well. Once you select this setting, everything you set in your menu will be saved here.

My primary slot is the XQD, and the secondary slot is overflowing. I am usually shooting in RAW in this setting. This means I can change the white balance later, with more control than I would have in JPEGs.

Also, I have set the bit depth to the highest setting of 14-bit to give me the most significant possible data capture from the sensor.

I set the picture control to standard, affecting only the RAW previews. If you are saving as JPEG and RAW, then the JPEGs will be a little more punch than the Neutral, which, for me, is too flat.

I shoot in the ADOBE RGB color space, and after editing in Lightroom, I output to sRGB. I have the most significant color space in Adobe RGB; therefore, I will have more information when editing, giving better color in the final image.

I prefer to shoot in AUTO ISO. The ISO sensitivity is set at ISO 100 and set to max out at ISO 12,800. I will go into this setting and often tweak the minimum shutter speed, especially when shooting under fluorescent lights, to 1/100. I wrote about Auto ISO in an earlier blog post here. The concept hasn’t changed since the article about the Nikon D3S was written. Earlier, I wrote about why we should shoot at 1/100 with fluorescent lights here.

I only changed a few things from default to custom settings.

I use the autofocus points of 51 with the auto setting on single. It will look for faces automatically. I may override this if the auto setting isn’t locking in where I typically want it to. Often, it is faster than I am, and sometimes, I need to override who I wish to be the focus point when many people are in a photo.

I also like to embed my name in all the photos, so I put my words in the Image Comment and Copyright Information.

I will write more in future posts on studio strobes and sports settings.