Mastering Pool Installations Photography: A Guide to Flambient Method

The top photo shows the editing of all the layers in PhotoShop

Capturing stunning pool installations requires a blend of technical expertise and creative finesse. Whether you’re showcasing your client’s latest project or looking to elevate your portfolio, the flambient method offers a powerful approach to achieving captivating pool photography. In this guide, we’ll walk through the step-by-step process from camera settings to editing techniques to help you master the art of pool photography.

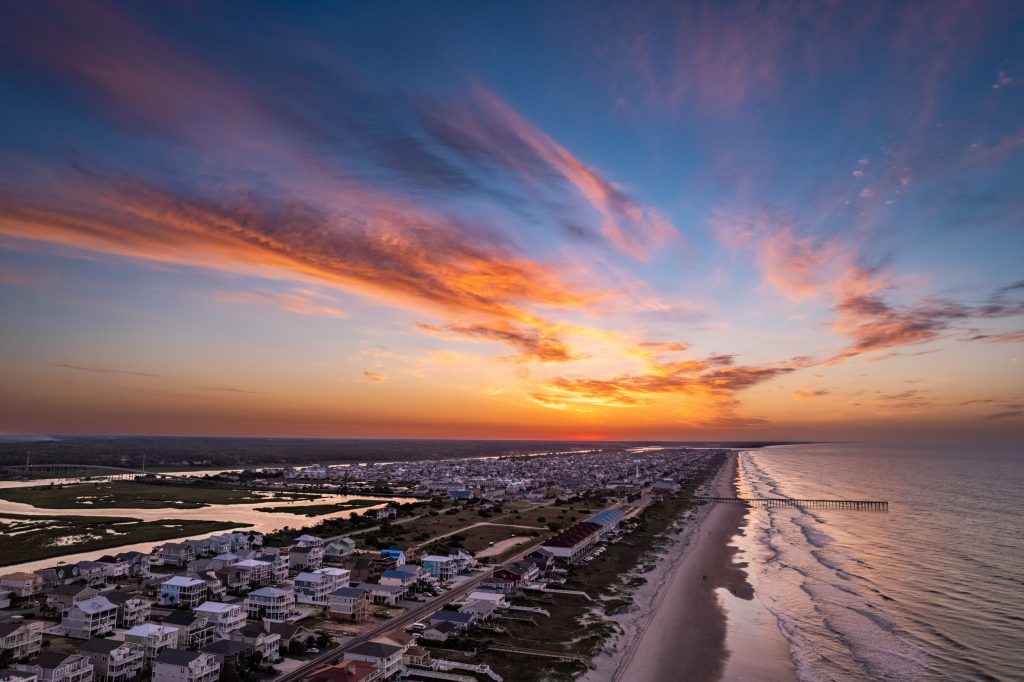
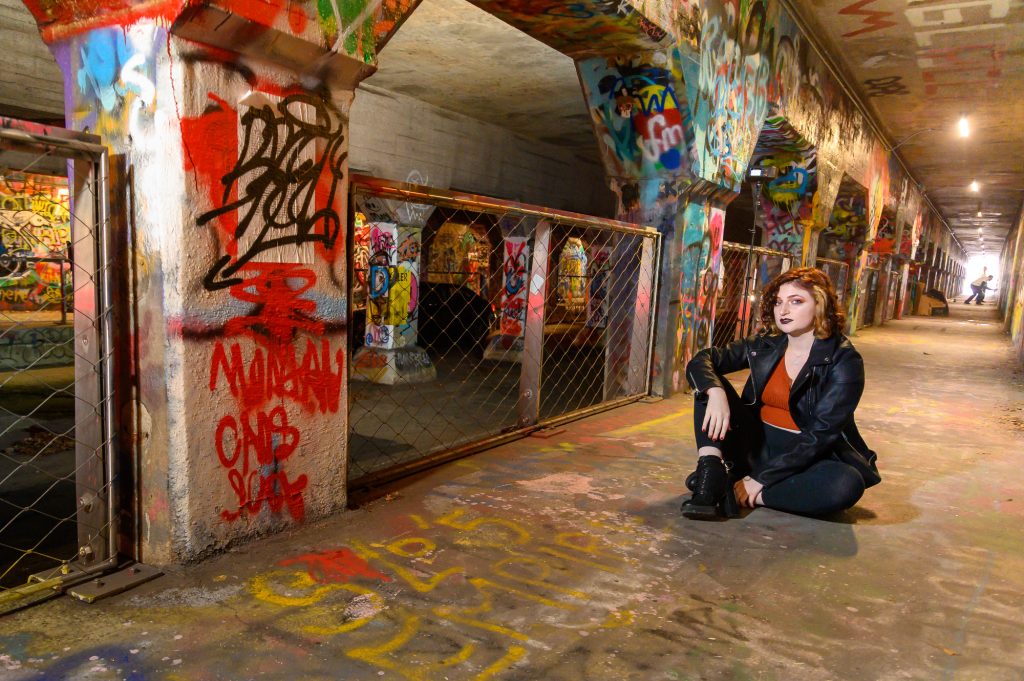
This is the starting point—photo out of camera with no editing.

Step 1: Set the Stage with Camera Settings

Dial in your camera settings for optimal results to kickstart your pool photography session. Begin with ISO 400, aperture at ƒ/7.1, and adjust the shutter speed based on metering. Shooting five bracketed exposures ranging from -2EV to +2EV ensures you capture a range of exposures, providing flexibility in post-processing.

Step 2: Illuminate with Flambient Technique

The flambient method combines flash and ambient light to illuminate the scene. After capturing the bracketed exposures, use a flash to fill in shadows and enhance the overall lighting. Take additional shots as needed to ensure every detail is perfectly illuminated, mainly focusing on areas like the water in the pool to capture accurate colors and reflections.

Step 3: Dive into Editing

Once you’ve captured your shots, it’s time to dive into the editing process. In Lightroom, merge the bracketed ambient photos into an HDR image using default settings. This creates an HDR.dng file that you can further refine in Lightroom if necessary.

Sometimes, I do not use the HDR to combine the five photos in Lightroom, but I will export them with the other flash photos to PhotoShop, do a custom blending of just the ambient images, and then merge them into one layer, which is the last top layer that I will use. I often duplicate this layer. One remains in normal mode, and the other in Luminosity mode.

Step 4: Fine-tune in Photoshop

To seamlessly blend the HDR image with the flash shots, open both sets of photos as layers in Photoshop. Ensure proper alignment by selecting all layers and using the Auto-Align Layers function. Create a Hide Mask on the top layer to prepare for selective editing.

Step 5: Perfect with Brush Tool

With the Brush Tool selected, adjust the settings to normal, Opacity 100%, and flow at 20%. I’d appreciate it if you could carefully paint over areas where the flash shots must be incorporated, ensuring a seamless blend between ambient and flash lighting. Please take your time to refine each detail until the image reaches the desired balance of light and shadow.

Step 6: Luminosity Ambient Layer

Click on your top image, which is my Ambient HDR. Then, just above, click and change it from Normal to Luminosity. Remember I said sometimes I duplicate this layer? If I did, the layer above all the flash photos is the Ambient HDR in Luminosity mode.

I then review any area that looks too “Flashy,” which means it looks like Flash hit it. I have the brush set to 5% to 15% with 100% Opacity. I lightly brush over those areas slowly, just brushing away those harsh shadows.

The Last layer is the Ambient HDR in Normal Mode, where I am now just brushing back some natural light into the photo. This is where I would do more in the sky and very little with the product the pool company installed. I want those that are close to the colors of the product.

Conclusion: Elevate Your Pool Photography with the Flambient Method

Mastering the flambient method opens up possibilities for capturing stunning pool installations. By harnessing the synergy between ambient and flash lighting, you can create images that truly showcase the beauty and craftsmanship of your subject. With attention to detail and a creative eye, your pool photography will captivate viewers and elevate your portfolio.

So next time you’re behind the lens at a pool installation, remember to implement the flambient method for breathtaking results that leave a lasting impression. Happy shooting!

Capturing the Magic: Showcasing RCS Pools & Spa’s Masterpieces Through Dusk Photography

Something magical happens as the sun dips below the horizon, casting a warm glow across the sky and reflecting off the tranquil waters of a pool. It’s the time of day when backyards become stages for unforgettable moments with friends and family. And for RCS Pools & Spa, it’s the perfect opportunity to showcase their exceptional craftsmanship and transform their projects into captivating works of art.

In a world of fierce competition where authenticity is paramount, RCS Pools & Spa has faced a new challenge. With competitors resorting to stock photos to portray their work as their own, RCS Pools & Spa is trying to set themselves apart and highlight the true beauty of their completed projects. Enter the storytelling lens of our photography and videography expert, who is ready to capture the essence of RCS Pools & Spa’s creations.

This week, I am privileged to collaborate with RCS Pools & Spa, capturing the essence of their finished projects through the enchanting art of dusk photography. With its fading light and the gentle glow of pool lights, Dusk sets the stage for a theatrical display of elegance and sophistication. During this magical hour, RCS Pools & Spa’s creations genuinely come to life, inviting viewers into a world of luxury and relaxation.

Using a blend of advanced photography techniques, including multiple exposures and drone imagery, we create stunning visuals that do justice to RCS Pools & Spa’s meticulous attention to detail. Each photograph tells a story, drawing the audience in and inviting them to imagine themselves lounging by the poolside, surrounded by beauty and tranquility.

But our work goes beyond mere imagery; it’s about authenticity and integrity. By showcasing RCS Pools & Spa’s genuine projects, we are not just creating advertising material; we are providing potential clients with a glimpse into the unparalleled quality and craftsmanship that sets RCS Pools & Spa apart from the competition. No stock photo can capture the essence of an actual RCS creation – and that’s a difference that discerning clients recognize.

Moreover, our collaboration with RCS Pools & Spa extends beyond traditional photography. Through captivating drone footage, we offer a unique perspective that showcases the grandeur of their projects from above. It’s a testament to our commitment to innovation and creativity, ensuring that RCS Pools & Spa’s work is presented in the best possible light.

As RCS Pools & Spa prepares to enter their work into international competitions for pool installers, our partnership takes on even greater significance. With our expertly crafted visuals, RCS Pools & Spa can confidently showcase its achievements globally, knowing that each image captures the essence of its unparalleled expertise and dedication to excellence.

In conclusion, our collaboration with RCS Pools & Spa is not just about capturing beautiful images; it’s about telling a story – a story of craftsmanship, passion, and authenticity. Together, we are turning moments into memories and setting the standard for pool design and installation excellence. So the next time you find yourself gazing at a breathtaking dusk photo of a pool, remember – behind every image lies the dedication and artistry of RCS Pools & Spa, captured through the lens of storytelling and innovation.

In Defense of On-Camera Flash: Capturing the Magic of the Springer Opera House Gala

As photographers, we often balance embracing available light and resorting to artificial lighting solutions. There’s an ongoing debate about the merits of on-camera flash, with many enthusiasts opting to avoid it whenever possible. However, my recent experience at the Springer Opera House Gala in Columbus, GA, illuminated that sometimes, the on-camera flash is not just a convenient tool but the best solution for capturing the moment effectively. I wasn’t hired to shoot this and just wanted the photos for our family and friends. Moving around with the flash on the camera was more manageable than having a light stand and flash.

Last weekend, I photographed the Gala at the iconic Springer Opera House following my daughter’s performance in “The Little Mermaid.” The atmosphere was electric, with guests mingling amidst the elegant ambiance of the Saloon, enjoying finger foods and champagne. As the night progressed, the energy intensified with the Cabaret, where performers enchanted the audience with Disney melodies.

Equipped with my trusty Nikon Z9 and the versatile 24-120mm ƒ/4 lens, I used the on-camera flash—a Godox V860IIN paired with a MagMod Sphere to diffuse the light. Additionally, I incorporated a Color Temperature Orange 1/2 filter inside the Sphere to enhance the warmth of the flash and maintain a cohesive color palette throughout my shots. Setting the white balance to 3400º K ensured consistency and accuracy in color reproduction.

Before committing to the flash, I conducted a test shot without it, assessing the room’s available light conditions. With settings at ISO 25600, 1/200, ƒ/4, I realized that relying solely on available light would result in compromised image quality and potentially missed moments. Consequently, I adjusted the Auto ISO to a more manageable ISO 5000, allowing me to maintain a minimum shutter speed of 1/125 while keeping the ISO within acceptable levels.

Throughout the evening, the on-camera flash proved indispensable in capturing the essence of the Gala. The controlled burst of light illuminated the scene, accentuating the vibrancy of the attendees and the grandeur of the surroundings. Whether freezing moments of laughter, highlighting intricate details of attire, or enhancing the sparkle of champagne glasses, the flash facilitated versatility and control that elevated the final images.

Despite the stigma often associated with on-camera flash, its judicious use can yield remarkable results, especially in dynamic and fast-paced environments like the Springer Opera House Gala. By understanding its capabilities and nuances, photographers can leverage it as a valuable tool in their arsenal, complementing available light to create compelling visuals that resonate with viewers.

In conclusion, my experience at the Springer Opera House Gala reaffirmed the notion that while on-camera flash may not always be the first choice, there are instances where it undeniably emerges as the most effective solution. As photographers, our ultimate goal is to capture moments authentically and evocatively; sometimes, embracing the flash is the key to achieving that goal.

The Power of Professional Nametags: Networking Essentials

First impressions are paramount in professional networking. Whether you’re attending a conference, a seminar, or a business mixer, how you present yourself can significantly impact the connections you make and the opportunities that arise. One often-overlooked tool in this realm is the humble nametag. Yet, its significance cannot be overstated.

Why a Nametag Matters:

Picture this: you walk into a crowded room filled with faces you’ve never seen before, all engaged in conversations. How do you navigate this sea of strangers? A clear, professional nametag instantly breaks down barriers. It provides an immediate reference point for others to address you by name, facilitating introductions and conversations.

Nametags serve as visual cues, making it easier for others to remember you long after the event has ended. This is especially crucial in environments where countless new acquaintances are created and faces quickly blur together. By wearing a nametag, you’re not just a face in the crowd but a distinct individual with a name and identity.

The Importance of Placement:

Now, where you place that nametag matters as much as having one. The general rule of thumb is to wear it on your right side. Why the right side, you may wonder? When people shake hands, their eyes naturally travel to the right, making your nametag more visible and accessible.

Placing it on the right ensures your name is prominently displayed during handshakes or interactions. This eliminates any awkward fumbling or confusion about where to look for your name.

The Elevator Speech: Always Be Prepared:

Opportunities can arise unexpectedly in networking, often in the blink of an eye. That’s why it’s crucial to have your elevator speech ready at a moment’s notice. An elevator speech is a brief, compelling introduction that summarizes who you are, what you do, and what you’re looking for professionally.

Crafting a concise and impactful elevator speech allows you to communicate your value proposition to potential contacts effectively. It should be tailored to your audience and delivered with confidence and enthusiasm. Remember, you only have a short window to capture someone’s attention, so make every word count.

My Elevator Speech

Hello! I’m Stanley Leary, a seasoned storyteller passionate about crafting narratives that resonate with audiences. Over the years, I’ve collaborated with esteemed brands like Chick-fil-A, Kimberly Clark, and Newell, Inc., both nationally and internationally.

What sets me apart is my deep understanding of the power of storytelling. I don’t just tell stories; I help my clients uncover their unique narrative thread—one that intersects seamlessly with their customers’ stories. By aligning these narratives, we create compelling connections that engage and inspire action.

My approach isn’t just about crafting tales; it’s about fostering meaningful relationships and driving results for my clients. Let’s connect if you want to elevate your brand’s story and unlock new opportunities. Together, we’ll embark on a journey leading to greater visibility, engagement, and success.

The Power of the Business Card:

While nametags facilitate immediate recognition, business cards are tangible reminders of your encounter. They provide recipients with your contact information and serve as a reference point for future communication.

A well-designed business card should include essential details such as your name, job title, company name, phone number, email address, and professional website or LinkedIn profile. Keep the design clean, experienced, and reflective of your brand. Like your nametag and elevator speech, your business card should leave a lasting impression.

In conclusion, never underestimate the power of a professional nametag when attending networking events. It’s a small yet impactful tool that can significantly enhance your networking efforts. Pair it with a well-crafted elevator speech and a sleek business card, and you’ll be well-equipped to make lasting connections and seize valuable opportunities in any professional setting.

Snapshot Moments: A Peek into UTC’s Photo Night Extravaganza

Lights, camera, action! It’s that time of year again when lenses are polished, shutter speeds are adjusted, and the University of Tennessee at Chattanooga transforms into a haven for all things photography. But wait, it’s not just any ordinary night—it’s the much-anticipated University of Tennessee at Chattanooga Photo Night, orchestrated by Billy Weeks, the maestro of imagery himself.

Caption: Portrait photographer Marielle Jai Echavez Mathis talks with Billy Weeks on stage about her work. She commented that she works with customers on “Photo Date Nights.” This is where she captures them together over a while to capture the couple’s love for each other.

Now, let’s be honest here. Billy knows that while photographers may excel at capturing moments frozen in time, they might not always be the best at verbalizing their artistry. Hence, he graciously extends an invitation to a stellar lineup of outside speakers, ensuring his students not only receive a hefty dose of inspiration but also learn from the best in the business.

Caption: Kevin Lilies shared this photo of a guy being saved in a tent revival because he said, “I am that guy. I have gotten so many second chances.” Kevin’s theme was about how much grace he has experienced. Before Billy asked any questions, he thanked him for all he did for the photo community. Kevin appreciates people like Billy and Bob Rosata, who have mentored him, and he always wants to give shout-outs to people.

Picture this: Kevin Lilies, the man behind the lens capturing the essence of the Atlanta Braves, takes center stage alongside documentary virtuoso Kathleen Greeson, AP’s very own Wade Payne, and the master of portraits, Marielle Jai Echavez Mathis. With such a star-studded cast, one can only imagine the flashbulbs going off in the minds of aspiring photographers.

Caption: Kathleen Greeson, a former student of UTC, embraced some of her low points and even shared that Billy Weeks had fired her from the Chattanooga Times. Kathleen shared photos from a community she started photographing just because kids played basketball at a community net. This was the beginning of a long project that, after 21 years, she made prints of the people from the earlier work and found them again recently, photographing them holding prints of themselves 21 years younger than today. She likes to go deep in her connections with people. I felt like Kathleen leaned into conflict and tension in her life and the lives of her subjects because I think she knows this is the key to the change that happens to the hero of a story.

But Billy’s meticulous planning doesn’t stop there. Oh no, he’s got this evening choreographed down to the millisecond. With students strategically placed in the audience armed with cue cards, Billy ensures he doesn’t overstay his welcome on the mic. Because let’s face it, even the most captivating storytellers can lose their audience if they drone on too long.

Caption: Some people interviewed in the student video projects showed up at the Photo Night. This guy with Asperger’s who loves the band KISS came dressed up like Paul Stanley of KISS and came on the stage at the end of the video, showing him putting on his makeup and playing the guitar he taught himself to play.

And then there’s the highlight reel—literally. Each speaker selects three of their most iconic photos and a video snippet. Billy then takes the reins, peppering the presenter with questions that peel back the layers of their creative process, all while providing invaluable insights to the eager audience.

Caption: Billy Weeks shares how he was behind this guy on a motorcycle, photographing a lady who was 102 years old. So Billy sets up that for him to stop doing that. The shaft of light he saw on the guy made him come out, and just as he did, the guy blew a puff of smoke from his cigarette. Billy also talked about “Being on the shadow side of the photo,” another way he likes to use light.

But what’s a night of photography without a bit of drama? Fear not, for Billy has it all under control. With video story projects showcasing the talents of UTC’s budding photographers sandwiched between speaker sessions, there’s never a dull moment. It’s the perfect blend of showcasing student work while keeping everyone on the edge.

Just when you thought the curtain was about to fall, Billy Weeks himself walked in, ready to take the hot seat. Interviewed by Bethany Cothran, the NPPA Chapter president at UTC, Billy flipped the script and became the subject of scrutiny. But hey, if anyone can handle the spotlight with grace and humor, it’s Billy Weeks.

Caption: Kevin Lilies is taking a moment to publicly thank Billy Weeks for all Billy does for the photo community.

As the night draws to a close, amidst the laughter, applause, and perhaps a few camera clicks, one thing becomes abundantly clear—UTC’s Photo Night isn’t just about snapshots and shutter speeds; it’s a celebration of creativity, camaraderie, and the timeless art of storytelling through the lens. And with Billy Weeks at the helm, every moment is worth capturing. Cheers to another unforgettable evening in the world of photography!

My Journey in Photography: 7 Mistakes I Made When Starting Out

As I reflect on my forty-year career as a photographer, I can’t help but acknowledge the myriad of mistakes I made along the way. Despite spending seventeen years as a staff photographer for various newspapers, magazines, nonprofits, and colleges, some of these errors persisted even while I juggled freelance work. Transitioning into full-time photography was a dream come true but came with challenges. Here are the seven most significant mistakes I made when I started:

  1. Underestimating the Business Side: Like many photographers, I was enamored with the artistry of the craft and often neglected the business aspects. I failed to recognize the importance of marketing, financial planning, and client management, ultimately hindering my growth.
  2. Lack of Financial Planning: Despite having a steady income from my staff positions, I needed to establish a solid financial plan when venturing into freelance work. I struggled setting appropriate pricing, budgeting for expenses, and managing cash flow effectively.
  3. Ignoring Marketing and Networking: I relied heavily on word-of-mouth referrals and social media, neglecting the importance of actively networking and marketing my services. This limited my visibility and growth potential in the industry.
  4. Not Diversifying Income Streams: While my staff positions provided a steady income, I needed to diversify my revenue streams through avenues like stock photography, workshops, or selling prints. This left me vulnerable to income fluctuations.
  5. Neglecting Legal and Contractual Aspects: I should have prioritized having clear contracts, copyright protection, or liability insurance, leaving myself vulnerable to legal issues and client disputes.
  6. Overlooking Client Relationships: While I focused on delivering quality work, I often neglected the importance of nurturing client relationships. Building long-term connections and ensuring client satisfaction are crucial for sustained success in the industry.
  7. Unrealistic Expectations: I harbored overly optimistic expectations about income, workload, and the time required to establish myself in the industry. This led to frustration and disappointment when reality didn’t align with my expectations.

Reflecting on these mistakes, I realize each was a valuable lesson that contributed to my photography growth. While it’s natural to stumble along the way, acknowledging and learning from our mistakes is critical to evolving and thriving in any career, especially one as dynamic and competitive as photography.

Strength: Financial Discipline

As a dedicated photographer, my passion for the craft often tempted me to invest in the latest equipment. However, I leveraged my innate penny-pinching tendencies to my advantage. I recognized the importance of fiscal responsibility and consciously decided to purchase gear only when I had cash. Refusing to succumb to the allure of credit card debt, I ensured that my financial decisions aligned with my long-term goals, allowing me to build a sustainable business without unnecessary financial strain.

Strength: Exceptional Time Management

One of my greatest photography industry strengths was my ability to book and manage multiple projects simultaneously. Rather than succumbing to overwhelm, I thrived in high-pressure environments by meticulously considering my workload and personal capacity. By prioritizing tasks and allocating my time, I could meet deadlines consistently and deliver quality work to my clients. This skill enhanced my reputation and laid the foundation for long-term success in the competitive field of photography.

Strength: Commitment to Continued Learning

In recognizing the dynamic nature of the photography industry, I understood the importance of continual education and skill development. Instead of resting on my laurels, I embraced a mindset of lifelong learning, investing in workshops, seminars, and courses to stay abreast of emerging trends and technologies. This proactive approach fueled my creativity and ensured that I remained competitive in an ever-evolving landscape. By prioritizing ongoing education, I positioned myself as a forward-thinking professional, capable of adapting to the changing demands of the industry and maintaining a distinct edge over my competitors.

Enhancing Photography Workflow with Nikon’s NX Tether 2.0 & Photo Mechanic Plus

In the fast-paced world of professional photography, every second counts. Whether on a high-profile commercial shoot or a creative studio session, having the right tools to streamline your workflow can make all the difference. Nikon’s NX Tether 2.0 is one such tool, with a plethora of new features and enhancements that revolutionize the way photographers interact with their cameras and clients.

One of the standout features of NX Tether 2.0 is its support for remote live view, video capture, and fully-featured wireless control with compatible Nikon cameras. This means photographers can check focus, lighting, and composition on a larger screen in real-time, quickly making on-the-fly adjustments. Gone are the days of being tethered by cables – with NX Tether, photographers can enjoy the freedom of wireless control, allowing for greater flexibility and creativity.

NX Tethering

For photographers like myself, who rely on tethering for client sessions, NX Tether’s wireless capabilities open up a world of possibilities. Using a compatible Nikon camera with a built-in wireless transmitter or an optional transmitter, I can shoot wirelessly as if physically tethered. This enhances efficiency and reduces the risk of accidental damage caused by tripping over cables – a common occurrence in busy studio environments.

How to Connect Nikon Z9 Wireless Tethering

I’ve integrated NX Tether into my workflow alongside Photo Mechanic Plus’s Live View Ingest, allowing me to display live captures on a large 55″ TV connected to my MacBook Pro. This setup enables my clients and I to view photos in real-time, providing instant feedback and ensuring that every shot meets their expectations. It’s a game-changer for collaboration and efficiency on set, allowing for seamless communication between all parties involved.

NX Tethering

But NX Tether isn’t just about convenience – it’s about empowering photographers and art directors to work together more effectively. On larger productions where collaboration is critical, having a tethered monitor allows art directors to oversee every aspect of the shoot, from lighting and composition to hair, makeup, and styling. With NX Tether’s wireless capabilities, art directors can now have real-time access to the images, providing invaluable feedback and guidance throughout the shoot.

Photo Mechanic Plus Live Ingest

I am using Photo Mechanic Plus with the NX Tethering so I can view the RAW files that have had filenaming changed and metadata included.

In NX Tether, I choose to have all the files sent to the computer.
You tell Photo Mechanic Plus what folder to look in for new photos. You then tell it where to put the images [folder]. Renaming and metadata are all possible, just as when you ingest into Photo Mechanic Plus.

Of course, effective collaboration requires a balance of creative input. While the art director plays a crucial role in setting the overall vision, it’s essential to allow the photographer creative freedom to execute their vision. Fostering a collaborative environment with clear roles and responsibilities can avoid conflicts and allow the creative process to flourish.

In conclusion, Nikon’s NX Tether 2.0 is a game-changer for photographers and art directors. Its support for remote live view, wireless tethering, and fully-featured control opens up new possibilities for collaboration and efficiency on set. Integrating NX Tether into your workflow allows you to streamline your process, enhance communication, and ultimately deliver stunning results for your clients.

Why Photo Mechanic Plus Outshines Lightroom in Archiving and Searching for Photos

Managing, archiving, and searching for images efficiently is paramount in photography. As a professional photographer, ensuring my workflow is streamlined and effective is essential to delivering high-quality work to my clients. In this pursuit, I’ve come to rely heavily on Photo Mechanic Plus for its unparalleled capabilities, especially when compared to Adobe’s Lightroom, particularly in one significant aspect.

Let’s paint a scenario: I’ve just completed a project, meticulously editing and refining a collection of RAW images to perfection. Now, my client requires a selection of these images in JPEG format. In a typical Lightroom workflow, the cataloging system is predominantly based on the RAW files imported into the catalog. Therefore, when it comes time to export JPEGs for the client, they reside on an external hard drive, disconnected from Lightroom’s organization.

This scenario introduces a significant inconvenience: searching through Lightroom’s catalog to retrieve the edited JPEGs for client delivery. Why should I go through the hassle of re-exporting images or navigating through Lightroom’s interface when the JPEGs are readily available elsewhere?

This is where Photo Mechanic Plus emerges as the hero of my workflow. Unlike Lightroom, Photo Mechanic Plus allows me to effortlessly ingest and cull RAW images. Once I’ve completed this initial culling process, I seamlessly import the selected images into Lightroom for further organization and editing, leveraging its robust features such as face recognition.

However, Photo Mechanic Plus truly shines in its ability to handle post-editing tasks efficiently. After editing and exporting the images to JPEG format, I turn to Photo Mechanic Plus for keywording using structured keywords. This step is crucial for enhancing my images’ searchability and discoverability, ensuring they are easily accessible whenever needed.

Once keywording is complete, Photo Mechanic Plus seamlessly integrates with my PhotoShelter account, allowing me to upload and share the images with my client effortlessly. By providing access to my PhotoShelter account, I grant my clients the ability to browse, select, and download the images they require, all without the need to navigate through Lightroom’s catalog or rely on re-exported files.

This streamlined workflow saves me valuable time and effort and enhances the client experience by providing quick and easy access to the needed images. In a fast-paced industry where efficiency is critical, Photo Mechanic Plus proves to be an invaluable tool for photographers seeking to optimize their workflow and deliver exceptional results.

In conclusion, while Adobe Lightroom remains a powerful tool for editing and organizing images, its limitations in post-editing tasks and client delivery make it less than ideal for photographers who demand efficiency and flexibility in their workflows. Photo Mechanic Plus fills this gap admirably, offering a comprehensive solution for seamlessly archiving, searching, and sharing images. If you want to take your photography workflow to the next level, Photo Mechanic Plus is undoubtedly worth exploring.

Editor Note: Once the images are up on PhotoShelter, they are searchable for the client. The search fields they can address are the Captions and keywords. The advantage of Photo Mechanic Plus is any metadata such as the EXIF [camera shooting data] is also searchable. You can search by camera, lens, serial number, aperture, ISO, shutter speed, date, time, and even more with Photo Mechanic Plus.

The Power of Contracts: Why Every Creative Needs One

Starting in any creative business can be daunting. Whether you’re a photographer, videographer, writer, or any other creative professional, there’s often a sense of trepidation regarding contracts. It’s understandable. Legal jargon can be intimidating, and formalizing agreements with clients can seem like overkill, especially when you’re just starting. However, I’m here to tell you that contracts are not just for lawyers or big corporations. They’re essential for protecting yourself, your work, and your clients while also elevating your professionalism in the eyes of those you do business with.

I am not a lawyer and recommend consulting one. Usually, they can help you create templates to use in your industry. I recommend Alicia Wagner Calzada.

How my contract has saved me

Having encountered numerous instances where clients have canceled less than 48 hours before an event, I cannot stress enough the importance of having a solid contract. Thanks to the provisions outlined in my contracts, I’ve secured full payment in these situations, mitigating the financial impact of last-minute cancellations. This underscores the necessity of contracts in protecting the interests of creative professionals and highlights their role in ensuring fair compensation for the time and resources invested in preparing for an event. Such cancellations could have resulted in significant financial losses and added stress without a contract. Still, with one in place, I’ve been able to uphold the agreed-upon terms and maintain a sense of professionalism and security in my business dealings.

One of the key reasons the clause regarding cancellations is essential in my contracts is my commitment to my clients. When a client books my services for an event, I reserve that specific date and time for them and often turn down other potential work opportunities to honor that commitment. This dedication ensures I can provide my clients with the highest service and attention to detail. However, when a client cancels on short notice, it disrupts my schedule and results in lost income from potential alternative bookings. By including a cancellation clause in my contracts, I can protect myself financially from these situations, ensuring that I am fairly compensated for the time and effort invested in preparing for the event and the lost opportunities caused by the cancellation. This clause serves as a safeguard, allowing me to maintain a sustainable and professional business while also upholding the integrity of my commitments to my clients.

Why you shouldn’t be scared of creating a contract

One of the most common fears when starting a creative business is appearing overly formal or bureaucratic. Many worry that presenting a contract to clients might scare them off or make them think we’re difficult to work with. However, the reality is quite the opposite. A well-drafted contract demonstrates that you take your work seriously and are committed to delivering a professional service. It sets clear expectations from the outset, which can help to build trust and confidence with your clients.

At its core, a contract is simply a tool for managing expectations. It provides a clear framework for what both parties can expect from the working relationship, minimizing the risk of misunderstandings or disputes. While verbal agreements may technically hold up in court, they often lead to “he said, she said” scenarios that can be difficult to resolve. Even something as informal as a written agreement on a napkin is better than nothing, but a properly drafted contract provides much greater clarity and protection for all parties involved.

So, what should you include in your contract? Here are some key sections that I always make sure to include:

1. Job Description: This section outlines the client’s requests, including specific requirements or deliverables. Clarity is critical, whether it’s a shot list for a photography assignment or a detailed run of a show for an event. I always ask plenty of questions upfront to ensure that both parties understand what’s expected. Additionally, I specify when the work will be delivered and how it will be delivered, giving myself a buffer to ensure that I can meet deadlines consistently.

2. License: This section outlines the client’s rights to use the work produced. Editorial assignments might involve one-time usage rights with a byline for the photographer. It could include unlimited usage rights for commercial clients for a specified period. The price of the assignment typically increases with the extent of usage rights granted, reflecting the value of the work being produced.

3. Terms & Conditions: This section lays out the rights and responsibilities of both parties in more detail. It covers general conditions that apply to all contracts, as well as any particular conditions that are specific to the current agreement. A critical aspect of this section is the choice of jurisdiction, specifying where any disputes will be resolved. I always choose the jurisdiction where I live, as it gives me a greater sense of security and familiarity with the legal system.

4. Line Items: Finally, I include a breakdown of all pricing components, including creative fees, expenses, and any other costs associated with the project. I prefer to use the term “creative fee” instead of “day rate” to emphasize the value of my work and avoid being perceived as a day laborer. Spelling out all expenses leaves no room for confusion or disagreement later.

In conclusion, contracts shouldn’t be seen as scary or unnecessary hurdles in your creative business journey. Instead, they should be embraced as powerful tools for clarity and protection. By establishing clear expectations from the outset, contracts can remove much of the stress and uncertainty associated with any job, allowing you to focus on what you do best: creating outstanding work for your clients. So don’t be afraid to embrace the power of contracts in your creative business—you’ll thank yourself later.

My Software For Writing Estimates & Invoices

In running my creative business, software like FotoBiz has become indispensable in streamlining my workflow and ensuring smooth operations. FotoBiz not only simplifies the process of writing estimates and invoices but also provides invaluable templates and pre-loaded legal language that I can tailor to fit the specifics of each client and project. This saves me time and ensures my documents are professional, comprehensive, and legally sound. Given the importance of contracts in protecting my interests and establishing clear client expectations, I highly recommend utilizing similar software for drafting contracts. With FotoBiz, I have peace of mind knowing that my contracts are well-written and enforceable, allowing me to focus on delivering exceptional creative work without the stress of administrative tasks.

The Importance of Turnaround Time in Photography: Meeting Client Expectations

When it comes to photography, whether it’s capturing the magic of a wedding, the professionalism of corporate headshots, or the urgency of breaking news, one crucial factor often gets overlooked: turnaround time. How soon can you expect to receive your photos after the event? The answer to this question depends on various factors, and understanding them can help clients and photographers manage expectations effectively.

Understanding Turnaround Time

Ashlee Richardson and Benjamin Boyette Wedding

Wedding Photography

For those eagerly awaiting their wedding photos, patience is vital. The turnaround time for wedding photos can vary significantly depending on the photographer’s workload and post-processing requirements. Typically, couples can expect to receive their photos within two weeks to 3 months after the wedding date. Some photographers may offer expedited processing for an additional fee, providing a quicker turnaround.

Headshot Photography

For headshot sessions, clients can usually anticipate receiving their photos within 1 to 2 weeks after the session. Again, this timeframe may vary based on the photographer’s workload and any specific agreements made with the client. Discussing the expected turnaround time beforehand ensures clarity on both sides.

Commercial Photography

Commercial photography projects span a broad spectrum, from small-scale shoots to large advertising campaigns. As such, the turnaround time can vary greatly. Smaller projects may be completed within a few days, while larger endeavors could take several weeks due to extensive editing and client coordination. Some photographers may offer expedited services for quicker delivery.

Photojournalism

In the fast-paced world of photojournalism, speed is essential. Photojournalists are known for their ability to deliver images quickly, often within tight deadlines. Whether covering breaking news or ongoing events, photojournalists work rapidly to provide timely coverage to their editors or wire services.

The Photographer’s Perspective

As a photographer, my philosophy centers on swift turnaround times. Drawing from my experience in photojournalism, where speed is paramount, I prioritize processing images promptly. Whether it’s a wedding, corporate event, or real estate shoot, I aim to deliver results swiftly without compromising quality. I usually turn around projects in a day or less.

Technology has enabled me to expedite the process in the digital age. I can shoot, edit, and transmit images in minutes with today’s cameras. This agility allows me to accommodate tight deadlines and fulfill client expectations effectively.

When clients book me for a project, I make it a point to inquire about their deadline and preferred delivery method. Most opt for online galleries for easy access and downloading. By understanding their needs upfront, I can ensure a seamless experience and strive to exceed their expectations by delivering ahead of schedule whenever possible.

Setting Yourself Apart as a Photographer

For photographers, offering prompt turnaround times can be a significant competitive advantage. In a crowded market, where clients value efficiency and reliability, the ability to deliver high-quality images quickly can set you apart from the competition. By emphasizing your commitment to timely delivery and exceeding client expectations, you enhance customer satisfaction and build a reputation for professionalism and reliability.

Conclusion

In photography, turnaround time is crucial in shaping the client experience. By understanding the factors influencing delivery timelines and adopting strategies to expedite the process, photographers can enhance their value proposition and distinguish themselves in a competitive landscape. For clients, clear communication and alignment on expectations ensure a positive and rewarding collaboration with their chosen photographer.

Capturing the Thrills of Rodeo: My Experience at the Panaewa Stampede in Hawaii

As a passionate photographer with a love for capturing action and excitement, few events rival the adrenaline-pumping atmosphere of a rodeo. From the thundering hooves of broncos to the daring maneuvers of bull riders, each moment presents a thrilling opportunity to freeze time and preserve the raw energy of the rodeo arena.

A teenage girl is riding her horse in the barrel racing event for the Panaewa Stampede Rodeo at Equestrian Center Complex, Stainback Highway, Hilo, Hawaii. [NIKON Z 9, NIKKOR Z 100-400mm f/4.5-5.6 VR S, Mode = Aperture Priority, ISO 1100, 1/4000, ƒ/5, (35mm = 200)]

Recently, I had the chance to immerse myself in the heart of the action at the Panaewa Stampede Rodeo, held on the breathtaking Big Island of Hawaii. Armed with my trusty Nikon Z9 camera and a selection of lenses, including the versatile 100-400mm and the reliable 24-120mm ƒ/4, I set out to capture the essence of this exhilarating event.

Cowboy swings his lasso in hopes of roping the steer during the Panaewa Stampede Rodeo at Equestrian Center Complex, Stainback Highway, Hilo, Hawaii. [NIKON Z 9, NIKKOR Z 100-400mm f/4.5-5.6 VR S, Mode = Aperture Priority, ISO 3200, 1/4000, ƒ/5, (35mm = 240)]

Upon arrival, I was immediately struck by the vibrant atmosphere and palpable anticipation that permeated the air. As the riders prepared for their events and the crowd buzzed excitedly, I wasted no time finding my vantage point. Initially drawn to the fence for a closer view, I quickly realized that my shots were obstructed by its presence, hindering my ability to capture the action.

Cowboy is trying his best to pull himself back upon the horse during the bucking competition of the Panaewa Stampede Rodeo at Equestrian Center Complex, Stainback Highway, Hilo, Hawaii. [NIKON Z 9, NIKKOR Z 100-400mm f/4.5-5.6 VR S, Mode = Aperture Priority, ISO 4500, 1/4000, ƒ/5.6, (35mm = 230)]

Adapting to the situation, I made my way to the back row of the risers/stands, where I discovered a newfound perspective that offered unobstructed views of the arena below. From this elevated position, I found that I could frame my shots more effectively, capturing the dynamic movement of the riders and their steeds against the backdrop of the expansive arena.

Young Boy rides a calf like the big cowboys do when riding a grown bull. The cowboy off to the right follows close behind him to rescue him if necessary during the Panaewa Stampede Rodeo at Equestrian Center Complex, Stainback Highway, Hilo, Hawaii. [NIKON Z 9, NIKKOR Z 100-400mm f/4.5-5.6 VR S, Mode = Aperture Priority, ISO 5000, 1/4000, ƒ/5.6, (35mm = 400)]

One of the invaluable lessons I learned from this experience was the importance of being prepared and informed. Before the event, I obtained a program detailing the schedule of events, allowing me to anticipate the action and position myself accordingly. Additionally, these programs provided valuable insights into the various competitions and participants, enriching my understanding of the sport and enhancing my ability to capture its essence through my lens.

A young teenage girl is wrestling the cow to the ground. She was dragged all over the ring. She came and sat up in the stands afterward, and her friends asked if she was OK, and she said she was doing fine. This was all part of the Panaewa Stampede Rodeo at Equestrian Center Complex, Stainback Highway, Hilo, Hawaii. [NIKON Z 9, NIKKOR Z 100-400mm f/4.5-5.6 VR S, Mode = Aperture Priority, ISO 3200, 1/4000, ƒ/5.6, (35mm = 150)]

Regarding camera settings, I prefer to keep things simple yet effective. Opting for Auto ISO, a fast shutter speed of 1/4000, and shooting wide open on my lens, I ensure I can freeze the fast-paced action with crisp detail. Pairing this with eye tracking and continuous focus with a Wide-L focus area on my Nikon Z9, I maintain a sharp focus on the subjects, allowing me to track their movements precisely and accurately.

During the Panama Stampede Rodeo at Equestrian Center Complex, Stainback Highway, Hilo, Hawaii, a cowgirl shows women can lasso a cow as good as any man could. [NIKON Z 9, NIKKOR Z 100-400mm f/4.5-5.6 VR S, Mode = Aperture Priority, ISO 2800, 1/4000, ƒ/5.6, (35mm = 240)]

As the day unfolded and the events progressed, I was utterly absorbed in the exhilarating spectacle, from the heart-stopping thrills of bull riding to the graceful agility of barrel racing; each moment presented a unique challenge and opportunity to capture the essence of rodeo culture.

This is a team of a cowgirl and a cowboy competing against other teams on the time it takes for one to lasso the head and the other to lasso one or both of the back feet to capture a cow during Panaewa Stampede Rodeo at Equestrian Center Complex, Stainback Highway, Hilo, Hawaii. [NIKON Z 9, NIKKOR Z 100-400mm f/4.5-5.6 VR S, Mode = Aperture Priority, ISO 5000, 1/4000, ƒ/7.1, (35mm = 155)]

Ultimately, my experience at the Panaewa Stampede Rodeo was exhilarating. Through careful preparation, adaptability, and a keen eye for detail, I captured the essence of this iconic event, preserving its energy and excitement for generations to come. As I reflect on this unforgettable experience, I am reminded once again of the timeless allure of rodeo and the profound impact it continues to have on both participants and spectators alike.

Capturing Unity: Behind the Lens of a 270+ People Group Photo

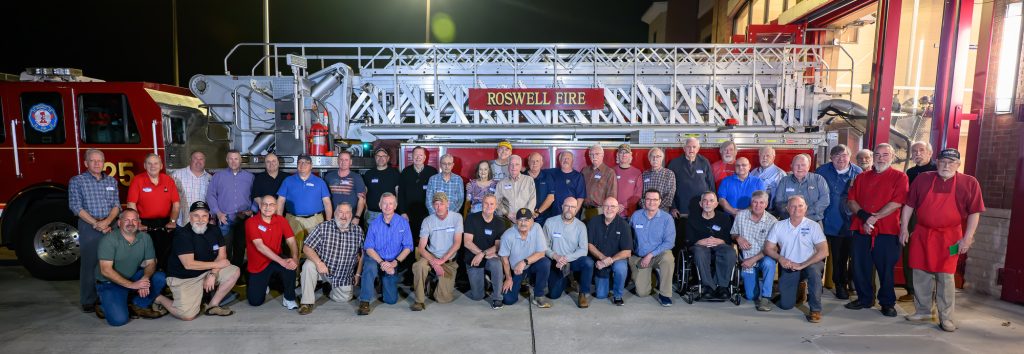
As a photographer, every project comes with unique challenges and opportunities, but few can compare to photographing a large group of over 270 people. Recently, I had the privilege of undertaking such a feat after a department’s annual Kickoff meeting, and I’m excited to share the behind-the-scenes insights and techniques that made it possible.

The first consideration was the logistics of arranging such a large group into a cohesive composition. With the help of the attendees, we removed all the chairs and arranged for everyone to fill the 2×3 format of the Nikon Z9 sensor dimensions. This ensured everyone fits within the frame and created a sense of unity and togetherness.

To capture everyone’s faces clearly and avoid unflattering angles, I positioned myself on stage using a ladder to elevate myself. While risers would have been ideal, creativity and adaptability are essential in such situations, so I made the best of the resources available. The elevated angle provided a better view and helped eliminate the dreaded double chin effect, as everyone naturally looked up toward the camera.
Lighting was another crucial aspect to consider. With all the room lights on, I supplemented the ambient light with two Flashpoint XPlor 600 HSS TTL flashes. Using TTL with +1 compensation on the flash ensured consistent and well-exposed lighting across the entire group, even in a large and varied indoor space.

However, technical considerations aside, one of the biggest challenges was getting everyone’s attention for the shot. This is where creativity and a bit of spontaneity came into play. Drawing inspiration from the energetic atmosphere of the event, I decided to engage the group by having them perform the Chick-fil-A cheer. Starting with the question, “Is Everyone Happy?” and eliciting a resounding “Yeah Man, H-A-P-P-Y Woo!” response captured their attention and brought a sense of fun and camaraderie to the moment.

Ultimately, the result was more than just a photograph; it was a visual representation of unity, teamwork, and shared purpose. Each face in the frame told a story, and together, they formed a powerful narrative of a vibrant and dynamic community coming together for a common goal.

Photographing such a large group presented its challenges. Still, with careful planning, creative thinking, and a collaborative spirit, we captured a moment that will be cherished for years to come. Moments like these remind me why I love what I do – not just for the images captured but for the connections made and the stories told through the lens.