Understanding the Relationship Between Aperture and Background Blur in Photography

[X-E2, XF55-200mmF3.5-4.8 R LM OIS, Mode = Aperture Priority, ISO 2000, 1/500, ƒ/5.6, (35mm = 300)]

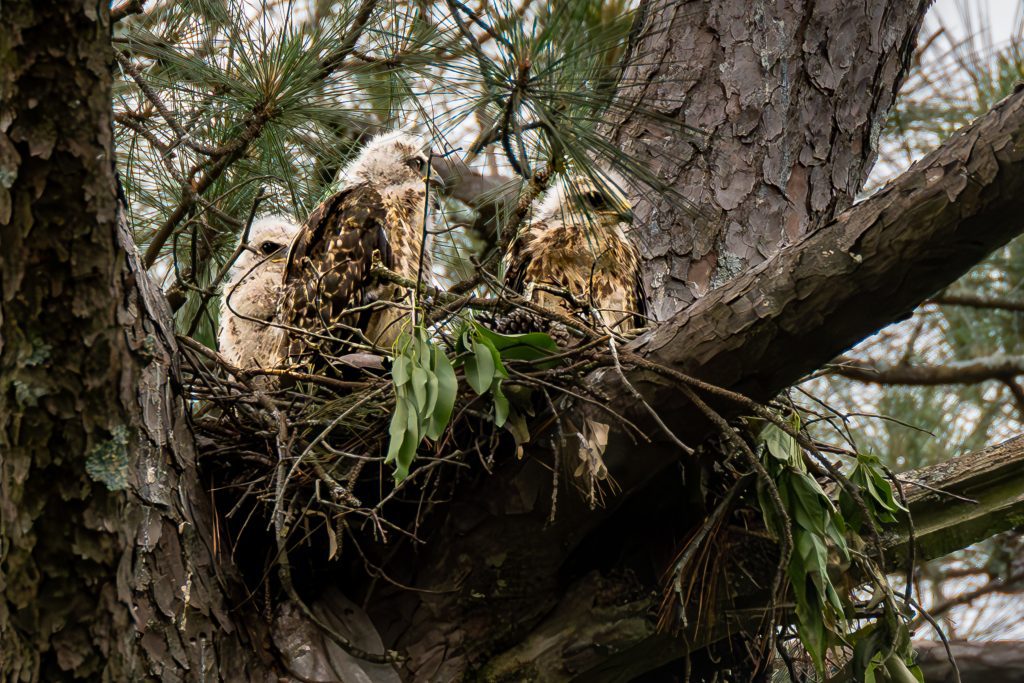
Depth of field is one of the most critical aspects of photography that allows photographers to control the amount of sharpness in a scene. It refers to the range of distances within a scene that appear acceptably sharp in an image. While many assume that depth of field is all about the aperture, the truth is that focal length and distance to the subject are just as crucial.

The aperture is undoubtedly an essential factor that affects the depth of field. A wide aperture (small f-number) results in a shallow depth of field, while a narrow aperture (large f-number) results in a deep depth of field. However, focal length and distance to the subject also play a significant role in determining the depth of field.

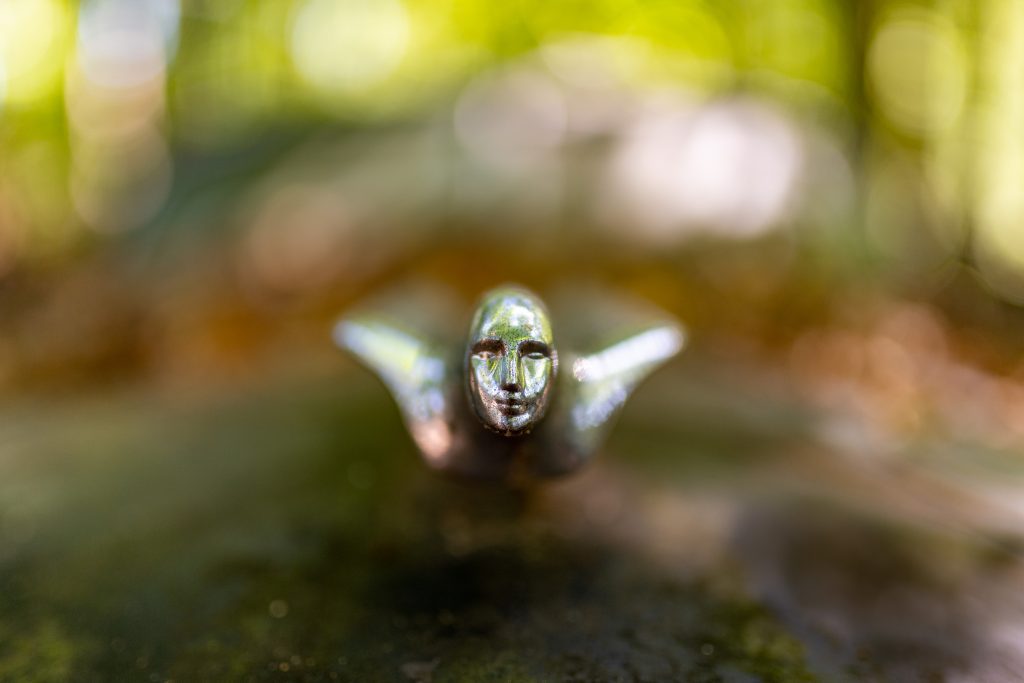
This is as close as I could get to the subject with the 85mm ƒ/1.4 lens. [NIKON D4, 85.0 mm f/1.4, Mode = Aperture Priority, ISO 900, 1/2000, ƒ/1.4, (35mm = 85)]

Focal length refers to the distance between the lens and the camera’s image sensor. It affects the angle of view, perspective, and image compression. When using a longer focal length, the depth of field appears shallower, making the background blurrier. In contrast, shorter focal lengths result in a deeper depth of field, making more of the scene appear in focus.
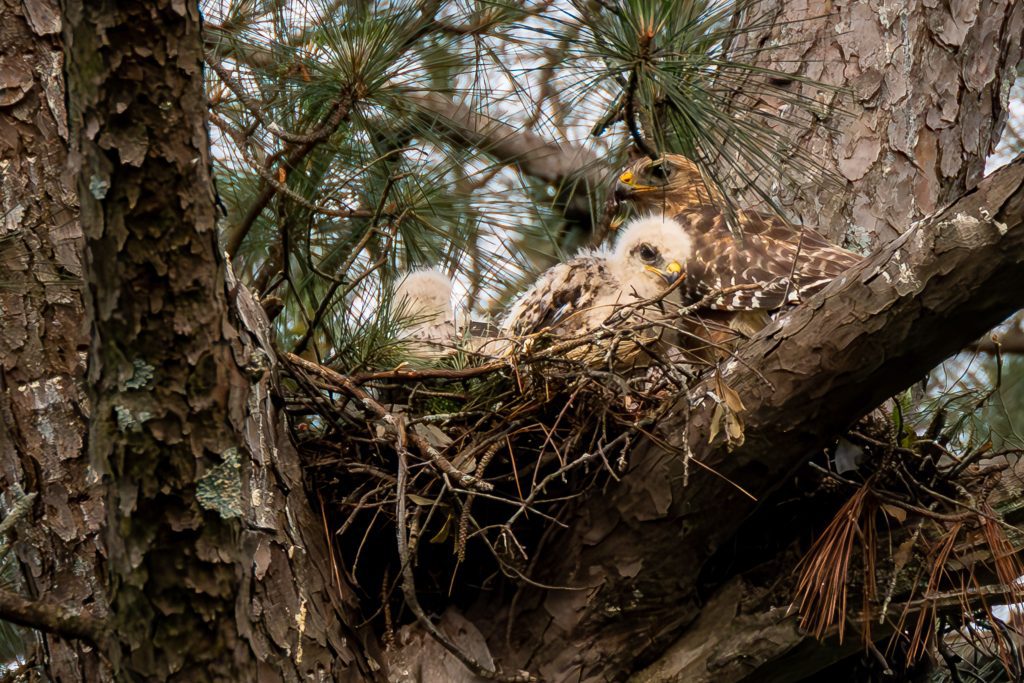
Notice how the BOKEH is silky and smooth, like in the photo above. When they are similarly framed, the 300mm compression gives similar BOKEH even with the 2-stop difference in the aperture of a ƒ/2.8 vs. ƒ/1.4. [NIKON D4, 122.0-300.0 mm f/2.8, Mode = Aperture Priority, ISO 1600, 1/2000, ƒ/2.8, (35mm = 300)]

Distance to the subject is another critical factor that affects depth of field. When you move closer to the subject, the depth of field becomes shallower. Conversely, when you move away from the subject, the depth of field becomes deeper. This is why portraits shot at a close distance with a wide aperture have a shallow depth of field, resulting in a blurred background.

Therefore, to achieve the desired depth of field, it is crucial to consider all three factors: aperture, focal length, and distance to the subject. A photographer needs to understand these factors and how they interact to create the desired effect in their image.

In conclusion, while the aperture is a crucial factor that affects the depth of field, it is equally important to consider the focal length and distance to the subject. By understanding how these factors interact, photographers can create stunning images with the perfect depth of field for their subject and creative vision.

The Extra 100mm: How the 100-400mm Lens Outperforms the 28-300mm for Event Photography

Investiture Ceremony Honorable J. Elizabeth McBath [NIKON Z 9, NIKKOR Z 100-400mm f/4.5-5.6 VR S, Mode = Aperture Priority, ISO 6400, 1/250, ƒ/5.6, (35mm = 400)]

If you are an avid photographer who loves to capture events, you may have already come across lenses with varying focal lengths. Two of the most popular lenses used for event photography are the 100-400mm and the 28-300mm lenses. While both lenses are versatile and can be used in various situations, the extra 100mm on the 100-400mm lens can make all the difference when capturing high-quality images at events.

The difference in focal length between the two lenses may not seem significant at first, but it can make a world of difference when photographing events. In addition, the extra 100mm on the 100-400mm lens provides a substantial amount of reach that can come in handy in various situations.

Investiture Ceremony Honorable J. Elizabeth McBath [NIKON Z 9, NIKKOR Z 100-400mm f/4.5-5.6 VR S, Mode = Aperture Priority, ISO 9000, 1/250, ƒ/5.6, (35mm = 400)]

First and foremost, the extra reach provided by the 100-400mm lens allows you to capture images of your subjects from a greater distance. This can be particularly useful in situations where you may not be able to get too close to your issues, such as at concerts or sporting events. In addition, with the extra 100mm, you can zoom in and capture details that would have been impossible to capture with the 28-300mm lens.

John Swofford, the commissioner for the ACC, speaks to the media on Sunday, October 26, 2008, in Atlanta. [NIKON D3, 122.0-300.0 mm f/2.8, Mode = Aperture Priority, ISO 6400, 1/640, ƒ/2.8, (35mm = 300)]

In addition to the increased reach, the 100-400mm lens provides better image quality. The optics on the 100-400mm lens are designed to give sharper images with less distortion, which is essential when capturing detailed shots at events. The lens also has a wider aperture, which allows more light to enter the lens and provides better low-light performance.

Another advantage of the 100-400mm lens is that it allows you to blur the background more effectively. This is especially useful when photographing portraits or capturing action shots at events. In addition, the lens’s longer focal length helps compress the background, making it easier to create a shallow depth of field and isolate your subject from the background.

Of course, it’s worth noting that the Nikon 100-400mm Z lens is generally about the same weight as the Nikon 70-200mm ƒ/2.8 Z lens, making it easier to carry around all day.

U.S. Attorney Ryan K. Buchanan delivers a powerful keynote speech at the Investiture Ceremony for Honorable J. Elizabeth McBath, celebrating her appointment as a federal judge at Richard B. Russell Federal Building and Courthouse in downtown Atlanta. [NIKON Z 9, NIKKOR Z 100-400mm f/4.5-5.6 VR S, Mode = Aperture Priority, ISO 14400, 1/250, ƒ/5.6, (35mm = 400)]

In conclusion, while the 100-400mm and the 28-300mm lenses are versatile and can be used for event photography, the extra 100mm on the 100-400mm lens can make all the difference when capturing high-quality images. The extra reach, improved image quality, and better background blur make the 100-400mm lens a must-have for any event photographer looking to take their photography to the next level.

The Importance of Multiple Backups: A Lesson in Protecting Your Digital Photos

Backing up digital content isn’t just a technical step—it’s an essential safeguard for protecting precious memories and critical data. A robust backup strategy ensures that your files are secure and accessible, no matter what unexpected challenges arise. Let’s explore a workflow tailored for photographers, videographers, and brand storytellers.

The Evolution of Backup Practices
Over the years, storage methods have significantly evolved. While CDs and DVDs were once popular backup choices, their limited storage capacity and slower access times have made them obsolete. For the past decade, I’ve transitioned entirely away from optical discs. Now, solid-state drives (SSDs) serve as my primary storage medium for working on photo and video projects.

Once a project is complete, I take a layered approach to backups:

  1. Primary Storage: Finished images are uploaded to platforms like PhotoShelter (for photos) and Vimeo (for videos). These platforms provide secure, cloud-based storage and easy accessibility for clients and collaborators.
  2. Secondary Backup: Projects are archived on a NAS (Network Attached Storage) system, specifically Synology, which offers advanced file management and data integrity features.

The Importance of Multiple Backups
Copying files from one drive to another isn’t sufficient to ensure their safety. Hard drives can fail, SSDs can become corrupted, and even well-maintained systems can encounter unexpected issues. That’s why I follow the 3-2-1 rule:

  • 3 Copies of your data
  • 2 Different types of storage (e.g., local drives and cloud services)
  • 1 Off-site backup

Using PhotoShelter as part of this strategy provides several advantages. It offers built-in redundancy, meaning multiple backups are maintained on their end. Additionally, its user-friendly platform allows for secure sharing and customizable permissions, making collaboration effortless.

Enhancing Data Protection with RAID Systems
Implementing a RAID (Redundant Array of Independent Disks) system is an excellent way to bolster data protection for home office setups. RAID uses multiple hard drives to ensure redundancy. For instance, if one drive fails, the system allows you to continue accessing your files from the remaining drives while replacing the faulty one.

Key Takeaway
Your digital content is valuable—both to your creative vision and to your clients. Adopting a modern, layered backup strategy using SSDs, cloud platforms like PhotoShelter or Vimeo, and a reliable NAS system like Synology ensures that your work is safe and easily accessible. By leveraging these tools, you can confidently protect your projects and deliver a seamless experience to your audience.

In conclusion, having multiple backup copies of your digital content and a secure cloud storage solution is crucial. By following a backup strategy that includes various backups and different media, such as CDs, DVDs, external hard drives, and cloud storage, you can ensure the safety and availability of your photos and other digital content. Additionally, exploring technologies such as RAID systems can provide extra protection and peace of mind.

Essential Questions and Information for Photographers When Talking to a Client

When a client contacts a photographer for a job, there are several key questions and pieces of information that the photographer should gather to provide the best possible service. Some of these include:

  1. Type of event or photoshoot: The photographer needs to know what kind of event or photoshoot they will cover, such as a wedding, portrait session, corporate event, etc.
  2. Date and location: The photographer will need to know the date and location of the event or photoshoot.
  3. Duration: The photographer will need to know how long the event or photoshoot will last.
  4. Client’s vision and style: The photographer will want to understand the client’s vision and style for the event or photoshoot, including any specific ideas or themes they have in mind.
  5. Budget: The photographer will want to discuss the client’s budget for the job, including any specific concerns or constraints.
  6. Prints and products: The photographer will want to know if the client wants any prints or products, such as albums, canvases, or digital files.
  7. Editing and retouching requests: The photographer will want to know if the client has any specific requests for editing and retouching, such as specific filters or effects they wish to be applied.
  8. Contact information: The photographer will want to get the client’s contact information, such as their name, email address, and phone number, to stay in touch and provide updates on the job.
  9. Deadline: The photographer needs to know when the deliverable is expected. Sometimes the client even needs photos during the event or within the hour after the event. Most of the time, they are comfortable with a few days before getting the deliverable, but you need to know their expectations.

By gathering this information, the photographer can better understand the client’s needs and tailor their services to meet their requirements.

Thomas Kennedy, executive director of ASMP speaks to the Atlanta Chapter Meeting

Ending the Phone Call

Before ending a phone call with a client, the photographer should summarize the key points discussed during the call and confirm the next steps. For example, they might say something like:

“Okay, so I understand that you’re looking for a photographer for a wedding on June 12th, and you’re interested in having a mix of posed and candid shots. You’re also looking for a package that includes a digital album and some prints. I’ll send you a detailed estimate and some examples of my work in the next few days. Thank you for the call, and I look forward to hearing back from you.”

Regarding giving a formal estimate to the client, it is a good practice to send it in writing after the call rather than giving it verbally. This provides a clear and detailed record of the agreed-upon services and costs, which can be referred to later if necessary. Additionally, it allows the client to take their time to review and consider the estimate, and it gives the photographer a chance to carefully consider the client’s specific needs and requirements before putting together a proposal.

Most of the time, end the call so you can work on the estimate

When you need to end the call and let the client know that you need to work through the numbers before providing a quote, you can use polite and professional phrasing such as:

“Thank you for taking the time to speak with me today. I have all the information I need to provide you with an accurate estimate. I’ll consider all your requirements and preferences and get back to you as soon as possible with a detailed quote. If you have any other questions, don’t hesitate to reach out. Have a great day!”

This lets the client know that you are taking their request seriously and working on providing a comprehensive quote. It also demonstrates professionalism and customer service, which can help to build trust and establish a positive relationship with the client.

James Dockery teaching on Adobe Premier during the Storytellers Abroad Workshop in Lima, Peru

When You Must Give a Quote Right Away

Sometimes, a photographer may need to give a quote before the end of the call, such as when the client has a tight deadline or when they need to make a decision quickly. For example, suppose a client contacts a photographer for an event that is taking place the following week and needs to secure a photographer as soon as possible. In that case, the photographer may need to provide a quote during the initial call. In these cases, the photographer should still try to gather as much information as possible about the client’s needs and requirements and then provide a quote that is as accurate and detailed as possible, given the limited information available.

For example:

Client: “Hi, I’m interested in hiring a photographer for an event next weekend. Can you give me a quote?”

Photographer: “Of course! Can you tell me a little more about the event, including the date and location and what kind of coverage you’re looking for?”

Client: “The event is next Saturday, a corporate function downtown. We need someone to cover the event for 5 hours, including both posed and candid shots.”

Photographer: “Okay, I can certainly do that for you. Based on your information, I can give you a rough estimate of $X. Please keep in mind that this is a rough estimate, and a more detailed quote can be provided once I have more information. Does that work for you?”

In this scenario, the photographer provides a quote as requested by the client but notes that the quote is a rough estimate and that a more detailed quote can be provided later. This allows the photographer to secure the job and provide a more accurate quote once they have all the necessary information.

The Power of Pedigree in Photography: My Experience with Baptist Children’s Homes of North Carolina

As a photographer, technical skills and subject knowledge are the most critical factors for taking great photos. However, as I was reminded this week, there’s a crucial aspect that often goes overlooked: your relationship with the subject.

I recently worked with Baptist Children’s Homes of North Carolina, photographing their executive director and leadership team. But the connection between us went much deeper than just a client-photographer relationship.

Dr. Michael C. Blackwell

My father was a pastor at Kennedy Home in Kinston, a part of Baptist Children’s Homes of North Carolina. Growing up, I received the Charity & Children newsletter and even wrote to Jim Edminson, one of the leaders, to connect and let him know about my background and interests. This connection paid off years later when Jim thought of me to celebrate their executive’s 40 years of service.

Jim Edminson

Additionally, my grandfather, Rev. Knolan Benfield, was a respected North Carolina pastor, with most of his career spent in Hickory and Morganton.

But there’s another layer to this connection. Don Ball was the first director of social work at Kennedy Home and later created the social work program at East Carolina University, where I got my degree in social work. And when I was introduced to the team, they immediately knew of my background and connection to the organization. They treated me like one of their own, making for a relaxed and comfortable photoshoot.

This experience taught me the power of pedigree in photography. When looking for clients or subjects to work with, take notice of the connections from your past. See who might overlap with your skills and background, and reach out to those people. You never know what opportunities might come from those connections.

In conclusion, while technical skills and subject knowledge are essential, consider the impact of your relationship with the subject. Your pedigree can make all the difference in creating a comfortable and successful photoshoot.

Streamlining My Kit: How the Nikon Z9 and Three Lenses Changed My Photography Game

Nikon has always been a trusted brand in the photography industry, and the recent release of their Nikon Z9 camera and lenses has only solidified their position. As a photographer, I have always relied on the versatility of zoom lenses, but with the new Z system, I can now confidently say that most of my jobs can be done with just three lenses: the Nikon 100-400mm, 24-120mm f/4, and 14-30mm f/4.

Gone are the days when I had to carry a bulky kit of lenses to cover different focal lengths. These three lenses provide a versatile range, from 14mm to 400mm, that can handle various shooting situations. The sharpness of these lenses, especially compared to their f-mount predecessors, is a significant improvement that has made a big difference in my work.

Of course, I still keep a few prime lenses, like the 85mm f/1.8 and the 35mm f/1.4, as they provide excellent image quality and offer a more shallow depth of field. But for events, I now have a much smaller selection of lenses that can handle everything from intimate wedding shoots to more significant events like sports.

The versatility of the Z system has allowed me to simplify my gear, and I appreciate Nikon’s continued innovations in this area. As technology advances, I believe it’s essential to evaluate your gear and make changes as needed. By replacing older lenses with new ones, I have been able to stay up-to-date and get the most out of my gear.

In conclusion, the Nikon Z9 and its lenses have been a game-changer for me, and I highly recommend them to anyone looking for a versatile and sharp camera system.

The Evolution of Nikon Cameras: From the Nikon D100 to the Nikon Z9

[NIKON Z 9, NIKKOR Z 24-120mm f/4 S, Mode = Aperture Priority, ISO 14400, 1/250, ƒ/4, (35mm = 24)]

Nikon DSLR & Digital cameras have come a long way since the release of the Nikon D100 in 2002. Over the years, Nikon has consistently pushed the boundaries of photography with innovative features and advanced technology. Here’s a look at the evolution of Nikon cameras from 2002 to today’s Nikon Z9.

[NIKON D100, 15-30mm f/3.5-4.5 Ex, Mode = Manual, ISO 800, 1/180, ƒ/6.7, (35mm = 22)]

2002- Nikon D100

The Nikon D100 was the first digital SLR camera from Nikon and marked the beginning of the digital age for Nikon. With a 6.1-megapixel sensor, the Nikon D100 was ahead and quickly became a popular choice for professional photographers.

[NIKON D2X, 18-135mm, Mode = Aperture Priority, ISO 100, 1/45, ƒ/7.1, (35mm = 60)]

2004- Nikon D2X

The Nikon D2X was an upgrade from the D100 and featured a 12.4-megapixel sensor, improved autofocus, and higher ISO performance. This camera was well-received by professional photographers and set a new standard for image quality.

[NIKON D3, 122.0-300.0 mm f/2.8, Mode = Aperture Priority, ISO 6400, 1/800, ƒ/5.6, (35mm = 420)]

2010- Nikon D3

The Nikon D3 was a game-changer when it was introduced in 2007. One of the significant innovations of the Nikon D3 was its high ISO performance. Before the release of the D3, digital SLR cameras struggled to produce high-quality images in low-light conditions. The D3, however, was capable of producing clean and noise-free images at ISO levels that were previously unimaginable. This was a significant breakthrough for professional photographers who often work in challenging lighting conditions. Shooting at high ISOs allowed photographers to easily capture fast-moving subjects and produce images with exceptional detail and clarity. Its low-ISO performance below ISO 800 is practically noise-free and retains many details and colors to ISO 12,800.

[NIKON D4, 14.0-24.0 mm f/2.8, Mode = Aperture Priority, ISO 160, 1/100, ƒ/8, (35mm = 14)]

2012- Nikon D4

The Nikon D4 was a significant upgrade from the D2X and featured a 16.2-megapixel sensor, an advanced autofocus system, and improved high ISO performance. This camera was popular among sports and action photographers and remains a classic today.

[NIKON D5, 120.0-300.0 mm f/2.8, Mode = Aperture Priority, ISO 360, 1/4000, ƒ/5.6, (35mm = 460)]

2016- Nikon D5

The Nikon D5 was the next generation of the D4 and featured a 20.8-megapixel sensor, an advanced autofocus system, and improved high ISO performance. The camera has 102 more focus points of 153 vs 51 in the Nikon D4. Also it is 2x better video recording quality of 2160 x 30fps vs 1080 x 30fps than with the D4.

2012- Nikon D800

The Nikon D800 was a significant leap forward for Nikon and featured a 36.3-megapixel full-frame sensor. This camera set a new standard for image quality and was a popular choice for landscape and studio photographers. I did not buy this camera or use it, but I was aware of the megapixel count going up.

[NIKON Z 6, 24.0-105.0 mm f/4.0, Mode = Aperture Priority, ISO 1250, 1/800, ƒ/4, (35mm = 24)]

2018- Nikon Z6 & Z7

With the release of the Nikon Z7, Nikon entered the mirrorless camera market. The Z7 featured a 45.7-megapixel full-frame sensor, an advanced autofocus system, and a sleek, compact design. This camera marked a new era for Nikon and paved the way for future mirrorless cameras. The Nikon Z6 is a full-frame mirrorless camera introduced in 2018 alongside the Nikon Z7. The Z6 is positioned as a more affordable alternative to the Z7 and features a 24.5-megapixel sensor, advanced autofocus system, and 4K video capabilities. The Nikon Z6 is a versatile camera well-suited for various photography genres, including portrait, landscape, and action. The compact design and fast autofocus make the Z6 an excellent choice for photographers who need a reliable camera for both stills and video. With its advanced technology and affordable price, the Nikon Z6 is popular with amateur and professional photographers.

[NIKON Z 9, NIKKOR Z 100-400mm f/4.5-5.6 VR S, Mode = Aperture Priority, ISO 11400, 1/2000, ƒ/5.3, (35mm = 300)]

2021- Nikon Z9

The Nikon Z9 is the latest and greatest camera from Nikon. This full-frame mirrorless camera features a 45.7-megapixel sensor, improved autofocus, and 4K video capabilities. With its advanced technology and sleek design, the Nikon Z9 is the ultimate tool for photographers.

In conclusion, Nikon has come a long way since the release of the D100 in 2002. With each new release, Nikon has pushed the boundaries of what is possible with digital cameras. From high-quality sensors, advanced autofocus systems, and sleek designs, Nikon has consistently delivered cutting-edge technology to photographers worldwide.

Continuous Growth: Essential for Freelance Photographers

As a freelance photographer, I know it is crucial to grow and evolve to continuously succeed in a competitive market. However, growth can also bring challenges, and if not approached carefully, it can lead to the downfall of your business.

One significant danger of growth is the potential for the business to outgrow you. When starting, it’s easier to understand every aspect of your business, from client relations to editing techniques. However, as your business grows and you take on more clients, it can become challenging to maintain the same level of control and involvement.

This can result in a decline in the quality of your work, decreased client satisfaction, and, ultimately, decreased profitability. To avoid these outcomes, freelance photographers must continuously improve their skills and develop their craft.

Additionally, having a clear growth strategy and regularly evaluating and adjusting your plans are crucial for sustainable growth. This will help you stay on track and achieve your long-term goals.

In conclusion, growth is a critical component of success for freelance photographers. By continuously improving your skills, having a well-thought-out growth plan, and regularly evaluating and adjusting your strategy, you can ensure your business continues to thrive and succeed as you grow.

Here are five inspiring quotes on the topic of growth and continuous improvement:

  1. “Growth is never by mere chance; it is the result of forces working together.” – James Cash Penney
  2. “The only way to do great work is to love what you do.” – Steve Jobs
  3. “Successful people do what unsuccessful people are not willing to do. Don’t wish it were easier, wish you were better.” – Jim Rohn
  4. “The only limit to our realization of tomorrow will be our doubts of today.” – Franklin D. Roosevelt
  5. “Successful and unsuccessful people do not vary greatly in their abilities. They vary in their desires to reach their potential.” – John Maxwell.

These quotes remind us that growth and success result from hard work and determination and that we can reach our full potential by continually striving to improve.

Capturing Every Moment with the Nikon Z9 and its Versatile Lens Combo

Using two Nikon Z9 cameras to cover events can provide photographers with a versatile and efficient solution. One camera equipped with the Nikon 24-120mm lens offers a wide range of focal lengths that are ideal for capturing wide-angle shots and portraits, while the other camera equipped with the Nikon 100-400mm lens provides longer focal lengths that are useful for telephoto shots, such as zooming in on details or capturing far-off subjects.

The Nikon Z9 is a high-end camera that is well-suited for event photography. Its fast autofocus, high resolution, and fast frame rate make it an ideal choice for capturing quick-moving action and keeping up with fast-paced events. In addition, the camera’s high-resolution viewfinder and tilting LCD screen make it easy to compose and review shots, even in challenging lighting conditions.

[NIKON Z 9, NIKKOR Z 24-120mm f/4 S, Mode = Aperture Priority, ISO 800, 1/250, ƒ/4, (35mm = 50)]

When using two Nikon Z9 cameras, photographers can quickly switch between lenses to take advantage of different focal lengths and shooting perspectives. For example, during an event, the photographer could use the 24-120mm lens to capture wide-angle shots of the entire scene and then switch to the 100-400mm lens to zoom in on a speaker up on the stage.

[NIKON Z 9, NIKKOR Z 100-400mm f/4.5-5.6 VR S, Mode = Aperture Priority, ISO 4000, 1/250, ƒ/5.6, (35mm = 210)]

In addition, having two cameras also provides a backup in case one camera malfunctions. This can be especially important during high-stakes events where missing a vital shot could have serious consequences. Finally, two cameras allow photographers to have multiple memory cards to help store and organize photos.

Overall, using two Nikon Z9 cameras with different lenses offers a flexible and efficient solution for event photography. With the ability to quickly switch between wide-angle and telephoto perspectives, photographers can capture a wide range of shots and provide comprehensive event coverage.

How I Carry The Gear

The HoldFast MoneyMaker 2-Camera Harness is an excellent solution for photographers who need to carry multiple cameras while covering events. The harness is durable, stylish, made from chestnut English bridle leather, and features black hardware. It allows you to comfortably have two cameras at your hips, with the straps forming an X pattern across your back for added support.

The speed clutch mechanism of the MoneyMaker Harness is a standout feature, allowing your camera to easily slide along the harness to your eye level when you’re ready to shoot. This mechanism will enable you to quickly and easily access your camera, ensuring you don’t miss a critical shot.

Attaching your cameras to the harness is a breeze. Screw the two camera accessory clips into the 1/4-20″ tripod threads of each camera or lens. There are two metal D-rings on each strap’s front and back, which can be used to attach optional camera straps and accessories. If needed, you can attach an optional camera leash to the front D-rings, securely securing a third camera to the harness.

[NIKON Z 9, NIKKOR Z 24-120mm f/4 S, Mode = Aperture Priority, ISO 1100, 1/250, ƒ/4, (35mm = 26)]

In conclusion, the HoldFast MoneyMaker 2-Camera Harness is ideal for event photographers needing multiple cameras. Its sturdy construction, ease of use, and versatility make it a must-have accessory for photographers who need to be ready for anything while on the job.

Avoiding Time Confusion: How to Adjust Time Zone Settings on the Nikon Z9 Properly

When traveling to different time zones, it’s important to remember to adjust your camera settings rather than changing the clock itself. This is especially true for the Nikon Z9, which has a built-in location data unit that records the camera’s current latitude, longitude, and altitude, as well as the current time (coordinated Universal Time, or UTC).

One of the main advantages of adjusting the time zone setting rather than the clock is that it ensures all your images will sync with each other when sorted by capture time. This can be especially helpful when working with multiple photographers, as it makes it easy to ensure that everyone’s images are correctly aligned.

To adjust the time zone setting on your Nikon Z9, ensure the location data function is turned on. This can usually be done by going into the camera’s settings menu and selecting the appropriate option. Once this is done, you can set the clock to synchronize with the time reported by the location data function.

It’s also worth noting that when you turn on the location data function, the Nikon Z9 will automatically adjust the time to the correct time zone for your region. This means that you won’t have to worry about manually changing the time every time you travel to a new location.

In conclusion, when traveling to different time zones, remember to adjust your camera settings rather than changing the clock. This will ensure that your images are correctly aligned and that you can efficiently work with other photographers. Also, remember to turn on the location data on Nikon Z9 and turn on the option to synchronize the camera clock with the time reported by the location data function.

Embracing the Future of Photography: How Artificial Intelligence and Technology Can Help Us Continue to Enjoy Our Passion as We Age

As we age, it’s natural to have concerns about how our abilities will change and how they might impact the things we enjoy. For photography enthusiasts, the fear of losing the ability to navigate the complex menus and settings on cameras and the memory recall required to process RAW files using software like Lightroom and Photoshop can be particularly daunting.

But it’s important to remember that just because we may experience age-related changes in our brain and memory doesn’t mean we have to give up the things we love. On the contrary, we can employ many strategies to maintain our cognitive abilities and enjoy photography as we age.

One strategy is to stay active and engaged in activities that challenge our brain, such as learning new photography techniques or taking on more complex photo editing projects. Keeping our minds busy and engaged can help maintain cognitive function and reduce the risk of age-related decline.

Another strategy is to seek assistive technologies that can help simplify capturing and editing photos. For example, artificial intelligence (AI) is increasingly used in photography to automate tasks and make it easier for users to achieve professional-quality results with minimal effort.

For example, AI-powered photo editing software can automatically adjust exposure, color, and other settings to achieve a desired look without requiring extensive manual adjustments. Similarly, AI-powered cameras can automatically change settings based on the scene and subject, making it easier to get the shot you want without navigating complex menus.

In conclusion, aging can be daunting, but it doesn’t mean we have to give up the things we love. On the contrary, by staying active and engaged, seeking out assistive technologies, and utilizing artificial intelligence, we can continue enjoying photography throughout our lives. And with technological advances, the future looks bright for photography enthusiasts of all ages.

Discovering the Diamond in the Rough: How Upgrading My PhotoShelter Plan Saved My Images

As a photographer, one of the most important things to consider is how to back up your images correctly. Whether you’re a professional or an amateur, you’ve likely spent countless hours capturing the perfect shot, and the last thing you want is to lose all of that hard work due to a technical glitch or equipment failure.

For years, I had used the basic plan on PhotoShelter, a popular online storage platform for photographers. Unfortunately, I had never considered upgrading my plan, so I wasn’t taking advantage of one of the essential features for photographers – backing up your images online.

That all changed recently when my good friend Ron Sherman mentioned that he had unlimited storage on his PhotoShelter account for around $500 a year. I was shocked to realize I had missed out on this valuable feature, and I immediately upgraded my plan.

Since then, I’ve been uploading all of my images to PhotoShelter, taking advantage of the platform’s geographically redundant servers to ensure that my pictures are safe and secure. This is the “C” in the A, B, & C of a backup plan, as the A & B have multiple copies on different devices.

In December 2022, when ASMP member John Harrington did his business practices presentation in Atlanta, he also mentioned keeping all of his files on PhotoShelter. This further reinforced my decision to upgrade my plan, and I am now confident that my images are protected.

My PhotoShelter Archive

The next step is to reach out to my clients and let them know that I have their images archived on PhotoShelter. This way, if they ever need access to those images again, they know I have them saved and available.

In conclusion, I am glad to have discovered this “diamond in the rough” and taken advantage of the benefits of PhotoShelter’s unlimited storage plan. I highly recommend this service to any photographer looking for a reliable and cost-effective way to back up their images.

I recommend PhotoShelter, and here is a link to signup.