Weddings Require “Going With The Flow”

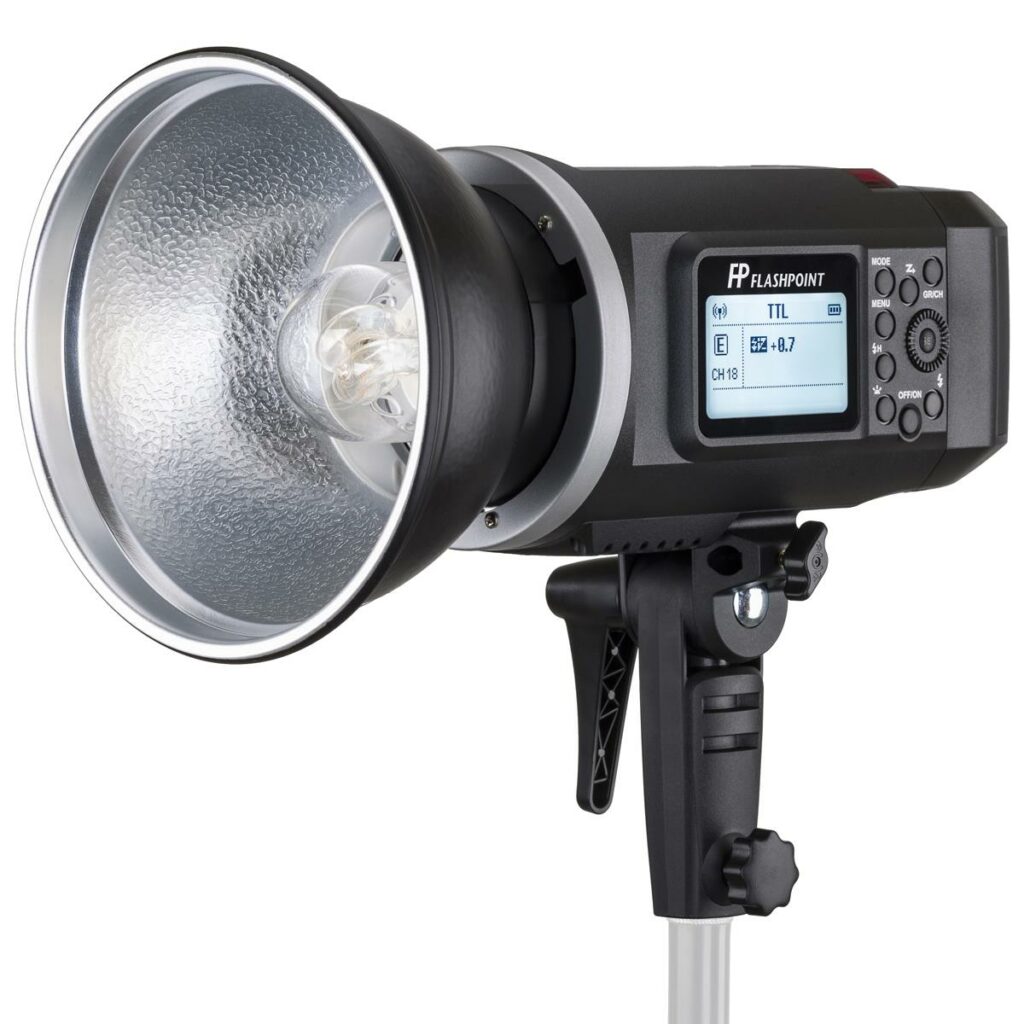
Ashley Nicole Westbrook & Mark Loggins Wedding [NIKON Z 6, 24.0-105.0 mm f/4.0, Mode = Manual, ISO 1250, 1/50, ƒ/9, (35mm = 24), off camera flash with the Flashpoint XPlor 600 HSS TTL]

The best part of shooting weddings is helping make one of the most important days in one’s life memorable. I know that after the wedding day, very little is left for the bride and groom other than the images captured on their day.

One thing I love to do for all my brides gets the photos to them quickly. I usually have all the images delivered in 48 hours.

Now weddings are often about crisis management. Plans are made, and at the last minute, things are constantly changing.

The photographer needs to be the one helping solve those issues as they rise and not the one creating a crisis for the bride or groom.

Groom & Groomsmen [NIKON Z 6, 24.0-105.0 mm f/4.0, Mode = Aperture Priority, ISO 100, 1/60, ƒ/6.3, (35mm = 24) off camera flash with the Flashpoint XPlor 600 HSS TTL]

This past year has had wedding planners and couples adjusting their plans. COVID-19 has had people have to be quarantined after coming in contact with someone who has COVID. Then people you planned to be part of the wedding must drop out.

I often find that the guys have fewer changes, are ready to go, and need little time for photos.

Bridesmaid helping the bride with her veil. [NIKON D5, 35.0 mm f/1.4, Mode = Aperture Priority, ISO 800, 1/250, ƒ/6.3, (35mm = 35)]

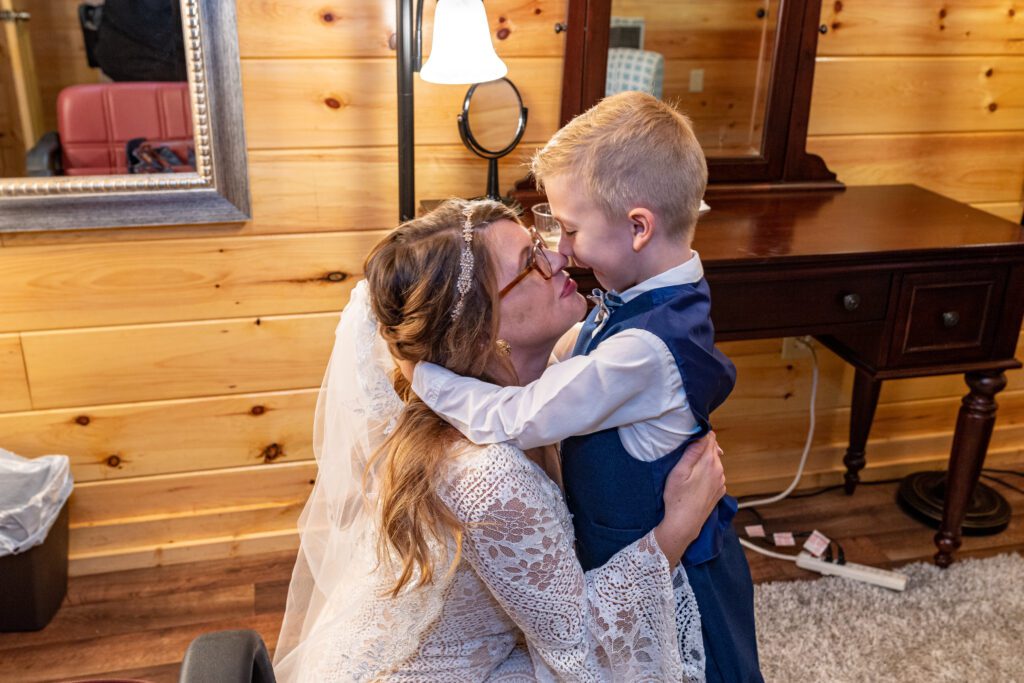
Hair and makeup take time with a bride. I love capturing those moments.

The bride and her son see each other for the first time after getting dressed and ready. [NIKON D5, 35.0 mm f/1.4, Mode = Aperture Priority, ISO 800, 1/40, ƒ/6.3, (35mm = 35)]

Camera & Lighting Changes

Because things change on the wedding day, you must be super flexible.

I am jumping from one location to the other as the Bride & Groom are getting ready. I am shooting inside and outside and moving from different inside areas to another inside location.

First Dance [NIKON Z 6, 24.0-105.0 mm f/4.0, Mode = Aperture Priority, ISO 1000, 1/6, ƒ/5.6, (35mm = 38)]

When the couple does their first dance, I change settings to create some motion blur to show movement. Then I have to adjust for other photos.

Finding those “moments” [NIKON D5, 35.0 mm f/1.4, Mode = Aperture Priority, ISO 3600, 1/30, ƒ/6.3, (35mm = 35)]

I am constantly looking for those “moments,” and they do not happen in the same place and with the same lighting.

Ashley Nicole Westbrook & Mark Loggins Wedding [NIKON Z 6, 24.0-105.0 mm f/4.0, Mode = Aperture Priority, ISO 5000, 1/500, ƒ/5.6, (35mm = 24)]

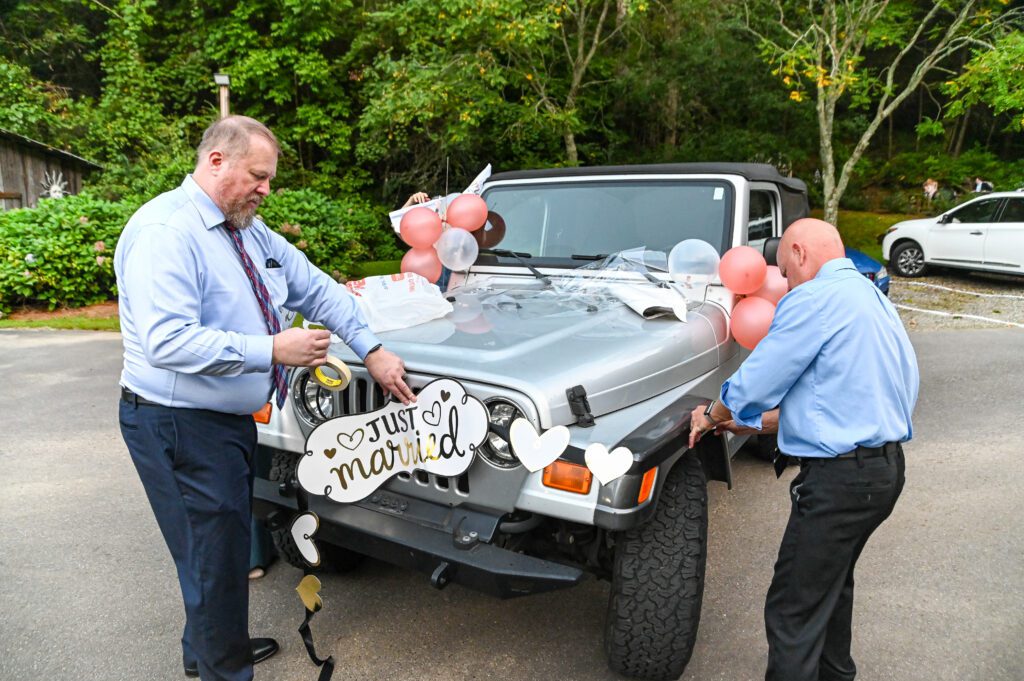
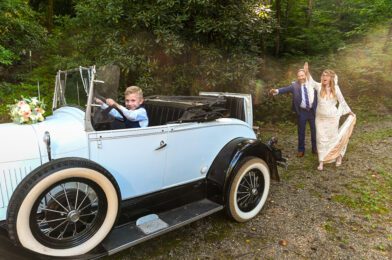
Some of the wedding party sneaks outside to decorate a car. Then back inside for dancing.

Mother & Son Dance [NIKON Z 6, 24.0-105.0 mm f/4.0, Mode = Aperture Priority, ISO 5000, 1/200, ƒ/5.6, (35mm = 35)]

If you were to walk behind me, taking photos on your latest camera on your phone, many of the pictures would not come out. I am adding light.

[NIKON Z 6, 28.0-300.0 mm f/3.5-5.6, Mode = Aperture Priority, ISO 100, 1/80, ƒ/4.8, (35mm = 65) off camera flash with the Flashpoint XPlor 600 HSS TTL]

While you can shoot many photos without a flash, I use it to help get better colors.

Using flash to get good skin tones [NIKON D5, 35.0 mm f/1.4, Mode = Aperture Priority, ISO 1400, 1/30, ƒ/6.3, (35mm = 35) Godox V860IIN on TTL with Magmod Sphere]

I use the Godox V860IIN on TTL with the Magmod Sphere on many photos where I cannot set up an off-camera flash. I usually have it pointing straight up.

Because I use flash a great deal to get better colors, I can turn my photos around a lot quicker than many wedding photographers.

Here are some ways Brides & Grooms can use the photos since they get these within 48 hours of the wedding.

Saying “Thank You”

While most couples dread handwriting 150 personalized notes, the deed must be done. And sooner rather than later—for gifts received after the wedding, you’re supposed to get thank-yous out within two months after you return from the honeymoon.

My couples can use their thank you cards’ photos from the wedding day.

Ashley Nicole Westbrook & Mark Loggins Wedding [NIKON Z 6, 24.0-105.0 mm f/4.0, Mode = Manual, ISO 500, 1/25, ƒ/9, (35mm = 58) off camera flash with the Flashpoint XPlor 600 HSS TTL]

Change Your Name

Once you’ve changed your social security card and driver’s license, everything else should be a piece of cake. Some places may only require a phone call. Make a list (post office, employers/payroll, voter registration office, alumni associations, and so on) and notify each organization. Change everything else!

Now for those changing their names, you may want to send cards to some people with your new name change, address, phone numbers, and email addresses.

Ashley Nicole Westbrook & Mark Loggins Wedding [NIKON Z 6, 24.0-105.0 mm f/4.0, Mode = Aperture Priority, ISO 100, 1/80, ƒ/4, (35mm = 28)]

While you have many things related to the wedding to use the photos for, you can use some of these for those holiday cards, like Christmas Cards.

Ashley Nicole Westbrook & Mark Loggins Wedding [NIKON Z 6, 24.0-105.0 mm f/4.0, Mode = Aperture Priority, ISO 1600, 1/160, ƒ/5.6, (35mm = 24)]

Usually, during the holiday, many people send out Holiday cards and even include letters to catch up with their friends and family on what has happened the past year.

Because I am an FAA Part 107 certified drone pilot, I can take photos at weddings. Due to limitations on flying over people, I arrive early and try and get a few pictures of the venue.

Drone Shot [DJI Air 2S, 22.4 mm f/2.8, Mode = Normal, ISO 100, 1/1600, ƒ/2.8, (35mm = 22)]
Drone Shot [DJI Air 2S, 22.4 mm f/2.8, Mode = Normal, ISO 110, 1/2000, ƒ/2.8, (35mm = 22)]

Camera Crisis

While everything above is pretty normal regarding weddings, there are other things that I often deal with other than people getting ready.

My camera did not work as I usually anticipate it to in one situation. I finally reset the camera to factory settings and started over getting it so I could take some more photos.

This doesn’t happen when you are in between shootings. I had just finished shooting some photos inside and went outside. I was shooting the dress by itself and just started using my off-camera flash for the first time. The settings were not working the way I was expecting. They needed the dress for the bride to get dressed. It took me a good 5 minutes to temporarily solve the problem.

This is why brides and grooms would be best hiring seasoned pros and not having a relative with a camera shooting their first wedding to save money. After all, if someone screws up and you don’t have photos, you can’t easily reshoot everything.

Shooting Flambient Real Estate Shots

I showed how to do this in my room with a lower ceiling, but we used the high ceiling for the class’s shooting.

The photo was combined with five bracketed photos to create an HDR ambient photo using Lightroom. Then, the flash shots of the room and the images were blended into PhotoShop.

Here is the Step-by-step process

The Camera Settings to start are ISO 400, ƒ/7.1, and the Shutter speed will be based on the metering.

Shoot five bracketed exposures of -2EV, -1EV, 0EV, +1EV, and +2EV. As you can see in this example, I have to skew this up one stop.

When shooting interiors, you usually shoot one stop brighter than what the camera would say is normal. This is because most interiors have a lot of light or white walls.

Whatever the exposure is for the frame in the middle of the two over- and underexposed frames, note the shutter speed. If there is no window with light coming in like here, you would be sure your shutter speed is two times faster. I shot 1/20 for the middle shot. Based on that, I would have shot at 1/80 to be two stops darker.

However, I made it even darker to get closer to the outside exposure. So, to get the outside balanced, I shot at 1/160 using my flash to get a good exposure inside. If it is too dark or light, I adjust the power of the flash to get a good exposure.

Flash just left of camera pointed down. [NIKON Z 6, 14.0 mm f/2.8, Mode = Manual, ISO 400, 1/160, ƒ/7.1, (35mm = 14)]

I usually bounce my flash with white ceilings, but for this one, I just raised the flash about 15 feet and shot pointed down. It creates shadows that we will fix later.

2nd flash to help get rid of shadows

I put the flash here to eliminate those shadows from the light in the earlier shot.

Window Pull

Shoot another shot, blowing out around the window. Shoot so the outside is well exposed and the inside around the window is overexposed.

Exposed for outside and no flash

Shot one without the flash as a safe shot if needed due to reflections on the window.

Now to Editing

Select all five ambient shots.

When in Lightroom, correct the lens, as seen above. You should be in the Lens Corrections tab, then the Profile tab and I will check both. Your lens will usually pop up; if not, use the pull-down menu to find it.

Select all the images and right-click to get this menu to pop up. Select HDR.

It will take a second. I use the default setting you see above. When this is done, click on merge.
It will create an HDR.dng file that will open in your Lightroom film strip. You can further correct it, but I will leave it as is for this photo.

Now select the HDR the flash shots you did, and right-click. Select Edit In>Open as Layers in Photoshop.

On the far right, after all the photos have loaded, you will see them stacked in the Layers panel. Top to bottom will be in the order they were shot. Click on the top one, and holding the Shift Key, click on the last one at the bottom, selecting all of them. Go to the top menu bar to Edit and choose Auto-Align Layers, as I have done here.

You will then see this pop-up.

If the Auto is checked here, then click on OK.

You will then see any corrections where you may have bumped the camera. We will crop this in Lightroom later.

Click on your top image, which, in this case, is my Ambient HDR. Then, just above, click and change it from Normal to Luminosity.

While the top layer is still selected, we will create a Hide Mask. Hold down the Option Key on a Mac & click on this icon that the red arrow is pointed to above.

You will see this after that step. Be sure the white brackets are about the black box. If not, the following steps will not work. Check this every so often to ensure you are OK.

Click on “B”

This now has you using the brush tool. Be sure your toolbar on top is normal, has an opacity of 100%, and flows at 20%. Where you see the 175 below the circle [Your number may be different], click on it, and this will pop up.

Hardness needs to be at 0%, which feathers the brush. To make the brush bigger, click on them ]; to make it smaller, click on [.

Now, we are almost ready to paint. We are not seeing the HDR; we are now seeing our first flash photo.

I clicked on the eye in the layers level to turn off the top two photos. I want to move the third one to just below the top HDR photo and the first Flash photo. Then, we repeat for that layer to create another hidden mask. See the instructions above on how we did that for the HDR. When you are done, it will look like this.

Now, turn all the eyes on for now.

Now, be sure you press “B” so you have the brush and that the white box is on top of the black box on the left, as seen below. If the boxes are reversed, then click on “X” to toggle between them.

Brush over the shadows of the ceiling fan and the hanging light; this is what I got if you mistake toggle to black with the “X” and reverse what you did.

Now, this looks pretty good. If I had redone this photo, I would have turned the lights on before shooting. Learn from me and turn all the lights on before you shoot. Also, I wouldn’t usually have the chair holding the door open. We just got permission to shoot in here less than 5 minutes before, and I was moving fast to teach the students, who had to do this after I finished preparing them.

Now, I am going to click on the HDR, make sure the white brackets are around the black box in the layers, and paint over some of the other shadows caused by the flash.

The last step is to take the Window Pull on the bottom and drag it to the top. Change it from Normal Mode to Darken and create a Layer Mask Hide. Then, using the brush, paint just the windows.

It’s not a big difference, but now you know how to do it. Select all the Layers and then click COMMAND + E to flatten them. Click on COMMAND + S to save it. Go back to Lightroom.

Find the image that will most likely be HDR-Edit.tif. Crop the photo, correct any last color, contrast, or other errors, and export it as a JPEG. You can see some of my changes on the right.

Final Image

SOP 1 Flambient Assignment

By the way, some students turned on the lights after I mentioned it to them. Christopher Morgan got a perfect photo of the adjoining room. His lens wasn’t as wide as mine, but he got a great shot.

Photo by Christopher Morgan

Why you want to fly a drone at Dusk or Dawn

[DJI Air 2s, Mode = Normal, ISO 300, 1/15, ƒ/2.8, (35mm = 22)]

As you can see from the photo above, much of the photo is dark, with just the areas where lights are lighting up.

University of the Nations ~ YWAM [DJI Air 2s, Mode = Normal, ISO 120, 1/1250, ƒ/2.8, (35mm = 22)]

During the day, everything has the same amount of light in the photo.

Kona, Hawaii [DJI Air 2s, Mode = Normal, ISO 110, 1/180, ƒ/2.8, (35mm = 22)]

Now here is the exact location during the daytime and nighttime.

Kona, Hawaii [DJI Air 2s, Mode = Normal, ISO 550, 1/8, ƒ/2.8, (35mm = 22)]

Here is not just an example of daytime and nighttime; this is how locations will take advantage and add colored lights to their water fountains at night.

Kona, Hawaii [DJI Air 2s, Mode = Normal, ISO 440, 1/13, ƒ/2.8, (35mm = 22)]

During the daytime, they don’t even run the fountain as much. Not as dramatic. Now there was heavy overcast when this was shot early morning.

University of the Nations ~ YWAM [DJI Air 2s, Mode = Normal, ISO 420, 1/15, ƒ/2.8, (35mm = 22)]

I hope you know why photographers like getting up before sunrise and shooting at sunset. Find a location like I did for these photos and shoot them in the daytime and then nighttime with your phone.

Graduation Announcements!

My daughter, Chelle, just finished her Bachelor of Fine Arts in Performance this summer from Columbus State University.

The Bachelor of Fine Arts (BFA) degree is considered the most prestigious bachelor’s degree you can receive in the visual arts. 

Chelle Leary [NIKON Z 6, 85.0 mm f/1.8, Mode = Aperture Priority, ISO 100, 1/2000, ƒ/1.8, (35mm = 85)]

Growing up the daughter of a photographer and majoring in theatre made her a natural in front of the camera. So, when it came time to plan for announcements, Chelle did her research and sent me some of her Pinterest boards on ideas.

The one on the left is with the flash, and the one on the right is without flash. See how much it helps. You can’t get this photo with your phone’s camera. It would help if you had the flash.

She wanted some photos in a park in Columbus, Georgia. I had her stand on the edge of the shade of the tree. The sun is catching her hair to give us a hair light, but she can easily open up her eyes because she doesn’t have the sun on her face—no squinting in these exterior photos.

This is the flash I am using off camera to take these photos.

Chelle Leary [NIKON Z 6, 85.0 mm f/1.8, Mode = Aperture Priority, ISO 100, 1/1000, ƒ/1.8, (35mm = 85)]

The trigger I use on the camera to talk to the flash by radio built into the transmitter and flash.

After getting a few shots outside, we moved inside. Chelle wanted colored lights as well as capturing her Halloween-themed decorations.

Chelle Leary [NIKON Z 6, 24.0-105.0 mm f/4.0, Mode = Manual, ISO 100, 1/3, ƒ/9, (35mm = 35)]

The flash to the left has an orange gel, and the one on the right has purple gel. The camera is on a tripod.

Note the camera specs. I am using a shutter speed of 1/3 second. This was to get the lights on the wall to show up.

Chelle Leary [NIKON Z 6, 24.0-105.0 mm f/4.0, Mode = Manual, ISO 100, 1/13, ƒ/9, (35mm = 24)]

We just played around, got different looks and expressions, and saw what we could create together.

Chelle Leary [NIKON Z 6, 24.0-105.0 mm f/4.0, Mode = Manual, ISO 100, 1, ƒ/9, (35mm = 52)]

Now I love the Nikon Z6 camera. I am letting it focus on her eyes. I have never really needed anything above 24 megapixels.

Chelle Leary [NIKON Z 6, 24.0-105.0 mm f/4.0, Mode = Manual, ISO 100, 1/8, ƒ/4, (35mm = 52)]

I changed the aperture from ƒ/9 to ƒ/4 to focus more on Chelle, but I like the ƒ/9 because that lets me pull the background into more focus and let you know a little more about how much she loves Halloween. Doesn’t everyone enjoy dressing up, playing like someone else, and indulging in candy?

Tips

The experts agree it is tacky for grads to mention gift registries or suggestions on an invitation, making it hard for guests to know what to give; guests can seek recommendations when they RSVP, advises Post. Many people automatically think of giving the graduate money as a present.

On college graduation announcements, you should always include your name, school, the year of your graduation, and the degree you received. You shouldn’t abbreviate the title of your degree. Spell out “Bachelor of Arts” or “Bachelor of Science” instead of putting “B.A.” or “B.S.”

What is Chelle doing?

Chelle is working at the Springer Opera House. The Springer Opera House is a historic theater at 103 Tenth Street in Downtown Columbus, Georgia. First opened on February 21, 1871, the theater was named the State Theatre of Georgia by Governor Jimmy Carter for its 100th anniversary season, a designation made permanent by the 1992 state legislature.