How do photographers add more value to their work so that clients love them?
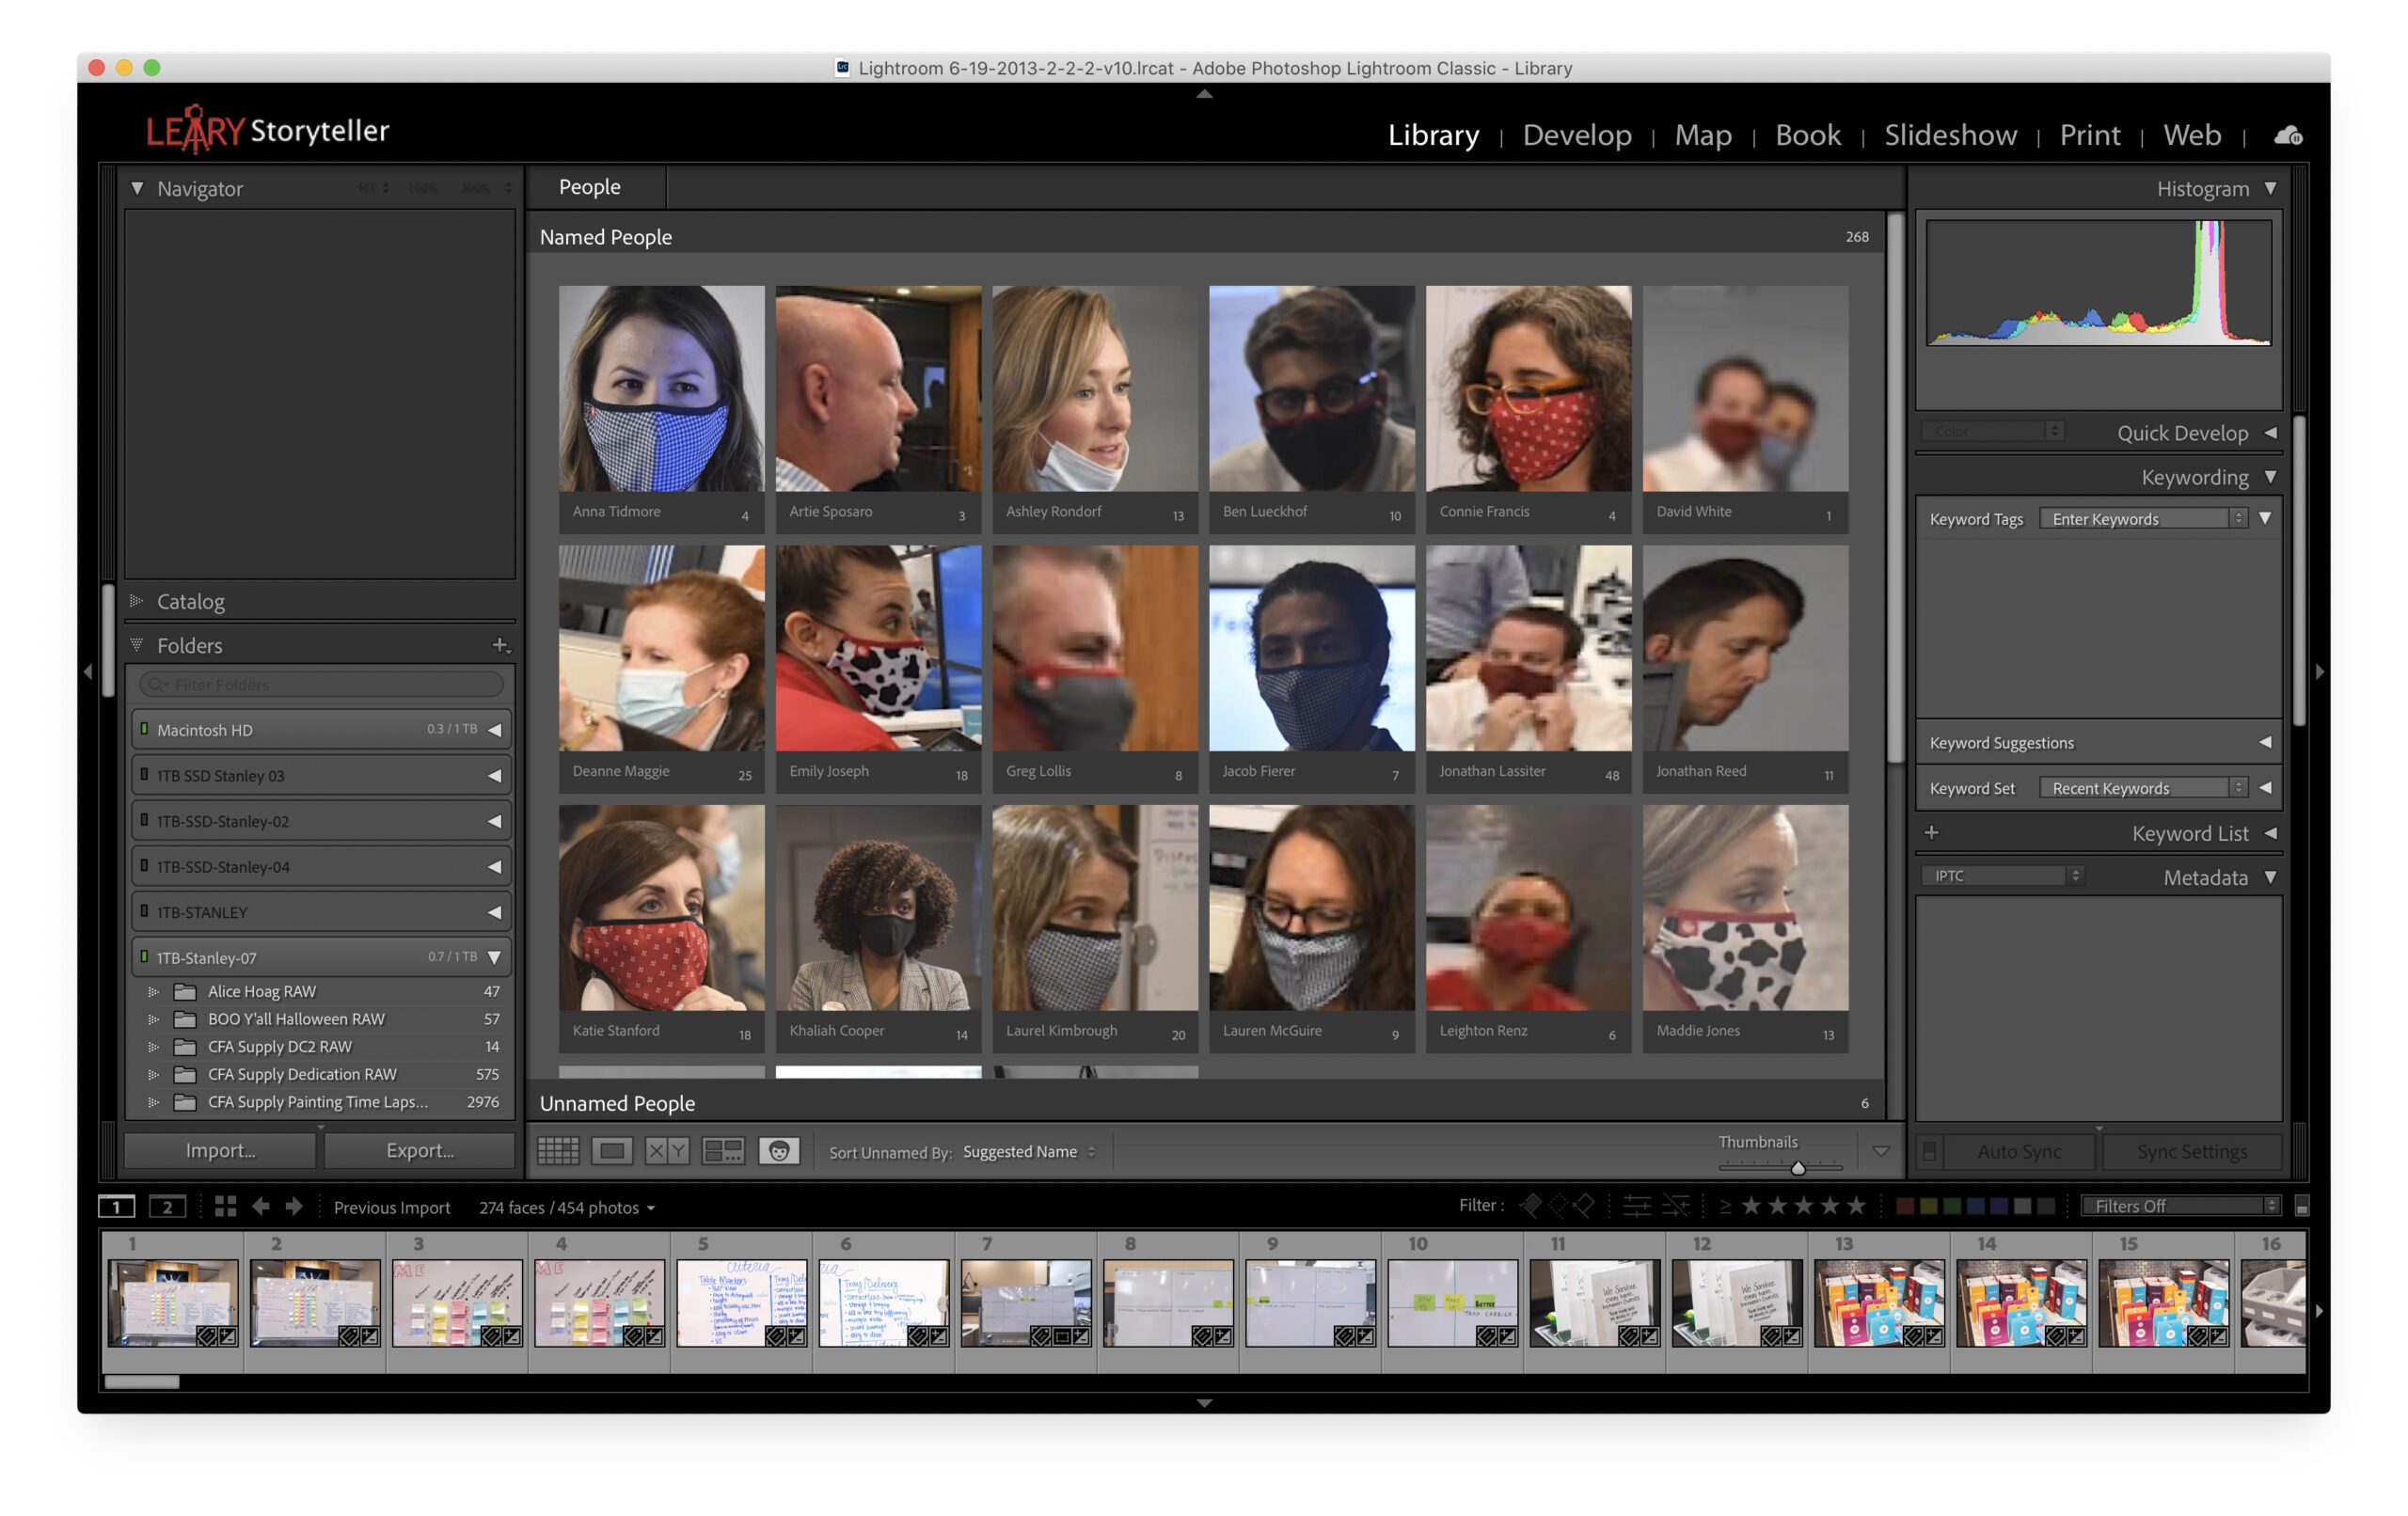
Lightroom Classic CC 7.3 (April 2018 release) has been optimized for more accurate detection of faces in your catalog photos. This means it will search all the images in the filmstrip of a folder or what you have ingested.

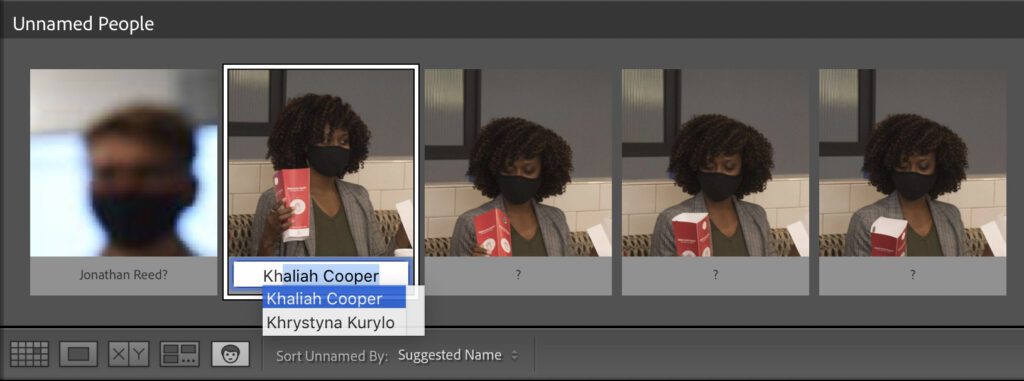
After it has found the faces, it puts them in an “Unnamed People” section. Just click on the “?” and fill in the correct name.

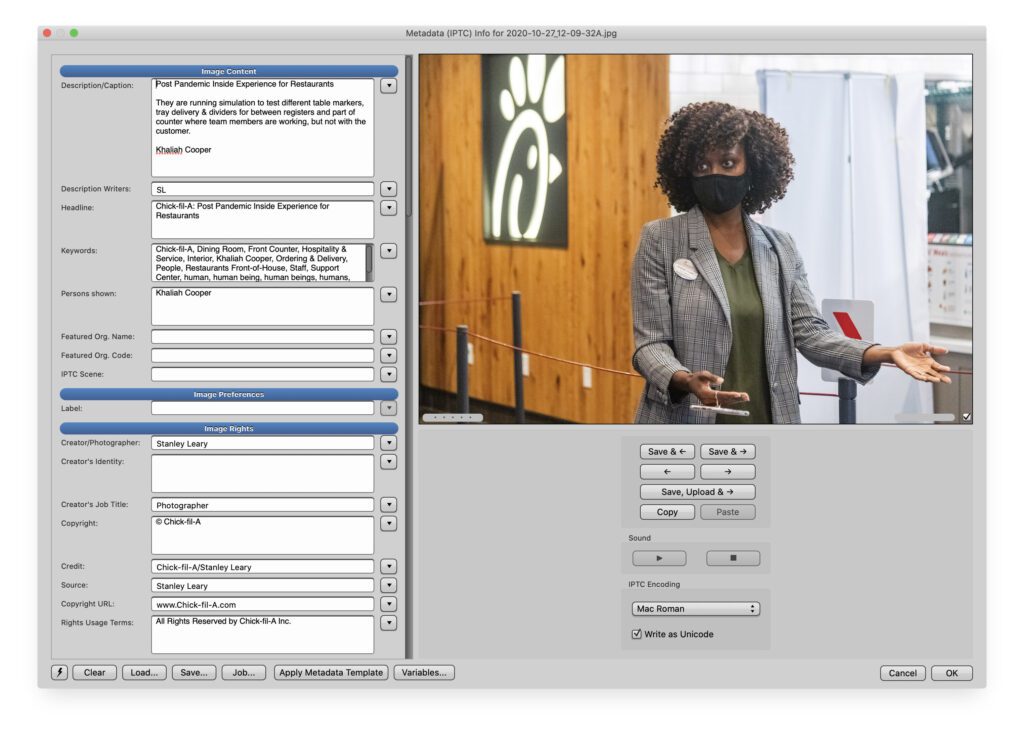
This information is written to the Keywords and a field called the “Persons Shown” area, which I worked with later in Photo Mechanic Plus.

Here, that field is just below the Keywords in Photo Mechanic Plus.
Here is my “Digital Workflow” before the changes I say I need to make to add value to your already awesome photos.
Post Processing
Here is my “Digital Workflow” before the changes I say I need to make to add value to your already awesome photos.
Post Processing
- Ingest to PhotoMechanic
- IPTC information is filled out and part of the ingesting process
- Select the keepers
- Delete all untagged images
- Import into Lightroom because I am shooting RAW
- Using metadata, I select all the photos with the same lens.
- Select all with the same lens
- Go to Develop Module “D” shortcut.
- On the far right, go to lens correction.
- Go back to Library, pick another lens, and do the same until all photos have been lens corrected.
- Click on profile and enable profile for Adobe Color or select another more appropriate profile by using browsing in the menu.
- Tip for selecting multiple images shot in the same scene and do a correction to all at once
- Go to settings and then tell it to Match Exposure on all those selected.
- ⌘D unselect
- Go one by one and check those correctly. Repeat this step for different scenes
- Correct for blown-out highlights
- Pull in blacks if necessary.
- I am often using the Dehaze and Texture sliders.
- For sharpening, I use this technique.
- Export all images to sRGB JPEGs Quality 80
- Open PhotoMechanic
- Upload to my PhotoShelter account for the client
After step 21, where I open the processed JPEGs, I now work on the IPTC metadata.

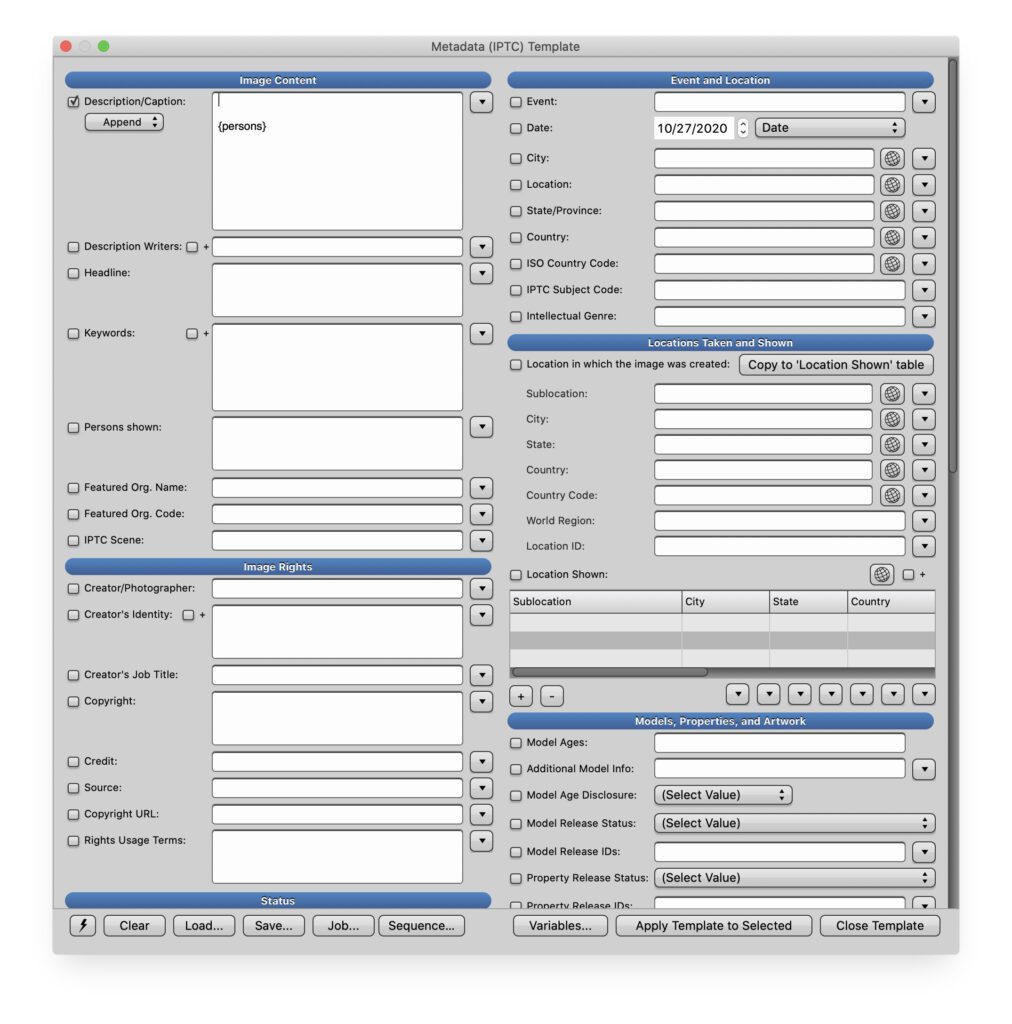
I select all the images and then use the shortcut “⌘+I,” which gives me the IPTC Metadata Master Template. Now I click into the Caption field and hit a few returns. I select “Append” from the pull-down menu on the left. Then I click on “Variables” down on the bottom, find “persons,” and click on it. It puts {persons} in the Caption field.
If I have other changes that would be easy to apply to all the images at once, I often do that here. Let’s say the same basic caption or keywords could be used. I go ahead and make those changes as well. Then at the bottom, next to “Close Template,” I click on “Apply Template to Selected.”
This takes all those identified in Lightroom’s Face Recognition and puts them into the caption field, making them easily searchable with any computer.
While Lightroom does put their names in the Keywords, I wouldn’t say I like that. So I overwrite that with my new keywords that I go and apply one by one or by selecting multiple images using the master template that I clear and apply each time if doing this to various photos.
If you are using the same changes a lot of the time, go ahead and save this template, and then you can load it when needed.
New Digital Workflow for Post Processing
- Ingest to Photo Mechanic Plus
- IPTC information is filled out and part of the ingesting process
- Select the keepers
- Delete all untagged images
- Import into Lightroom, because I am shooting RAW
- Use Face-Recognition to help identify people
- Using metadata I select all the photos with the same lens
- Select all with the same lens
- Go to Develop Module “D” shortcut
- On far right go to lens correction
- Go back to Library and pick another lens and do the same until all photos have been lens corrected
- Click on profile and enable profile for Adobe Color or select another more appropriate profile by using browsing in the menu
- Tip to select multiple images shot in the same scene and do correction to all at once
- Go to settings and then tell it to Match Exposure on all those selected
- ⌘D unselect
- Go one by one and check those correct. Repeat this step for different scenes
- Correct for blown out highlights
- Pull in blacks if necessary
- I am often using the Dehaze and Texture sliders
- For sharpening I use this technique
- Export all images to sRGB JPEGs Quality 80
- Open Photo Mechanic Plus
- Select all Images
- Append caption to include {persons]
- Go through all images being sure caption [“Caption” field contains the specifics about a photo]
- Using structured keywords apply them to each photo. [“Keyword” field is limited to generic terms]
- Upload to my PhotoShelter account for the client
Please send a note with your images telling the client how they can search their images on their Mac or PC.
How to search on a Mac computer?
- On your Mac, click the Spotlight icon in the upper-right corner of the menu bar or press the Command-Space bar. …
- In the search field, type what you’re looking for—results appear as you type.
How to search on a PC computer?
- Click the Start button to go to the Start screen,
- then start typing to search for a file.
- The search results will appear on the right side of the screen. Click a file or folder to open it.
Any text put into the IPTC Caption or keyword fields is searchable, and they can find those photos.
Do this often enough, and they will no longer be calling your competition for those jobs. Why? They can find your photos and not your competition’s. That is how you increase your value to your customers.

